Schlagwort: 3D printing project
-

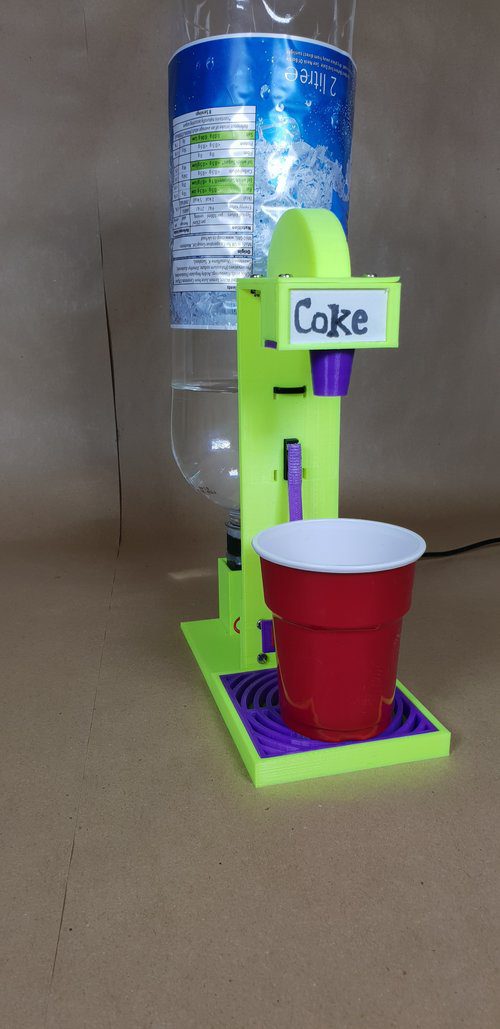
Weekend Project: Stay Hydrated with a 3D Printed Drinks Tap
Reading Time: 4 minutesWant to bring the convenience of a soda fountain machine into your own home? Take a refreshing sip from the 3D printed Drinks Tap created by That Robot Guy. There are few things in the restaurant world that are as enticing as a free refill, just one more glass of your beloved soft…
-

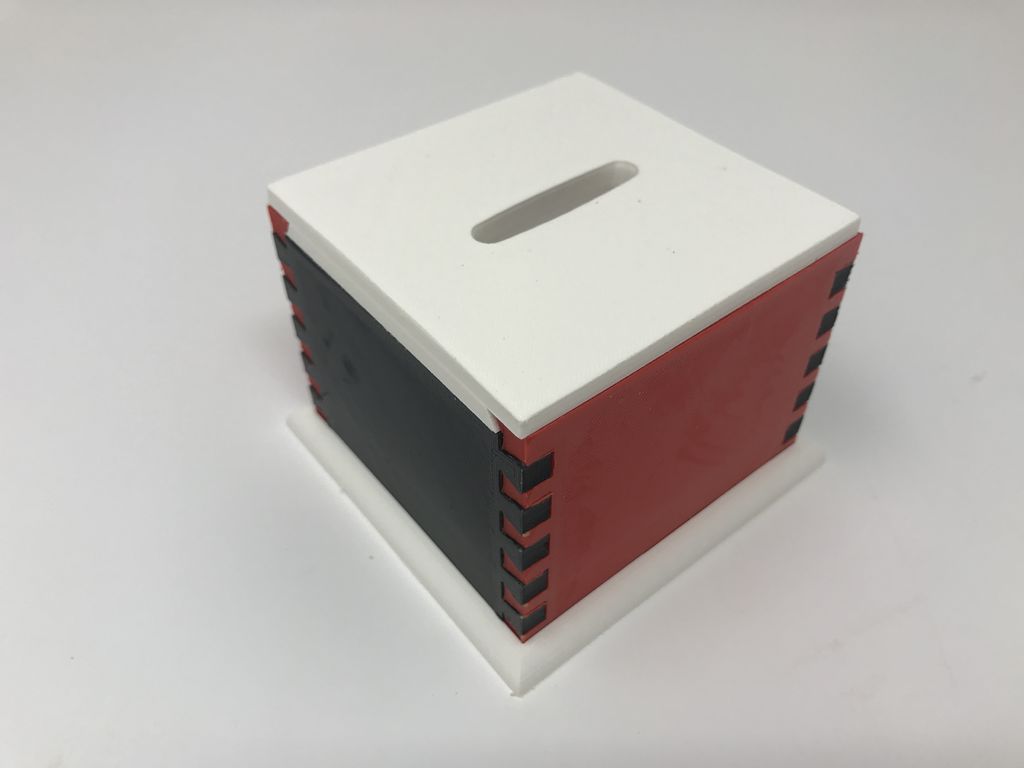
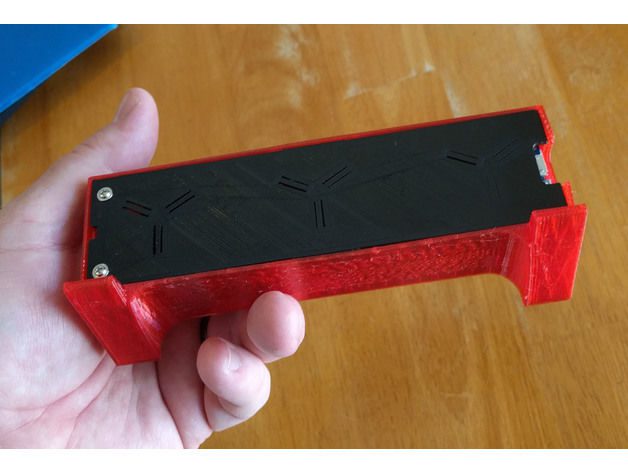
Weekend Project: Stash Your Cash in this 3D Printed Secret Coin Bank
Reading Time: 3 minutesMaker Greg Zumwalt is back on Instructables with another 3D printed coin bank. His latest creation is the Simple Secret Box II, a fully 3D printed coin bank with a secret locking mechanism. Searching for a fun way to teach his grandchildren the valuable lesson of saving money, maker Greg Zumwalt decided…
-

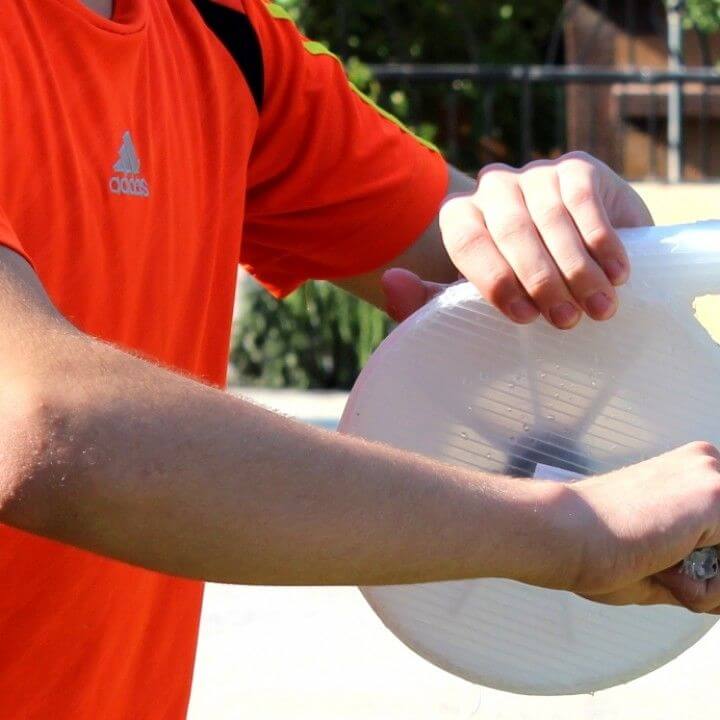
Weekend Project: Crank Out the Fun with This 3D Printed Manivelle Water Gun
Reading Time: 3 minutesThe summer might be coming to a close, but that doesn’t mean you can’t soak your friends and family in a water fight. Spray the day away with this 3D printed Manivelle Water Gun designed by maker Hassan Nasser. Many of us can recall our fond summer memories of neighborhood water fights, from…
-

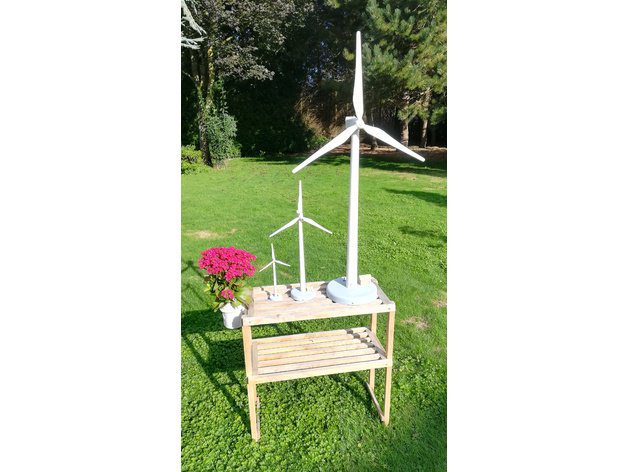
Weekend Project: 3D Print Your Own Wind Turbine Model
Reading Time: 3 minutesWant to teach your kids about the power of renewable energy? Or just want to build your own wind turbine replica? Then check out this 3D printed wind turbine model created by maker Luc Tellier. If you’ve ever driven past a batch of towering wind turbines on a rural road, you know just…
-
Weekend Project: 3D Print a Mini Steering Wheel for Your Xbox One or PS4 Controller
Reading Time: 3 minutesWant to make your video gaming experience even more realistic? New York-based designer Brent Scott has created a 3D printable mini steering wheel that you can mount onto your Xbox One or PlayStation 4 controller. As the video game graphics slowly become on par with our own reality, they create an immersive experience…
-

Weekend Project: Get Groovy with 3D Printed LED Magic Mushrooms
Reading Time: 3 minutesTurn your home into a magical forest of fungi with the 3D printed Magic Mushroom lighting decoration –created by German designer UniversalMaker. One spectacular aspect of 3D printing is that it provides the ability to expand your imagination beyond the everyday world, no matter how fantastical your idea might be. On today’s…
-

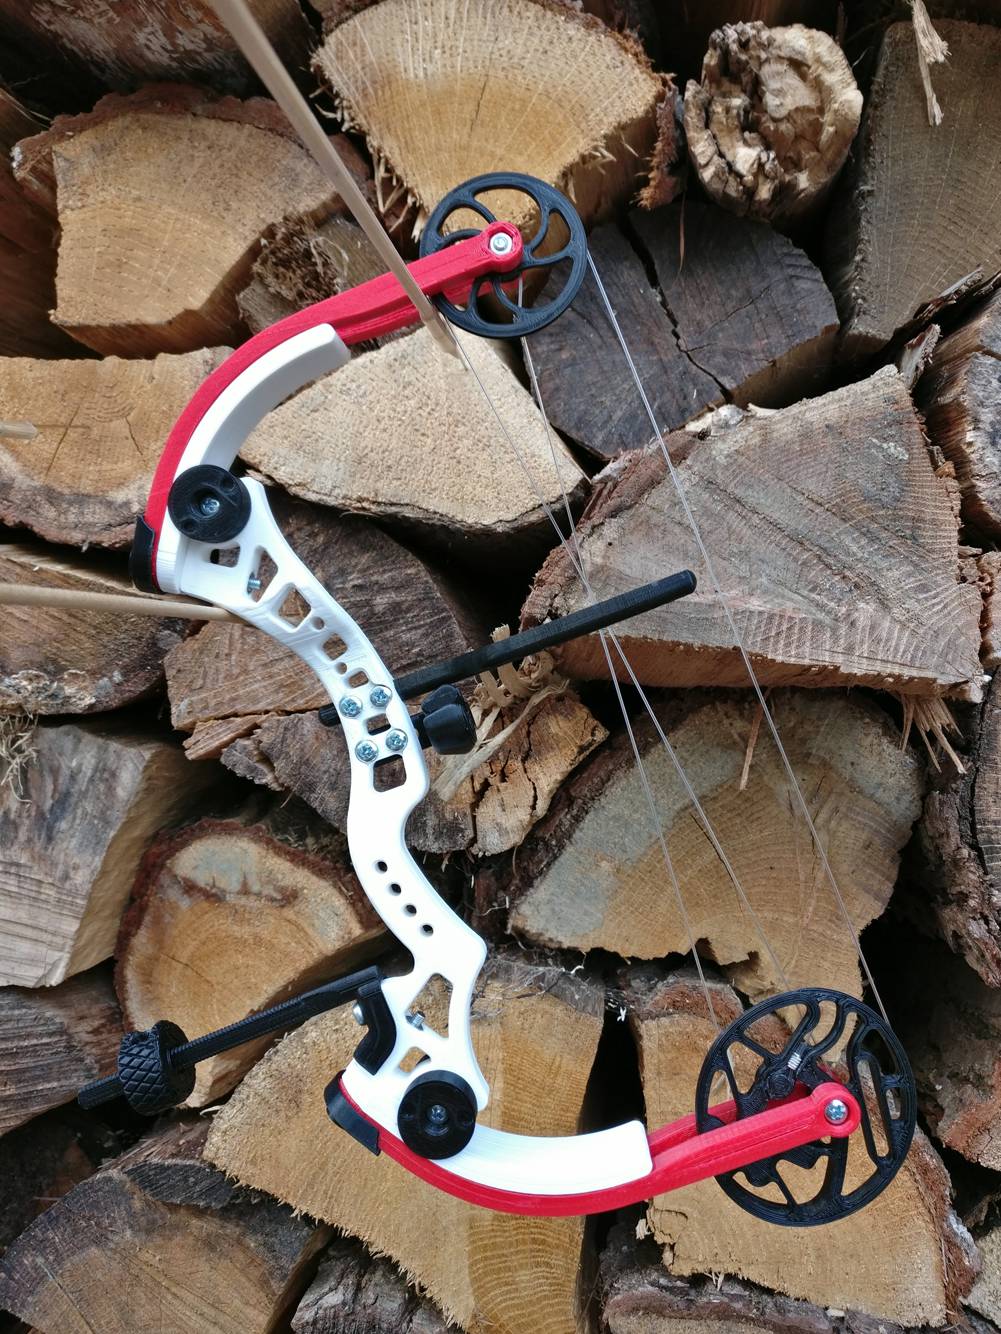
Weekend Project: Take Aim With a 3D Printed Miniature Compound Bow
Reading Time: 3 minutesLooking for an affordable and fun project to round out the summer with? Why not practice your archery skills with a fully 3D printed miniature compound bow. While the world has been expressing an immense amount of concern over the potential rise of 3D printed guns, it’s easy to lose sight of all…
-

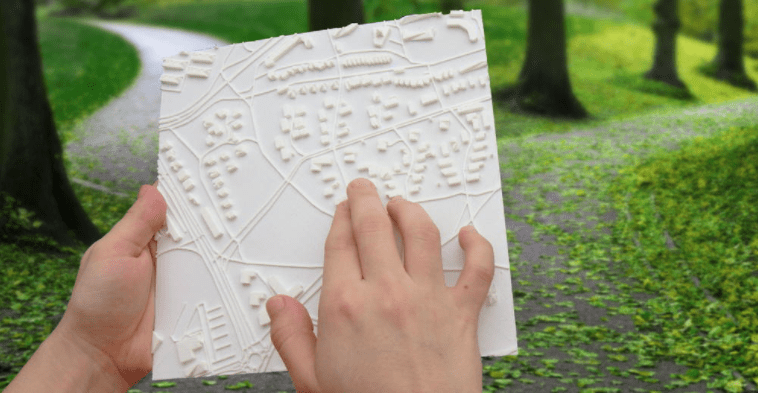
Weekend Project: Make a Customized Map Clock to Celebrate Timeless Memories
Reading Time: 3 minutesRecently shared on the r/3DPrinting subreddit, one maker created an endearing anniversary gift for his girlfriend. This 3D printed clock has a custom 3D map as the face, showcasing the exact area where they first met. You make your own too! Every relationship is special in its own way, and 3D printing…
-

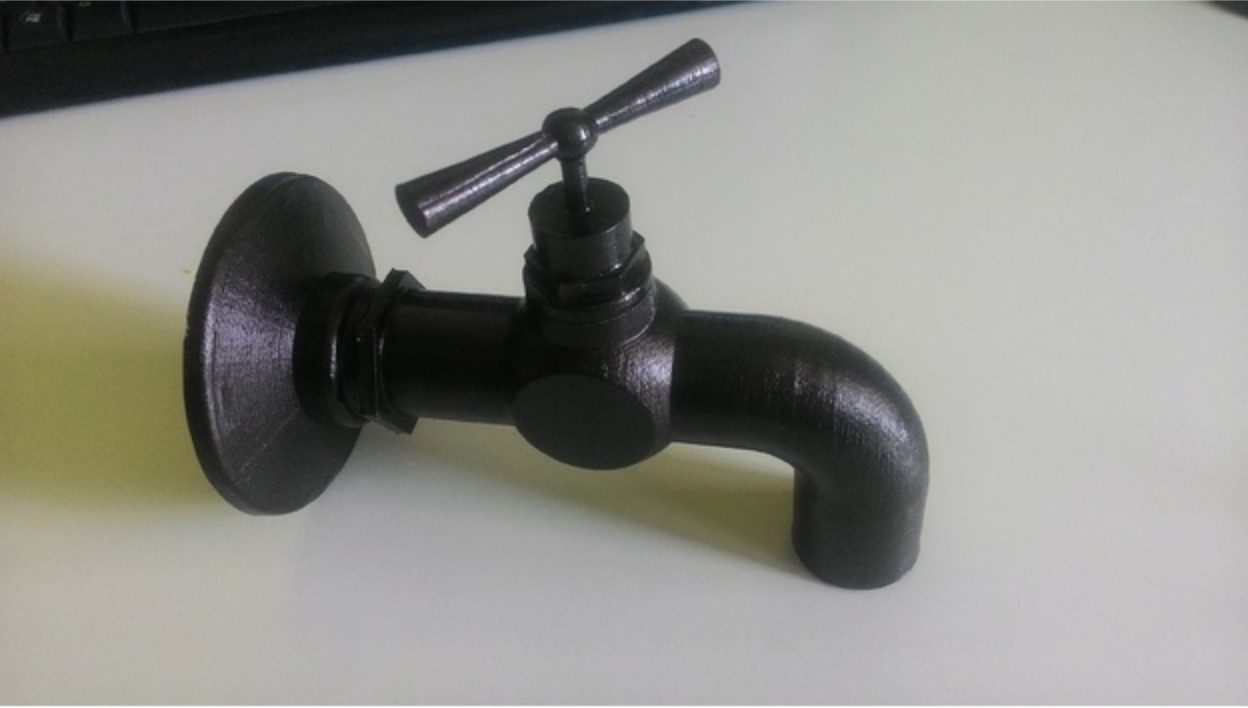
Weekend Project: Amaze Your Friends with a 3D Printed Magic Faucet
Reading Time: 3 minutesA floating faucet? Sounds interesting, doesn’t it? This 3D printed Magic Faucet is a wonderful project for those who love optical illusions. It’s relatively easy to make and simply amazing to look at. In our never-ending endeavor to provide users with fun and useful projects to take on during the weekend, we’ve…
-

Weekend Project: Have a Pool Party with this 3D Printed Cricket Paddle Wheel Boat
Reading Time: 4 minutesThe Ruiz Brothers of Adafruit are at it again with another fascinating 3D printing project: the 3D printed Crickit Paddle Wheel Boat. This water rover even has an underwater camera mount, so you can capture footage at your end of the summer pool party! As we enter into the final stretch of…
-

Weekend Project: Get Scientific with this 3D Printed Open Source Laboratory Rocker
Reading Time: 3 minutesNeed some affordable scientific equipment to experiment and make a breakthrough discovery? This 3D printed open source laboratory rocker is a terrific tool for biological and molecular mixing applications. In the scientific setting, a laboratory rocker is used as a mixing device for various biological and molecular applications. It consists of a tray…
-

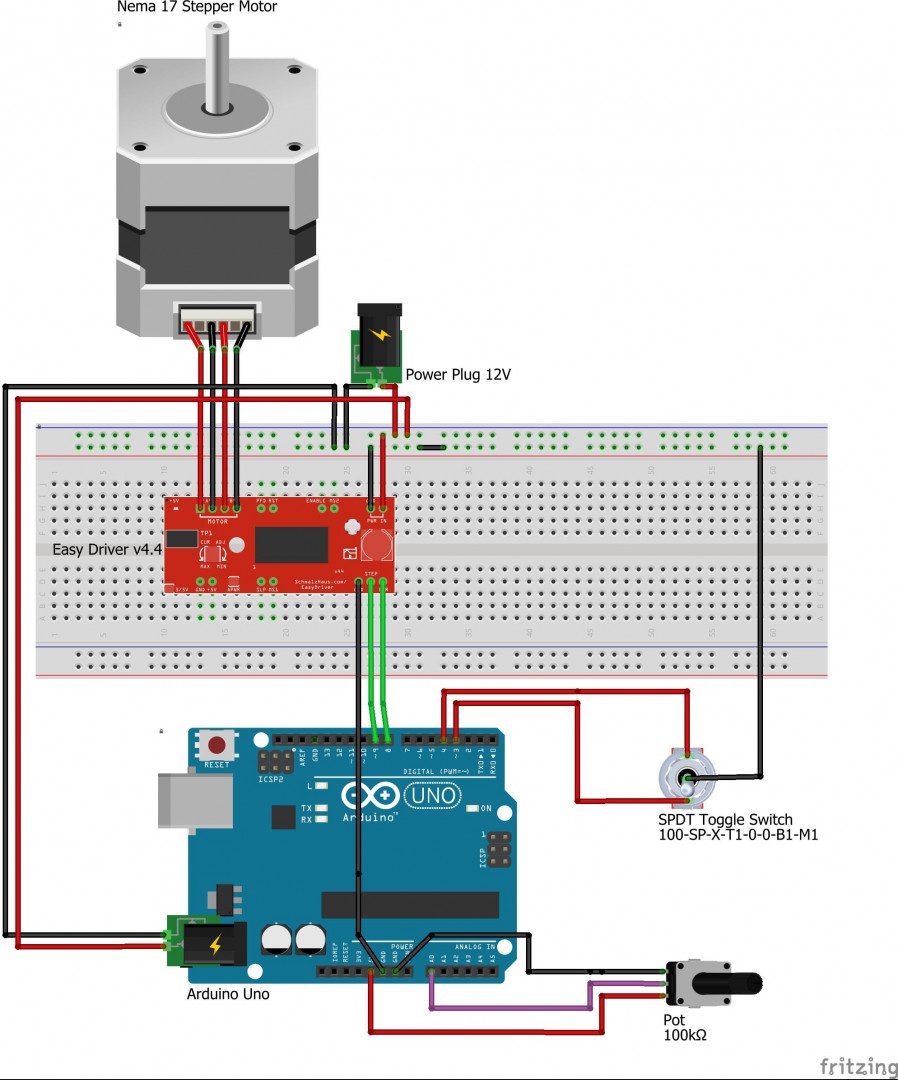
Weekend Project: 3D Print Your Own Magnetic Levitation Device!
Reading Time: 3 minutesInstructables user and designer 3DSage has unveiled an amazing 3D printed Levitation Device that you can make at home. It’s a crazy contraption that uses a magnet to make objects float before your very eyes! For many of us, childhood was marked by amazement when we witnessed our favorite superhero defy the…
-

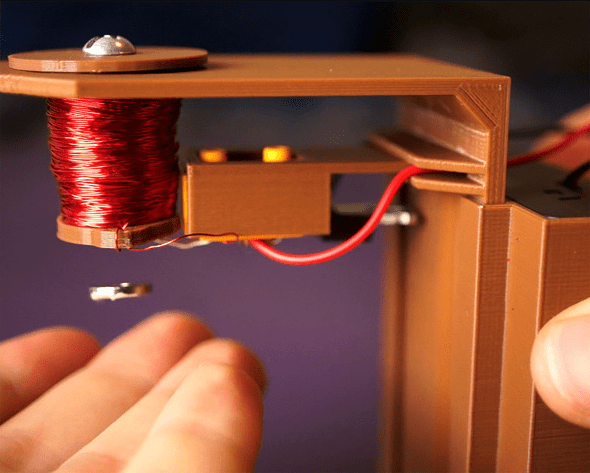
Weekend Project: 3D Print These Seaworthy Voronoi Jellyfish Lights
Reading Time: 3 minutesGive your home an aquatic feel with these incredible 3D printed DIY Voronoi Jellyfish lights created by German maker and Thingiverse user UniversalMaker3D. Who needs IKEA when you have your very own 3D printer? Okay, well sometimes it’s nice to buy some new furnishings and chow down on those Swedish meatballs, but…
-
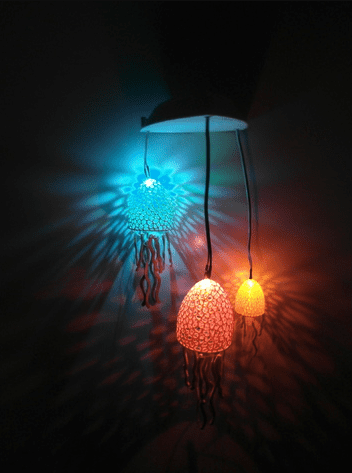
Weekend Project: 3D Print a Servo-Driven Tiny FPV Tank (with a Camera!)
Reading Time: 3 minutesRoll through the upcoming workweek in a servo-driven 3D printed Tiny FPV Tank. This RC model comes equipped with a camera, LEDs, and uses Lego threads to roll around. Spearheaded by projects like OpenRC, the team here at All3DP definitely noticed an increase of interest in using 3D printing to create remote-controlled…
-

Weekend Project: Turn Back Time with a 3D Printed Delorean Clock From ‘Back to the Future’
Reading Time: 3 minutesHave you always wanted to travel through time like Marty McFly and Doc Brown in ‘Back to the Future’? Well, Great Scott! Now you can with this amazing 3D printed Delorean clock. Originally released in 1985, the critically acclaimed film Back to the Future has proven itself to be timeless, which is a…
-

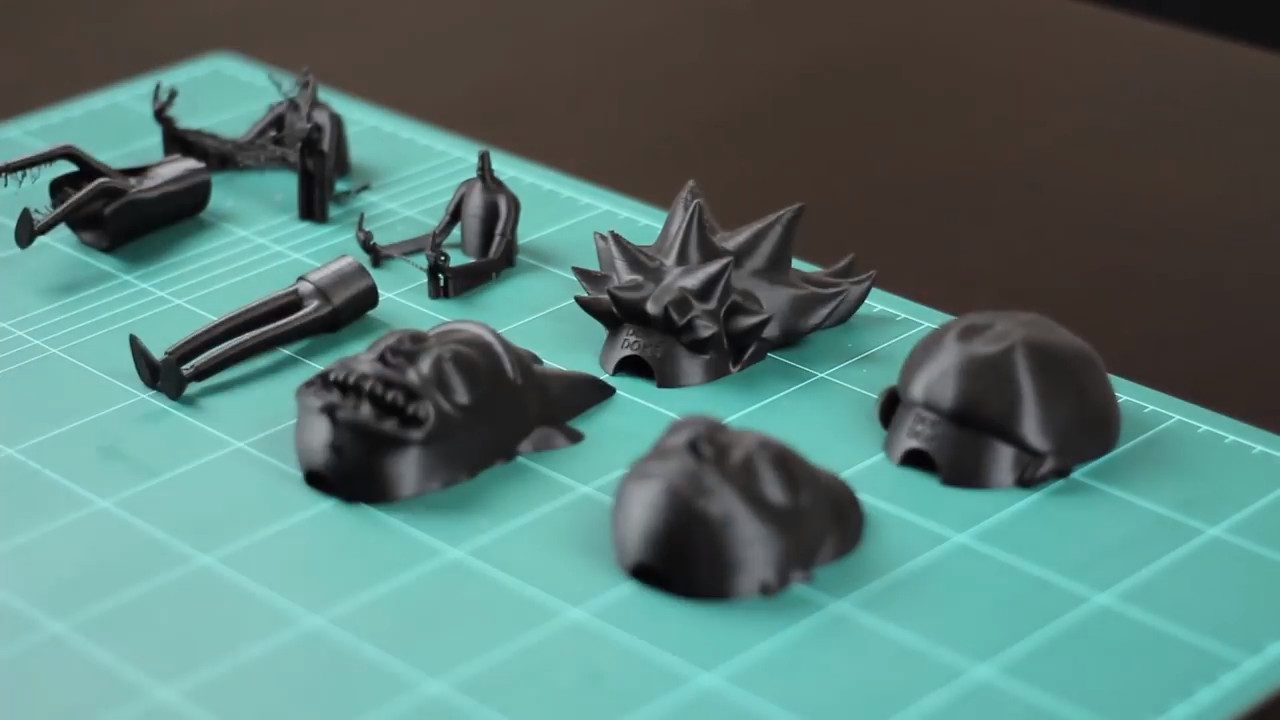
Weekend Project: Get Schwifty with These 3D Printed “Rick and Morty” Bobbleheads
Reading Time: 4 minutesSpanish designer Antonio García (also known as Duke Doks) shows off how to create incredibly detailed 3D printed Rick and Morty bobbleheads. Seriously, these models will have you screaming wubba lubba dub dub! If you haven’t seen (or at least heard of) the critically acclaimed and unconscionably hilarious animated television series Rick and Morty,…
-
Weekend Project: Get Your Message Across with this 3D Printed LED Marquee Scroller
Reading Time: 4 minutesYou can have the time, weather, news and more at your side at all times with this easy-to-build 3D printed LED marquee scroller created by Instructables user Qrome. In a world where infinite information is accessible at our fingertips, we’ve grown accustom to obtaining the latest news or data as soon as…
-
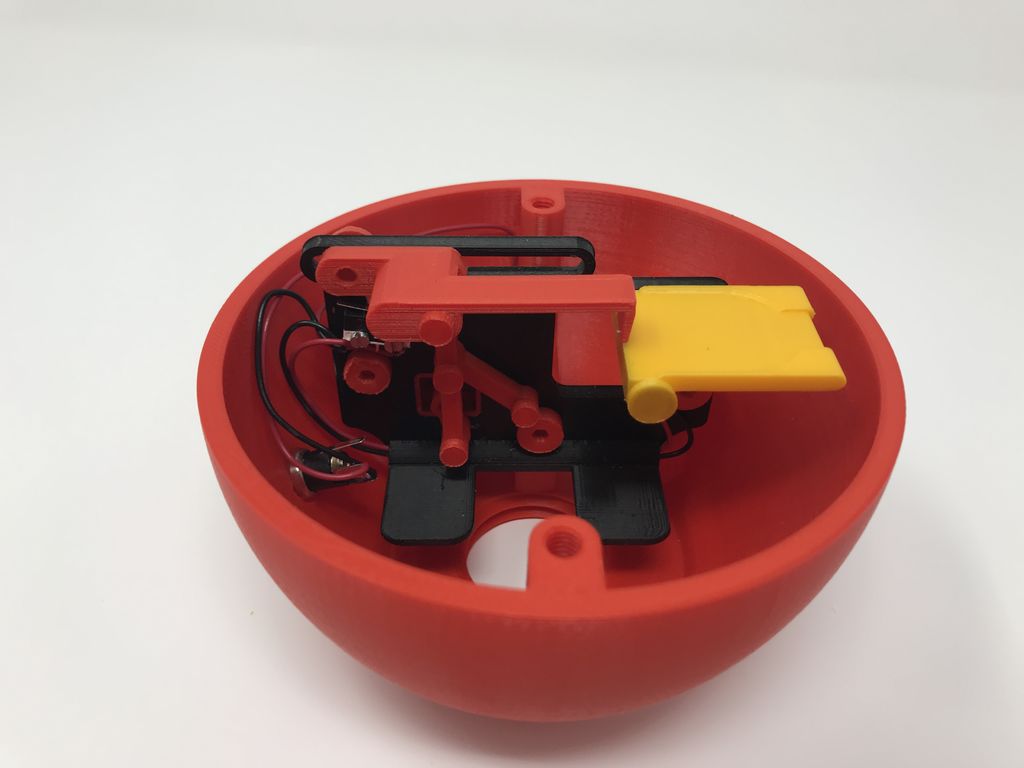
Weekend Project: Start Saving with a 3D Printed Apple Coin Bank
Reading Time: 3 minutesHave some loose change lying around? Why not save it for a rainy day by 3D printing this gear motor-driven Apple Coin Bank designed by maker Greg Zumwalt. Saving money is a healthy financial habit that will keep your bank account growing, and even a few coins can go a long way. Many…
-
Weekend Project: Satisfy Your World Cup Fever with This 3D Printed Lithophane Lamp
Reading Time: 4 minutesThe FIFA World Cup is in full swing, and now you can 3D print your own lithophane lamp to light your favorite team’s path to victory! Check out this amazing 3D printed World Cup-themed lamp designed by the 3D printing company Voladd. With the 2018 FIFA World Cup currently taking place in…
-
Project of the Week: Travel Terrain With This 3D Printed Modular SMARS Robot
Reading Time: 3 minutesWant to build your own custom robot with no screws attached? The 3D printed SMARS modular robot is the perfect project for beginners and seasoned makers who want a quick and easy introduction to the world of robotics. As we’ve constantly seen while exploring the expansive maker universe, robotics and 3D printing…
-
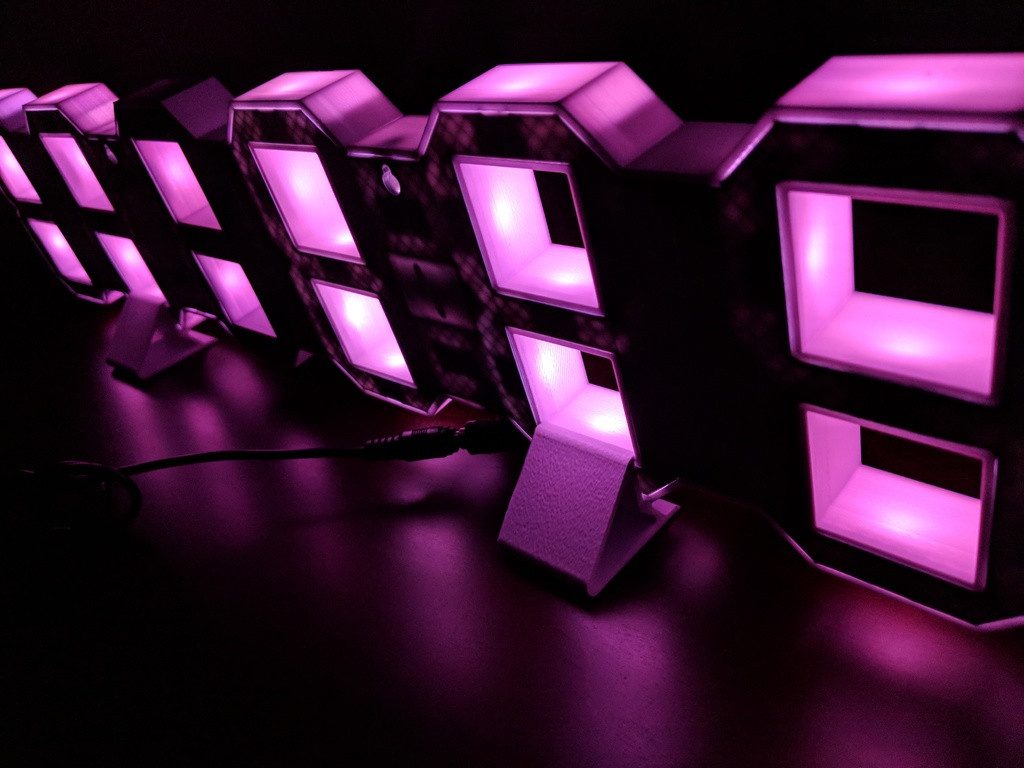
Weekend Project: 3D Print a Sleek 7-Segment LED Clock
Reading Time: 4 minutesCombine function and form with this 7-segment LED clock, designed by Kansas-based maker Leonard Lee. It reliably delivers accurate time — down to the second — while at the same time adding a little light to your life. How many times have you squinted across a room trying to read the time…
-
Weekend Project: Take Flight With This 3D Printed V911 Micro Flying Wing
Reading Time: 3 minutesHow’s the local weather forecast looking this weekend? Why not 3D print your own micro flying wing to soar beyond the kites and frisbees at the park. Designed by Thingiverse user drcameron, this RC wing attachment will have you soaring through blue skies with style. With projects like OpenRC taking the 3D…