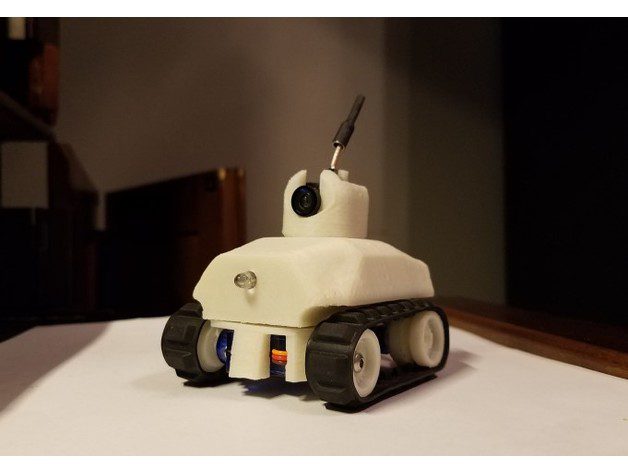
Roll through the upcoming workweek in a servo-driven 3D printed Tiny FPV Tank. This RC model comes equipped with a camera, LEDs, and uses Lego threads to roll around.
Spearheaded by projects like OpenRC, the team here at All3DP definitely noticed an increase of interest in using 3D printing to create remote-controlled cars, planes, drones and boats. While we’ve featured a handful of these fun hobbyist-type projects in our Weekend Project series, few of them pack a compact punch like this Tiny FPV Tank designed by Thingiverse user RotorGator.
Not only is this servo-powered tank small, it also implements Lego threads, a tiny FPV camera and LEDs. It might not be battle-ready, but this miniaturized tank will provide you with a fun way to inconspicuously cruise around and film all of life’s top-secret missions.
Let’s take a look at what you need to put together your own 3D printed Tiny FPV Tank.
3D Printed Tiny FPV Tank: What You Need & Putting it Together
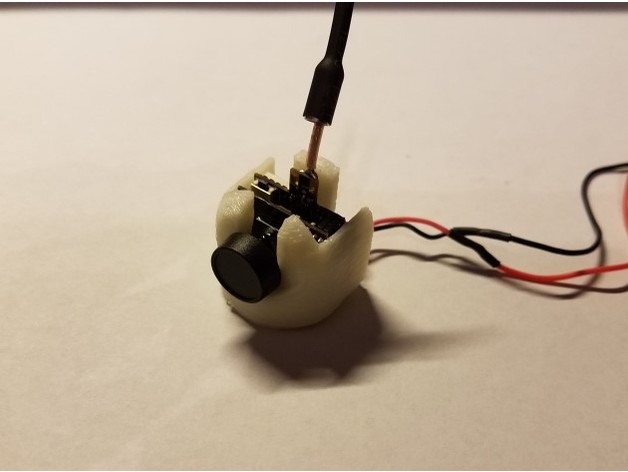
This Tiny FPV Tank is comprised of a handful of 3D printed parts, but RotorGator has split the body into six sections: the chassis, frame, two drive wheels, two non-drive wheels, two non-drive spacers and the FPV camera mount. Use of support structures is only necessary for a few parts if you decide to print them whole, otherwise you can go support-less by printing the wheels and frame in halves.
The files are freely available on Thingiverse, you can download them here.
Although the body of this tank is heavily based around 3D printing, you’ll still need a handful of components to put this armored vehicle into action. Here’s what else you need besides your 3D printer:
The details on the assembly process are sparse, but the build seems relatively easy. Here’s how the designer lays things out on the Thingiverse page.
Once you have the parts 3D printed, remove any supports before you start putting it together. Cut off the servo arm in order to fit it snugly into the driven wheel and attach it using the supplied screw. Using M3 bolts and spacers, mount the non-driven wheels. If you decided to print the parts in halves, use super glue to put them together. The 3D printed frame and chassis should snap together quite easily. Finally, use a bit of super glue to attach the FPV pod to the top of the tank’s frame.
Following these steps and the provided photos, you should be able to build your own Tiny FPV Tank. If you have any questions or comments, you can head on over to Thingiverse and drop a line to the creator of the project.

Website: LINK
Schreibe einen Kommentar
Du musst angemeldet sein, um einen Kommentar abzugeben.