Spanish designer Antonio García (also known as Duke Doks) shows off how to create incredibly detailed 3D printed Rick and Morty bobbleheads. Seriously, these models will have you screaming wubba lubba dub dub!
If you haven’t seen (or at least heard of) the critically acclaimed and unconscionably hilarious animated television series Rick and Morty, you must be living in another dimension. By now, the intergalactic adventures of the easily agitated Morty and his lawless scientist of a grandfather Rick have touched our funny bone at some time or another
Now, you can have this dynamic duo bobbing away and flipping you the bird on your desk thanks to the Madrid-based motion graphics and 3D artist Antonio García, also known as Duke Doks. He recently shared two highly detailed 3D printable models–one of Rick and one of Morty– that look like they just sprung right out of the television screen and into this reality.
With a desktop 3D printer, some primer and paint, a couple of springs and some intensive post-processing, you can follow along with Duke Doks and create your own Rick and Morty bobbleheads–no Mr. Meseeks required.
Let’s take a quick look at this awesome project and what you need to bring your favorite dimension-traveling characters to life.
3D Printed Rick & Morty Bobbleheads: How to Create Your Own
The STL files for the Rick and Morty bobbleheads are available to download from Cults. The Morty model is completely free, while Rick Sanchez will cost you a mere $1.80 to obtain. Considering these are incredibly high quality models, we definitely don’t mind shelling out a few bucks for them.
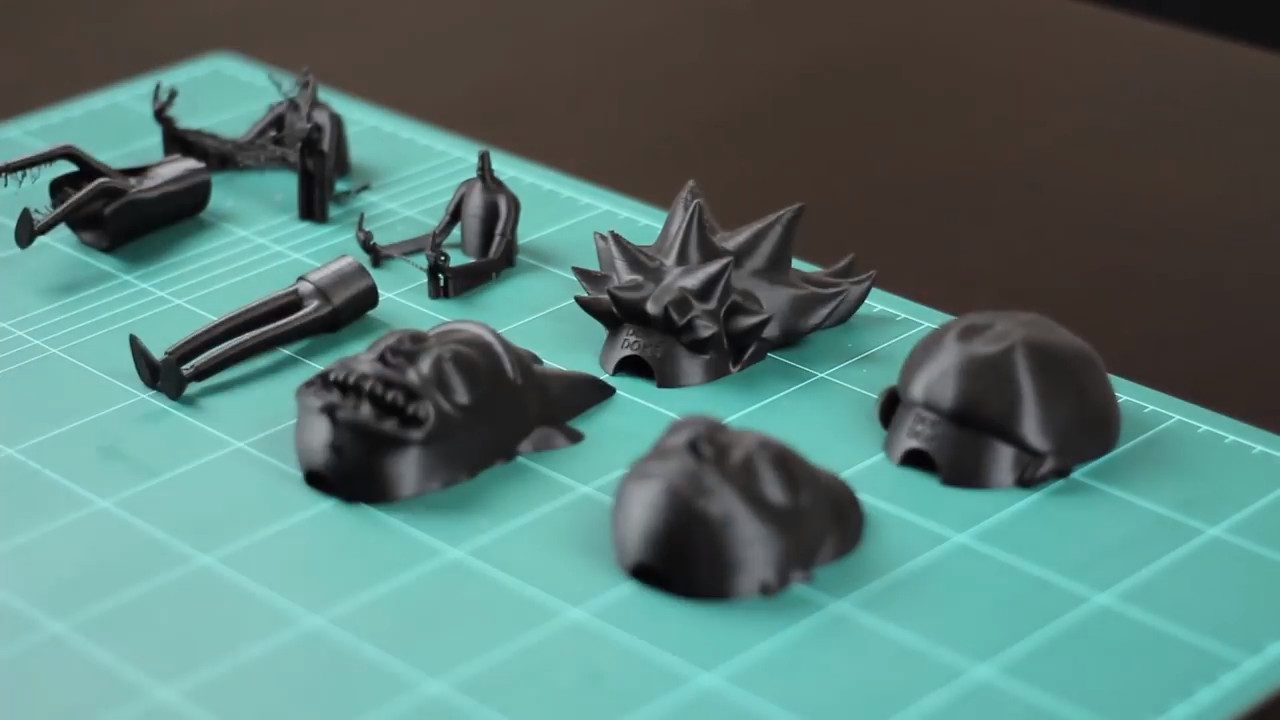
Both models are divided into a few different parts, which are later attached with an adhesive glue later on. García appears to have used 20 percent infill for each 3D printed section, and utilizes support structures when necessary. As you can probably tell from the smooth and glossy surface finish on these bobbleheads, there’s a lot of post-processing involved. Thankfully, the designer shares his methodology in a YouTube video (posted below).
After gluing the parts together (keeping the body and head separate, for now), the next step is to smoothen out the 3D model with 240 grit sandpaper. Once the 3D printed parts are properly sanded, the designer uses double-sided tape to secure the models down for painting. The painting process starts by applying a coating of Grey Filler/Primer, which eliminates the appearance of any layering or scratches. Once the primer has settled, García sands down the model once more to give it a glossy aesthetic.

Finally, using an assortment of spray paint from Montana Colors and meticulously applied tape to prevent the various colors from getting in the wrong area, he carefully applies the paint to evoke the look of the cartoon characters. He also uses a paint brush to detail the small and hard-to-reach sections, like the eyes and Rick’s drool-laden mouth. We assume that acrylic paint can be used here as well, but the automotive-grade spray paint seems to have a magnificent aesthetic effect that might not be replicated otherwise.

After the paint job is complete, simply insert a small spring into the head and attach it to the body. You now have your very own Tiny Rick and ticked off Morty! You can learn more about this project by checking out the video below.
Website: LINK
Schreibe einen Kommentar
Du musst angemeldet sein, um einen Kommentar abzugeben.