Weekend Project: Get Your Message Across with this 3D Printed LED Marquee Scroller
You can have the time, weather, news and more at your side at all times with this easy-to-build 3D printed LED marquee scroller created by Instructables user Qrome.
In a world where infinite information is accessible at our fingertips, we’ve grown accustom to obtaining the latest news or data as soon as we wake up and unlock our smartphones. You can take things a step further by 3D printing your own LED marquee scroller, which was created by Instructables member and RC plane enthusiast Qrome.
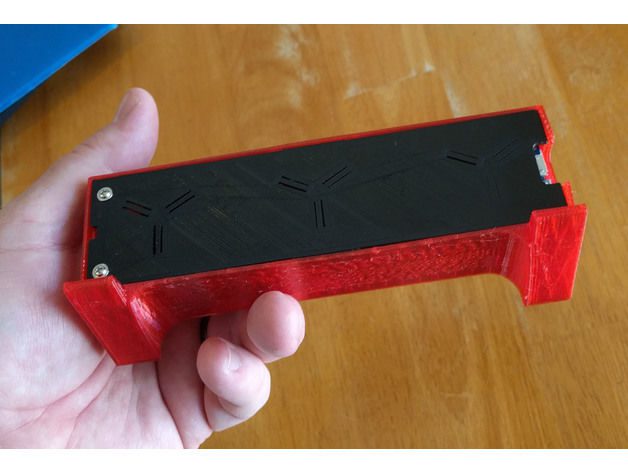
The designer has made it possible to add a plethora of information to this LED marquee scroller, including a digital clock, local weather, news headlines, 3D printing progress via OctoPrint, the value of Bitcoin and even random and humorous advice. This project shows what you can accomplish with just a couple of electronic components and a 3D printer. Equipped with a 3D printed enclosure, you can get creative and mix different colors to go along with your personal preference.
Let’s take a look at what you need to build your own LED marquee scroller.
3D Printed LED Marquee Scroller: What you Need
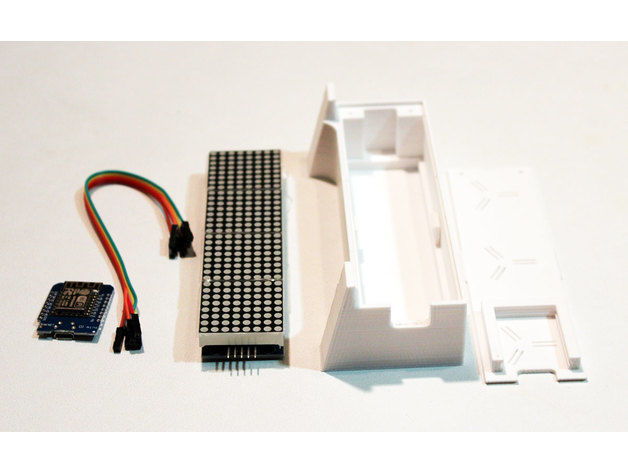
There isn’t much you need to create this LED marquee scroller as far as components are concerned. Of course, you’ll need the STL files for the 3D printed case, which can be freely downloaded from Thingiverse. This project does require a bit of soldering, but Qrome lays out the step-by-step process very clearly. Aside from the 3D printed enclosure, here’s what else you need:
In order to program the scroller with relevant information, you can follow along with the coding process included on the project’s Github.
3D Printed LED Marquee Scroller: Putting it Together
Starting off with the 3D printing process, Qrome suggests printing the two STL files (Base and Plate) with 20 percent infill, no supports required. The case is designed to snap-fit the Dot Matrix, and also includes a slot in the back panel for the Wemos D1 Mini. But before we start putting everything together, you’ll need to do some soldering first.
The Dot Matrix Module comes with the wires you can utilize during the soldering process. All you need to do is cut off the plugs and solder them directly to the pin locations on the LED Dot Matrix Display and to the Wemos D1 Mini. Here are the connections that need to be made:
- CLK -> D5 (SCK)
- CS -> D6
- DIN -> D7 (MOSI)
- VCC -> 5V+
- GND -> GND-
Next, using Arduino IDE software, you’ll need to configure it to work with the Wemos board and USB port. There are a range of USB drivers, as well as packages and libraries, to download in order to program the marquee scroller. Qrome goes into detail on which to install on his Instructables post.
Once you’ve completed this, the final step is to configure the web interface.
The marquee scroller utilizes the Wemos board’s WiFiManager to become an AP Hotspot when the last network it was connected to can’t be found. You can connect to the WiFi manager with your phone and enter your WiFi connection information. After the device is connected to your WiFi network, the assigned IP address can be used to open a browser to the Web Interface, which is where everything can be configured there.
And that’s about all it takes to create your own marquee scroller. To learn more about this project, check out the Instructables post.

Website: LINK