Schlagwort: diy
-

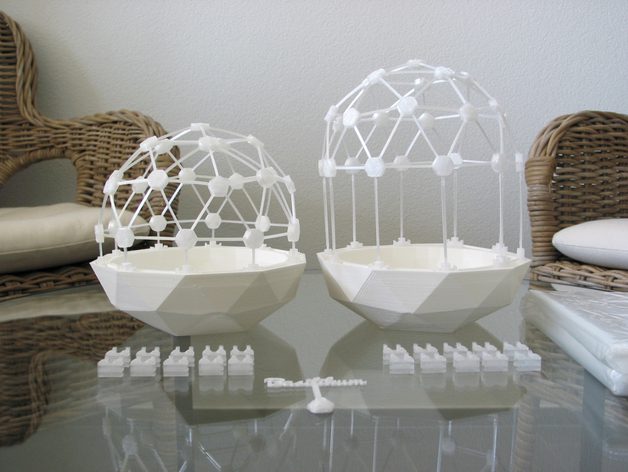
Weekend Project: Celebrate Earth Day with This 3D Printed Greenhouse Dome
Reading Time: 3 minutesWith Earth Day coming up this weekend, why not celebrate by 3D printing a DIY greenhouse dome for your garden? Polish up that green thumb, it’s time to use those maker skills for a Mother Nature-approved project. Nature is filled with majestic plants, vibrant flowers, and ripe fruits, all of which tend…
-

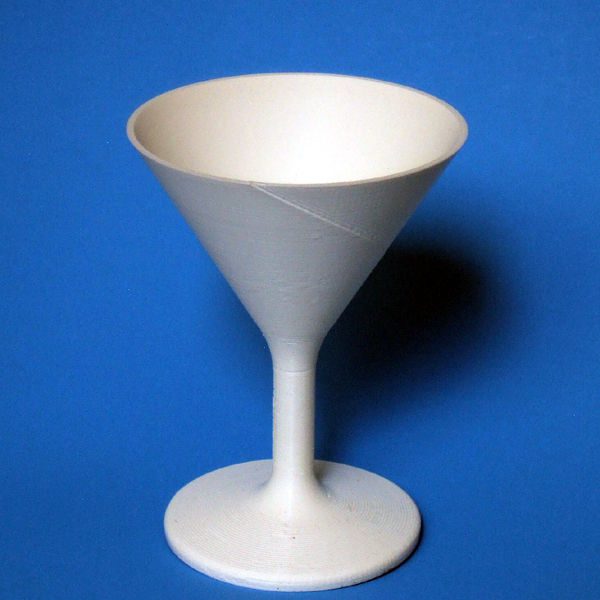
Weekend Project: How to 3D Print Watertight and Airtight Containers
Reading Time: 3 minutesA new Instructables post from user mikey77 shows how you can adjust your 3D printing slicer settings to make watertight and airtight containers, cups, tanks, and more. There are tons of useful and unique objects that you can create with your desktop 3D printer, but there are certain factors that prevent makers from…
-

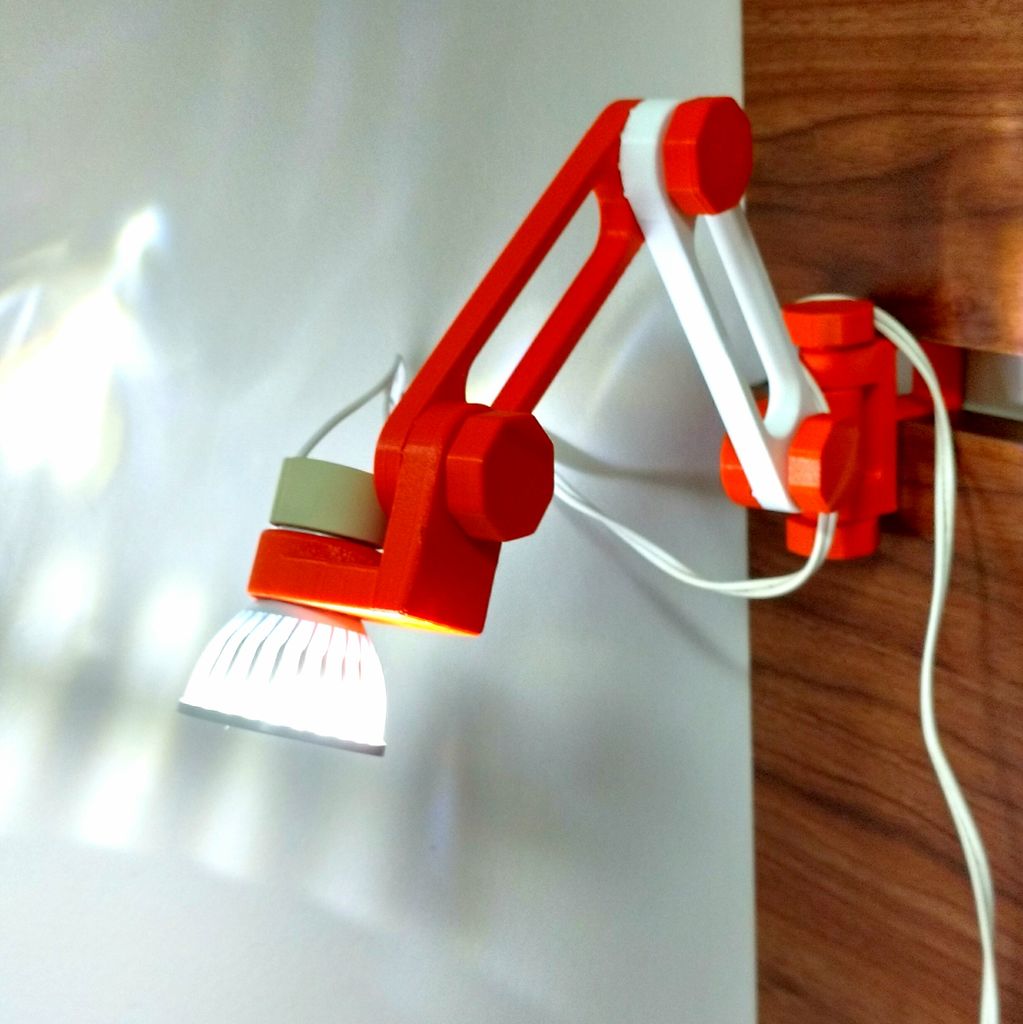
Project of the Week: 3D Print Your Own Articulating LED Lamp
Reading Time: 3 minutesEngineer and maker Igor Albuquerque has created a 3D printed articulating LED lamp that you can mount on your desk and configure to fit your work or study environment. Studying or working late tonight? Well, you’ll need good lighting at your desk to keep your eyes comfortable and healthy. Why not use your…
-

Weekend Project: Take Aim With This Awesome 3D Printed Mini Crossbow
Reading Time: 3 minutesSouth Korean maker “DIYPark” shows us how to create a fully 3D printed and functional Mini Crossbow. Set up some targets and take aim, because it’s time to get your archery on. When taking on a DIY project, we often see how combining 3D printing with electronics and other technologies can produce…
-

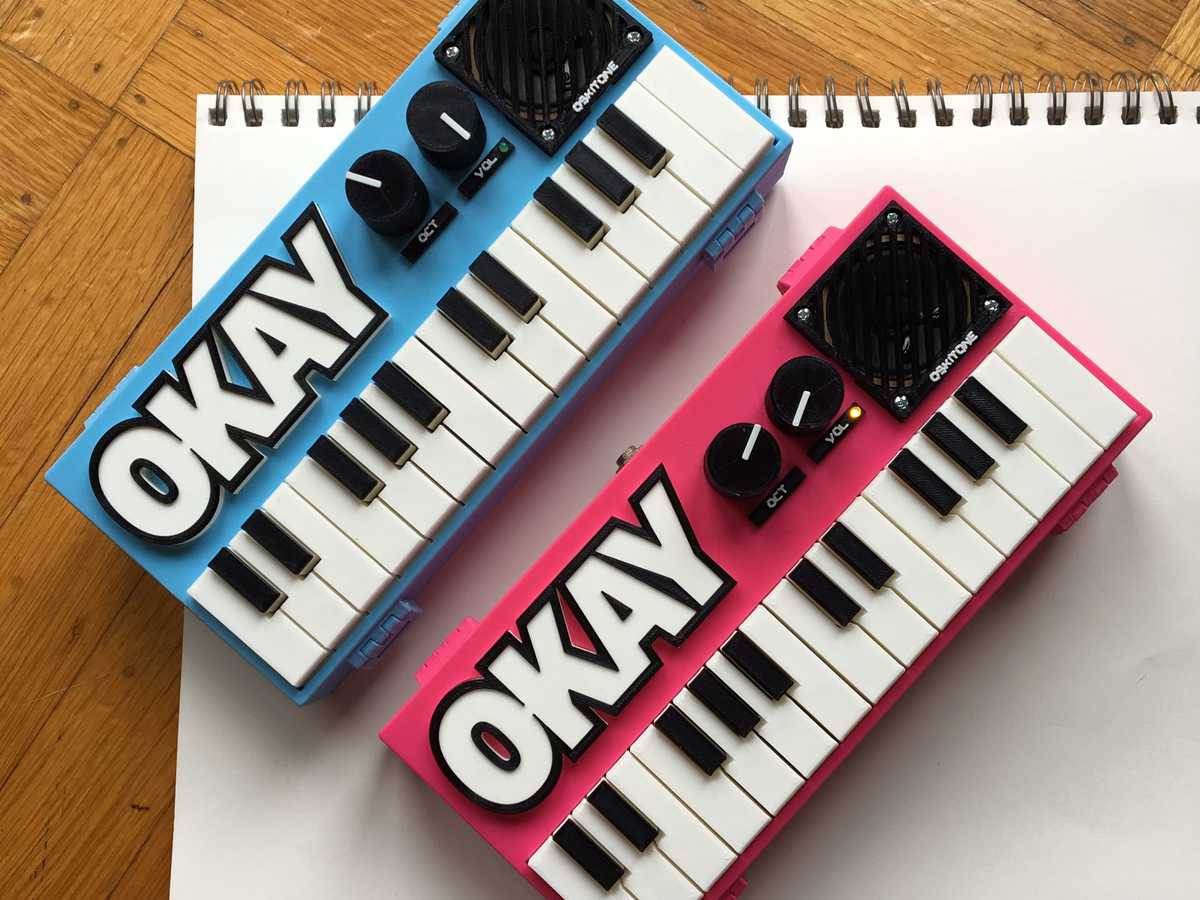
Weekend Project: 3D Printed OKAY 2 Synth Brings Music to the Maker’s Ears
Reading Time: 3 minutesOskitone’s new and improved OKAY 2 is a mind-blowing DIY synth that you can 3D print and put together on your own. Hone your 3D printing and soldering skills with this sweet musical instrument and let the sounds sweep you away! Looking for a new musical instrument to play? Why not use…
-

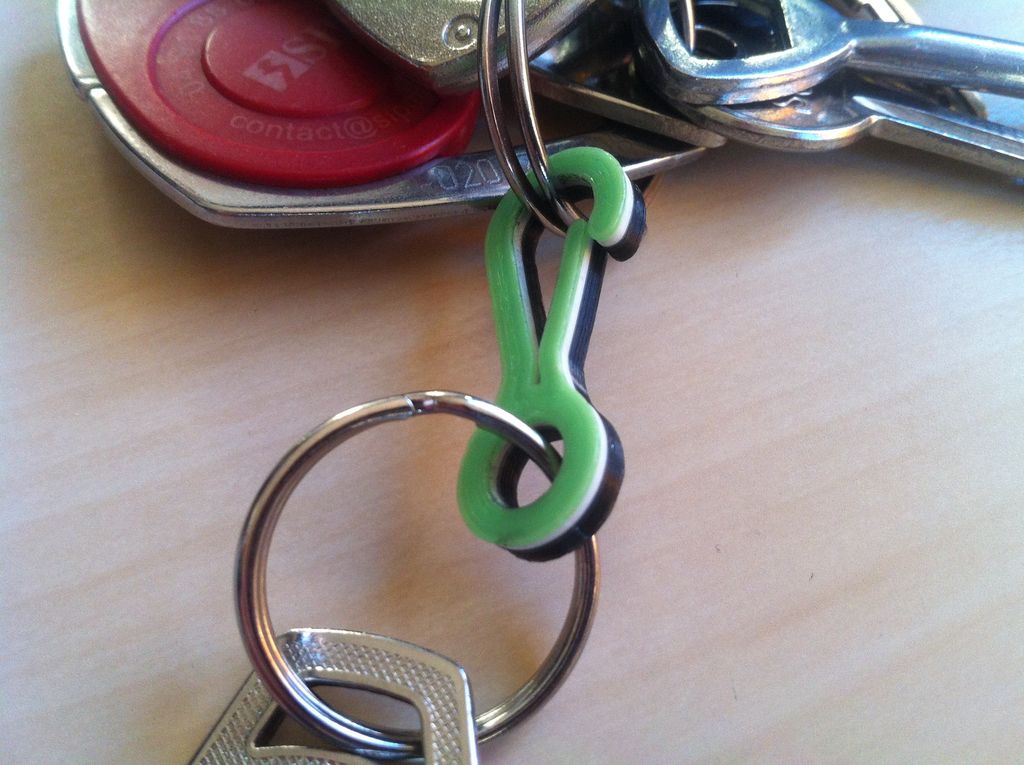
Project of the Week: Fuse Your Filament and 3D Print Multicolor Objects
Reading Time: 3 minutesNo dual extrusion? No problem! This week’s Project of the Week shows us how to fuse different filaments together and create your own multicolor objects with a single extrusion 3D printer. Thanks to recent advancements in dual extrusion FDM 3D printing, makers can now create vibrant objects in multiple colors. Unfortunately, only…
-

Weekend Project: 3D Print Your Own Customizable Soda Can Lamp
Reading Time: 3 minutesAn engineer named Arnd (also known as AHNT) recently shared a fun 3D printing project, showing us how to create an customizable soda can lamp that can you light up with LEDs or a candle. Here at All3DP, we go through a lot of 3D printing filament and thirst-quenching carbonated drinks, so…
-

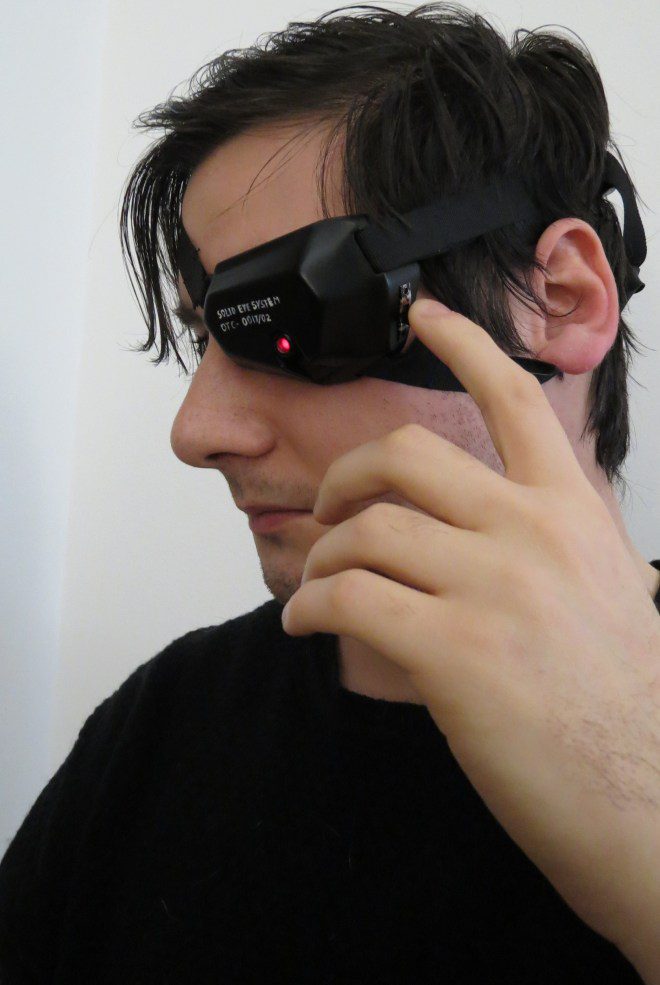
Project of the Week: 3D Printed Solid Eye from Metal Gear Solid 4
Reading Time: 4 minutesAre you a diehard fan of the Metal Gear video game franchise? Now you can use your 3D printer to cosplay as Solid Snake with a Solid Eye that is equipped with a working LED light. For over 30 years, generations of gamers have been captivated by Hideo Kojima’s massively popular action-adventure stealth…
-

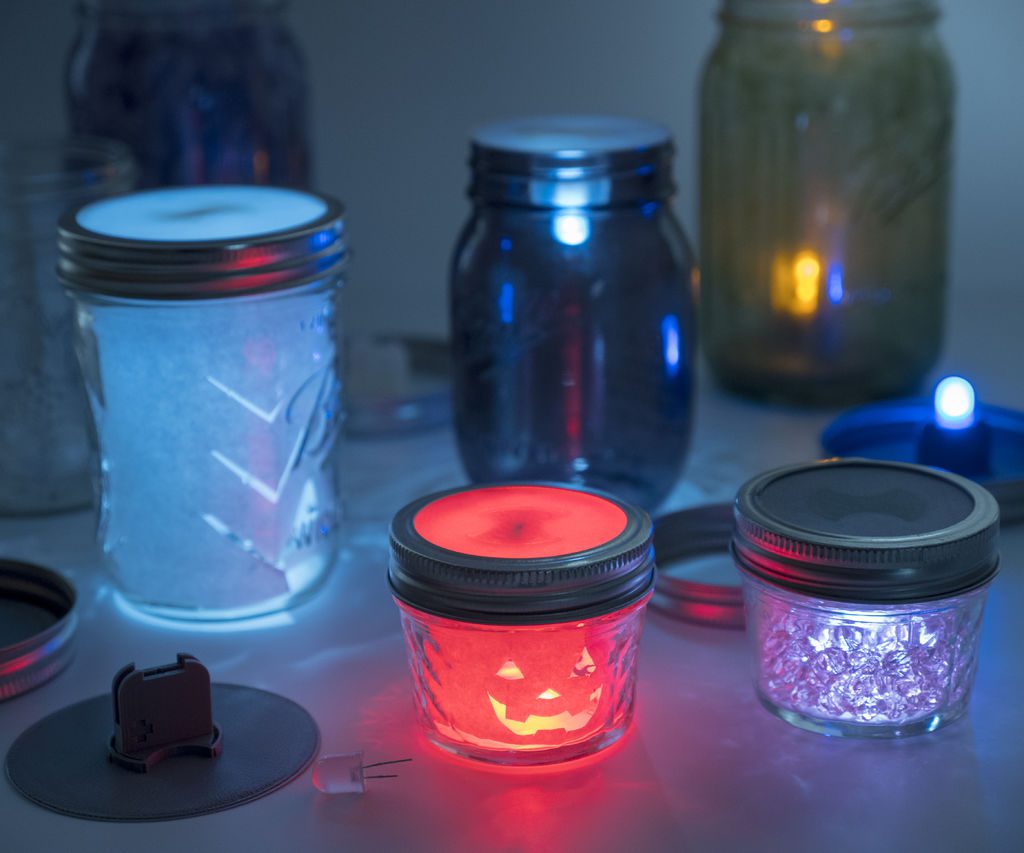
Weekend Project: Create Your Own 3D Printed LED Mason Jar Lanterns
Reading Time: 4 minutesInstructables content creator Becky Stern shares her latest 3D printing project: LED Mason Jar Lanterns. This beginner-level project will help you improve your design and DIY skills, and you’ll have some lovely new lanterns to light up your home! If there’s one type of container that has become synonymous with the stereotypical…
-

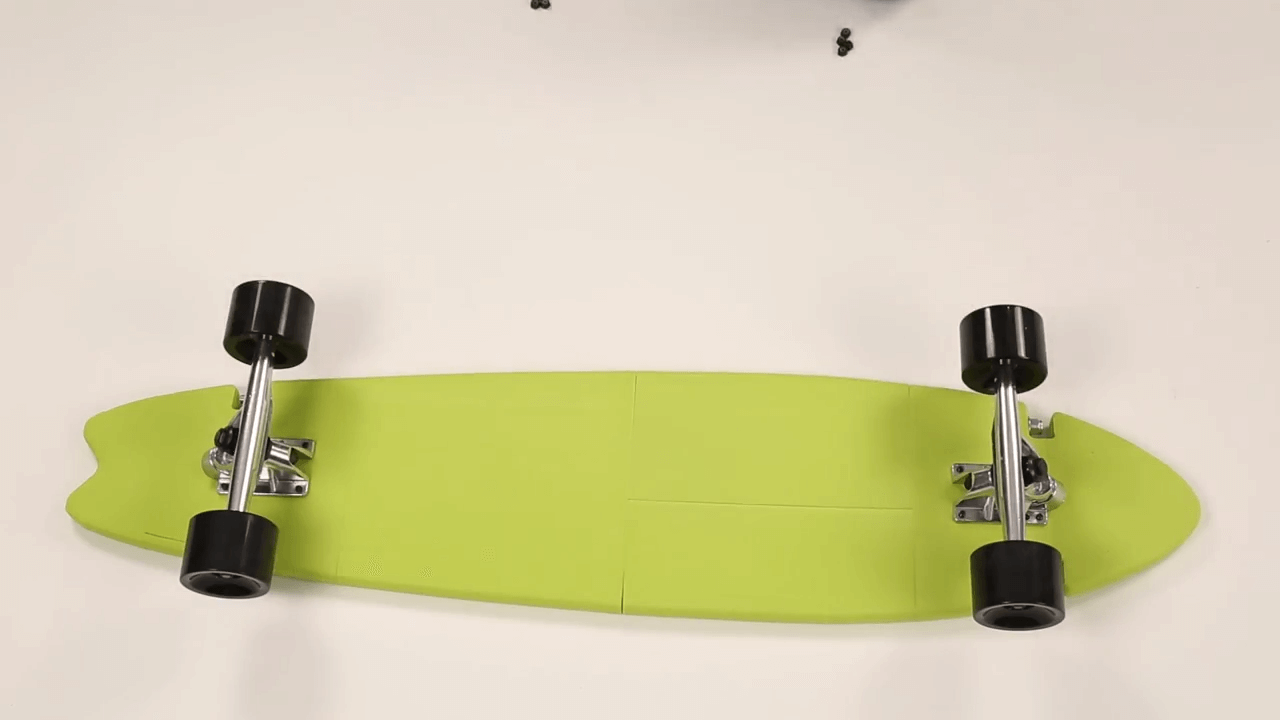
Weekend Project: Shred the Streets with Your Own 3D Printed Longboard
Reading Time: 3 minutesLulzbot shows us how to build a fully functional longboard using 3D printing technology. You can follow along with their surprisingly simple instructions or use them as a basis to build your own board. Ever want to use your 3D printer to create a functional mode of transportation? On today’s edition of…
-

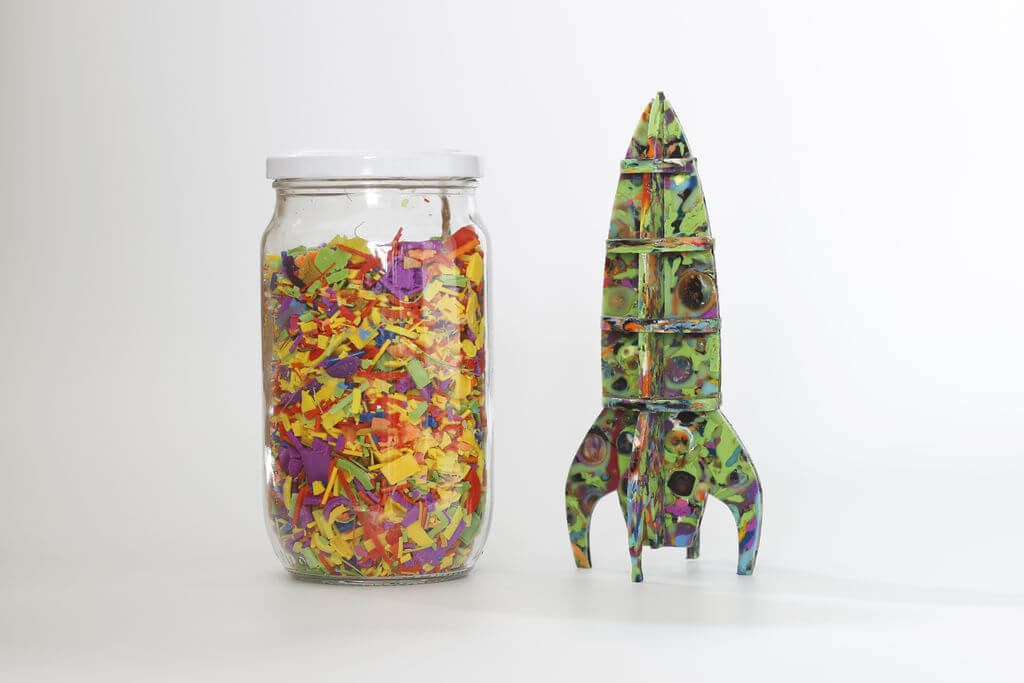
Weekend Project: Recycle Your Leftover Filament with a “Plastic Smoothie”
Reading Time: 4 minutesHave a trash bin full of leftover filament scraps and failed prints? Designer Agustin Flowalistik shows us how to recycle 3D printing waste by creating a Plastic Smoothie, which can be used in a laser cutter to create vibrant objects. You know how the old saying goes… One manufacturing technology’s trash is…
-

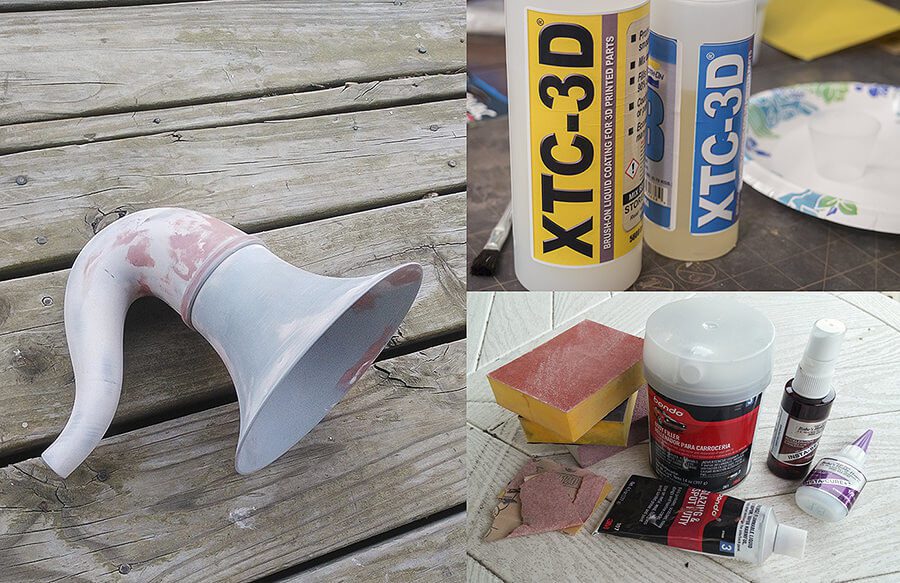
Gramazon: Turn Your Amazon Echo Dot Into a Gramophone with 3D Printing
Reading Time: 3 minutesRecently purchased an Amazon Echo Dot but not in love with its eerie futuristic attitude? Maker Baard Fleistad has created the Gramazon, a 3D printable gramophone attachment to give your AI device a 1920s makeover. Small, black, and round, the Amazon Echo Dot is an inconspicuous addition to the household, that is until it…
-

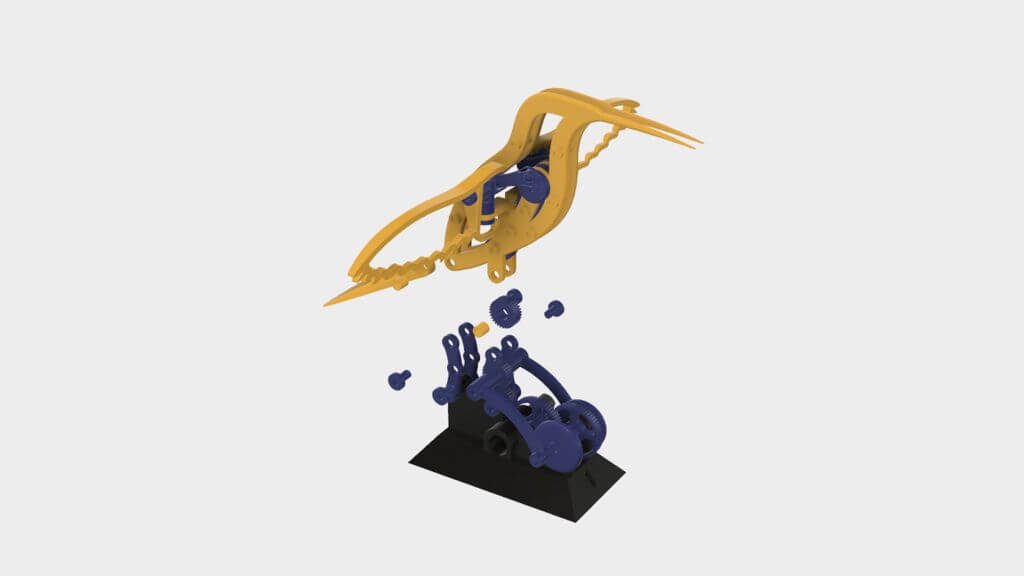
Weekend Project: 3D Print a Mechanical Hummingbird
Reading Time: 4 minutesIt’s time to leave the nest and make yourself a stunning and challenging DIY desk ornament. Maker Greg Zumwalt has created a complex 3D printed mechanical hummingbird-themed automata toy–and you can too. One of the many advantages of 3D printing is its ability to manufacture complex geometries in a single print. But…
-

Weekend Project: 3D Print Your Own Animated Physics Toy
Reading Time: 3 minutesLooking for an awesomely interactive project to 3D print this weekend? The Ruiz Brothers and Phillip Burgess have shared Animated LED Sand, a DIY physics toy featured on Adafruit. Although the laws of physics are an integral part to our understanding of the nature and universe that surrounds us, learning about Newton’s…
-

4 Easy Life Hacks On How To Open A Wine Bottle Without A Corkscrew
Reading Time: < 1 minuteIn this video tutorial, we will show you how to open a wine bottle without a corkscrew. The video contains 4 easy life hacks that you can do yourself with simple household items: 1. Open a wine bottle using only a lighter. Just heat up the bottle for 1 minute on…
-

YouTuber 3D Prints and Tests a Screw Drive RC Tank
Reading Time: 3 minutesCreate your own radio controlled 3D printed screw drive tank by following along with YouTuber Ivan Miranda’s latest six-part project. Maker Ivan Miranda has a message for you: never give up. These words flash up on his latest video about creating a 3D printed screw drive RC. It’s the final video in…
-

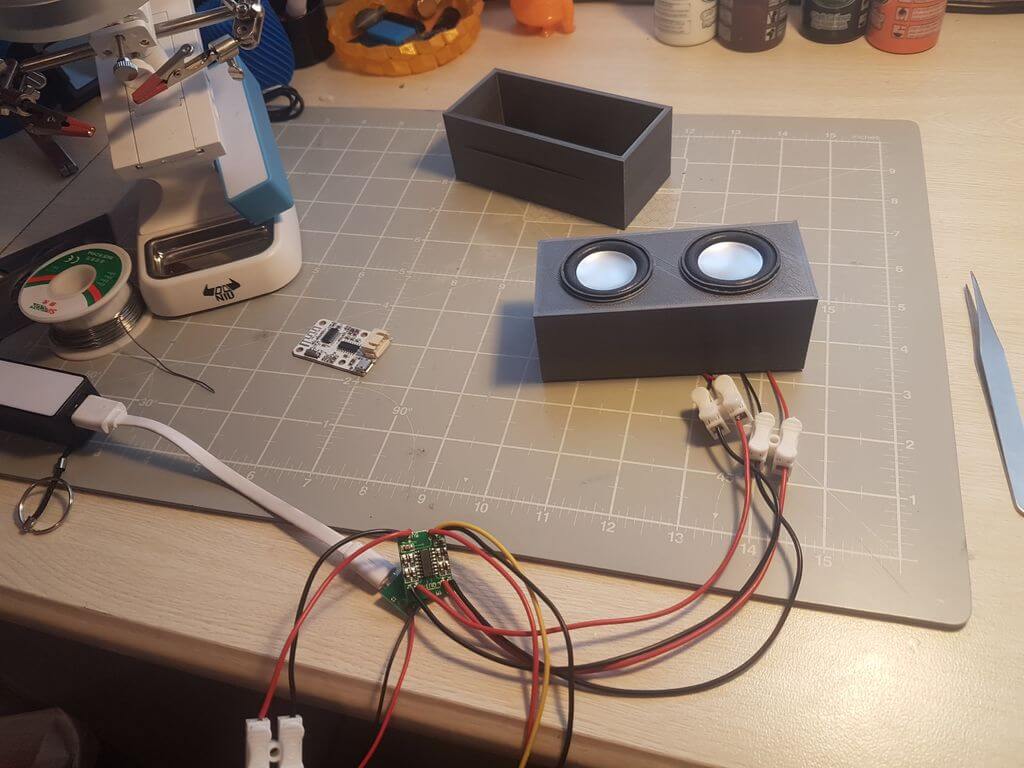
Weekend Project: 3D Printed Mini Bluetooth Speakers
Reading Time: 4 minutesEver wanted to use your 3D printer to create the ultimate speaker box? Coder and tinker Yasthil Bhagwandeen shares a new Instructables project on how to build your very own 3D Printed Mini Bluetooth Speakers. Now that sounds cool… 3D printing technology is disrupting how a wide range of consumer goods are produced,…
-

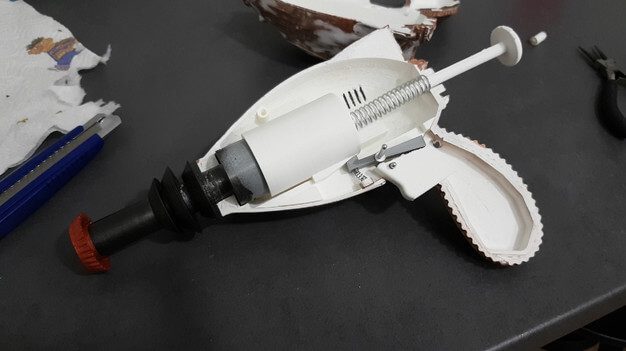
Weekend Project: 3D Print Your Own NERF Thirst Zapper Gun From Fallout 4
Reading Time: 3 minutesWith just a spring and a 3D printer, Croatian digital artist and maker Vedran Marjanovic Wekster shows you how to create a NERF-ified version of the Thirst Zapper gun from the video game series Fallout. In the post-apocalyptic setting of the critically acclaimed video game Fallout 4, the main character– referred to as “Sole…
-

30+ “DIY WHY” Projects That Probably Should Have Never Happened
Reading Time: < 1 minuteDo It Yourself projects allow people to reuse items lying around the house to create something cool instead of throwing them away. However, just because you can make anything it doesn’t mean you should. A subreddit with a pretty self-explanatory title (DiWHY) is collecting the worst DIY fails, and they are…
-

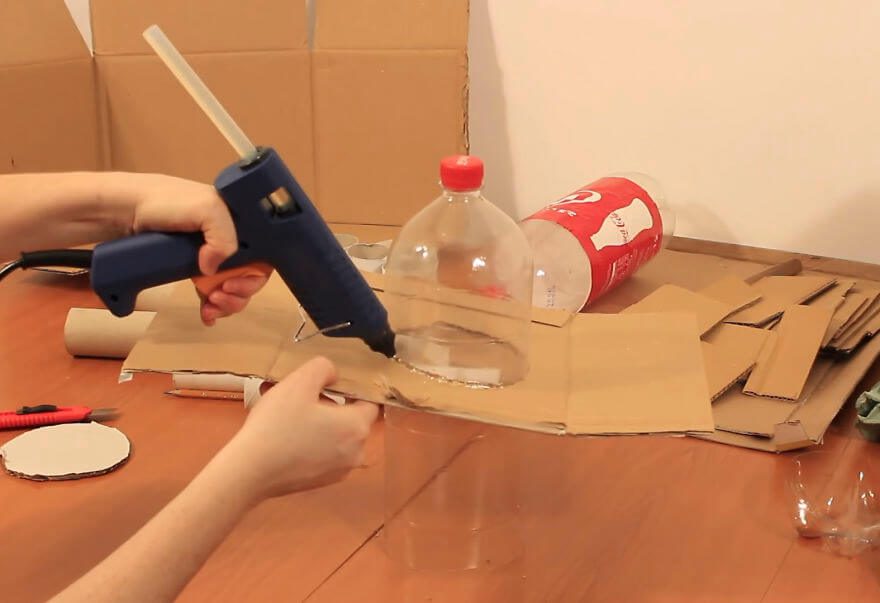
DIY Fairy House That I Made From Trash
Reading Time: 3 minutesHi, in this tutorial I show you how I made a fairy house lamp recycling some cardboard from an old box, egg cartons, pizza boxes, toilet paper tubes and two plastic bottles. The only bought materials I used are the acrylic colors, the hot glue and the P.V.A. glue (less than 3$…
-
Weekend Project: A $20 DIY Heated DryBox for 3D Printing Filament Storage
Reading Time: 3 minutesWant to keep your filament in tip-top shape? Engineer and 3D printing enthusiast RichRap shows us how to create DIY Heated DryBox for 3D Printing filament for under $20. No matter how finely tuned your 3D printer is, the quality of your prints are highly dependent on the state of the filament you’re…
-

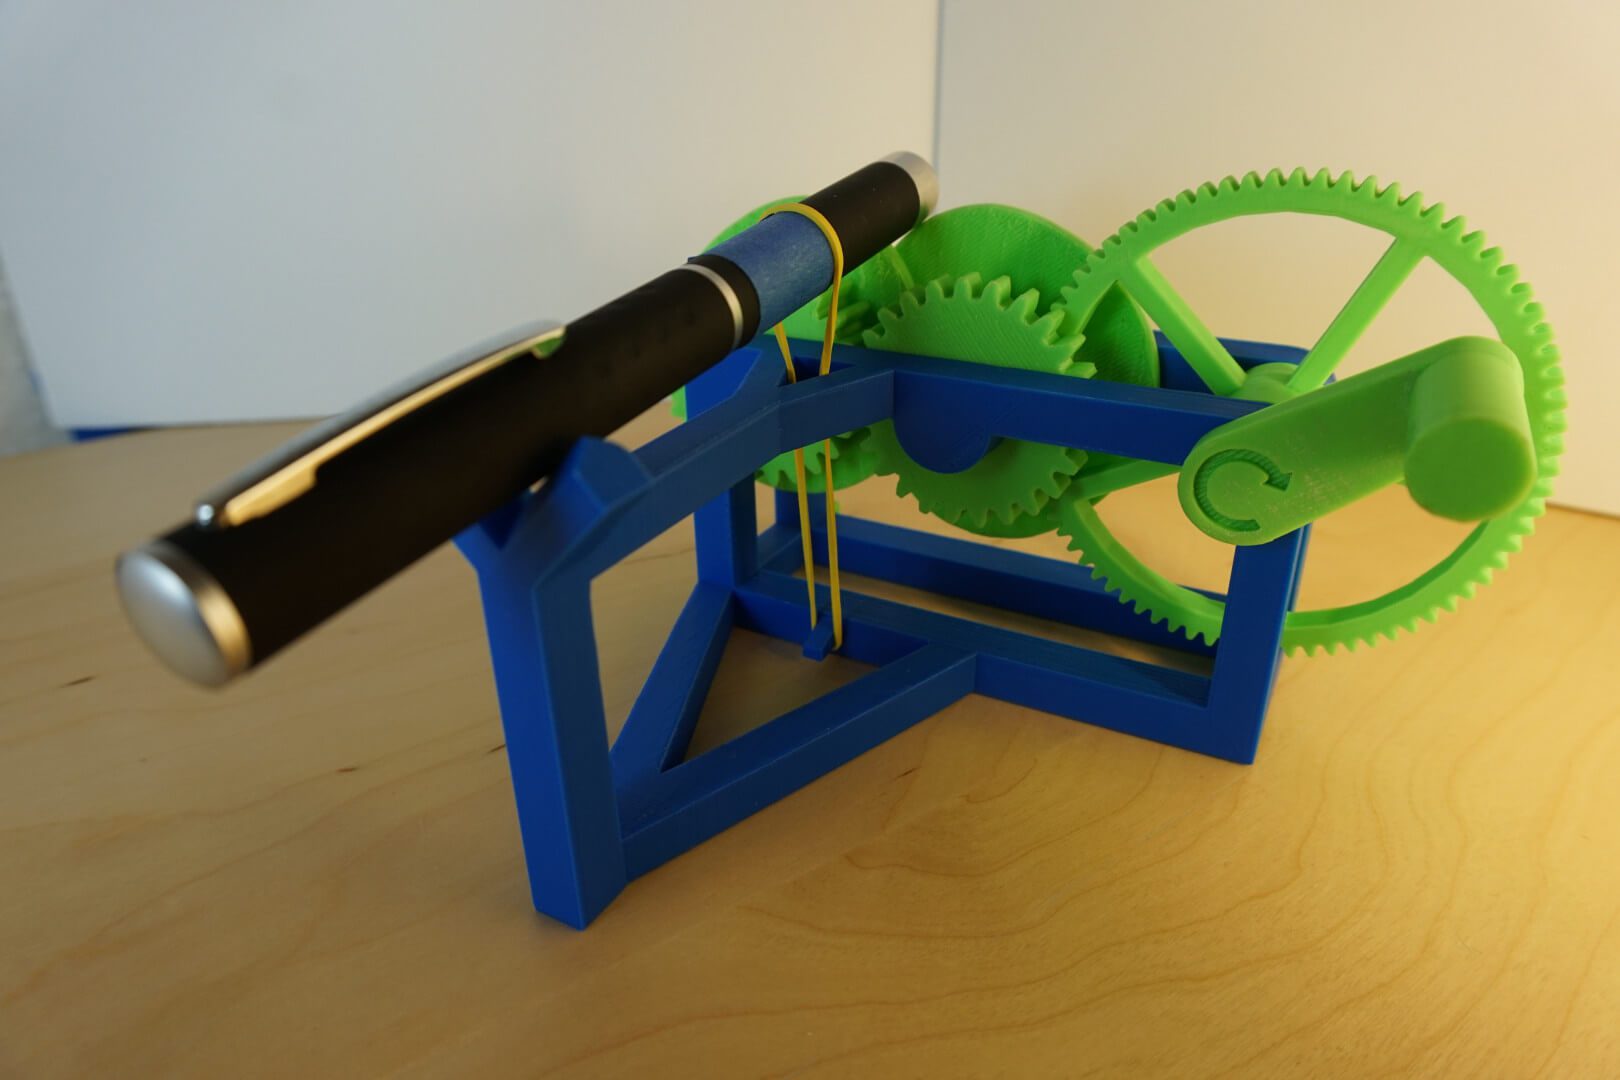
Weekend Project: 3D Print Your Own Mechanical Laser Show!
Reading Time: 3 minutesLooking for a weekend DIY project? Check out this awesome 3D printed hand-powered mechanical laser show created by software developer Evan Stanford. Is your 3D printer sitting idle this weekend? Want to find a amusing project to show your friends and family just what this technology is capable of? What better way…