Oskitone’s new and improved OKAY 2 is a mind-blowing DIY synth that you can 3D print and put together on your own. Hone your 3D printing and soldering skills with this sweet musical instrument and let the sounds sweep you away!
Looking for a new musical instrument to play? Why not use your 3D printer to create a synthesizer that is completely tailored to your style? Well, we’ve got a great project for all the musically-minded makers to take on over the weekend.
Last year, the San Francisco-based one-man musical instrument studio Oskitone released its first version of the OKAY synth, and has since refined the concept in a variety of ways. The new and improved OKAY 2 is an analog, monophonic, square wave synthesizer that is largely made up of 3D printed parts. It was designed on OpenSCAD and EAGLE by a man named Tommy, who is in charge of Oskitone.
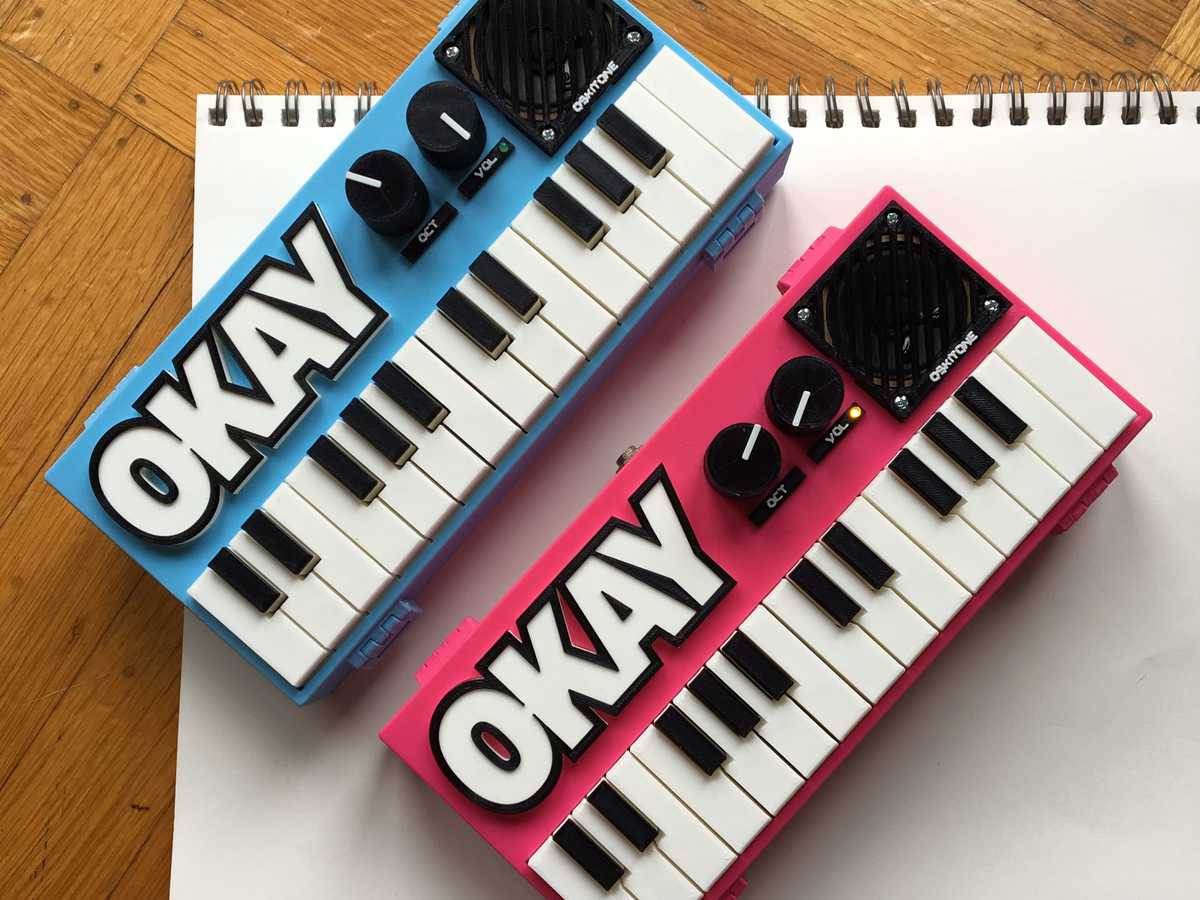
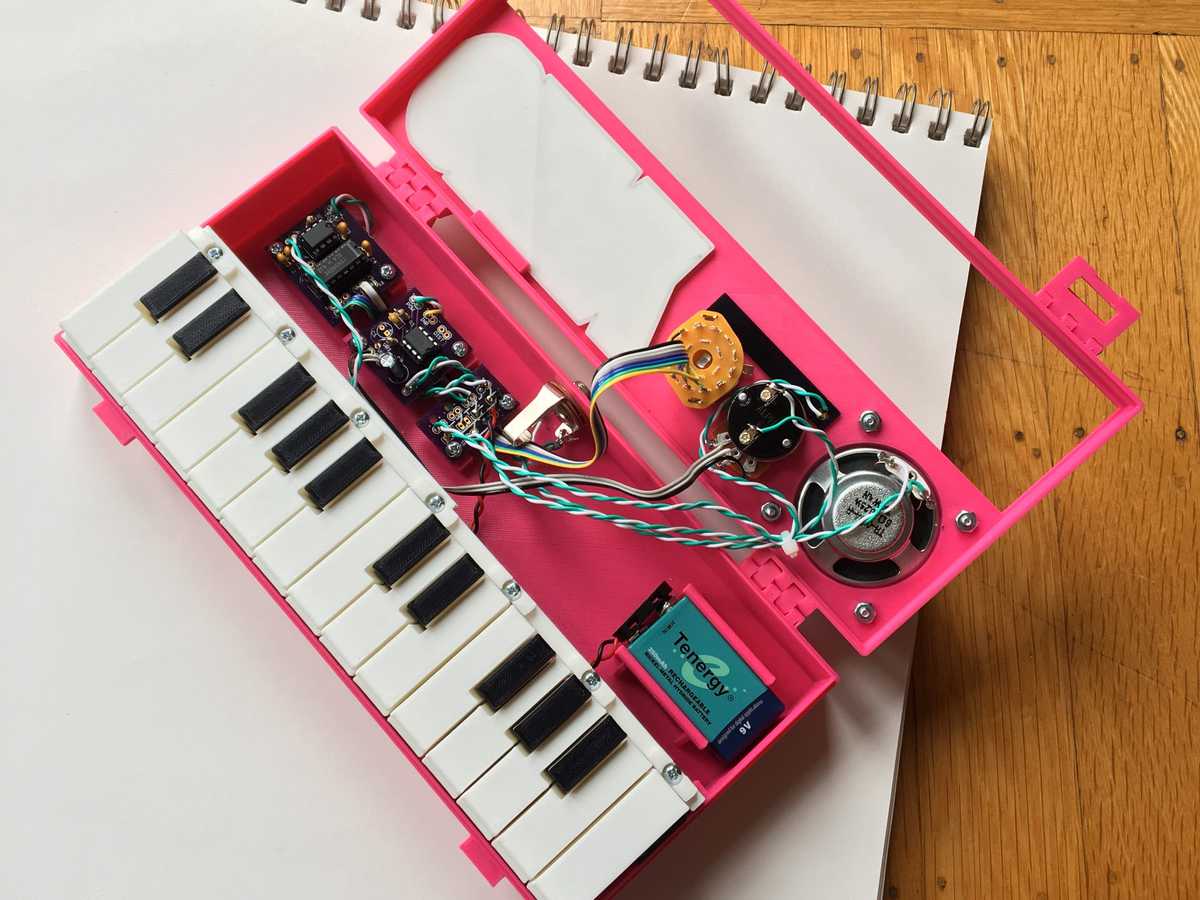
The instrument utilizes modular PCBs, octave and volume controls, and a speaker to share your creative sounds with the world. Unlike the first iteration, the OKAY 2 has a completely redesigned key mounting, improvements in the key travel distance, an audio out jack, and a built-in display stand.
More Musical Ideas: 15 Groovy Ideas for Homemade Musical Instruments to DIY
This 3D printed synth looks and sounds tremendous, and you can build your own customized version for a relatively low price. Let’s take a look at what it takes to assemble and start jamming out on the 3D printed OKAY 2 synth.
[embedded content]
DIY OKAY 2 Synth: What Do You Need?
In order to build your own OKAY 2 Synth, you’ll need to have a 3D printer and soldering iron kit. While there are a number of electronic components inside of this compact instrument, you can acquire everything by ordering the OKAY 2 Synth DIY kit from the Oskitone website for $55.
The STL files for the body and keys of the synthesizer are freely available on Thingiverse.
If you want to skip the 3D printing and assembly process, you can also just purchase the assembled version of the synth in green or hot pink for $110. But building the OKAY 2 your self is half of the fun! So let’s figure out how to put it all together.
DIY OKAY 2 Synth: Putting it All Together
Putting together this DIY synthesizer is no easy feat, but thankfully Oskitone provides detailed instructions on how to put this project together. The lengthy assembly manual goes into the 3D printing settings, the PCB assembly, testing and debugging, and circuit schematics.
As you can see in the time-lapse video below, the OKAY 2 Synth requires quite a bit of assembly and soldering time, but your hard work will be rewarded with a customized musical instrument create with your very own hands. If you want to learn more about how this synthesizer is put together, be sure to view the full assembly manual from Oskitone.
[embedded content]
Website: LINK
Schreibe einen Kommentar
Du musst angemeldet sein, um einen Kommentar abzugeben.