Schlagwort: raspbian

  • New Raspberry Pi OS release — December 2020

    New Raspberry Pi OS release — December 2020

    Reading Time: 10 minutes

    Well, in a year as disrupted and strange as 2020, it’s nice to know that there are some things you can rely on, for example the traditional end-of-year new release of Raspberry Pi OS, which we launch today. Here’s a run-through of the main new features that you’ll find in it.

    Chromium

    We’ve updated the Chromium browser to version 84. This has taken us a bit longer than we would have liked, but it’s always quite a lot of work to get our video hardware acceleration integrated with new releases of the browser. That’s done now, so you should see good-quality video playback on sites like YouTube. We’ve also, given events this year, done a lot of testing and tweaking on video conferencing clients such as Google Meet, Microsoft Teams, and Zoom, and they should all now work smoothly on your Raspberry Pi’s Chromium.

    Version 84 of the Chromium web browser

    There’s one more thing to mention on the subject of web browsers. We’ve been shipping Adobe’s Flash Player as part of our Chromium install for several years now. Flash Player is being retired by Adobe at the end of the year, so this release will be the last that includes it. Most websites have now stopped requiring Flash Player, so this hopefully isn’t something that anyone notices!

    PulseAudio

    From this release onwards, we are switching Raspberry Pi OS to use the PulseAudio sound server.

    First, a bit of background. Audio on Linux is really quite complicated. There are multiple different standards for handling audio input and output, and it does sometimes seem that what has happened, historically, is that whenever anyone wanted to use audio in Linux, they looked at the existing libraries and programs and went “Hmmm… I don’t like that, I’ll write something new and better.” This has resulted in a confused mass of competing and conflicting software, none of which quite works the way anyone wants it to!

    The most common audio interface, which lies underneath most Linux systems somewhere, is called ALSA, the Advanced Linux Sound Architecture. This is a fairly reliable low-level audio interface — indeed, it is what Raspberry Pi OS has used up until now — but it has quite a lot of limitations and is starting to show its age. For example, it can only handle one input and one output at a time. So for example, if ALSA is being used by your web browser to play sound from a YouTube video to the HDMI output on your Raspberry Pi, nothing else can produce sound at the same time; if you were to try playing a video or an audio file in VLC, you’d hear nothing but the audio from YouTube. Similarly, if you want to switch the sound from your YouTube video from HDMI to a USB sound card, you can’t do it while the video is playing; it won’t change until the sound stops. These aren’t massive problems, but most modern operating systems do handle audio in a more flexible fashion.

    More significant is that ALSA doesn’t handle Bluetooth audio at all, so various other extensions and additional bits of software are required to even get audio into and out of Bluetooth devices on an ALSA-based system. We’ve used a third-party library called bluez-alsa for a few years now, but it’s an additional piece of code to maintain and update, so this isn’t ideal.

    PulseAudio deals with all of this. It’s a piece of software that sits as a layer between all the audio hardware and all the applications that send and receive audio, and it automatically routes everything to the right places. It can mix the audio from multiple applications together, so you can hear VLC at the same time as YouTube, and it allows the output to be moved around between different devices while it is playing. It knows how to talk to Bluetooth devices, and it greatly simplifies the job of managing default input and output devices, so it makes it much easier to make sure audio ends up where it is supposed to be!

    One area where it is particularly helpful is in managing audio input and output streams to web browsers like Chromium; in our testing, the use of PulseAudio made setting up video conferencing sessions much easier and more reliable, particularly with Bluetooth headsets and webcam audio.

    The good news for Raspberry Pi users is that, if we’ve got it right, you shouldn’t even notice the change. PulseAudio now runs by default, and while the volume control and audio input/output selector on the taskbar looks almost identical to the one in previous releases of the OS, it is now controlling PulseAudio rather than ALSA. You can use it just as before: select your output and input devices, adjust the volume, and you’re good to go.

    The PulseAudio input selector

    There is one small change to the input/output selector, which is the menu option at the bottom for Device Profiles. In PulseAudio, any audio device has one or more profiles, which select which outputs and inputs are used on any device with multiple connections. (For example, some audio HATs and USB sound cards have both analogue and digital outputs — there will usually be a profile for each output to select where the audio actually comes out.)

    The PulseAudio profile selector

    Profiles are more important for Bluetooth devices. If a Bluetooth device has both an input and an output (such as a headset with both a microphone and an earphone), it usually supports two different profiles. One of these is called HSP (HeadSet Profile), and this allows you to use both the microphone and the earphone, but with relatively low sound quality — equivalent to that you hear on a mobile phone call, so fine for speech but not great for music. The other profile is called A2DP (Advanced Audio Distribution Profile), which gives much better sound quality, but is output-only: it does not allow you to use the microphone. So if you are making a call, you want your Bluetooth device to use HSP, but if you are listening to music, you want it to use A2DP.

    We’ve automated some of this, so if you select a Bluetooth device as the default input, then that device is automatically switched to HSP. If you want to switch a device which is in HSP back to A2DP, just reselect it from the output menu. Its microphone will then be deactivated, and it will switch to A2DP. But sometimes you might want to take control of profiles manually, and the Device Profiles dialog allows you to do that.

    (Note that if you are only using the Raspberry Pi’s internal sound outputs, you don’t need to worry about profiles at all, as there is only one, and it’s automatically selected for you.)

    Some people who have had experience of PulseAudio in the past may be a little concerned by this change, because PulseAudio hasn’t always been the most reliable piece of software, but it has now reached the point where it solves far more problems than it creates, which is why many other Linux distributions, such as Ubuntu, now use it by default. Most users shouldn’t even notice the change; there may be occasional issues with some older applications such as Sonic Pi, but the developers of these applications will hopefully address any issues in the near future.

    Printing

    One thing which has always been missing from Raspberry Pi OS is an easy way to connect to and configure printers. There is a Linux tool for this, called CUPS, the Common Unix Printing System. (It’s actually owned by Apple and is the underlying printing system used by macOS X, but it is still free software and available for use by Linux distributions.)

    CUPS has always been available in apt, so could be installed on any Raspberry Pi, but the standard web-based interface is a bit unfriendly. Various third-party front-end tools have been written to make CUPS a bit easier to use, and we have decided to use one called system-config-printer. (Like PulseAudio, this is also used as standard by Ubuntu.)

    So both CUPS and system-config-printer are now installed as part of Raspberry Pi OS. If you are a glutton for punishment, you can access the CUPS web interface by opening the Chromium browser and going to http://localhost:631, but instead of doing that, we suggest just going into the Preferences section in the main menu and opening Print Settings.

    The new Printer Settings dialog

    This shows the system-config-printer dialog, from which you can add new printers, remove old ones, set one as the default, and access the print queue for each printer, just as you should be familiar with from other operating systems.

    Like most things in Linux, this relies on user contributions, so not every printer is supported. We’ve found that most networked printers work fine, but USB printers are a bit hit-and-miss as to whether there is a suitable driver; in general, the older your printer is, the more likely it is to have a CUPS driver available. The best thing to do is to try it and see, and perhaps ask for help on our forums if your particular printer doesn’t seem to work.

    This fills in one of the last things missing in making Raspberry Pi a complete desktop computer, by making it easy to set up a printer and print from applications such as LibreOffice.

    Accessibility

    One of the areas we have tried to improve in the Desktop this year is to make it more accessible to those with visual impairments. We added support for the Orca screen reader at the start of the year, and the display magnifier plugin over the summer.

    While there are no completely new accessibility features this time, we have made some improvements to Orca support in applications like Raspberry Pi Configuration and Appearance Settings, to make them read what they are doing in a more helpful fashion; we’ve also worked with the maintainers of Orca to raise and fix a few bugs. It’s still not perfect, but we’re doing our best!

    One of the benefits of switching to PulseAudio is that it now means that screen reader audio can be played through Bluetooth devices; this was not possible using the old ALSA system, so visually-impaired users who wish to use the screen reader with a Bluetooth headset or external speaker can now do so.

    One feature we have added is an easy way to install Orca; it is still available through Recommended Software as before, but given that is not easy to navigate for a visually-impaired person, there is now a keyboard shortcut: just hold down ctrl and alt and press the space bar to automatically install Orca. A dialog box will be shown on the screen, and voice prompts will let you know when the install has started and finished.

    And if you can’t remember that shortcut, when you first boot a new image, if you don’t do anything for thirty seconds or so, the startup wizard will now speak to you to remind you how to do it…

    Finally, we had hoped to be able to say that Chromium was now compatible with Orca; screen reader support was being added to versions 8x. Unfortunately, for now this seems to only have been added for Windows and Mac versions, not the Linux build we use. Hopefully Google will address this in a future release, but for now if you need a web browser compatible with Orca, you’ll need to install Firefox from apt.

    New hardware options

    We’ve added a couple of options to the Raspberry Pi Configuration tool.

    On the System tab, if you are running on Raspberry Pi with a single status LED (i.e. a Raspberry Pi Zero or the new Raspberry Pi 400), there is now an option to select whether the LED just shows that the power is on, or if it flickers off to show drive activity.

    LED control in Raspberry Pi Configuration

    On the Performance tab, there are options to allow you to control the new Raspberry Pi Case Fan: you can select the GPIO pin to which it is connected and set the temperature at which it turns on and off.

    Fan controls in Raspberry Pi Configuration

    How do I get it?

    The latest image can be installed on a new card using the Raspberry Pi Imager, or can be downloaded from our Downloads page.

    To apply the updates to an existing image, you’ll need to enter the usual commands in a terminal window:

    sudo apt update
    sudo apt full-upgrade

    (It is safe to just accept the default answer to any questions you are asked during the update procedure.)

    Then, to install the PulseAudio Bluetooth support, you will need to enter the following commands in the terminal window:

    sudo apt purge bluealsa
    sudo apt install pulseaudio-module-bluetooth

    Now reboot.

    To swap over the volume and input selector on the taskbar from ALSA to PulseAudio, after your Raspberry Pi has restarted, right-click a blank area on the taskbar and choose Add / Remove Panel Items. Find the plugin labelled Volume Control (ALSA/BT) in the list, select it and click Remove; then click the Add button, find the plugin labelled Volume Control (PulseAudio) and click Add. Alternatively, just open the Appearance Settings application from the Preferences section of the Main Menu, go to the Defaults tab and press one of the Set Defaults buttons.

    As ever, do let us know what you think in the comments.

    Website: LINK

  • Remote humidity detector

    Remote humidity detector

    Reading Time: 3 minutes

    We know crawl spaces are creepy, sweaty, and confining but, hear us out…

    You need to keep an eye on the humidity level in your crawl space, as it can seriously affect the whole house’s overall health. It’s ideal to be able to do this remotely (given the creepy, sweaty atmosphere of the space), and a Raspberry Pi allows this.

    Jamie Bailey took to Medium to share his Raspberry Pi setup that allows him to monitor the humidity of the crawl space in his home from a mobile device and/or laptop. His setup lets you check on the current humidity level and also see the historical data over time. You can also set alarms to be sent to you via text or email whenever the humidity level exceeds a certain threshold.

    The hardware you need

    • Power outlet or extension cord in your crawl space
    • Raspberry Pi (3 or 4) or Raspberry Pi Zero W (or WH)
    • BME280 temperature/humidity sensor
    • Female-to-female jumper wires

    The software you need

    Jamie’s walk-through is extensive and includes all the command line code you’ll need too, so make sure to check it out if you attempt this build.

    Assembly

    The BME280 sensor has four pins you need to connect to your Raspberry Pi. This will send the humidity data to your Raspberry Pi, which you’ll have already set up to let you know what’s happening remotely.

    • BME280 VIN pin connects to GPIO pin 1 (3.3V)
    • BME280 GND pin connects to GPIO pin 6 (GND)
    • BME280 SCL pin connects to GPIO pin 5 (SCL)
    • BME280 SDA pin connects to GPIO pin 3 (SDA)
    You can see the Raspberry Pi in a black case hanging in the centre against a floor joist.

    Once you have all your software sorted and your hardware connected, turn your Raspberry Pi off and take it down to your crawl space (monitor, keyboard, and mouse are no longer necessary). Jamie advises hanging your Raspberry Pi from the floor joists instead of letting it touch the ground, to avoid contact with any water. He put a nail in one of the floor joists and draped the power cord over the nail (see above). Turn your tiny computer on, make sure data starts flowing into your dashboard, and you’ve got yourself remote humidity sensor!

    PS We’re English so… is a crawl space the same as an attic or what? Asking for a friend!

    Never mind, Alex asked her American girlfriend.

    Website: LINK

  • Raspberry Pi-powered wedding memories record player

    Raspberry Pi-powered wedding memories record player

    Reading Time: 3 minutes

    We’re a sentimental bunch and were bowled over by this intricate, musical wedding gift. It’s powered by a Raspberry Pi and has various other bits of geeky goodness under the hood. Honestly, the extra features just keep coming — you’ll see.

    This beautifully crafted ‘record player’ plays one pair of newlyweds’ Spotify accounts, and there’s a special visual twist when their ‘first dance’ wedding song plays.

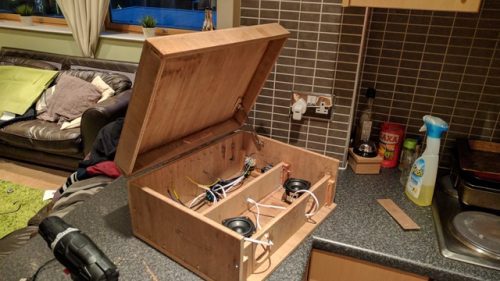
    Midway through the build process

    First, a little background: the newlyweds, Holly and Dougie, have been sweethearts since early highschool days. Their wedding took place on a farm near the village they grew up in, Fintry in rural Scotland.

    No Title

    No Description

    Throughout the wedding day, the phrase “Music is a huge deal” was repeated often, which gave the bride’s older brother Ben Howell the idea for a homemade, Raspberry Pi–powered gift.

    Custom tagline laser-cut and spray-painted

    He built the couple a neatly finished music box, known as HD-001 (HD for ‘Holly Dougie’ of course) and home to a ‘smart turntable’. It can connect to a wireless network and has a touch screen where the record label would normally sit. When you lift the lid and switch it on, it asks “Hello. Who’s listening?”

    Once you tap on the picture of either the bride or groom, it accesses their Spotify account and fetches the album artwork of whatever song it plays.

    What’s inside?

    The main brain is Raspberry Pi 3 running Raspberry Pi OS. The interface is built as a web page in mostly PHP and JavaScript. It uses the Spotify API to get the ‘now playing’ track of the bride’s or groom’s account, and to fish out the album artwork URL from the return data so it can display this on a rotating panel.

    The audio side is a powered by a 50W Bluetooth amplifier, which is entirely independent from the Raspberry Pi computer.

    The build details

    The enclosure is all custom-designed and built using scrap wood wrapped in green faux leather material. Ben sourced most of the other materials — rubber feet, hinges, switches, metal grille — on Amazon.

    The HD-001 also features a hand-built 4-way speaker system and a custom-made speaker grille with that famous phrase “Music is a huge deal” on the front.

    The lettering on the grille was laser-cut by a company in Glasgow to order, and Ben spray-painted it metallic grey. The LCD panel and driver board are also from Amazon.

    To play and pause music, Ben sourced a tone-arm online and routed cabling from the Raspberry Pi GPIO pins through to a micro-switch where the original needle should sit. That’s how lifting the arm pauses playback, and replacing it resumes the music.

    Getting the audio to work

    Ben explains: “Essentially, it’s a fancy Bluetooth speaker system disguised as an old-fashioned turntable and designed to behave and work like an old-fashioned turntable (skeuomorphism gone mad!).”

    Oh, and our favourite adorable bonus feature? If the first dance song from Holly’s and Dougie’s wedding is played, the album artwork on the LCD panel fades away, to be replaced by a slideshow of photos from their wedding.

    And for extra, extra big brother points, Ben even took the time to create a manual to make sure the newlyweds got the most out of their musical gift.

    We have it on good authority that Ben will entertain anyone who would like to place a pre-order for the HD-002.

    Website: LINK

  • Latest Raspberry Pi OS update – May 2020

    Latest Raspberry Pi OS update – May 2020

    Reading Time: 7 minutes

    Along with yesterday’s launch of the new 8GB Raspberry Pi 4, we launched a beta 64-bit ARM version of Debian with the Raspberry Pi Desktop, so you could use all those extra gigabytes. We also updated the 32-bit version of Raspberry Pi OS (the new name for Raspbian), so here’s a quick run-through of what has changed.

    NEW Raspberry Pi OS update (May 2020)

    An update to the Raspberry Pi Desktop for all our operating system images is also out today, and we’ll have more on that in tomorrow’s blog post. For now, fi…

    Bookshelf

    As many of you know, we have our own publishing company, Raspberry Pi Press, who publish a variety of magazines each month, including The MagPi, HackSpace magazine, and Wireframe. They also publish a wide range of other books and magazines, which are released either to purchase as a physical product (from their website) or as free PDF downloads.

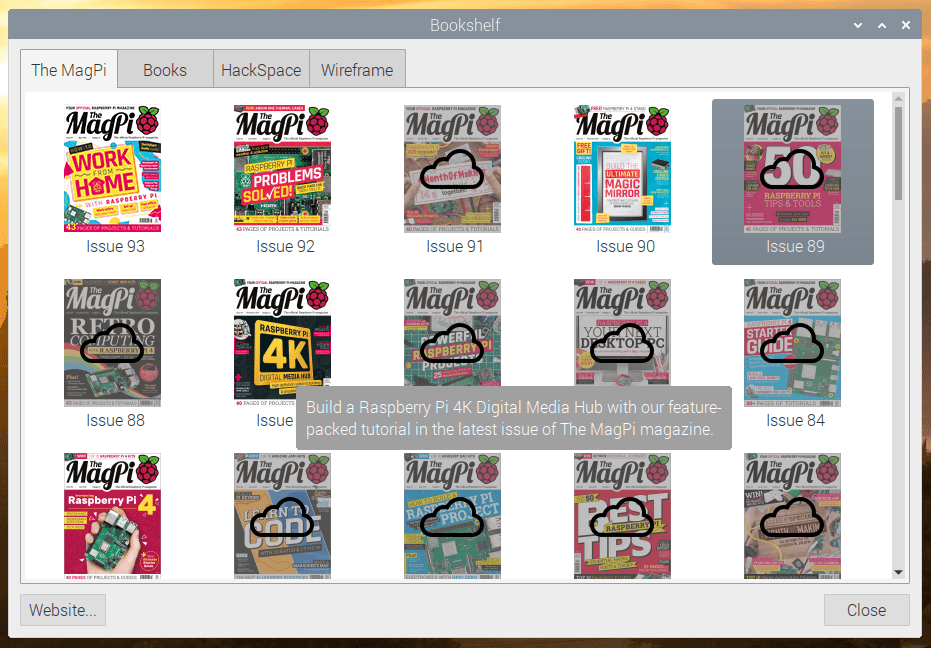
    To make all this content more visible and easy to access, we’ve added a new Bookshelf application – you’ll find it in the Help section of the main menu.

    Bookshelf shows the entire current catalogue of free magazines – The MagPi, HackSpace magazine and Wireframe, all with a complete set of back issues – and also all the free books from Raspberry Pi Press. When you run the application, it automatically updates the catalogue and shows any new titles which have been released since you last ran it with a little “new” flash in the corner of the cover.

    To read any title, just double-click on it – if it is already on your Raspberry Pi, it will open in Chromium (which, it turns out, is quite a good PDF viewer); if it isn’t, it will download and then open automatically when the download completes. You can see at a glance which titles are downloaded and which are not by the “cloud” icon on the cover of any file which has not been downloaded.

    All the PDF files you download are saved in the “Bookshelf” directory in your home directory, so you can also access the files directly from there.

    There’s a lot of excellent content produced by Raspberry Pi Press – we hope this makes it easier to find and read.

    Magnifier

    As mentioned in my last blog post (here), one of the areas we are currently trying to improve is accessibility to the Desktop for people with visual impairments. We’ve already added the Orca screen reader (which has had a few bug fixes since the last release which should make it work more reliably in this image), and the second recommendation we had from AbilityNet was to add a screen magnifier.

    This proved to be harder than it should have been! I tried a lot of the existing screen magnifier programs that were available for Debian desktops, but none of them really worked that well; I couldn’t find one that worked the way the magnifiers in the likes of MacOS and Ubuntu did, so I ended up writing one (almost) from scratch.

    To install it, launch Recommended Applications in the new image and select Magnifier under Universal Access. Once it has installed, reboot.

    You’ll see a magnifying glass icon at the right-hand end of the taskbar – to enable the magnifier, click this icon, or use the keyboard shortcut Ctrl-Alt-M. (To turn the magnifier off, just click the icon again or use the same keyboard shortcut.)

    Right-clicking the magnifier icon brings up the magnifier options. You can choose a circular or rectangular window of whatever size you want, and choose by how much you want to zoom the image. The magnifier window can either follow the mouse pointer, or be a static window on the screen. (To move the static window, just drag it with the mouse.)

    Also, in some applications, you can have the magnifier automatically follow the text cursor, or the button focus. Unfortunately, this depends on the application supporting the required accessibility toolkit, which not all applications do, but it works reasonably well in most included applications. One notable exception is Chromium, which is adding accessibility toolkit support in a future release; for now, if you want a web browser which supports the accessibility features, we recommend Firefox, which can be installed by entering the following into a terminal window:

    sudo apt install firefox-esr

    (Please note that we do not recommend using Firefox on Raspberry Pi OS unless you need accessibility features, as, unlike Chromium, it is not able to use the Raspberry Pi’s hardware to accelerate video playback.)

    I don’t have a visual impairment, but I find the magnifier pretty useful in general for looking at the finer details of icons and the like, so I recommend installing it and having a go yourself.

    User research

    We already know a lot of the things that people are using Raspberry Pi for, but we’ve recently been wondering if we’re missing anything… So we’re now including a short optional questionnaire to ask you, the users, for feedback on what you are doing with your Raspberry Pi in order to make sure we are providing the right support for what people are actually doing.

    This questionnaire will automatically be shown the first time you launch the Chromium browser on a new image. There are only four questions, so it won’t take long to complete, and the results are sent to a Google Form which collates the results.

    You’ll notice at the bottom of the questionnaire there is a field which is automatically filled in with a long string of letters and numbers. This is a serial number which is generated from the hardware in your particular Raspberry Pi which means we can filter out multiple responses from the same device (if you install a new image at some point in future, for example). It does not allow us to identify anything about you or your Raspberry Pi, but if you are concerned, you can delete the string before submitting the form.

    As above, this questionnaire is entirely optional – if you don’t want to fill it in, just close Chromium and re-open it and you won’t see it again – but it would be very helpful for future product development if we can get this information, so we’d really appreciate it if as many people as possible would fill it in.

    Other changes

    There is also the usual set of bug fixes and small tweaks included in the image, full details of which can be found in the release notes on the download page.

    One particular change which it is worth pointing out is that we have made a small change to audio. Raspberry Pi OS uses what is known as ALSA (Advanced Linux Sound Architecture) to control audio devices. Up until now, both the internal audio outputs on Raspberry Pi – the HDMI socket and the headphone jack – have been treated as a single ALSA device, with a Raspberry Pi-specific command used to choose which is active. Going forward, we are treating each output as a separate ALSA device; this makes managing audio from the two HDMI sockets on Raspberry Pi 4 easier and should be more compatible with third-party software. What this means is that after installing the updated image, you may need to use the audio output selector (right-click the volume icon on the taskbar) to re-select your audio output. (There is a known issue with Sonic Pi, which will only use the HDMI output however the selector is set – we’re looking at getting this fixed in a future release.)

    Some people have asked how they can switch the audio output from the command line without using the desktop. To do this, you will need to create a file called .asoundrc in your home directory; ALSA looks for this file to determine which audio device it should use by default. If the file does not exist, ALSA uses “card 0” – which is HDMI – as the output device. If you want to set the headphone jack as the default output, create the .asoundrc file with the following contents:

    defaults.pcm.card 1 defaults.ctl.card 1

    This tells ALSA that “card 1” – the headphone jack – is the default device. To switch back to the HDMI output, either change the ‘1’s in the file to ‘0’s, or just delete the file.

    How do I get it?

    The new image is available for download from the usual place: our Downloads page.

    To update an existing image, use the usual terminal command:

    sudo apt update sudo apt full-upgrade

    To just install the bookshelf app:

    sudo apt update sudo apt install rp-bookshelf

    To just install the magnifier, either find it under Universal Access in Recommended Software, or:

    sudo apt update sudo apt install mage

    You’ll need to add the magnifier plugin to the taskbar after installing the program itself. Once you’ve installed the program and rebooted, right-click the taskbar and choose Add/Remove Panel Items; click Add, and select the Magnifier option.

    We hope you like the changes — as ever, all feedback is welcome, so please leave a comment below!

    Website: LINK

  • Introducing Raspberry Pi Imager, our new imaging utility

    Introducing Raspberry Pi Imager, our new imaging utility

    Reading Time: 3 minutes

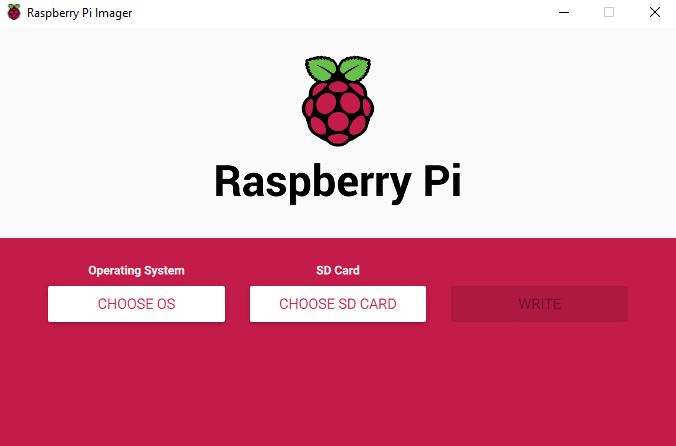
    We’ve made a simpler way to image your microSD card with Raspbian, the official Raspberry Pi operating system, and other operating systems. Introducing our new imaging utility, Raspberry Pi Imager.

    Raspberry Pi Imager

    Simplifying the Raspberry Pi experience

    For me, one of the most important aspects of the Raspberry Pi experience is trying to make it as easy as possible to get started.  To this end, since launching the first Raspberry Pi, we’ve added a GUI to our operating system, a wizard to help you set up your Raspberry Pi the first time you boot it, and lots of books and magazines to get people up and running.  We’ve even developed the Raspberry Pi Desktop Kit to put all the things you need (yes, Alex, I know – except for a monitor) into a single box to make it as easy as possible!

    SD cards can be a bit tricky

    Despite all these moves towards more simplicity, when it comes to microSD cards, programming them with your favourite Raspberry Pi operating system has always been a little bit tricky.

    The main problem comes from the differences between the operating systems that people’s main computers are likely to use: Windows, macOS, and Linux all use different methods of accessing the SD card, which doesn’t help matters. And, for some new Raspberry Pi users, understanding where to find the latest up-to-date image and how to get it onto the microSD card can be a bit confusing, unless you’ve had prior experience with image-flashing tools such as Etcher.

    For that reason, we’ve always suggested that you should buy a pre-loaded NOOBS SD card from your Raspberry Pi Approved Reseller.

    But what if you want to re-image an existing card?

    Introducing the new Raspberry Pi Imager

    Image Utility

    No Description

    From today, Raspberry Pi users will be able to download and use the new Raspberry Pi Imager, available for Windows, macOS and Ubuntu.

    The utility is simple to use and super speedy, thanks to some shortcuts we’ve introduced into the mechanics.

    Firstly, Raspberry Pi Imager downloads a .JSON file from our website with a list of all current download options, ensuring you are always installing the most up-to-date version.

    Once you’ve selected an operating system from the available options, the utility reads the relevant file directly from our website and writes it straight to the SD card. This speeds up the process quite considerably compared to the standard process of reading it from the website, writing it to a file on your hard drive, and then, as a separate step, reading it back from the hard drive and writing it to the SD card.

    During this process, Raspberry Pi Imager also caches the downloaded operating system image – that is to say, it saves a local copy on your computer, so you can program additional SD cards without having to download the file again.

    Open source and ready to go!

    Download the Raspberry Pi Imager from our downloads page today.

    Raspberry Pi Imager is fully open source and was originally written as a modification of the PiBakery tool, later modified and finished by Floris Bos (the original writer of the NOOBS tool and the PiServer tool). You can see Floris’ other software, for data centres, here.

    Website: LINK

  • SD Card Speed Test

    SD Card Speed Test

    Reading Time: 6 minutes

    Since we first launched Raspberry Pi, an SD card (or microSD card) has always been a vital component. Without an SD card to store the operating system, Raspberry Pi is pretty useless*! Over the ensuing eight years, SD cards have become the default removable storage technology, used in cameras, smartphones, games consoles and all sorts of other devices. Prices have plummeted to the point where smaller size cards are practically given away for free, and at the same time storage capacity has increased to the point where you can store a terabyte on your thumbnail.

    SD card speed ratings, and why they matter

    However, the fact that SD cards are now so commonplace sometimes conceals the fact that not all SD cards are created equal. SD cards have a speed rating – how fast you can read or write data to the card – and as card sizes have increased, so have speed ratings. If you want to store 4K video from your digital camera, it is important not just that the card is big enough to hold it, but also that you can write it to the card fast enough to keep up with the huge amount of data coming out of the camera.

    The speed of an SD card will also directly affect how fast your Raspberry Pi runs, in just the same way as the speed of a hard drive affects how fast a conventional desktop computer runs. The faster you can read data from the card, the faster your Raspberry Pi will boot, and the faster programs will load. Equally, write speed will also affect how well any programs which save large quantities of data run – so it’s important to use a good-quality card.

    What speed can I expect from my SD card?

    The speed rating of an SD card should be printed either on the card itself or on the packaging.

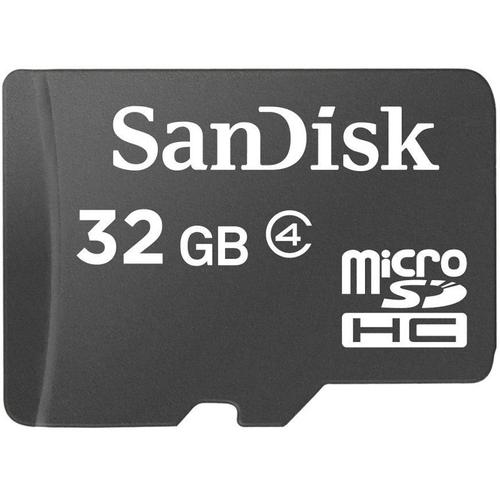
    The 32GB card shown below is Class 4, denoted by the 4 inside the letter C – this indicates that it can write at 4MB/s.

    The 64GB card shown below is Class 10, and so can write at 10MB/s. It also shows the logo of UHS (“ultra high speed”) Class 1, the 1 inside the letter U, which corresponds to the same speed.

    More recently, speeds have started to be quoted in terms of the intended use of the card, with Class V10 denoting a card intended for video at 10MB/s, for example. But the most recent speed categorisation – and the one most relevant to use in a Raspberry Pi – is the new A (for “application”) speed class. We recommend the use of Class A1 cards (as the one above – see the A1 logo to the right of the Class 10 symbol) in Raspberry Pi – in addition to a write speed of 10MB/s, these support at least 1500 read operations and 500 write operations per second. All the official Raspberry Pi microSD cards we sell meet this specification.

    A new tool for testing your SD card speed

    We’ve all heard the stories of people who have bought a large capacity SD card at a too-good-to-be-true price from a dodgy eBay seller, and found that their card labelled as 64GB can only actually hold 2GB of data. But that is at least fairly easy to spot – it’s much harder to work out whether your supposedly fast SD card is actually meeting its specified speed, and unscrupulous manufacturers and sellers often mislabel low quality cards as having unachievable speeds.

    Today, as the first part of a new suite of tests which will enable you to perform various diagnostics on your Raspberry Pi hardware, we are releasing a tool which allows you to test your SD card to check that it performs as it should.

    To install the new tool, from a terminal do

    sudo apt update sudo apt install agnostics

    (“agnostics”? In this case it’s nothing to do with religion! I’ll leave you to work out the pun…)

    Once installed, you will find the new application “Raspberry Pi Diagnostics” in the main menu under “Accessories”, and if you launch it, you’ll see a screen like this:

    In future, this screen will show a list of the diagnostic tests, and you will be able to select which you want to run using the checkboxes in the right-hand column. But for now, the only test available is SD Card Speed Test; just press “Run Tests” to start it.

    Understanding your speed test results

    One thing to note is that the write performance of SD cards declines over time. A new card is blank and data can be written to what is effectively “empty” memory, which is fast; but as a card fills up, memory needs to be erased before it can be overwritten, and so writes will become slower the more a card is used. The pass / fail criteria in this test assume a new (or at least freshly formatted) card; don’t be alarmed if the write speed test fails when run on the SD card you’ve been using for six months! If you do notice your Raspberry Pi slowing down over time, it may be worth backing up your SD card using the SD Card Copier tool and reformatting it.

    The test takes a minute or so to run on a Raspberry Pi 4 (it’ll take longer on older models), and at the end you’ll see a results screen with either (hopefully) PASS or (if you are less fortunate) FAIL. To see the detailed results of the speed test, press “Show Log”, which will open the test log file in a text editor. (The log file is also written to your home directory as rpdiags.txt.)

    We are testing against the A1 specification, which requires a sequential write speed of 10MB/s, 500 random write operations per second, and 1500 random read operations per second; we run the test up to three times. (Tests of this nature are liable to errors due to other background operations accessing the SD card while the test is running, which can affect the result – by running the test multiple times we try to reduce the likelihood of a single bad run resulting in a fail.)

    If the test result was a pass, great! Your SD card is good enough to provide optimum performance in your Raspberry Pi. If it failed, have a look in the log file – you’ll see something like:

    Raspberry Pi Diagnostics - version 0.1 Mon Feb 24 09:44:16 2020 Test : SD Card Speed Test Run 1 prepare-file;0;0;12161;23 seq-write;0;0;4151;8 rand-4k-write;0;0;3046;761 rand-4k-read;9242;2310;0;0 Sequential write speed 4151 kb/s (target 10000) - FAIL Note that sequential write speed declines over time as a card is used - your card may require reformatting Random write speed 761 IOPS (target 500) - PASS Random read speed 2310 IOPS (target 1500) - PASS Run 2 prepare-file;0;0;8526;16 ... 

    You can see just how your card compares to the stated targets; if it is pretty close to them, then your card is only just below specification and is probably fine to use. But if you are seeing significantly lower scores than the targets, you might want to consider getting another card.

    br>
    br>
    [*] unless you’re using PXE network or USB mass storage boot modes of course.

    Website: LINK

  • A new Raspbian update

    A new Raspbian update

    Reading Time: 7 minutes

    The last major release of Raspbian was the Buster version we launched alongside Raspberry Pi 4 last year. There was a minor release a couple of months later, which was mostly just bug-fixes for the first release (hence no blog post), but today’s release has a few changes that we thought it was worth bringing to your attention.

    File manager changes

    We previously made some significant changes to the PCmanFM file manager included as part of the Raspberry Pi Desktop; we added a cutdown mode which excludes a lot of the less commonly used functionalities, and we set this as the default mode.

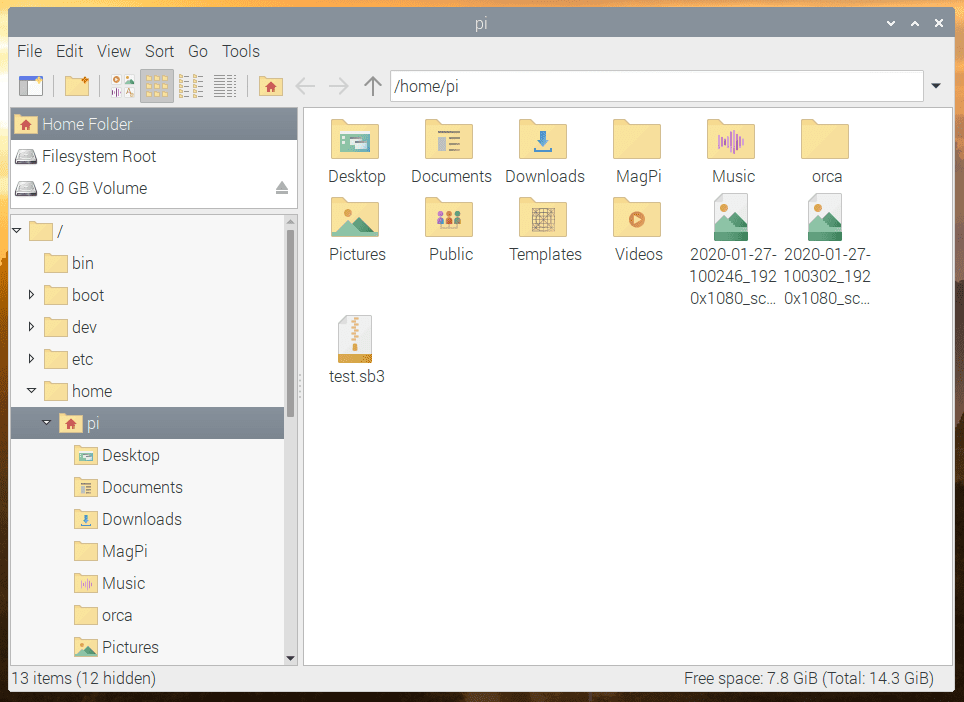
    One of the things we removed for this mode is the Places view, an optional view for the left-hand pane of the window which provides direct access to a few specific locations in the file system. We felt that the directory browser was more useful, so we chose to show that instead. But one useful feature of Places is that it displays external devices, such as USB drives, and these are somewhat awkward to find in the file manager otherwise.

    So for this release, the Places view has been reinstated, but rather than being a separate switchable view, it is a small panel at the top of the directory browser. This hopefully gives the best of both worlds: easy access to USB drives, and a directory view. You can customise what is shown in the Places view on the Layout page of the file manager Preferences dialogue, or you can turn it off completely if you’d rather just have the directory browser.

    PCmanFM file manager on Raspbian

    There are a few other small changes to the file manager: there is now a new folder icon on the taskbar, and the expanders in the directory browser (the little triangles next to directory names) are now only shown when a directory has subdirectories.

    Finally, the folder and file icons used in the file manager have been replaced with some new, cleaner designs. These are designed to make it more obvious at a glance what sort of file an icon represents, and also to fit better with the slightly flatter GUI appearance we moved to for Buster.

    Orca screen reader

    One area of the desktop which we have been wanting to improve for some time is accessibility, particularly for those with visual impairments. To this end, we asked the accessibility charity AbilityNet to assess the Raspberry Pi Desktop to see how usable it was for those with disabilities, and where we could make improvements.

    They gave us a lot of very helpful feedback, and their number one suggestion was that we needed to make the Orca screen reader work with the desktop.

    Orca is an application which uses synthesised speech to read out menus, window titles, button labels, and the like. It’s a standard Linux application, but people who have tried it on Raspberry Pi found that it didn’t actually work with Raspbian. (When I first installed it, all it did was to make slightly alarming growling noises instead of speaking!)

    After quite a bit of fiddling and head-scratching, Orca now works as intended. It will read out many of the pre-installed applications, and should work with a lot of other Linux software packages as well.

    Unfortunately, there are a few areas where it won’t work. Orca hooks into various user interface toolkits — the software which is used to draw buttons, menus, etc. on the screen. It is fully compatible with the GTK toolkit (which is used for most of the desktop) and Qt (which is used for the VLC media player and the qpdfview PDF viewer). But many applications (such as Thonny, Sonic Pi, and Scratch) are built on toolkits which are not compatible with the screen reader. Also, the current release of Chromium is not compatible with Orca, but the forthcoming version 80 release, which should be available in a few months, will be Orca-compatible. In the meantime, if you want an Orca-compatible browser, you can install Firefox by entering the following into a terminal window:

    sudo apt install firefox-esr

    (Please note that we do not recommend using Firefox on Raspbian unless you need Orca compatibility, as it is not optimised for video playback on the Pi in the same way as Chromium.)

    Orca screen reader settings dialogue

    Orca doesn’t have a menu entry — the settings dialog shown above can be opened by holding down the Insert key and then pressing the space bar, or by typing orca -s into a terminal window.

    Please note that Orca currently doesn’t work with Bluetooth audio devices, so we recommend using it with either the Pi’s own HDMI output or headphone socket, or with a USB or HAT external audio device.

    Orca can either be installed from Recommended Software, in the Universal Access category, or by entering the following into a terminal window:

    sudo apt install orca

    This is hopefully just the start of making the Raspberry Pi Desktop more accessible for those with disabilities, as we are planning to do more work in this area in the future.

    New Scratch blocks

    Scratch 3 has added the ability to load a project from the command line at launch (scratch3 filename.sb3).

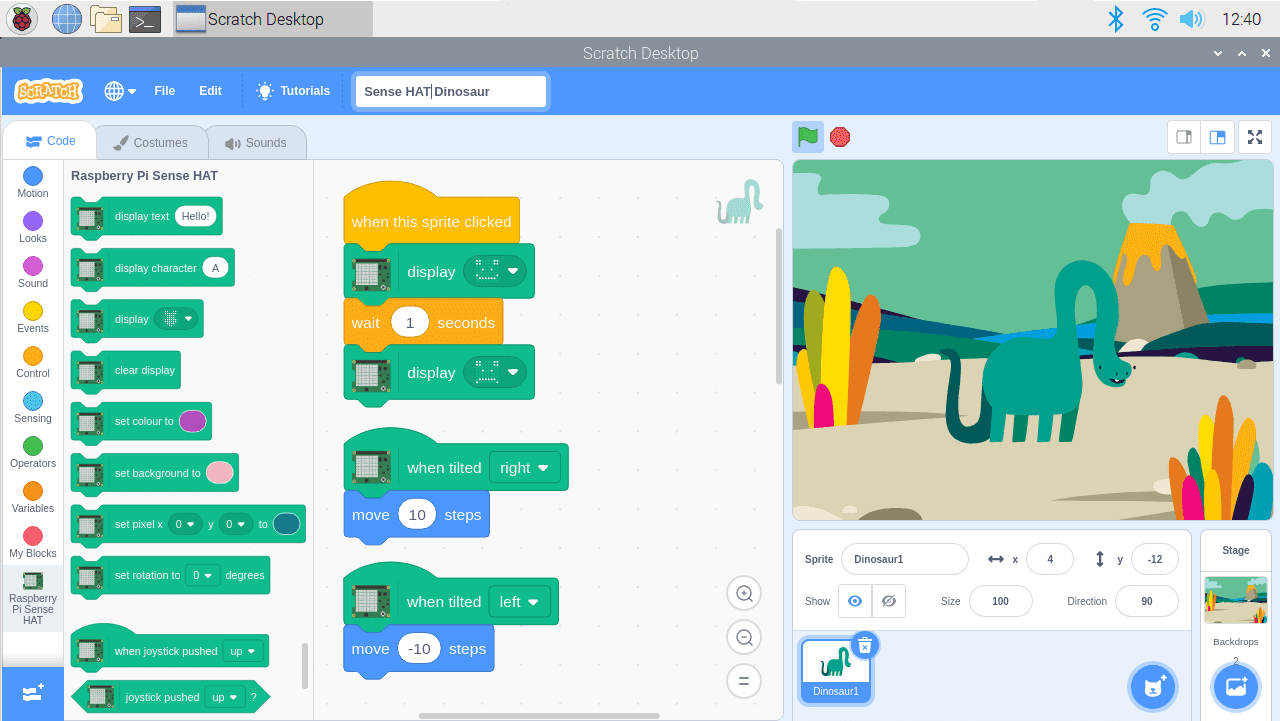
    There are also two new blocks in the Sense HAT extension, ‘display stage’ and ‘display sprite’. The first of these shows the current stage on the SenseHAT LED array; the second shows the current sprite on the LEDs.

    Example output of Sense HAT Scratch extension

    Thonny improvements

    A lot of work has been done on Thonny to improve performance, particularly when debugging. In previous releases, setting breakpoints caused performance to slow down significantly — this was particularly obvious when running PyGame Zero games, where the frame rate was very slow. The new version is substantially faster, as you can see if you set breakpoints in any of…

    Code the Classics

    …the Python games from Eben’s book Code the Classics – Volume 1, which are now installable from Recommended Software, and can be found in the Games menu.

    Example of Mynapod video game

    If you want to look at the code for the games, this can be found in /usr/share/code-the-classics.

    Volume control / mixer

    In previous releases, there was an Audio Device Preferences application in the main menu to enable device-specific settings to be made for external audio devices. This has now been removed; all these settings are now available directly from the volume plugin on the taskbar: with an external device selected as the output or input device, right-click the volume icon and choose the Output Device Settings… or Input Device Settings… option to open the configuration dialog.

    Example of Output Device Settings menu of Raspberry Pi Desktop

    Screen blanking

    The option to disable the timeout which blanks the screen after a few minutes has been added to Raspberry Pi Configuration. To try and reduce clutter in this application, the options from the System tab are now split across two tabs; all display-related options, including screen blanking, are now on the new Display tab.

    Example of Raspberry Pi Configuration menu of Raspberry Pi Desktop

    We’ve also been able to reinstate the pixel doubling option for Raspberry Pi 4; this was originally implemented in a manner incompatible with the KMS video driver used on Raspberry Pi 4, but we’ve now found a way to make it work with KMS. (The pixel doubling option is designed to make the Raspberry Pi’s screen easier to use for people with visual disabilities — it doubles the size of every pixel, scaling the entire screen by a factor of two.)

    We’ve made one minor change to key shortcuts: in previous versions of Raspbian, the combination Ctrl-Alt-Delete launched the task manager. We felt it might be better to be consistent with the behaviour of Windows PCs since the dawn of time, so now Ctrl-Alt-Delete launches the shutdown options dialog. If you want to access the task manager with a key shortcut, you can now do so using Ctrl-Shift-Escape — also consistent with the behaviour of Windows.

    There are also numerous other small bug fixes and robustness improvements across the board.

    How do I get it?

    The new image is available for download from the usual place: our Downloads page.

    To update an existing image, use the usual terminal command:

    sudo apt update sudo apt full-upgrade

    We hope you like the changes — as ever, all feedback is welcome, so please leave a comment below!

    Website: LINK

  • Scratch 3 Desktop for Raspbian on Raspberry Pi

    Scratch 3 Desktop for Raspbian on Raspberry Pi

    Reading Time: 4 minutes

    You can now install and use Scratch 3 Desktop for Raspbian on your Raspberry Pi!

    Scratch 3

    Scratch 3 was released in January this year, and since then we and the Scratch team have put lots of work into creating an offline version for Raspberry Pi.

    The new version of Scratch has a significantly improved interface and better functionality compared to previous versions. These improvements come at the cost of needing more processing power to run. Luckily, Raspberry Pi 4 has delivered just that, and with the software improvements in the newest version of Raspbian, Buster, we can now deliver a reliable Scratch 3 experience on our computer.

    Which Raspberry Pi can I use?

    Scratch 3 needs at least 1GB of RAM to run, and we recommend a Raspberry Pi 4 with at least 2GB RAM. While you can run Scratch 3 on a Raspberry Pi 2, 3, 3B+, or a Raspberry 4 with 1GB RAM, performance on these models is reduced, and depending on what other software you run at the same time, Scratch 3 may fail to start due to lack of memory.

    The Scratch team is working to reduce the memory requirements of Scratch 3, so we will hopefully see improvements to this soon.

    How to install Scratch 3

    You can only install Scratch 3 on Raspbian Buster.

    First, update Raspbian!

    • If you’ve yet to upgrade to Raspbian Buster, we recommend installing a fresh version of Buster onto your SD card instead of upgrading from your current version of Raspbian.
    • If you’re already using Raspbian Buster, but you’re not sure your running the latest version, update Buster by following this tutorial:

    How to update Raspbian on your Raspberry Pi

    How to update to the latest version of Raspbian on your Raspberry Pi.

    Once you’re running the latest version of Buster, you can install Scratch 3 either using the Recommended Software application or apt on the terminal.

    How to install Scratch 3 using the Recommended Software app

    Open up the menu, click on Preferences > Recommended Software, and then select Scratch 3 and click on OK.

    How to install Scratch 3 using the terminal

    Open a terminal window, and type in and run the following commands:

    sudo apt-get update sudo apt-get install scratch3

    What can I do with Scratch 3 and Raspberry Pi?

    Scratch 3 Desktop for Raspbian comes with new extensions to allow you to control the GPIO pins and Sense HAT with Scratch code!

    GPIO extension

    GPIO extension is a replacement for the existing extension in Scratch 2. Its layout and functionality is very similar, so you can use it as a drop-in replacement.

    The GPIO extension gives you the flexibility to connect and control a whole host of electronic devices.

    Simple Electronics extension

    If you are looking to add something simple, like an LED or button controller for a game, you should find the new Simple Electronics extension easier to use than the GPIO extension. The Simple Electronics extension is the first version of a beginner-friendly extension for interacting with Raspberry Pi’s GPIO pins. Taking lessons from the implementation of gpiozero for Python, this new extension provides a simpler way of using electronic components: currently buttons and LEDs.

    In this example, an LED connected to GPIO pin 17 is controlled by a button connected between pin 2 and GND.

    Sense HAT extension

    We’ve improved the Sense HAT extension to take advantage of new features in Scratch 3, and the updated version of the extension also introduces a number of new blocks to allow you to:

    • Sense tilting, shaking, and orientation
    • Use the joystick
    • Measure temperature, pressure, and humidity
    • Display text, characters, and patterns on the LED matrix

    micro:bit and LEGO extensions

    The micro:bit and LEGO extensions will become available later on Scratch 3 Desktop. This is because Scratch Link, the software which allows Scratch to talk to Bluetooth devices, is not yet available for Linux-type operating systems like Raspbian. A version of Scratch Link for Raspbian is part of our plans but, as yet, we don’t have a release date.

    A round of thanks

    It has been a long ambition of both the Scratch and Raspberry Pi teams to have Scratch 3 running on Raspberry Pi, and it’s amazing to see it released!

    A big thank you to Raspberry Pi engineer Simon Long for building and packaging Scratch 3, and to the Scratch team for their support in getting over some of the problems we faced along the way.

    Website: LINK

  • Buster – the new version of Raspbian

    Buster – the new version of Raspbian

    Reading Time: 7 minutes

    Amid all the furore about the release of a certain new piece of hardware, some people may have missed that we have also released a new version of Raspbian. While this is required for Raspberry Pi 4, we’ve always tried to maintain software backwards-compatibility with older hardware, and so the standard Raspbian image for all models of Raspberry Pi is now based on Buster, the latest version of Debian Linux.

    Why Buster?

    The first thing to mention about Buster (who was the actual dog in Pixar’s “Toy Story” films, as opposed to the toy one made out of a Slinky…) is that we are actually releasing it slightly in advance of the official Debian release date. The reason for this is that one of the important new features of Raspberry Pi 4 is that the open-source OpenGL video driver is now being used by default, and this was developed using the most recent version of Debian. It would have been a lot of work to port everything required for it back on to Raspbian Stretch, so we decided that we would launch on Raspbian Buster – the only question was whether Buster would be ready before the hardware was!

    As it turns out, it wasn’t – not quite. The official launch date for Buster is July 7, so we are a couple of weeks ahead. That said, Buster has been in a “frozen” state for a couple of months now, with only minor changes being made to it, so the version we are releasing is pretty much identical to that which will be officially released by Debian on July 7.

    We started using Buster internally in January this year, so it has had a lot of testing on Pi – while we may be releasing it a bit early, you need have no concerns about using it; it’s stable and robust, and you can use apt to update with any changes that do happen between now and July 7 without needing to reinstall everything.

    What’s new?

    There are no huge differences between Debian Stretch and Debian Buster. In a sad reflection of the way the world is nowadays, most of the differences are security changes designed to make Buster harder to hack. Any other differences are mostly small incremental changes that most people won’t notice, and this got us thinking…

    When we moved from Jessie to Stretch, many people commented that they couldn’t actually see any difference between the two – as most of the changes were “under the hood”, the desktop and applications all looked the same. So we told people “you’ve now got Stretch!” and they said “so what?”

    The overall appearance of the desktop hasn’t changed significantly for a few years, and was starting to look a bit dated, so we thought it would be nice to give the appearance a mild refresh for Buster. Then people would at least be able to see that their shiny new operating system looked different from the old one!

    The new appearance

    There has been a definite trend, in the design of most computer graphical user interfaces over recent years, to simplify and declutter; to reduce the amount of decoration, so that a button becomes a plain box rather than something that resembles a physical button. You can see this in both desktop OSes like Windows, and in mobile OSes like iOS – so we decided it was time to do something similar.

    The overall appearance of most of the interface elements has been simplified; we’ve reduced things like the curvature of corners and the shading gradients which were used to give a pseudo-3D effect to things like buttons. This “flatter” design looks cleaner and more modern, but it’s a bit of a juggling act; it’s very easy to go too far and to make things look totally flat and boring, so we’ve tried to avoid that. Eben and I have had a mild tussle over this – he wanted as much flatness as possible, and I wanted to retain at least a bit of curvature, so we’ve met somewhere in the middle and produced something we both like!

    We’ve also changed the default desktop for a new one of Greg Annandale’s gorgeous photographs, and we’ve moved to a grey highlight colour.

    (If you really don’t like the new appearance, it is easy enough to restore the former appearance – the old desktop picture is still installed, as is the old UI theme.)

    Other changes

    We’ve been including the excellent Thonny Python development environment in Raspbian for some time now. In this release, it’s now our default Python editor, and to that end, we are no longer including IDLE by default. IDLE has always felt dated and not very pleasant to use, and Thonny is so much nicer that we’d strongly recommend moving to it, if you haven’t already!

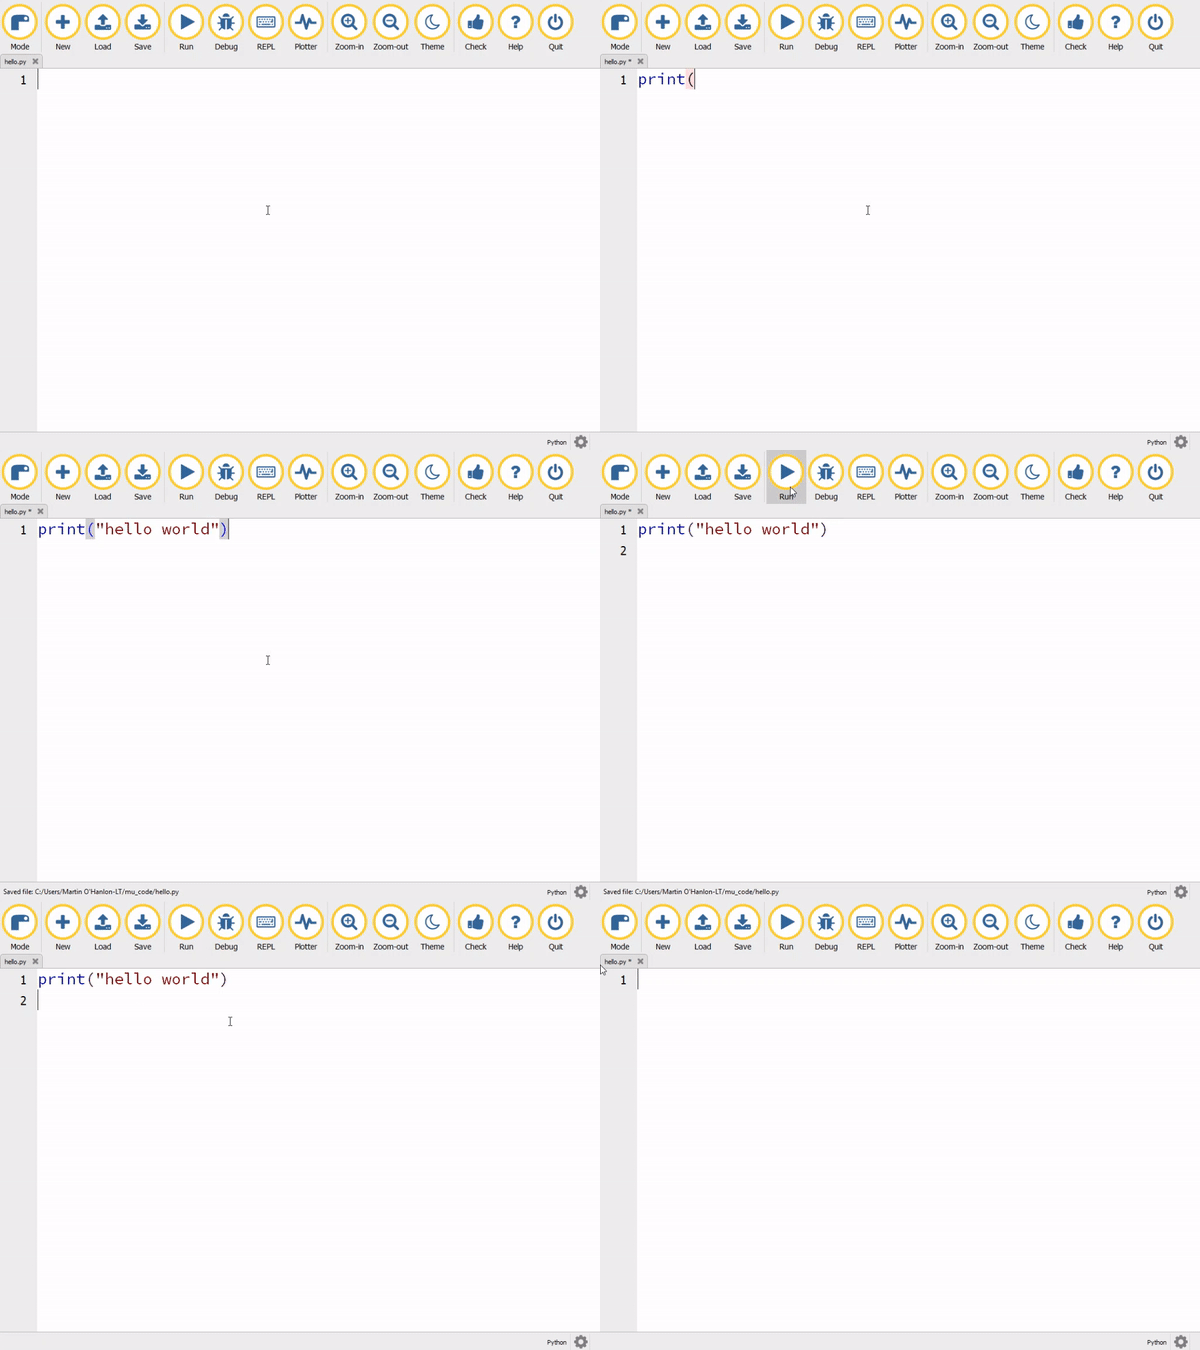
    (If you’d like an alternative to Thonny, the Mu Python IDE is also still available in Recommended Software.)

    We’ve made some small tweaks to the taskbar. The ‘eject’ icon for removing USB devices is now only shown if you have devices to eject; it’s hidden the rest of the time. Similarly, if you are using one of the earlier Pis without Bluetooth support, the Bluetooth icon is now hidden rather than being greyed out. Also, the CPU activity gauge is no longer shown on the taskbar by default, because this has become less necessary on the more powerful recent Raspberry Pi models. If you’d still like to use it, you can add it back – right-click the taskbar and choose ‘Add / Remove Panel Items’. Press the ‘Add’ button and you’ll find it listed as ‘CPU Usage Monitor’. While you are in there, you’ll also find the new ‘CPU Temperature Monitor’, which you can add if you’re interested in knowing more about what the CPU is up to.

    One program which is currently missing from Buster is Mathematica. Don’t worry – this is only a temporary removal! Wolfram are working on getting Mathematica to work properly with Buster, and as soon as it is ready, it’ll be available for installation from Recommended Software.

    A few features of the old non-OpenGL video driver (such as pixel doubling and underscan) are not currently supported by the new OpenGL driver, so the settings for these are hidden in Raspberry Pi Configuration if the GL driver is in use. (The GL driver is the default on Raspberry Pi 4 – older Pis will still use the non-GL driver by default. Also, if using a Raspberry Pi 4 headless, we recommend switching back to the non-GL driver – choose ‘Legacy’ under the ‘GL Driver’ setting in ‘Advanced Options’ in raspi-config.)

    If the GL driver is in use, there’s a new ‘Screen Configuration’ tool – this enables you to set up the arrangement of multiple monitors on a Raspberry Pi 4. It can also be used to set custom monitor resolutions, which can be used to simulate the effect of pixel doubling.

    Finally, there are a couple of new buttons in ‘Raspberry Pi Configuration’ which control video output options for Raspberry Pi 4. (These are not shown when running on earlier models of Raspberry Pi.) It is not possible on the Raspberry Pi 4 to have both analogue composite video (over the 3.5mm jack) and HDMI output simultaneously, so the analogue video output is disabled by default. 4Kp60 resolution over HDMI is also disabled by default, as this requires faster clock speeds resulting in a higher operating temperature and greater power consumption. The new buttons enable either of these options to be enabled as desired.

    How do I get it?

    As ever with major version changes, our recommendation is that you download a new clean image from the usual place on our site – this will ensure that you are starting from a clean, working Buster system.

    We do not recommend upgrading an existing Stretch (or earlier) system to Buster – we can’t know what changes everyone has made to their system, and so have no idea what may break when you move to Buster. However, we have tested the following procedure for upgrading, and it works on a clean version of the last Stretch image we released. That does not guarantee it will work on your system, and we cannot provide support (or be held responsible) for any problems that arise if you try it. You have been warned – make a backup!

    1. In the files /etc/apt/sources.list and /etc/apt/sources.list.d/raspi.list, change every use of the word “stretch” to “buster”.
    2. In a terminal,

    sudo apt update

    and then

    sudo apt dist-upgrade

    3. Wait for the upgrade to complete, answering ‘yes’ to any prompt. There may also be a point at which the install pauses while a page of information is shown on the screen – hold the ‘space’ key to scroll through all of this and then hit ‘q’ to continue.
    4. The update will take anywhere from half an hour to several hours, depending on your network speed. When it completes, reboot your Raspberry Pi.
    5. When the Pi has rebooted, launch ‘Appearance Settings’ from the main menu, go to the ‘Defaults’ tab, and press whichever ‘Set Defaults’ button is appropriate for your screen size in order to load the new UI theme.
    6. Buster will have installed several new applications which we do not support. To remove these, open a terminal window and

    sudo apt purge timidity lxmusic gnome-disk-utility deluge-gtk evince wicd wicd-gtk clipit usermode gucharmap gnome-system-tools pavucontrol

    We hope that Buster gives a little hint of shiny newness for those of you who aren’t able to get your hands on a Raspberry Pi 4 immediately! As ever, your feedback is welcome – please leave your comments below.

    Website: LINK

  • GPIO Zero v1.5 is here!

    GPIO Zero v1.5 is here!

    Reading Time: 6 minutes

    GPIO Zero is a zero-boilerplate Python library that makes physical computing with Python more accessible and helps people progress from zero to hero.

    Today, I’m pleased to announce the release of GPIO Zero v1.5.0. It’s packed full of updates, including new features, bug fixes, and lots of improvements to the documentation.

    Guido, the creator of Python, happened across the library recently, and he seemed to like it:

    Guido van Rossum on Twitter

    GPIOzero I love you! https://t.co/w3CnUGx3yO

    Pin factories – take your pick

    GPIO Zero started out as a friendly API on top of the RPi.GPIO library, but later we extended it to allow other pin libraries to be used. The pigpio library is supported, and that includes the ability to remotely control GPIO pins over the network, or on a Pi Zero over USB.

    This also gave us the opportunity to create a “mock” pin factory, so that we could emulate the effect of pin changes without using real Raspberry Pi hardware. This is useful for prototyping without hardware, and for testing. Try it yourself!

    As well as the pin factories we provide with the library (RPi.GPIO, pigpio, RPIO, and native), it’s also possible to write your own. So far, I’m aware of only one custom pin factory, and that has been written by the AIY team at Google, who created their own pin factory for the pins on the AIY Vision Kit. This means that you can connect devices to these pins, and use GPIO Zero to program them, despite the fact they’re not connected to the Pi’s own pins.

    If you have lots of experience with RPi.GPIO, you might find this guide on migrating from RPi.GPIO to GPIO Zero handy.

    Ultrasonic distance sensor

    We had identified some issues with the results from the DistanceSensor class, and we dealt with them in two ways. Firstly, GPIO Zero co-author Dave Jones did some work under the hood of the pins API to use timing information provided by underlying drivers, so that timing events from pins will be considerably more accurate (see #655). Secondly, Dave found that RPi.GPIO would often miss edges during callbacks, which threw off the timing, so we now drop missed edges and get better accuracy as a result (see #719).

    The best DistanceSensor results come when using pigpio as your pin factory, so we recommend changing to this if you want more accuracy, especially if you’re using (or deploying to) a Pi 1 or Pi Zero.

    Connecting devices

    A really neat feature of GPIO Zero is the ability to connect devices together easily. One way to do this is to use callback functions:

    button.when_pressed = led.on
    button.when_released = led.off

    Another way is to set the source of one device to the values of another device:

    led.source = button.values

    In GPIO Zero v1.5, we’ve made connecting devices even easier. You can now use the following method to pair devices together:

    led.source = button

    Read more about this declarative style of programming in the source/values page in the docs. There are plenty of great examples of how you can create projects with these simple connections:

    Testing

    An important part of software development is automated testing. You write tests to check your code does what you want it to do, especially checking the edge cases. Then you write the code to implement the features you’ve written tests for. Then after every change you make, you run your old tests to make sure nothing got broken. We have tools for automating this (thanks pytest, tox, coverage, and Travis CI).

    But how do you test a GPIO library? Well, most of the GPIO parts of our test suite use the mock pins interface, so we can test our API works as intended, abstracted from how the pins behave. And while Travis CI only runs tests with mock pins, we also do real testing on Raspberry Pi: there are additional tests that ensure the pins do what they’re supposed to. See the docs chapter on development to learn more about this process, and try it for yourself.

    pinout

    You may remember that the last major GPIO Zero release introduced the pinout command line tool. We’ve added some new art for the Pi 3A+ and 3B+:

    pinout also now supports the -x (or --xyz) option, which opens the website pinout.xyz in your web browser.

    Zero boilerplate for hardware

    The goal of all this is to remove obstacles to physical computing, and Rachel Rayns has designed a wonderful board that makes a great companion to GPIO Zero for people who are learning. Available from The Pi Hut, the PLAY board provides croc-clip connectors for four GPIO pins, GND, and 3V3, along with a set of compatible components:

    Since the board simply breaks out GPIO pins, there’s no special software required. You can use Scratch or Python (or anything else).

    New contributors

    This release welcomed seven new contributors to the project, including Claire Pollard from PiBorg and ModMyPi, who provided implementations for TonalBuzzer, PumpkinPi, and the JamHat. We also passed 1000 commits!

    Watch your tone

    As part of the work Claire did to add support for the Jam HAT, she created a new class for working with its buzzer, which works by setting the PWM frequency to emit a particular tone. I took what Claire provided and added some maths to it, then Dave created a whole Tones module to provide a musical API. You can play buzzy jingles, or you can build a theremin:

    GPIO Zero theremin

    from gpiozero import TonalBuzzer, DistanceSensor buzzer = TonalBuzzer(20) ds = DistanceSensor(14, 26) buzzer.source = ds

    …or you can make a siren:

    GPIO Zero TonalBuzzer sine wave

    from gpiozero import TonalBuzzer from gpiozero.tools import sin_values buzzer = TonalBuzzer(20) buzzer.source = sin_values()

    The Tones API is a really neat way of creating particular buzzer sounds and chaining them together to make tunes, using a variety of musical notations:

    >>> from gpiozero.tones import Tone
    >>> Tone(440.0)
    >>> Tone(69)
    >>> Tone('A4')

    We all make mistakes

    One of the important things about writing a library to help beginners is knowing when to expect mistakes, and providing help when you can. For example, if a user mistypes an attribute or just gets it wrong – for example, if they type button.pressed = foo instead of button.when_pressed = foo – they wouldn’t usually get an error; it would just set a new attribute. In GPIO Zero, though, we prevent new attributes from being created, so you’d get an error if you tried doing this. We provide an FAQ about this, and explain how to get around it if you really need to.

    Similarly, it’s common to see people type button.when_pressed = foo() and actually call the function, which isn’t correct, and will usually have the effect of unsetting the callback (as the function returns None). Because this is valid, the user won’t get an error to call their attention to the mistake.

    In this release, we’ve added a warning that you’ll see if you set a callback to None when it was previously None. Hopefully that will be useful to people who make this mistake, helping them quickly notice and rectify it.

    Update now

    Update your Raspberry Pi now to get the latest and greatest GPIO Zero goodness in your (operating) system:

    sudo apt update
    sudo apt install python3-gpiozero python-gpiozero

    Note: it’s currently syncing with the Raspbian repo, so if it’s not available for you yet, it will be soon.

    What’s next?

    We have plenty more suggestions to be working on. This year we’ll be working on SPI and I2C interfaces, including I2C expander chips. If you’d like to make more suggestions, or contribute yourself, find us over on GitHub.

    Website: LINK

  • A new Raspbian update: multimedia, Python and more

    A new Raspbian update: multimedia, Python and more

    Reading Time: 7 minutes

    Today we’re releasing a new update for Raspbian, including a multimedia player, updated Thonny, and more. Here’s Simon with everything you need to know.

    Updating Raspbian on your Raspberry Pi || Raspberry Pi Foundation

    How to update to the latest version of Raspbian on your Raspberry Pi.

    VLC Media Player

    When I first joined Raspberry Pi, back in the dim and distant past (in reality 2014, but it does seem a long time ago now…), and I started looking at Raspbian, I made a list of the additional features and applications that I thought it needed to be a “complete” modern desktop operating system. Over the years, we’ve managed to tick off most of the items on that list, but one glaring omission has been nagging at me all this time: a decent media player. Windows has Windows Media Player; MacOS has QuickTime Player and iTunes; but we’ve had a big hole where something similar ought to be for Raspbian. It’s been a common request on the forums, and while we’ve had bits and pieces that do some of the job, like the command line OMXPlayer application, we really wanted a nice GUI-based media player.

    VLC is one of those programs that “just works” for media playback; it is cross-platform, it has a nice interface, and it plays back pretty much anything you throw at it. It was the player I really wanted to use in Raspbian — but it was unable to access VideoCore’s video decoding hardware, and the software video codecs in VLC were too slow to be anything more than irritating when running on Raspberry Pi, so it really wasn’t worth shipping it. Until now.

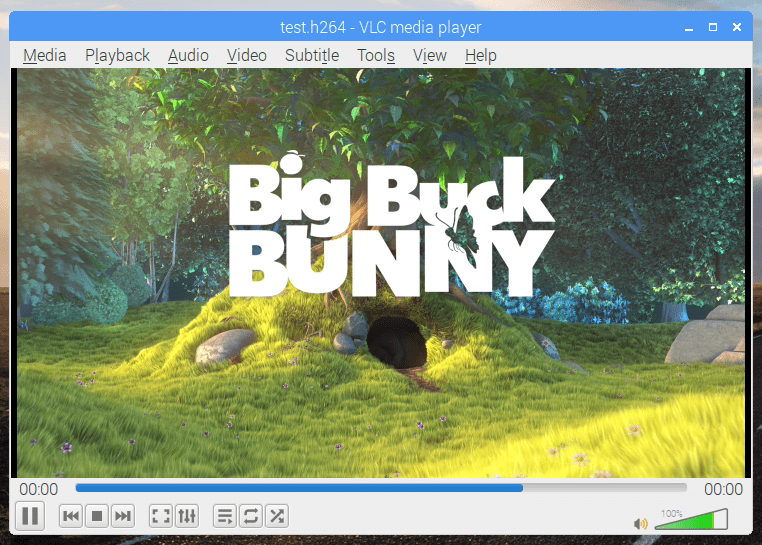
    After a lot of work (by people far cleverer than me), we are now able to announce that Raspbian includes a fully hardware-accelerated version of VLC. It plays most audio file formats; it uses software codecs for many video formats, and it uses VideoCore’s video engine to accelerate playback of H.264, MPEG-2 and VC-1 video. (Note that you will need to buy additional codec licences for MPEG and VC-1; if you’ve already bought a licence to enable hardware acceleration in OMXPlayer and Kodi, this licence will also enable these codecs for VLC.)

    Raspbian update screenshot

    This is still a work in progress — we’ve got most of the major bugs out, but there will most likely be the odd glitch, and you’ll probably find that Pi Zero and Pi 1 will still struggle with some content. But once you’ve updated your Pi, you should find that double-clicking on a video file will open it in VLC and play it back with decent quality.

    Thonny 3

    A couple of years ago, as part of the list of additional features mentioned above, we looked for a nicer Python development environment than IDLE, and we found Thonny — a really elegant combination of a user-friendly IDE with features that are also useful to expert developers. It’s been our standard IDE shipped with Raspbian ever since, and Aivar Annamaa, the developer, has been very responsive to our feedback and requests for new features.

    He’s recently released version 3 of Thonny, and this is now the version in Raspbian. Version 3 offers a lot of useful new debugging features, such as breakpoints and an Assistant feature that analyses your code to find bugs that Python’s syntax checker misses. There is a lot more information about Thonny 3 on Aivar’s website — it’s well worth a read.

    Raspbian update screenshot

    We’ve also made one user interface change this time. We’ve always offered the choice between running Thonny in its regular mode, and a cut-down “simple” mode for beginners, which removes the menus and gives a fixed screen layout. Up until now, switching between the two has happened via different entries in the main Raspberry Pi menu, but that was a bit clumsy. In the new version, simple mode is the default, and you can switch Thonny into regular mode by clicking the link in the top right-hand corner of the window; if you want to switch back to simple mode, select it on the General tab of the Thonny options dialogue, which is available in the Tools menu. (Thonny will always start in the last mode you selected.)

    Desktop configuration

    One of the other changes we’ve made this time is one that hopefully most people won’t notice!

    The configuration of the Raspberry Pi desktop has always been a bit of a mess. Due to the fact that the underlying LXDE desktop environment is made up of a bunch of different programs all running together, trying to set up something like the system font or the highlight colour involves making changes to several configuration files at once. This is why pretty much the first thing I did was to write the Appearance Settings application to try to make this easier than digging around in multiple config files.

    Linux desktop applications are supposed to have a global configuration file (usually in the directory /etc/xdg/) that takes effect unless overridden by a local configuration file (in the hidden .config subdirectory of the user’s home directory). Unfortunately, not all the desktop components adhered to this specification. As a result, getting the Appearance Settings application to work involved quite a bit of kludging things about under the hood, and one of these kludges was to always keep a local copy of each of the configuration files and to ignore the global versions.

    This worked, but it had the undesirable side effect that any time we wanted to update the appearance of the desktop, we had to delete all the local configuration files so they could be replaced by the new ones, and this meant that any changes the user had made to the configuration were lost. This was quite annoying for many people, so with this release, we’ve tried to stop doing that!

    Most of the desktop components have now been modified so that they correctly read the global configuration files, and for future releases, we are going to try to just modify the global versions of these files and not touch the local ones. If we update the configuration, you will see a message informing you that this has happened, but your local files will be left unchanged. To make sure you get the latest configuration, launch Appearance Settings and choose one of the buttons on the “Defaults” tab; doing this will set your desktop to our currently recommended defaults. But if you want to stick with what you’ve already got, just don’t do that! You can even try the new defaults out: press one of the defaults buttons, and if you don’t like the results, just hit Cancel, and your previous configuration will be restored.

    Raspbian update screenshot

    One final point on this: in order to get this all to work properly in future, we have had to delete a few local files on this occasion. These are files that most people will never have modified anyway, so this will hopefully not present any problems. But just in case, they have been backed up in the oldconffiles subdirectory of the user’s home directory.

    Multiple images

    When I first started working on Raspbian, the desktop image file was just under 1GB in size. This has gradually crept up over the years, and now it’s around 1.75GB. While downloading a file of this size isn’t a significant problem for someone with fibre broadband, many people are on slower connections where such large downloads can take hours.

    In order to try and address this, for all future releases we will now release two separate images. The default Raspbian release is now a minimal install — it gives you the desktop, the Chromium browser, the VLC media player, Python, and some accessory programs. Running alongside this is the “Raspbian Full” image, which also includes all our recommended programs: LibreOffice, Scratch, SonicPi, Thonny, Mathematica, and various others.

    The Recommended Software program that we launched in the last release can be used to install or uninstall any of the additional programs that are in the full image; if you download the minimal image and check all the options in Recommended Software, you will end up with the full image, and vice versa.

    Raspbian update screenshot

    Hopefully, this means that downloading Raspbian will be easier for people on slower connections, and that you can easily add just the programs you want. The full image is provided for everyone who wants to get everything in one go, or who won’t have access to the internet to download additional programs once their Pi is up and running.

    We’ll also continue to produce the existing Raspbian Lite image for people who only want a command-line version with no desktop.

    Update Raspbian

    Both the new images are available to download from the usual place on our site.

    To update an existing image, open a terminal window and use the usual commands:

    sudo apt-get update
    sudo apt-get dist-upgrade

    To install the new VLC media player from a terminal, enter:

    sudo apt-get update
    sudo apt-get install vlc

    As ever, all feedback is welcome, so please leave a comment below!

    Website: LINK

  • The last 10%: revamping the Raspberry Pi desktop

    The last 10%: revamping the Raspberry Pi desktop

    Reading Time: 4 minutes

    Simon Long is a Senior Principal Software Engineer here at Raspberry Pi. He’s responsible for the Raspberry Pi Desktop on both Raspbian and Debian, and his article from The MagPi issue 73 explores the experience of revamping our desktop. Get your copy of The MagPi in stores now, or download it as a free PDF here.

    The PIXEL desktop on Raspberry Pi

    It was almost exactly four years ago when I was offered the chance to work at Raspberry Pi. I knew all the team very well, but I’d had hardly any involvement with the Pi itself, and wasn’t all that sure what they would want me to do; at that time, I was working as the manager of a software team, with no experience of hardware design. Fortunately, this was when software had started to move up the list of priorities at Raspberry Pi.

    The 2014 updated desktop

    Eben and I sat down on my first day and played with the vanilla LXDE desktop environment in Raspbian for 15 minutes or so, and he then asked me the fateful question: “So — do you think you can make it better?” With rather more confidence than I felt, I replied: “Of course!” I then spent the next week wondering just how long it was going to take before I was found out to be an impostor and shown the door.

    Simon Long Raspberry Pi

    Simon Long, Senior Principal Software Impostor

    UI experience

    To be fair, user interface design was something of which I had a lot of experience — I spent the first ten years of my career designing and implementing the user interfaces for a wide range of products, from mobile phones to medical equipment, so I knew what a good user interface was like. I could even see what changes needed to be made to transform the LXDE environment into one. But I didn’t have a clue how to do it — I’d barely used Linux, never mind programmed for it…

    Raspberry Pi desktop circa 2015

    As I said above, that was four years ago, and I’ve been hacking the Pi desktop from that day on. Not all the changes I’ve made have been popular with everyone, but I think most people who use the desktop feel it has improved over that time. My one overriding aim has been to try to make the Pi desktop into a product that I actually want to use myself; one that takes the good user interface design principles that we are used to in environments like macOS and Windows — ideas like consistency, attractive fonts and icons, intuitive operation, everything behaving the way you expect without having to read the instructions — and sculpting the interface around them.

    Final polish

    In my experience, the main difference between the Linux desktop environment and those of its commercial competitors is the last 10%: the polishing you do once everything works. It’s not easy making something that works, and a lot of people, once they have created something and got it working, leave it and move onto creating something else. I’m really not great at creating things from scratch — and have nothing but admiration for those who are — but what I do enjoy doing is adding that last 10%: going from something that works to something that works well and is a pleasure to use. Being at Raspberry Pi means I get to do that every day when I come to work.

    Stu Ayres on Twitter

    A whole new #computersciences suite of @Raspberry_Pi computers at @MyddeltonCol ! So excited to start teaching some physical computing!

    Every time I see a photo of a Pi running at a Jam, or in a classroom, anywhere in the world, and it’s using my desktop — the thrill from that never goes away.

    If you’d like to read more about the evolution of the Raspberry Pi desktop, and Simon’s adventures at Raspberry Pi, you can access the entire back catalogue of his blog posts here.

    Website: LINK

  • Debian turns 25

    Debian turns 25

    Reading Time: 2 minutes

    Want to feel old? Debian, the popular free Unix-like operating system based on the Linux kernel and GNU userland, is turning 25. Composed entirely of free software, Debian is maintained and packaged entirely by volunteers. Announced to the world by Ian Murdock 25 years ago this week, the first internal release, Debian 0.01, took place in September 1993, followed in June 1996 by a first stable version, Debian 1.1 (code name ‘Bo’).

    The following two decades have seen eight further major releases, the most recent being Debian 9.0 (code name ‘Stretch’), released in June 2017.

    Raspbian

    Raspberry Pi owes a considerable debt to the Debian project. Our operating system images are built on top of Raspbian Stretch, which is a community-led rebuild of Debian Stretch, optimised for the specific ARM cores used in our products.

    The Raspberry Pi desktop environment

    In addition to the core Debian system, we bundle a variety of useful non-Debian software. Some packages, like Simon’s UI mods, and the Chromium web browser, are free as in speech. Others, like Wolfram Mathematica and Minecraft, are free as in beer.

    Our most recent release adds more usability features, including a post-install wizard to simplify the setup process for new users.

    Download Raspbian today!

    If you’ve yet to try Raspbian on your Raspberry Pi, you can download it here. This tutorial from The MagPi demonstrates how to write an image onto a fresh SD card:

    Use Etcher to install operating systems onto an SD card

    Lucy Hattersley shows you how to install Raspberry Pi operating systems such as Raspbian onto an SD card, using the excellent Etcher. For more tutorials, check out The MagPi at http://magpi.cc ! Don’t want to miss an issue? Subscribe, and get every issue delivered straight to your door.

    And those of you who are already using Raspbian, be sure to check you have the most up-to-date version by following this easy video tutorial:

    Updating Raspbian on your Raspberry Pi || Raspberry Pi Foundation

    How to update to the latest version of Raspbian on your Raspberry Pi. Download Raspbian here: https://www.raspberrypi.org/downloads/raspbian/ More informatio…

    Don’t have a Raspberry Pi? Don’t worry: we also make a version of our operating system, based on x86 Debian, that will run on your PC or Mac! With an x86-based computer running our Debian Stretch OS, you can also use the PiServer tool to control a fleet of Raspberry Pis without SD cards.

    Website: LINK

  • Mu, a new Python IDE for beginners

    Mu, a new Python IDE for beginners

    Reading Time: 2 minutes

    Mu is a very simple-to-use Python editor and IDE (integrated development environment) and this week, version 1.0 was released!

    Mu Python IDE for beginners Raspberry Pi

    New Mu

    Mu is designed to be as user-friendly and as helpful as possible for new Python programmers, presenting just the tools that are useful, such as:

    • Syntax highlighting
    • Automatic indentation
    • In-built help
    • Code checking
    • Debugging

    Great for new programmers

    Mu is intended to be not the only Python IDE you’ll ever need, but the first one — the editor that helps you start your coding journey, but not necessarily the one you finish it with. So when you’re ready, you will have the skills and confidence to move on to using a more advanced Python IDE.

    You can use Mu in a number of modes; modes make working with Mu easier by only presenting the options most relevant to what you’re using Mu for:

    Mu Python IDE for beginners Raspberry Pi

    Available now

    Mu version 1.0 is available now for Windows, macOS, Linux, and the Raspberry Pi’s official operating system Raspbian! And to help new Python programmers get started, we have created a guide to Getting Started with Mu for all these operating systems.

    Mu Python IDE for beginners Raspberry Pi

    Mu is the brainchild of Nicholas Tollervey, who has worked tirelessly to create Mu. I recently met up with him and some of the Mu team at the world’s first Mu-“moot” to celebrate this release:

    Nicholas Tollervey on Twitter

    World’s first Mu-moot. 🙁

    One of the inspirations for Mu was the keynote presentation at EuroPython 2015 given by Raspberry Pi’s Carrie Anne Philbin. She talked about the barriers to children getting started with Python, including the lack of an suitably easy-to-use IDE:

    Carrie Anne Philbin – Keynote: Designed for Education: A Python Solution

    Carrie Anne Philbin – Keynote: Designed for Education: A Python Solution [EuroPython 2015] [23 July 2015] [Bilbao, Euskadi, Spain] The problem of introducing children to programming and computer science has seen growing attention in the past few years. Initiatives like Raspberry Pi, Code Club, code.org, (and many more) have been created to help solve this problem.

    Raspberry Pi has provided support for the project, helping to take Mu from its first implementation as a micro:bit programming tool to a general-purpose and simple-to-use Python editor and IDE!

    You can find installation instructions as well as tutorials on Mu’s website.

    Website: LINK

  • Raspbian update: first-boot setup wizard and more

    Raspbian update: first-boot setup wizard and more

    Reading Time: 5 minutes

    After a few months of hiding in a dark corner of the office muttering to myself (just ask anyone who sits near me how much of that I do…), it’s time to release another update to the Raspberry Pi desktop with a few new bits and a bunch of bug fixes (hopefully more fixes than new bugs, anyway). So, what’s changed this time around?

    Setup wizard

    One of the things about Raspbian that has always been a bit unhelpful is that when a new user first boots up a new Pi, they see a nice desktop picture, but they might not have much of an idea what they ought to do next. With the new update, whenever a new Raspbian image is booted for the first time, a simple setup wizard runs automatically to walk you through the basic setup operations.

    Localisation

    The localisation settings you can access via the main Raspberry Pi Configuration application are fairly complex and involve making separate settings for location, keyboard, time zone, and WiFi country. The first page of the wizard should make this a little more straightforward — once you choose your country, the wizard will show you the languages and time zones used in that country. When you’ve selected yours, the wizard should take care of all the necessary international settings. This includes the WiFi country, which you need to set before you can use the wireless connectivity on a Raspberry Pi 3B+.

    Raspbian update June 2018

    There will be some special cases — e.g. expatriates using a Pi and wanting to set it to a language not spoken in their country of residence — where this wizard will not give sufficient flexibility. But we hope that for perhaps 90% of users, this one page will do everything necessary in terms of international settings. (The more detailed settings in Raspberry Pi Configuration will, of course, remain available.)

    Other settings

    The next pages in the wizard will walk you through changing your password, connecting to the internet, and performing an initial software update to make sure you get any patches and fixes that may have been released since your Raspbian image was created.

    Raspbian update June 2018

    On the last page, you will be prompted to reboot if necessary. Once you get to the end of the wizard, it will not reappear when your Pi is booted. (If you do want to use it again for some reason, just run it manually by typing

    sudo piwiz

    into a terminal window and pressing Enter.)

    Recommended software

    Over the last few years, several third-party companies have generously offered to provide software for Pi users, in some cases giving free licenses for software that normally requires a license fee. We’ve always included these applications in our standard image, as people might never find out about them otherwise, but the applications perhaps aren’t all of interest to every user.

    So to try and keep the size of the image down, and to avoid cluttering the menus with applications that not everyone wants, we’ve introduced a Recommended Software program which you can find in the Preferences menu.

    Raspbian update June 2018

    Think of this as our version of the Apple App Store, but with everything in it available for free! Installing a program is easy: just put a tick in the box to the right, and click “OK”. You can also uninstall some of the preinstalled programs: just untick the respective box and click “OK”. You can even reinstall them once you’ve realised you didn’t mean to uninstall them: just tick the box again and click — oh, you get the idea…

    As we find new software that we recommend, or as more manufacturers offer us programs, we’ll add them to Recommended Software, so it’ll be kept up to date.

    New PDF viewer

    Ever since the first version, Raspbian has included the venerable PDF viewer Xpdf. While this program does work, it’s fairly old and clunky, and we’ve been trying to find something better.

    In this release, we are replacing Xpdf with a program called qpdfView, which is a much-improved PDF viewer. It has a more modern user interface, it renders pages faster, and it preloads and caches future pages while you’re reading, which should mean fewer pauses spent waiting for the next page to load.

    Raspbian update June 2018

    If you want something to read in it, we are now including the latest issue of The MagPi as a PDF file — look in the ‘MagPi’ directory in your home directory ‘pi’.

    Other updates

    The Chromium browser is now at version 65. We’ve also updated the links to our website in the Help menu, and added a new Getting Started option. This links to some really helpful new pages that walk you through getting your Pi up and running and using some of its key features.

    If you have volume up/down buttons on your keyboard, these will now control whatever audio output device is selected, rather than only controlling the internal audio hardware. The resolution has also been increased: each button push increases or decreases the volume by 5% rather than 10%.

    If you are using the network icon to reconnect to a wireless network, the passcode for the network will be shown in the connection dialog, so you won’t have to type it in again.

    In Raspberry Pi Configuration, you can now enable and disable the serial port console independently of the serial port hardware.

    The keyboard layout setting dialogue now makes settings that should be correct both in the desktop and also when the Pi is booted to console.

    There are various other small bug fixes and tweaks to appearance and behaviour, but they’re mostly only the sort of things you’d spot if you’re a slightly obsessive user interface developer…

    How do I get it?

    The new image is available for download from the usual place: our Downloads page. We’ve also updated the x86 image with most of the changes, and that’s up on the page as well.

    To update an existing image, use the usual terminal command:

    sudo apt-get update
    sudo apt-get dist-upgrade

    Here’s a quick video run-through of the process:

    Updating Raspbian on your Raspberry Pi || Raspberry Pi Foundation

    How to update to the latest version of Raspbian on your Raspberry Pi.

    To install the new PDF viewer (and remove the old one):

    sudo apt-get install qpdfview
    sudo apt-get purge xpdf

    To install the new Recommended Software program:

    sudo apt-get install rp-prefapps

    Finally, to install the setup wizard (which really isn’t necessary on an existing image, but just in case you are curious…):

    sudo apt-get install piwiz

    We hope you like the changes — as ever, all feedback is welcome, so please leave a comment below!

    Website: LINK

  • Build a house in Minecraft using Python

    Build a house in Minecraft using Python

    Reading Time: 9 minutes

    In this tutorial from The MagPi issue 68, Steve Martin takes us through the process of house-building in Minecraft Pi. Get your copy of The MagPi in stores now, or download it as a free PDF here.

    Minecraft Pi is provided for free as part of the Raspbian operating system. To start your Minecraft: Pi Edition adventures, try our free tutorial Getting started with Minecraft.

    Minecraft Raspberry Pi

    Writing programs that create things in Minecraft is not only a great way to learn how to code, but it also means that you have a program that you can run again and again to make as many copies of your Minecraft design as you want. You never need to worry about your creation being destroyed by your brother or sister ever again — simply rerun your program and get it back! Whilst it might take a little longer to write the program than to build one house, once it’s finished you can build as many houses as you want.

    Co-ordinates in Minecraft

    Let’s start with a review of the coordinate system that Minecraft uses to know where to place blocks. If you are already familiar with this, you can skip to the next section. Otherwise, read on.

    Minecraft Raspberry Pi Edition

    Plan view of our house design

    Minecraft shows us a three-dimensional (3D) view of the world. Imagine that the room you are in is the Minecraft world and you want to describe your location within that room. You can do so with three numbers, as follows:

    • How far across the room are you? As you move from side to side, you change this number. We can consider this value to be our X coordinate.
    • How high off the ground are you? If you are upstairs, or if you jump, this value increases. We can consider this value to be our Y coordinate.
    • How far into the room are you? As you walk forwards or backwards, you change this number. We can consider this value to be our Z coordinate.

    You might have done graphs in school with X going across the page and Y going up the page. Coordinates in Minecraft are very similar, except that we have an extra value, Z, for our third dimension. Don’t worry if this still seems a little confusing: once we start to build our house, you will see how these three dimensions work in Minecraft.

    Designing our house

    It is a good idea to start with a rough design for our house. This will help us to work out the values for the coordinates when we are adding doors and windows to our house. You don’t have to plan every detail of your house right away. It is always fun to enhance it once you have got the basic design written. The image above shows the plan view of the house design that we will be creating in this tutorial. Note that because this is a plan view, it only shows the X and Z co-ordinates; we can’t see how high anything is. Hopefully, you can imagine the house extending up from the screen.

    We will build our house close to where the Minecraft player is standing. This a good idea when creating something in Minecraft with Python, as it saves us from having to walk around the Minecraft world to try to find our creation.

    Starting our program

    Type in the code as you work through this tutorial. You can use any editor you like; we would suggest either Python 3 (IDLE) or Thonny Python IDE, both of which you can find on the Raspberry Pi menu under Programming. Start by selecting the File menu and creating a new file. Save the file with a name of your choice; it must end with .py so that the Raspberry Pi knows that it is a Python program.

    It is important to enter the code exactly as it is shown in the listing. Pay particular attention to both the spelling and capitalisation (upper- or lower-case letters) used. You may find that when you run your program the first time, it doesn’t work. This is very common and just means there’s a small error somewhere. The error message will give you a clue about where the error is.

    It is good practice to start all of your Python programs with the first line shown in our listing. All other lines that start with a # are comments. These are ignored by Python, but they are a good way to remind us what the program is doing.

    The two lines starting with from tell Python about the Minecraft API; this is a code library that our program will be using to talk to Minecraft. The line starting mc = creates a connection between our Python program and the game. Then we get the player’s location broken down into three variables: x, y, and z.

    Building the shell of our house

    To help us build our house, we define three variables that specify its width, height, and depth. Defining these variables makes it easy for us to change the size of our house later; it also makes the code easier to understand when we are setting the co-ordinates of the Minecraft bricks. For now, we suggest that you use the same values that we have; you can go back and change them once the house is complete and you want to alter its design.

    It’s now time to start placing some bricks. We create the shell of our house with just two lines of code! These lines of code each use the setBlocks command to create a complete block of bricks. This function takes the following arguments:

    setBlocks(x1, y1, z1, x2, y2, z2, block-id, data)

    x1, y1, and z1 are the coordinates of one corner of the block of bricks that we want to create; x1, y1, and z1 are the coordinates of the other corner. The block-id is the type of block that we want to use. Some blocks require another value called data; we will see this being used later, but you can ignore it for now.

    We have to work out the values that we need to use in place of x1, y1, z1, x1, y1, z1 for our walls. Note that what we want is a larger outer block made of bricks and that is filled with a slightly smaller block of air blocks. Yes, in Minecraft even air is actually just another type of block.

    Once you have typed in the two lines that create the shell of your house, you almost ready to run your program. Before doing so, you must have Minecraft running and displaying the contents of your world. Do not have a world loaded with things that you have created, as they may get destroyed by the house that we are building. Go to a clear area in the Minecraft world before running the program. When you run your program, check for any errors in the ‘console’ window and fix them, repeatedly running the code again until you’ve corrected all the errors.

    You should see a block of bricks now, as shown above. You may have to turn the player around in the Minecraft world before you can see your house.

    Adding the floor and door

    Now, let’s make our house a bit more interesting! Add the lines for the floor and door. Note that the floor extends beyond the boundary of the wall of the house; can you see how we achieve this?

    Hint: look closely at how we calculate the x and z attributes as compared to when we created the house shell above. Also note that we use a value of y-1 to create the floor below our feet.

    Minecraft doors are two blocks high, so we have to create them in two parts. This is where we have to use the data argument. A value of 0 is used for the lower half of the door, and a value of 8 is used for the upper half (the part with the windows in it). These values will create an open door. If we add 4 to each of these values, a closed door will be created.

    Before you run your program again, move to a new location in Minecraft to build the house away from the previous one. Then run it to check that the floor and door are created; you will need to fix any errors again. Even if your program runs without errors, check that the floor and door are positioned correctly. If they aren’t, then you will need to check the arguments so setBlock and setBlocks are exactly as shown in the listing.

    Adding windows

    Hopefully you will agree that your house is beginning to take shape! Now let’s add some windows. Looking at the plan for our house, we can see that there is a window on each side; see if you can follow along. Add the four lines of code, one for each window.

    Now you can move to yet another location and run the program again; you should have a window on each side of the house. Our house is starting to look pretty good!

    Adding a roof

    The final stage is to add a roof to the house. To do this we are going to use wooden stairs. We will do this inside a loop so that if you change the width of your house, more layers are added to the roof. Enter the rest of the code. Be careful with the indentation: I recommend using spaces and avoiding the use of tabs. After the if statement, you need to indent the code even further. Each indentation level needs four spaces, so below the line with if on it, you will need eight spaces.

    Since some of these code lines are lengthy and indented a lot, you may well find that the text wraps around as you reach the right-hand side of your editor window — don’t worry about this. You will have to be careful to get those indents right, however.

    Now move somewhere new in your world and run the complete program. Iron out any last bugs, then admire your house! Does it look how you expect? Can you make it better?

    Customising your house

    Now you can start to customise your house. It is a good idea to use Save As in the menu to save a new version of your program. Then you can keep different designs, or refer back to your previous program if you get to a point where you don’t understand why your new one doesn’t work.

    Consider these changes:

    • Change the size of your house. Are you able also to move the door and windows so they stay in proportion?
    • Change the materials used for the house. An ice house placed in an area of snow would look really cool!
    • Add a back door to your house. Or make the front door a double-width door!

    We hope that you have enjoyed writing this program to build a house. Now you can easily add a house to your Minecraft world whenever you want to by simply running this program.

    Get the complete code for this project here.

    Continue your Minecraft journey

    Minecraft Pi’s programmable interface is an ideal platform for learning Python. If you’d like to try more of our free tutorials, check out:

    You may also enjoy Martin O’Hanlon’s and David Whale’s Adventures in Minecraft, and the Hacking and Making in Minecraft MagPi Essentials guide, which you can download for free or buy in print here.

    Website: LINK

  • Raspbian update: supporting different screen sizes

    Raspbian update: supporting different screen sizes

    Reading Time: 5 minutes

    You may have noticed that we released a updated Raspbian software image yesterday. While the main reason for the new image was to provide support for the new Raspberry Pi 3 Model B+, the image also includes, alongside the usual set of bug fixes and minor tweaks, one significant chunk of new functionality that is worth pointing out.

    Updating Raspbian on your Raspberry Pi

    How to update to the latest version of Raspbian on your Raspberry Pi.

    Compatibility

    As a software developer, one of the most awkward things to deal with is what is known as platform fragmentation: having to write code that works on all the different devices and configurations people use. In my spare time, I write applications for iOS, and this has become increasingly painful over the last few years. When I wrote my first iPhone application, it only had to work on the original iPhone, but nowadays any iOS application has to work across several models of iPhone and iPad (which all have different processors and screens), and also across the various releases of iOS. And that’s before you start to consider making your code run on Android as well…

    Screenshot of clean Raspbian desktop

    The good thing about developing for Raspberry Pi is that there is only a relatively small number of different models of Pi hardware. We try our best to make sure that, wherever possible, the Raspberry Pi Desktop software works on every model of Pi ever sold, and we’ve managed to do this for most of the software in the image. The only exceptions are some of the more recent applications like Chromium, which won’t run on the older ARM6 processors in the Pi 1 and the Pi Zero, and some applications that run very slowly due to needing more memory than the older platforms have.

    Raspbian with different screen resolutions

    But there is one area where we have no control over the hardware, and that is screen resolution. The HDMI port on the Pi supports a wide range of resolutions, and when you include the composite port and display connector as well, people can be using the desktop  on a huge number of different screen sizes.

    Supporting a range of screen sizes is harder than you might think. One problem is that the Linux desktop environment is made up of a large selection of bits of software from various different developers, and not all of these support resizing. And the bits of software that do support resizing don’t all do it in the same way, so making everything resize at once can be awkward.

    This is why one of the first things I did when I first started working on the desktop was to create the Appearance Settings application in order to bring a lot of the settings for things like font and icon sizes into one place. This avoids users having to tweak several configuration files whenever they wanted to change something.

    Screenshot of appearance settings application in Raspbian

    The Appearance Settings application was a good place to start regarding support of different screen sizes. One of the features I originally included was a button to set everything to a default value. This was really a default setting for screens of an average size, and the resulting defaults would not have worked that well on much smaller or much larger screens. Now, there is no longer a single defaults button, but a new Defaults tab with multiple options:

    Screenshot of appearance settings application in Raspbian

    These three options adjust font size, icon size, and various other settings to values which ought to work well on screens with a high or low resolution. (The For medium screens option has the same effect as the previous defaults button.) The results will not be perfect in all circumstances and for all applications — as mentioned above, there are many different components used to create the desktop, and some of them don’t provide any way of resizing what they draw. But using these options should set the most important parts of the desktop and installed applications, such as icons, fonts, and toolbars, to a suitable size.

    Pixel doubling

    We’ve added one other option for supporting high resolution screens. At the bottom of the System tab in the Raspberry Pi Configuration application, there is now an option for pixel doubling:

    Screenshot of configuration application in Raspbian

    We included this option to facilitate the use of the x86 version of Raspbian with ultra-high-resolution screens that have very small pixels, such as Apple’s Retina displays. When running our desktop on one of these, the tininess of the pixels made everything too small for comfortable use.

    Enabling pixel doubling simply draws every pixel in the desktop as a 2×2 block of pixels on the screen, making everything exactly twice the size and resulting in a usable desktop on, for example, a MacBook Pro’s Retina display. We’ve included the option on the version of the desktop for the Pi as well, because we know that some people use their Pi with large-screen HDMI TVs.

    As pixel doubling magnifies everything on the screen by a factor of two, it’s also a useful option for people with visual impairments.

    How to update

    As mentioned above, neither of these new functionalities is a perfect solution to dealing with different screen sizes, but we hope they will make life slightly easier for you if you’re trying to run the desktop on a small or large screen. The features are included in the new image we have just released to support the Pi 3B+. If you want to add them to your existing image, the standard upgrade from apt will do so. As shown in the video above, you can just open a terminal window and enter the following to update Raspbian:

    sudo apt-get update
    sudo apt-get dist-upgrade

    As always, your feedback, either in comments here or on the forums, is very welcome.

    Website: LINK

  • MagPi 67: back to the future with retro computing on your Pi

    MagPi 67: back to the future with retro computing on your Pi

    Reading Time: 3 minutes

    Hey folks, Rob from The MagPi here! While we do love modern computers here at The MagPi, we also have a soft spot for the classic machines of yesteryear, which is why we have a huge feature on emulating and upcycling retro computers in The MagPi issue 67, out right now.

    The MagPi 67 Retro Gaming Privacy Security

    Retro computing and security in the latest issue of The MagPi

    Retro computing

    Noted retro computing enthusiast K.G. Orphanides takes you through using the Raspberry Pi to emulate these classic machines, listing the best emulators out there and some of the homebrew software people have created for them. There’s even a guide on how to put a Pi in a Speccy!

    The MagPi 67 Retro Gaming Privacy Security

    Retro fun for all

    While I’m a bit too young to have had a Commodore 64 or a Spectrum, there are plenty of folks who read the mag with nostalgia for that age of computing. And it’s also important for us young’uns to know the history of our hobby. So get ready to dive in!

    Security and more

    We also have an in-depth article about improving your security and privacy online and on your Raspberry Pi, and about using your Pi to increase your network security. It’s an important topic, and one that I’m pretty passionate about, so hopefully you’ll find the piece useful!

    The new issue also includes our usual selection of inspiring projects, informative guides, and definitive reviews, as well as a free DVD with the latest version of the Raspberry Pi Desktop for Windows and Apple PCs!

    Get The MagPi 67

    Issue 67 is available today from WHSmith, Tesco, Sainsbury’s, and Asda. If you live in the US, head over to your local Barnes & Noble or Micro Center in the next few days for a print copy. You can also get the new issue online from our store, or digitally via our Android and iOS apps. And don’t forget, there’s always the free PDF as well.

    New subscription offer!

    Want to support the Raspberry Pi Foundation and the magazine? We’ve launched a new way to subscribe to the print version of The MagPi: you can now take out a monthly £4 subscription to the magazine, effectively creating a rolling pre-order system that saves you money on each issue.

    You can also take out a twelve-month print subscription and get a Pi Zero W, Pi Zero case, and adapter cables absolutely free! This offer does not currently have an end date.

    We hope you enjoy this issue! See you next time…

    Website: LINK

  • The Raspberry Pi PiServer tool

    The Raspberry Pi PiServer tool

    Reading Time: 7 minutes

    As Simon mentioned in his recent blog post about Raspbian Stretch, we have developed a new piece of software called PiServer. Use this tool to easily set up a network of client Raspberry Pis connected to a single x86-based server via Ethernet. With PiServer, you don’t need SD cards, you can control all clients via the server, and you can add and configure user accounts — it’s ideal for the classroom, your home, or an industrial setting.

    PiServer diagram

    Client? Server?

    Before I go into more detail, let me quickly explain some terms.

    • Server — the server is the computer that provides the file system, boot files, and password authentication to the client(s)
    • Client — a client is a computer that retrieves boot files from the server over the network, and then uses a file system the server has shared. More than one client can connect to a server, but all clients use the same file system.
    • User – a user is a user name/password combination that allows someone to log into a client to access the file system on the server. Any user can log into any client with their credentials, and will always see the same server and share the same file system. Users do not have sudo capability on a client, meaning they cannot make significant changes to the file system and software.

    I see no SD cards

    Last year we described how the Raspberry Pi 3 Model B can be booted without an SD card over an Ethernet network from another computer (the server). This is called network booting or PXE (pronounced ‘pixie’) booting.

    Why would you want to do this?

    • A client computer (the Raspberry Pi) doesn’t need any permanent storage (an SD card) to boot.
    • You can network a large number of clients to one server, and all clients are exactly the same. If you log into one of the clients, you will see the same file system as if you logged into any other client.
    • The server can be run on an x86 system, which means you get to take advantage of the performance, network, and disk speed on the server.

    Sounds great, right? Of course, for the less technical, creating such a network is very difficult. For example, there’s setting up all the required DHCP and TFTP servers, and making sure they behave nicely with the rest of the network. If you get this wrong, you can break your entire network.

    PiServer to the rescue

    To make network booting easy, I thought it would be nice to develop an application which did everything for you. Let me introduce: PiServer!

    PiServer has the following functionalities:

    • It automatically detects Raspberry Pis trying to network boot, so you don’t have to work out their Ethernet addresses.
    • It sets up a DHCP server — the thing inside the router that gives all network devices an IP address — either in proxy mode or in full IP mode. No matter the mode, the DHCP server will only reply to the Raspberry Pis you have specified, which is important for network safety.
    • It creates user names and passwords for the server. This is great for a classroom full of Pis: just set up all the users beforehand, and everyone gets to log in with their passwords and keep all their work in a central place. Moreover, users cannot change the software, so educators have control over which programs their learners can use.
    • It uses a slightly altered Raspbian build which allows separation of temporary spaces, doesn’t have the default ‘pi’ user, and has LDAP enabled for log-in.

    What can I do with PiServer?

    Serve a whole classroom of Pis

    In a classroom, PiServer allows all files for lessons or projects to be stored on a central x86-based computer. Each user can have their own account, and any files they create are also stored on the server. Moreover, the networked Pis doesn’t need to be connected to the internet. The teacher has centralised control over all Pis, and all Pis are user-agnostic, meaning there’s no need to match a person with a computer or an SD card.

    Build a home server

    PiServer could be used in the home to serve file systems for all Raspberry Pis around the house — either a single common Raspbian file system for all Pis or a different operating system for each. Hopefully, our extensive OS suppliers will provide suitable build files in future.

    Use it as a controller for networked Pis

    In an industrial scenario, it is possible to use PiServer to develop a network of Raspberry Pis (maybe even using Power over Ethernet (PoE)) such that the control software for each Pi is stored remotely on a server. This enables easy remote control and provisioning of the Pis from a central repository.

    How to use PiServer

    The client machines

    So that you can use a Pi as a client, you need to enable network booting on it. Power it up using an SD card with a Raspbian Lite image, and open a terminal window. Type in

    echo program_usb_boot_mode=1 | sudo tee -a /boot/config.txt

    and press Return. This adds the line program_usb_boot_mode=1 to the end of the config.txt file in /boot. Now power the Pi down and remove the SD card. The next time you connect the Pi to a power source, you will be able to network boot it.

    The server machine

    As a server, you will need an x86 computer on which you can install x86 Debian Stretch. Refer to Simon’s blog post for additional information on this. It is possible to use a Raspberry Pi to serve to the client Pis, but the file system will be slower, especially at boot time.

    Make sure your server has a good amount of disk space available for the file system — in general, we recommend at least 16Gb SD cards for Raspberry Pis. The whole client file system is stored locally on the server, so the disk space requirement is fairly significant.

    Next, start PiServer by clicking on the start icon and then clicking Preferences > PiServer. This will open a graphical user interface — the wizard — that will walk you through setting up your network. Skip the introduction screen, and you should see a screen looking like this:

    PiServer GUI screenshot

    If you’ve enabled network booting on the client Pis and they are connected to a power source, their MAC addresses will automatically appear in the table shown above. When you have added all your Pis, click Next.

    PiServer GUI screenshot

    On the Add users screen, you can set up users on your server. These are pairs of user names and passwords that will be valid for logging into the client Raspberry Pis. Don’t worry, you can add more users at any point. Click Next again when you’re done.

    PiServer GUI screenshot

    The Add software screen allows you to select the operating system you want to run on the attached Pis. (You’ll have the option to assign an operating system to each client individually in the setting after the wizard has finished its job.) There are some automatically populated operating systems, such as Raspbian and Raspbian Lite. Hopefully, we’ll add more in due course. You can also provide your own operating system from a local file, or install it from a URL. For further information about how these operating system images are created, have a look at the scripts in /var/lib/piserver/scripts.

    Once you’re done, click Next again. The wizard will then install the necessary components and the operating systems you’ve chosen. This will take a little time, so grab a coffee (or decaffeinated drink of your choice).

    When the installation process is finished, PiServer is up and running — all you need to do is reboot the Pis to get them to run from the server.

    Shooting troubles

    If you have trouble getting clients connected to your network, there are a fewthings you can do to debug:

    1. If some clients are connecting but others are not, check whether you’ve enabled the network booting mode on the Pis that give you issues. To do that, plug an Ethernet cable into the Pi (with the SD card removed) — the LEDs on the Pi and connector should turn on. If that doesn’t happen, you’ll need to follow the instructions above to boot the Pi and edit its /boot/config.txt file.
    2. If you can’t connect to any clients, check whether your network is suitable: format an SD card, and copy bootcode.bin from /boot on a standard Raspbian image onto it. Plug the card into a client Pi, and check whether it appears as a new MAC address in the PiServer GUI. If it does, then the problem is a known issue, and you can head to our forums to ask for advice about it (the network booting code has a couple of problems which we’re already aware of). For a temporary fix, you can clone the SD card on which bootcode.bin is stored for all your clients.

    If neither of these things fix your problem, our forums are the place to find help — there’s a host of people there who’ve got PiServer working. If you’re sure you have identified a problem that hasn’t been addressed on the forums, or if you have a request for a functionality, then please add it to the GitHub issues.

    Website: LINK

  • GPIO expander: access a Pi’s GPIO pins on your PC/Mac

    GPIO expander: access a Pi’s GPIO pins on your PC/Mac

    Reading Time: 4 minutes

    Use the GPIO pins of a Raspberry Pi Zero while running Debian Stretch on a PC or Mac with our new GPIO expander software! With this tool, you can easily access a Pi Zero’s GPIO pins from your x86 laptop without using SSH, and you can also take advantage of your x86 computer’s processing power in your physical computing projects.

    A Raspberry Pi zero connected to a laptop - GPIO expander

    What is this magic?

    Running our x86 Stretch distribution on a PC or Mac, whether installed on the hard drive or as a live image, is a great way of taking advantage of a well controlled and simple Linux distribution without the need for a Raspberry Pi.

    The downside of not using a Pi, however, is that there aren’t any GPIO pins with which your Scratch or Python programs could communicate. This is a shame, because it means you are limited in your physical computing projects.

    I was thinking about this while playing around with the Pi Zero’s USB booting capabilities, having seen people employ the Linux gadget USB mode to use the Pi Zero as an Ethernet device. It struck me that, using the udev subsystem, we could create a simple GUI application that automatically pops up when you plug a Pi Zero into your computer’s USB port. Then the Pi Zero could be programmed to turn into an Ethernet-connected computer running pigpio to provide you with remote GPIO pins.

    So we went ahead and built this GPIO expander application, and your PC or Mac can now have GPIO pins which are accessible through Scratch or the GPIO Zero Python library. Note that you can only use this tool to access the Pi Zero.

    You can also install the application on the Raspberry Pi. Theoretically, you could connect a number of Pi Zeros to a single Pi and (without a USB hub) use a maximum of 140 pins! But I’ve not tested this — one for you, I think…

    Making the GPIO expander work

    If you’re using a PC or Mac and you haven’t set up x86 Debian Stretch yet, you’ll need to do that first. An easy way to do it is to download a copy of the Stretch release from this page and image it onto a USB stick. Boot from the USB stick (on most computers, you just need to press F10 during booting and select the stick when asked), and then run Stretch directly from the USB key. You can also install it to the hard drive, but be aware that installing it will overwrite anything that was on your hard drive before.

    Whether on a Mac, PC, or Pi, boot through to the Stretch desktop, open a terminal window, and install the GPIO expander application:

    sudo apt install usbbootgui

    Next, plug in your Raspberry Pi Zero (don’t insert an SD card), and after a few seconds the GUI will appear.

    A screenshot of the GPIO expander GUI

    The Raspberry Pi USB programming GUI

    Select GPIO expansion board and click OK. The Pi Zero will now be programmed as a locally connected Ethernet port (if you run ifconfig, you’ll see the new interface usb0 coming up).

    What’s really cool about this is that your plugged-in Pi Zero is now running pigpio, which allows you to control its GPIOs through the network interface.

    With Scratch 2

    To utilise the pins with Scratch 2, just click on the start bar and select Programming > Scratch 2.

    In Scratch, click on More Blocks, select Add an Extension, and then click Pi GPIO.

    Two new blocks will be added: the first is used to set the output pin, the second is used to get the pin value (it is true if the pin is read high).

    This a simple application using a Pibrella I had hanging around:

    A screenshot of a Scratch 2 program - GPIO expander

    With Python

    This is a Python example using the GPIO Zero library to flash an LED:

    pi@raspberrypi:~ $ export GPIOZERO_PIN_FACTORY=pigpio
    pi@raspberrypi:~ $ export PIGPIO_ADDR=fe80::1%usb0
    pi@raspberrypi:~ $ python3
    >>> from gpiozero import LED
    >>> led = LED(17)
    >>> led.blink()
    A Raspberry Pi zero connected to a laptop - GPIO expander

    The pinout command line tool is your friend

    Note that in the code above the IP address of the Pi Zero is an IPv6 address and is shortened to fe80::1%usb0, where usb0 is the network interface created by the first Pi Zero.

    With pigs directly

    Another option you have is to use the pigpio library and the pigs application and redirect the output to the Pi Zero network port running IPv6. To do this, you’ll first need to set some environment variable for the redirection:

    pi@raspberrypi:~ $ export PIGPIO_ADDR=fe80::1%usb0
    pi@raspberrypi:~ $ pigs bc2 0x8000
    pi@raspberrypi:~ $ pigs bs2 0x8000

    With the commands above, you should be able to flash the LED on the Pi Zero.

    The secret sauce

    I know there’ll be some people out there who would be interested in how we put this together. And I’m sure many people are interested in the ‘buildroot’ we created to run on the Pi Zero — after all, there are lots of things you can create if you’ve got a Pi Zero on the end of a piece of IPv6 string! For a closer look, find the build scripts for the GPIO expander here and the source code for the USB boot GUI here.

    And be sure to share your projects built with the GPIO expander by tagging us on social media or posting links in the comments!

    Website: LINK

  • Stretch for PCs and Macs, and a Raspbian update

    Stretch for PCs and Macs, and a Raspbian update

    Reading Time: 6 minutes

    Today, we are launching the first Debian Stretch release of the Raspberry Pi Desktop for PCs and Macs, and we’re also releasing the latest version of Raspbian Stretch for your Pi.

    Raspberry Pi Desktop Stretch splash screen

    For PCs and Macs

    When we released our custom desktop environment on Debian for PCs and Macs last year, we were slightly taken aback by how popular it turned out to be. We really only created it as a result of one of those “Wouldn’t it be cool if…” conversations we sometimes have in the office, so we were delighted by the Pi community’s reaction.

    Seeing how keen people were on the x86 version, we decided that we were going to try to keep releasing it alongside Raspbian, with the ultimate aim being to make simultaneous releases of both. This proved to be tricky, particularly with the move from the Jessie version of Debian to the Stretch version this year. However, we have now finished the job of porting all the custom code in Raspbian Stretch to Debian, and so the first Debian Stretch release of the Raspberry Pi Desktop for your PC or Mac is available from today.

    The new Stretch releases

    As with the Jessie release, you can either run this as a live image from a DVD, USB stick, or SD card or install it as the native operating system on the hard drive of an old laptop or desktop computer. Please note that installing this software will erase anything else on the hard drive — do not install this over a machine running Windows or macOS that you still need to use for its original purpose! It is, however, safe to boot a live image on such a machine, since your hard drive will not be touched by this.

    We’re also pleased to announce that we are releasing the latest version of Raspbian Stretch for your Pi today. The Pi and PC versions are largely identical: as before, there are a few applications (such as Mathematica) which are exclusive to the Pi, but the user interface, desktop, and most applications will be exactly the same.

    For Raspbian, this new release is mostly bug fixes and tweaks over the previous Stretch release, but there are one or two changes you might notice.

    File manager

    The file manager included as part of the LXDE desktop (on which our desktop is based) is a program called PCManFM, and it’s very feature-rich; there’s not much you can’t do in it. However, having used it for a few years, we felt that it was perhaps more complex than it needed to be — the sheer number of menu options and choices made some common operations more awkward than they needed to be. So to try to make file management easier, we have implemented a cut-down mode for the file manager.

    Raspberry Pi Desktop Stretch - file manager

    Most of the changes are to do with the menus. We’ve removed a lot of options that most people are unlikely to change, and moved some other options into the Preferences screen rather than the menus. The two most common settings people tend to change — how icons are displayed and sorted — are now options on the toolbar and in a top-level menu rather than hidden away in submenus.

    The sidebar now only shows a single hierarchical view of the file system, and we’ve tidied the toolbar and updated the icons to make them match our house style. We’ve removed the option for a tabbed interface, and we’ve stomped a few bugs as well.

    One final change was to make it possible to rename a file just by clicking on its icon to highlight it, and then clicking on its name. This is the way renaming works on both Windows and macOS, and it’s always seemed slightly awkward that Unix desktop environments tend not to support it.

    As with most of the other changes we’ve made to the desktop over the last few years, the intention is to make it simpler to use, and to ease the transition from non-Unix environments. But if you really don’t like what we’ve done and long for the old file manager, just untick the box for Display simplified user interface and menus in the Layout page of Preferences, and everything will be back the way it was!

    Raspberry Pi Desktop Stretch - preferences GUI

    Battery indicator for laptops

    One important feature missing from the previous release was an indication of the amount of battery life. Eben runs our desktop on his Mac, and he was becoming slightly irritated by having to keep rebooting into macOS just to check whether his battery was about to die — so fixing this was a priority!

    We’ve added a battery status icon to the taskbar; this shows current percentage charge, along with whether the battery is charging, discharging, or connected to the mains. When you hover over the icon with the mouse pointer, a tooltip with more details appears, including the time remaining if the battery can provide this information.

    Raspberry Pi Desktop Stretch - battery indicator

    While this battery monitor is mainly intended for the PC version, it also supports the first-generation pi-top — to see it, you’ll only need to make sure that I2C is enabled in Configuration. A future release will support the new second-generation pi-top.

    New PC applications

    We have included a couple of new applications in the PC version. One is called PiServer — this allows you to set up an operating system, such as Raspbian, on the PC which can then be shared by a number of Pi clients networked to it. It is intended to make it easy for classrooms to have multiple Pis all running exactly the same software, and for the teacher to have control over how the software is installed and used. PiServer is quite a clever piece of software, and it’ll be covered in more detail in another blog post in December.

    We’ve also added an application which allows you to easily use the GPIO pins of a Pi Zero connected via USB to a PC in applications using Scratch or Python. This makes it possible to run the same physical computing projects on the PC as you do on a Pi! Again, we’ll tell you more in a separate blog post this month.

    Both of these applications are included as standard on the PC image, but not on the Raspbian image. You can run them on a Pi if you want — both can be installed from apt.

    How to get the new versions

    New images for both Raspbian and Debian versions are available from the Downloads page.

    It is possible to update existing installations of both Raspbian and Debian versions. For Raspbian, this is easy: just open a terminal window and enter

    sudo apt-get update
    sudo apt-get dist-upgrade

    Updating Raspbian on your Raspberry Pi

    How to update to the latest version of Raspbian on your Raspberry Pi. Download Raspbian here: More information on the latest version of Raspbian: Buy a Raspberry Pi:

    It is slightly more complex for the PC version, as the previous release was based around Debian Jessie. You will need to edit the files /etc/apt/sources.list and /etc/apt/sources.list.d/raspi.list, using sudo to do so. In both files, change every occurrence of the word “jessie” to “stretch”. When that’s done, do the following:

    sudo apt-get update 
    sudo dpkg --force-depends -r libwebkitgtk-3.0-common
    sudo apt-get -f install
    sudo apt-get dist-upgrade
    sudo apt-get install python3-thonny
    sudo apt-get install sonic-pi=2.10.0~repack-rpt1+2
    sudo apt-get install piserver
    sudo apt-get install usbbootgui
    

    At several points during the upgrade process, you will be asked if you want to keep the current version of a configuration file or to install the package maintainer’s version. In every case, keep the existing version, which is the default option. The update may take an hour or so, depending on your network connection.

    As with all software updates, there is the possibility that something may go wrong during the process, which could lead to your operating system becoming corrupted. Therefore, we always recommend making a backup first.

    Enjoy the new versions, and do let us know any feedback you have in the comments or on the forums!

    Website: LINK

  • piwheels: making “pip install” fast

    piwheels: making “pip install” fast

    Reading Time: 6 minutes

    TL;DR pip install numpy used to take ages, and now it’s super fast thanks to piwheels.

    The Python Package Index (PyPI) is a package repository for Python modules. Members of the Python community publish software and libraries in it as an easy method of distribution. If you’ve ever used pip install, PyPI is the service that hosts the software you installed. You may have noticed that some installations can take a long time on the Raspberry Pi. That usually happens when modules have been implemented in C and require compilation.

    XKCD comic of two people sword-fighting on office chairs while their code is compiling

    No more slacking off! pip install numpy takes just a few seconds now \o/

    Wheels for Python packages

    A general solution to this problem exists: Python wheels are a standard for distributing pre-built versions of packages, saving users from having to build from source. However, when C code is compiled, it’s compiled for a particular architecture, so package maintainers usually publish wheels for 32-bit and 64-bit Windows, macOS, and Linux. Although Raspberry Pi runs Linux, its architecture is ARM, so Linux wheels are not compatible.

    A comic of snakes biting their own tails to roll down a sand dune like wheels

    What Python wheels are not

    Pip works by browsing PyPI for a wheel matching the user’s architecture — and if it doesn’t find one, it falls back to the source distribution (usually a tarball or zip of the source code). Then the user has to build it themselves, which can take a long time, or may require certain dependencies. And if pip can’t find a source distribution, the installation fails.

    Developing piwheels

    In order to solve this problem, I decided to build wheels of every package on PyPI. I wrote some tooling for automating the process and used a postgres database to monitor the status of builds and log the output. Using a Pi 3 in my living room, I attempted to build wheels of the latest version of all 100 000 packages on PyPI and to host them on a web server on the Pi. This took a total of ten days, and my proof-of-concept seemed to show that it generally worked and was likely to be useful! You could install packages directly from the server, and installations were really fast.

    A Raspberry Pi 3 sitting atop a Pi 2 on cloth

    This Pi 3 was the piwheels beta server, sitting atop my SSH gateway Pi 2 at home

    I proceeded to plan for version 2, which would attempt to build every version of every package — about 750 000 versions in total. I estimated this would take 75 days for one Pi, but I intended to scale it up to use multiple Pis. Our web hosts Mythic Beasts provide dedicated Pi 3 hosting, so I fired up 20 of them to share the load. With some help from Dave Jones, who created an efficient queuing system for the builders, we were able make this run like clockwork. In under two weeks, it was complete! Read ALL about the first build run drama on my blog.

    A list of the mythic beasts cloud Pis

    ALL the cloud Pis

    Improving piwheels

    We analysed the failures, made some tweaks, installed some key dependencies, and ran the build again to raise our success rate from 76% to 83%. We also rebuilt packages for Python 3.5 (the new default in Raspbian Stretch). The wheels we build are tagged ‘armv7l’, but because our Raspbian image is compatible with all Pi models, they’re really ARMv6, so they’re compatible with Pi 3, Pi 2, Pi 1 and Pi Zero. This means the ‘armv6l’-tagged wheels we provide are really just the ARMv7 wheels renamed.

    The piwheels monitor interface created by Dave Jones

    The wonderful piwheels monitor interface created by Dave

    Now, you might be thinking “Why didn’t you just cross-compile?” I really wanted to have full compatibility, and building natively on Pis seemed to be the best way to achieve that. I had easy access to the Pis, and it really didn’t take all that long. Plus, you know, I wanted to eat my own dog food.

    You might also be thinking “Why don’t you just apt install python3-numpy?” It’s true that some Python packages are distributed via the Raspbian/Debian archives too. However, if you’re in a virtual environment, or you need a more recent version than the one packaged for Debian, you need pip.

    How it works

    Now that the piwheels package repository is running as a service, hosted on a Pi 3 in the Mythic Beasts data centre in London. The pip package in Raspbian Stretch is configured to use piwheels as an additional index, so it falls back to PyPI if we’re missing a package. Just run sudo apt upgrade to get the configuration change. You’ll find that pip installs are much faster now! If you want to use piwheels on Raspbian Jessie, that’s possible too — find the instructions in our FAQs. And now, every time you pip install something, your files come from a web server running on a Raspberry Pi (that capable little machine)!

    Try it for yourself in a virtual environment:

    sudo apt install virtualenv python3-virtualenv -y
    virtualenv -p /usr/bin/python3 testpip
    source testpip/bin/activate
    pip install numpy

    This takes about 20 minutes on a Pi 3, 2.5 hours on a Pi 1, or just a few seconds on either if you use piwheels.

    If you’re interested to see the details, try pip install numpy -v for verbose output. You’ll see that pip discovers two indexes to search:

    2 location(s) to search for versions of numpy:
 * https://pypi.python.org/simple/numpy/
 * https://www.piwheels.hostedpi.com/simple/numpy/

    Then it searches both indexes for available files. From this list of files, it determines the latest version available. Next it looks for a Python version and architecture match, and then opts for a wheel over a source distribution. If a new package or version is released, piwheels will automatically pick it up and add it to the build queue.

    A flowchart of how piwheels works

    How piwheels works

    For the users unfamiliar with virtual environments I should mention that doing this isn’t a requirement — just an easy way of testing installations in a sandbox. Most pip usage will require sudo pip3 install {package}, which installs at a system level.

    If you come across any issues with any packages from piwheels, please let us know in a GitHub issue.

    Taking piwheels further

    We currently provide over 670 000 wheels for more than 96 000 packages, all compiled natively on Raspberry Pi hardware. Moreover, we’ll keep building new packages as they are released.

    Note that, at present, we have built wheels for Python 3.4 and 3.5 — we’re planning to add support for Python 3.6 and 2.7. The fact that piwheels is currently missing Python 2 wheels does not affect users: until we rebuild for Python 2, PyPI will be used as normal, it’ll just take longer than installing a Python 3 package for which we have a wheel. But remember, Python 2 end-of-life is less than three years away!

    Many thanks to Dave Jones for his contributions to the project, and to Mythic Beasts for providing the excellent hosted Pi service.

    Screenshot of the mythic beasts Raspberry Pi 3 server service website

    Related/unrelated, check out my poster from the PyCon UK poster session:

    A poster about Python and Raspberry Pi

    Click to download the PDF!

    Website: LINK