Schlagwort: minipc

  • Review: Grove Starter Kit for Raspberry Pi Pico

    Review: Grove Starter Kit for Raspberry Pi Pico

    Reading Time: 3 minutes

    At the heart of the Grove Starter Kit for Raspberry Pi Pico is a Grove Shield ($4). This board has ten different Grove Connectors: three analogue ports, two digital ports, three UART ports, and four I2C ports. It also has a 3 V/5 V power switch to adjust the voltage output, and a six-pin SPI interface.

    Raspberry Pi Pico slots into the header on the Grove Shield and Grove parts are snapped straight into the white Grove connectors. This enables you to prototype projects quickly and easily.

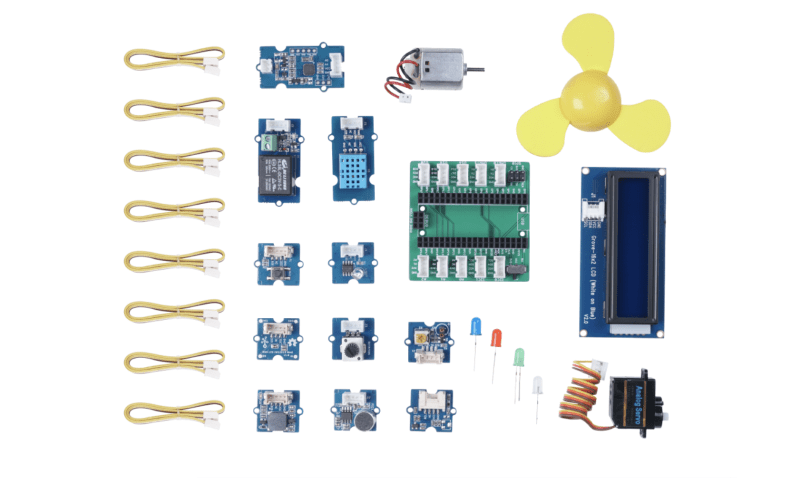
    The Grove Starter Kit contains a range of Grove components and the Grove Shield

    You will need to have soldered pins on to your Pico (or you can pick up a pre-soldered Pico). But from that point on, you don’t need to solder parts or figure out circuits and jumper wires. You just connect the Grove part to the Grove Shield using one of the included Grove Universal 4-Pin cables. Grove itself says this “simplifies the learning system, but not to the point where it becomes dumbed down”.

    Each Grove cable has four wires: typically one for power, another for ground, and two for input and output (the exact nature of each wire depends on the part it’s connected to; you can read more here.

    This does, indeed, make it extremely easy to hook up components to Raspberry Pi Pico. And to that end, the kit comes with a wide range of parts to play with. There is an LED pack, RGB LED display, light sensor, sound sensor, rotary angle sensor, temperature and humidity sensor, passive buzzer, button, servo, mini fan (with DC motor), relay, and a 16×2 character LCD.

    Learning curve

    The Grove Shield for Pi Pico wiki page has a range of tutorials that use the parts found in the kit.

    	The Grove Shield for Raspberry Pi Pico has a range of ports that make it easy to click and connect components

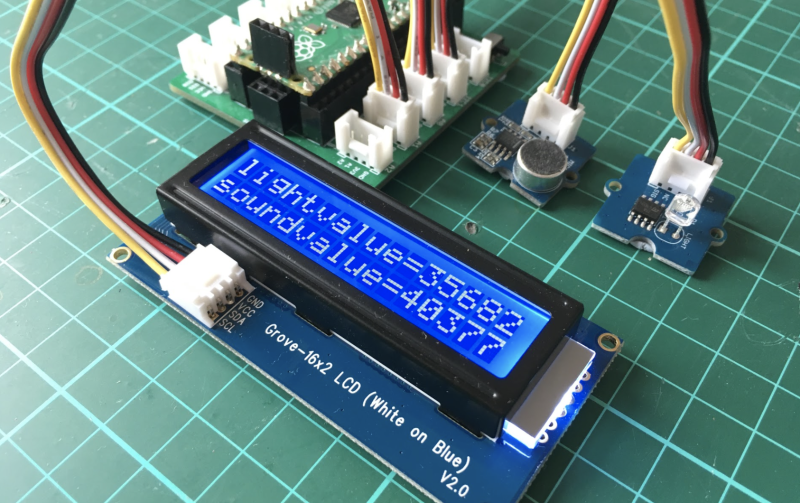
    The tutorials use all the parts found in the Starter Pack and give a good overview of what you can do. You typically need to download a Python module for each part. And analysing the code will give you a good overview of what each component can do. We programmed the LCD to respond to light and sound; a fan and servo movement detector; and played around with lights, buttons, and the relay.

    Thanks to the Python support files, introductory wiki tutorials, and the click-and-play nature of the kit, it is ridiculously easy to move from having an idea to getting it working.

    There is an argument that replacing the pure jumper wires and breadboard with a custom connector removes part of the learning curve. And it’s hard to take a prototyped circuit and wire components directly to Pico so you remain attached to the Grove Shield and its ecosystem of parts. But, for the sheer joy of attaching a component and getting it to work, this is hard to beat.

  • Automatic Seedling Nurturer

    Automatic Seedling Nurturer

    Reading Time: 3 minutes

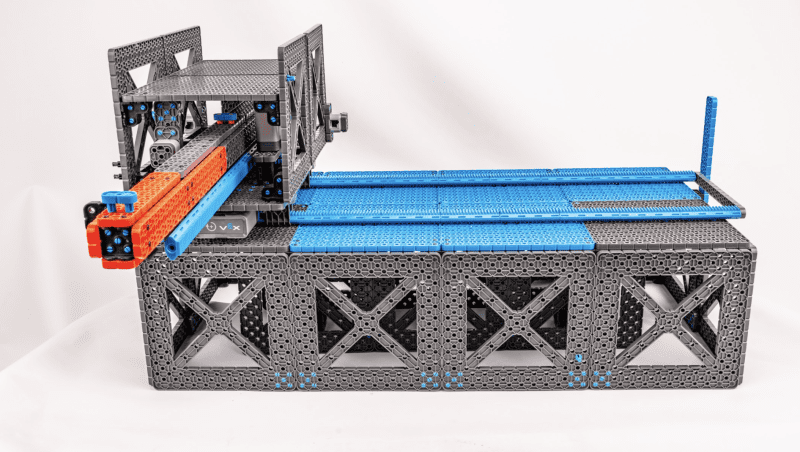
    “This specific robot allows Raspberry Pi to communicate with the VEX IQ system to create a plant watering and lighting system,” Chloe tells us. “I was trying to raise seedlings and found that sometimes I would forget to water the plants or turn on the grow light. I thought it would be useful to automate the project. VEX – with its motors, sensors, and Lego-like parts – lends itself to making structures. However, there is no internal mechanism for monitoring the time of day. I wondered if I could use a Raspberry Pi with a real-time clock to trigger the mechanism. Raspberry Pi would open up many other possibilities, like accessing the mechanism via the web or recording data points (temperature, humidity, growth) for later comparison.”

    Ideas on ideas

    Just using a Raspberry Pi as a timer, though, is a bit overpowered, but the possibilities of what could be done with it sparked new ideas.

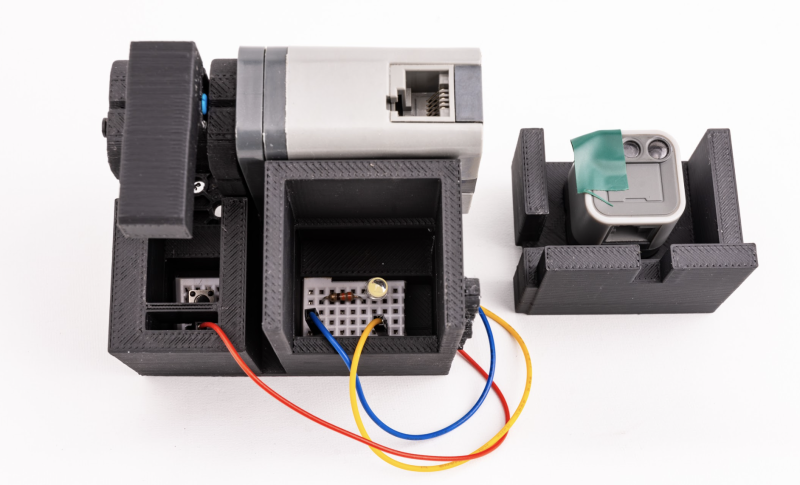
    As the arm is over a seedling, the VEX IQ microcontroller pushes a button that is sensed by Raspberry Pi and triggers a watering pump to stream water over the plant

    “Initially, the goal was to water seedlings automatically,” Chloe reveals. “However, as the idea formed, other benefits of using a Raspberry Pi arose. From an educational standpoint, I learned how to wire a breadboard, an LED light, and a button. Learning to do these tasks with a Raspberry Pi was rewarding in itself, but applying the wiring of the breadboard and peripherals as part of my project was an added bonus.”

    She says there were many reasons for using Raspberry Pi. “For one, with its multitude of sensors, accessibility to networks, and bountiful options for programming languages, [it] provided a flexible solution that could not only be used in this project, but whose lessons could be expanded to other projects. This project could have been done more simply with a UART connection using an older model VEX EDR microcontroller. This way, the transmission of information would have then been direct. But by doing the project with the Raspberry Pi VEX IQ communicator, I learned about 3D printing, circuits, LEDs, and GPIO pins.”

    Let them grow

    We’ve seen that Raspberry Pi can help grow plants and such, but can a Raspberry Pi/construction block robot hybrid do the same?

    The communicator uses a series of buttons and lights that allow Raspberry Pi and VEX to communicate

    “It works quite well,” Chloe says. “There is a YouTube video that shows not only how it works, but a couple examples of seedling growth. I had to connect the VEX IQ microcontroller to a constant DC power supply. Sometimes, one in 40 waterings, one of the motors would seize up and my apparatus would commit egregious overwatering. This was uncommon, however.”

    Chloe isn’t resting on her laurels either: “I want to learn more about networking. My goal is to create an easy-to-use interface to be able to manipulate the apparatus from distant sites. I also used the Raspberry Pi VEX IQ Communicator to create an automatic pet feeder and water bowl filler. There is a short video on the same YouTube channel of this device. The pet carer is in a more nascent stage of development.”

  • Discover 50 hacks & hints in The MagPi #105

    Discover 50 hacks & hints in The MagPi #105

    Reading Time: 2 minutes

    Get more from your Raspberry Pi with this excellent collection of tips

    50 Hacks & Hints

    The whole team worked together on this one. We sat down and threw all our favourite secrets into the ring, and in doing so we all learned something new from each other. Result! Now it’s your turn to learn the hidden secrets that make using Raspberry Pi a joy.

    Dede Mitchell's fantastic chalkboard mixes traditional chalk drawings with smart software

    Build an LCD Chalkboard

    Dede Mitchell’s day job is as an intra-office administrator and logistics expert at Operation Restoration. Under her guise of the Maladjusted Milliner, she runs Operation Restoration –  a non-profit organisation that provides assistance to women and girls affected by incarceration. Check out her amazing story and this great LCD Chalkboard build.

    Recreating this complex Star Wars arcade machine was no small challenge

    3/4 Star Wars Arcade Cabinet

    James Milroy built the arcade cabinet that he played back in the 1980s. And we think he did an amazing job. The Star Wars Arcade cabinet has a lot of detail, a replica analogue controller yoke, and superb styling.

    KG explains how to assemble your parts and start building an arcade machine

    Build an arcade machine: Assemble your cabinet

    If you want to build your own arcade machine then KG has you covered. Last month our arcade expert ran a list of components that you’ll need to make an arcade machine. This month KG starts to put the bits together and switches on the cabinet. 

    Check out these incredible builds for #MonthOfMaking 2021

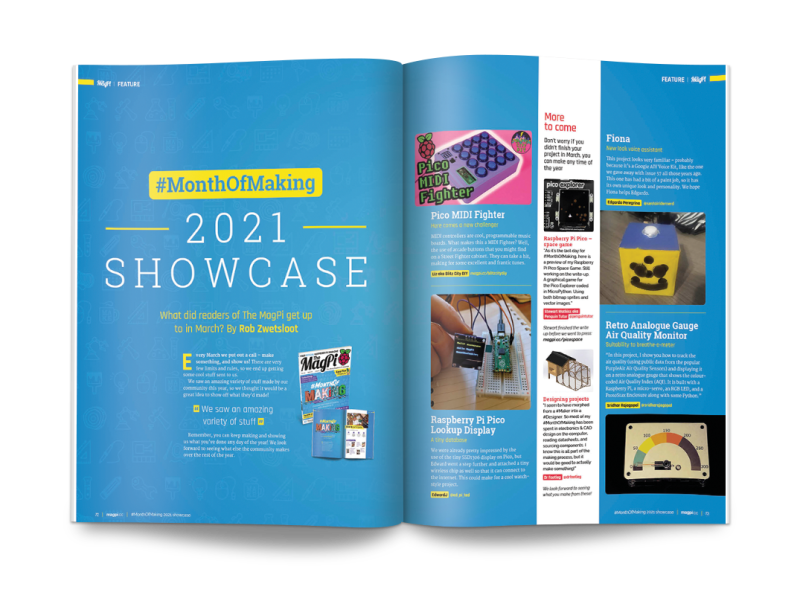
    #MonthOfMaking 2021 Showcase

    We saw an amazing variety of stuff made by our community this year, so we thought it would be a great idea to show off what you all made. Remember, you can keep making and showing us what you’ve done any day of the year. We look forward to seeing what else the community makes over the rest of the year. 

    Pick up your copy of The MagPi magazine #105

    The MagPi magazine is available as a free digital download, or you can purchase a print edition from our Raspberry Pi Press store.

  • Win one of two 4.01″ ACeP 7-colour e-Paper display HATS!

    Win one of two 4.01″ ACeP 7-colour e-Paper display HATS!

    Reading Time: < 1 minute

    Subscribe

  • 10 Amazing: Maker Tools

    10 Amazing: Maker Tools

    Reading Time: 4 minutes

    Helping hands

    Handy holders

    Handy holders

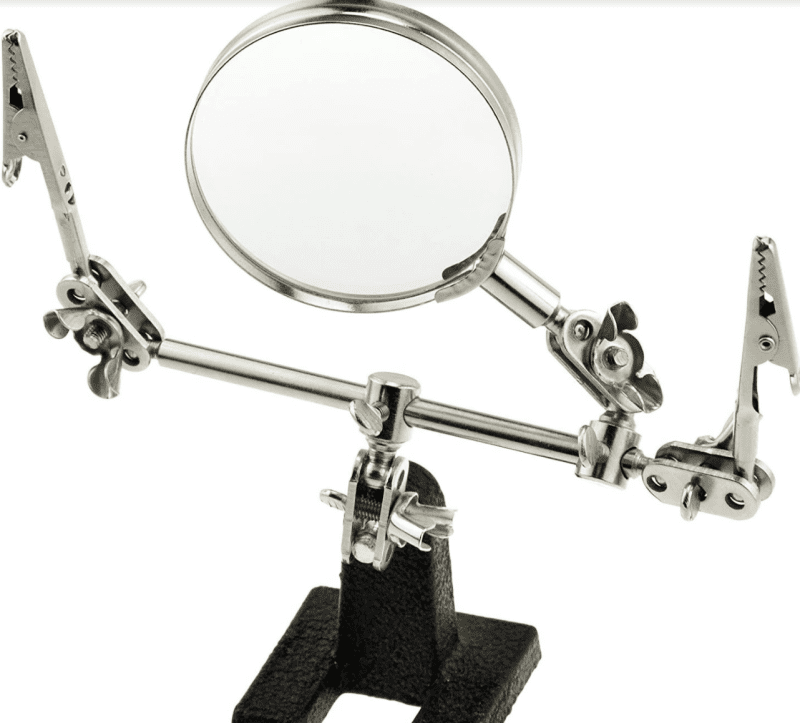
    Due to various reasons, humans have two hands. Sometimes less. Balancing wires and solder and a (very hot) soldering iron, or holding a small piece steady painting, can be tricky even for the most dextrous. With movable clamps and a magnifying glass, helping hands make it easier for everyone.

    3D printer

    Print your dreams

    3D printer

    A quite expensive item for sure, but one that has endless possibilities. Thanks to online modelling communities and easy access to basic CAD software, you can quickly prototype and test designs for projects, or create that part you can’t get elsewhere.

    Wire stripper

    No knife required

    Wire stripper

    Snipping wires to length is easy; removing the plastic insulation to reveal the actual conductive wire underneath can be a little tricky. We recommend a good wire stripper, especially when you get past the breadboard prototyping phase.

    Glue gun

    Hot fusion

    Glue gun

    Easy to apply, quick to set, strong, and insulating? Glue guns are a maker’s best friend. Always make sure to get one with at least two settings, though. And don’t rely on just one for all your gluing needs. You can even get sealing wax sticks for them, as well.

    Cutting mat

    Precision slicing

    Cutting mat

    While you can cut on the surface of a wooden workbench in a pinch (and with permission), a cutting mat is definitely the preferred method. It won’t dull the blade as much, they self-heal, and they usually come with angles and measuring tools built onto the surface so you can have a better visual guide.

    Rotary multi-tool

    Spinning trimmer

    Rotary multi-tool

    Otherwise known as a Dremel, which is a brand of tool maker that makes popular rotary tools, they’re great for small projects. You can sand, buff, cut, drill, shave, and more by switching out the different tool heads. It’s great for makers as they’re small and cover a lot of bases.

    Directional light

    See your project

    Directional light

    It’s easy to find little USB LED lights on a goose neck these days. They’re bright, low energy, can be clamped to a table, and moved around however you wish. For finer work, good illumination is key, and they’re a bit more flexible than a head torch.

    Needle-nose pliers

    Grab small things

    Needle-nose pliers

    You never realise just how much you need a slim pair of pliers until you really need them and all you have are tweezers or heavy-duty pliers bigger than a Raspberry Pi. Of course, a good set of tweezers and regular-sized pliers are great to have as well.

    Soldering iron

    Create circuits

    Soldering iron

    An essential tool for electronics, a soldering iron is basically a very hot metal pen that allows you to melt specially treated, soft metal that allows for wires and circuits to be connected and have electricity run through them. Make sure to tin the tip before using, though: magpi.cc/tin.

    Clamps/vice

    Steady on

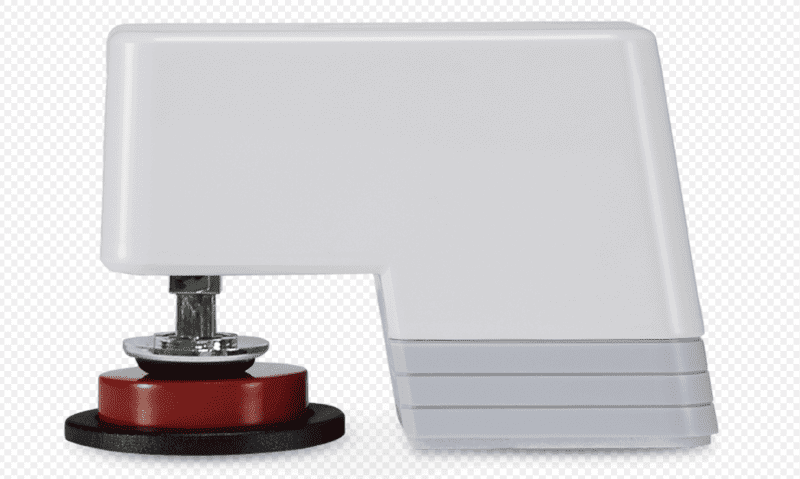
    Vital for a lot of wood- and metalwork – even some painting! A clamp can keep your projects sturdy so that drilling or cutting won’t go awry, or make sure glue will dry firmly, or even make sure metal is aligned for welding. Got a miniature with a base? You can lightly clamp it in one to keep it steady too.

    Clamps/vice

  • Design a high-tech home office

    Design a high-tech home office

    Reading Time: 2 minutes

    In The MagPi issue 103 we addressed one of the burning issues of the day: how do I let my family know I’m on a Zoom call? We invented a ‘digital do-not-disturb sign’ that can be remotely controlled by some buttons or an event detected by Home Assistant. Display any message you want right outside your door and avoid those moments that could send you viral on social media.

    If you’re working at home and have your own working space, particles and gases (now, now) can build up without proper ventilation. Consider adding a Pimoroni Enviro+ to your arsenal. This HAT with optional add-on particle sensor monitors dust, temperature, and other concerns, sending the data straight into Home Assistant.

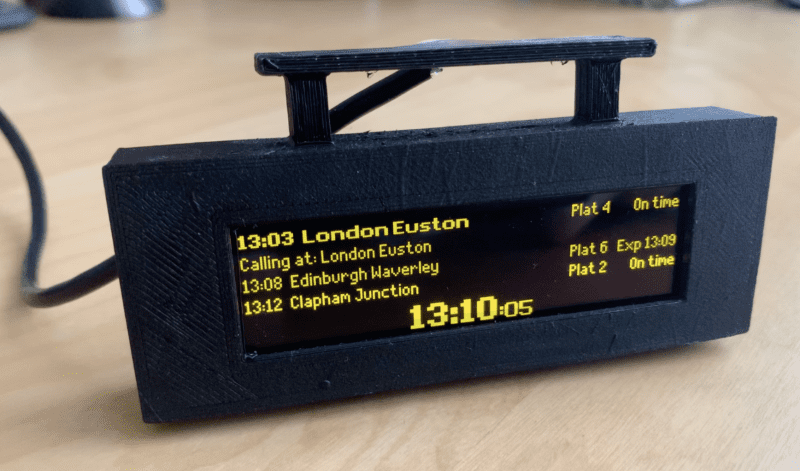
     This miniature railway sign can make sure you are on time

    Home automation isn’t just about switching lights on and off. There’s a wealth of information provided free-of-charge from the internet that you can use to affect your environment. A great example is the data that powers all the railway station displays in the UK. This is freely available and this great project by Chris Crocker-White allows you to make your own home display.

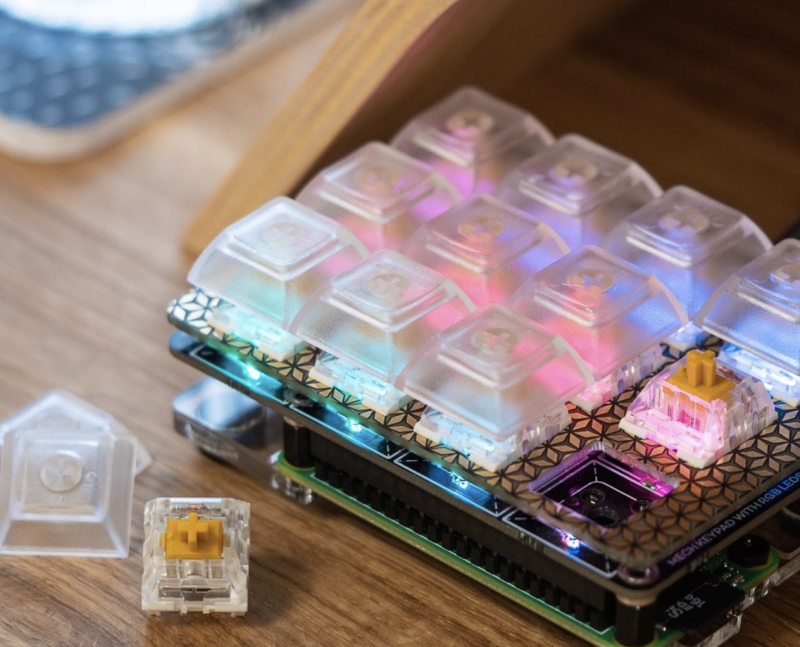
    Our newest member of the Raspberry Pi family, Pico, can act as a keyboard over USB. Pairing one with Pimoroni’s RGB Keypad Base creates an inexpensive macro keyboard. Create shortcuts for your common operations and program them into your Pico to speed up your day. No more fighting with the mouse to reach ‘Leave Meeting’.

  • Automate your kitchen

    Automate your kitchen

    Reading Time: 2 minutes

    Wire up a coffee machine

    If you really want that fresh coffee in the morning to be just right, how about automating your coffee machine? If your machine can start when power is applied, then a simple WiFi power switch will suffice. There are some ‘smart’ coffee machines available such as Smarter Coffee, but another option is to add a button-presser such as MicroBot Push which can be controlled with HA.

    Drink smarter

    Discover sous-vide

    This amazing technique cooks plastic-wrapped food in a water bath using precise temperatures. The result is tender and flavoursome meals that cook over hours not minutes. Sous-vides are typically expensive, but you can build your own and monitor it using HA, such as this project. As ever, always be careful mixing electricity and water.

    Create tender and flavoursome meals with sous-vide

    Install smart meters

    The kitchen is the heart of the home, so it pays to keep an eye on how much blood it’s pumping. As smart meters roll out, it’s good to know that many models such as Honeywell’s AS302P advertise their usage to supplied displays. With a bit of help, these transmissions can be captured by HA so you can create your own dashboards or set alarms when the cooker gets too greedy. Take a look at this tutorial by Erik Schrama.

    Keep an eye on power consumption

    Get smart about safety

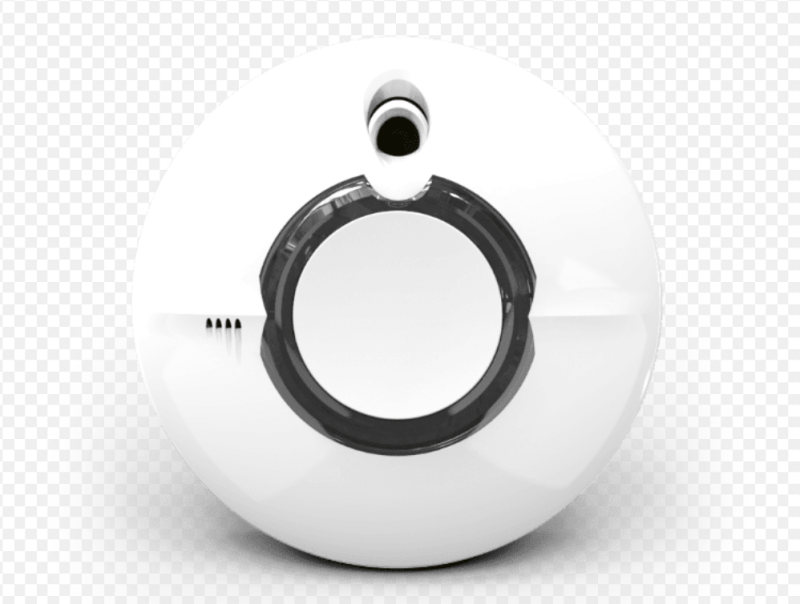
    After lighting, a logical first step for the home automation fan is monitoring of the environment. Smart smoke alarms and carbon monoxide detectors are available, but you may be interested in making open-source versions so you can trigger alerts when things don’t seem right. The Pi Hut sells an MQ-135 Gas Sensor which is great for experimenting with home-built smoke detectors. Please note that no DIY smart device is ever any replacement for a proper certified smoke alarm, such as those made by FireAngel.

    Smart smoke alarms and carbon monoxide detectors

  • Cam Chess

    Cam Chess

    Reading Time: 3 minutes

    Playing against an on-screen computer opponent just isn’t the same, says Geoff. “It loses the social aspect.” Furthermore, it takes time to adapt from on-screen diagrams to playing with a physical board and pieces – something he imagines more people doing now that the TV show has given chess a moment in the spotlight. “The ideal practice is to train with the same board and pieces as you would use at the local club,” he says, but it’s prohibitively expensive for schools and many clubs, which is where his CamChess project fits in. “I wanted to build a system that would work with standard plastic pieces on a standard vinyl board,” and also record the moves.

    A canny move

    CamChess combines the best elements of an electronic board with the ability to record moves, but costs only around £50 ($70) excluding Raspberry Pi 4.

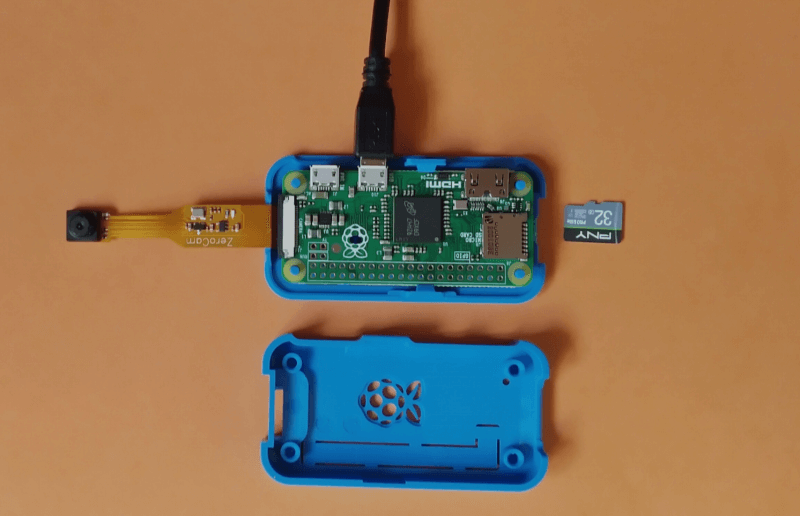
     A Raspberry Pi Zero with ZeroCam is fixed to the ceiling above

    After retiring 20 years ago from his job as a consultant for large-scale computing systems, Geoff has racked up experience of building small-scale projects. Despite a 30-year break from it, he can still write code. “Python was a bit of a culture shock,” he reveals, “but I soon adapted.” Geoff made full use of standard Python modules, along with OpenCV and NumPy for image processing, and Stockfish as the chess engine.

    A Raspberry Pi Zero with an attached ZeroCam worked well for capturing images of the chess board. Mounting the ZeroCam on a door frame using some sticky tape high above the centre of the chess board helped minimise lens distortion. Raspberry Pi Zero takes pictures on command and sends them back to another computer for analysis. Geoff used a Raspberry Pi 4 to do this, but says any ‘non-antique’ Linux, Windows, or Mac computer would work.

    Match ready

    Due to congested WiFi channels where he lives, he opted for Ethernet to connect Raspberry Pi 4 and Raspberry Pi Zero and send images using the USB cable that also powers the latter. These images tell the computer the latest chess move that has been made, which Python-chess then replicates on-screen. Having experimented with the image comparison method used by Realtime OpenCV Chess, Geoff thrashed out a method that determines whether each chess square is empty or occupied and whether it’s a white piece or a black piece.

     The ZeroCam picks up moves on the board and displays them on screen

    It was a challenge to get the board to configure itself automatically but Geoff eventually worked out how to do so using standard threshold optimisation techniques. CamChess now only needs to be shown the start position, and works out its internal settings from there. CamChess’s difficulty level can be set to engage the hobbyist player and they can make moves for both sides until they reach a position that is of interest to them.

    While he’s largely happy with the existing build, Geoff hopes others will make their own versions of CamChess and let him know how they get on. We did ask him about his own next move, but he’s keeping mum. 

  • Giant Hornet Detector

    Giant Hornet Detector

    Reading Time: 3 minutes

    Sean has been keeping bees for around seven years and began developing a small photo booth – the HoneyBee Booth – that would use artificial intelligence to detect and count Varroa mites, and notify him of the findings. He adapted it to detect other species on hearing about the murder hornets’ arrival.

    Geolocation data of any affected hives is sent to a Microsoft Azure IoT Central dashboard. Washington’s Department of Agriculture can use this in their efforts to eradicate the invasive species. “Using Raspberry Pi 3, Arducam [camera], small motion sensor, and 3D-printable case, I’m able to classify an image in about two seconds,” claims Sean. However, keen to make this an easily and cheaply replicable project, he suggests a $5 Raspberry Pi Zero will work almost as well, with the caveat that identification takes closer to a minute.

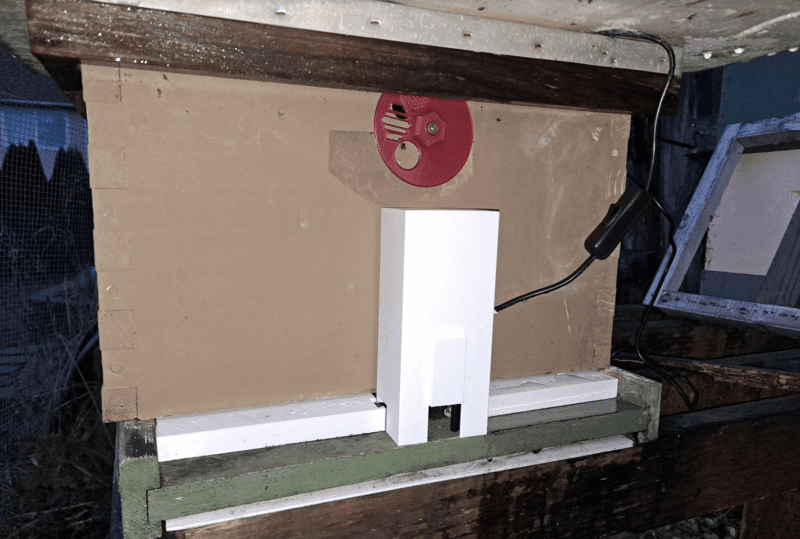
    The booth can be fitted with a weather protection cover

    Sharing the resulting images poses a problem, since many beehives are remotely located, but Sean is hoping LoRaWAN (Long Range Wide Area Network) will help. LoRaWAN is designed to work with low-power devices over vast areas and will work well in locations not covered by 3G or wireless LAN. “All the image classification takes place on Raspberry Pi, leaving only the need to transmit telemetry data, which should fit nicely within packet size limitations that exist with LoRaWAN.”

    Track and trace

    Sean is keen to ensure others can replicate his project, envisaging “a non-tech savvy beekeeper” putting one together and watching for Asian giant hornets. Cost, open-source code, and a simple build were therefore priorities. “I love the idea of a community contributing to a large pool of images that can be used to further train and improve the learning models,” he says. It also means Raspberry Pi Zero can be used, keeping all-important costs low.

    An as-yet-unresolved issue is how to photograph booth visitors, such as this earwig, from the bottom as well as the top to aid identification

    He sketched and 3D-printed his own basic, but weatherproof, case as the camera booth and to house Raspberry Pi. There’s a hole on the top for the LED, while the camera and wires for the motion sensor were inserted via the booth door and attached at the end. Sean enabled SSH and I2C using the command prompt (see the setup instructions) so Raspberry Pi can be accessed remotely. A funnel added at the end helps ensure insects are hustled into the booth to be photographed. Getting the camera focus right and clear images of booth visitors was time-consuming but, as Sean’s enthusiasm shows, the results have proved rewarding.

    Exciting sightings

    Sean is excited about the possibilities of the project based around a camera, motion sensor, and a learning model. “Maybe you want to spot an incoming locust migration, get up-close pictures of a very rare insect species, [or] spot elephants on a train track and alert the conductor or train station to stop?” he enthuses. “I can’t wait to see what people come up with!”

  • Create a cool kids room

    Create a cool kids room

    Reading Time: 2 minutes

    Set up a sibling alarm

    Brothers! Sisters! Boo! If your sibling is driving you up the wall by messing with your stuff, then catch them in the act. Using a Raspberry Pi HQ Camera and a cheap magnetic door sensor, you can take a photo or record video whenever the door opens, then send it straight to your phone. Busted! Take a look at this Room Guard project: magpi.cc/roomguardproject.

    Brothers! Sisters! Boo!

    Fit a dinner klaxon

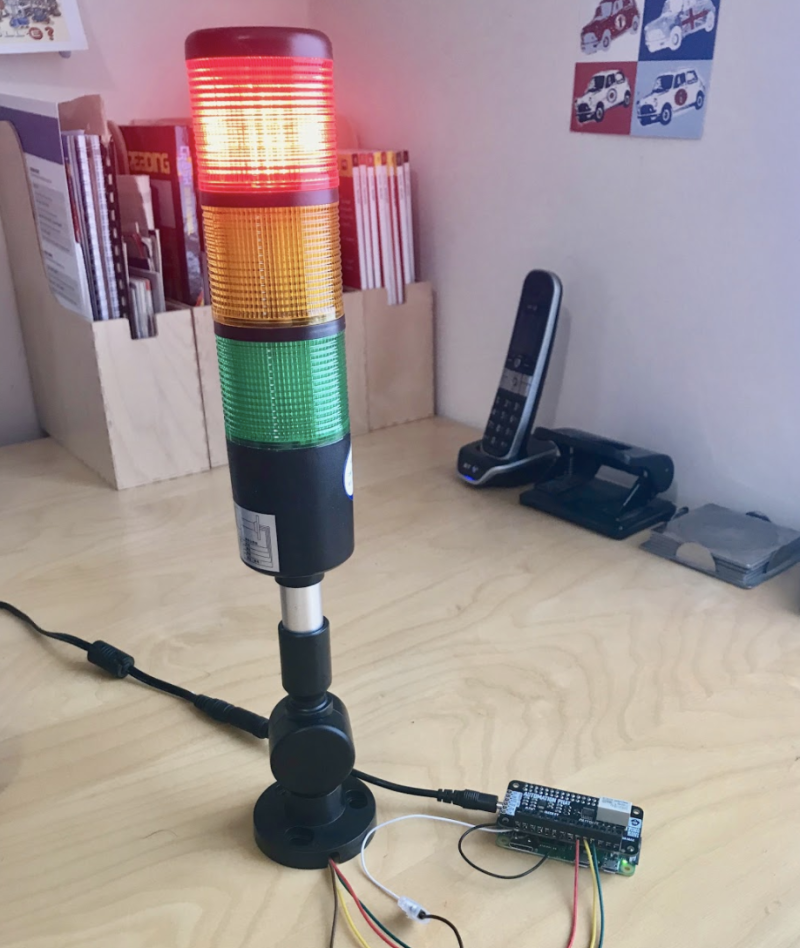
    A really popular project from The MagPi issue 73 (magpi.cc/73), the teenage klaxon is the ultimate solution to yelling up the stairs in frustration at a headphone-clamped offspring. Simply use the web interface on your phone to set the candle light to green, amber, or ‘right, now you’re really in trouble’.

    DINNER TIME!

    Listen to internet radio

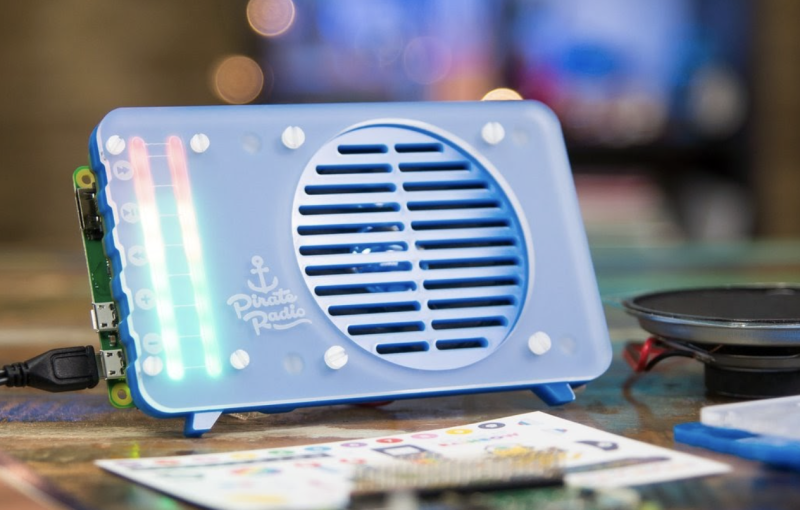
    No kid’s sanctuary is complete without some sounds. Why not add to your home audio system (see ‘Living room’) with another device or build an internet radio, capable of reaching thousands of stations across the globe. We really like Pimoroni’s Pirate Radio (magpi.cc/pirateradio) as a great starter kit.

    Sanctuary sounds

    Fit some fun lighting

    If you really want to make an impression on your friends, get some LED strips and power them with a Raspberry Pi. You can start with single-colour 5050-type LED strips or move up to individually controllable NeoPixel sets (magpi.cc/neopixels). A project like this can just build and build; how about adding a microphone to create dancing lights? The Pi Hut has a great NeoPixels tutorial (magpi.cc/usingneopixels).

    Rainbow steps

  • Liven up your living room

    Liven up your living room

    Reading Time: 2 minutes

    Install smart lighting

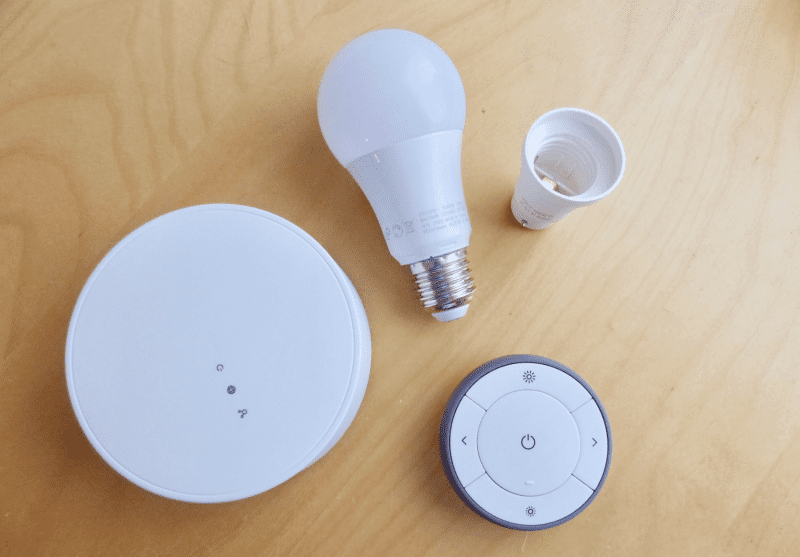
    Most HA projects start with lighting. Being able to switch lights on throughout the house, wherever you are, or have them react to different sensors or events is a great way to get started in this field. There are a lot of options and the prices have plummeted. Check out ikea’s Trådfri range or the popular Philips Hue system.

    Smart lighting options

    Build a home cinema

    How about the ability to convert your living room into a cinema at the click of a button? Logitech’s Harmony Hub allows you to control your TV, amp, and game consoles from your phone or Home Assistant. You can create complex scripts and also set lighting or lower blinds. Popcorn optional.

     Build a home cinema

    Set up a smart sound system

    If you’re after some sounds, check out our recent tutorials on building the ultimate music server using Raspberry Pi and Mopidy. Create your own Sonos-rivalling system and have synced music throughout the home. A Raspberry Pi Zero with an inexpensive DAC (digital-to-analogue converter) HAT will give you excellent audio reproduction for a fraction of the commercial price. See issues 96, 97 & 98.

     DAC (digital-to-analogue converter) HAT

    Control your central heating

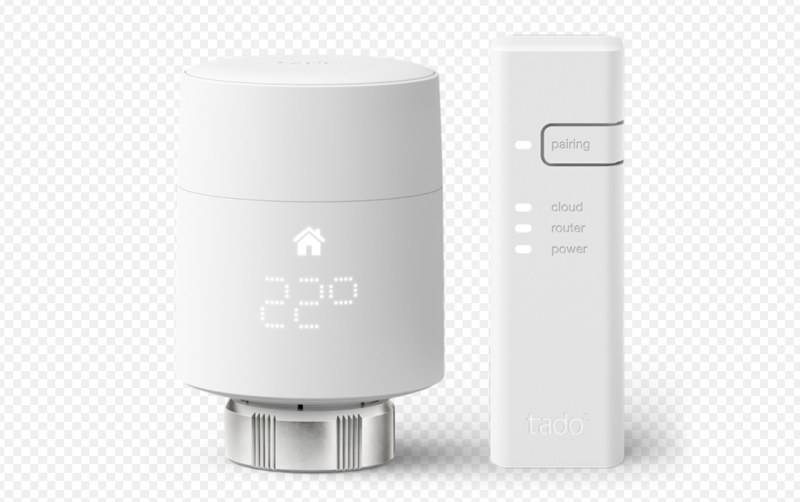
    Need to be cosy? Need to control exactly how cosy you are? Many solutions exist for remote control of central heating. We particularly like the motorised thermostats that can be quickly added to radiators as these give you precise control over every room and HA can use individual temperature sensors to get every room just right.

    Motorised thermostats

    Build a magic mirror

    A magic mirror places a screen behind a semi-transparent sheet. Once framed, it gives the impression of text floating in the air that can display your calendar, the weather, or anything else. To find out how to make one, pick up a copy of The MagPi issue 90.

    MagPi 90

  • Haptic navigation

    Haptic navigation

    Reading Time: 2 minutes

    There are other ways to relay the information, though, such as how Sukriti has made use of touch: “This open-source solution uses a Raspberry Pi Zero W and a mobile phone to relay turn-by-turn instructions with haptic feedback, more commonly known as vibrations, over an SSH connection with the mobile device.”

    A running thread

    Sukriti tells us that around 466 million people worldwide have disabling hearing loss, 34 million of which are children. The WHO believes that this number will double in the next 30 years.

    You can rest it on your person while driving to get directions

    “Having worked in the distracted navigation space at a Tel Aviv startup in 2014, I was acutely aware of the limitations of voice navigation for those with hearing impairments,” she says. “My interest in the space was reignited during a conversation with Pete Cossaboon, who runs obstacle races as a blind athlete. I learned that he wanted to be more independent in navigating the space he is in. Both of these problems could potentially be solved with a haptics-based solution, and this is the first version of it.”

    Using Raspberry Pi made sense in this context due to price and small size, and Sukriti found it easier to work with as well. “For me as a developer, programming on Raspberry Pi is intuitive, especially since I was looking for an interface between a mobile phone and a physical device.”

    Touch and go

    The system currently works using MapBox, a third-party mapping and navigation service, which provides the directions that are then translated to vibrations on the device. It can be extended to other frameworks with an API that allows for HTTP requests to be sent to Raspberry Pi, such as iOS and mobile web.

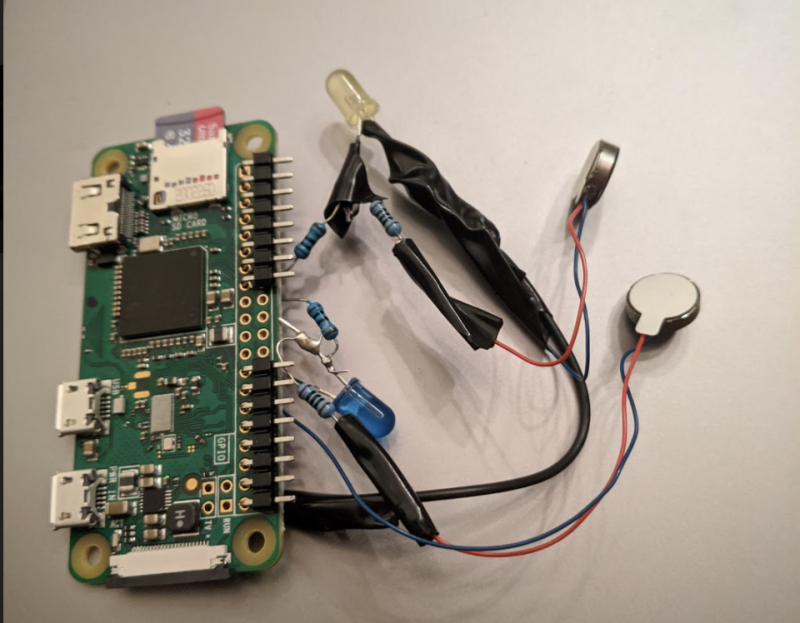
    The basic electronics are quite simple

    “It works really well in terms of navigation … for people with hearing impairments,” Sukriti reveals. “I can see its applications in VR navigation as well. The solution would be even more useful for visually impaired users with proximity sensors to help avoid obstacles, in addition to navigation outdoors.”

    Work is ongoing with the project, with Sukriti wanting to add more haptic sensors for different navigation commands, proximity sensors, PWM output for varying intensity, and more.

    “I have tested the prototype with a couple of people, and the feedback has been really positive,” she says. “I have personally been using it on runs, so my music is not interrupted if I go on unfamiliar paths.”

  • The smart crust-cutting robot

    The smart crust-cutting robot

    Reading Time: 3 minutes

    For Andrew DeGonge, the latter question has a clear cut answer: crusts are to be chopped. Indeed, he’s so determined that the sides of bread are banished, he’s used his loaf and created an automatic guillotine-like device to do the hard work for him.

    “Crust in general isn’t my main problem. Cheap bagged bread is,” he tells The MagPi. “It’s all so mushy and the crust is even more of a burnt soggy mush. So, like any reasonable adult I prefer bagged bread without it to make it a bit more tolerable, although I do love the crust on a good sourdough or Italian loaf.”

    No crumby thought

    The idea for a crust cutter rolled into his head when he was considering building a robot with computer vision. “I wanted it to be original so I thought to myself, ’what’s a problem many people have that doesn’t have an automated solution?,” he says. “I realised there was no way to automatically cut the crust off sandwiches so decided to create one, just because I can.”

    Although a Raspberry Pi 4 is used for the project, Andrew says a Raspberry Pi Zero would have been more than enough to handle the task

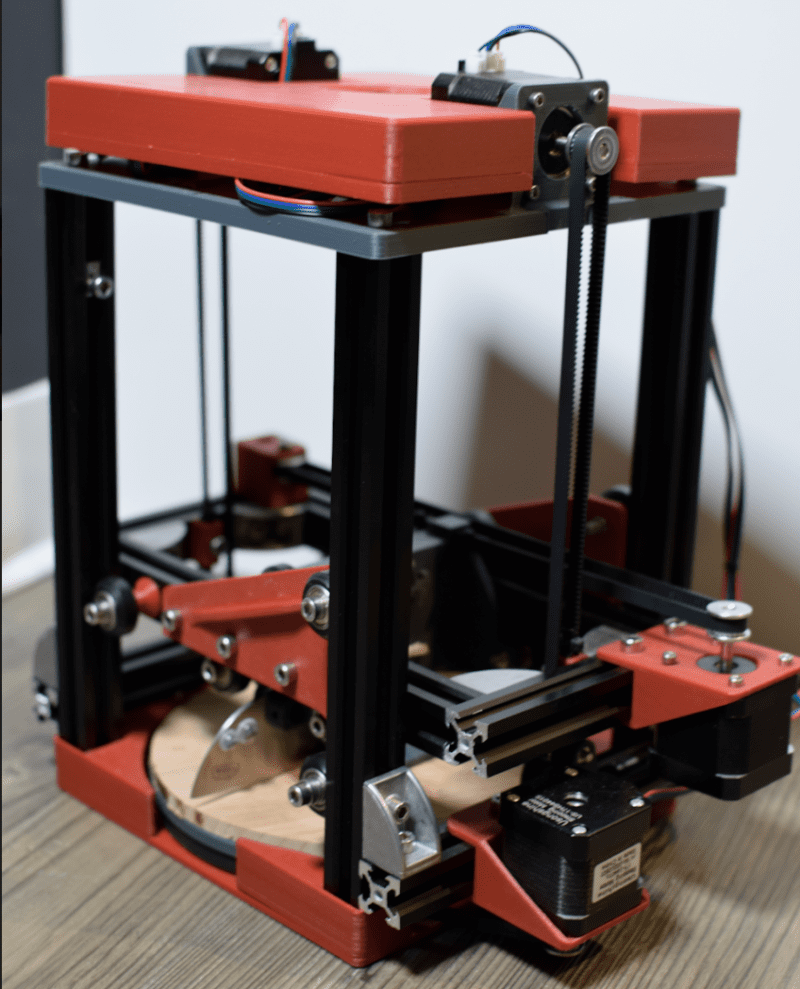
    Andrew spent ten hours creating a CAD drawing of the project, ensuring enough room for the necessary motors and knife. “I went with stepper motors for the motion control and used V-slot extrusions and wheeled gantries for linear motion,” he explains.

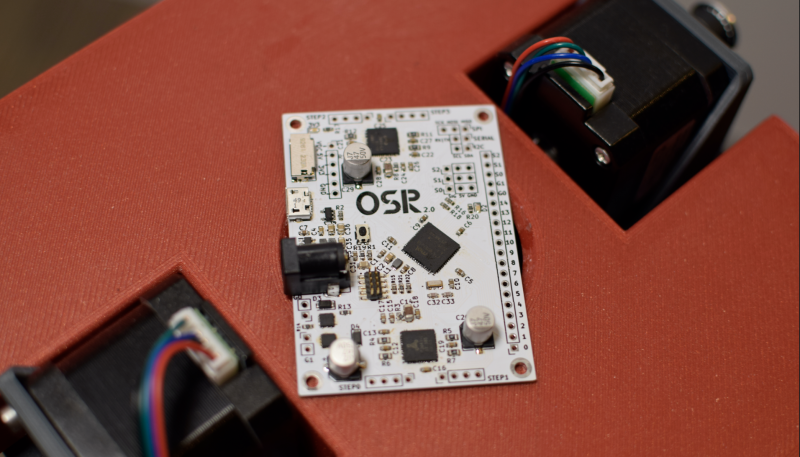
    He also built a custom four-axis control board (“the OSR, which controls all of the stepper motors”) and he used a Raspberry Pi 4 paired with a Camera Module V2. “Raspberry Pi is the easiest and cheapest way I know to integrate computer vision into my projects,” Andrew says.

    As such, with the components sitting within a 3D-printed frame, Andrew envisaged placing a sandwich on a rotating cutting board before having the camera take images for analysis using OpenCV. “I spent 30 to 40 hours on the code, which included all the OSR, computer vision, and Python segments,” he reveals. It was time to get chopping.

    Sticking the knife in

    By comparing the current image frame to previous ones, the device determines the shape and size of the bread. “I then feed the rotation of the rectangle to the stepper controlling the turntable cutting area to align the sandwich with my knife,” Andrew says. “Next, the knife moves horizontally in the X-axis to a position that is a small offset in from the edge of the bread, and finally the Z-stage comes down and makes a cut. Then it’s a matter of doing three more rotations and three more cuts to remove the rest of the crust.”

    Andrew’s own four-axis control board (dubbed the OSR control board) communicates with Raspberry Pi via USB and controls all the stepper motors

    The main problem was figuring how to convert the camera’s pixel measurements into real-world measurements. “I ended up uniformly converting the measurements because cutting food doesn’t need to have sub-millimetre accuracy,” he says. “I ran into some motor control issues which ended up being bugs in my stepper control loops, but it all works pretty well.”

    Now Andrew doesn’t worry about crusts, especially now he’s using a sharper knife. “People criticised the bot for not cutting well enough, so I redesigned the gantry to support a sharper knife while using a pivoting knife mechanism and adding a food-holding spring-loaded platform. It’s now a seriously capable bot that cuts bread very cleanly and accurately. It’s cool, if not a little scary.”

  • Review: Pico Explorer Base

    Review: Pico Explorer Base

    Reading Time: 3 minutes

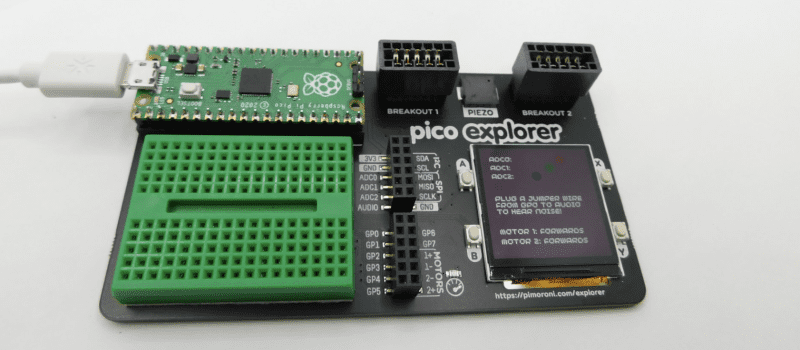
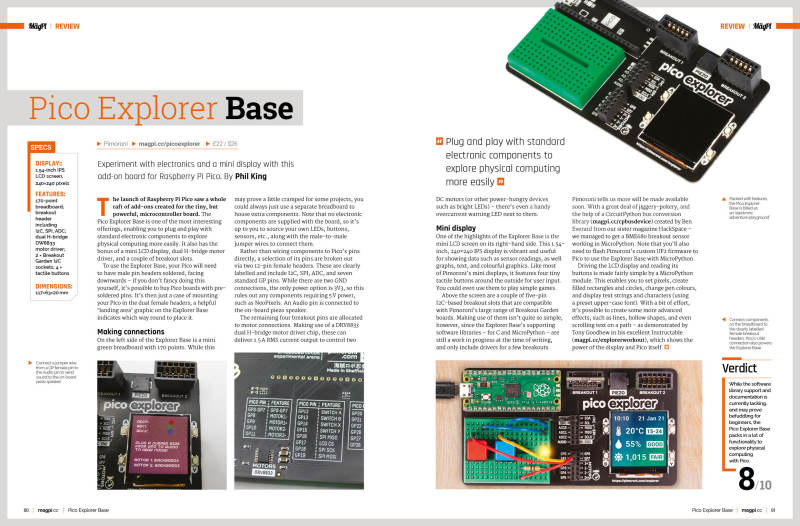
    To use the Explorer Base, your Pico will need to have male pin headers soldered, facing downwards – if you don’t fancy doing this yourself, it’s possible to buy Pico boards with pre-soldered pins. It’s then just a case of mounting your Pico in the dual female headers; a helpful ‘landing area’ graphic on the Explorer Base indicates which way round to place it.

    Making connections

    On the left side of the Explorer Base is a mini green breadboard with 170 points. While this may prove a little cramped for some projects, you could always just use a separate breadboard to house extra components. Note that no electronic components are supplied with the board, so it’s up to you to source your own LEDs, buttons, sensors, etc., along with the male-to-male jumper wires to connect them.

    Packed with features, the Pico Explorer Base is billed as an ‘electronic adventure playground’

    Rather than wiring components to Pico’s pins directly, a selection of its pins are broken out via two 12-pin female headers. These are clearly labelled and include I2C, SPI, ADC, and seven standard GP pins. While there are two GND connections, the only power option is 3V3, so this rules out any components requiring 5V power, such as NeoPixels. An Audio pin is connected to the on-board piezo speaker.

    The remaining four breakout pins are allocated to motor connections. Making use of a DRV8833 dual H-bridge motor driver chip, these can deliver 1.5A RMS current output to control two DC motors (or other power-hungry devices such as bright LEDs) – there’s even a handy overcurrent warning LED next to them. 

    Mini display

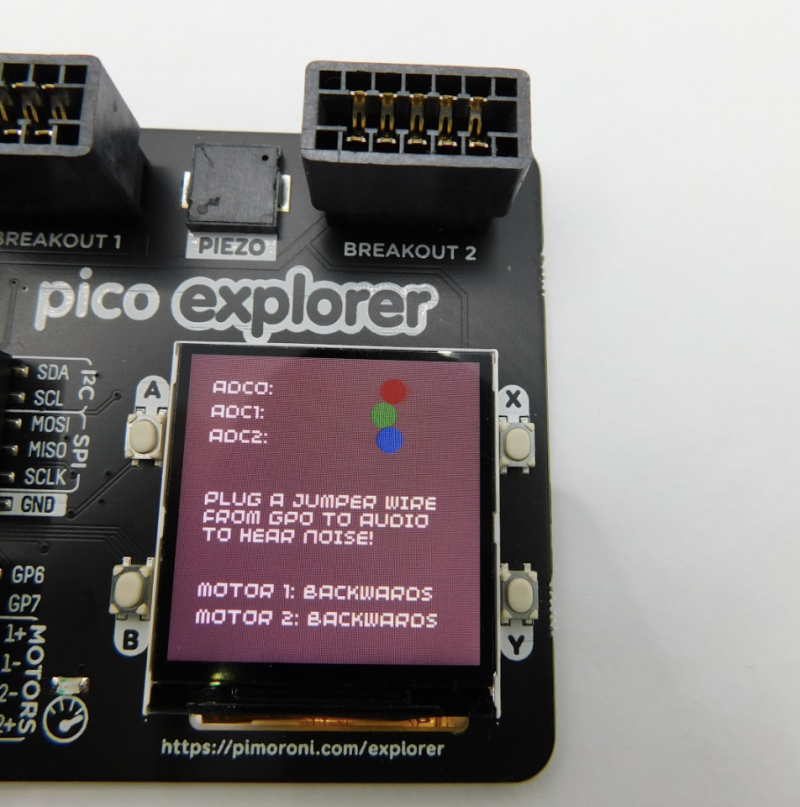
    One of the highlights of the Explorer Base is the mini LCD screen found on its right-hand side. This 1.54-inch, 240×240 IPS display is vibrant and useful for showing data such as sensor readings, as well graphs, text, and colourful graphics. Like most of Pimoroni’s mini displays, it also features four tiny tactile buttons around the outside for user input. You could even use them to play simple games.

    Connect a jumper wire from a GP female pin to the Audio pin to send sound to the on-board piezo speaker

    Above the screen are a couple of five-pin I2C-based breakout slots that are compatible with Pimoroni’s large range of Breakout Garden boards. Making use of them isn’t so simple, however, since the Explorer Base’s supporting software libraries – for C and MicroPython – are still very much a work in progress at the time of writing, and only include drivers for four breakouts. With a great deal of jiggery-pokery, and the help of a CircuitPython bus conversion library created by Ben Everard from our sister magazine HackSpace – we managed to get a BME680 breakout sensor working in MicroPython. Note that you’ll also need to flash Pimoroni’s custom UF2 firmware to Pico to use the Explorer Base with MicroPython.

    Driving the LCD display and reading its buttons is made fairly simple by a MicroPython module. This enables you to set pixels, create filled rectangles and circles, change pen colours, and display text strings and characters (using a preset upper-case font). With a bit of effort, it’s possible to create some more advanced effects, such as lines, hollow shapes, and even scrolling text on a path – as demonstrated by Tony Goodhew in his excellent Instructable, which shows the power of the display and Pico itself.

  • POV Display

    POV Display

    Reading Time: 3 minutes

    By rotating a strip of LEDs at high speed and syncing their blinking patterns, it’s possible to create the illusion of a still or moving image. This is just what Japan-based family team of makers HomeMadeGarbage have done for their POV Display, even spinning a Raspberry Pi Pico around with the LED strips.

    Power of PIO

    The makers tell us that, after creating a similar project using Sony’s considerably more expensive Spresense board, they were inspired to try it with Pico, as they were “very surprised at the parallel high-speed operation of PIO.” The latter is the unique Programmable Input/Output feature of Pico’s RP2040 chip that enables the use of custom communication protocols in addition to the built-in I2C and SPI. This offers a faster way of outputting bit-banged data (even video) to non-standard devices with a deeper level of control, without tying up the main processor.

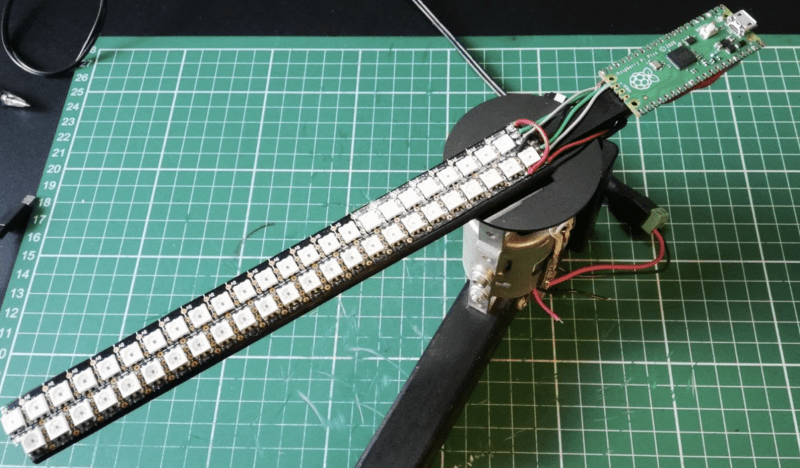
    Mounted on the other end of the rotating arm, Raspberry Pi Pico controls the LEDs

    The POV Display uses two different PIO state machines (from the eight available on the chip) to control, in parallel, a pair of super-bright 24-LED APA102 (aka DotStar) strips on its rotating arm. The arm is spun at high speed by a Mabuchi RS-540SH motor, as commonly used in remote-control cars.

    Each rotation is detected using a reflectance sensor on the arm and a small white marker underneath. HomeMadeGarbage say that they improved detection reliability by inserting “a filter and a Schmitt trigger between the reflectance sensor and Pico to prevent chattering.”

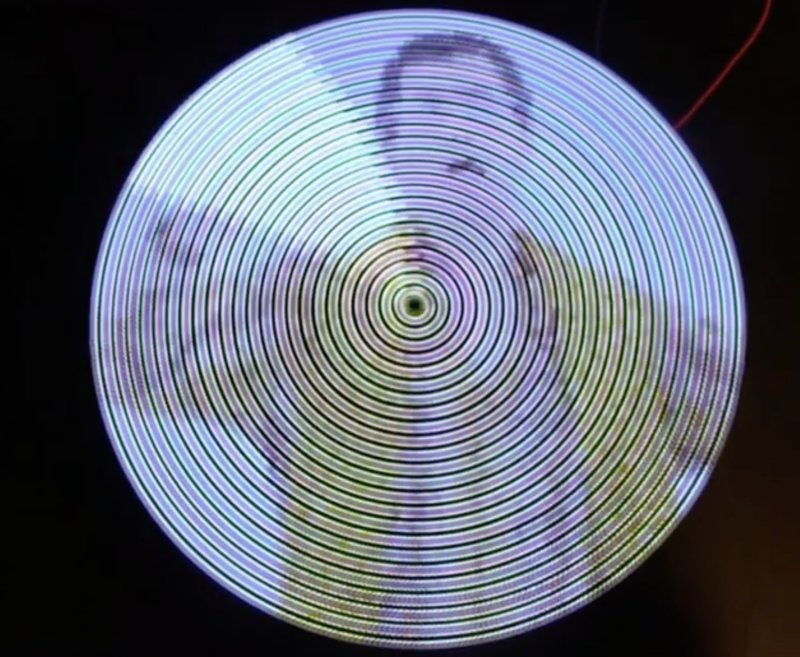
     When the arm is spun rapidly, the LEDs are blinked rapidly in a pattern

    In the software, written in C, the time taken for one rotation is divided by 1000 to sync the blinking of LED patterns stored in a graphics array. “In order to leave a beautiful afterimage, a speed of ten revolutions or more per second is required,” reveal HomeMadeGarbage. 

    Discovering that “the I/O of Raspberry Pi Pico can run very fast”, they’ve managed to spin the arm at up to 960rpm while displaying an image at 1000 frames per rotation.

    Spinning around

    With everything, including Raspberry Pi Pico, whizzing around at high speed, you may well be wondering how it’s powered without quickly causing a tangle of wires. The solution is the use of a wireless charging module, one of whose circular coils sits on top of the motor, the other in the underside of the arm centre. “5V is supplied to the transmitting side of the wireless charging module, and the receiving side receives the voltage, [which] drives Pico, sensor, and LEDs.”

    After posting a video of the POV Display in action, HomeMadeGarbage found that people were “surprised at the high-speed operation.” They now plan to make an improved version with a narrower-pitch LED bar. Also on the cards is a 3D POV Display using Pico – we can’t wait to see that!

  • Automated camera-based drone landing system

    Automated camera-based drone landing system

    Reading Time: 3 minutes

    To do this, Chinthaka has been leading a team in using a standard radio-controlled quadrocopter drone fitted with a Raspberry Pi 3B+  and a Camera Module. They’ve worked on an automatic landing system, allowing the drone to be brought down to the ground without mishap.

    “Automatic landing is a kind of automatic flight towards a specific landing spot and to achieve this with a drone it must find the landing spot itself,” Chinthaka explains. “I believe that landing spots can be recognised by processing the images from an on-drone camera, but this image processing needs to be implemented in real-time, generally less than 15 milliseconds.”

    Be snappy

    It’s this need for fast on-board processing that led Chinthaka to consider using Raspberry Pi. “The idea is that flight control is conducted as soon as the images are processed, so we not only needed a good, lightweight camera but a lightweight on-drone computer too,” he reveals. “Raspberry Pi 3B+ is obviously lightweight and it can be easily implemented within a drone. Raspberry Pi 4 can be used for this too.”

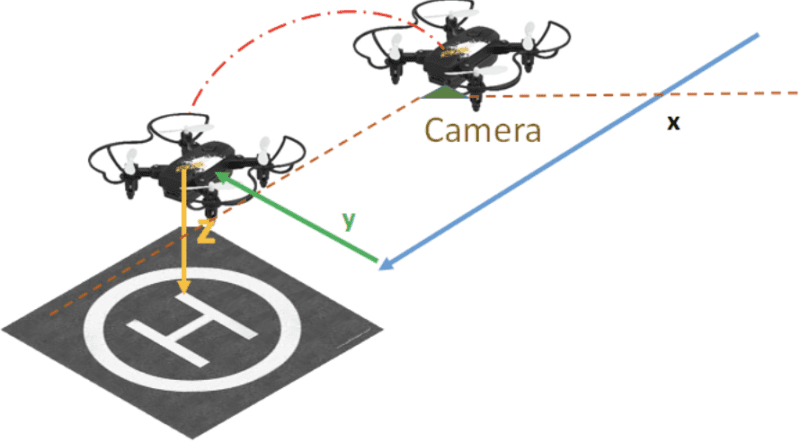
    The drone looks for the landing pad by monitoring captured images before moving to the landing spot, hovering, and determining that it’s safe to land

    The camera was chosen because it has a wide angle. “It’s wider than the other cameras that are compatible with Raspberry Pi, so it can capture a large area and this capturing ability makes it easy to identify a landing spot,” says Chinthaka. A depth camera was also important. “During the drone landing, the ground object information can be easily recognised with a depth camera rather than a 2D camera.”

    For optimal results, the camera lens is kept horizontal, even when the drone body is not in this position during the flight. “If the lens was not always horizontal, then it would be difficult to smoothly capture the landing spot during flight because of the shaking of the drone,” Chinthaka says. “We made our own lightweight gimbal to keep the camera lens horizontal but a commercially available gimbal may also be used for this task.”

    H marks the spot

    The idea is that the drone looks out for an H-shaped symbol placed on the ground at the landing location. Using software created by the team, the image is processed and converted into physical co-ordinates to generate a horizontal feedback.

    The wide-angle camera can capture a large area to help identify a landing spot

    “Some parts of the software include OpenCV library functions,” says Chinthaka. “We also wrote software for the landing process, but developing the necessary algorithms to detect the landing spot in real-time was the greatest challenge.”

    Even so, the researchers were able to get the image processing time down to three milliseconds. This allows the drone to quickly fly over to the landing spot, hover over it and land vertically, all controlled by Raspberry Pi. “It’s been a big success and we expect it will have a wide number of future uses,” Chinthaka concludes.

  • Interview: Kevin Johnson

    Interview: Kevin Johnson

    Reading Time: 3 minutes

    “So my official title is Club Programs Coordinator,” Kevin tells us. “What that means is I help develop engagement strategies and also implement them to keep our youth programs community (Code Club, CoderDojo, Coolest Projects) in the USA fully immersed in all of the free resources we have. It involves a lot of writing, which I love because my background is in creative writing, so I write monthly newsletters and blogs, I design seasonal competitions for young people to participate in, I try to maintain our presence on social media, and a bunch of other things. I’m truly a wearer of many hats!”

    What did you know about Raspberry Pi before joining?

    Full transparency, I did not know much about Raspberry Pi prior to joining the Foundation because my introduction to tech was mainly focused in Adobe Creative Suite programs like Photoshop, Illustrator, Premier Pro, etc. I was in a multimedia academy (CMMA) in high school, so I dabbled a little bit with coding, but not enough to know about the different hardware out there. My knowledge of Raspberry Pi came when I discovered the job listing and after reading through the Code Club and CoderDojo blogs, I was immediately hooked. To see such a small device have such a large impact on people all over the world, especially people from different socioeconomic backgrounds, I had to have the job. Fast-forward two years and here I am, still loving every minute!

    You’ll see Kevin helping out at just about every event in the US, and some elsewhere in the world!

    What are some of your favourite moments with the Raspberry Pi community?

    I had a blast co-hosting last year’s Coolest Projects USA event that we held in Santa Ana, CA at the Discovery Cube Orange County! I love the energy that young people bring to any space and in that space the energy was at an all-time high. Also, who hasn’t dreamed of being a talk show host?! If you can get on a stage and keep a group of young people entertained and laughing, it’s a great sign that you’re doing alright in life. I have to also mention the few trips our team here in the USA have taken to Cambridge to visit the Foundation headquarters; those have been some of the greatest moments of my life! Being part of a global community, learning about other cultures, connecting with colleagues on a more personal level is just amazing. It means the world to me to work for a global organisation that finds importance in bringing its employees together not just to work, but to also play and have fun.

    Coolest Projects USA is a huge event which Kevin not only co-hosted, but he was also one of the organisers

    What can you tell us about upcoming events?

    We’re really excited about this year’s Coolest Projects event, especially because this will be a global event where we will hold one event for all of our participating regions. Here in the USA, we were lucky to be able to have the event in-person right before the lockdowns started last year, so while we did get to experience that, we did not get to experience the event online like everyone else. Collaborating with the global team on the upcoming Coolest Projects Online has birthed some really awesome ideas that we can’t wait to share with everyone come early June when this year’s showcase happens!

  • Review: IoT Cricket

    Review: IoT Cricket

    Reading Time: 3 minutes

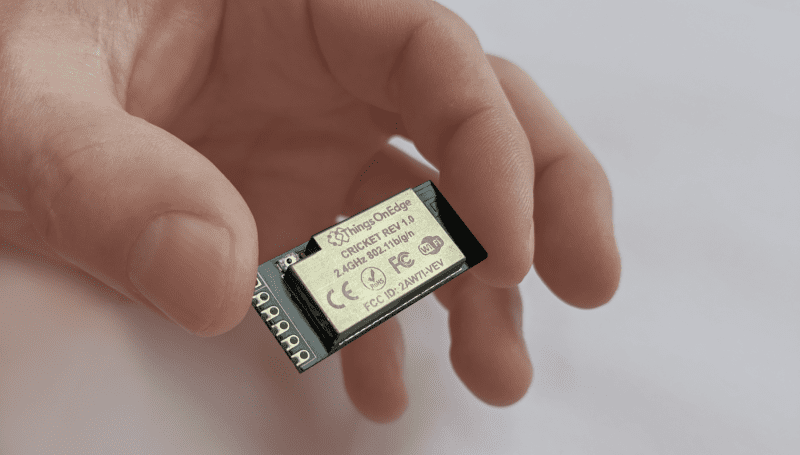
    The IoT Cricket (£16) is a small package based on the ubiquitous ESP8266 chipset, popular for its solid wireless LAN support. ESP microcontrollers are widely available and some can be had for just a couple of pounds, so it may come as a surprise to see a British-designed and made product introduced to an already saturated market. Turns out there are a few things that make this device different from the rest.

    The IoT Cricket is small, elegant, and perfect for single-purpose use

    The IoT Cricket appears to have been designed around the philosophy of ‘do one thing and do it well’. At first glance it may not seem like a good deal. It’s more expensive than many similar controllers and lacks a full range of inputs as seen on Arduino-compatible ESP devices. In fact, the IoT Cricket boasts a total of one digital and one analogue input and a 3.3V output. This simplistic approach and some clever design solves one of the great headaches of ESP-based IoT devices: power. By combining a real-time clock into the design to control wake-ups as well as a ‘wake up’ line, it draws true 0A when idle. It can also operate on voltages from 1V up to 3.3V. This means you can power it from a single AAA battery for potentially months, even years, depending on activity.

    Zero-code configuration

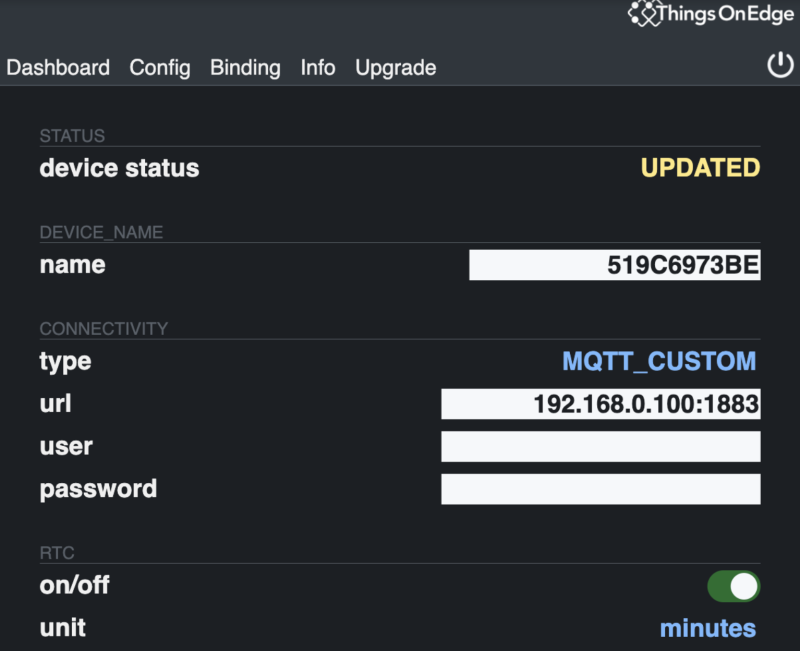
    You can’t write code for the IoT Cricket. Everything is configured using an on-board web interface (there is also an over-the-air solution). Placing it into configuration mode (using the smallest button we’ve ever seen) starts a wireless hot spot that allows you to set the behaviour of the device. Options include using the RTC to wake the device at given intervals, how to read inputs, and also what to do with the data. IoT Crickets support MQTT and HTTP GET or POST actions, making them instantly compatible with a huge range of monitoring and alerting services. Things On Edge even provides a free MQTT broker if you don’t want to set up your own.

    You can configure the IoT Cricket through its web interface, even remotely using its OTA feature

    Programming microcontrollers is not for everyone (especially if you’re using C), so this novel approach of configuring the IoT Cricket places the Internet of Things within the reach of a much wider audience. Even if you are accustomed to coding ESP devices, getting a simple project up and running with this approach is much quicker.

    Things On Edge has provided several examples of projects using the IoT Cricket, including door sensors, wireless light controllers, motion detection, and more. There is also considerable documentation on integrating with services such as IFTTT and Home Assistant. They’ve even included an on-board temperature sensor (TMP1075DSG) so you can get started with no soldering. The online documentation can be a little hard to wade through, but seems to be constantly improving. All-in-all, it’s a very impressive device if you want ultra-low power consumption and very easy setup.

  • Autonomous Home Robot

    Autonomous Home Robot

    Reading Time: 3 minutes

    “I have always loved robots,” Nick tells us. “Building my own autonomous robot has been a goal for me, as long as I can remember. I also wanted to make my robot useful. I am always making things but then end up taking them apart the next week because they didn’t end up being useful. I challenged myself to make this robot useful, and help carry out tasks around the house.”

    And so, several years ago, work on the Autonomous Home Robot began and it’s fair to say that the project has evolved over that time. “It started as a tiny remote-controlled self-balancing robot,” says Nick. “Now it is a big robot that navigates around the house!”

    Nuts and bolts

    Nick’s robot basically consists of two sections: the base and the head. “The base consists of a lidar laser scanner, Raspberry Pi, and Teensy,” he reveals. “The lidar scanner, which is mounted on a small auto-levelling platform, sends its range data to Raspberry Pi. The [latter] is the brain which takes in the lidar data and streams it over to a master computer for processing. Raspberry Pi also sends drive drive messages to the Teensy, which handles motor control.” 

     The lidar sensor is mounted on an auto-levelling platform to counter the tilt of the robot on the floor – this will really come into play when Nick makes the robot self-balancing

    In the head of the robot, Nick has positioned a second Raspberry Pi, an Arduino, and a camera. “Similarly to the base, Raspberry Pi streams the camera feed over to the master computer, and sends head movement commands to the Arduino,” he says.

    The robot navigates its way around the house by using various systems that Nick has installed, and it knows where it is in a room by using wheel rotations (odometry). Nick elaborates, “This odometry is then combined with the laser data to make a map. On the map, I can specify a point that the robot will drive to, and the robot will make its way there, while avoiding obstacles.”

    Robot research

    There was a great deal of technical coding, along with languages and systems, to learn before Nick’s robot came into being, including Python, C, HTML, and OpenCV. The hardest part was to learn Robot Operating System (ROS). “It took a lot of reading and studying to set up the robot. Once I was motivated enough to put in the time to really learn ROS, everything fell into place.”

    On the lower part of the robot is a 12V 10A power system for the motors. A 5V 16A USB power brick is used for the two Raspberry Pi boards

    Nick is the first to admit that his robot is an ongoing project and is continually evolving, but the potential is there for it to perhaps carry things around the home, act as a robotic companion, and more. He’s already made many finely tuned modifications.:“I have added many things to the initial design, like tilting laser scanners, tilting cameras, a rotating head, and even the temporary four-wheel drive base.”

    He also has plans for a lot more improvements, “including new motors, making the robot self-balancing, Raspberry Pi 4s, and a big battery so that the robot can completely navigate on its own.”

    Nick is clearly very self-motivated and has input many hours of hard work to get to this point. “I asked for feedback recently from my engineer friend who encouraged me to focus on getting the core of the robot working well and stop adding extraneous features. A combination of his help, along with many others, have helped make this robot work!”

  • Build the home of the future in The MagPi #104

    Build the home of the future in The MagPi #104

    Reading Time: 3 minutes

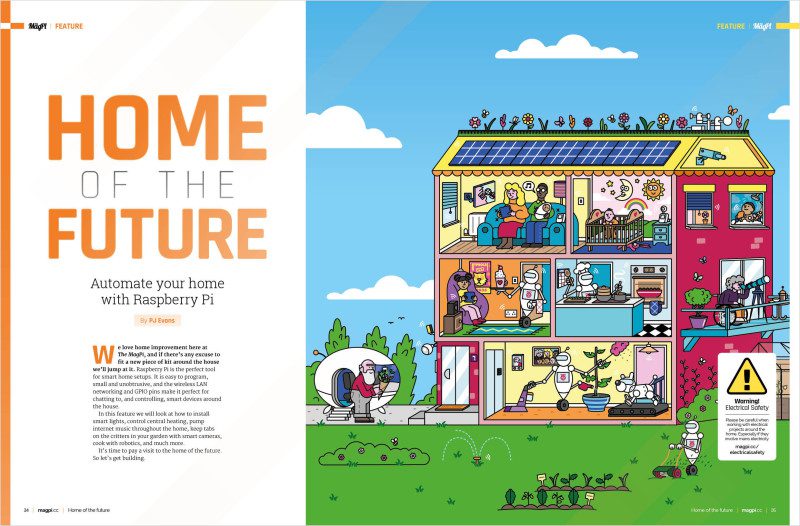
    Home of the future

    Home of the future 

    This is a wonderful feature that’s packed with innovative ideas for DIY projects. We’ve gone room-by-room around the house and looked for Raspberry Pi projects that turn a dull house into a smart home.

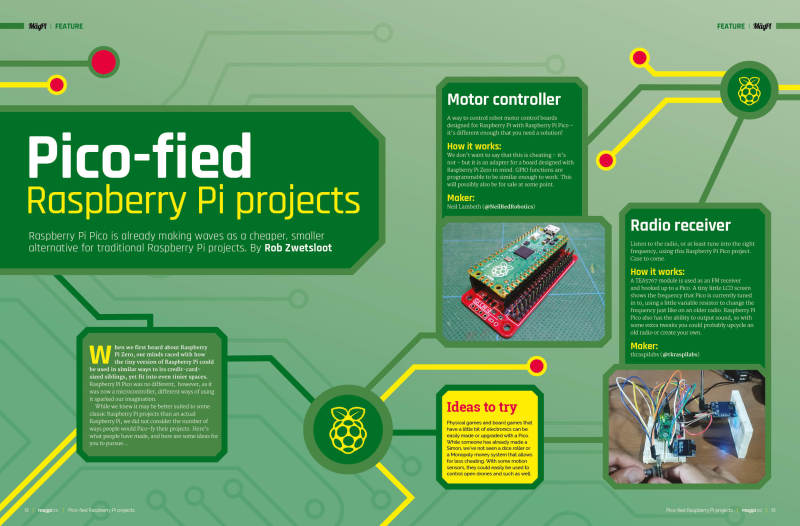
    Pico-died Raspberry Pi projects

    Pico-fied Raspberry Pi projects

    Raspberry Pi’s new microcontroller offers new ways to go about classic builds. In this feature, we look at the ways makers are using Pico to reimagine their Raspberry Pi projects. From motor controllers to music and MIDI generation. 

    iPod Classic Spotify player

    iPod Classic Spotify player

    The iPod Classic was great for its time. But the world has moved on to music streaming. What better way to rediscover this old piece of kit than to use Raspberry Pi Zero to add Spotify to it? We take a look at this wonderful build.

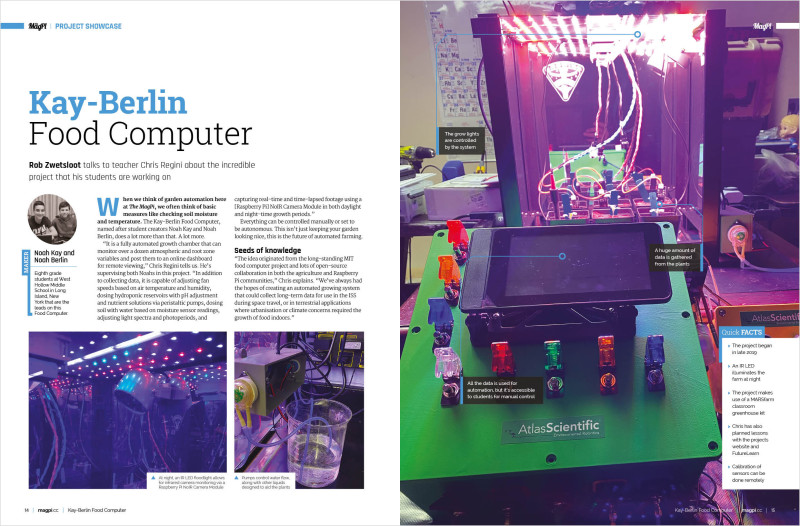
    Kay-Berlin Food Computer

    Growing food with Raspberry Pi: Kay-Berlin Food Computer

    Automated farming may be the future for the agriculture industry. Some makers are using Raspberry Pi to experiment with growing food automatically. The Kay-Berlin Food Computer is a fully automated growth chamber that can monitor over a dozen atmospheric and root zone variables. Tasty!

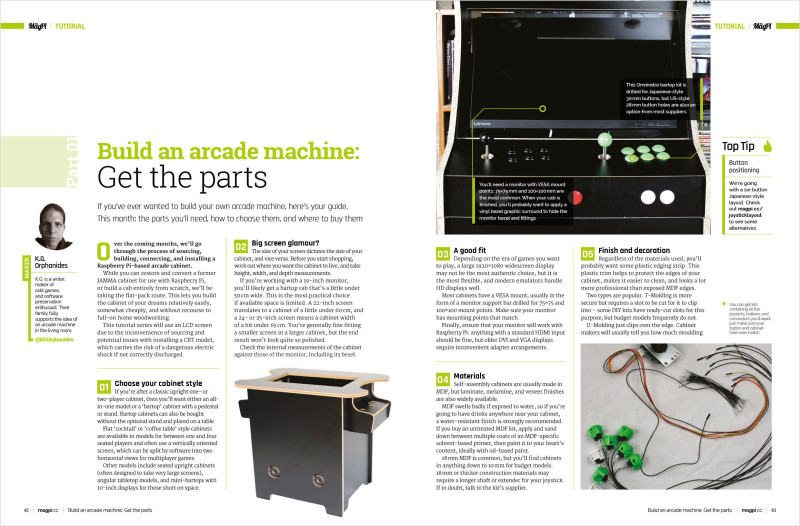
    Build an arcade machine: Get the parts

    Build an arcade machine: Part one, get the parts

    Many makers dream of owning an arcade machine. This month, KG Orphanides is starting a new series on building an arcade cabinet from scratch. We’ll look at the parts you need to buy, and a few places to get them from. Join us on a journey to own our very own coin-op classic. 

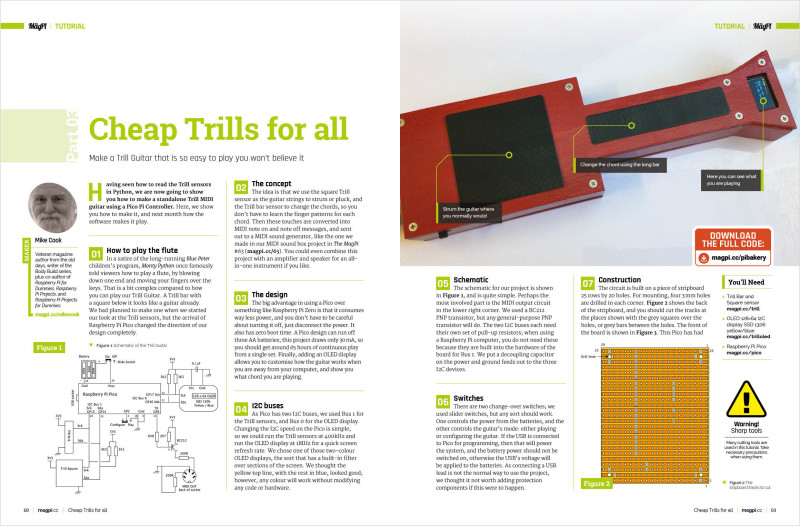
    Cheap trills for all: MIDI guitar

    Make a MIDI guitar with trill sensors

    Mike Cook has been busy with Trill sensors in the last few issues of The MagPi magazine, and this issue he gets to use them with Raspberry Pi Pico to build this rather cool MIDI guitar. It reminds us of the Guitar Hero video game (but it’s much more versatile).

    Pico Explorer Base

    Prototype electronics with Pico Explorer Base

    Raspberry Pi Pico is a wonderful piece of kit, and the only thing that makes us more excited is the wide range of products coming out. One of the first off the blocks is Pimoroni’s Pico Explorer Base. Experiment with electronics, and a mini display, and build your own Pico physical computing projects.

    Pick up your copy of The MagPi magazine #104

    The MagPi magazine is available as a free digital download, or you can purchase a print edition from our Raspberry Pi Press store.

  • Win one of six SmartiPi Touch Pro Cases!

    Win one of six SmartiPi Touch Pro Cases!

    Reading Time: < 1 minute

    Subscribe

  • Make a digital do-not-disturb sign

    Make a digital do-not-disturb sign

    Reading Time: 6 minutes

    In this tutorial we’re going to use a popular messaging protocol, MQTT (Message Queuing Telemetry Transport). With MQTT we will set up a simple do-not-disturb sign that you can trigger with a single key press and customise to your heart’s content.

    Step 01: Prepare Raspberry Pi

    We’re using two Raspberry Pi Zero W computers for this project, although it will work with any recent model. For both, we recommend installing Raspberry Pi OS Lite (magpi.cc/software) as we don’t need a desktop interface. Make sure both devices are working and connected to the same network. We also recommend setting their host names by running sudo raspi-config at the command line, then going to System Options > Hostname. We chose ‘busybot’ for the sign and ‘buttonbot’ for the controller and that’s how we’ll refer to them throughout this tutorial. Finally, make sure everything is up-to-date. Enter these commands:

    sudo apt update
    sudo apt full-upgrade

    You should be able to ping one device from the other. On ‘busybot’ Raspberry Pi Zero W, enter:

    ping buttonbot.local

    You should should get a response from ‘buttonbot’ Raspberry Pi Zero W.

    Step 02: Install the Scroll pHAT HD and diffuser

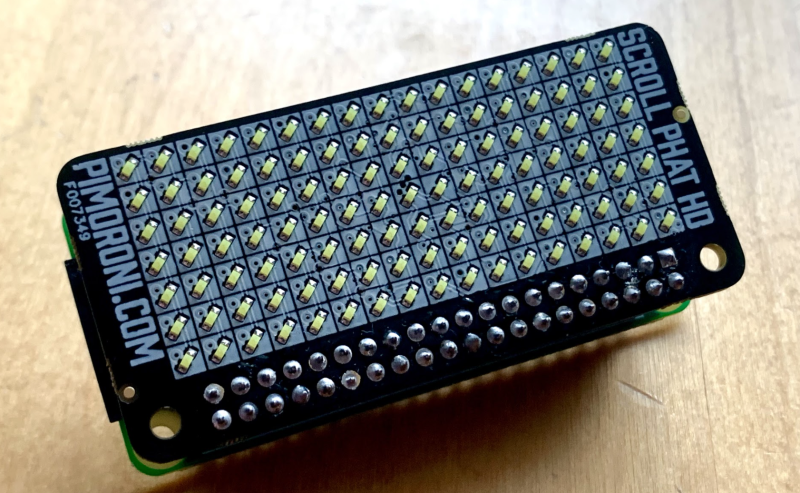
    We’re going to set up the display first. Pimoroni’s Scroll pHAT HD is a display made up of 17×7 pixels (119 total) and comes with a Python library that does all the hard work of displaying and scrolling text for us. The pHAT form factor makes it just the right size for a display, but of course you can adopt this tutorial to any display you like. You’ll need to solder the 40-pin header to the display and also add a reciprocal header to ‘busybot’ Raspberry Pi if it doesn’t already have one. Before assembling them together, screw on the diffuser, which will make the display much easier to read. Now, with Raspberry Pi powered off, carefully connect the Scroll pHAT HD.

    Step 03: Set up the display software

    It’s time to make sure our display is working before we go any further. Fortunately, Pimoroni has created an install script for us. At the command line, run the following:

    curl https://get.pimoroni.com/scrollphathd | bash

    Make sure you do the ‘Full Install’ when the option is presented. This will set up Raspberry Pi so it can communicate with the display and install all the Python libraries we need. Take a look at Pimoroni’s GitHub (magpi.cc/scrollphatgit) for more information on installation.

    Once the install has finished, we can test things out. Reboot, then try this on the command line:

    cd ~/Pimoroni/scrollphathd/examples
    python3 swirl.py

    See a pretty pattern? Then you’re ready to proceed. Have fun with the other examples in the directory; they’re a great source of inspiration.

    Step 04: Introducing MQTT

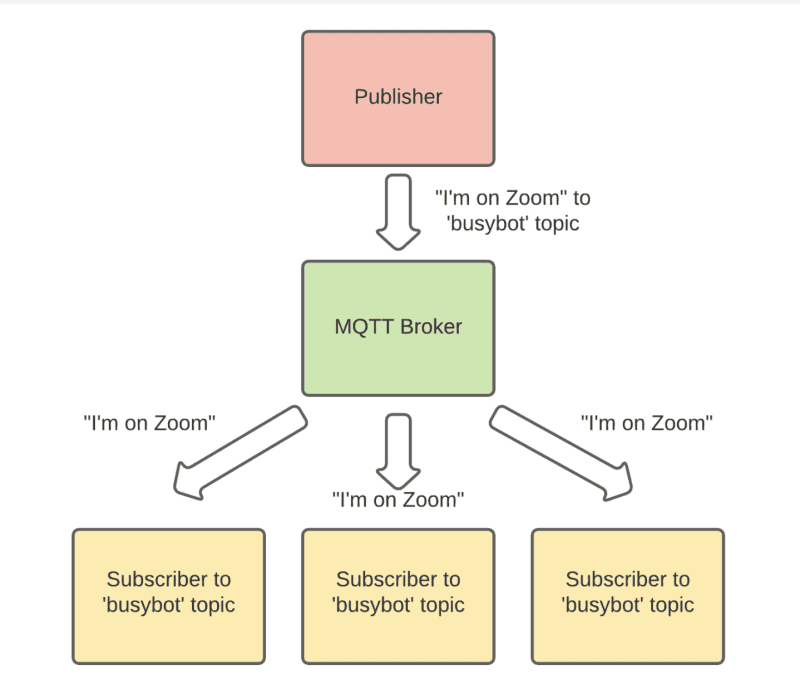
    Our buttonbot and busybot are going to need to talk to each other over the network. One of the easiest, and most popular, ways to do this is the MQTT protocol. It uses a pub/sub model (publisher / subscriber) to process messages. An MQTT server (the ‘broker’) receives messages from ‘publishers’ that are then transmitted to ‘subscribers’. These are organised by ‘topic’. The biggest advantage is that publishers don’t need to understand or even be aware of the subscribers, they just need to speak MQTT. Don’t worry if this is confusing; working through the tutorial will make things clearer.

    Step 05: Mosquitto

    For our system to work, you need an MQTT server (or ‘broker’) to handle the messages. This can be anywhere on your network, but for the purposes of the tutorial we’ll install it on the same ‘busybot’ Raspberry Pi driving the display. MQTT software tends to be very ‘lightweight’, so a Raspberry Pi Zero W can easily handle being the server as well as a publisher. Mosquitto is probably the most popular set of MQTT tools. Installation is straightforward, too. Enter this at the command line:

    sudo apt install mosquitto mosquitto-clients
    sudo pip3 install paho-mqtt

    The broker will be automatically installed as a service and always be running in the background. We’ve also installed Paho, a popular Python library for implementing MQTT.

    The MQTT protocol is perfect for Internet of Things projects

    Step 06: Busybot’s code

    The code for this project does two main jobs: listens to the MQTT server for new messages, and then takes those messages and scrolls them on the display. You can enter the code shown here or get the files from magpi.cc/busybotgit. We need the code to be running all the time. To do this, create a new file from the command line:

    sudo nano /usr/lib/systemd/busybot.service

    Enter the code from busybot.service. (Change the paths if you’ve created the code elsewhere.) Save the file (CTRL+X and then Y), then enter these commands:

    sudo systemctl enable /usr/lib/systemd/busybot.service
    sudo systemctl start busybot

    Step 07: Testing time

    Let’s confirm that the code is working. Using the Paho MQTT libraries, the code subscribes to the MQTT topic ‘busybot’ on the broker. Whenever anything publishes a line of text to that topic, busybot will be notified, the text delivered and then displayed. We can check everything is working using the Mosquitto command line publishing tool:

    mosquitto_pub -h localhost -t busybot -m "Hello from MagPi"

    If you see the messages scrolling across, then everything is working. Send any message you wish, or a blank space to clear the display.

    The Scroll pHAT HD without its diffuser. 119 very bright LEDs

    Step 08: Assemble the Keybow

    Now we have our display working, it’s time to turn our attention to sending the messages. MQTT is widely supported and you can get clients for almost every platform and programming language in common use. That means we can send messages to the display from pretty much anywhere. In this tutorial, we’re going to use Pimoroni’s Keybow interface to provide a quick way of setting messages. On the second ‘buttonbot’ Raspberry Pi WH, assemble the Keybow as instructed  at magpi.cc/assemblekeybowmini, but don’t install Keybow OS – we’re sticking with Raspberry Pi OS Lite.

    Step 09: Keybow setup

    We’ll now add some code to send messages to the MQTT broker when buttons are pressed. First, from the command line, we need to install some dependencies on buttonbot:

    sudo apt install python3-pip git
    sudo pip3 install keybow paho-mqtt

    Now get the code from GitHub:

    cd
    git clone https://github.com/mrpjevans/busybot.git

    We can now test the Keybow with a simple example:

    cd ~/busybot
    python3 test_keybow.py

    Press the keys. Do they all light up? Then all is well.

    Need more buttons? Try the nine-key Keybow

    Step 10: Keybow code

    In the busybot directory, have a look at buttonbot.py. You’ll also need to change the name of the MQTT broker and/or topic if you’ve used something different. 
    We need to make sure the code is always running, just like busybot. Again, we’ll create a service to do this. From buttonbot’s command line, go through the process in Step 6 to create a service file and enable it. Just make sure you change the

    ExecStart

    line to:

    ExecStart=/usr/bin/python3 /home/pi/busybot/buttonbot.py

    Save the file and enable it as before.

    Step 11: Testing and tinkering

    Everything should now be ready. With both Raspberry Pi Zero computers running, try pressing a key on the Keybow. A message will now scroll across the display on the other Raspberry Pi Zero. Make sure all three keys work. You’re now ready to start customising the system to your own needs. If you edit buttonbot.py, you’ll see some documented options for changing the messages and the colours of the keys. Free free to experiment, make changes and make this code your own. If you need more than three messages, see if you can alter the code to support key press combinations, which would give you up to seven options.

    Step 12: Python vs C++

    As the display doesn’t ‘know’ about buttonbot’s existence, it means that anything capable of speaking MQTT can send messages to busybot to set the scrolling text. It could be done from the command line or when a certain event happens. If you’ve been following the Home Assistant (HA) series in The MagPi magazine, then you may be interested to know that HA speaks MQTT, so the display could be tied to a temperature or motion sensor. Have fun dreaming up new ideas for your display.