Schlagwort: 3dprint

  • Creality CR-10 Review – The Best 3D Printer under $500

    Creality CR-10 Review – The Best 3D Printer under $500

    Reading Time: 3 minutes

    We use a lot of different 3D printers here in the All3DP workshop. And making the jump between them often highlights the quirks and foibles of each one. In the case of the Creality CR-10, one pitfall is the fact that you must auto-home the 3D printer before each print job. Forgetting to do so mostly results in the print head trying to rip the print bed off. You only make that horrifically jarring mistake once or twice before causing irreversible damage.

    Initial prints on the Creality CR-10 exhibited ringing, and some quite noticeable layer skipping. Nothing too troubling for a semi-assembled kit since such printers are usually a work-in-process — you should expect to be making tweaks to the Creality CR-10 as you put more prints under the machine’s belt. For our first few Benchy prints, a once over with hex wrench to tighten screws helped. As did removing some of the comically excessive lubricant on the lead screw.

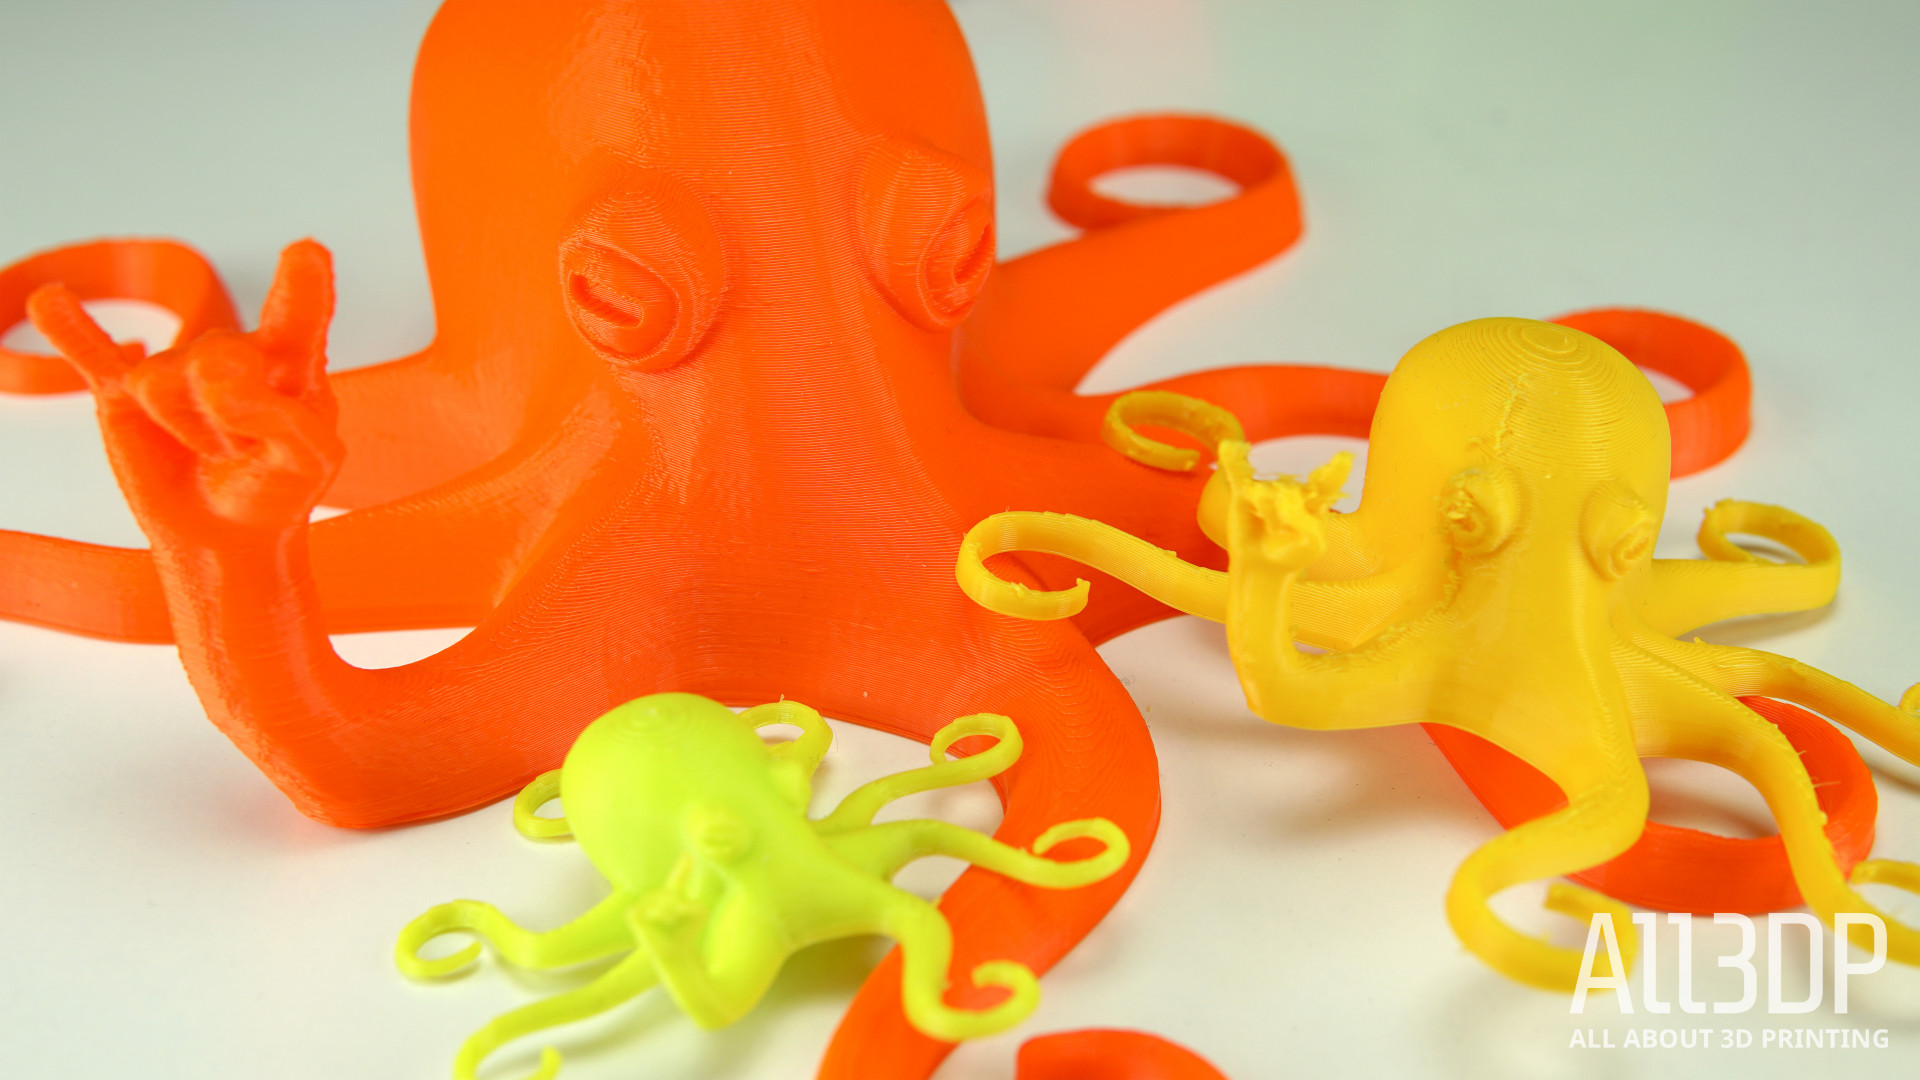
    Scaling ambitions to match the print volume, you start to see why the Creality CR-10 is so beloved in the community. The mind clears of the tat and trinkets smaller build volumes tend to nurture, and you begin to see handy large-scale inspiration everywhere.

    Creepy wall-mounted hand coat holders? Charming lamp-shades for the kids’ room? Check and check. 1-1 scale Oscars trophy? Well, perhaps not. Of the few print problems encountered using the Creality CR-10, one was minor tangles in filament spools pulling the control box (to which the filament holder is mounted) over onto its side. What might have otherwise cleared with a little pressure from the extruder instead throws part of the printer on its side. Not ideal.

    The other issue lay with warping and print bed adhesion. The Creality CR-10 comes with large individual sheets of painters tape and, curiously, a roll of the stuff too. Its just natural to use what they provide, but we found the Creality CR-10’s glass bed with a spritz of print adhesive more than enough for flawlessly sticking prints.


    Creality CR-10
    Creality CR-10 prints

    That is, of course, for filaments that don’t have a tendency to curl at the first sign of trouble. In our experience, printing ABS with the Creality CR-10 out of the box is difficult, if not impossible. The print bed, while rated for 100 degree Celsius, barely manages to hold this and, as such, has a tough time holding ABS. This fact rings true regardless of which adhesives you use.

    And that’s just the first layers. With 400mm of possible print height completely open to the room and temperature fluctuations, warping and cracks are probably guaranteed. Which is curious then, that stores such as GearBest list it as good for ABS.

    Add an enclosure to keep all that heat in and around the print, and we suspect the Creality CR-10 could handle ABS admirably. But with an open design and large, as well as an exposed heated bed that reaches 100 degrees, it just didn’t seem to go well.

    And speaking of the heated bed, crikey does it take an age to heat to high temperatures. On a couple of occasions, we thought the print had stalled and resorted to a hard resetting the printer to try and fix the “problem”. It turns out at the upper end of its range, it takes a long time to achieve its target temperature.

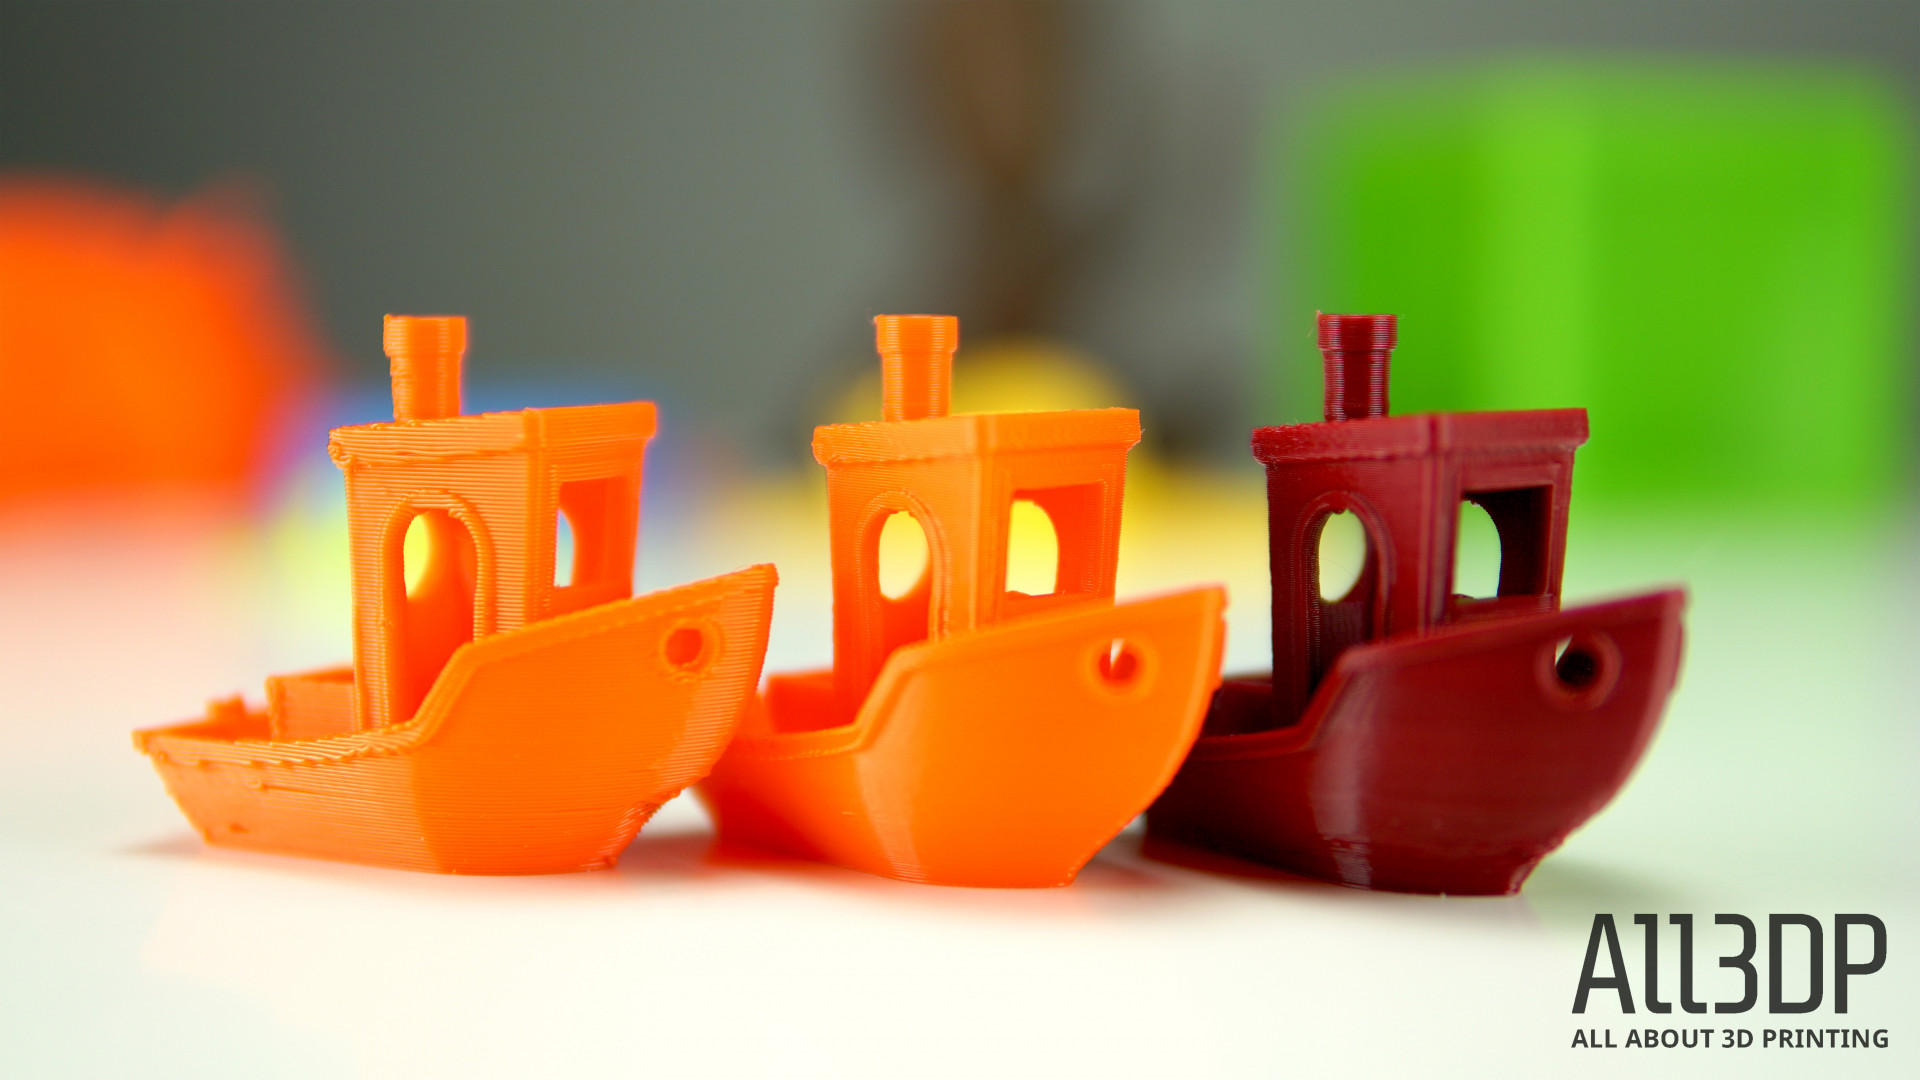
    But it’s not all doom and gloom. As with most 3D printers, it’ll only print as well as you have the settings dialed in, and we’d like to think we achieved some exceptional prints with the Creality CR-10.

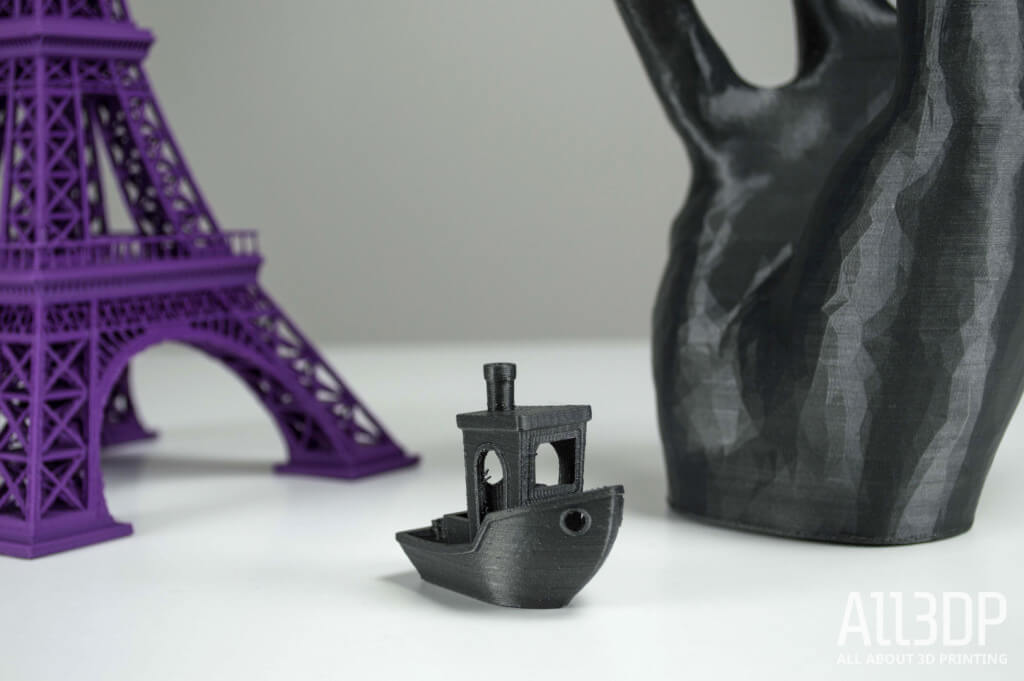
    By no means perfect, the complexity of a large Eiffel Tower proved an impressive demo for the Creality CR-10. Printed twice, once in 3DK Berlin’s purple PLA and once in Verbatim’s transparent PLA, the Creality CR-10 managed to complete both without failure — surviving bridging, severe overhangs and a mind-boggling number of retractions in the process all over some 60 hours of print time combined.

    Website: LINK

  • Ultimaker Cura 3.2 Adds Experimental Supports and Layer Features, Improves UI

    Ultimaker Cura 3.2 Adds Experimental Supports and Layer Features, Improves UI

    Reading Time: 3 minutes

    Ultimaker is releasing its stable version of  Cura 3.2 after a few weeks of beta testing. You can now download the popular 3D slicing software from the company’s website. As usual, the software is free.

    In mid-January,3D printer manufacturer Ultimaker released the beta version of the Cura 3.2, its latest update of the 3D slicer application. A month later they now announced that the stable version is ready to use and the testing period is over.

    The Cura team has added new two major new features to the release of Cura 3.2:

    • Adaptive layers: This experimental feature lets Ultimaker Cura compute a variable layer height based on the model shape. The result? High-quality surface finishes with a marginally increased print time. This setting can be found under the experimental category.
    • Tree support: Also to be thought an experimental feature for 3D printing experts, these support structures use ‘branches’ that ‘grow’ and multiply towards areas that need support. The result gives you fewer points of contact on the model, resulting in more even surface finishes. You can use tree support together with more traditional support structures.

    There’s also improvements in terms of security, for example, the signed binaries for windows preventing irritating unknown application warnings. To find out more about the many other improvements, download Cura 3.2 or read about the features below.


    Cura 3.2

    Many Improvements in the Graphical User Interface in Cura 3.2

    Also, Cura 3.2 now offers several improvements regarding the GUI of the program.

    • Multi-build plate. By enabling multi-build plate in the software preferences, a new panel is added to the workspace. It lets you manage separate build plates with shared settings in a single session. This feature also hooks into the Cura Connect print queue.
    • Faster startup. Cura 3.2 now loads the printer definitions when adding a printer, instead of loading all available printers on startup. This reduces the startup time compared to previous versions.
    • Signed binaries for Windows: Windows installer and binaries have been digitally signed to prevent “Unknown application” warnings and virus scanner false-positives. This makes the software a bit more secure.
    • Improved adjustment meshes: Per model settings have extra options, letting you easily use custom meshes as support structures, or assign different slicing settings to different sections of your model.
    • Backface culling. Cura 3.2 offers more performance in the layer view by only rendering visible surfaces of a model, instead of rendering the entire model. You’ll get an improved frame rate, and reduced GPU strain.
    • Sidebar Improvements: The sidebar to QtQuick 2.0 is now updated with increased speed to achieve a better width and style fit. The sidebar can also be hidden to give greater visibility to wider build plates.
    • Bug Fixes – of course, Ultimaker worked on bug fixes within the software. These were pointed out by the community who noticed incompatible Mirror tool, Center model settings and more.

    You can find out more about the updates and ways in which Ultimaker has optimized Cura by downloading it, here. Also, visit the company website to find out more and keep up with their latest releases.

    Also, we’ve just completed an in-depth tutorial on the hidden Cura settings. Please continue here.


    Website: LINK

  • 3D Print a Universal Cable Fix to Repair any Broken Cables

    3D Print a Universal Cable Fix to Repair any Broken Cables

    Reading Time: 2 minutes

    If you’re faced with a broken cable, maker Marius Taciuc has a 3D printed enclosure solution. Although can’t beat a replacement cable, it’s a great short-term universal cable fix.

    Cables are fragile. They can be cut, ripped apart, or — most commonly — have a loose connection. Most makers just use just some Gaffer tape to repair their broken cables – but there’s a more elegant, 3D printed solution that even offers strain relief.

    Marius Taciuc entered the Hackaday Repairs You Can Print contest with a 3D printed mic cord repair. Rather than attempting to use electrical tape to try and fix the problem, he 3D printed an enclosure which is way more stable.

    Taciuc’s 3D printed enclosure can be used as a join box for both cables or chords. It’s a close-fit but it’s possible to glue everything in place, providing a short-term solution for broken cables.

    Taciuc uses cable ties to provide strain relief and hot glue to hold everything in place. The enclosure mechanically supports the two broken sides making it an interesting project to try out if you have a broken cord or cable.

    What You’ll Need To Repair a Broken Cable

    • A 3D Printer
    • Files available for download from Hackaday.
    • A glue gun & glue
    • Cable ties
    • Heat shrink tube
    • Soldering iron


    How to Fix Your Broken Cord

    To begin, download and use the files to 3D print your enclosure. Make as many as you need. Next, after your enclosure has finished printing, insert both ends of the cable into the box.

    With cable ties, secure the cord or cable in place inside the box. It’ll be important to buy 2mm or thinner cables so they fit inside the enclosure.

    Next, take your heat shrink tube and put this on the wires. Solder the wires until they’re joined and heat the tubes to shrink them too.

    Finally, add glue using your hot glue gun. Fill the box between the wires but do not add more that lid level. Attach the lid while the glue is wet and wait until it’s dry.

    Voila. Your cable is ready to be used again. Watch the process in the video below if you’d like to know more about the universal cable fix.

    Source: Hackaday


    Website: LINK

  • Stratasys & Dassault Systèmes Partner to Develop Low-Cost 3D Printed Prosthetics

    Stratasys & Dassault Systèmes Partner to Develop Low-Cost 3D Printed Prosthetics

    Reading Time: 3 minutes

    Stratasys is partnering with Dassault Systèmes to supply Unlimited Tomorrow with 3D printing and CAD software dedicated to producing affordable, patient-specific prosthetic devices.  

    From surgical models to personalized prosthetics, 3D printing has proven extremely advantageous for a wide variety of medical applications. Among the few pioneers of healthcare-related additive manufacturing is the 3D printing giant Stratasys.

    The company recently launched BioMimics, a platform that enables physicians to reliably 3D print accurate and complex anatomical structures for training purposes. Now, Stratasys is partnering with the leading 3D engineering software company Dassault Systèmes to empower amputees through 3D printing and CAD software.

    The collaborative effort, which was announced this week at SOLIDWORKS World 2018, aims to develop affordable and functional prosthetic arms for amputees. The 3D printed prosthetics company Unlimited Tomorrow will pair Stratasys’ 3D printing solutions and Dassault’s proprietary CAD software.

    Traditional prosthetics usually come at a high price tag, costing anywhere between $20,000-$100,000. Meanwhile, Unlimited Tomorrow’s 3D printed prosthetics only cost around $5,000. The company uses a supply chain that streamlines the parts development and also reduces the number of fittings required.

    “Unlimited Tomorrow is driven by enabling the possible, with unique thinking that results in absolutely incredible ideas. Our intent is always ‘user-first’, meaning the technology serves needs of patients from the outset – and it’s all driven by the most advanced technology,” said Easton LaChappelle, founder of Unlimited Tomorrow.

    The 3D printed prosthetics producer also offers a $2,500 cheaper version for children who are still outgrowing their prosthetics.

    Stratasys and Dassault Systèmes Help Make 3D Printed Prosthetics More Accessible

    Stratasys and Dassault Systèmes will provide dedicated 3D printing and CAD/CAE supplies to this newfound initiative. Additionally, both are providing additional support as part of the program. For instance, both the Stratasys PolyJet and Stratasys Direct Manufacturing teams will actively help develop and produce these 3D printed prosthetics.

    The collaboration further boasts a design-to-creation process by using Dassault Systèmes’ leading CAD software SOLIDWORKS.

    Through the partnership, Unlimited Tomorrow will be able to print prosthetics in any size and also color. The newly developed automated design process makes it easier than ever to customize the prothetic devices for each individual patient.

    First, Unlimited Tomorrow will collect 3D scans of the missing arm and opposite full arm. The software then runs the scans and automatically generates ready-to-3D-print files. Once printed, the engineer will install sensors and wireless chargers to ensure haptic feedback.

    Arita Mattsoff, vice president of corporate social responsibility at Stratasys, explained:

    “We view 3D printing as a catalyst for healthcare innovation to enable better patient care, streamline procedures, and improve learning. One of the most visible impacts is in creation of prosthetics. That’s why a main component of our Corporate Social Responsibility program is focused on accessibility of devices – driving true change, improving quality-of-life, and advancing recipients’ self-esteem.”

    Unlimited Tomorrow is currently hosting a crowdfunding campaign via MicroVenutres, the new equity funding platform from Indiegogo.


    Easton LaChappelle – Founder of Unlimited Tomorrow. (Image: Unlimited Tomorrow)

    Source: Stratasys & Unlimited Tomorrow


    Website: LINK

  • 3-in-1 Snapmaker 3D Printer: Review the Facts Here!

    3-in-1 Snapmaker 3D Printer: Review the Facts Here!

    Reading Time: < 1 minute

    The concept of the Snapmaker 3D printer is a modular machine with three distinct functions. The intended audience is the workshopper pushed for space.

    First and foremost, the Snapmaker is an all-metal 3D printer. The aluminum frame encases all wiring, with the exception of a few tidy ribbon cables.

    But the killer feature is that three interchangeable modules can be swapped onto the Snapmaker’s X-axis rail. In addition to 3D printing, it’s also capable of laser engraving and CNC milling.

    The fused deposition modelling (FDM) 3D printing module accepts a standard 1.75mm filament spool. The bed can be heated up to 80 degrees Celsius. But with a build volume of only 125mm square, prints are going to be strictly limited in size.

    Ease of use is another core proposition with the Snapmaker 3D printer. It has an LCD touchscreen for operation, is simple to assemble, and comes bundled with the proprietary Snap3D software.

    The laser engraving module has a class 200 mW laser. This is capable of burning designs into wood, leather and similar materials. In addition, the CNC milling module has an adjustable spindle speed between 2,000 and 7,000 rpm.

    Website: LINK

  • Lulzbot TAZ 6 Review: The Best Large Format 3D Printer

    Lulzbot TAZ 6 Review: The Best Large Format 3D Printer

    Reading Time: 11 minutes

    The Lulzbot TAZ 6 comes assembled in a sizable box that features its name in big, bold letters alongside the company’s iconic logo. This triumphant choice in packaging fits the printer’s large build volume and open source bravado that Aleph Objects prides itself on.

    Right away, unpacking this printer reveals a number of useful tools and components. Aleph Objects includes the following with the Lulzbot TAZ 6 3D printer:

    • LulzBot Hexagon Hot End Tool Head with 0.50mm Nozzle
    • Quick Setup Guide
    • 4GB SD Card
    • Filament Feed tube
    • Toolkit bag
    • 15 Piece Metric Hex Key Set
    • Pliers, Needle Nose
    • Tweezers
    • Standard Precision Knife
    • Dental Pick
    • Part Removal Knife (clam knife)
    • Metric Ruler
    • Complete documentation for Lulzbot TAZ 6

    Now, with all of these spare parts, you might assume that some assembly is required for this printer. But the Lulzbot TAZ 6 demands the minimum amount of effort from the user. Simply snap everything into place and you’re ready to start calibrating just 20 minutes after tearing the packaging tape away from the printer’s vibrant box.

    This task is made even easier by the exceptional and eye-catching documentation that accompanies the Lulzbot TAZ 6. There are three different booklets included with the 3D printer, including a comprehensive user manual, as well as a “Start Here” and “Operation” guide.

    The introductory “Start Here” guide offers a step-by-step on how to properly unpack and setup your Lulzbot TAZ 6. Upon cracking open this booklet, you’ll find a plethora of high-resolution images and corresponding information. First, the user must remove the packaging foam and tape used to protect the printer during its shipping journey.

    After these preliminary steps, it’s time to assemble the remaining parts of the Lulzbot TAZ 6. Following the guide, this entire process should only take about 20-30 minutes to complete. To start, you must mount the Y-axis assembly to the printer frame, using four thumbscrews to secure the print surface in place.

    There are a few additional cables to connect (all of which are visually displayed in the documentation), followed by mounting the tool head. Again, this is another step that the Lulzbot team has managed to make as intuitive and convenient as possible. Last but not least, you snap the filament guide tube onto the side bracket and voilà, it’s time to start printing.

    Although the setup was mostly trouble-free, I did have a gripe with the way this filament guide tube was assembled. But more on that in the following section. From the “Start Here” guide, we move directly into the “Operation” booklet, which details how to get printing after assembly is complete.

    The guide helps you get acquainted with the special Lulzbot edition of Cura, the popular 3D printing slicer developed by Ultimaker. It also shows how to properly load filament and ensure that you’re first print goes off without a hitch. Lastly is the Lulzbot TAZ 6 user manual, which isn’t needed to start printing, but offers a comprehensive overview of everything you need to know about the hardware and software.

    Generally speaking, Aleph Objects’ 3D printer range arguably has one of the best minimalistic designs on the market. The Lulzbot TAZ 6 is certainly no exception to this. The printer’s frame is comprised of a sturdy black powder-coated metal, with smooth steel rods that use self-lubricating linear bushings. Sprinkled amongst the sleek black frame are components printed in Lulzbot’s lime green material, adding a little vibrance to the otherwise stark design.

    As we’ve mentioned, the Lulzbot TAZ 6 is pretty gigantic, and the minimalist frame allows you to observe the 3D printing action from almost any angle.

    While most of the setup process was pretty intuitive, one glaring issue was the erratic filament feed guide tube. The starting point of this tube contraption connects right behind the printer’s spool holder. But from there, the user is left with a wonky tube that has no real endpoint, and ends up sort of just hovering above the extruder.

    During one print, the tube was being whipped around by the extruder so much that my PETG filament snapped mid-print. After situating the tube in a better position, this problem didn’t occur again. We were even able to resume the print after reinserting the filament, which showcased the printer’s ability to pickup where it left off. Still, it was one of the few flaws we found amongst the otherwise impeccable design.

    The user interface is tastefully placed in the upper lefthand corner of the printer, easy to access without being overly intrusive. Sleek, sturdy, and simple are the three perfect words to describe the design of the Lulzbot TAZ 6.

    After setting up the Lulzbot TAZ 6, it was time to start with our first print. And what better way to christen a Lulzbot 3D printer than with the beloved Rocktopus model. This suave octopus is an easy and quick print, holding up its one human-like hand making the sign that is synonymous with rock-and-roll.

    However, the standard Rocktopus model is underwhelmingly small compared to the build size of the Lulzbot TAZ 6. Thus, we used Lulzbot Cura to scale up the design fill the print bed.

    The resulting print is a massive sea creature diligently telling us all to keep on rocking. Even at this massively increased size, the large-scale Rocktopus came out with superb detail.


    Once we completed the two Rocktopus prints, we moved onto the one-and-only 3DBenchy model, the acclaimed 3D printer torture test that comes in the form of a tiny boat.

    Upon opening the latest version of Cura Lulzbot Edition, the slicer offers three different preset printing profiles mode: high quality, high speed, and standard. Interested in what each of the three profiles offered, we decided to print a Benchy model for each.

    In the Standard profile (0.25mm), the Benchy model was nearly flawless, handling overhangs and geometric shapes with ease. The only noticeable issue was the small text on the back of the boat, which was likely muddled due to the printer’s 0.50mm nozzle. Despite this, the Lulzbot TAZ 6 produced a fine little ship on the Standard setting. It took about one hour and 05 minutes to print.


    3DBenchy printed with different slicing profiles: High Speed (Left), Standard (Center), High Quality (Right)

    On the “High Speed” profile (0.38mm), the print speed was increased greatly, spitting out a formidable Benchy in just 43 minutes. However, the difference in quality was definitely apparent, particularly in the ship’s hull. The base of the Benchy model was far from perfect, but the overhangs and geometrical shapes on top came out almost identically to the “Standard” Benchy.

    Finally, it was time to try out the “High Quality” profile (0.15mm). This particular Benchy model came out incredibly smooth, by far the best resolution of the three. However, we noticed that the first layer (which shows the “CT3D.xyz” text) was completely missing.

    A bit flabbergasted by this issue, we dug a bit deeper to figure out what the problem was. After some investigation, it seems that there was a bug within the slicer software, not the hardware. Aside from the mysteriously missing first layer, the high-resolution Benchy passed most of the benchmarks. It took about one hour and 20 minutes to print.


    Despite the apparent bugs in the Cura Lulzbot Edition slicer, the printer itself had proven itself to be worth the hype thus far.

    After the initial journey printing the 3DBenchy and Rocktopus models, it was time to kick things into gear and find out what the Lulzbot TAZ 6 was really capable of. We printed an array of models in different filaments types, including ABS, PETG, Flexbile, Woodfill, and other exotic materials.

    Looking to print something functional that would also test the ability of the Lulzbot TAZ 6, and so we selected the popular Measuring Cube by iomaa. We figured this to be the perfect model to test considering the food-safe nature of PETG filament. The design is both practical and has geometric properties that will challenge the printer.


    The Lulzbot TAZ 6 handled the Innofil EPR InnoPET with ease, producing smooth layers and stunning details. The most impressive parts of the print are the difficult angles printed without supports, as well as the different measurements that are cleanly inscribed on the model.

    Next up, we loaded in some ABS to print the Gear Bearing design by emmett. The model is a planetary gear set that is meant to be pre-assembled, meaning you get a rotating gear system right off the print bed. After scaling up the model to make it bigger, we printed it with Blue ABS from Rigid.ink.


    The Lulzbot TAZ 6 also managed to print this material with phenomenal results. It took a bit of twisting and turning to loosen the model up, but soon after the print was complete we had a working gear that was printed as a single piece.

    We also wanted to experiment with exotic filaments like wood and metal filled PLA. We used 3D Cork from the Polish filament producer Pri Mat3D to print everyone’s favorite model: Baby Groot. The Lulzbot TAZ 6 was able to print this cute little waving character with no supports, and the Cork filament provided a woodsy charm that suits the model perfectly.


    There were a few issues with retraction, leaving some stringy or rough surfaces on the print. However, with a bit of tweaking to the slicer settings, the wood fill can surely be optimized to turn out even better.

    Last but not least, we decided to give flexible filament a go, using Yellow Flexfill material produced by the Czech company Fillamentum. Unfortunately, we didn’t have the LulzBot TAZ Flexystruder Tool Head v2 at our disposal. The optional tool head is engineered to print with flexible filaments, and without it, we were unsure of how the Lulzbot TAZ 6 would react.

    Refusing to be deterred, we loaded up the flexible filament and circled back to the beloved Rocktopus model. It took some tweaking and one failed print, but we were ultimately able to print a decent model with the printer’s stock tool head.

    There was a bit of stringiness left on the model, but this is a common theme when 3D printing flexible filaments. All in all, we were impressed to see the Lulzbot TAZ 6 handle this difficult material without the specially developed Flexystruder.

    We’ve briefly mentioned some of the trouble we had with the latest Cura Lulzbot Edition slicer, but overall the software was both accessible and expansive. While slicing a 3D model, you can either use the recommended settings for a specific filament and printing profile, or you can customize and tweak each part of the printing process.

    When using the custom print setup, the Cura Lulzbot Edition slicer allows you to control every aspect of the shell, infill, print speed, cooling, experimental settings, and much more.  Advanced users can take complete control over the Lulzbot TAZ 6, while the user interface on the printer offers further possibilities to modify setting mid-print.

    With the recommended print setup, there’s a long list of materials to choose from. Although many filament types are not included on this preset list, you can easily import settings or create your own filament profiles.

    Aside from our aforementioned bug issue with the “High Detail” profile, the slicer itself seems a little bit slower than other options, including the basic version of Cura.

    All in all, the specialized slicer is easy to use and provides full control over the Lulzbot TAZ 6. Still, the slicing speed and issue with printing profile keeps Cura Lulzbot Edition from earning a perfect 10.

    After testing the Lulzbot TAZ 6 with a multitude of filaments and models, we found this monstrous machine to be exceptionally reliable and easy to use.

    The generous build size, unmatched dependability, and sturdy design makes the Lulzbot TAZ 6 well worth its high-end price.

    The Lulzbot TAZ 6 printer is certainly not for makers on a strict budget. But those who are willing to pay the price for a steadfast and enormous printer will be hard-pressed to find a better option. While we faced a few issues with the slicer, the hardware itself worked incredibly well.

    We ultimately found the Lulzbot TAZ 6 to be a beastly and highly reliable machine. We fed multiple types of filament through the extruder, including PLA, ABS, PETG, Exotics, and even flexible. All of these materials printed successfully, and most with impeccable quality. Needless to say, as frequent users of the Lulzbot Mini, we were very pleased with our Lulzbot TAZ 6 experience.

    All in all, the Lulzbot TAZ 6 is a workhorse designed for pro-sumers and hobbyists that want to keep their maker spirit going from sunrise to sundown.

    However, it the Lulzbot TAZ 6 is a bit outside of your price range, take a look at some worthy alternatives below.

    If the Lulzbot TAZ 6 is a bit outside of your price range, or the sheer size of this printer just frightens you, there are a number of good alternatives you can turn to.

    First and foremost, you can downsize to the Lulzbot Mini, a smaller and more inexpensive member of the Aleph Objects family. For half the price, you’ll get a 152 x 152 x 158 mm build volume and equal 3D printing capabilities. However, unlike the Lulzbot TAZ 6, the Mini has no standalone 3D printing feature, which means you’ll have to stay tethered to a PC.

    If size is an important factor, but the Lulzbot TAZ 6 is outside of your price range, the Creality CR-10 may be a suitable alternative. Although you lose a bit of that reliability that Aleph Objects offers with its 3D printers, the CR-10 has quickly become the go-to option for makers on a budget. For under $500, you’ll get a print area of 300 x 300 x 400mm. However, keep in mind that you’ll be missing out on the consistency and performance that comes with owning a Lulzbot 3D printer.

    Zortrax M300


    Check Price

    Is the Lulzbot TAZ 6 just not big enough for you? Perhaps the Zortrax M300 will tickle your fancy with its 300 x 300 x 300 mm build area. This Polish 3D printer is a bit bigger, but it also cost more money. On top of that, you miss out on the advantages of having open source hardware, as the M300 will encounter more restrictions than the Lulzbot TAZ 6.

    Website: LINK

  • Desktop Metal Unveils Live Parts Generative Design Tool for SOLIDWORKS

    Desktop Metal Unveils Live Parts Generative Design Tool for SOLIDWORKS

    Reading Time: 3 minutes

    Desktop Metal is partnering with Dassault Systèmes to develop Live Parts, a new generative design tool. This experimental technology is exclusive to SOLIDWORKS users, and aims to simplify generative design for 3D printing. 

    This week in Los Angeles, some of the most innovative names in 3D printing and CAD software have joined together at SOLIDWORKS World 2018. With over 5,000 members of the manufacturing and engineering community in attendance, the event is heralded as the place to learn new 3D design skills and speak with experts.

    Eager to share some exciting news at the show was Desktop Metal, the Massachusetts metal 3D printing startup that has recently skyrocketed into the additive manufacturing spotlight. Last year, the company debuted the Studio System and Production System, two groundbreaking 3D printers that are aiming to disrupt the metal 3D printing market.

    Read more: Interview with Desktop Metal: The Metal 3D Printing Hype is Real (And Made of Steel)

    The latest development from Desktop Metal, which was debuted at SOLIDWORKS World 2018, is Live Parts. This is a new advanced software tool that focuses on experimental generative design. This tool was created through a partnership with Dassault Systèmes, the company responsible for the 3D CAD software SOLIDWORKS.


    Desktop Metal Unveils Live Parts, A New Approach to Generative Design

    The aim of Live Parts is to simplify generative design, enabling the creation of strong and lightweight parts in a matter of minutes. With it, users can maximize the full potential of 3D printing, leading to material and cost efficiency, as well as design flexibility.

    Developed by DM Labs, Desktop Metal’s research and innovation group, Live Parts is powered by a Graphics Processing Unit (GPU)-accelerated multi-physics engine. This allows designs to be auto-generated in real time, applying morphogenetic principles and advanced simulation to ensure parts are optimized for 3D printing.


    “At Desktop Metal, we are committed to making metal 3D printing both accessible and successful for designers, engineers and manufacturing teams. In addition to hardware, we believe design for additive manufacturing software tools and techniques are critical to the successful fabrication of strong, lightweight parts that perform. We are excited to partner with Dassault Systèmes on the preview of our latest innovation, Live Parts, and to offer our software tool as a means for educational exploration to the largest community of engineers leading advancements in additive manufacturing,” said Ric Fulop, CEO and Co-Founder at Desktop Metal.

    In addition to hardware, we believe design for additive manufacturing software tools and techniques are critical to the successful fabrication of strong, lightweight parts that perform.

    The tool creates functional parts with complex geometries that are well-suited for 3D printing technology. Moreover, Live Parts is accessible to users with zero knowledge on how to design for the techniques and guidelines of additive manufacturing.

    Desktop Metal and Dassault Systèmes will continue to work together and create new features, eventually offering a full workflow from design to 3D printing. The two companies will also collaborate on new initiatives, including metal 3D printing certification and curriculum, as well as joint educational programs.

    “We are extremely excited to partner with Dassault Systèmes to offer SOLIDWORKS users access to the Live Parts technology preview, and we look forward to future collaboration on educational and additional software tools specifically suited for designing for additive manufacturing,” Fulop adds.

    Source: Desktop Metal

    Website: LINK

  • World’s Largest 3D Printed Camper Trailer Will be Live-streamed

    World’s Largest 3D Printed Camper Trailer Will be Live-streamed

    Reading Time: 3 minutes

    A 3D printing cafe (yes, that’s a thing) will attempt to 3D print the world’s largest single piece camper trailer. Weighing 600 lbs and 13 feet long, the mega project will be streamed live on the cafe’s Facebook page.

    A prototype 3D printed camper van, the Wave, will be fabricated live for all to see from Thursday, February 8th. The project, an in-house effort of Create Cafe 3D with the help of Saskatchewan Polytechnic, will see a 28-foot long ErectorBot 3D printer do the heavy lifting, extruding some 600 lbs of PETG provided by a proprietary hopper.

    The Wave is planned to become a commercial line of camper trailers available in three sizes — 13-, 16- and 19-feet — sold by Wave of the Future 3D. Founded by Randy Janes (who is also a member of the Create Cafe team), Janes is also the owner of the ErectorBot that will be housed in Create Cafe 3D for the duration of the print.

    This exercise has been long in the making, with Janes approaching Create Cafe 3D CEO Dustin Maki way back in 2016 with the premise of printing “the worlds first full-size camper”. Two years later the plan is coming to fruition, with Janes’ behemoth 3D printer installed in the cafe ready to undertake a 10-14 day print job in full view of Create Cafe 3D’s coffee-swigging customers.

    It’s well and good making bombastic claims to world-firstedness, but what exactly makes the Wave stand apart? What are the benefits of 3D printing a camper trailer?


    Printron large-scale 3d printer
    Janes’ ErectorBot, nicknamed “Printron” at Create Cafe 3D ready to print the Wave camper

    Creating the Custom Camper

    For one, Wave of the Future and Create Cafe 3D claim a 100 year life expectancy from a PETG 3D printed camper. By printing a watertight single shell design, they plan to eliminate the primary cause of degradation in campers: water damage. No seams between sheet metal or wood like found on traditional campers means no way for water to seep inside and degrade the materials.

    The material properties of PETG also contribute to such hardiness, with abrasion resistance the cited benefit here.

    Given the large nature of the print job, any optimization is a welcome thing. To this, a partnership with Saskatchewan Polytechnic resulted in an applied research project provided high-flow printing nozzles, without which the collaboration claims it could not succeed.

    The prototype Wave was designed in Fusion 360 and sliced in Simplify3D by Create Cafe 3D’s Head of Design, Duncan Boyes.

    Looking to whip up greater public interest in 3D printing in Canada, the printing of the Wave will be live-streamed on Create Cafe’s Facebook page on February 8th, 12pm CST (the company originally communicated February 5th for the stream, but a customs issue with the Wave’s PETG pellets has forced the project back).

    Although if you’re in the neighborhood, you could always pop in for a coffee and check it out in person.

    Website: LINK

  • Solidworks Add-In for DragonFly2020 Pro Makes Creating 3D Printed Electronics Easier

    Solidworks Add-In for DragonFly2020 Pro Makes Creating 3D Printed Electronics Easier

    Reading Time: 2 minutes

    Nano Dimension, known for their circuit boards 3D printers, partnered up with software company Dassault Systèmes and implemented a Solidworks add-in for its DragonFly 2020 Pro 3D printer.

    The DragonFly 2020 Pro is a 3D printer from Nano Dimension which was unveiled last September. It is designed to manufacture embedded electronics and circuit boards. All3DP covered the printer’s release.

    However, Nano Dimension is always working on enhancing its 3D printers and for the latest improvement, it partnered up with French software company, Dassault Systèmes.

    Solidworks is the software published by the French company which is now being implemented into the DragonFly 2020 Pro as an add-in. The hope is that adding this software to the fully industrial machine will hugely benefit mechanical and electrical engineers.

    The reason being that this add-in makes 3D printing with embedded electronics accessible. In fact, it’s now possible for users to print complex shapes designed in Solidworks using metals and polymers. It takes just one build process to create designs with embedded electronics.

    “By 3D printing electronics, designers can obtain faster prototypes and work on PCBs in 3D, not just 2D… With Nano Dimension’s SOLIDWORKS add-in, for the first time ever users can design and 3D print electronics with a push of a button. We are proud to be partnering with an industry innovator like Nano Dimension,” explains Suchit Jain, Vice President of Strategy & Business Development, SOLIDWORKS, Dassault Systemes.

    Solidworks Software Add-In Features

    Thanks to the new add-in, users can design objects in Solidworks and automatically transfer the files to slicing software. This will save time, enhance designs and hopefully create more reliable products.

    Essentially, it’s now possible to 3D print designs which contain conductors without leaving Solidworks. Unlike with most editing software, it’ll be possible for users to design using more than one material.

    It’s now simple to point and click in order to subdivide an object. Next, different object parts will automatically have either conductive or insulating materials. After this is complete, you’re ready to print.

    “We developed this add-in for SOLIDWORKS applications as a direct response to our customers’ needs for prototyping increasingly complex designs… The SOLIDWORKS add-in for the DragonFly 2020 Pro is the first tool to enable the combination of freeform objects and embedded 3D electronics. This capability offers our customers the ability to make what is currently unmakeable,” explains Simon Fried, President of Nano Dimension USA.

    Interested in finding out more? Nano Dimension’s technology will be on display at the Solidworks World 2018 showcase. This is happening between February 4th and 7th in Los Angeles, USA.

    Source: tct Magazine

    Website: LINK

  • New HP Jet Fusion 300 / 500 Series With Full Color 3D Printing

    New HP Jet Fusion 300 / 500 Series With Full Color 3D Printing

    Reading Time: 3 minutes

    HP introduces new industrial 3D printers capable of full-color engineering-grade parts. Prices for the new HP Jet Fusion 300 / 500 series start from $50,000, making innovation accessible to small to medium-sized businesses and academic institutions.

    Don’t Miss: With Multi Jet Fusion, HP Challenges Injection Molding

    Today sees the launch of the HP Jet Fusion 300 / 500 series 3D printers. With the new range, the company promises engineering-grade, functional parts in either full color or black or white for a fraction of the cost of similar solutions.

    Depending on configuration and color preference, the cost of the Jet Fusion 300 / 500 series starts from $50,000. This price point should make Multi Jet Fusion technology more accessible to small to medium-sized businesses, universities and research institutions.

    “HP is committed to democratizing 3D design and manufacturing, unleashing new possibilities for millions of innovators around the world,” says Stephen Nigro, President of 3D Printing at HP.

    “No matter your industry, no matter your design complexity, no matter what colors fit your business needs – black, white, or the full color spectrum – the new HP Jet Fusion 300 / 500 series gives you the freedom to create brilliant new parts liberated from the constraints of traditional production methods.”

    The new Jet Fusion 300 / 500 series complements HP’s existing industrial-grade Jet Fusion 3200 / 4200 / 4210 3D solutions, which deliver a low cost/part ratio and are designed for manufacturing environments.

    HP Jet Fusion 300 / 500 Series Offers Voxel Level Control

    The new HP Jet Fusion 300 / 500 series offerings include:

    • HP Jet Fusion 340 (Black and White) / 380 (Color): for customers who have smaller part-size needs or who commonly print fewer parts per build.
    • HP Jet Fusion 540 (Black and White) / 580 (Color): with a bigger build size than the 300 series for customers who have larger part-size needs or heavier production demands.

    The company is keen to emphasize how Multi Jet Fusion technology can control part properties at the individual voxel level; this means the design and production of previously inconceivable parts is now possible in full color.

    Industries that could benefit from these advances ranges from automotive and medicine, to aerospace and consumer goods. HP is already engaging in the co-development of new color applications with universities and businesses around the world. These include Phoenix Children’s Hospital, Yazaki Corp., and Youngstown State University.

    “At Phoenix Children’s Hospital, we strive to create personalized experiences benefitting the long-term well-being of our patients,” says Dr. Justin Ryan, Cardiac 3D Print Lab, Phoenix Children’s Hospital.

    “From visually-appealing casts and corrective devices, to custom surgical guides, to interactive and personalized anatomical models, we see tremendous value in the design possibilities and highly-accurate and durable parts from HP’s new 3D printers.”

    Source: HP


    HP Jet Fusion 300/500 series

    Website: LINK

  • Massachusetts Man Develops Braille Toy for Daughter with Usher Syndrome

    Massachusetts Man Develops Braille Toy for Daughter with Usher Syndrome

    Reading Time: 2 minutes

    After learning that his daughter suffers from Usher Syndrome, a degenerative disease that leads to blind- and deafness, Jake Lacourse channeled his anguish into the development of a fun educational toy that would teach 2-year-old Becca braille.

    To those untouched by it, it may be surprising to learn that the leading cause of deaf-blindness is Usher Syndrome. A hereditary genetic disorder, the signs of Usher Syndrome (night blindness, gradual deterioration of vision, complete or partial and deteriorating hearing) typically manifest in the young.

    In current medicine the disorder is largely untreatable. For Jake Lacourse, a product engineer from Massachusetts, USA, learning that his 2-year-old daughter Becca suffered from the most aggressive form of Usher Syndrome proved a turning point.

    A key element of easing the transition to a vision and hearing-impaired life is recognizing the signs early, and education. With Becca diagnosed as likely to lose her sight as a teen, Lacourse set about using his experience to help her in every way possible.

    “We recognized there was nothing really out there for her… We wanted to create a special toy for her” he explains. And a special toy is exactly what he created. Currently only a prototype, the BecDot is an educational aid that teaches children the braille for a variety of words and letters.

    Feeling Words: 3D Printed BecDot Prototype Teaches Braille

    The BecDot is a tablet-sized box with an NFC pad next to four areas with motorized pins. Connected to a phone running the BecDot’s proprietary app, parents or teachers can program in words, characters and various concepts of braille, which are then translated to the array of pins which raise up above the surface of the box.

    In addition, NFC tags (readable by the BecDot) can be stuck to any favorite toy and programmed into the app, allowing for familiarity to be interwoven into the child’s learning of braille.

    Testing the design with Becca, Lacourse’s use of 3D printing for the shell of the device proved a wise decision. Tested to destruction (as most parents of toddler’s will attest to) this fed back into the BecDot’s design, with the current shape one Becca has yet to destroy.

    Such is the potential benefit of Lacourse’s BecDot, it was presented at the Consumer Electronics Show in January by the Not Impossible Foundation. As the winner of The Not Impossible Limitless Award, it was one of a number of innovations the “bring positive change to the global community”.

    There’s currently no word on a commercial release for the BecDot, but more information can be found on the BecDot website. Sticking to the original goal of affordability, Lacourse expects that the final version of the BecDot to cost approximately $100.

    Tthe Lacourse family’s experiences with Usher Syndrome and information on charity’s seeking a cure can be found here.

    (Top image credit: Robin Lubbock/WBUR)

    Website: LINK

  • [DEAL] 25% Off Monoprice Maker Select Plus

    [DEAL] 25% Off Monoprice Maker Select Plus

    Reading Time: < 1 minute

    For the merry merry month of February, Monoprice is knocking 25% off its compact Maker Select Plus 3D printer.

    We know it’s just a rebadged Wanhao Duplicator i3 Plus, but for just $299 bucks the Monoprice Maker Select Plus is pretty good value no matter the branding.

    For that kind of money you’re looking at a 200 x 200 x 180mm build volume atop a heated bed with a simple touchscreen for operation, minimal setup (it comes fully assembled) and up to 50% faster printing than its Maker Select brother.

    All that within a smaller footprint, to boot.

    To get it for $299 (+free shipping) use the code “SELPLUS” at checkout on the Monoprice website. It should work until the end of the month — February 28th.

    DEAL: Monoprice Maker Select Plus 3D Printer, 25% off (now US$299 + free shipping)

    All3DP is an editorially independent publication. Occasionally we need to pay our bills, so we affiliate some product links through which we may receive a small commission. For the full spiel, check out our Terms of Use.

    Website: LINK

  • Haptic 3D Modeling Software Anarkik3D Design Version 3.1 is Now Available

    Haptic 3D Modeling Software Anarkik3D Design Version 3.1 is Now Available

    Reading Time: 2 minutes

    Anarkik3D’s latest software for 3D printing, Anarkik3D Design 3.1, enables you to touch and feel 3D qualities of your design using the Falcon mouse system.

    If you’re a jewelry designer or work in the fashion industry, Anarkik3D has released a new version of 3D design software which is aimed at you. The software creates haptic 3D designs which allows you to go deeper into the 3D model.

    Anarkik3D Design 3.1 now added support for the 3D mouse system, which provides the user with physical feedback on the designs. The idea is that this enables you to create free-flowing 3D objects such as artistic pieces. It’s very different from most 3D CAD systems.

    When working on a new idea, when else do you bump into your design or feel your model as you move your cursor around in the 3D space?


    Anarkik3D Design

    Features of Anarkik3D Design 3.1

    For the new software, Anarkik3D explain that many interface operations have been simplified significantly. For example, by making it more straightforward to use and providing the ability to create geometric shapes which you can then manipulate.

    As well as this, you can increase or decrease mesh complexity. Now, this process is a lot easier and chopping up the 3D mesh occurs far more rapidly. You can also change the hardness and softness of objects and the colors easily.

    Anarkik3D’s Design software is great for artists, jewelry designers and those working in the fashion industry. In fact, the website describes the software as a “3D modelling system for applied artists and designer-makers.”

    After creating a design, the software supports .stl, .3DS, .OBJ and .wrl files. You can then 3D print these designs to create functional pieces or prototypes.

    The Anarkik3D Design 3.1 will cost you $550. However, the company points out that this will raise at the end of this month. As well as the software, you’ll also have to buy the Falcon haptic device for $249. Visit the Anarkik3D website to find out more.

    Source: Fabbaloo 


    Anarkik3D Design

    Website: LINK

  • Danish Engineering Students Use BigRep ONE 3D Printer to Create Functional Bicycle Design

    Danish Engineering Students Use BigRep ONE 3D Printer to Create Functional Bicycle Design

    Reading Time: 4 minutes

    Mechanical engineering students from the Aalborg University Esbjerg have used a BigRep ONE to 3D print a functional bike frame in one piece. PhD doctorate Peter Riddersholm Lauridsen shares an inside look at this project, and explains how 3D printing enables students to hone their engineering skills. 

    In universities across the world, 3D printing is becoming an integral tool for students in the field of engineering and design. As many projects have shown, this technology has lead to the actualization of some big ideas, and that innovation is only amplified when a gigantic 3D printer like the BigRep ONE rolls onto campus.

    The German manufacturer BigRep is known for its mammoth industrial-grade FDM 3D printers, its flagship being the BigRep ONE. This machine offers a 1005 x 1005 x 1005 mm build volume, dual-extrusion capabilities, auto-leveling, and the list of features goes on… Needless to say, the production scale leads to nearly limitless creative possibilities. We even collaborated with BigRep on a gigantic 3D printed fidget spinner back when they were all the rage.

    Read more: Inside BigRep: Bringing in Big Bucks, Building Smaller Printers

    Mechanical engineering students from the Aalborg University Esbjerg in Denmark are currently using the BigRep ONE for their own unique project. Led by PhD doctorate Peter Riddersholm Lauridsen, the goal is to 3D print a functional bicycle frame in a single piece.


    Mechanical Engineers Hone Skills with 3D Printing Bicycle Frame Project

    We talked to Lauridsen about why his team opted to create a 3D printed bicycle frame for their semester project. He explains that there are many factors an engineer must be aware of, such as the load carrying structure, material properties, dynamic loading on structures, and improving performance with new materials.

    “A bike is a simple mechanical construction and obvious to use in a project. The idea was to design a topology optimized bike frame because 3D-printing makes it possible to make these complex structures. In the university, we have bought a BigRep ONE that makes it possible to print the bike frame in one piece. That was also one of the reasons why I specifically was going for a bike frame in the semester project,” says Lauridsen. 

    Looking for a material that is easy to print with, the bicycle frame is printed in orange PLA. The mechanical engineering team successfully printed the frame on their first try. In the future, they plan to repeat the project with a stricter focus on material performance and topology optimization.


    Pedaling Towards a Functional Future with 3D Printing Technology

    Despite being produced in plain PLA, Lauridsen claims that the bike frame is able to carry at least 90 kg of weight and works under certain conditions. In fact, the PhD doctorate states that this bike can be used to transport yourself around the university. He believes that the mechanical capabilities of a 3D printed bike frame will only improve as time goes on and the technology advances.

    “I think it will be possible to design a usable 3D printed bike frame. The technology in the field evolves quickly and in a few years will this be possible. The print materials are also getting stiffer due to the added glass fibers and carbon fibers. Hopefully is it possible in near future to print with even higher percentage of glass fibers or carbon fiber in the filament,” Lauridsen concludes.

    During the next semester, each student will have their own 3D printer to further explore the technology. For the mechanical engineers at Aalborg University Esbjerg, the BigRep ONE displays a large and open window into what will be possible in the future, as well as what engineering feats can be accomplished today.


    Website: LINK

  • MasterSpool Could Help Reduce Waste When Buying 3D Printing Filament

    MasterSpool Could Help Reduce Waste When Buying 3D Printing Filament

    Reading Time: 3 minutes

    3D printing expert Richard Horne (a.k.a. RichRap) is proposing a new way to receive filament which involves one MasterSpool and minimally packaged refills. Already manufacturers such as Das Filament are onboard with this idea.

    It’s not news to anyone that consumers are becoming more eco-conscious and demanding environmentally friendly products. As a result, companies are being forced to meet these demands. Of course, the 3D printing community is no different.

    Slowly, manufacturers are providing more sustainable filament options – for example, recyclable or cardboard spools. However, for Richard Horne, aka RichRap3D, this wasn’t enough.

    He explains in a blog post that for many years he wished for a no-spool based filament delivery service. So, instead of waiting and wishing, he came up with his own idea – the MasterSpool.

    Essentially, this concept is a material refill system. Horne’s idea is that you would print yourself a MasterSpool and then simply buy the filament refills from manufacturers which can be packaged in the bare minimum plastic.

    This avoids the heavy 260 grams of extra plastic used only for the spool. Horne’s idea would also reduce the weight needed to be shipped and hopefully save you a few dollars too.

    He’s created a video to give some more insight into his idea:

    Save the Planet One Spool at a Time

    Of course, there is the option of using un-spooled filament. However, Horne adds: “Most often, users of 3D printers do not want to use un-spooled filament. Winding filament onto a spool is also not a good idea because it can encourage breaking and tangles. It also takes a lot of time for the user.”

    So, when searching for alternatives, he came across a 2-piece Filament Spool by Dingoboy71 on Thingiverse. Horne came up with his own design which he explains can be tweaked depending on your 3D printer and needs.

    However, he pointed out a few drawbacks for 3D printer manufacturers such as the fact that there are too many different spool sizes and mounting methods currently to choose from for just one MasterSpool. Also, Horne pointed out that securing and shipping the filament without a spool may pose a problem but suggested coil to hold it in place.

    Just one day after tweeting about his idea, German 3D printing manufacturer, Das Filament, tested out the idea. They tweeted a photo and reported that when testing out this idea, it came back nicely.

    Horne may have just changed the way we receive filament in the future. If you’re inspired, you can 3D print his MasterSpool by downloading the files from YouMagine. Make sure to tweet him @RichRap3D to let him know your thoughts if you do.

    Source: Rich Rap Blog


    MasterSpool

    Website: LINK

  • Weekend Project: A $20 DIY Heated DryBox for 3D Printing Filament Storage

    Weekend Project: A $20 DIY Heated DryBox for 3D Printing Filament Storage

    Reading Time: 3 minutes

    Want to keep your filament in tip-top shape? Engineer and 3D printing enthusiast RichRap shows us how to create DIY Heated DryBox for 3D Printing filament for under $20.  

    No matter how finely tuned your 3D printer is, the quality of your prints are highly dependent on the state of the filament you’re feeding through the extruder. Some 3D printing materials are highly susceptible to moisture in the air, which can result in poor quality prints. Before printing, these spoiled filaments need to be kept in an airtight container with desiccant and dried out in the oven.

    On today’s Weekend Project, we’re sharing the DIY Heated DryBox created by engineer and renowned 3D printing enthusiast RichRap. Not only does this contraption keep your filament properly stored, it also has the capacity to actively heat the material while printing. More importantly, the entire project shouldn’t cost you anymore than $20 – $30, depending on where you source your materials.

    Let’s dig a bit deeper into what you’ll need to build a DIY Heated DryBox.


    DIY Heated DryBox: What Do You Need?

    There is some 3D printing involved in the assembly of the DIY Heated DryBox. But it also requires some other inexpensive parts. Here’s what you need:


    DIY Heated DryBox: Putting it all Together

    The first thing you’ll need is a plastic storage box that holds at least 11 liters and has a lid. You can likely find one at your local hardware store or on Amazon. It’s important that the height of the box is tall enough to fit an upright spool of filament, but the lid doesn’t have to be completely sealable.

    RichRap also suggests using a Reptile Heating Mat as the heating element for the DIY Heated DryBox. He was initially inspired to create this solution after a trip to E3D, a UK producer of high-end 3D printing accessories. While visiting, he saw the company was storing its exotic and nylon materials in a plastic box that had this type of heater laid on top of it.

    The temperature and humidity sensor is stored within a 3D printed housing. The heating element slides into the 3D printed base, and will rest underneath the filament to keep the environment toasty. You’ll also have to 3D print a spool. All of these files are freely available on Thingiverse or Youmagine.


    Finally, two cable connectors are inserted in the front, allowing two different filaments to exit through tubing directly to the printer. Another cable connector is mounted in the back for the power cable of the heating element.

    This project requires a bit of hands-on work, but the results that RichRap achieves without breaking the bank are truly impressive. While filament storage solutions like the Polybox are readily available, the DIY Heated DryBox is more versatile and costs a fraction of the price to create. On top of that, you get that sense of accomplishment that comes with completing any useful DIY project.

    Learn more about the components on RichRap’s blog, and check out the video below to see the entire assembly process in action.

    Website: LINK

  • Learning about Chandra X-ray Observatory Discoveries with 3D Printed Supernova Models

    Learning about Chandra X-ray Observatory Discoveries with 3D Printed Supernova Models

    Reading Time: 3 minutes

    NASA’s Chandra X-ray Observatory’s Communications and Public Engagement group uses 3D models and prints to educate and raise awareness about our high-energy universe. 

    Ever wondered what it feels like to hold a supernova in your hand? April Jubett, who works for the Chandra X-ray Observatory communication team, uses 3D printing and information collected by NASA to enable people to do just that.

    NASA’s Chandra X-ray Observatory is a space-based telescope which orbits our planet. Its purpose is to collect data in the form of X-ray light from high-energy objects. These objects could be exploding stars or black holes.

    Scientists use the information collected by Chandra in a multitude of ways. For Jubett, this is by explaining science in creative ways. In order to teach us Earthlings about the discoveries, Chandra’s Communications and Public Engagement group creates 3D models and prints. Jubett has been a member since 2001, she explains:

    “With recent breakthroughs, such as our ability to map X-ray data of astronomical objects in three dimensions, my team has expanded its role to include 3D printing of such objects, and now even virtual and augmented reality experiences around those data sets.”


    Chandra X-ray Observatory

    Learning about Space with 3D Prints

    The group use a multitude of tools for teaching such as videos and podcasts. However, they’ve found that holding a print is a tangible way to help people get their mind around new phenomenas.

    “We use our 3D prints with people of all ages and of varying interests and abilities… The idea of holding a ‘dead star’ in your hand seems to appeal to most people with a curious mind. We can use our prints to help explain basic X-ray astronomy, physics, and technology to even very young children,” Jubbet continue.

    Her team runs STEM workshops for middle school and high school students. They also work with blind and visually-impaired communities. The 3D printed models, which Jubett creates using Ultimaker 3D printers, make perfect hands-on learning tools.

    Students can even get involved on their own by using STL files provided by the team. To do this, they can simply visit the Chandra X-Ray Observatory website.

    Jubett prints using PLA and PVA but hopes to try out new materials int he future. Impressively, she taught herself how to use a 3D printer through trial and error. The first model was printed in 2014.

    Now, a 3D printer is running 24/7. However, due to a trial and error process, Jubett occasionally ends up with just one model per week. She hopes this will change in future with the creation of better 3D files from X-ray data.

    Anyone can learn from the Chandra X-Ray Observatory thanks to Jubett and her team translating scientific data into easy to understand learning tools. Visit the website to find out more and start learning.

    Source: Ultimaker


    Chandra X-Ray Observatory


    Website: LINK

  • Weekend Project: 3D Print Your Own Mechanical Laser Show!

    Weekend Project: 3D Print Your Own Mechanical Laser Show!

    Reading Time: 3 minutes

    Looking for a weekend DIY project? Check out this awesome 3D printed hand-powered mechanical laser show created by software developer Evan Stanford. 

    Is your 3D printer sitting idle this weekend? Want to find a amusing project to show your friends and family just what this technology is capable of? What better way to seize the day than with a fully 3D printed mechanical laser light show.

    Today’s Weekend Project is the Mechanical Laser Show, a spectacular showcase of the functionality of 3D printed gear mechanisms and 3D design. Created by software developer Evan Stanford, his goal was to use a laser to display a Persistence Of Vision (POV) image. However, he didn’t want to use any electric motors or servos, instead opting to create a hand-powered device with fully 3D printed parts.

    The outcome is an impressive feat in mechanical engineering, one that you can replicate quite easily at home. This project uses a gear mechanism and custom designed cams, which are used to display the laser image. In his visual examples, Stanford creates laser-powered stars, hearts, even the Batman logo on the wall.


    DIY Mechanical Laser Show: What Do You Need?

    Interested in building your own mechanical laser show? Here’s what you need to put this project together:


    DIY Mechanical Laser Show: Putting it all Together

    First things first, you’ll need to 3D print the different parts, all of which are available on Thingiverse. The device itself is comprised of nine components: the front and back plate, gear, crank, bolt, two axels, and two cams, which are interchangeable depending on the image you wish to display.

    The rubber band is used to secure the laser pointer to the 3D printed device. Stanford shares a few different 3D printable cam designs on Thingiverse.

    Stanford describes how the basics of how device works on the project’s Hackaday page:

    “When you turn the input crank, the cams turn at a 5:1 ratio. Every time the cams rotate, the laser traces the path once. Using 2 cams allows the laser to move with 2 degrees of freedom. Basically one actuates in the X axis and one in the Y axis.”


    To design your own image projections, Stanford developed a Go program (available via GitHub) that takes the target path as input and outputs the two cam profiles. This target path uses a series of points that the laser will travel to sequentially. The software developer also shares instructions to ensure that the mechanical variables or optimized to properly display the laser show.

    If you want take on this project, you can find more information on the Hackaday project page. And, if you’re not convinced yet, check out the mesmerizing “Mechanical Laser Show” video below and get inspired. Happy making!

    Website: LINK

  • 34 Best 3D Printing Services 2017 / 2018

    34 Best 3D Printing Services 2017 / 2018

    Reading Time: 3 minutes
    Shapeways Worldwide (DHL, UPS, USPS) Instant Metal, Plastic, Ceramic, Sandstone, Wax SLS, Binder Jet Steel, Wax casting 3D Hubs Worldwide (depends on chosen Hub), pickup is free Instant Metal, Plastic, Paper, Resin, Stone, Wax FDM, Jetting, Metal Sintering, Paper, PolyJetting, SLA, SLS, CFF, Wax Casting i.materialise Worldwide (UPS) Instant Metal, Plastic, Ceramic, Resin, Wood Casting, CeramicJet, Colorjet, DMLS, FDM, Indirect Metal Printing, Polyjet, SLS, SLA Stratasys Direct Worldwide Instant Metal, Plastic, Acrylic, Ceramic, Foam, Wax CNC, DMLS, FDM, LS, PolyJet, SLS, Urethane Casting Sculpteo Worldwide (UPS and others) Instant Metal, Plastic, Ceramic, Fullcolor, Resin, Wax Casting, CLIP, ColorJet, SLA, DMLS, FDM, SLS Protolabs Worldwide Instant Metal, Plastic, Nylon DMLS, SLA, SLS Ponoko Worldwide (UPS and USPS) Instant Metal, Plastic ColorJet, FDM, SLS iMakr Worldwide (Store pick-up possible) Request Form, 1 Day Response Time Plastic, Resin FDM, SLA MakeXYZ Worldwide (UPS, USPS) Instant Plastic, Nylon, Resin FDM, SLA Voodoo Manufacturing Worldwide, US (Uber Rush, FedEx), Rush Production available Instant Plastic FDM Trinckle Worldwide (DHL) Instant Metal, Plastic, Multicolor, Resin ColorJet, FDM, SLA, SLS, Wax casting Treatstock Worldwide Instant Metal, Plastic, Gypsum, Paper, Powder, Resin, Wax, Wood BinderJet, FDM, MultiJet, SDL, SLA, SLS Materialise OnSite Worldwide (UPS) Instant Plastic, Gypsum, Glass, Multicolor, Resin Colorjet, DMLS, FDM, Polyjet, SLA, SLA Star Rapid Worldwide (Fedex, DHL, UPS) Request Form, 1 Day Response Time Metal, Plastic DMLM, SLA WhiteClouds No reply to our request. Request Form Metal, Plastic, Fullcolor ColorJet, MJP, SLA, DMP, SLS Shapetizer No reply to our request. Instant Resin, Plastic, Precious Metal Casting, SLA Kraftwurx Worldwide Instant Metal, Plastic, Ceramic, Paper, Resin, Stone, Wax Casting, DMLS, FDM, SLA, SLS 3D Print-Au Australia, New Zealand (Toll Priority) Instant Nylon SLS SD3D Worldwide, lead time 3-7 business days Instant Quote Nylon, Thermoplastic FDM Quickparts Worldwide Instant Metal, Plastic, Nylon, Resin, Wax ColorJet, CNC, DMLS, MultiJet, SLA, SLS HK3DPrint Worldwide (China SF Express, FedEx, EMS) Instant Fullcolor, Nylon SLS X3D Print Worldwide (Chronopost, La Poste) Instant Resin SLA BuildParts Worldwide (FedEx, UPS) Instant Metal, Plastic, Resin CLIP, FDM, Polyjet, SLA, SLS, Urethane Casting Fathom Worldwide (FedEx and local couriers) Instant (for Advanced Services, Request Form) Metal, Plastic, Resins, Urethanes, Silicones FDM, PolyJet, SLA, SLS MeltWerk Europe (DHL in 7 – 22 days) Instant Plastic SLS Incept3D Worldwide (Fedex, UPS, or USPS) Request Form, 1 day response time Metal, Plastic, Resin FDM, SLA, DMLS RapidCrafting Worldwide (UPS), 3-7 days Email, 1 day response time Metal, Plastic, Ceramic, Fullcolor, Resin Colorjet, DMLS, FDM, SLA, SLS Beta-Prototypes Worldwide Request Form, 1 Day response time Metal, Plastic, Resin FDM, SLA, SLS 3Diligent Worldwide (FedEx) Request Form, 1 Day response time Metal, Plastic, Nylon, Resin DMLS, EBM, FDM, Polyjet, SLA, SLM, SLS 3D Printing Ally Express Service available for SLS Instant Plastic, Ceramic, Fullcolor, Nylon, Polycarbonate, Resin, Wax Color Jet Printing, FDM, Multijet Printing, SLA, SLS PartSnap Worldwide (USPS, UPS, FedEx) Instant Plastic, Resin FDM, FFF, PolyJet Iannone 3D Worldwide (USPS, DHL) Request Form Plastic, Nylon, Wax FDM, Wax printing Rapid3DParts No reply to our request for information. Request Form, 2 Days Response Time Plastic ColorJet, PolyJet, SHS, SLS Rapid3D Multiple Express Options Available Request Form, 2 Days Response Time Resin SLA

    Website: LINK

  • 34 Best 3D Printing Services 2018

    34 Best 3D Printing Services 2018

    Reading Time: 3 minutes
    Shapeways Worldwide (DHL, UPS, USPS) Instant Metal, Plastic, Ceramic, Sandstone, Wax SLS, Binder Jet Steel, Wax casting 3D Hubs Worldwide (depends on chosen Hub), pickup is free Instant Metal, Plastic, Paper, Resin, Stone, Wax FDM, Jetting, Metal Sintering, Paper, PolyJetting, SLA, SLS, CFF, Wax Casting i.materialise Worldwide (UPS) Instant Metal, Plastic, Ceramic, Resin, Wood Casting, CeramicJet, Colorjet, DMLS, FDM, Indirect Metal Printing, Polyjet, SLS, SLA Stratasys Direct Worldwide Instant Metal, Plastic, Acrylic, Ceramic, Foam, Wax CNC, DMLS, FDM, LS, PolyJet, SLS, Urethane Casting Sculpteo Worldwide (UPS and others) Instant Metal, Plastic, Ceramic, Fullcolor, Resin, Wax Casting, CLIP, ColorJet, SLA, DMLS, FDM, SLS Protolabs Worldwide Instant Metal, Plastic, Nylon DMLS, SLA, SLS Ponoko Worldwide (UPS and USPS) Instant Metal, Plastic ColorJet, FDM, SLS iMakr Worldwide (Store pick-up possible) Request Form, 1 Day Response Time Plastic, Resin FDM, SLA MakeXYZ Worldwide (UPS, USPS) Instant Plastic, Nylon, Resin FDM, SLA Voodoo Manufacturing Worldwide, US (Uber Rush, FedEx), Rush Production available Instant Plastic FDM Trinckle Worldwide (DHL) Instant Metal, Plastic, Multicolor, Resin ColorJet, FDM, SLA, SLS, Wax casting Treatstock Worldwide Instant Metal, Plastic, Gypsum, Paper, Powder, Resin, Wax, Wood BinderJet, FDM, MultiJet, SDL, SLA, SLS Materialise OnSite Worldwide (UPS) Instant Plastic, Gypsum, Glass, Multicolor, Resin Colorjet, DMLS, FDM, Polyjet, SLA, SLA Star Rapid Worldwide (Fedex, DHL, UPS) Request Form, 1 Day Response Time Metal, Plastic DMLM, SLA WhiteClouds No reply to our request. Request Form Metal, Plastic, Fullcolor ColorJet, MJP, SLA, DMP, SLS Shapetizer No reply to our request. Instant Resin, Plastic, Precious Metal Casting, SLA Kraftwurx Worldwide Instant Metal, Plastic, Ceramic, Paper, Resin, Stone, Wax Casting, DMLS, FDM, SLA, SLS 3D Print-Au Australia, New Zealand (Toll Priority) Instant Nylon SLS SD3D Worldwide, lead time 3-7 business days Instant Quote Nylon, Thermoplastic FDM Quickparts Worldwide Instant Metal, Plastic, Nylon, Resin, Wax ColorJet, CNC, DMLS, MultiJet, SLA, SLS HK3DPrint Worldwide (China SF Express, FedEx, EMS) Instant Fullcolor, Nylon SLS X3D Print Worldwide (Chronopost, La Poste) Instant Resin SLA BuildParts Worldwide (FedEx, UPS) Instant Metal, Plastic, Resin CLIP, FDM, Polyjet, SLA, SLS, Urethane Casting Fathom Worldwide (FedEx and local couriers) Instant (for Advanced Services, Request Form) Metal, Plastic, Resins, Urethanes, Silicones FDM, PolyJet, SLA, SLS MeltWerk Europe (DHL in 7 – 22 days) Instant Plastic SLS Incept3D Worldwide (Fedex, UPS, or USPS) Request Form, 1 day response time Metal, Plastic, Resin FDM, SLA, DMLS RapidCrafting Worldwide (UPS), 3-7 days Email, 1 day response time Metal, Plastic, Ceramic, Fullcolor, Resin Colorjet, DMLS, FDM, SLA, SLS Beta-Prototypes Worldwide Request Form, 1 Day response time Metal, Plastic, Resin FDM, SLA, SLS 3Diligent Worldwide (FedEx) Request Form, 1 Day response time Metal, Plastic, Nylon, Resin DMLS, EBM, FDM, Polyjet, SLA, SLM, SLS 3D Printing Ally Express Service available for SLS Instant Plastic, Ceramic, Fullcolor, Nylon, Polycarbonate, Resin, Wax Color Jet Printing, FDM, Multijet Printing, SLA, SLS PartSnap Worldwide (USPS, UPS, FedEx) Instant Plastic, Resin FDM, FFF, PolyJet Iannone 3D Worldwide (USPS, DHL) Request Form Plastic, Nylon, Wax FDM, Wax printing Rapid3DParts No reply to our request for information. Request Form, 2 Days Response Time Plastic ColorJet, PolyJet, SHS, SLS Rapid3D Multiple Express Options Available Request Form, 2 Days Response Time Resin SLA

    Website: LINK

  • Raise3D N2 3D Printer: Review the Facts Here!

    Raise3D N2 3D Printer: Review the Facts Here!

    Reading Time: 2 minutes

    The Raise3D N2 Plus has a huge build volume of 12″ x 12″ x 12″. Additionally, the entire printer is fully enclosed with a sturdy aluminum metal frame and ABS, acrylic, and poly-carbonate casing.

    The fully enclosed design not only improves print quality when printing with materials such as ABS, but also greatly enhances the safety of the printer, making the N2 Plus a great fit for schools and businesses.

    Printing with a Raise3D N2 3D printer is especially user-friendly due to a 7 inch full color touchscreen which allows for complete device control as well as print monitoring and fine tuning during a print. The functionality of this screen can also be accessed via wifi over a LAN setup, meaning you can control your Raise3D printer from anywhere in your home or office.

    The touchscreen is also integrated with the N2’s print resuming feature, allowing you to immediately resume a print that was interrupted due to a power outage or accidental shut-off.

    The Raise 3D N2 comes stock with a heated bed and their V2 Hot End capable of temperatures up to 300 C. This makes the N2 compatible with almost any material currently available, including PLA, ABS, PETG, Nylon, Carbon Fiber, TPU/TPE (Flexibles), and Metal Composites (with the upgrade to a wear resistant nozzle).

    Important to note is that the Raise3D N2 does not come with dual extrusion as standard. For those folks who need dual extrusion, the Raise3D N2 Dual is your best bet. With dual extrusion, you can print with two different colors at the same time, or pair one material with a dissolvable support material like PVA and HIPS. With soluble support, you can print complex models with ease.

    Website: LINK

  • Precious Plastic Creates Recycled iPhone Case with Help From 3D Hubs

    Precious Plastic Creates Recycled iPhone Case with Help From 3D Hubs

    Reading Time: 3 minutes

    The global community Precious Plastic has created a recycled iPhone case with CNC milling from 3D Hubs. The organization has created an open source production ecosystem that includes a plastic waste shredder, an filament extrusion machine, an injection molder, and a compressor to help process the molds.

    The mass production of plastic has led to the rapid accumulation of 8.3 billion metric tons of plastic waste. A whopping 91% of plastics are not being recycled, and this is generating an alarming amount of pollution across the planet.

    Launched by Dave Hakkens in 2013, Precious Plastic is a global community of creators and environmentally conscious people looking to end plastic pollution. Anyone is welcome to join and share collaborative techniques and ideas. Thanks to the initiate, there are already hundreds of places globally where people can hand in old plastics to be turned into creative or useful products.

    Currently, the team is turning otherwise unrecyclable plastic into functional smartphone cases. Anything from old plastic bottles to takeaway cup tops are being combined to create new iPhone cases.


    Plastics tend to be very durable, which makes them a burden to the environment due to the unforgiving breakdown processes. However, at the same time, this burdening quality also enables designers to create new functional projects for everyday use.

    Even more exciting, Precious Plastic has created a manufacturing ecosystem to help people to turn plastic waste into valuable products. We previously covered the project during the initial launch of its open source production platform.

    The company offers a bundle of machinery, including a plastic waste shredder, an extrusion machine to create 3D printing filaments from recycled plastics, an injection molder, as well as a compressor to help process the molds.

    In order to demonstrate the potential of its plastic recycling mission, the company has created a recycled iPhone case. They used a mixture of old milk bottles, takeaway coffee tops, and old cleaning bottles to create this unique, eco-friendly product.


    Turning Plastic Waste Into a Polished Product

    The mold for the case was created using CNC machining from 3D Hubs. Recently considered a leading 3D printing service hub provider, 3D Hubs recently announced that it would transition into a broader manufacturing service.

    Jerry De Vos, who designed the iPhone case, based the mold creation on a CAD file of an iPhone. He could have used metal 3D printing to create the molds, but CNC machining proved to be the better alternative in this case, offering a lower cost and greater accessibility.

    This more traditional manufacturing method also offered a high dimensional accuracy (-/-.127mm), while the available materials were able to withstand the heat/pressure of 100’s of shots. The mold cost Precious Plastic €450. The case was finished off using Precious Plastic’s home-made injection molding machine.

    Although the team at Precious Plastic admits that iPhone itself isn’t the most environmentally friendly objects, the design ultimately showcases the potential of creating products from recyclable plastics.

    The Precious Plastic website features many more innovative and stunning community creations. As the world deals the rising predicament of plastic pollution, this community is fighting to clean up the Earth, while turning waste into practical products.

    Source: Precious Plastic & 3DHubs

    Website: LINK