Schlagwort: tech articles
-

Photon: A DIY incident light meter
Reading Time: 3 minutesPico power While most modern digital cameras have light meters built-in, many older cameras don’t have this luxury, and the price of some light meters can be prohibitive. Enter Martin Spendiff and Vanessa Bradley, two familiar makers who present their latest Pico-based project: Photon, a very budget-friendly take on this handy tool.…
-

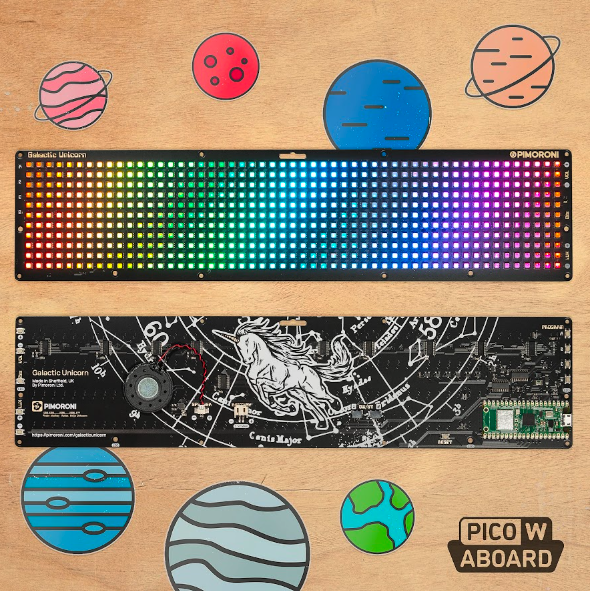
Galactic Unicorn (Pico W Aboard) review
Reading Time: 3 minutesWhen you first power on the Galactic Unicorn, via the supplied short micro-USB cable, it immediately springs into life with Pimoroni’s MicroPython firmware and code examples pre-installed, so there’s no need to flash it. Text on the display invites you to press the A, B, C, or D button to launch a…
-

Smart camera
Reading Time: 2 minutesSimilar things can be said about text generators like ChatGPT. We’ve seen people use it to create a jumping on point for simple Python code, which is an interesting use of open-source scripts. However, for actual text… well, the best way I’ve seen it described is ‘confidently wrong’. For very basic stuff,…
-

PiRitos Star Trek interface
Reading Time: 2 minutesThis means if you really want to do some light Star Trek roleplay, you can have several screens in one room which have some degree of connectivity – such as displaying a red alert. “After that, I connected LEDs to the back of my monitor and they would pulse red if the…
-
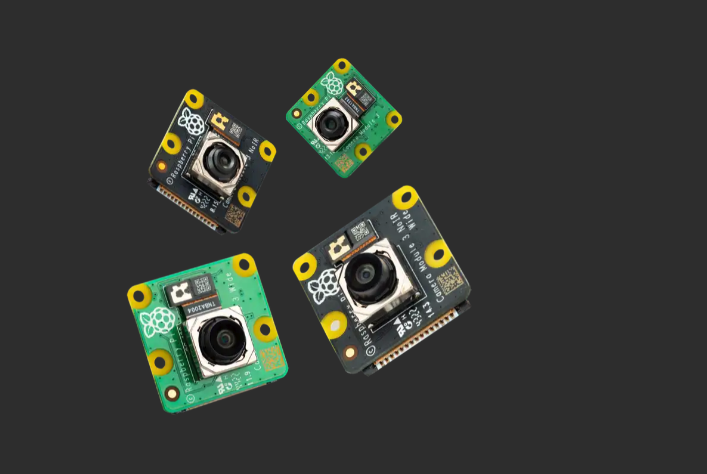
Deep focus on the Camera Module 3 in The MagPi magazine issue #126
Reading Time: 2 minutesEverything you need to know about the new 12-megapixel camera module with HDR and lightning-fast autofocus. Our feature is packed with starter advice, engineering insights and project ideas. Create smart lights Use Raspberry Pi and Pico to light up your home. This feature covers NeoPixels, motion-sensing lights, and how to control HUE…
-
Win one of ten Raspberry Pi Camera Module 3
Reading Time: < 1 minuteSave 35% off the cover price with a subscription to The MagPi magazine. UK subscribers get three issues for just £10 and a FREE Raspberry Pi Pico W, then pay £30 every six issues. You’ll save money and get a regular supply of in-depth reviews, features, guides and other Raspberry Pi…
-

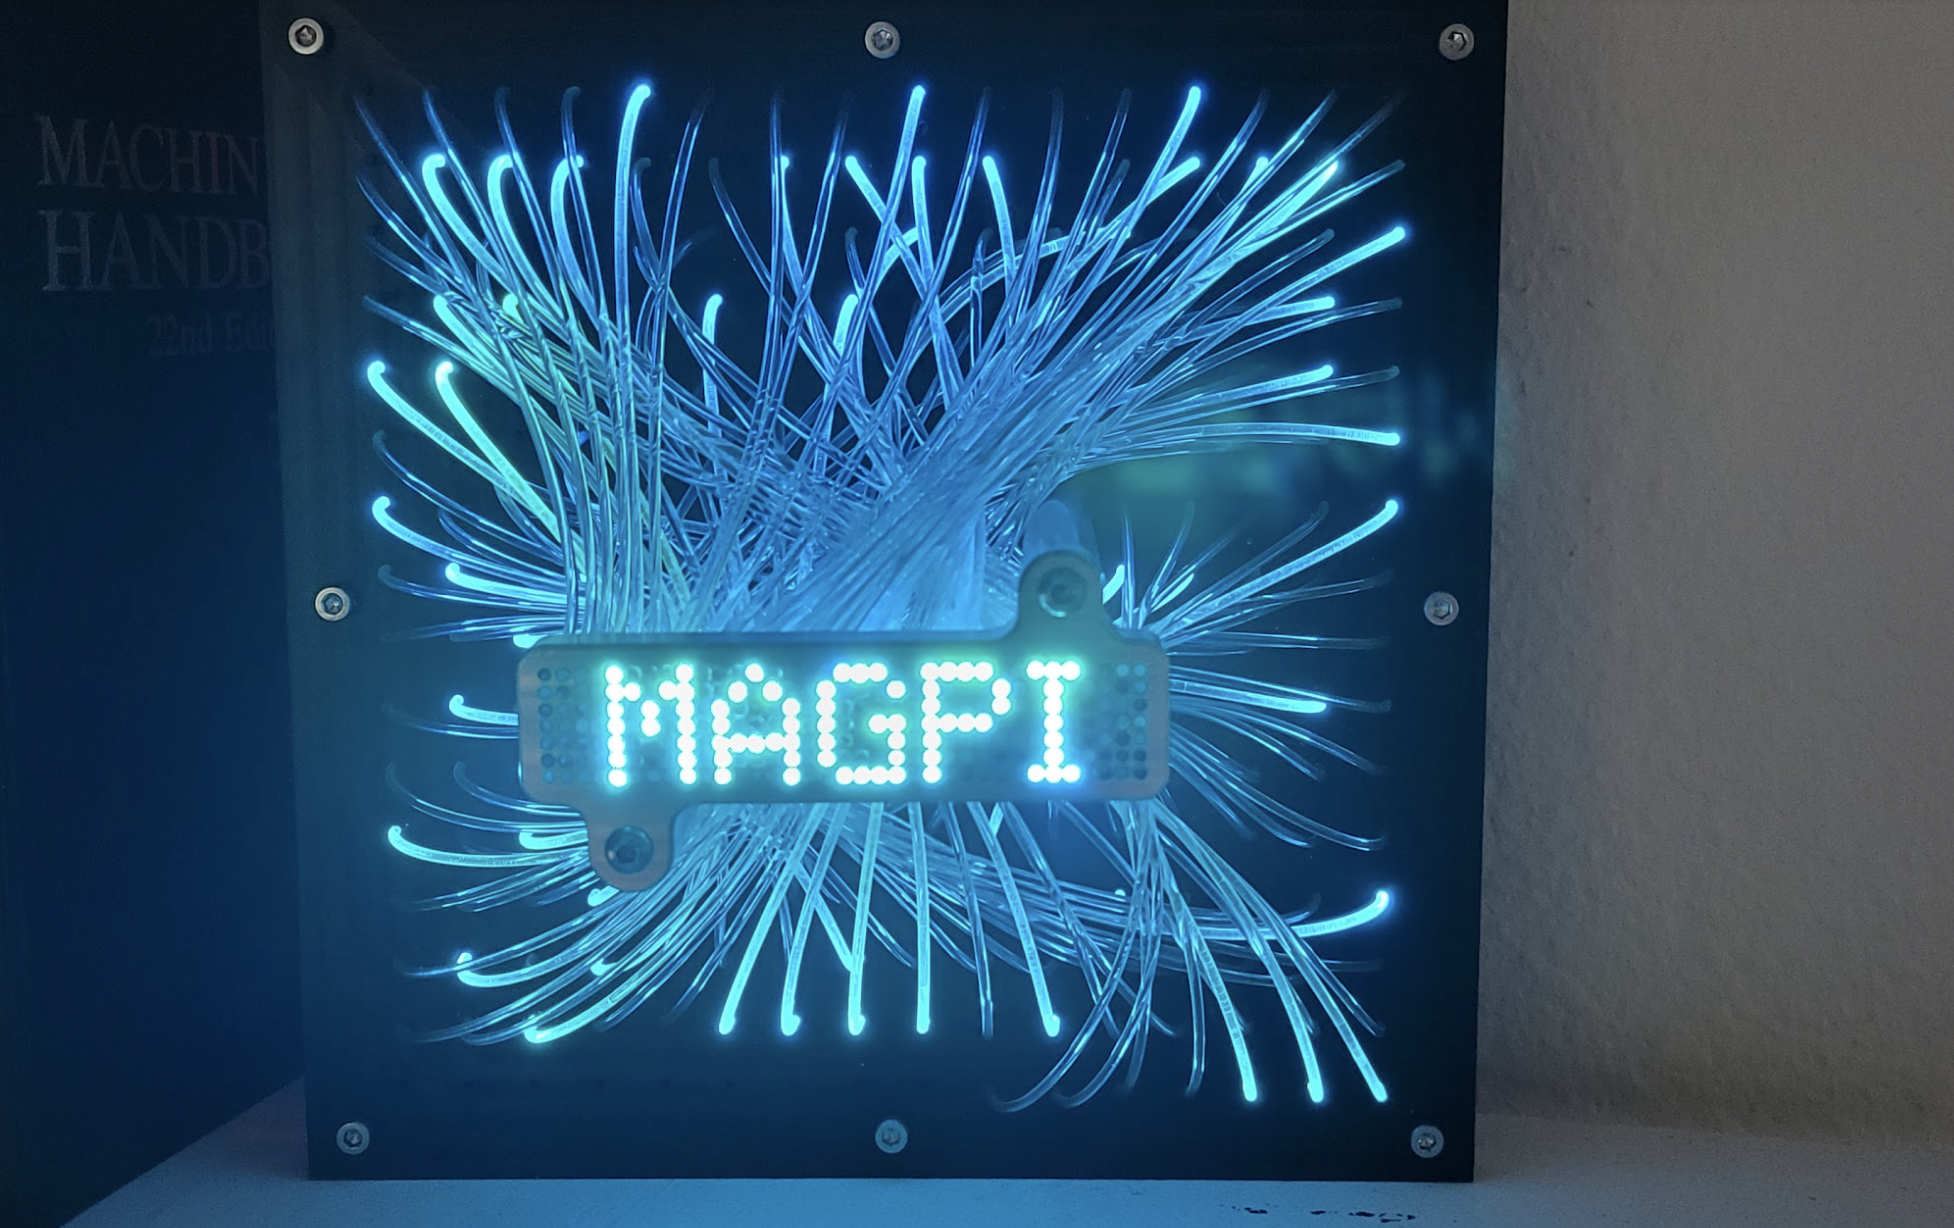
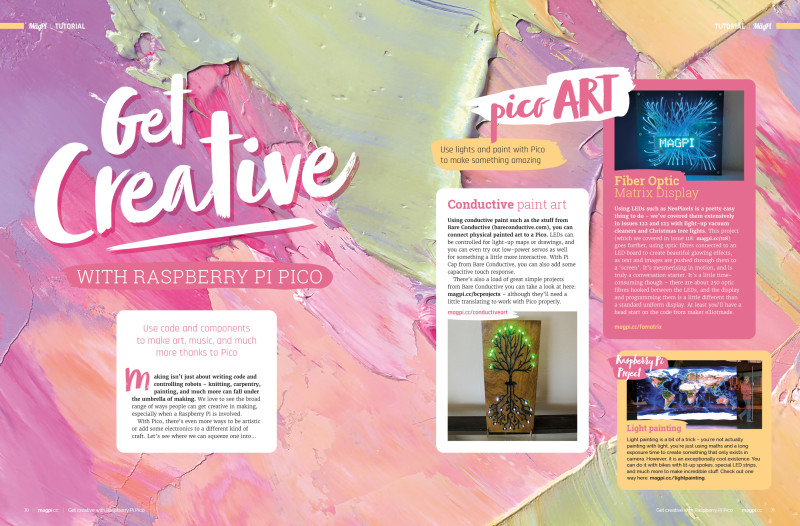
Get creative with Raspberry Pi Pico
Reading Time: 2 minutesFiber OpticMatrix Display Using LEDs such as NeoPixels is a pretty easy thing to do – we’ve covered them extensively in issues 122 and 123 with light-up vacuum cleaners and Christmas tree lights. This project (which we covered in issue 118) goes further, using optic fibres connected to an LED board to…
-

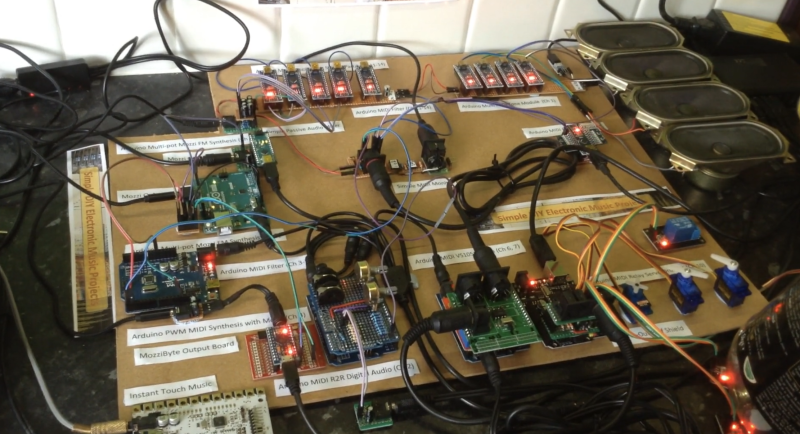
Make sound with Pico
Reading Time: 3 minutesPico Portal Music Box Even after 15 years, Portal’s Still Alive song is still well remembered and this project will make sure you never forget it. Pico can actually play MP3 files, and maker thisoldgeek wanted to give it a more antique music box vibe, so he created one in the style…
-
RelayFi smart relay board review
Reading Time: 2 minutesThe four relays take up most of the board and handle conversion and control for four mains-powered devices. We highly suggest getting some kind of case for the board as there are solder points on the underside of the PCB. These relays are controlled via an optoisolator which does improve the safety…
-
What we achieved in 2022
Reading Time: 2 minutesFor 2022, I decided to make some goals and rough plans instead of stumbling into projects like I have in the past – and also promising to go a bit easier on myself if I didn’t achieve them all. Still stumbling One thing I’m always proud of is the work we do…
-
Code Pico with Thonny
Reading Time: 2 minutes2. Choose interpreter Thonny is normally used to write programs that run on the same computer you’re using Thonny on; to switch to writing programs on your Raspberry Pi Pico, you’ll need to choose a new Python interpreter. Look at the bottom-right of the Thonny window for the word ‘Python’ followed by…
-
Set up Raspberry Pi Pico
Reading Time: < 1 minute2. Switch to MicroPython Raspberry Pi Pico is set up, by default, for use with the C/C++ Software Development Kit (SDK). The C/C++ SDK is an extremely flexible and powerful way to interact with your Raspberry Pi Pico. However, there’s a more beginner-friendly method: MicroPython. Hold down the small button on…
-
PiCar entertainment system
Reading Time: 3 minutes“I have made extensive modification to my Jeep, including replacing the motor with a Chevy LS 6.0 V8,” Vincent tells us. “This required some hacking into the Jeep’s CAN bus to fool the Jeep into thinking it still has a motor. There is so much useful information present on the network that…
-
reTerminal E10-1 industrial expansion board review
Reading Time: 2 minutesWe do mean beefy too – it’s larger than the original reTerminal, and attaching it does increase the footprint (and weight). However, for that sacrifice you do get a barrel DC jack, a battery compartment, PoE, improved wireless LAN, mobile network support, serial ports, microphones, and speakers for any machine learning application,…
-
Mini Mars Rover
Reading Time: 3 minutesNikodem had to fit the building of his own remote-controlled Mini Mars Rover around his other university work, and there was plenty to do, including designing it from scratch in CAD and undertaking a lot of 3D printing and CNC machining. “All parts were designed in such a way that you can…
-

Meet Jeff Geerling: YouTuber, ex-engineer, maker
Reading Time: 3 minutes“And sometimes you accidentally short a computer’s power supply and end up with a burn on your finger and a dead computer!” When did you first learn about Raspberry Pi? I remember reading about the first board on Ars Technica in early 2012. I bought my first Raspberry Pi (a Model B)…
-
Raspberry Pi Pico Plant Waterer
Reading Time: 3 minutesFor Vanessa Bradley and Martin Spendiff, collectively known as VEEB, the scenario came up because their “lovely” neighbour sometimes watered their houseplants, but the plants didn’t always survive the experience. To save any more plants dying, they designed a carefully calibrated mechanism that would test whether the soil was dry enough for…
-
K-9 Doctor Who companion
Reading Time: 3 minutesThe K-9 project helped Fitz fulfil an ambition to build a film replica of one of their “favourite companions to my favourite Doctor” [Tom Baker, naturally] and “to experiment with Raspberry Pi and other microcontrollers, and electronics to see how well they might replicate all the animatronic and visual features of the…
-

Get started with Raspberry Pi in The MagPi magazine issue #125
Reading Time: 2 minutesRaspberry Pi Starter Guide This is no ordinary starter guide. The latest edition of The MagPi magazine is packed with pages that demystify Our QuickStart guide helps you set up the hardware and Raspberry Pi operating system. Plus a super fast primer to making projects with Python code and basic electronics. Get…
-

Win 1 of 10 Raspberry Pi Zero 2 W
Reading Time: < 1 minuteSave 35% off the cover price with a subscription to The MagPi magazine. UK subscribers get three issues for just £10 and a FREE Raspberry Pi Pico W, then pay £30 every six issues. You’ll save money and get a regular supply of in-depth reviews, features, guides and other Raspberry Pi…
-

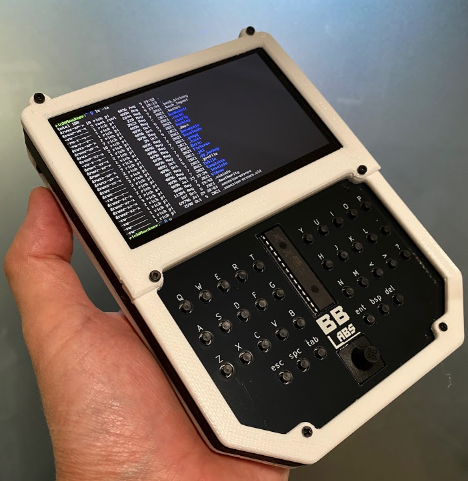
HandiPi: All-in-one handheld desktop computer
Reading Time: 3 minutesRichard was inspired by the PICOmputer PCB created by Peter ‘Bobricius’ Misenko. “It’s a sort of carrier board for Raspberry Pi Pico that includes a keyboard using 6 mm push-button tactile switches and a display,” he explains. “When I later ordered a Raspberry Pi 4 computer, I got to thinking: what if I…
-

Elecrow SH080 8-inch mini HDMI screen review
Reading Time: 3 minutesElecrow’s own website suggests using this screen with a Raspberry Pi for gaming. We tested the display alongside Elecrow’s CrowPi L – itself a dedicated laptop hull that fits a full-size Raspberry Pi inside and which has an HDMI port. Rather unusually, the screen has a mini HDMI input. Powering the screen…