Schlagwort: 3dprint

  • Anet A8 Review: A Delightful DIY 3D Printer Kit

    Anet A8 Review: A Delightful DIY 3D Printer Kit

    Reading Time: 7 minutes

    For the following critique on this DIY 3D printer kit, we found it important to focus primarily on both the ease of assembly and overall printing performance. What we soon discovered was that this printer was a challenge to build, but could also print like a charm, which was unexpected considering the low price point of this 3D printer kit.

    We will get into the assembly and printing performance in more detail later on, but for now, let us share our overall thoughts from our Anet A8 review. When you take the price, modifiability, and surprisingly good print quality into consideration, it’s hard not to get behind this 3D printer kit.

    However, there were a few downsides to our experience with this printer. The main obstacle with the Anet A8 is finding the time and patience to assemble and optimize the printer. Not only is the assembly process relatively complex (particularly for beginners) but calibrating the printer also takes precision and a certain level of stoicism.

    Once you get past the construction and calibration process, using the printer becomes a total breeze. There were a couple of hiccups along the way, but the best part about assembling this printer from scratch is that potential problems are easily solvable.

    Still, getting this printer up and running properly didn’t come without certain hurdles. But the proud feeling that comes with identifying and fixing a problem on your own helps to make up for the few pitfalls. Based on our judgement, the Anet A8 is an ideal DIY 3D printer for eager and determined beginners, as well as for makers looking to print on a budget.

    Offering a step-by-step learning experience for a 3D printer kit, the Anet A8 features a black laser-cut acrylic frame and 220 x 220 x 240mm printing volume. It’s compatible with a number of materials, including ABS, PLA, Woodfill, Nylon PVA, PP, and others.

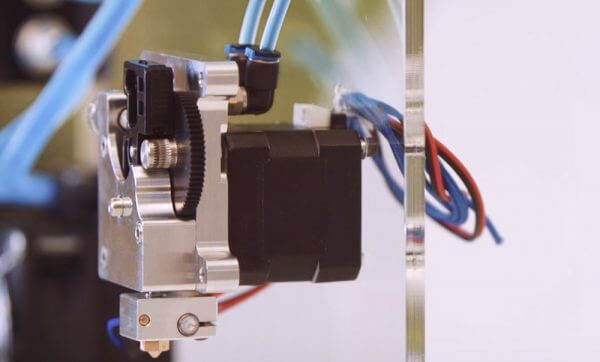
    Topline features are all-metal pulleys for enhanced functionality and performance, quick-release feed gears for fast and efficient filament extrusion, and stainless steel rail rods, gears, bearings, and connectors.

    In terms of PC compatibility, the options are pretty much anything. The Anet A8 3D printer works with Windows XP, Windows 7, Windows 8, Windows 10, Mac, and Linux.

    Full Specifications

    • Print Area: 220 x 220 x 240mm
    • Frame material: Acrylic plate
    • Platform board: Aluminum Base
    • Nozzle quantity: Single
    • Nozzle diameter: 0.4mm
    • Layer thickness: 0.1-0.3mm
    • Offline print with SD card
    • LCD Screen: Yes
    • Print speed: up to 100mm/s
    • Material diameter: 1.75mm
    • File format: G-code, OBJ, STL
    • XY-axis positioning accuracy: 0.012mm
    • Z-axis positioning accuracy: 0.004mm
    • Voltage: 12V
    • Host computer software: Cura, Repetier-Host
    • Packing Type: unassembled packing
    • Certificate: EMC, FCC, LVD, RoHs

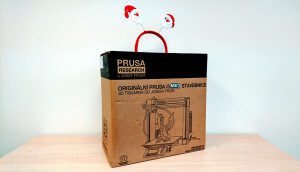
    Before we could extrude our criticism about the Anet A8’s printing performance, we first had to put the entire printer together. The 3D printer kit came in a small cardboard box with different components arranged neatly in three layers of styrofoam. However, one important item was missing from the packaging: a set of assembly instructions.

    No big deal. The manual was easily obtainable from the internet. But, after completing the first few steps, we found the instructions to be unclear and lacking in visual detail, and opted to use a comprehensive step-by-step guide YouTube video by Osdoyi.

    With the visual guide, the assembly process became quite enjoyable and, for someone with little experience building 3D printers, presented an moderate but welcome challenge. First came the acrylic frame of the printer, followed by the X-axis, Y-axis, and Z-axis (as well as the stop sensors). The extruder and guide rods also had to be put together and attached to the frame.

    After putting together the frame, X-axis, Y-axis, and Z-axis, guide rods, and the belt, it was time to direct my attention to the motherboard and power supply. Thankfully, no soldering or excessive tinkering was necessary, just a bit of wire stripping and plugging stuff in. However, we did find that the final result was a mess of wires. This was partially solved with zip ties and wire tubing sleeves (both of which are provided with the printer.

    Aside from the missing instructions and unavoidable wire spaghetti, the assembly process was extremely fun and insightful. On top of that, the hands-on experience made it easy to go back and fix or enhance other issues that were faced later on.

    Some might find the overall design of the Anet A8 a bit too shoddy or simplistic, but we personally found the minimalistic design to benefit the performance. The open-ended style allows you to easily tweak and dig into every nook and cranny of the printer.

    For example, after assembly, we realized that the toothed belt was not fastened tight enough. Not only was there a limited amount of rubber belt material (meaning that one screw up would damper the whole project), but you also had to fit the component into tight spaces and ensure that there was enough tension.

    Thanks to the minimal design, it was easy to go back and resolve this issue. This accessibility also allowed certain elements like extruder to be disassembled when we experienced a clog.

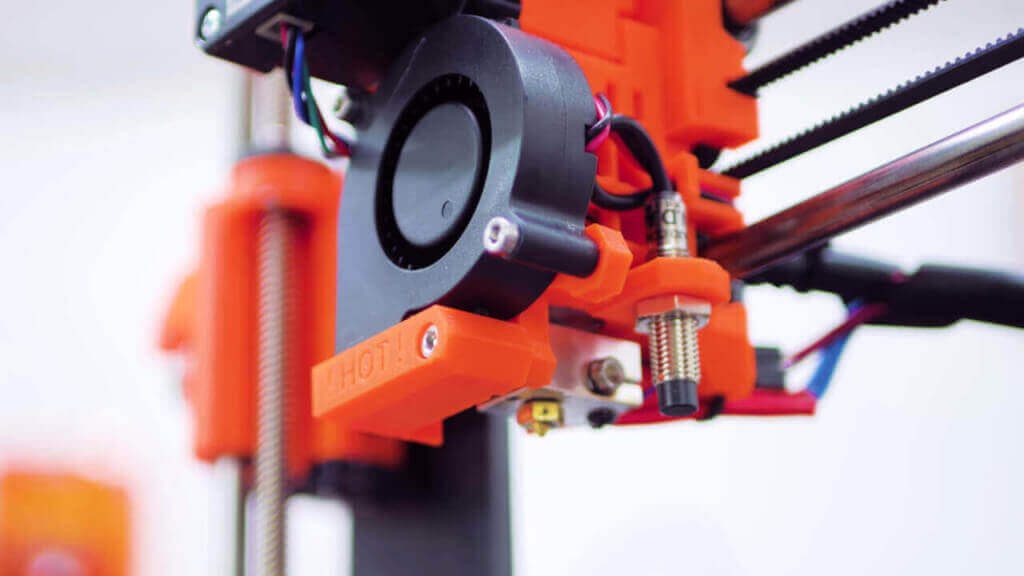
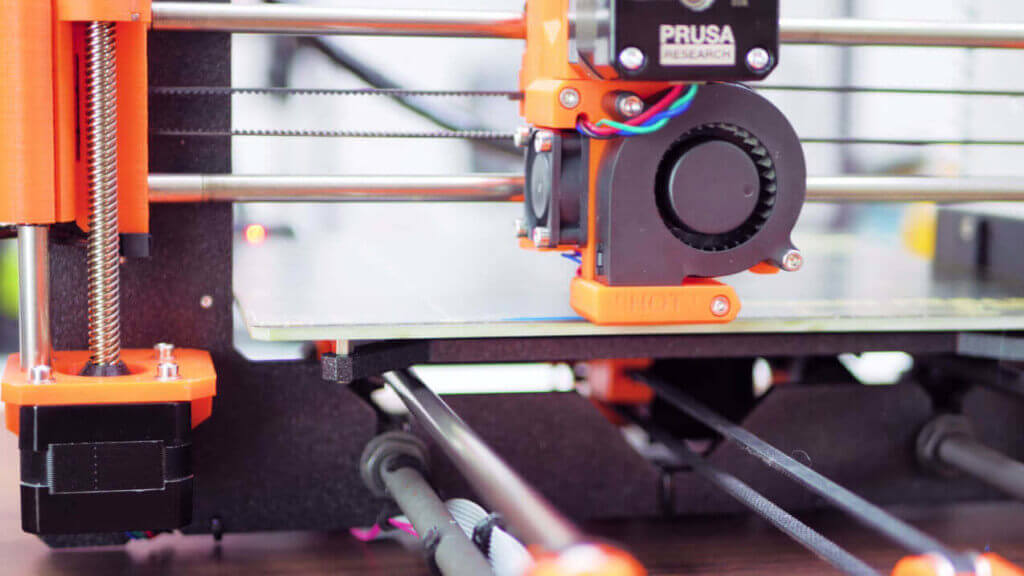
    However, there were some downsides to the design as well. For example, the 3D printed fan duct that came with the printer didn’t fix properly onto the extruder, and hung down lower than the nozzle. Luckily, there were a number of fan mods on Thingiverse (more on this later), so we were able to overcome this problem.

    Other issues include the overwhelming array of wires, the absence of a power button (you must unplug to turn off), and some rods beneath the print bed that came loose every now and then. One surprise came early on during our printing experimentation. After unclogging the nozzle and reassembling the extruder, we noticed a bit of smoke coming out of the nozzle.

    Clearly alarmed by this hazardous sign, we took the extruder apart and found that the wiring attached to the heating block was lose. After doing a bit of research on Google, we realized this wasn’t an uncommon problem. Although we simply (and carefully) fit the wire in snugly, others suggest using thermal paste to keep the wiring in place.

    Still, these minor discrepancies weren’t that surprising for such an affordable 3D printer kit. Considering you’re getting a cheap Prusa clone for just over $200, it’s tough to hold a grudge over these design flaws.

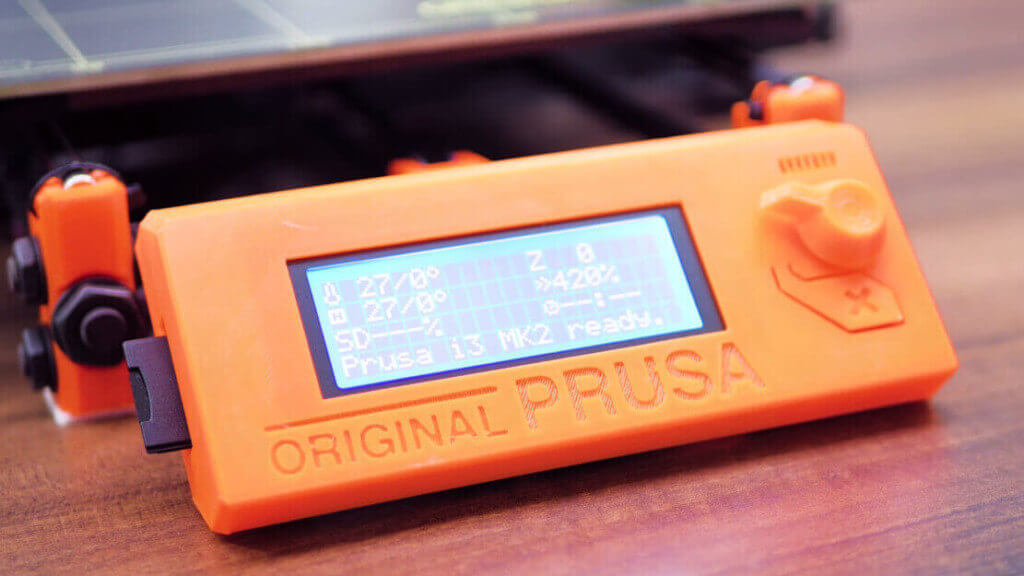
    As for the user interface, the LCD screen was adequate enough, but seemed to lack in practicality at some points. This DIY 3D printer offers many options on the UI, but the clunky buttons makes it hard to navigate quickly. Still, you can modify the nozzle and print bed temperature, fan speed, and monitor the over printing process on the fly. The positioning function also enables slight movements of each axis, a nice feature that assists with calibration.

    Now that we’ve gone over the assembly process and over design, it’s time to get into the fun stuff: printing performance. Before we could get extruding, the Anet A8 had to be calibrated. The first attempt at calibrating this DIY 3D printer was a bit challenging, and took a bit of trial and error.

    When adjusting the height of each print bed corner, we suggest keeping track of your screwdriver revolutions in order to keep the bed properly leveled. To achieve optimal calibration, set the extruder at the home position and use a single sheet of paper to test the height between the nozzle and print bed. Essentially, you should feel a moderate amount of tension when sliding the paper in between the nozzle and bed. Once you reach this and set the print bed to an even level, you’re finally ready to get printing.

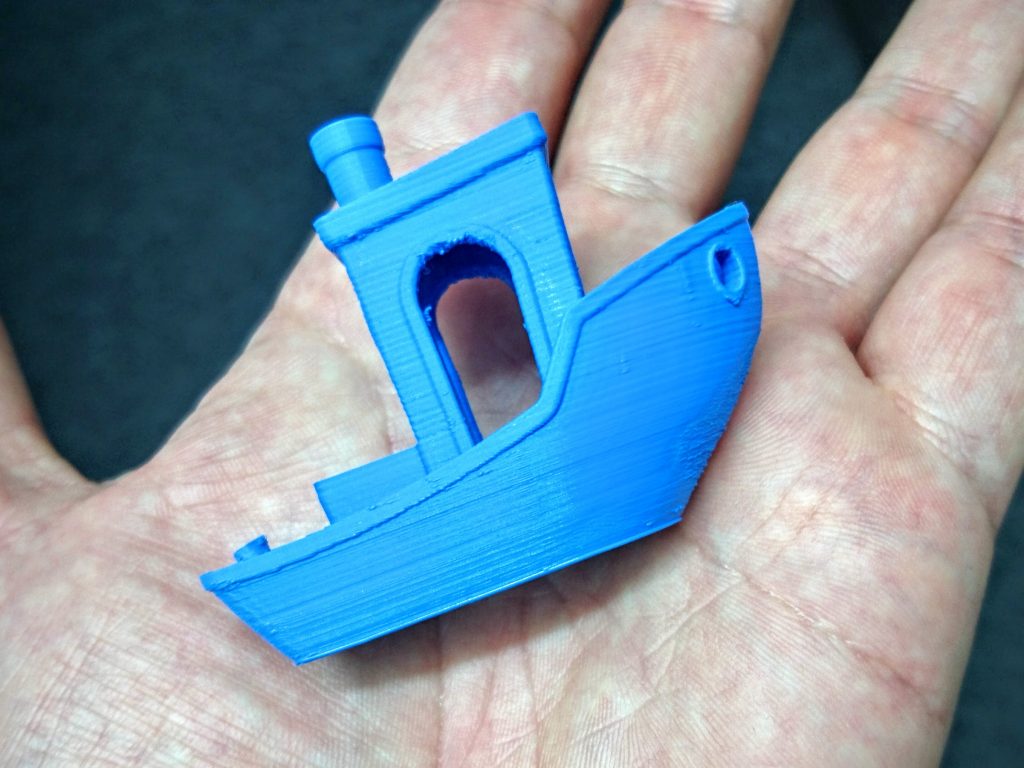
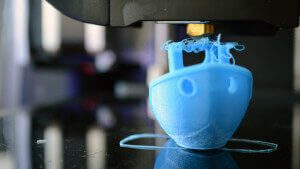
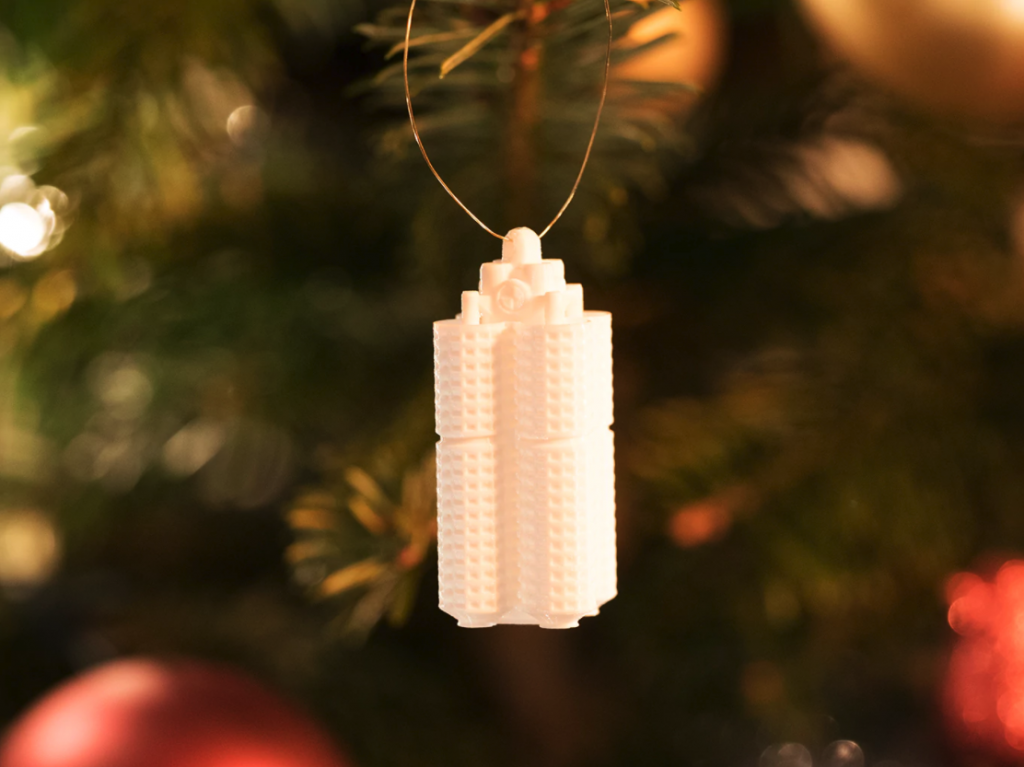
    Of course, there’s no better 3D model to test out the capabilities of your printer than with #3DBenchy. On the first attempt (the white Benchy pictured above to the right), the print surface came out with an extremely wavy print surface. The effect was interesting to say the least, but not quite what we were looking to achieve. We soon realized that the streaky effect stemmed from the loose belt beneath the print bed.

    After tightening that up, we went for #3DBenchy round two (the red model pictured above). This next print was a major improvement over the first attempt, but we still noticed some stringiness in the interior of our boat. After going to Simplify3D to modify the retraction settings and print temperature, we achieved our best results yet (the purple #3DBenchy pictured to the left). This improved print was also a result of a special modification we created for this 3D printer kit, but more on that in the following section.

    Although it took a bit of finessing to optimize the printer, the purple print showcased surprisingly good quality. For a printer that costs just around $220, the results were quite staggering. After finishing the #3DBenchy test, we decided it was time to enhance the printer with some 3D printed modifications.

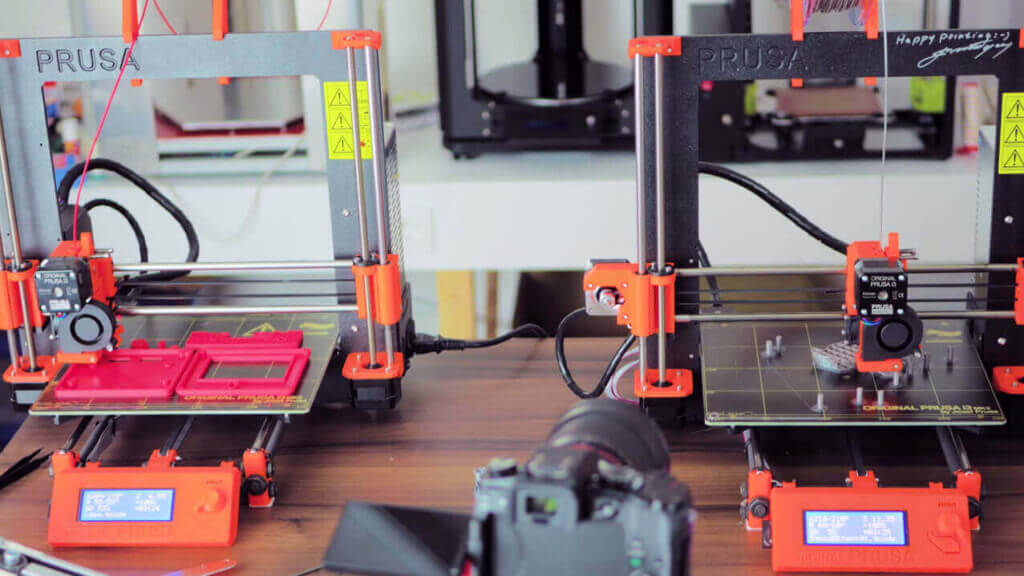
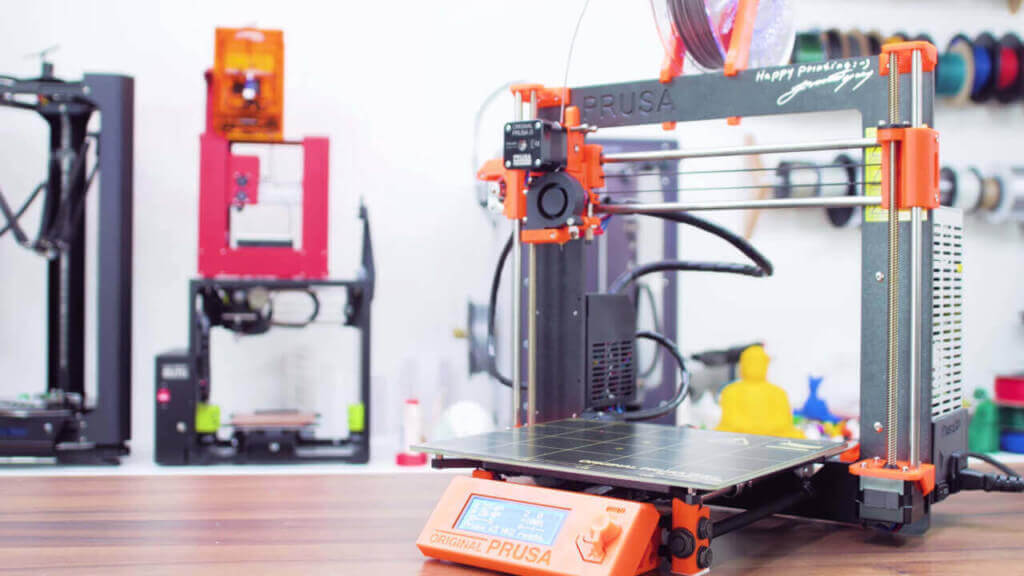
    All in all, while the Anet A8 certainly had a few flaws, the DIY 3D printer experience was one that all aspiring makers and tinkers should take on at some point. While this printer falls short of the renowned Prusa i3 MK2, the lower price point (and timely shipping) makes it a viable option for those looking to spend less and print right away.

    These are our parting words in our Anet A8 review. Ready? If you’re looking for a cheap DIY 3D printer to build and actually enjoy using, the Anet A8 could be the one for you.

    Website: LINK

  • Researchers 3D Print Accurate Microfluidic Model of the Blood-Brain Barrier

    Researchers 3D Print Accurate Microfluidic Model of the Blood-Brain Barrier

    Reading Time: 3 minutes

    Italian researchers have developed 3D bio-hybrid microfluidic models to screen for drugs and assess toxicity of nanoparticles crossing the blood-brain barrier.

    The primary function of the blood-brain barrier is to protect the brain from neurotoxic compounds, pathogensand , blood-circulating compounds. In order to develop new treatments for neurodegenerative disease and brain disorders, researchers are observing how this barrier can be crossed.

    A team of Italian researchers have created a life-like 3D bio-hybrid microfluidic model of the blood brain barrier using high-resolution 3D printing technology.

    Although static 2D models as well as 2D microfluidic systems already exist, they are also quite limited. For the first time, 3D printing has enabled reproduction of microcapillaries of the neurovascular system on a 1:1 scale.

    This accomplishment will enable the research team to screen the capabilities that drugs and other nanovectors have in crossing the blood-brain barrier. One of the main advantages of this system is that it renders animal models unnecessary, reducing ethical concerns and preventing harm to living species.

    Defined as a bio-hybrid, the brain microcapillaries of the model include both artificial and biological components. While the artificial structure includes 3D porous tubes and is made using two-photo lithography, the biological portion includes porous microtubes that allow for the growth of endothelial cells.

    The design is based on a mathematical model that should also guide further development of additional prototypes. The flow rate of the solution inside the microvessel is adjusted to a realistic and comparable value.


    Scanning electron microscopy image of the bio-hybrid BBB model. (Image: Gianni Ciofani, IIT)

    3D Printed Models of the Blood-Brain Barrier Could Offer Inside Look at Neurodegenerative Disease and Brain Disorders

    Gianni Ciofani, who leads the Smart Bio-Interfaces group at the Italian Institute of Technology and is an Associate Professor at Polytechnic University of Torino, explains:

    “The novelty of our work mainly consists in the fabrication of a reliable platform to carry out high-throughput quantitative investigations of drug delivery to the brain. The in vitro model provides a closed system where the different variables such as drug concentration, blood flow speed, pH, and temperature can be easily tuned and monitored, thus providing precious and detailed information about the BBB crossing in real time and at cellular/sub-cellular level.”

    Though certain drugs show potential in the treatment of brain disorders, many are unable to cross the blood-brain barrier. Therefore, researchers have resorted to analyzing why these molecules are unable to cross the barrier and study the underlying cellular mechanisms.

    This work potentially represents an important advancement for both pharmaceutical companies and scientific researchers exploring brain therapeutics for conditions such as brain cancer, Alzheimer’s, and Parkinson’s disease.

    In the future, the team hopes to test the model using a variety of drugs, molecules, and nanoparticles. However, widespread safety concerns exist over the accumulation of nanoparticles in organs, and thus their potential toxicity will continue to require rigorous testing.

    The study, entitled “A 3D Real-Scale, Biomimetic, and Biohybrid Model of the Blood-Brain Barrier Fabricated through Two-Photon Lithography”, was recently published in the journal Small.


    3D rendering of confocal acquisition of the bio-hybrid BBB model. (Image: Gianni Ciofani, IIT)

    Source: nanowerk

    Website: LINK

  • Japanese Architect Fits More Than 30 Iconic Buildings in One 3D Printed Object

    Japanese Architect Fits More Than 30 Iconic Buildings in One 3D Printed Object

    Reading Time: 3 minutes

    Japanese architect Fumio Matsumoto has created “Memories of Architecture”, an exhibit that features more than 30 iconic buildings in a single 3D printed object.

    As society and technology both progress rapidly over time, the way we design and imagine architecture is also in a constant state of metamorphoses. 3D printing is proving itself to be a viable tool in the world of construction, as additively manufactured structures are being erected across the world, from Russia to Dubai.

    But a Japanese architect named Fumio Matsumoto has decided to use this emerging technology to pay homage to iconic buildings from throughout history. In his latest exhibit “Memories of Architecture,” Matsumoto manages to fit more than 30 famous structures into one grandiose 3D printed object.

    These significant architectural works were melded together ranging from old to new, and reproduced at 1:300 scale. The 3D printed artwork features styles of all kind, starting with ancient Egypt and finishing at the present day.


    3D Printed “Memories of Architecture” Exhibit Connects Centuries of Architectural Work Together

    One quick glance at the 3D printed exhibit will leave your mind puzzled as you try to decipher what each part represents. The “Memories of Architecture” project includes different facets of these various structures, such as façades, exterior forms, interior spaces, and structures.

    “While it is not a comprehensive overview of architectural history, it does illustrate some significant trends over time, such as the shift from massive to minute forms and from enclosed to open spaces,” Matsumoto said about the project.

    Other structures showcased in the 3D printed exhibit include Karnak Temple, the Pantheon, Notre-Dame de Reims, the Colosseo, Villa Savoye, the Reliance Building, and the Moriyama House, among others.

    “Memories of Architecture” is part of a larger showcase called “ARCHITECTONICA”. This permanent exhibit is taking place in the Koishikawa Annex at the University of Tokyo Museum of Architecture. The museum itself is known for its architectural materials, miniature models, and life-sized ethnological materials relating to space around the body.

    While we’ve certainly seen our fair share of 3D printing being used in construction and architectural applications, Matsumoto has presented a unique example of how a technology of the future can be used to commemorate iconic buildings from the past.


    Source: Arch Daily

    Website: LINK

  • Best Home / Desktop Laser Cutters & Laser Cutting Services

    Best Home / Desktop Laser Cutters & Laser Cutting Services

    Reading Time: 5 minutes

    When creating a design or pattern for laser cutting, you can use either 2D or 3D design software. Laser cutters essentially function like an average 2D inkjet printer but come with drivers that allow the laser cutting machine follow specific designs. While these specific drivers are highly common in 2D design software, there is less support from 3D software.

    Graphic design software like Adobe Illustrator and free drawing tools like AutoCAD are ideal 2D programs for laser cutting technology. But 3D software like Solidworks, Autodesk Inventor, and Autodesk Fusion can also be utilized to create certain types of designs and patterns.

    As laser cutting becomes more accessible and affordable, we’ve seen a major shift in the consumer market. What was once a tool strictly for industrial purposes, you can now find laser cutters in schools, maker spaces, small businesses, and even homes. Here are a few of the most popular desktop laser cutter manufacturers on the market.

    Home/Desktop Laser Cutter #1: Orion Motor Tech 


    If you’re looking for a high quality laser cutting machine that can fit on your desktop, look no further than the Orion Motor Tech laser cutter. This compact machine offers an engraving/cutting area of 300 x 500mm. This laser cutting machine has a resolution ratio of 0.001 in 0.026mm/4500DPI, and operates at a maximum speed of 500mm/s while engraving and 80mm/s when cutting.

    What set the Orion laser cutter apart from others is the user-friendliness and low price of around $450. The Orion laser engraver operates with a 50W water cooling laser tube and high-precision stepping motor. You can utilize a variety of materials, including plastic, leather, stone, crystal, and more. However, beware, if you decide to buy the Orion laser cutting machine, there are other components you will likely need alongside it. This includes a CO2 laser engraver, smoke pipe, smoke fan, water pump, power wire, USB cable, and USB dongle key.

    Orion also offers a 40W CO2 laser cutter at a reduced price. You can check that out here.

    Buy the Orion Laser Cutter here:

    Home/Desktop Laser Cutter #2: Makeblock


    Makeblock’s LaserBot is a desktop laser engraver developed on an open-source platform. This minimalistic home laser cutting machine is equipped with 1.6W 445nm high-power solid-state lasers. This is ideal for the tinkerer looking for a cheap laser cutting machine than can be fully adaptable.

    The LaserBot includes a simple H-shaped structure made from high-precision anodized aluminum alloy. It is also Arduino compatible and can engrave up to 0.1mm. This laser cutting kit allows you to build up your machine, giving a first-hand look at the laser cutting process. Priced at around $350, this laser cutting kit is a bargain for makers with a fair amount of time on their hands.

    Buy the LaserBot Laser Cutter here: 

    Home/Desktop Laser Cutter #3: CNCShop


    This desktop laser cutter from CNCShop is for someone looking for a larger machine that isn’t afraid to pay a pretty penny for quality. This laser engraver and cutter is powered by a 130W CO2 sealed tube, and also comes with a USB interface. You can use a variety of materials with this laser cutter, including wood, leather, rubber, bamboo, plexiglass, marble, and more.

    The CNCShop laser cutting machine has a maximum cutting size of 1400 x 900mm and a max speed of 1,000mm/s. While sizable, the laser cutting machine offers a position accuracy of 0.01mm. Additional parts can be added to modify the machine, such as red dot function, up-down worktable, autofocus, and more. However, this 400kg laser cutting machine will require a lot of space to operate, and therefore is best suited for a small business or ambitiously sized workshop. You can purchase the CNC Shop laser cutter for around $3,000.

    Buy the CNCShop Laser Cutter here:

    Home/Desktop Laser Cutter #4: Epilog Laser


    Epilog has a vast product line consisting of different size laser cutters, from desktop to industrial. You can start off with their Zing Laser Series, which is their entry level desktop laser cutter range. The Zing 16 and Zing 24 are both considered low-cost and high-quality machines. The 16 is estimated to cost just under $8000. Find out more information on their massive range of laser cutter on the Epilog website.

    Home/Desktop Laser Cutter #5: Full Spectrum Laser


    Desktop Laser Cutter

    Recognized as one of the most affordable laser cutting manufacturers, Full Spectrum can put a capable machine in your home or office for under $5,000. Hobbyists and makers would be intrigued by their Muse Laser Cutter (starting at $5,000) and Hobby Series Laser Cutter (starting at $3,500). Find out more information on their low-cost laser cutting machines on the Full Spectrum website.

    Home/Desktop Laser Cutter #6: Chinese Imports


    If you’re on a tight budget and don’t mind owning a product without a name brand, you might want to look into importing a desktop laser cutter from China. A quick search on eBay or Alibaba will net you a wide range of imported product. While you can probably find yourself a home laser cutting machine from China for less than $500, it’s definitely worth shelling out at least $1000 to ensure that you’re receiving an adequate machine. These are ideal for tech-savvy users who don’t mind upgrading and modding the night away. While the bundled software leaves much to be desired, the low price point makes it hard not to consider the option of importing from China.

    Website: LINK

  • Pope Francis Receives 3D Printed Nano-Nativity Scene for Christmas

    Pope Francis Receives 3D Printed Nano-Nativity Scene for Christmas

    Reading Time: 2 minutes

    Lithuanian researchers from Vilnius Gediminas Technical University have 3D printed the world’s smallest nativity scene. The nanoscale-sized gift was given to Pope Francis for Christmas.

    Last week, Pope Francis paid a highly anticipated visit to Lithuania, and his presence was commemorated with an unprecedentedly tiny gift. During his travels, Lithuanian President Dalia Grybauskaitė presented the leader of the Catholic Church with a nanoscale-sized nativity scene.

    This piously miniature gift, which is smaller than a human cell was created in the nanoscale with laser 3D printing technology. The project was headed by researchers from Vilnius Gediminas Technical University (VGTU), and created within the local creativity and innovation centre LinkMenų Fabrikas.

    The religiously significant scene has been submitted to the Guinness World Records for being the world’s smallest nativity scene.


    3D Printed Nano-Nativity Scene Celebrates Big Tradition in Small Size

    To create the nanoscale adornment, the research team 3D scanned fifteen sculptures from the nativity scene at the Cathedral Square in Vilnius. They then reduced the size of the 3D models 10,000 times to 300 micrometres (0.3 mm), making it small enough to be placed on a single human eyelash.

    The VGTU team collaborated with the Laser Research Center at Vilnius University, the micro-fabrication company Femtika, and the 3D tech company Ideja 3D. Not only does the nativity scene make for a thoughtful gift for the visiting pope, it also showcases the technological leap that local businesses in Lithuania have made.

    “With the festive season upon us, we would like to demonstrate to the world an exceptional science and business potential in high-technology market in Lithuania. We do not only master the technology, but we are also able to apply it creatively by developing a new form to an old tradition, and combining both intellectual and cultural achievements of humanity,” said Eglė Girdzijauskaitė, ‎Vice Director at VGTU “LinkMenų fabrikas”.

    There were a total of five nano-nativity scenes 3D printed. One was gifted to Pope Francis, one will remain in the Lithuanian Presidential Palace in Vilnius, another in Vilnius Archdiocese, while the last two will be showcased to the public at LinkMenų fabrikas and Vilnius Municipality.

    Source: VGTU

    Website: LINK

  • Monoprice Select Mini Review: The Best 3D Printer under $250

    Monoprice Select Mini Review: The Best 3D Printer under $250

    Reading Time: 7 minutes

    The topline specs for the Monoprice Select Mini are a build area of 120 x 120 x 120 mm, which is roughly the height of a can of Coke. The highest print resolution is 100 microns, with a heated build plate, and a printing speed of 55 mm per second.

    Files can be uploaded to Monoprice Select Mini via a microSD card slot or a USB connection. The manual says that compatible slicing software — the application you’ll need to use to prepare objects for printing —  is Cura, Repetier-Host, ReplicatorG, and Simplify3D.

    What this means is that the Monoprice Select Mini can parse standard G-code, and is not confined to proprietary software. For the purposes of this review, we used Cura.

    Similarly, the Monoprice Select Mini doesn’t require special filament and can accept any standard 1.75 mm spool of PLA or ABS thermoplastic. For our testing, we opted to use ColorFabb PLA in sky blue.

    The two aspects concerning software and filament are incredibly rare at this price level. Other 3D printing manufacturers like M3D Micro and XYZprinting tend to impose closed software or filament, which locks you into their operational ecosystem for the long-term.

    The setup of the Monoprice Select Mini is fairly easy. You should be up and printing within 20 minutes or less.

    Inside the box you’ll find the printer, an AC power adapter, a hex key for leveling the bed platform, a dinky plastic spatula for scraping prints off the bed, a microSD card with 256mb storage capacity, and a micro USB cable.

    A scrap of paper has basic setup instructions and then points you towards a URL where you can download the full manual for Monoprice Select Mini.

    There’s also a rectangular length of folded sheet metal inside Monoprice Select Mini, and its purpose is not immediately clear. Turns out it’s a spool holder that clips onto the side of the main unit.

    Important to note is that the Monoprice Select Mini doesn’t come with any filament. Make sure you have a 1.75 mm spool of your favorite material ready to go or order it at the same time as the printer.

    For setup stage, you have to navigate a full-color LCD interface with a click-wheel. The menus in Monoprice Select Mini are clearly structured and well thought out. Via the interface, you initiate the process of calibration, preheating the hotend, and then loading up your filament.

    The calibration is a bit tricky; this is supposed to have been set at the factory, and you should be able to slide a sheet of paper between the print bed and the hotend. If you can’t, you have to use the hex key to tweak the springs at each corner of the print bed. This can take some time before you get it juuuuust right.

    Which brings us the first quirk (of many); the heated bed of Monoprice Select Mini is an aluminum plate with no protective covering except for a sheet of builders tape. This is quickly going to degrade over prolonged use, so you should ensure you have a roll of tape ready to replace it as and when you need to.

    The next quirk is that the AC power adapter on our unit died within 12 hours of use. This was *incredibly* annoying, but relatively easy to replace with a generic power adapter for around 30 bucks or so. Something to be aware of in case it happens to you…

    One of the most appealing things about the Monoprice Select Mini is the build quality; it’s sturdy and robust, with a folded sheet metal enclosure housing the electronics. It’s built like a tank, but also compact and portable, so you won’t be concerned about damaging it in transport.

    This is a Cartesian style fused filament fabrication (FFF) printer, with a one-sided arm holding the print head in the style of a Printrbot Simple (at Amazon). The printer only has a single fan for cooling the nozzle, however, which may limit your options for exotic filaments.

    At the top of the main pillar is a spring-loaded “quick-release” extruder with a steel gear. It’s a nice design, and it feeds the filament to the hotend using a Bowden cable setup. Again, this may limit your options, especially if you were hoping to print with flexible filaments.

    The Monoprice Select Mini hotend has an extruder diameter of 0.4 mm and can reach temperatures of 230°C. We weren’t able to ascertain how easy it would be to replace the nozzle, and this is an important factor in the long-term. Nozzles are prone to degrade over time and will need replacing.

    Some more quirks we noticed; the print head has an auto-leveling probe attached, so in theory it should have intelligent positioning feedback. The extruder will know when it’s hit the build plate, in other words, and can adjust itself accordingly to make calibration more simple.

    In practice, however, the probe only checks one corner of the build plate, as opposed to all four. On that basis, the auto-leveling doesn’t seem all that intelligent!

    UPDATE 25/08: We’ve been told in the comments that this isn’t actually an auto-leveling probe, but a Z-home microswitch that lets the printer know when to stop lowering the head so it doesn’t crash into the build plate. Apologies for the confusion!

    The next quirk is that the control interface tells us that wi-fi has been deactivated, and there’s no way to switch it on. It appears that wireless connectivity is an available feature of the Monoprice Select Mini, but Monoprice have chosen to deactivate it in the firmware.

    Preloaded on the microSD card are a pair of models for printing, a cat and an elephant. Presumably, these have been optimized to best show off the Monoprice Select Mini performance. With that in mind, we started on these models before slicing some of our own.

    The first thing we printed was a the cat, with a resolution we’re guessing was 200 microns. Details came out fine and clear right up until the final layers, whereupon the tips of the cats paw and ears became garbled. This happened three times on three separate attempts.


    Monoprice MP Select Mini

    Analysing the G-Code in Simplify3D, it appears that the print head is speeding up at the final layers, right at the limits of 55 mm/s, hence the repeated failure. It has to be said, the fact that the Monoprice Select Mini is supplying a sample model that’s doomed to fail — and to a potential audience of first-time users no less — is pretty staggering.

    The second thing we printed was the elephant, at 200 microns and 10% infill, and there were no problems here. The Monoprice Select Mini did an admirable job with things like bridging and overhangs, and the retraction was tight enough that stringing was non-existent.


    Monoprice MP Select Mini

    Moving on to slicing our own models, we opted to use Cura software as per the manufacturer recommendation. John Biehler has supplied some excellent Cura settings in his review of the Monoprice Select Mini, so we used the same.

    The models we printed were a 3DBenchy and a Graphica Mega Ghost at 200 microns and 10% infill, a V29 whistle at 200 microns and 100% infill, and another 3DBenchy at 100 microns and 10% infill.


    Monoprice MP Select Mini

    Basic details came through pretty well on all of the 200 micron models. The MP Select Mini didn’t seem to struggle too much with small unsupported spans and overhangs, although there is the noticeable occurrence of blobs and zits. Layers also remained fairly consistent along the X and Y axes.

    The V29 whistle sounds exactly as loud and irritating as intended, which means the chambers were successfully printed without obstructions. The Graphica Mega Ghost and its obscenely long tongue also printed intact, where the hinge for the tongue was printed in one piece and glided smoothly.

    The 3DBenchy at 100 microns also printed intact and the quality of the detailing was impressive. This is a $199 machine, remember. The only major error was the prow of the boat, where there was some significant “wurfling” of the layers.


    Monoprice MP Select Mini

    In general operation, prints tended to fail when the filament spool snagged itself, or when we failed to apply enough adhesive glue to the print bed. We can’t attribute these issues to the Monoprice Select Mini itself — it’s an occupational hazard of FFF printing — but it’s still frustrating when it does happen.

    A minor niggle is that during operation the print bed slides forward towards the front of the machine, which can obstruct access to the click-wheel controls.

    One more quirk is that the temperature of the hotend seemed to have a margin of error of about 5°C. For example, if the temperature was set to 215°C, the control panel indicated that it was hovering between 213°C and 217°C.

    This didn’t impact too badly on our PLA-based test prints, but such inconsistency will cause problems when printing with materials more sensitive to temperature changes.

    UPDATE 25/08: We’ve been asked to supply more examples of printing at 100 microns. Here’s a low-poly Maoi bust, scaled up by 50% from the original size, and printed at 100 microns with 30% infill. It turned out beautifully, with the exception of the overhang on the chin; it has the same wurfling effect as the 3DBenchy at the same resolution.


    Monoprice MP Select Mini

    Website: LINK

  • 3D Printing Troubleshooting: 34 Common 3D Printing Problems

    3D Printing Troubleshooting: 34 Common 3D Printing Problems

    Reading Time: < 1 minute

    [unable to retrieve full-text content]Website: LINK

  • Original Prusa i3 MK2 Review: It Doesn’t Get Any Better

    Original Prusa i3 MK2 Review: It Doesn’t Get Any Better

    Reading Time: 13 minutes

    This is where 3D printing is right now, according to Thomas Sanladerer. Read his detailed and enthusiastic Original Prusa i3 MK2 review. 

    Don’t miss: Best Prusa i3 Clone – 24 Prusa i3 Kits vs Prusa i3 MK2

    Editor’s Note: This content originally appeared on Thomas Sanladerer’s YouTube Channel and is licensed as Creative Commons Attribution Share-alike thanks to his supporters on Patreon. If you are looking for the Prusa Mk3 review, please continue here

    So as it turns out, there are a number of issues with reviewing the Original Prusa i3 MK2.

    The first one being, it completely changed my frame of reference for how I’ll expect a printer to perform at a given price-point.

    And secondly… I guarantee you, there will be people calling me a sellout for this, but as always, this review was not influenced by anything other than my own experiences with this machine. I think this is the absolutely best goddamn 3D printer on the market right now.

    But let’s start out with what this i3 is. If you’re at all interested in 3D printing, you will have heard the name “Prusa i3” or just “i3” or even “i4” for various 3D printer kits before, some of which have practically nothing to do with what the i3 actually is.

    The thing is, “Prusa” is actually a person, Josef “Jo” Prusa from Prague, whose first popular design was the first Prusa Mendel, a cheaper and simpler version of the old Sells Mendel back in the day.

    Skip forward to today and you’ll find an almost 60-person strong team under the Prusa Research brand, engineering, and selling, what is now the Original Joseph Prusa i3 “MK2” (or “Mark 2”, I guess). That and only that is what we’re looking at today.

    Original Prusa i3 MK2 Review: Overview

    1. Features & Specifications
    2. Assembly & Performance
    3. Verdict

    If you’ve seen articles like “Best Prusa i3 Clone – 24 Prusa i3 Kits vs Prusa i3 MK2”, some of those machines are based on the open source i3 design, but thinking you’ll get the exact same experience from any of the kits from Far East sellers would be like buying this Goophone i7 and expecting it to rival an actual Apple iPhone 7. You get the idea.

    Original Prusa i3 MK2 Review: Features & Specifications

    Now, of course, the Prusa i3 design is completely open-source, both the hardware and software, and the MK2 comes with a bunch of very clever features for both of them. Let’s have a look at what the Original Prusa i3 MK2 promises specs-wise.

    So it’s still the familiar design of the vertical center plate carrying the Z and X axis and the M12 threaded rod base that carries that vertical plate and the Y-axis. This gives the Original Prusa i3 MK2 a slightly plus-sized build volume that’s 250mm or 10 inches wide, 210mm deep and 200 mm tall.

    It’s printing onto the MK42 heated bed, so the solution to all problems apparently, and that’s a thick, custom PCB — or printed circuit board — heater with no aluminum, glass, or anything else required to give it stiffness, since it’s already made from glass-fiber-reinforced resin, and to get your prints to stick, a thin PEI foil on top. This means it heats up and cools down fairly quickly, actually just as quickly as the hotend if you simply want to print PLA, and also ends up as a very light y-axis setup.

    The MK42 heater PCB also has zones with different heating properties that compensate for the bed cooling down faster at its edges, so you’ll get a very even temperature distribution at any point of the bed, which is important for printing larger prints with high-temp plastics.

    And having a genuine all-metal E3D v6.1 hotend in here means that you can throw any material at the printer. Use PLA, ABS, PET, Nylon or particle-filled filaments like wood-infused materials with the stock setup and brass 0.4mm nozzle; or swap in a hardened or coated nozzle for glass or carbon-fiber-reinforced filaments; or add a Volcano heater and nozzle if you want to go, like, really fast.

    Or if you’d rather end up with even more precise prints instead, grab a finer 0.25mm nozzle. Spoiler alert: it already prints magnificently with the default setup, but of course, the v6.1 does give you a lot of flexibility there.


    original prusa i3 mk2 review

    Next to the hotend, we find something I believe should be mandatory for any 3D printer sold today — a bed probe. And not just any probe, but a smaller-than-usual inductive one. Dubbed the P.I.N.D.A. probe (which apparently has a different meaning in Czech), it’s a custom-made sensor that of course takes up less space and also runs reliably off of 5v directly instead of requiring some sort of voltage level adaption like the larger, standard industrial probes.

    The Original Prusa i3 MK2 uses the probe for several tasks. One, it does auto mesh bed leveling, which allows the printer to correct for a slight bow or warp in the build platform instead of just a planar misalignment. Two, if you built the Original Prusa i3 MK2 from the kit version, it also uses the embedded calibration spots in the MK2 heated bed to square up your X and Y axes, so even if you built it with the lower frame super poorly aligned to the rest of the machine, which can be tricky to get perfectly right, your prints will still come out square after you let the printer calibrate itself.

    Some reviewers actually left that part out completely. It does square itself up, no need to meticulously adjust it while building it. And both the mesh leveling and the auto-squaring were developed by the Prusa Research team and are now becoming part of the main Marlin firmware as well, so that everyone can use them. Open source for the win!

    You’ll mostly be operating the printer through this decidedly unspectacular LCD controller. But I do actually like the way the clickwheel knob looks with this flap, which makes it super easy to use with a quick flick of a finger. I know, it’s the smallest of all details, but those usually do make the biggest differences.


    original prusa i3 mk2 review

    On the LCD, you get all the options for running the calibration routines, and loading and unloading filament. And it’s all not just dumb scripts, these will actually detect if something doesn’t look right, like the heaters not responding properly or the sensor not triggering at the height it’s expecting it to. So in plain words, if you mess up building the printer or something else fails, the Original Prusa i3 MK2 isn’t going to instantly destroy itself.

    So the entire machine is driven by a genuine Ultimachine Mini Rambo, which means reliable components for driving heaters and such as well as having a solid fusing concept that will protect the machine should anything ever short out. On the other side behind the frame we find a generic power supply without a fan, which does get warm to the touch during regular use.

    What’s awesome here is that it has this cover on its connector side, and this, in fact, also comes preinstalled even on the kit. You will not need to wire up mains voltage into your machine, you simply plug in your power cord into the fused IEC connector and the other side into the Mini Rambo mainboard. That’s awesome! And the frame also gets grounded properly by having the power supply attached to it, and even stiffened up by having it brace the vertical frame against the subframe.


    original prusa i3 mk2 review

    One thing about the entire wiring situation that stands out is that the most strained wire bundles, the ones going to the extruder and to the heated bed, actually include a piece of 3 mm Nylon filament to keep them from kinking and wearing out from repeatedly bending in the same spot. And short of using an actual drag chain, that’s what i think is one of the best ways of taking care of such a wire bundle.

    Original Prusa i3 MK2 Review: Assembly & Performance

    So if you’re deciding to build the Original Prusa i3 MK2 yourself, you should plan for a good five hours of assembly fun. And it was actually quite enjoyable. If you want to see my entire assembly process, check out the livestream recording here. It took me quite a bit longer, but then again, I was also trying to entertain about 500 people at the same time.

    The manual takes you through each step of the assembly, and then through the automatic calibration, and shows you how to prepare your own prints. While the pictures in the printed version aren’t particularly great, you can also pull up the additional online guide alongside it and augment the printed one with the images there.

    Now, Jo Prusa actually sent me two machines: one assembled, one as a kit. The assembled one actually came with a bit of shipping damage; it looked like the bed shipping lock came loose, broke its belt mount, and tore the LCD case off the frame. The latter only required a pair of zip ties to fix, and the belt mount, well, I used the part from the kit for that and then used the already assembled Original Prusa i3 MK2 to print a replacement part. But obviously, Prusa Research would just ship you the replacement part no problem.


    original prusa i3 mk2 review

    So with both machines assembled, it turns out they actually perform absolutely identically. If it weren’t for the signed frame, I’d have no way to tell them apart other than the serial number.

    You get a testing protocol with each machine; on the kit, they hook up the components on a dummy setup, for the assembled one, they actually test all components in the printer itself, as to how each part actually performs compared to how it should perform.

    And boy, do these MK2s perform well. Let me just show you the first “real” print I did on the assembled Original Prusa i3 MK2.

    This frog was printed live on stream, using the supplied sample GCode and Fillamentum Rapunzel Silver filament. And it looks absolutely perfect. There is literally nothing about this print that I could criticize, and that’s Ultimaker-level quality straight out of the box!


    original prusa i3 mk2 review

    But what good would a single demo print be if you couldn’t print your own stuff this well? Well, turns out you can do just that. So software-wise, Prusa Research are providing a full installer for Windows and Mac OSX, and instructions on how to set up the tools if you’re using GNU/Linux, and their software package includes everything from drivers, a preconfigured slicer, a printer host, a Netfabb installer, a color print tool as well as a firmware updater.

    Let’s go through those one by one: Drivers! The Original Prusa i3 MK2 still shows up as a serial port when you plug it into any USB port, so you can use it with any printer host, be it on a full computer or a Raspberry Pi with Octoprint or any other cloud printing solution. However, it also identifies straight-up as a 3D printer to Windows 10 and, I believe, also to Windows 8.1, so you can use the integrated 3D Builder app to print things or print directly from professional CAD tools like Solidworks without even needing to ever touch a separate slicer or 3D printer host.

    That is pretty awesome, I think, and other than some 3D Systems and Stratasys machines, I don’t know of any other 3D printer that allows you to work that way yet. Basically, you get the Original Prusa i3 MK2 to show up as a printer device, you get a print queue for it and all applications that support the Windows 3D printer interface will be able to use it directly. Very, very nice.


    original prusa i3 mk2 review

    But of course, you can still use the traditional way of exporting your model as an STL file and taking that through a slicer. You get a pre-configured version of Slic3r, which is actually a newer and improved version compared to what you can officially download.

    This includes a full profile for the printer, for various layer heights and after-market nozzle sizes – here’s where that smaller 0.25mm nozzle comes in – and for a bunch of different materials, covering all the basic ones from PLA, ABS, PET, over Taulman T-Glase or Bridge Nylon. All the ones I tried ended up working absolutely perfectly – unless, of course, I messed up the settings myself. You can still go in and tweak all of them, it’s just usually not necessary.

    If you prefer a different slicer, say Cura or Simplify3D, you can also download ready-to-go profiles for those from Prusa’s site.

    Now, having a ready-to-rock slicer like this is, in my opinion, one of the easiest and most effective ways to add value to any 3D printer. Because I don’t want to mess with tuning in a 3D printer and having my first ten or so print being complete failures, especially after I’ve just spent half day assembling it already. And having sort of this one-click solution to slicing available just completely removes that step from the equation, especially if you get profiles that are as well-tuned-in as the ones the Original Prusa i3 MK2 comes with.

    Pretty much all of my prints with this machine so far were done with the exact stock profiles and I just don’t feel a need to tweak them unless I wanted to add a new material that’s not supported out of the box.

    One more cool feature I’ve been using for years on most of my custom printers is the hotend priming on the bed edge instead of having the slicer draw a skirt around the print for that. Basically, you get a more reliably primed hotend and don’t waste a whole bunch of space on your printbed.


    original prusa i3 mk2 review

    Let’s move on with the software. You also get a firmware update tool for the Original Prusa i3 MK2, as the firmware is continuously being improved, and, point in case, they’ve already had a look at the points where I screwed up in the unboxing and now have the printer tell you not to do those exact things.

    Also, there were some performance improvements already, but be honest, I didn’t have any issues with the firmware running out of processing power anyways. If you’re using the supplied Slic3r install, you’ll even get a notification on the MK2’s LCD before a print if a new firmware is available.

    Then, color print! While the Original Prusa i3 MK2 is a single-color 3D printer, they’ve included some features to allow you to print in multiple colors by swapping filament mid-print. You can either do this through the LCD controller on any print (which you could also use simply to drop in a fresh spool of filament if your old one runs out) or by inserting color change positions to the ready-to-print GCode file before a print, and at those positions the printer will pause and ask you to swap its filament.

    Original Prusa i3 MK2 Review: A Flawless Experience?

    So overall, that’s pretty much a flawless experience with the Original Prusa i3 MK2 so far. Now of course, it’s still a regular FDM-based 3D printer, a very good one, but it still has its limits like any other machine.

    I still had one print fail, this ginormous Squid Attack model, which I even scaled down and therefore made it even harder to print. The overhangs on this one were just a bit too extreme and ended up curling up and getting the printer to skip.


    original prusa i3 mk2 review

    Now there are two different run modes you can select on the Original Prusa i3 MK2, power and silent mode. I had the MK2s on silent mode for most of the time, and that really does make them comfortably quiet with the hotend fan as the loudest part.

    I guess going with power mode could have made the Squid Attack print go through successfully. Of course, the printer does also get significantly louder, so to make use of that mode, you should definitely have the machine in a room separate from your living room.

    So let’s recap. The Original Joseph Prusa i3 MK2 is a €739 or $845.79 kit or an €999 or $1,087.79 assembled machine that punches way, way above its weight class. While it’s not your super-streamlined mainstream design 3D printer, it easily outperforms those with a form-follows-function approach, brings many innovative and actually useful features to the table and print like a champ.

    Again, the Original Prusa i3 MK2 has the best and most consistent print quality – even straight out of the box with zero tuning – of any filament-based 3D printer I’ve ever seen. It’s literally got everything I’m looking for in a 3D printer right now. From now on, it will be my new benchmark which other printers will have to measure against when it comes to ease of use, features, and raw print quality.


    original prusa i3 mk2 review

    Website: LINK

  • The 3D Printing Handbook Review: The Only Handbook You’ll Ever Need

    The 3D Printing Handbook Review: The Only Handbook You’ll Ever Need

    Reading Time: 2 minutes

    You can tell some thought was put into the design of the The 3D Printing Handbook. The layout is targeted for engineers and techies, which means no wasted time trying to find what you need. It’s configured to be able to flip right to what you’re looking for, even giving key words in the margins to avoid having to scan the full text. Genius!

    The 3D Printing Handbook is not only orientated to answer the how, as one would expect from a manual, but also the who, what, when, where and why. It does this with decision trees, real-life examples in industry, current brands and companies, clear images throughout the printing stages, simplified sketches, and more.

    Furthermore, there is a nice balance of visual aids, mixing images of different stages of the 3D printing process and simplified sketches that show the basic mechanism.

    The use of simplified sketches to show the basic mechanism is nicely balanced with real-life applications. It’s so important to have bona fide examples when working with a technology like this, because something in the design phase can be drastically different when transferred into a practical utilization. 3D Hubs addresses this disconnect by showing the limitations of the various technologies and tells you right off the bat which 3D printing technology is best for which application.

    A highlight of this manual is that it takes a broad perspective in addition to the direct operation, answering any and all related questions that could arise. By doing so, it allows you to fully understand the process and technology. This complete understanding is crucial to be able to manipulate the technology’s capabilities and look beyond the traditional applications.

    Website: LINK

  • Security Breach: Email Addresses & Passwords of Gearbest Users Leaked Online

    Security Breach: Email Addresses & Passwords of Gearbest Users Leaked Online

    Reading Time: 4 minutes

    A Reddit user recently discovered that sensitive customer information from hundreds of GearBest users was hacked and uploaded into a Pastebin file. 

    The Chinese electronics online retailer GearBest is a popular outlet for a variety of affordable consumer electronics, including 3D printer kits like the Creality CR-10, Anet A8, among others.

    The 3D printing community has developed mixed feelings towards GearBest, some speak positively about the affordable pricing, while others are skeptical about the product quality and customer service. One Reddit user named “jamesdownwell” recently discovered that the Chinese retailer may have been subject to a hack.

    After performing a “random security check” on his personal email account, the Redditor discovered that the email addresses, password, and purchase information of around 150 supposed GearBest users was posted online in a Pastebin file.

    Redditor Discovers GearBest User Information Hacked and Shared Online

    The Reddit user “jamesdownwell” alleges that his post on the matter was deleted from r/GearBest for no reason, but his claims eventually ended up being crossposted in r/3DPrinting. He also stated that although he immediately emailed GearBest, the initial response to this urgent matter seemed a bit lackluster.

    “I immediately contacted them through Customer Support and Facebook. Their Customer Support didn’t answer until the next day, clearly not understanding the request, despite me including a screenshot of the online leak. I replied with a link and they didn’t respond until a day later saying that they “take matters of security very seriously” they “will investigate” and ever so generously donated $10 credit to my account.”

    Here’s the email exchange between the Reddit user and GearBest, which was shared via this Reddit thread:


    However, the Italian Android fan-site Tutto Android claims that it had gotten in touch with GearBest. According to their article (translated from Italian using Google Translate), the online retailer said that they are aware of the situation and have already warned users involved in the hack to change their passwords.

    Shortly after the news surfaced on Reddit, GearBest released a full statement of their own:

    Our IT department have investigated this issue and we have identified a few hundred accounts that may have been exposed. Immediately after this knowledge came to our attention we have frozen these accounts and contacted the affected users.

     Our investigation concludes that it is unlikely that our users information can be leaked from our system. What has likely happened is that ill-intentioned people bought and/or hacked user login information from other websites and were trying to see if those data could access GearBest. As far as we know, those hackers used some special software to facilitate uploading large volumes of leaked data from other sites to try to deceptively login with Gearbest from a group of high risk IPs.

    Apart from the steps we have taken above to alert our customers to update their passwords, we are also urgently working on risky IP identification and a more complicated verification code to prevent systematic password testing.

    We would like to take this opportunity to thank you for raising this issue. Please rest assured that Gearbest remains a safe website and will strive to keep protecting the interest of our users to the best of our abilities.

    GearBest claims that the leaked information was unlikely to have come from their system, but rather through other websites and “ill-intentioned people”. The company also alleges that number of hacked accounts is only in the hundreds, and that all affected users have been notified have had their accounts frozen.

    Either way–just to be on the safe side–it would probably be wise for any GearBest users out there to change their password and check to see if their information was hacked.


    Website: LINK

  • Climate Change Activists Create 3D Printed “No-Snow-Globes”

    Climate Change Activists Create 3D Printed “No-Snow-Globes”

    Reading Time: 2 minutes

    Plan B, UK-based climate change activists, have partnered with the ad folks at Martin Agency to release quirky snow-less snow globes.

    When they’re not busy attempting to sue the UK government for alleged inaction over climate change, activist group Plan B have taken to glum festive frippery with the release of “No-snow globes”.

    A muddy, glib scene depicting the a chilling future affected by climate change, the snow globes are distinctive for the distinct lack of the very thing people want them for — snow.

    Seen by the group as an opportunity to prompt discussion about meeting carbon targets, three no-snow-globes were produced. The group turned to advertising agency Martin London, who also shaped a campaign around the no-snow-globe message.


    No-snow-globe

    3D Printing a Depressing Decoration

    Inspired by the recent rare snowfall in the UK, the no-snow globes are fabricated using an SLA 3D printer. Depicting three dour festive scenes, the figures were then hand-painted.

    Speaking of the no-snow-globes, Director Tim Crosland of Plan B said “Not everyone wants to discuss the apocalypse at Christmas time! So this campaign has been designed as a playful and accessible way to get people talking about climate change over the festive season. We’re using it a bit like a Trojan Horse – smuggling in a dose of reality about the urgency of the situation – without putting people off their Brussel sprouts.

    The no-snow-globes do not appear to be for sale (for the sake of maintaining festive cheer, probably a good thing), but there’s no denying the charm in portraying a warmer, snow-less future this way.

    Source: Creativeboom.com


    No-snow-globe

    Website: LINK

  • UNIZ Unveils Five 3D Printers With Uni-Directional Peel Technology

    UNIZ Unveils Five 3D Printers With Uni-Directional Peel Technology

    Reading Time: 3 minutes

    The 3D printer manufacturer UNIZ is planning to launch five new 3D printers equipped with its new uni-directional peel technology at CES 2018. 

    At the start of the new year, tech companies and enthusiasts from around the globe will gather in Las Vegas for CES 2018. The trade show features the latest and greatest innovations in consumer technology hardware, and of course, that includes 3D printing as well.

    The San Diego 3D printer manufacturer UNIZ will be present at the event, and will roll the dice with five new machines and a cutting-edge 3D printing technology.

    The company will launch three desktop 3D printers and two industrial 3D printers, all of which utilize uni-directional peel (UDP) technology. This printing technique offers a twist on stereolithography, increasing speed by minimizing the peel time of the conventional layered process.

    UNIZ is adding the SLASH+, SLASH OL, SLASH PRO, zSLTV15 and zSLTV23 to its product range. Each printer targets a different sector of the consumer or industrial 3D printer market.


    The zSLTV industrial 3D printer from UNIZ

    A Quick Look at the UDP 3D Printers UNIZ Will Launch at CES 2018

    Initially, UNIZ released the successfully crowdfunded SLASH LCD-SLA 3D Printer at CES 2016. This year, the 3D printer manufacturer is equipped with an arsenal of new products.

    The SLASH+ is essentially an upgrade over its predecessor, and is aimed at prosumers, hobbyists, educators, and artists. Using UDP technology, the printer is capable of 3D printing six full-arch dental models in less than five minutes.

    The SLASH OL satisfies the lower end of the consumer market, offering this unique 3D printing technology for under $1000. This machine offers an XY resolution up to 150um and is said to be 500 times faster than FDM printers at the same price point.

    UNIZ’s final addition to the desktop line is the SLASH PRO. This printer is designed for desktop users that need bigger parts. With double the build volume of the SLASH z-axis, users can create sizable objects quickly, such as a full-size outer-sole in under an hour.

    On the industrial side of things, UNIZ is also launching the zSLTV15 and zSLTV23. The first offers 89um XY resolution and a 330 x 190 x 410mm build envelope. With the company’s UDP technology, the zSLTV15 prints much faster than the desktop versions,  capable of producing 20 full-arch dental models in less than five minutes.

    Last but not the least, the zSLTV23 features an even larger build volume (521 x 293 x 650mm) and faster printing speeds (7,000 cc/hr solid and 56000cc/hr envelope speed). In fact, according to UNIZ, this machine will be the fastest SLA 3D printer the market has seen.

    Despite being a newcomer to the 3D printer market, UNIZ has made an impressive leap by bringing five new printers to the table. If you’ll be in Sin City attending CES 2018, which takes place from January 9 – 12, you can catch UNIZ at booth #9110 in the North Hall of the Las Vegas Convention Centre.


    The SLASH + desktop printer from UNIZ

    Website: LINK

  • 3D Printing Marzipan Animals and Fruit in Germany’s Luebeck

    3D Printing Marzipan Animals and Fruit in Germany’s Luebeck

    Reading Time: 2 minutes
    Marzipan

    Since centuries, Marzipan from Luebeck adheres to strict rules on the amount of almond paste in the product. Now 3D printing starts livening up the scene. 

    Do you think the almond treat Marzipan is out-dated and associate it with your grandparents? No wonder, as it actually dates back to the Middle Ages.

    It’s an important tradition in Germany, especially around Christmas time. But market pressures mean companies are having to come up with new ways to compete. So, one German company based in Luebeck is changing the perception of the sweet Christmas treat by modernizing it.

    This is the idea of Niederegger, a family-run confectionary store founded in 1806. At the busy Niederegger store in central Luebeck, the 3D printer is churning out animals and fruit goodies. However, the machine doesn’t yet compete with the handmade traditional treats.

    But, in order to attract more business — and not compromise on the content of almond paste — Niederegger hope the 3D printer can attract attention throughout the year. Currently, 60% of sales occur during Christmas time.

    Marzipan

    3D Printing Meets Candy

    Currently, marzipan from Luebeck is protected by the European Union. This means there are strict rules surrounding its almond paste content hence why many businesses struggle.

    “When you think that we have 2/3 almonds and only 1/3 sugar, you have to think that the price (of the marzipan) would need to double at least,” when the cost of almonds quadruples, explains Kathrin Gaebel, a Niederegger spokeswoman.

    With the price of nuts rising due to drought in California, marzipan companies are taking on higher costs to create the treats. This has caused many companies in Luebeck to go bankrupt.

    Niederegger is keeping afloat. However, it has needed help from the state of Schleswig-Holstein, Germany. The small company received €885,000 euros to be spent on quicker production methods.

    Could 3D printing be the answer? Or is it tradition that keeps the marzipan industry alive in Luebeck?

    Needless to say, it’s an important custom the state is willing to keep up. “As a child, you get it as a gift and you give it to children as a gift,” explains Eva Mura, a Niederegger spokeswoman.

    Source: Hindustan Times

    Marzipan

    The post 3D Printing Marzipan Animals and Fruit in Germany’s Luebeck appeared first on All3DP.

    Website: LINK

  • 3D Printed Ceramic Implant Fuses With Bone to Repair Broken Limbs

    3D Printed Ceramic Implant Fuses With Bone to Repair Broken Limbs

    Reading Time: 2 minutes

    Researchers from the University of Sidney have developed a 3D printed ceramic implant that fuses with natural bone. The implant was successfully used to repair large leg fractures in sheep. 

    As most of us know, breaking a bone is never an enjoyable experience, and having a metal plate or screws inserted into the fracture area doesn’t exactly jumpstart the fun. Thankfully, 3D printing technology is making it easier to create patient-specific implants and treat injuries or other debilitating conditions.

    Now, a team of researchers from the University of Sydney have developed a ceramic 3D printed implant that naturally fuses with bone to repair broken limbs. That means no metal plates or screws are required.

    The project, which is being led by Professor of Biomedical Engineering Hala Zreiqat, has been underway for a few years. After the material was successfully used to heal broken arm bones in rabbits, the team was moved on to a larger and more wooly animal. The researchers recently used the 3D printed ceramic implant to repair large leg fractures in sheep.

    3D Printed Ceramic Implant Offers Advantages Over Traditional Fracture Treatment

    In the latest phase of the study, the eight sheep observed and treated were able to walk with the implants directly after surgery. For the first month, plaster casts were used to help stabilize their legs, but the healing process was surprisingly quick and effective.

    According to the researchers, 25 percent of the fractures were healed after three months, while 88 percent were healed after one year. X-rays showed that the ceramic implant actually fused into the bone.

    While this breakthrough certainly has implications regarding the use of 3D printed implants in patients, the research is ongoing.

    The ultimate aim of the project is to 3D print scaffolds out of a novel bioactive ceramic (known as Sr-HT-Gahnite) that are optimized and strong enough to be used as a bone substitution in spinal fusion.

    Dr. Zreigat hopes to prove that this 3D printed implant will match patient-specific needs and improve longterm treatment efficacy. The study involving the sheep has yet to be published, but more details will be shared soon.

    Source: New Scientist

    The post 3D Printed Ceramic Implant Fuses With Bone to Repair Broken Limbs appeared first on All3DP.

    Website: LINK

  • Drive Into the Holiday Season With 3D Printable BMW Christmas Ornaments

    Drive Into the Holiday Season With 3D Printable BMW Christmas Ornaments

    Reading Time: 3 minutes

    BMW celebrates the holiday season and 3D printing technology by releasing STL files of its iconic logo, the famous BMW Welt, a set of wheels, and more. 

    Of all the industries that have taken interest in advancing 3D printing technology, none seem as invested as the automotive sector. From rapid prototyping to small-run manufacturing, numerous car manufacturers have integrated 3D printing onto the production line.

    One of the pioneers in this field is the German automotive manufacturer BMW. Not only has the company used 3D printing to showcase unique concepts and improve its production capabilities, it has also been on the forefront of various investment opportunities.

    Over the past couples of years, BMW has provided funding to a few of the most highly anticipated 3D printing companies, including Carbon and Desktop Metal. Clearly, additive manufacturing is playing an increasing role in BMW’s ecosystem.

    The automotive manufacturer recently shared a post detailing the ways that 3D printing has reshaped its prototyping and production. To show appreciation for this emerging technology, BMW is celebrating in the holiday season with 3D printable Christmas ornaments.

    BMW Shares 3D Printable Ornaments for the Christmas Tree

    As you can see, 3D printing is poised to have a major impact on the future of BMW’s manufacturing process. And so, the German automotive giant has shared a number of STL files for 3D printing and/or Beemer enthusiasts to print and hang on the Christmas tree.

    Here’s what they’re offering:

    BMW Welt


    Based out in Munich, the BMW Welt is a famous multi-use exhibition center that sees over three million visitors a year.

    BMW Wheel


    Want to take that new 3D printer out for a spin? Well now you can do so with a set of BMW wheels. These double-spokes will look great hanging from your tree or even your car dashboard.

    BMW Logo


    Of course, nothing can beat the iconic BMW emblem. Now, it’s finally available for 3D printing, meaning you can showoff your Beemer fandom by printing and hanging this logo up for all to see.

    The BMW Four-Cylinder


    The Four-Cylinder building is the BMW headquarters, also located in Munich. This 101-meter-high landmark building was designed by architect Karl Schwanzer. Now, you can print it out at home and have a piece of BMW’s history with you at all times. 

    You can download all of the STL files from the BMW website. Find the STL files and learn more by clicking here.

    Website: LINK

  • AutoCAD Free Download – AutoCAD Trial Plus Free Alternatives

    AutoCAD Free Download – AutoCAD Trial Plus Free Alternatives

    Reading Time: < 1 minute

    AutoCAD is a commercial software for 2D and 3D computer-aided design (CAD). It is considered by many as the granddaddy of CAD software. The desktop application is available since 1982; in addition, a mobile app came out in 2010. Now, you can form your own opinion: Learn how to download the free AutoCAD trial version.

    Moreover, AutoCAD’s wide array of features makes it a versatile tool. It is used across a wide range of industries: architecture, engineering, graphic design, management, and others.

    Therefore, it comes as no surprise that a popular CAD software like AutoCAD is quite expensive. Indeed, the $1,470 per year price tag may be too high for most people. But you can still profit from Autodesk’s quality without paying in full. We have listed the free trial version of AutoCAD, an educational version and the slimmed down AutoCAD LT. Also, we have prepared a list of the free CAD software alternatives to download.

    Website: LINK

  • E3D Releases Titan Aqua Water-Cooling System for FDM Printing

    E3D Releases Titan Aqua Water-Cooling System for FDM Printing

    Reading Time: 3 minutes

    In order to improve high-temperature 3D printing, E3D releases the Titan Aqua hotend and extruder alongside a water-cooling kit.

    As any desktop 3D printer owner knows, the more you use your machine, the better your prints and overall experience will be. However, when it comes to printing with high-performance materials like PEEK or even ABS, things can get a bit tricky.

    For those of us who have been frustrated by the throes of engineering-grade plastics, the UK 3D printing startup E3D is offering a new component to help cool your jets (as well as your printer).

    On Wednesday, E3D officially released the Titan Aqua, a water-cooled hotend and extruder setup that is designed to thrive in hot environments. When printing with a material like ASA, ABS, or PEEK, having properly heated surroundings is integral to success.


    However, high temperatures can also lead to decreased printing precision, while also overworking both the fans and motors. These motors tend to create heat internally due to electrical power dissipation, and can sometimes fail at temperatures over 80°C.

    With the Titan Aqua, E3D claims that users will be able continue printing in warm environments without sacrificing the wellbeing of your 3D printer. The water-cooling system is engineered to maintain a sharp thermal break, while internal cooling channels help to cool the body and motor in a quiet and efficient manner.


    Titan Aqua: A Refreshing Upgrade for Heat-Seeking 3D Printing Enthusiasts

    The Titan Aqua comes with a compatible water-cooling kit, designed similarly to a computer cooling system. The system includes a combination reservoir and pump, and merges the radiator and fan into a single, compact unit.

    Moreover, the watertight Titan Aqua is adaptable and also upgradable. The extruder is well suited for use with pre-existing water-cooling systems. The system uses a V6 heat break, which has a hot side that is identical to the E3D-V6 HotEnd. Therefore, the Titan Aqua can be upgraded with any V6-compatible block or nozzle.

    The water-cooling system is unlike any other hotend and extruder setup. The Titan Aqua uses a large fan that is mounted outside of the print chamber. Since the fan is so big, it’s able to spin at a slower–and therefore much quieter–speed.


    The coolant in the system is designed to transfer heat from the HotEnd to a radiator attached to the fan, where it can be dissipated. Additionally, the water-cooling channel is widened in order to remove metal and reduce weight while also maximizing water-flow and heat-transfer area.

    Needless to say, E3D has added an extremely interesting 3D printing accessory to its vast product line. Although the Titan Aqua and water-cooling kit isn’t something the average 3D printer user might need, it will likely be a hit among those printing with engineering-grade materials at high temperatures.

    You can learn more about the Titan Aqua on E3D’s blog. 

    Website: LINK

  • Building the Original Prusa i3 MK3: Review the Facts Here!

    Building the Original Prusa i3 MK3: Review the Facts Here!

    Reading Time: 2 minutes

    So what’s the big deal about the Original Prusa i3 MK3? It’s pitched as a refinement of everything Prusa Research have achieved to date; more than a reliability upgrade, but a new and improved desktop 3D printer with some awesome new features.

    Where the previous model offered astonishing print quality for the money, the Original Prusa i3 MK3 seeks to make the discipline of fused deposition modeling (FDM) more intuitive and easier than ever before, with a plethora of sensors to alert users to potential problems and prevent failed prints.

    There’s a lot to cover, but to summarize those new features:

    • Filament sensor
    • Power Panic
    • RPM sensing fans and Noctua
    • Ambient thermistor and P.I.N.D.A 2 with thermistor
    • EINSY RAMBo motherboard
    • Trinamic2130 drivers with layer shift detection, faster and silent printing
    • New Y axis
    • Bondtech extruder
    • Magnetic MK52 Heatbed
    • Powder coated PEI spring steel print sheet
    • Ready for OctoPrint

    The Filament Sensor uses an optical filament encoder to detect the presence and movement of a filament. This provides early warning for when the filament is about to run out, and the machine can pause the print and prompt the user to insert a new spool. It can also detect stuck filament and recommend a “cold pull” to clean the nozzle and continue the print.

    Other upgrades are Power Panic, where the MK3 can recover and resume a print-job after a power loss, and a new EINSY RAMBo motherboard which is pitched as the most advanced 3D printer board currently available. How advanced is it? It can monitor power, for one, which allows for the detection of blown fuses. For another, it features Trinamic drivers which are super fast, quiet, and can detect (and correct) layer shift while printing.

    Elsewhere, the Original Prusa i3 MK3 has a reworked Y axis for improved frame rigidity and an extra 10mm build volume on the Z-height. And there’s an upgraded Bondtech drive gear extruder, which grips filament from both sides to increase the push force of the filament and making it more reliable (especially for flexible filaments).

    But perhaps the biggest highlight of the MK3 is the new MK52 Magnetic HeatBed, which holds detachable alloy spring steel sheets powder coated with PEI. As the sheet cools down, parts can be popped off by simply flexing the sheet.

    So! Without further ado, let’s move onto the unboxing and build, shall we?

    Website: LINK

  • Magic Leap Finally Reveal their First Augmented Reality Glasses

    Magic Leap Finally Reveal their First Augmented Reality Glasses

    Reading Time: 3 minutes

    Magic Leap’s “One Creator Edition” is finally here. “Magic Leap One”, the first product of the company’s Augmented Reality technology, will be made public to developers in 2018. Still, there is no price available yet. 

    After raising more than $1.8 billion across four investments rounds and making several bold announcements about changing the Augmented Reality game, Magic Leap finally revealed their first product.

    Magic Leap’s first AR headset is called “Magic Leap One”. It consists of a surprisingly small AR headset named “Lightwear”, which looks significantly smaller than the competitors’ models. Also, you get a remote-like controller trackpad that offers six degrees of freedom (6DOF) tracking. Last but not least, everything is tethered to a small wearable computing device named “Lightpack”. It offers a computing performance the company compares to a regular laptop PC.

    The Lightwear AR glasses are fitted with sensors; eight can be seen on the front. These sensors gather 3D readings of real-world surroundings. With the acquired information, the device uses projections to produce virtual objects. It also measures and emulates lighting conditions, which makes the AR experience much more lifelike. As the device will store the data of the room, the AR can even “interact” with objects in the real world, if programmed to do so. The device also replicates real-world sounds using 3D “soundfield” audio features.

    Inputs include eye-tracking, voice recognition, head position, gesture recognition and movement in general.


    Magic Leap

    Magic Leap One: Available to Developers in 2018, No Date Set for Consumers

    The company state on their website: “We’re adding another dimension to computing. Where digital respects the physical. And they work together to make life better. Magic Leap One is built for creators who want to change how we experience the world.”

    Magic Leap will ship “Magic Leap One” to developers in 2018. They are also launching a “Creator Portal” at the same time. It will include learning resources, tools, documentation, and support. Find out more on their website.

    The company also adds: “The result is a system that sees what you see, allowing light-field objects to not only exist in the physical world but actually interact with it… Whether it’s virtual displays sitting alongside the computer monitor on your desk or a virtual panda that climbs across your living-room couch, visual perception with machine learning unlocks the power of spatial computing.”

    Source: Upload VR


    Magic Leap

    Website: LINK

  • Win a Monoprice Maker Ultimate and 3x Spools of MatterHackers PRO Filament!

    Win a Monoprice Maker Ultimate and 3x Spools of MatterHackers PRO Filament!

    Reading Time: < 1 minute

    It’s the season of giving, so why not give yourself the chance to win a brand new Monoprice Maker Ultimate and 3 spools of MatterHackers PRO filament.

    We’re continuing our giveaway bonanza this week with the Monoprice Maker Ultimate. It comes pre-assembled and tooled up with an all metal frame, anti-jam feed mechanism and a 200 x 200 x 175mm heated build platform.

    Capable of high-resolution prints (the paperwork states 0.02mm layer heights), it should be just the thing to get you printing long into 2018.

    Not only that, we’re including three spools of MatterHackers PRO series filament. And the best thing, the winner can  choose exactly which filaments they receive from the range.

    Big thanks to Monoprice and MatterHackers for partnering with All3DP to make this giveaway possible.

    Win a Monoprice Maker Ultimate & 3 Spools MatterHackers PRO filament

    Monoprice Maker Ultimate + 3 Spools of Matterhackers PRO filament

    *Note: a previous version of this post listed only the Monoprice Maker Ultimate as the prize. It’s actually better than that, with 3 spools of MatterHackers PRO series filament up for grabs too. Our apologies for the mistake.*

    Website: LINK

  • Best 3D Printer Awards 2017 / 2018 – The 12 Best 3D Printers

    Best 3D Printer Awards 2017 / 2018 – The 12 Best 3D Printers

    Reading Time: 4 minutes


    How to buy the best 3D printer

    Selecting the best 3D printer for your needs is not an easy task. We want to make the process it a little bit easier with All3DP’s Best 3D Printer Awards.

    Finding the Best 3D Printer for Beginners

    If you are a newcomer to 3D printing, things can get overwhelming. Specifications and terminology may sound gibberish and intimidating. So you best resort to a dedicated 3D printer for beginners, right? Unfortunately, that’s not always the case. There are four traps you can fall into.

    1. There are some 3D printers on the market that claim to be “best 3D printers for beginners”. While they come prebuilt, you will pay extra by paying for overpriced filament, get frustrated with poor build quality, and get dubious printing results. To avoid this, better check some independent reviews the chosen model.

    2. Don’t buy too cheap. When looking for the best 3D printer for your money, the worst thing you can do is to waste it on a cheap, untested no-name 3D printer. Don’t get us wrong, we don‘t want to talk you into spending more of your hard earned money – but there’s a huge difference between a „best cheap 3D printer“ and the best cheap 3D printer. Again, reviews matter to get the best 3D printer available.

    3. Also, there’s a legion of the Prusa i3 clones. They come in different brands, variations, and fittings. While some are actually really good, others offer inferior quality and are way too complicated to handle. Most of the Prusa clones come as a kit, which complicates things. If you want to go for one, make sure the machine has a good, readable documentation and an active community, so you have someone to ask if you are running into trouble.

    4. So why not buy a 3D printer on Kickstarter? In our opinion, Kickstarter and Indiegogo are not the best places to buy 3D printers. You can get ripped off intentionally (like with the $99 “Peachy Printer“), leave empty-handed (like with the “Tiko 3D“) or get your printer much later than promised (which happens to most Kickstarter projects).

    After so much advice, we recommend you to take a look at the categories “Best 3D Printer under $250“, “Best 3D Printer under $500“, and — of course — “Best 3D Printer for Beginners” of All3DP’s Best 3D Printer Awards. Surely, you’ll find the best 3D printer for you in these categories.

    Finding the Best 3D Printer for Makers

    If you consider yourself a tinkerer or maker who wants to tap into 3D printing, you won’t need the most expensive and flashy model available on the market. 
The good part is that you can save a significant sum by buying a 3D printer kit. You’ll also learn a lot by assembling the machine yourself.

    The market for the 3D printing hobbyist is heavily populated, so you have a great choice of machines to choose from. The most difficult part is finding the best 3D printer for your needs.

    If you want to make sure to get the best 3D printer, we recommend you take a look at the categories „Best 3D Printer for Beginners“, „Best 3D Printer Under $250“ and „Best 3D Printer Under $500“. These will give you the best bang for the buck.

    Finding the Best 3D Printer for Enthusiasts

    If you are already experienced in 3D printing and consider yourself a 3D printing enthusiast, you already have an opinion on the best 3D printer brands and their machines. You need some alternatives, not general advice.

    The categories „Best 3D Printer“, „Best 3D Printer Under $500“, „Best 3D Printer Under $1000“, „Best 3D Printer Kit“, „Best Workhorse 3D Printer“ and „Editor’s Choice“ are most likely to meet your needs.

    The Best 3D Printers for Professional Use

    If you are a professional that just wants to get the job done by 3D printing, you don’t care too much about brands. You need your prototype without having to tweak dubious settings. You need a 3D printer something that works out of the box, that gives you hassle-free and reliable results. Also, the materials you can print on matter to you.

    If you feel you belong in this category, please check the „Best 3D Printer“ and „Best Workhorse 3D Printer“. If you need high-quality details, you should also check our award for „Best SLA 3D Printer“.

    Website: LINK