Kategorie: Reviews

  • Win a THine Cable Extension Kit!

    Win a THine Cable Extension Kit!

    Reading Time: < 1 minute

    Subscribe

  • Raspberry Pi Ri

    Raspberry Pi Ri

    Reading Time: 2 minutes

    “I was using Raspberry Pi 400, and I had a small problem with the placement of the GPIO,” he tells us. “I couldn’t reach it without turning the entire thing, and it would stop my workflow to plug things in. The lack of labelling on a breadboard is also a problem for me. I keep GPIO pinouts up on my walls, but that’s really just a patch, not a solution.”

    Elijah also managed to spread out the GPIO pins in the process, retaining some ‘real-estate’ on the breadboard.

    A close-up on the GPIO labelling, which makes it much easier to quickly wire up some LEDs

    Hidden benefits

    “While it does help me work faster, it would also help a beginner who does not know what GPIO pins are what, because it has a label on it,” Elijah reckons. “On top of that, it hides the T-connector under the breadboard, which saves pins one-to-three on each side of the breadboard. When there are only five pins that directly connect with the GPIO pins, every saved space counts.”

    Apparently it also stops the whole thing sliding around a bit – the ribbon cable is stiff and has a habit of moving the breadboard around as it flexes and moves.

    The 3D print is fairly simple, but it’s optimised specifically for Raspberry Pi 400 for now

    “The Ri fixes that by keeping the breadboard where a ‘numpad’ would usually be on a full-sized keyboard,” Elijah explains. “If the normal breadboard size is too small for the project that you are doing, you can always just swap it out for a bigger breadboard, because it used the standard side pins of the breadboard to hold itself to the 3D print.”

    Now and then

    While it’s helped Elijah with productivity, he isn’t finished with the project yet, and has some future plans for it.

    The T-connector is underpinned – soldered to the bottom of the breadboard to save space

    “I plan to uncover the two vent holes by having the 3D print connect using the GPIO pins instead of clipping to the side of the board,” Elijah says. “Underpinned trays for a breadboard for Pico, [Raspberry Pi Zero] W, and [Model] B form factors are also planned for after the school year.”

    If you want to make your own, Elijah has put the 3D model for the little underpinned holder up on Thingiverse.

  • Smart Buoy

    Smart Buoy

    Reading Time: 3 minutes

    “We wanted to create a solution,” she tells us, “that would be cheap to build, easy to run, and provide meaningful data. In the bigger picture, it feels really important that we’re able to build continuous datasets so we can get a more thorough picture of what’s happening at our coasts.”

    It was also important for the team to try to understand the mechanisms driving coastal change. “Understanding how and why coasts are changing is the first step in robustly evidencing policy decisions to protect them,” says Steph.

    Buoy oh buoy!

    After six months of planning and designing, including “two jam-packed weeks” in which the team physically built and deployed their prototype (see magpi.cc/smartbuoy for videos), Smart Buoy finally landed in Grenada’s warm waters.

    Testing the Buoy indoors. At the top left is the base station comprising a Raspberry Pi Zero with radio module

    But, as Steph explains, there were some issues along the way. “The most challenging and time-consuming part was designing the Buoy casing and ensuring it was waterproof. While making the system solar-powered was pretty straightforward, ensuring it used minimal power required building a power scheduling system. We also set the bar pretty high in terms of what we wanted the Buoy to measure. Ensuring all the components worked to a good degree of accuracy was a massive challenge, and something we didn’t quite achieve.”

    In addition, the team had problems with the memory of the Arduino used inside the Buoy, while SPI connections required a multiplexer. “During some initial tests, the sensors gave very odd results, so we had to go back to basics. On the plus side, the Raspberry Pi [used in the base station] worked flawlessly!” says Steph.

    The Smart Buoy is essentially a solar-powered system of sensors which is controlled by an Arduino. “Once deployed, the Buoy sends measurements of environment characteristics (including wave height, wave power, and water temperature) via radio to a Raspberry Pi base station, which hosts a real-time dashboard and stores the measurements in a database.”

    3D-printed in two halves, the waterproofed Buoy is fitted with four mini solar panels for power

    The team chose Raspberry Pi as it’s straightforward to program and connect to a radio module so it can communicate with the Arduino inside the Buoy. “Running Linux meant it was simple to run a database and a server for the dashboard. The maximum distance for the radio signal is 1 km, so we had the base station on dry land while the Buoy was out at sea,” explains Steph.

    Hopes for the future

    Although the team weren’t able to keep the Smart Buoy in Grenada’s waters for as long as they’d hoped, many positives came out of the exercise, including the lessons they learnt from the build. “We’d love to be able to invest more time in finessing the project and making more Buoys – a network around the island would be amazing, and would give you a really interesting, holistic (and hopefully meaningful) look at the coast.”

    In addition, they introduced their prototype to some officials from the National Science and Technology Council in Grenada: “Their feedback was that something like the Buoy, which gives reliable data with little manual input, would be invaluable.” But, most importantly, Steph and the team have achieved their initial goal of making their Smart Buoy on a budget. “When we embarked on this project, it was to make a prototype to show that you could make something akin to a thousand-pound research buoy without splashing out.”

    While they know that Smart Buoy is still in prototype stage, the team hope to make improvements. “It would be amazing to see the Buoy in production, and we believe it would be a really valuable tool for education, citizen scientists, and even small governments.”

    Reaction from others has been positive too, as Steph reveals: “It made us so happy when a teacher in Spain got in touch to share that they were remaking the Buoy with their class… We really hope this project has inspired others, and would love to hear from anyone who could help us take the Buoy to the next level!”

  • The Computers That Made Britain book is out now

    The Computers That Made Britain book is out now

    Reading Time: 3 minutes

    We heartily recommend that you pick up a copy of this fantastic new book, The Computers That Made Britain. If you have any interest at all in the history of computing, the behind-the-scenes stories here are illuminating. 

    In the spirit of plugging this book for Tim, and our friends over at the exceptionally good Wireframe magazine, here are some of our highlights from the book along with our favourite adverts for these classic machines.

    Sinclair ZX Spectrum

    Few computers ignite such affection as the ZX Spectrum (perhaps only matched by our beloved Raspberry Pi). Many British programmers cut their teeth on Sinclair computers.

    Sinclair took out full-page adverts in the daily newspapers with the headline, ‘Popular in schools. And the only computer that runs primary schools software at home.’ The message was a spin on a now familiar formula: if you want the best for your children, you need to buy them a computer. 

    We love these adverts for The Sinclair spectrum. They show clearly all the different demands. Kids want games, adults want learning software, and Sinclair itself wanted to show off its considerable high-tech manufacturing prowess.

    BBC Micro and Acorn Electron

    While Sinclair and Commodore were heavily used for games, Acorn’s BBC Micro was at the heart of the BBC Computer Literacy Project. Every UK schoolchild for a generation learned to code on a BBC Micro. 

    It’s as hard to overestimate the effect of the BBC Micro as it is to quantify it. For a start, unlike any of the other computers in this book, it wasn’t simply a clever box: thanks to the backing of the BBC, it was supported by TV programmes, by excellent guides, by training for teachers, and by local colleges. It also had ubiquity: in the mid-1980s, it would have been hard to find a British school that didn’t contain a Micro.

    The Acorn Electron is a more downbeat tale of the computer that should have been a much bigger success than it was. We’re still smarting about never owning one, to be honest.

    Amstrad CPC 464

    When Alan Sugar entered the computer market, everybody doubted his ability to make an effective high-tech device. But you know what, we knew lots of people with Amstrad CPC 464’s and they were all happy.

    The Amstrad CPC 464 story is perhaps the most interesting in the book. A telling account of how Alan Sugar managed to form a team to produce a cracking all-in-one computer, packed with value, and with decent performance.

    So what was the CPC 464’s impact upon Britain? It’s true that it doesn’t produce the same level of nostalgia as either the BBC Micro or the ZX Spectrum, but when we asked people via social media what impact the CPC 464 had on their lives we virtually drowned in responses.

    Like many computers, Amstrad’s market was for teenagers wanting to play games who had to convince adults that it would be an invaluable learning tool, as this Amstrad CPC 6128 advert so deftly demonstrates:

    Commodore 64

    Commodore may not have been a British computer company, but there’s no denying the impact it made on British computing, and around the world.

    ‘You could go to the US and someone will say, what was the BBC Micro? They’d never heard of it. Whereas you could go almost anywhere in the world with a Commodore 64 and they know it.’ Kit Spencer

    As a special bonus, check out this Australian advert for the Commodore 64. It’s too good to leave out.

    Be sure to pick up your copy of The Computers That Made Britain today. Click here to download a free copy or purchase a print edition from The Raspberry Pi Press Store.

    Let us know in the comments which classic home computer was best.

  • Floppy Controller Board

    Floppy Controller Board

    Reading Time: 3 minutes

    For the uninitiated, floppy disks were once cutting edge technology – so-called because the original 8-inch and 5.25-inch versions were thin and bendy (give one a shake and you’ll see what we mean). They also came in smaller sizes including the more robust 3.5-inch and 3-inch varieties. Each offered fast and reliable storage – a world away from cassette tapes.

    Scott feels nostalgic when he thinks of these disks, which is why he has created a floppy controller board. “The primary benefit is to make use of vintage hardware, in particular 5.25-inch disks which are not often usable on many newer computers,” he says. “The device allows disk images to be read and written, making it possible to back up a 360kB floppy or create a floppy from a disk image to use in another vintage computer.”

    Time is of the essence

    Creating the hardware proved to be fairly straightforward. Scott made use of the WD37C65 floppy controller integrated circuit – “a great single-chip solution,” he says – because it combines the floppy controller, data separator, and control latch. It was used to create a HAT for Raspberry Pi which also has a 34-pin floppy header for the connection of a disk drive.

    The floppy controller HAT

    One of the key challenges came in creating the accompanying software. “It was tricky to get right due to the timing requirements involved,” Scott explains. He started by taking the floppy driver from Wayne Warthen’s ROMWBC project which allows an old disk operating system called CP/M to be ROM-based.

    “It’s written in Z80 assembly and I used that as a basis for writing a Raspberry Pi driver in Python with C extensions,” Scott continues. “Since the software is written as a user-mode Python program, it may make it feasible to accommodate more unusual – that is, non-IBM PC – disk formats, or even reproduce vintage copy protection schemes.”

    Back to the future

    To get to that point, however, Scott has had to overcome the fact that Raspberry Pi OS is not a real-time operating system. “That was the primary challenge,” he says. “For high density drives, and by that I mean 1.44MB and 1.2MB, bytes must be read from the disk controller every 13 microseconds. For low density, they must be read every 26 microseconds.

    	The project allows for the reading and writing of floppy disks such as these once-popular 5.25-inch varieties

    “If Raspberry Pi is unable to read a byte in time, then the controller will declare a buffer overrun and abort the transfer. General-purpose Linux does not provide the type of scheduling guarantees to user-mode processes necessary to meet these demands 100 percent of the time. The Linux kernel could decide to swap in another process at any time, leading to a multi-millisecond delay.”

    For help, Scott turned to the official Raspberry Pi forum and found that contributor ‘tjrob’ had worked on a technique to improve the real-time performance of the user-mode process. “Transfers rarely fail on low-density disks, but the failure rate on higher density disks may be around two to three per cent,” Scott says.

    Even so, the setup works and disks can be read and written using Raspberry Pi. It’s not yet at the stage where you could fire up an emulator and run software from the floppy drive. “The driver doesn’t provide the same interface as a Linux-block device, but that’s something that could be added in a straightforward way,” Scott says. Even so, it brings a new lease of life to an age-old format.

  • Picoth two-factor authentication device

    Picoth two-factor authentication device

    Reading Time: 3 minutes

    Simple security

    Picoth is a “small USB keypad with RGB buttons and a nice colour TFT screen. Just plug it in and you get a powerful authentication assistant that will type in your 2FA (two-factor authentication) codes for you. You can store up to ten codes per page, with any number of pages you need,” making it ideal for online banking, GitHub, Twitter, and messaging platforms. Rather than having to unlock the phone, open the authenticator app, scroll to find the code, then type it in within a few seconds, Angainor says Picoth is set up with one touch to display the code with its label and one touch to auto-type it. Furthermore, the screen displays the remaining time, since 2FA codes change every 30 seconds.

    This compact project has few components and costs a modest 40 euros

    “This first goal of the project was to have something I feel the need for every single day: a small and trustable device that can keep my various 2FA authentications safe and always at hand,” says Angainor of why he created Picoth. Raspberry Pi Pico “handles the hardware – a 4×4 matrix keypad and its 16 RGB LEDs, the 240×135 TFT colour screen, and a clock module – as well as all the software: code generation, USB_HID emulation, and animations”.

    With experience using Python on other microcontrollers, Angainor jumped at the chance to do the same with a Raspberry Pi one. “I just love Python’s expressiveness and compactness, and it’s so seamless to prototype with.” He likes Pico because it boots in a couple of seconds, is very affordable, and hardware vendors had extensions and packs available as soon as Pico went on sale. He chose Pimoroni’s “intelligent” multifunction Keypad Base, having tried to create a similar device using the firm’s Keybow.

    Tricky code words

    For Picoth, he says the “fun thing was parsing the official documents to check the flexible GPIO features, and what pins could be routed to I2C and SPI ports.” Having connected Pico to the display and keypad, he set about coding using MicroPython and Pimoroni libraries. He compiled everything himself as the Pimoroni firmware lacked the SHA-256 and SHA-1 he needed, editing the display library code since the pins were hard-coded. He got his device to work but hit a snag (see magpi.cc/harshdecision) relating to the USB input devices. It meant the device couldn’t type the code itself. “While usable, this was a serious drawback” and prompted a move to CircuitPython which is slower but has built-in USB-HID support.

    Can you spot Pico?

    The change meant “significant changes and added constraints” to his plans. Getting the keypad and display to work together was perhaps the biggest hurdle in the project but, as ever, the Raspberry Pi community came up trumps: “an awesome library by Sandy Macdonald, targeting a keybow2040, that was a perfect fit for the keypad,” says Angainor. He also notes that Raspberry Pi and Python’s ecosystems were what made the project possible at all, turning things into a matter of deciding how to assemble the parts. “There were some hacks needed because some items were not to be used that way, but that’s part of the fun.”

  • Drinks Machine

    Drinks Machine

    Reading Time: 3 minutes

    “I’d been missing my meals in the local chain pub with their self-service drinks machines,” Spencer says of his motivation for the project. “I wanted to make a machine that could sit on my desk and pour drinks while I was working.”

    At first, Spencer intended to create an automated home watering system. “Then, like many projects, things took a sudden twist,” he laughs. His first big decision was whether to make use of a standard Raspberry Pi computer or Raspberry Pi Pico.

    “Both would have worked well, taking inputs, displaying a message on the OLED display, and activating the relays,” he explains. “In the end I went for a non-Pico Raspberry Pi computer as I liked the opportunity to SSH into it and select myself a drink from a different room (as long as the glass was under it).”

    A glass act

    The drinks machine incorporates a Touch pHAT, offering six touch-sensitive buttons. It also has an OLED display, a four-channel relay board, and two submersible water pumps. Spencer designed the case using Autodesk’s Fusion 360 CAD software. “I printed it in a lovely red filament, opting for a modular approach with each piece slotting into each other,” he says.

    A drinks glass has filled up nicely, ready for Spencer to take a refreshing sip

    Although Spencer has created many projects (he can often be found at Raspberry Pi events up and down the country either speaking or helping out), for the drinks machine he insisted on paying great attention to the quality of the final build.

    “This was the first project where I planned in advance the route that cables would take to make sure they were all hidden,” he tells The MagPi. “This was also my first project where I used custom-made cable looms for 5 V, ground, and I2C with heat shrink to tidy them up. I didn’t want it to look homemade, and I wanted it to dispense drinks without flooding my desk, too.”

    Going down well

    Spencer has certainly succeeded in creating a robust, fab-looking project and he’s been enjoying lots of cold beverages of late without ever needing to leave his chair. So how does it all work? “The drinks machine can either be operated by pressing the capacitive touch buttons or programmed to dispense a drink at a certain time,” he says of his device’s automatic credentials.

    Spencer wants to be able to use the Secure Shell (SSH) protocol to send a remote message to Raspberry Pi, telling it to create a drink

    “When one of the capacitive buttons is pressed, a relay is activated and this switches on a small submersible pump.” The drink is then dispensed into the glass, while the name of the drink is displayed. But there’s room for improvement.

    “I still need to add fail-safes such as empty glass detection,” Spencer says, again looking to prevent liquid from spilling. “But this has been a fun build and I am looking forward to seeing what comes next with it.“

  • Tiny Mac

    Tiny Mac

    Reading Time: 3 minutes

    He completed his first microcontroller project 20 years ago, and has continued to incorporate technology into his sculpture designs ever since. His latest mixes 3D modelling and Raspberry Pi to create a Tiny Mac.

    Mac envy

    Tiny Mac is the first iteration of Chuck’s endeavour to combine Raspberry Pi and sculpture. He first encountered Raspberry Pi when creating a programming prototype for a client and, with Raspberry Pi Zero, saw a chance to make his version of a 2013 shrunk-down Mac project he’d long admired.

    “Tools, technology, and software have progressed since then, so I decided to make my own,” says Chuck. “I owned a Mac Plus back in the day and I loved that computer,” he adds.

    Raspberry Pi Zero was the obvious choice because Chuck didn’t want full-size USB ports sticking out of the side of the case. He chose the smallest possible display he could find, since this determined the scale of the case he’d need to design and 3D-print. Raspberry Pi Zero W was the best option, but meant missing out on decent sound output. A sound-board conflicted with the display, and Bluetooth provided only a partial solution but, having got some further ideas from other makers, Chuck is keen to explore some other sound options.

    Sizeable issue

    A bigger issue was the lack of room left over in the case once the 40-pin GPIO cable was inside. It took up most of the Tiny Mac’s interior. Sound and space issues aside, Chuck says the whole project was surprisingly straightforward. He modestly describes his input as designing the case and “bringing together components and software that already exists”. The process began with an ARM emulator on Chuck’s Raspberry Pi 4, but it became a Raspberry Pi Zero project in order to avoid making a case  with a wider bezel for the screen that he wanted. “There were many, many versions of the case,” he says. “I can get very fussy about how things look.” This extended to the 3D printer filament which needed to be the right Macintosh colour.

    The case is 3D-printed in four parts

    Having bought most of the hardware – Raspberry Pi Zero W, ribbon cable, display, 3 mm hex screws and nuts, HDMI, microSD card, and power supply – online, he turned to the Gryphel Project. The site exists to preserve early Macintosh computer software.

    Everything runs from Raspberry Pi OS desktop. Chuck wrote a startup script for the emulator but it wouldn’t quit to the Raspberry Pi OS desktop, instead needing to be shut down via SSH. There are probably ways to work around this, he says, “but it was beyond my skills to make it happen.”

    You need a really short ribbon cable or you’ll never fit it in your tiny Mac case

    Chuck’s instructions on building the tiny Mac also include links to other software that can be used on the retro computer. He also suggests using the Tiny Mac to run homebrew games or to host OctoPrint for 3D printing.

  • Interview: Phil Howard

    Interview: Phil Howard

    Reading Time: 4 minutes

    How did you start your Raspberry Pi journey? We’ve heard many stories, but not many that are quite like the case of Phil Howard, who you may know as Gadgetoid.

    “I don’t really have an electronics history to speak of,” Phil tells us when we ask about his background. “Despite pulling things like broken Lego trains apart as a child and magically getting them to work, I’d never really picked up electronics tinkering as a hobby. About the closest I’ve come was taking an electronics A level for… about a week. I expected electronics tinkering and got a lot of maths. I didn’t like maths. I took Media and Film studies instead. I’ve been spending the last 20 years slowly butting heads with the fundamentals I missed out on, but I think the film and media background helped put me where I am today. No regrets.”

    Pimoroni’s famous Bot-Lab, where many products are engineered

    Phil had been programming since childhood, though, starting with Visual Basic and moving into classic web development languages like HTML and JavaScript. Taking an interest in the once-popular OpenPandora handheld Linux PC/game emulator, he was eventually introduced to Raspberry Pi and is now the lead developer over at Pimoroni.

    When did you first learn about Raspberry Pi?

    That’s a tough one – it probably went around a news site, the OpenPandora forums, RSS feed, or word-of-mouth in the office. At the time I was working on web stuff for a marketing agency in Norwich, and had precious little background in electronics tinkering. I did have a keen interest in technology, however, and I’d been writing tech reviews casually. [I remember] the RS site allowed me to register interest, and my very first Raspberry Pi shipped on 19 November, 2012. I still have the shipping email.

    One of Phil’s more recent projects was 32blit, a retro-style, programmable handheld games console

    Almost immediately after receiving [it], I started reaching out to manufacturers who were building add-ons, cases and, accessories – this was usually how I pulled together some blog content since getting ‘accessory for X’ was always easier than getting ‘X’. This was especially true with the immense demand for Raspberry Pi. These companies included AB Electronics and – yes – Pimoroni, and I think this might have been a small part of how I got their attention.

    I quickly turned to blogging my adventures, writing reviews, and making myself heard in the Raspberry Pi community. You can still dig up my old ramblings at pi.gadgetoid.com.

    What is it like working with/for Pimoroni?

    It’s been quite the journey with the steady growth of Pimoroni, [and recently] I’ve run the full gamut from working at home, to uprooting my life to move to Sheffield and work with the Pirates, going through a building move or two, and finally uprooting again to relocate to Cambridge when working in offices became… not so popular.

    The Display-O-Tron 3000 was one of the many great Pimoroni projects Phil worked on

    When I first started, I was shooting the breeze with Jon – co-founder and CEO – over email and, probably, Skype at the time. We’d rubber-duck for each other through a new landscape of makey technical things, and we worked together on products like Display-O-Tron 3000 and Pibrella.

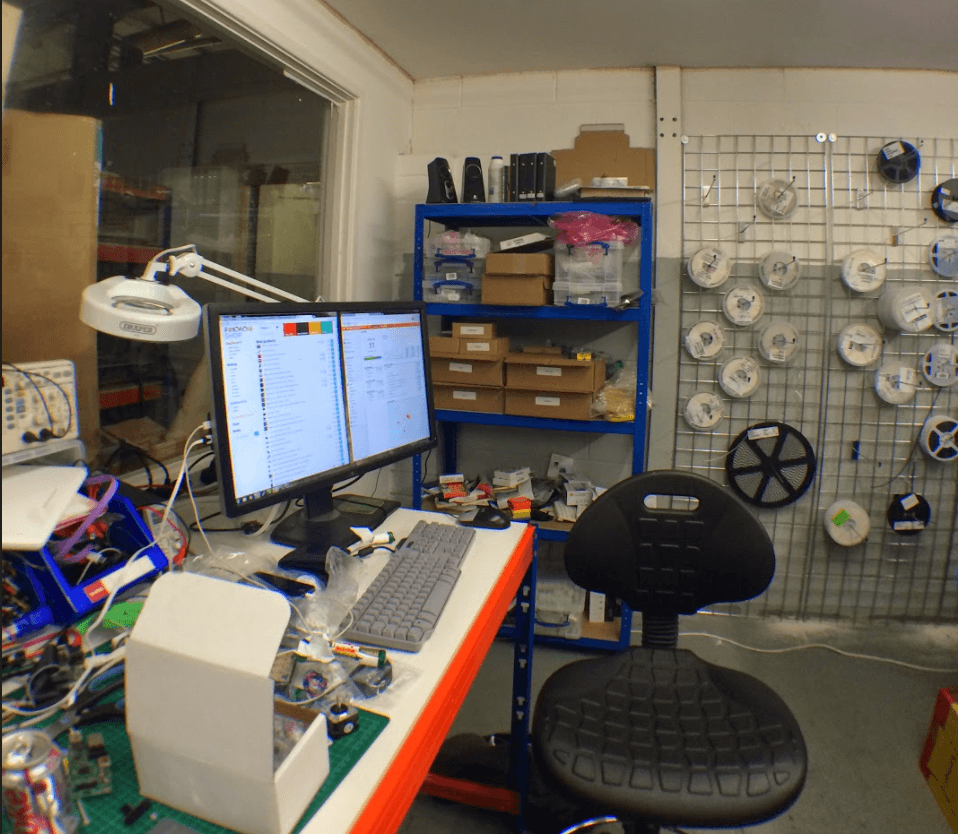
    I’d travel back and forth to Sheffield and spend some days working more closely with them in their Burton Street warehouse, which comprised mostly of a narrow galley of laser cutters. It also had a haphazard stud-wall stock room, a packing/kitting/production area, an elbow-to-elbow engineering room we called (and still do) the ‘Bot-Lab’, and lots of roof leaks, freeze pops, and snacks… It felt a lot more like a shared hackspace than a workplace.

    What are some of your favourite Pimoroni products you’ve worked on?

    I think my favourite must be the ones I designed, prototyped, and programmed myself under the harsh, but fair, scrutiny of Jon and Paul. They gave me a lot of leeway to design a product, make mistakes, and wire things up wrong, but had a keen vision for how a Pimoroni product should pull together and were always nudging me toward that.

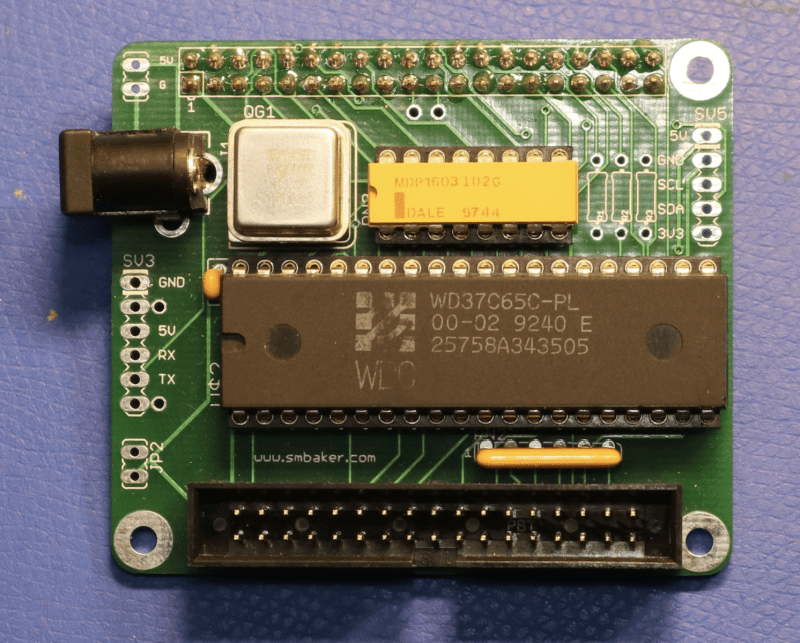
    These include Pan-Tilt HAT, Micro Dot pHAT, Enviro pHAT (the very first one), and I also had a very deep involvement in the engineering behind Flotilla, touching every single PCB in Eagle (our house PCB editor of choice for better or worse) at one point or another. Flotilla was the first big project I worked on once I officially started working for Pimoroni, and it fused my past of HTML, CSS, and JavaScript with this new world of electronics. It was an extremely ambitious project and made for some haphazard, if very effective, on-the-job training. It was a stepping stone to my less hectic role writing Python software (and now Pico) for our wider product range.

  • Review: THine Cable Extension Kit

    Review: THine Cable Extension Kit

    Reading Time: 2 minutes

    The kit comes in two parts: the Transmitter Board attaches to your Raspberry Pi Camera Module / HQ Camera; the Receiver Board connects to Raspberry Pi via the GPIO pin header.

    Each board features a CSI socket and RJ45 (Ethernet) socket and the two are connected via a CAT5e or higher LAN/Ethernet cable. The system is designed to be ‘plug and play’, so all you need to do is hook everything up and use the Camera Module as normal.

    Japanese company THine’s V-by-One HS Serializer / Deserializer technology provides a “high speed data link solution for MIPI CSI‑2, camera serial interface”. Learn more on THine’s website.

    THine Cable Extender is ideal for running a Raspberry Pi HQ Camera outdoors while Raspberry Pi remains safely out of the elements

    The Cable Extension kit comes supplied with the two boards, a 2-metre LAN cable and the ribbon flex cables, along with mounting screws. Our test kit also came with a Raspberry Pi 4, HQ Camera, and a 5 m Elecom CAT6 Ethernet cable.

    We took everything apart and set it back up with a fresh installation of Raspberry Pi OS, then followed the quick-start guide.

    Snap happy

    Setup was hassle free and it ‘plugged and played’ as outlined by THine. There was no need for any additional software installation. One thing of note: this is not a network-enabled solution. Instead, the LAN/Ethernet cable is designed to run directly from Raspberry Pi to Camera Module. We tested it around the house and ran the cable out into our garden where we kept an eye on a bird feeder from afar.

    And 20 metres is a massive upgrade from the 20 cm CSI cable included with the Camera Module. We checked with Raspberry Pi, and there is a limit with CSI before you lose signal integrity. There’s no guarantee that a CSI cable longer than the 20 cm one supplied will work.

    So this is a big upgrade in effective distance. The Cable Extension Datasheet has more info on cables tested up to 20 m with this kit.

    It can be a mild trouble to fine-tune the HQ Camera Module’s adjustment rings with the Raspberry Pi screen so far away. Apart from that, we struggle to find any downside. Cable Extension Kit works exactly as outlined and performs a useful function admirably well.

    There are many use cases where it is beneficial to keep the camera and Raspberry Pi some distance apart, especially when filming in a hostile environment. THine outlines a project where they set up an outdoor PiKon 3D-printed telescope and used it at night during a freezing Chicago winter.

    THine Cable Extension Kit is a niche product for a niche use case. But the technology is clever and it works exactly as outlined with no fuss. If you have a desire to place your Camera Module some distance away from Raspberry Pi, then this is the way to do it.

  • Farm Sensor Dashboard

    Farm Sensor Dashboard

    Reading Time: 2 minutes

    “After helping a friend doing farmer’s produce deliveries around Brooklyn, I reached out to Essex Farm, and I was kindly invited to come up there and see for myself how they work,” Léo explains to us. “While picking tomatoes, radishes, cucumbers, and more in the unforgiving August sun, I noticed someone with a temperature gun going between all the greenhouses and the fridges, to monitor the temperature. And so I had an idea – and a few months later, a prototype.”

    The result ended up as the Farm Sensor Dashboard (farmsensordashboard.com), which not only helps the farmers track the temperature of these greenhouses and fridges, but also the humidity.

    Simple build

    The devices hang in their respective spaces within a sealed bag

    Anyone who has built soil sensors or worked with temperature sensors knows that this is quite a simple build, and in fact only really requires one main sensor, a DHT22. To get it fully connected and able to work with the online platform, Léo turned straight to Raspberry Pi. “Raspberry Pi Zero W met all my requirements: wireless LAN, GPIO for the sensor, cheap, low specs, and of course the immense availability of online resources and supportive community,” he says.

    The dashboard itself is very easy to use, giving you the latest readings at a glance and allowing you to drill down into historical measurement graphs. Data like this is incredibly useful for efficiently using humidifiers, watering, and refrigeration systems – it could even be used to automate those kinds of mechanisms. It runs on a simple Python script, while the dashboard website uses a mixture of Rails, Next.js, React, and some custom CSS work from Léo himself.

    “The farmers find the app useful: they went from checking spaces twice a day to once a day,” Léo reveals.

    More automation

    The basic build of the devices used by Farm Sensor Dashboard

    As well as the current temperature and humidity sensing, Léo and the Essex Farm folks plan to upgrade the sensor suite on the current dashboard: “We’re going to add more sensors, and I’m looking at other problems such as tracking soil moisture, tracking organic matter, and possibly use a solar-powered WiFi repeater.”

    It’s an interesting system, and we hope Léo and the rest of the Essex Farm team manage to streamline their growing. If you want to check out the farm itself, you can head to essexfarmcsa.com, and see what kind of produce is being created with the help of Raspberry Pi.

  • Discover Big Builds in The MagPi magazine issue #106

    Discover Big Builds in The MagPi magazine issue #106

    Reading Time: 3 minutes

    Raspberry Pi Big Builds

    Raspberry Pi Big Builds

    Super-size your projects with our guide to the biggest builds around: arcade machines, pinball tables, photo booths, magic mirrors and guitars. These are large projects that take time and attention. The result is going to be special.

    Summer Projects

    Summer Projects

    Whether you’re off on a weekend break or looking forward to spending more time in the garden, these amazing outdoor builds take your Raspberry Pi out of the den and into the sunlight. Upgrade your vegetable garden, keep an eye on the local wildlife, keep track of the weather, and even build a smart BBQ. There’s an amazing array of outdoor builds for the summer months.

    Picoth

    Picoth two-factor authentication device

    Every month we have an incredible array of projects built by the fantastic Raspberry Pi community. There’s a lot to choose from this month, but we love Angainor’s Raspberry Pi Pico project that uses a 4×4 matrix keyboard and LED display to create an authentication device.

    Raspberry Pi Ri

    Raspberry Pi Ri

    Elijah Horland, a young maker from MythBusters Jr. has come up with a clever solution for breaking out the GPIO pins on a Raspberry Pi 400. Raspberry Pi Ri is a keyboard extension that places a clip-on breadboard in the space to the right of the keyboard.

    Pico Voice

    Build a Pico-Voice sound effect system

    We love Mike Cook’s tutorials. Every few months he comes up with an incredible new make that stuns us (and teaches both us and other readers electronics and code skills). Pico-Voice is another such curiosity. This project uses rotary switches and a DAC to perform digital signal processing on Raspberry Pi Pico. The result is a voice changer that’s educational and fun to play with.

    Phil Howard

    Community showcase: Phil Howard interview

    Every edition of The MagPi showcases the finest projects and people from the Raspberry Pi community. This month we interview Pimoroni’s lead developer Phil Howard (AKA ‘Gadgetoid’). Phil talks to us about blogging, writing reviews and being inside the Raspberry Pi community and all the amazing things he’s built with Raspberry Pi.

    Pick up your copy of The MagPi magazine #106

    The MagPi magazine is available as a free digital download, or you can purchase a print edition from our Raspberry Pi Press store.

  • Win a Grove Starter Kit for Raspberry Pi Pico!

    Win a Grove Starter Kit for Raspberry Pi Pico!

    Reading Time: < 1 minute

    Subscribe

  • Portable Raspberry Pi projects

    Portable Raspberry Pi projects

    Reading Time: 3 minutes

    Raspberry Pi Zero AirPlay

    Music anywhere

    Need a portable speaker that anyone can control easily? This AirPlay speaker is simple and looks great. magpi.cc/airplay

    Becca Cam

    HQ Camera hack

    The recent HQ Camera is a powerful sensor with some great
    lenses. It’s not a full camera, though, so Becca put it inside an
    old SLR. magpi.cc/beccacam

    Lunchbox Arcade Game

    Need food badly

    A quick go at Street Fighter on a lunch-break is a tradition in some offices, and
    this takes it a little step further by combining the two. magpi.cc/lunchbox

    mintyPi

    Incognito gaming

    Stuffing a Raspberry Pi Zero into a mints tin is an incredible accomplishment in
    itself, and mintyPi takes it a step further to be a whole game system. magpi.cc/mintypi

    PiBoy DMG

    Game Boy converter

    There are a few ways to turn a Raspberry Pi into a portable handheld, but this all-in-one kit from PiBoy DMG is one of our recent favourites.

    $130 | magpi.cc/piboydmg

    Portable Raspberry Pi 4 computer

    Recycled parts

    HackSpace magazine editor Ben Everard made this very quickly with some
    spare parts and a handmade wooden ‘case’. It does the job surprisingly well.

    hsmag.cc/24

    Ruggedized Raspberry Pi Portable

    Apocalypse-ready

    When planning for many kinds of fictional apocalypse, people seem to always forget the tech part. This rugged laptop will help there and in the real world.

    magpi.cc/ruggedpi

    Wearable time-lapse camera

    Conspicuous fast-motion

    A very cool use of Raspberry Pi that lets you walk around and get a nice little time-lapse of your day.

    magpi.cc/timelapse

  • Raspberry Pi OS Tips

    Raspberry Pi OS Tips

    Reading Time: 3 minutes

    1 Create a custom OS

    The Raspberry Pi Imager tool makes preparing your SD cards a breeze, and the latest version now features a new Advanced menu. It is accessed by pressing CTRL+SHIFT+X. This enables you to preset your wireless LAN network, host name, and many other options. Ideal for multiple setups, trying new operating systems, and headless projects (where you don’t need the graphical interface).

    2 Go configure!

    Raspberry Pi OS has features and settings that can be used to create an ideal setup. For example, if you want to interface with an I2C-based device or a Raspberry Pi camera, you’ll need to enable support. The utility you’ll need is Raspberry Pi Configuration. This can be run from the interface using Menu > Preferences > Raspberry Pi Configuration. You can also run it from the command line like so:

    sudo raspi-config

    .

    3 Manage your memory

    Raspberry Pi OS reserves a certain amount of memory for exclusive use by the GPU (graphics processing unit). If you’re not making use of a desktop (such as a headless project) or if you are wanting a boost for a graphics-intensive application, you can change how much memory is allocated in Raspberry Pi Configuration under Performance.

    4 Make your desktop your own

    Not happy with the default look of the desktop? No problem. Visit Preferences > Appearance Settings and you can change fonts, colours, placements, and the background image. If you want to go further, you can find many guides to creating different environments on the web. You can even replace the default desktop window manager with alternatives.

    5 Get more software

    Raspberry Pi OS comes with lots of software to get you started, from programming environments to a complete suite of office software. This is just the beginning. Take a look at Menu > Preferences > Add New Software and you’ll find thousands of packages that are one-click installs. Check Menu > Preferences > Recommended Software for the top picks.

    6 Backup, backup, backup!

    If you’re storing data that you can’t afford to lose, make sure to be backing up. One of the easiest methods is to clone the whole SD card (although it can get large!). Check out this guide.

    7 Accessibility

    Screenshot 2021-05-11 at 14.55.50

    Raspberry Pi OS has optional tools to assist people. In the Recommended Software application under Preferences, select the Universal Access category to install Orca, a popular screen reader, and Magnifier which enables easy screen zooming. Also, be sure to read our ‘Make Making Accessible’ feature in The MagPi issue 96.

    8 Meet the terminal

    On the top bar of your desktop, you’ll see a small black box with a blue bar on top. This is your link to the command line via Terminal; the real power of Raspberry Pi OS. Pressing Ctrl+Alt+F1 to F6 opens six different full-screen TTY (teletype) command-line interfaces. Press Ctrl+Alt+F7 to return to the regular desktop interface).

    The Terminal gives command-line access to your system. When following projects in The MagPi and online, getting to know this way of talking to your Raspberry Pi is essential to growing your skills. Learn more here.

    9 Pick your favourites

    See that toolbar at the top of the screen? It is endlessly customisable. You can select your favourite apps for one-click access, change its size, position, make it disappear when you ‘mouse away’, even have multiple panels. Just right-click on the toolbar to explore all the options.

    10 Take a screenshot

    Need to take a quick picture of your desktop? Couldn’t be easier. Just press Print Screen and a PNG image will be placed in your home folder. If you would like more options, such as a timer, the software does the work. The screenshot command

    scrot

    can be run from the command line, or you can install GNOME Screenshots. Here’s a full guide.

    In the latest issue of The MagPi Magazine, there are 50 hacks and hints. Check them all out from page 32 in The MagPi #105.

  • Modern Jukebox

    Modern Jukebox

    Reading Time: 3 minutes

    So, Bob set about his task – a time-consuming build, as the printing of the casing and parts for the jukebox took over 75 hours to complete, not accounting for the failed prints. “My printer is a Prusa i3 MK3S, an excellent and reliable printer,” Bob tells us, “but it requires mechanics like the belts to be properly tuned and adjusted. Once the printer and 3D software are dialled in, it’s stick-to-it. Major parts took from 4–12 hours to print, over about four months. 3D printing is iterative, and I’m a poor planner. A few long reprints were needed once the electronics were ready to be fitted, to correct for clearances and other problems.”

    Light fantastic!

    So, what do the internal workings consist of? “Raspberry Pi is at the base of a stack of electronics,” says Bob. On top of Raspberry Pi, which runs the Volumio music app, Bob has an IQaudio DigiAMP+ HAT to route music to two Dayton Audio RS100-8 full-range speakers, and above that is an Adafruit Perma-Proto board powered by 5 V from the IQaudio amp. “That board hosts a SparkFun Sound Detector through an Arduino Micro. The Arduino uses the Sound Detector output to power NeoPixel strings for sound-reactive lighting effects.”

    	Mounted on Raspberry Pi, the electronics include an Arduino Micro, SparkFun Sound Detector, and an IQaudio DigiAMP+ connected to two speakers

    The Modern Jukebox can be controlled either by the touchscreen display or via a web page from a computer, tablet, or phone, courtesy of Volumio. The user can raise and lower volume, choose music, skip tracks, pause/play, and so on. “On the back, there’s an on-off switch and a switch that controls the NeoPixel LEDs,” Bob reveals. “The ‘Tube’ LEDs around the outside can be set to sound-reactive, bubble/chaser through a colour wheel, or off. The LEDs around the grille rotate through a colour wheel at startup, then stay lit always.”

    Adopt, adapt, improve

    Bob is very appreciative of the work of others that has inspired and aided him in his jukebox design. “This jukebox was such a long project, it wouldn’t be possible without prior art from other makers,” he notes. “I built on the efforts of Marco Gregorio for the 3D jukebox model, and Michael Bartlett for the lighting effects.”

    Bob selects a song on the touchscreen panel, which shows Volumio’s intuitive user interface

    Bob learnt from the work of these makers and adapted it for his own project. “I modified Marco’s excellent full-sized, solid 3D Wurlitzer model. There were a very large number of components to review – what to keep, what is missing – to make this a scaled-down, modern-tech, 3D-printable object.”

    It’s fair to say that Bob’s Modern Jukebox has been a labour of love, but he’s received some super-enthusiastic feedback from makers and admirers, with one friend asking, “Wow – is he taking orders?” Bob estimates that he has spent around 160 hours in the course of a year on his creation, but a quality output requires an investment of time. “I’m not on a deadline, so my approach to projects is like ‘painting the Sistine Chapel’ – it takes an unknown amount of time and it’s done when it’s good!”

  • Raspberry Pi Refrigerator

    Raspberry Pi Refrigerator

    Reading Time: 3 minutes

    It’s a good idea, then, to create an alert system that will inform you if your fridge or freezer is suffering a drastic drop in temperature. One such solution has been created by Rick Kuhlman, who has sought to save the world’s frozen pies (and other foodstuffs, of course) from being destroyed by making good use of a Raspberry Pi computer.

    Rick got to work after witnessing the devastating effects a power cut can cause when his wife lost months’ worth of breast milk during an outage. By connecting an Adafruit integrated temperature and humidity sensor to a Raspberry Pi Zero using a flat flex cable, he’s developed a near-perfect, low-cost solution.

    Keeping cool

    “Raspberry Pi Zero is inexpensive and extremely capable,” he says. “It’s especially nice for small headless projects with wireless LAN connectivity. But the biggest reason I turned to this computer is because of the community, documentation, and tutorials that already exist. Unknown issues can be solved quickly by learning from the shared knowledge the community constantly generates.”

    A dashboard has been created in Initial State. It receives data every ten minutes, and allows for data to be viewed in real-time

    At first, Rick played around with wireless sensors and items from the SmartThings platform. “It seemed elegant but the well-below-freezing temperatures totally degraded the batteries, and I wanted a reliable solution that didn’t require constant fidgeting to keep it working.”

    He experimented with different wiring across a freezer’s vacuum seal and he considered ultra-thin thermocouple wire. “Ultimately, though, I wanted to use the Adafruit sensor because of its temperature range and simplicity of integration with Raspberry Pi. The flat flex cable was key to getting signals across the freezer seal without leakage.”

    Avoiding the cut

    Setting up the hardware proved straightforward. The relative difficulty came in creating the accompanying software. “Raspberry Pi OS Lite is great for headless applications, but it takes more configuration to set up and install the modules, libraries, and SDKs properly,” Rick says. “Getting wireless LAN setup headlessly, getting SSL access, and starting the app on bootup is not very discoverable either.”

    Wires from the encased sensor are soldered to Raspberry Pi Zero. The maker wants to add a door sensor, too, for speedier alerts

    But once he had everything in place, coding the app was smooth. Rick used the IoT platform Initial State, so Raspberry Pi Zero only needs to stream the data via Initial State’s Python SDK. “Without any extra coding on the device, I was able to create SMS/email triggers for temperature thresholds and data dropouts,” he says. “I also calculated and displayed the various statistics and unit conversions using the expression engine.”

    You can view the status of the fridge online.

    The device has been running flawlessly for six months, already sending alerts via text and email when the power was cut due to storms around his home in Nashville. It has also let Rick know when the door was left open for too long, heading off some potential meaty disasters. “I’m now able to sleep easy knowing my prime briskets are safe and sound,” he laughs.

  • Terminator HQ Tank

    Terminator HQ Tank

    Reading Time: 3 minutes

    Fortunately for humankind today, Michael Darby’s DIY robot version of the HK Tank is a lot less deadly, firing beams of light from RGB LEDs. “I have always been a huge fan of the Terminator films and I’ve always wanted to recreate the robots from them,” he tells us. “The tracked chassis [a DFRobot Black Gladiator] was perfect for this – it’s not dangerous, but it may bump into someone. The lights on it are also kind of bright.”

    Enemy detection

    Not only does Michael’s robot look the part, it has numerous sensors to help it navigate, along with a Raspberry Pi Camera Module for spotting humans and objects. If a human is detected, ‘purple plasma’ – or rather, a flash of the RGB LEDs – is fired at them.

    Fitted with a gold heatsink, a Raspberry Pi 4 is the robot’s brain, while an Arduino handles low-level functions

    Mounted to one side, with a shiny gold heatsink, a Raspberry Pi 4 is the brain of the robot, handing the TensorFlow machine learning and AI functions. “It’s using a pre-trained model, so I think it has a good few thousand things at least it can detect,” says Michael. “In future I will look into getting it trained on more things.”

    The robot’s Raspberry Pi also communicates with an Arduino which handles the low-level functions, such as controlling the two DC motors and reading no fewer than five ultrasonic sensors used for obstacle avoidance. “There are probably other sensors I could have used,” notes Michael, “but I thought these would be the easiest to implement. There are two on the front to make sure it doesn’t hit a wall (and also help with the aesthetic) and the others are all in place to prevent it from hitting things behind it, or driving off of the edge of things.”

    Join the queue

    With the project taking “a good few months” to develop, Michael says the most difficult was sorting out the code – written in Python – and getting it to do what he wanted. “This project had some really new stuff I was trying, such as the event queue to allow asynchronous processing; this is where it really got complex.”

    Here, the robot’s AI has detected a human

    Rather than handling one function at a time, the code is based on an event queue. All functions are threaded and running simultaneously, dropping their results or requests into the central queue. This prevents conflicts and is based on priority for the functions: “If there is a module that requires something to happen sooner, like some kind of priority action for moving to a location, or recognising a person, it will be handled before a lower-level action such as processing an object that isn’t a mission parameter.”

    Mission parameters are stored in YAML files rather than hard-coded. “You can essentially give it commands via a YAML file that contains all of its standing orders and configurations,” explains Michael. “From here it can be set to identify certain things and react in a certain way, such as spot a human and light up the ‘plasma turret’ RGB LEDs.”

    While the robot has received positive feedback from the community, he’s planning to make improvements, such as training the model on specific faces and “allowing for more complex patrol patterns and ‘missions’ and make it more of an autonomous bot.” Maybe it’s just as well it’s only firing light beams.

  • AI-suke the robot

    AI-suke the robot

    Reading Time: 2 minutes

    “I named the robot AI-suke, which means ‘AI help’,” Rito tells us. “AI-suke has a built-in camera and speaker, and faces and voice messages are registered in advance. AI-suke can do face recognition to identify the person who visits the house, and play a voice message tailored to that person.”

    Notifications, with a photo, are sent to the user's phone via LINE

    It will also send notifications to LINE, a smartphone instant messaging service, so you can know if someone has arrived while you’re out of the house.

    Design and success

    AI-suke has a ‘face’, as well as other humanoid features, which gets people to look at it. This, in turn, means their face can actually be seen by the camera.

    Rito and AI-suke

    “The people talking to AI-suke feel calm and happy because of its cute voice and appearance,” Rito says. “My five-year-old brother acted as the voice actor. The cute body is made with cardboard and wire. These give people a warm impression, as well as ease the anxiety.”

    You can view a video of AI-suke in action. It’s in Japanese, but you’ll get the idea.

    What does the future hold for this young maker?

    “I would like to make things that are not only useful for people, but also make people happy. Raspberry Pi has many powerful functions, so I will try them to improve my future work.”

  • A smart investment

    A smart investment

    Reading Time: 2 minutes

    I’m here to tell you that now is the perfect time. As long as you have some time.

    When we’re out enjoying the parks and beaches and pub gardens, who will be left at home to feed the cat? Who will water your plants? Who will brew your artisanal latte? Certainly not the cat. So why not invest your time now so that you can have a bit more time when it really matters? Go find your copy of issue 104 of The MagPi, and have a look through the feature for some ideas and inspiration.

    Wasted time

    As the saying goes, ‘the time you enjoy wasting is not wasted time’. And sometimes taking the extra time to set up a system to do a job feels like you’re spending as much time as you might be saving. This is where we like to come in with fun ways to make with Raspberry Pi, and great stories to inspire you to dream big and maybe do something a bit different.

    Maybe this is your excuse to get plants that need watering. Or to get into really nice coffee. Definitely not a cat, though: they’re no fun. You might discover a fun new hobby, a new way to code, or at the very least, you might have a fun story to tell later on.

    Nothing is forever

    I have been there with the whole investing time for the future thing when it comes to making, so I do have some advice: build in some redundancies, make backups, write notes, and basically make sure that if something inevitably breaks, you can fix it. Of course, this may take more time, but it will save time in the future. Hopefully this won’t happen while you’re off enjoying your summer, though. Might overfeed the cat.

    So go forth. Invest your time, have some fun, and then enjoy the sweet, sweet fruits of your labours.