Raspberry Pi OS Tips
1 Create a custom OS
The Raspberry Pi Imager tool makes preparing your SD cards a breeze, and the latest version now features a new Advanced menu. It is accessed by pressing CTRL+SHIFT+X. This enables you to preset your wireless LAN network, host name, and many other options. Ideal for multiple setups, trying new operating systems, and headless projects (where you don’t need the graphical interface).
2 Go configure!
Raspberry Pi OS has features and settings that can be used to create an ideal setup. For example, if you want to interface with an I2C-based device or a Raspberry Pi camera, you’ll need to enable support. The utility you’ll need is Raspberry Pi Configuration. This can be run from the interface using Menu > Preferences > Raspberry Pi Configuration. You can also run it from the command line like so:
sudo raspi-config.
3 Manage your memory
Raspberry Pi OS reserves a certain amount of memory for exclusive use by the GPU (graphics processing unit). If you’re not making use of a desktop (such as a headless project) or if you are wanting a boost for a graphics-intensive application, you can change how much memory is allocated in Raspberry Pi Configuration under Performance.
4 Make your desktop your own
Not happy with the default look of the desktop? No problem. Visit Preferences > Appearance Settings and you can change fonts, colours, placements, and the background image. If you want to go further, you can find many guides to creating different environments on the web. You can even replace the default desktop window manager with alternatives.
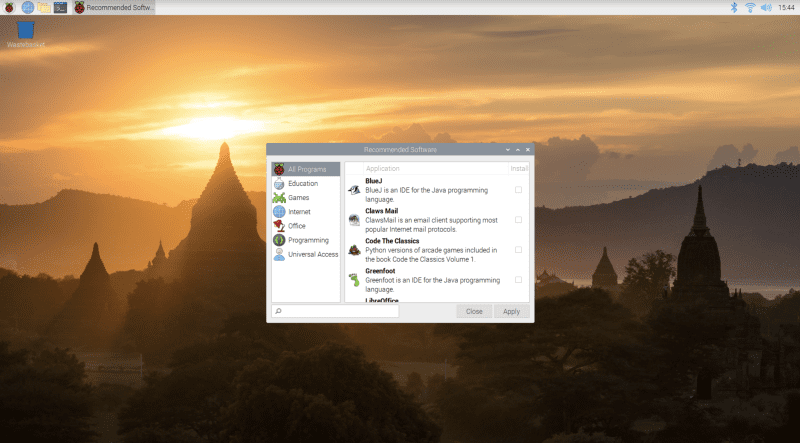
5 Get more software

Raspberry Pi OS comes with lots of software to get you started, from programming environments to a complete suite of office software. This is just the beginning. Take a look at Menu > Preferences > Add New Software and you’ll find thousands of packages that are one-click installs. Check Menu > Preferences > Recommended Software for the top picks.
6 Backup, backup, backup!
If you’re storing data that you can’t afford to lose, make sure to be backing up. One of the easiest methods is to clone the whole SD card (although it can get large!). Check out this guide.
7 Accessibility

Raspberry Pi OS has optional tools to assist people. In the Recommended Software application under Preferences, select the Universal Access category to install Orca, a popular screen reader, and Magnifier which enables easy screen zooming. Also, be sure to read our ‘Make Making Accessible’ feature in The MagPi issue 96.
8 Meet the terminal
On the top bar of your desktop, you’ll see a small black box with a blue bar on top. This is your link to the command line via Terminal; the real power of Raspberry Pi OS. Pressing Ctrl+Alt+F1 to F6 opens six different full-screen TTY (teletype) command-line interfaces. Press Ctrl+Alt+F7 to return to the regular desktop interface).
The Terminal gives command-line access to your system. When following projects in The MagPi and online, getting to know this way of talking to your Raspberry Pi is essential to growing your skills. Learn more here.
9 Pick your favourites
See that toolbar at the top of the screen? It is endlessly customisable. You can select your favourite apps for one-click access, change its size, position, make it disappear when you ‘mouse away’, even have multiple panels. Just right-click on the toolbar to explore all the options.
10 Take a screenshot
Need to take a quick picture of your desktop? Couldn’t be easier. Just press Print Screen and a PNG image will be placed in your home folder. If you would like more options, such as a timer, the software does the work. The screenshot command
scrot can be run from the command line, or you can install GNOME Screenshots. Here’s a full guide.

In the latest issue of The MagPi Magazine, there are 50 hacks and hints. Check them all out from page 32 in The MagPi #105.