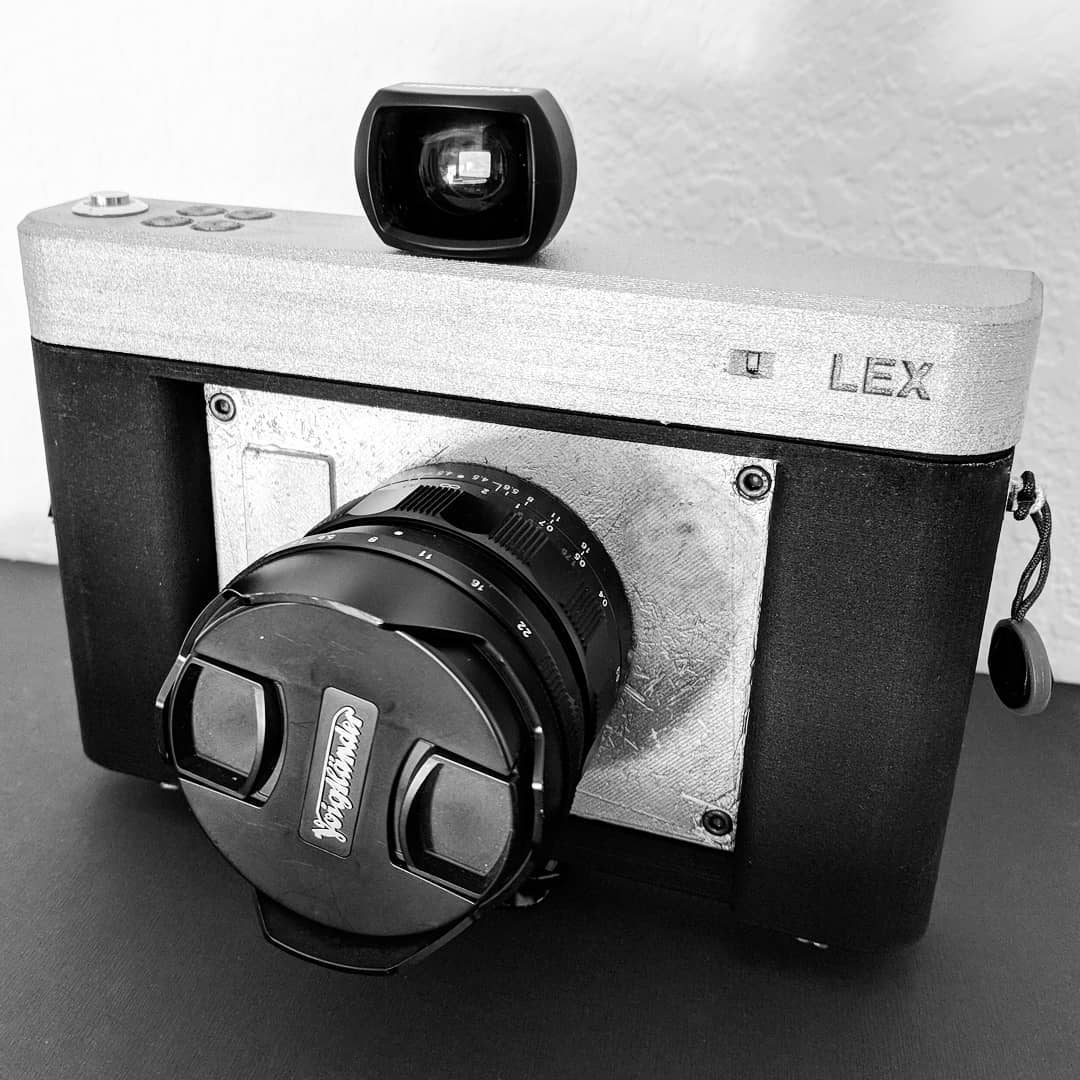
Coming soon to a crowdfunding platform near you, Lex is a protoype 3D printed camera that shoots 35mm film using modern Sony lenses.
Alexander Gee, a programmer and engineer based in Austin, Texas, has been developing a 3D printed camera body that shoots with modern Sony lenses using 35mm film. It’s called Lex.
“There is a particular aesthetic to shooting on film that gets lost when you use digital cameras,” Gee says.
“Like most people, I’m not shooting on film every day. My daily driver is a Sony A9. But sometimes I want to be able to use the lenses I can use with that camera with film emulsions.”
The Lex 3D printed camera accepts Sony’s E-mount lenses, the type designed for its higher-end cameras like the new Sony A7 III (whose digital image sensor is the same full-frame size as a shot of 35mm film). Currently, the Lex prototype offers auto exposure but not autofocus.
Gee estimates the prototype’s cost at about $450, including 3D printing and a shutter ordered from Sony’s parts catalogue.
Lex 3D Printed Camera is a Work in Progress
According to the Lex Optical website, the 3D printed camera has been in development for over a year. It is planned to be released as an open source project eventually. But first, a crowdfunding campaign is being put together for the production of a small batch.
The scope of the project is that it should be simple enough to build a Lex with just a 3D printer and a soldering iron. With full access to the designs, users can change any component of Lex they require. For example, if you don’t have Sony lenses to hand, you can design a Canon FD mount instead.
Finally, all makes of 35mm film should be compatible with a Lex. You can select any ISO between 6 and 512,000.
Gee is optimistic that others will help him to develop and improve Lex; momentum for the project may grow after he’s shared the STL files for 3D printing.
“I’d love to see others pick this project up and run with it,” he enthuses.
“I’ve got a day job and I’m not a mechanical engineer by trade, so there are huge leaps and bounds people with more skills than I could make on a project like this.”
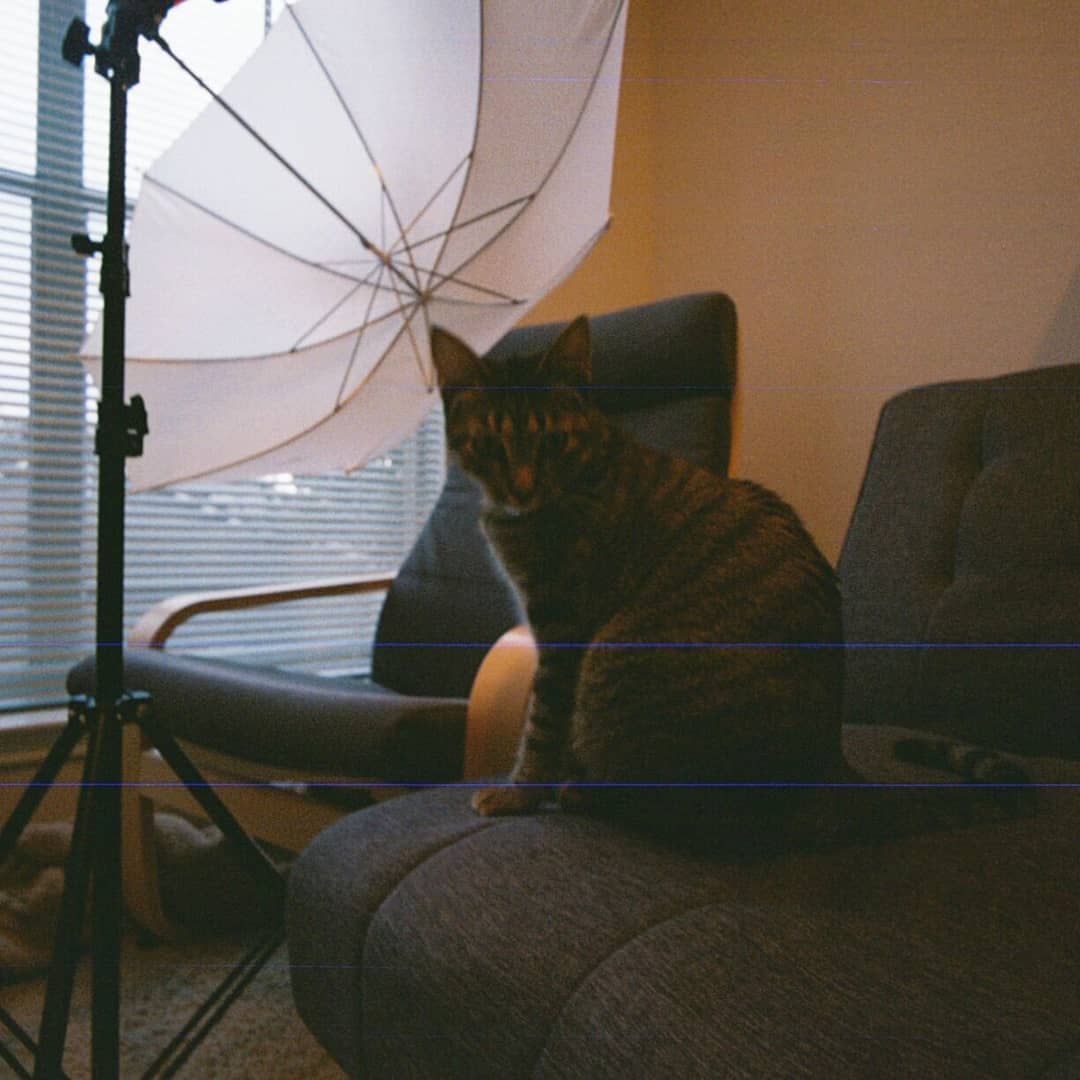
Sample photo taken with a Lex 3D printed camera using 35mm film and Sony lenses.
To announce its newest material, E-RigidForm, EnvisionTEC 3D printed a ridiculously long chain. Measuring out at 328 feet, the links demo the material’s tough properties and the possibility of such parts for end use.
Michigan-headquartered 3D printer manufacturer EnvisionTEC broadened its already pretty vast pool of materials this month with the announcement of E-RigidForm. Positioned as tough and durable, the polyeurethane-like material is comparable to nylon 6 and polycarbonate.
To show off the new material ahead of this month’s RAPID + TCT show, the company turned to its own 3D builder Robert Montes, who devised record-setting print: the longest continuous single-print chain.
Almost entirely filling the 18-cubic-inch build volume of the company’s largest resin printer, the Xede 3SP, the chain consists of 6,144 links 1.5-inch links and requires just shy of 100 hours print time.
It took Montes (with some colleagues in support) two weeks to design, and required an extremely graphically powerful computer to process for printing, generating supports and divining the layers to be printed.
In all its a remarkable print, and incredibly satisfying to see pulled apart into the single chain. Check out the video below and see for yourself.
Solid Chain, Even More Solid Material
The material EnvisionTEC shows off with this chain will perhaps be as interesting as the chain itself to non-manufacturers. Dubbed E-RigidForm, this new tough material boasts a high tensile strength, measuring 68-73MPa at 7% elongation at break.
Speaking about the new release, EnvisionTEC CEO Al Siblani said “A print job of this size and complexity would not have been possible before, simply because of the stiffness required during the 3D printing process for so many links and layers.”
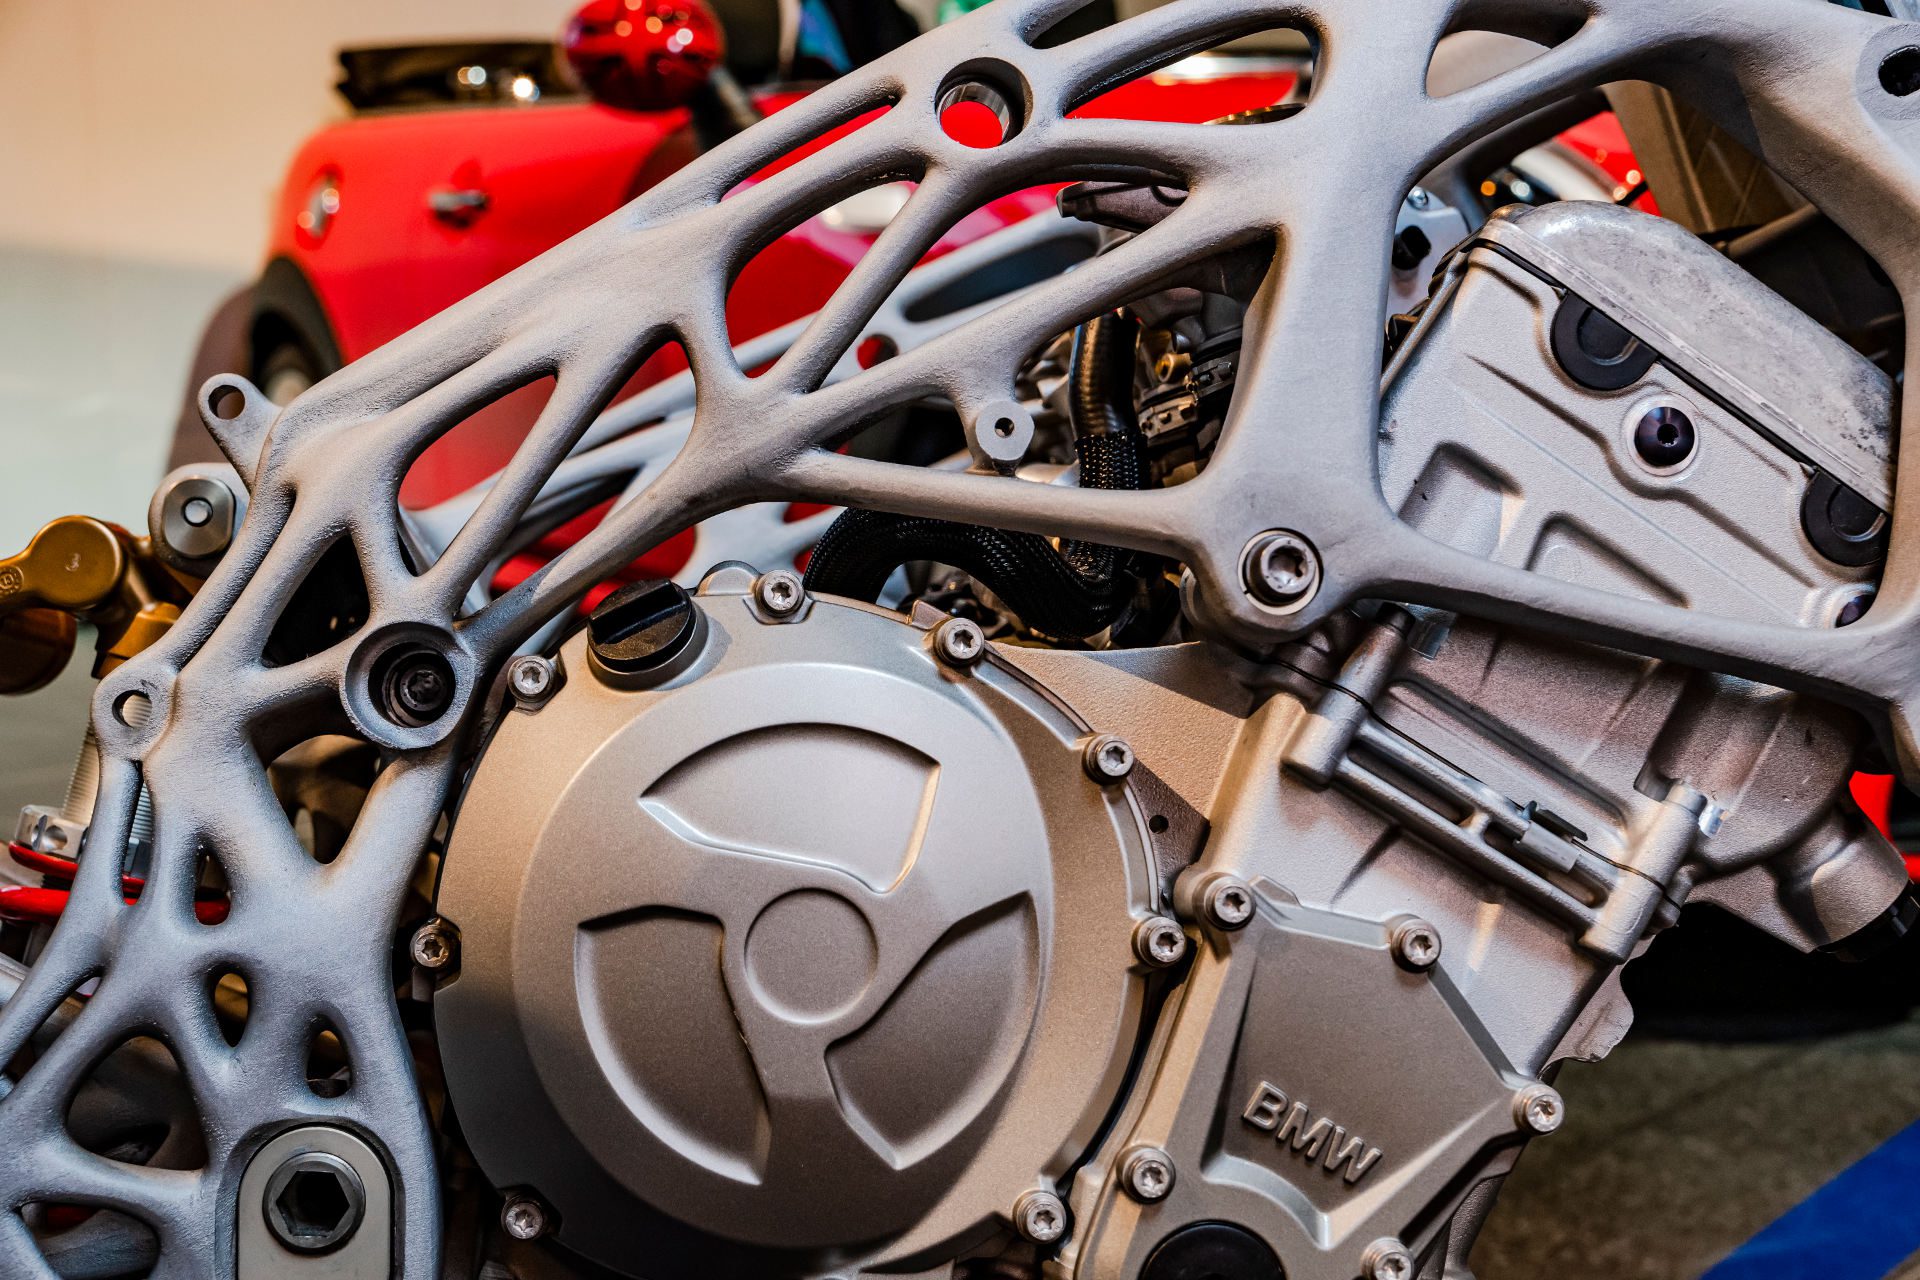
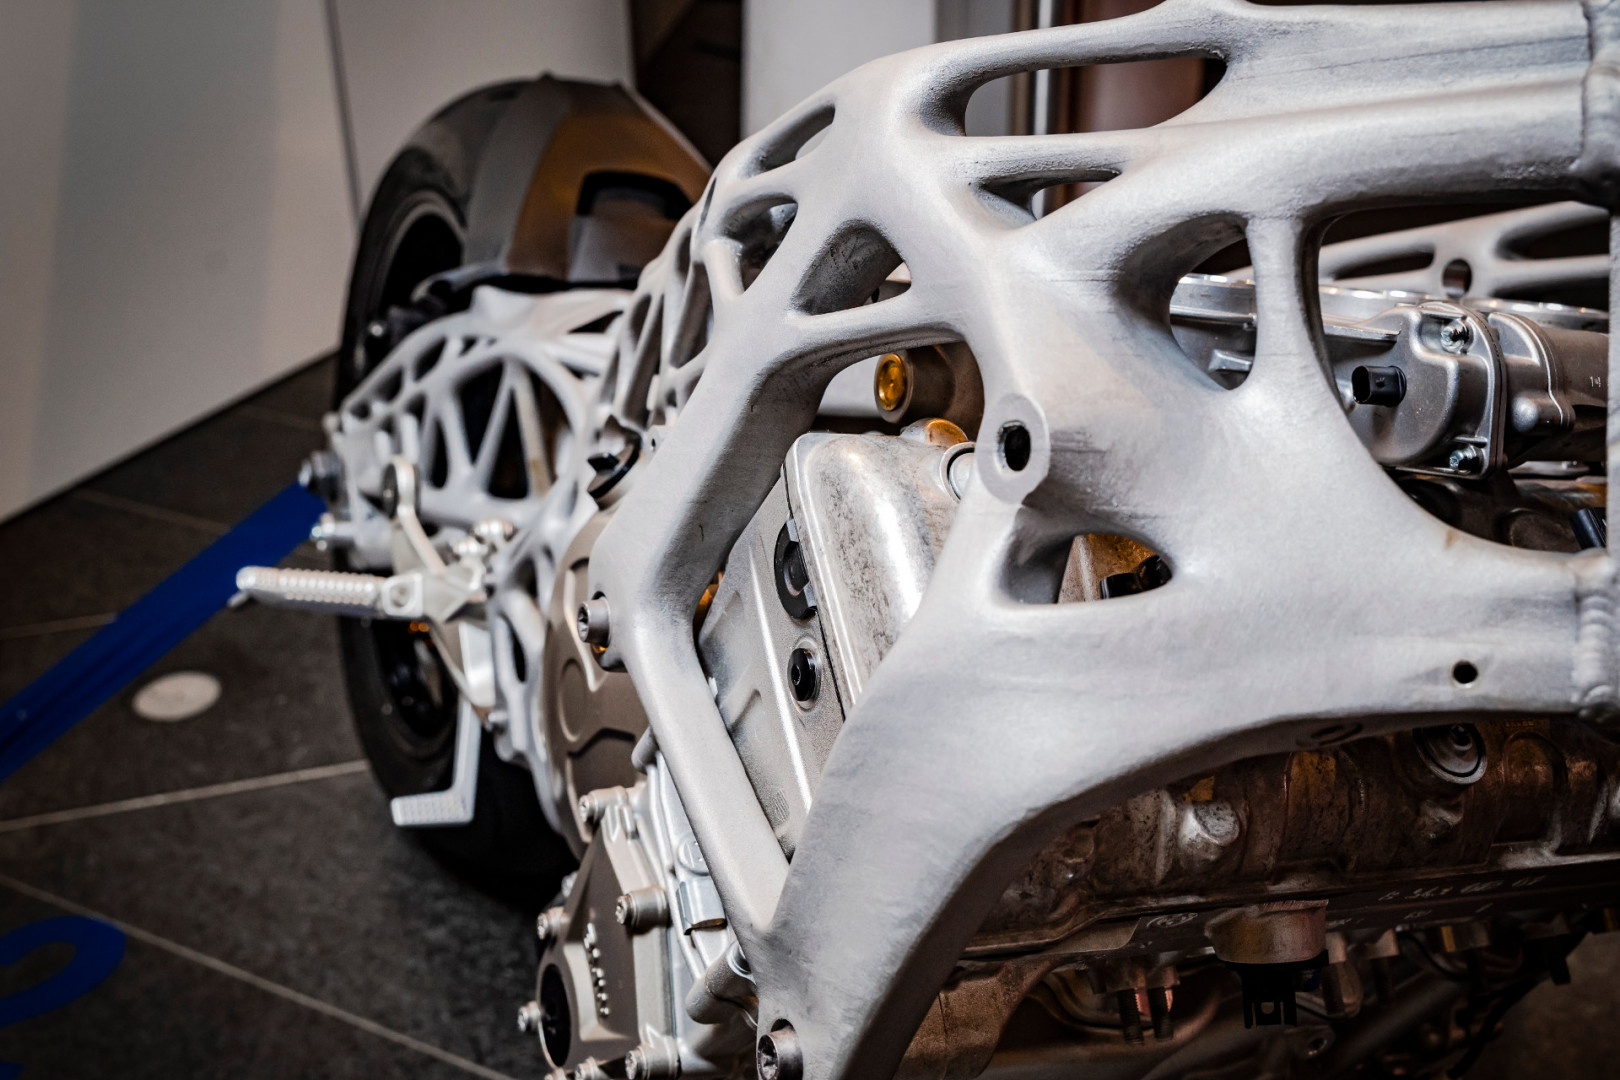
Carmaker BMW showed a 3D printed motorcycle frame at their Digital Day 2018 in Munich, an S1000RR superbike with a frame and swing arm fabricated using metal powder laser melting.
Every year, the BMW Group hosts a Digital Day at their illustrious headquarters in Munich. It’s a platform for the automaker to showcase some of their latest and greatest developments in automotive technology.
Front and center to these innovations, naturally, is additive manufacturing. The group is already using 3D printing to produce car parts, but the presence of a radical 3D printed motorcycle frame this year showed that the technology still has plenty of road to run.
The S1000RR superbike features a 3D printed aluminium chassis and swingarm. Details on the precise construction method used on the superbike are not provided, but it’s a safe bet that it’s metal powder laser melting.
This is a process where a laser fuses layers of metal powder in a vat to form a shape, layer by layer. BMW is already using this technique for their cars to produce lighter but structurally stiffer components.
3D Printed Motorcycle Frame is Showpiece of Digital Day 2018
Beyond the eye-candy of a 3D printed motorcycle frame, the BMW Group also drew attention to other areas of their 3D printing activities.
An additively manufactured water pump wheel was fitted in DTM racing cars for the first time back in 2010. And the new BMW i8 Roadster features a soft-top cover with an aluminium bracket made using a metal powder laser melting technique.
Elsewhere, the new MINI Yours Customized product line enables customers to personalize the design of selected components and then have them produced via 3D printing.
Last but not least, there’s the grand opening of the Additive Manufacturing Campus at the BMW Group Research and Innovation Centre (FIZ) in Munich in Spring 2019.
Overall, the advantages to the BMW Group are clear; 3D printing provides them with the ability to custom-build highly-complex objects. That, and they can rapidly prototype new components quickly and cheaply. Indeed, the automaker says that it’s already producing over 140,000 prototype parts per year.
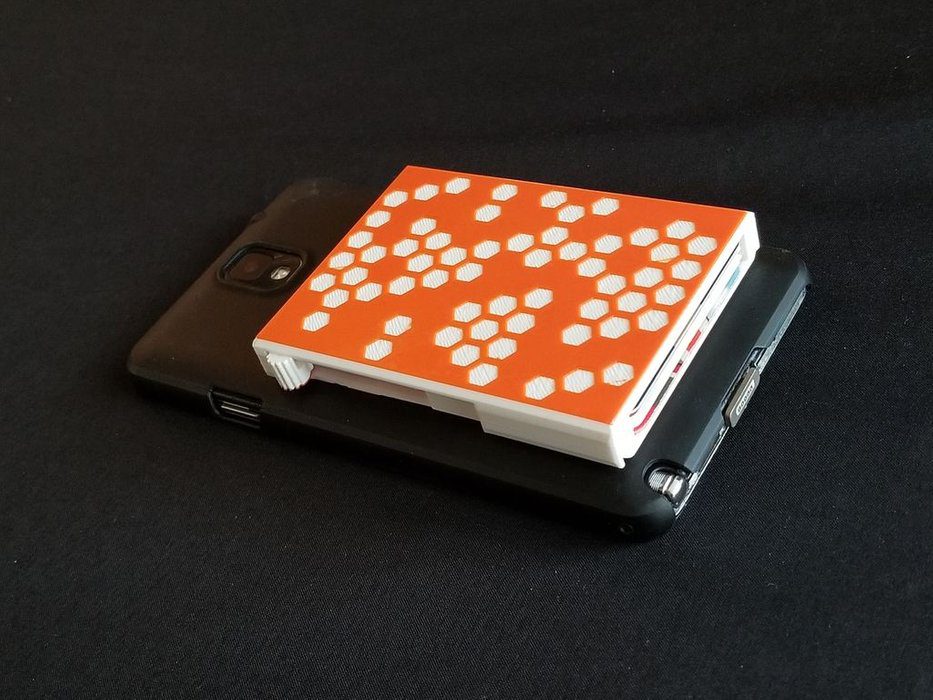
Need a safe and sleek place to store your credit cards, gift cards, and your other wallet inhabitants? This fully 3D printed Card Wallet is extremely easy to make, and has a card pusher to give you instant access to your plastic money!
Most of the projects we share at All3DP are primarily focused on 3D printing, but some of them require other components and technologies to bring the idea to life. Unfortunately, that could end up being quite a drain on your wallet, so we decided to bring you a fully 3D printed that will not only save you money, it will also store your credit cards too!
The 3D printable Card Wallet by Instructables user mdavisgtm is a simple, yet sleek design, a unique fusion of minimalistic style and functionality. The wallet uses card inserts to individually hold each card in place so they don’t slip out. It’s also equipped with a card pusher that is activated by sliding a knob on the side of the print.
Not only is this impressive design fully 3D printed, it doesn’t require any support structures, and can also be assembled in under one minute without any glue or screws.
Let’s take a closer look at how to assemble the fully 3D printed Card Wallet.
3D Printed Card Wallet: Putting it Together
The Card Wallet comes in seven individual parts, all of which can be 3D printed without support structures. The STL files are all freely available on the Instructables post that details the project.
There are four different models, but the card insets must be printed four times at a .08mm layer height. All of the other parts are printed at a .16mm layer height. You can even print a multi-colored version by switching filaments after the first couple of layers of the Top-print 1.STL.
Once you’ve finished printing the parts, the rest of the assembly process is a cinch. Take the bottom part of the wallet and stack the four Card Insert parts on top of one another. Then, snap the Card Pusher onto the designated post at the bottom of the model. Finally, slide the honeycomb-designed top into place and there you have it. Pretty easy, right?
Now that you have your 3D printed Card Wallet ready, pick your four most important cards and slide them into the slots. You now have a secure place to keep your cards without taking up too much space in your pockets. If you want, you can even tape the card wallet to the back of your phone case!
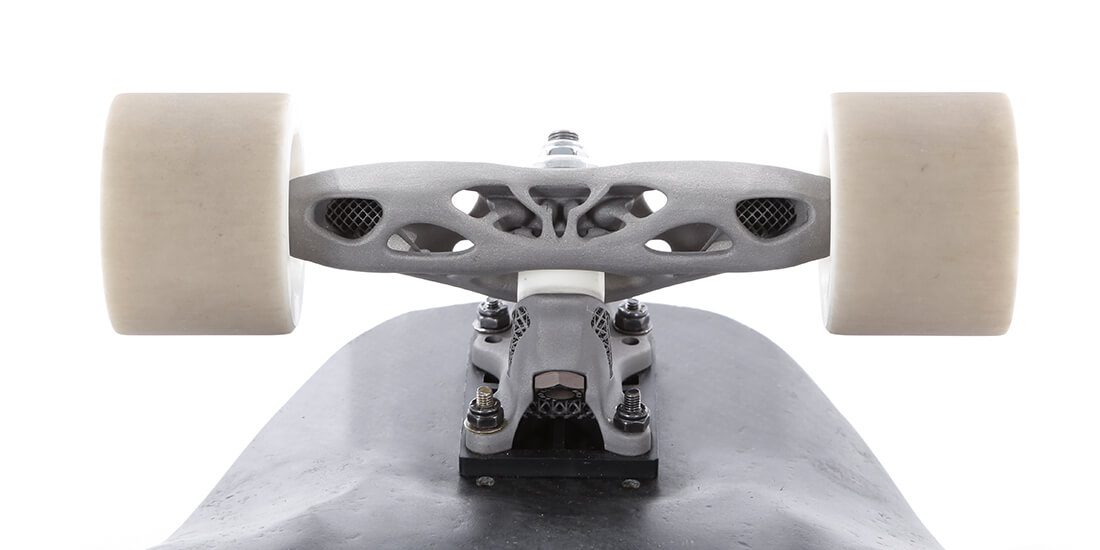
Engineering student Philipp Manger designed a pair of custom skateboard trucks for downhill racing — combining topological optimization and lattice structures — and had them 3D printed in metal.
Downhill longboarding is an extreme sport combining skateboarding and surfing, capable of speeds of more than 90 miles per hour. Naturally, optimizing your gear for performance is important, not least of which are the skateboard trucks.
The truck of a skateboard sits on the underside of the deck. Made of axles, bushes, and pins, the truck is the interface between the wheels and deck. It provides the rider with the necessary control when they shift their weight, bending and reacting to the travel of the board.
Precision-engineering student and downhill skateboarder Philipp Manger combined both passions in developing new skateboard trucks. Project TOST (Topology Optimized Skateboard Trucks) is specifically concerned with downhill longboarding. Where traditional skateboard truck designs are best for thrashing in the streets; a style called the reverse-kingpin truck is better for longboarding and high-speed skateboarding.
“It’s the only skateboard part I haven’t made before, and it fit perfectly to try out these new technologies,” he says. Drawing on more than 15 years experience in engineering, learning CAD and 3D design to work on — among other things — steering columns for the Mini Cooper, the German native was ready to tackle skateboard redesign.
“It gave me a lot of preparation. No matter what you’re doing, engineering is engineering,” he enthuses.
“If you design a part for a car, it’s not a lot different than for a skateboard — they’re both design. And I had the opportunity to learn a lot about design methods, what’s called parametrical constructions or parametric modeling. I tried out a lot of different CAD tools, and it’s very hands-on.”
Project TOST are a New Breed of Skateboard Trucks
To optimize the reverse-kingpin truck, Manger set out to achieve the same stiffness while reducing the overall weight. He used Autodesk Fusion 360 and Netfabb to generate a lattice structure. Lattice designs are intricate constructions that offer significant improvements in weight, performance, and strength; this is a big deal to industries like aerospace, but is it really necessary for a skateboard?
“In terms of downhill skateboarding, if you try to brake from 80 kilometers per hour on a board weighing 5 kilograms, it’s harder than a board of 3 or 4 kilograms, so it makes the whole handling easier,” Manger explains. That, plus any reduction in weight will make the board easier to carry when trudging back uphill.
But topology-optimized designs like Manger’s skateboard trucks are impossible to manufacture traditionally. Milling or casting techniques are not able to provide the necessary detail or precision. Undeterred, he turned to Fraunhofer IWU, a German production-technology institute.
“The Institute’s focus is on metal additive manufacturing and other lightweight designs, so it was the perfect partner,” Manger says.
“I was happy to find such a big organization to work with, and they supported me with the access to the building and manufacturing facilities, especially a GE Concept Laser M2, which is a laser-beam-melting machine. It gave me a lot of know-how.”
Currently, Manger has no formal plans to commercialize his futuristic new skateboard trucks.
“The project wasn’t really about creating a skateboard truck. It was more about finding new ways for lightweight designs for metal additive manufacturing,” he says.
“Project TOST shows new approaches from the combination of organic forms and lattice structures. The skateboard trucks just happen to be a demonstrator that everyone can understand.”
As well as being able to use Snapchat for turning yourself into a dog and stalking your crush, you can now play their new AR experience, Snappables, with your friends.
If you’re sat across from someone making weirder than normal faces at their phone, you can guarantee they’re trying out Snapchat’s latest interactive AR lenses.
The AR games and experiences are played in the Snapchat camera. Everything from facial expressions to touch and motion will control your character and help you beat your friends.
Snappables are the company’s first shared AR experience meaning you can interact with a friend on their phone. Although it’s possible to enjoy some of the games solo, Snappables have been designed to play and send to people to challenge them to beat your score or to go head-to-head with multiplayers.
On Wednesday April 25th, Snapchat launched the lens-based games. But, they also released this video helping you to realize just how ridiculous you’ll look to anyone not in the know:
Reshuffling Snapchat to Make Space for AR
Don’t worry, everything you love about Snapchat will remain. In fact, the company add in a blog post: “Snappables live right where Lenses do.” Regular lenses will be to the right of the camera button while Snappables are to the left.
“Fight aliens, start a rock band, play basketball, and more — together with your friends, no matter where you are,” Snapchat further adds in the post.
Other games include, fighting aliens and blowing kisses. But, every week new games will be released to keep you hooked. To start playing with friends, get the app update for both iOS and Android.
Although the games certainly look fun, could they also be a distraction from the fact that Snapchat could be trialling six second ads which you can’t skip (only in publisher made shows) next month?
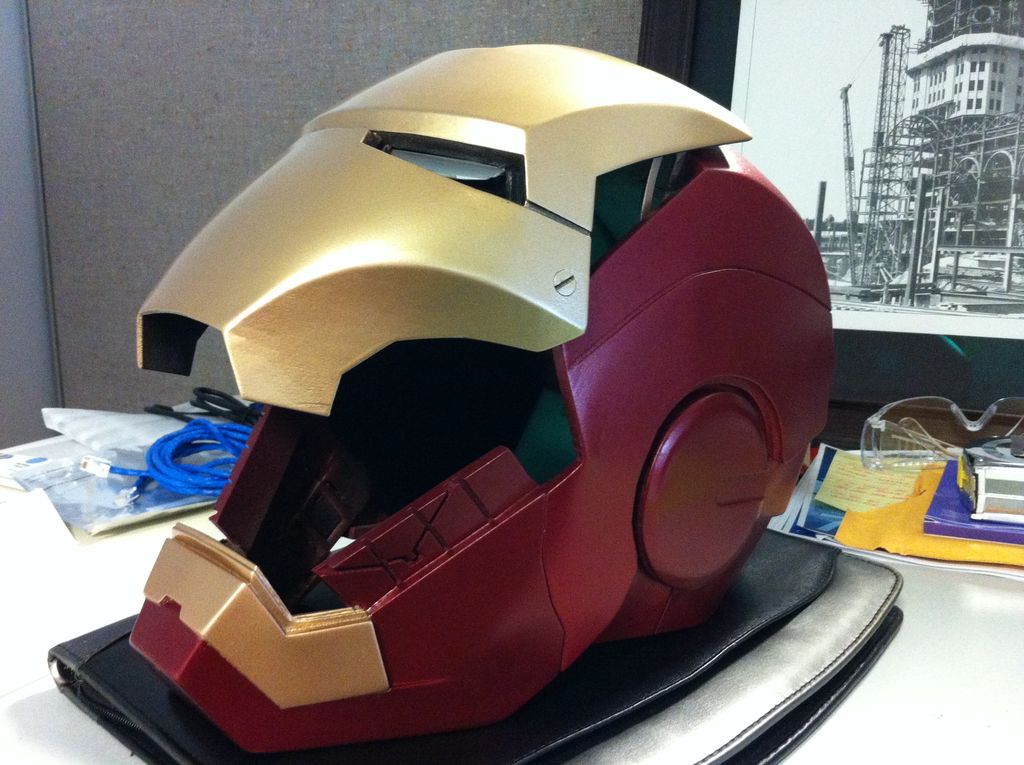
Looking forward to the release of Avengers: Infinity Wars? Why not 3D print a fully functional Ironman helmet. This wearable looks like it came straight out of the big screen, equipped with light up eyes and a retractable face plate.
Unless you’ve been living under a rock, or, if you reside in the Marvel universe, on the moon of Titan, you’ve probably heard the hype about the new Avengers: Infinity Wars film. As superhero movie buffs flock to theatre this weekend, show them how much of a fanboy-or-girl you are with some 3D printed cosplay.
Originally created by Instructables user “samohtep” back in 2012, this 3D printed Ironman helmet is one of the most realistic prints we’ve seen come out of Stark Industries. This advanced project will show you how to produce a wearable Ironman helmet that is equipped with a retractable faceplate and light-up eyes.
This project is probably not exactly suitable for beginners, but should be doable for more experienced makers. But hey, each superhero needs to start somewhere. Of course, if you think this project is too tough for you, you can always opt for an easier print, such as this Captain America helmet or Thor’s hammer. There are also easier options for 3D printing an Ironman helmet, but this version was definitely the best we could find.
Aside from a sizable 3D printer, some red and gold PLA filament, and the suave of Tony Stark, here’s what else you need to create your own 3D printed Ironman helmet:
Components for the helmet:
Post-processing checklist:
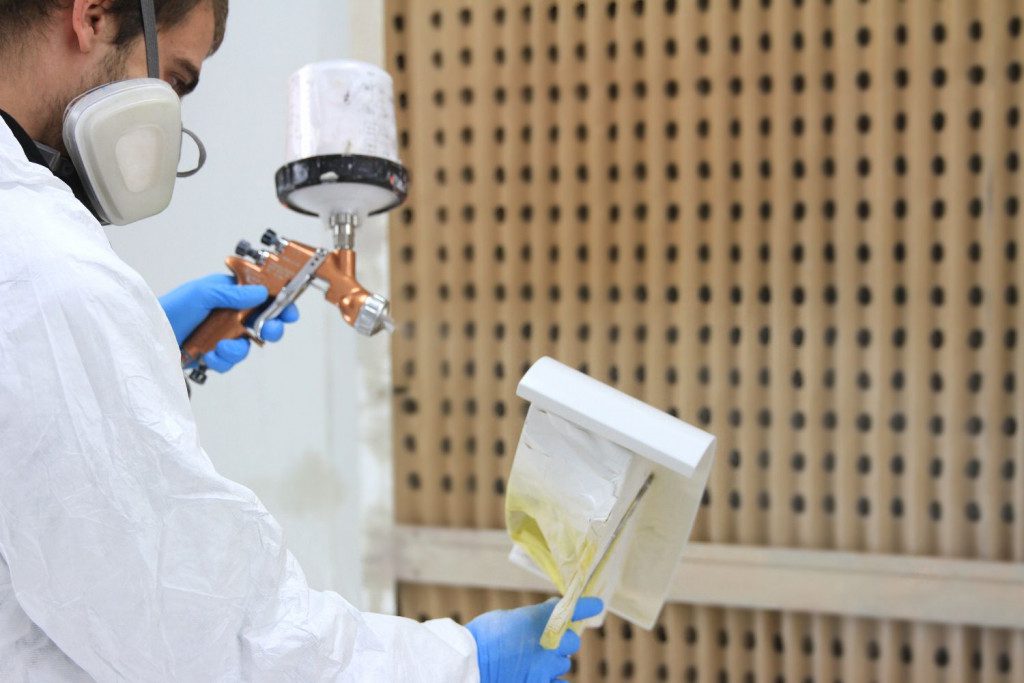
Be advised that you’ll need to wear rubber gloves, long sleeved clothing, and a breathing helmet with eye protection throughout the assembly process. In order to make a realistic helmet, there are some potentially hazardous chemicals that will be used, such as the fiberglass cloth, primer spray, automotive paints, and so on. Find a ventilated and open area to assemble the Ironman helmet, it’s always better to be safe than sorry.
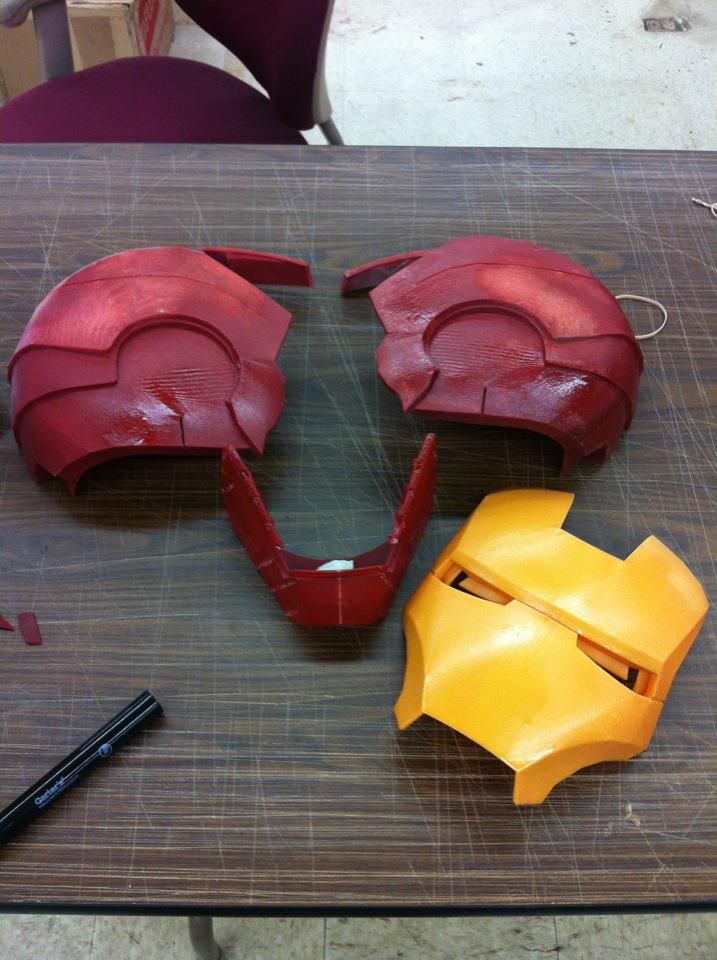
3D Printed Ironman helmet: Putting it Together
For the 3D printing process, samohtep stresses making the parts thick, so that they don’t warp. After some trial and error, the original STL files were thickened to provide a better structure. After the various parts are printed, it’s time to assemble them together.
To do this, the creator of the project first connected the two main halves of the helmet and clamped them together. After this, he laid down three layers of fiberglass cloth and epoxy resin. Once hardened, he added a few layers of bondo to the outside and sanded it down to fill the gap on the exterior surface. At this point, it would be wise to wear your protective gear, as the fiberglass cloth can irritate both your skin and eyes.
Once the 3D printed parts are assembled, samohtep installed the cabinet hinges, which are used to open and close the face plate. Using hot glue, the top piece of the hinge was attached to the top edge of the interior face of the faceplate. This took some tweaking to ensure that both the faceplate could open and close, and also that it didn’t cause discomfort to the wearer. He also added a pair of center release buckles to each side of the neck opening.
After the hinges and jaw connectors are properly placed, the maker added a layer of padding inside of the helmet. To do so, he cut several 1″ wide strips of foam and attached them to the back with a dab of hot glue.
Next, he used a .375″ wide circuit board and five bright white LEDs for the eyes, placing them inside a container made from an index card and electrical tape. According to samohtep, it took more trial and error to situate the lights properly, which you can follow along in more detail via his Instructables post.
After priming the entire helmet, the maker used red and gold spray paint from Duplicolor Perfect Match to add the signature Ironman look. Keep in mind that, if you use the same automotive paint used by samohtep, you should continue wearing your breathing mask during the priming and painting process. In between the four to five coats of paint, he did some light sanding to keep the surface of the helmet as pristine as possible.
Lastly, to keep the faceplate up, the ambitious maker decided to add .1875″ round rare earth magnets to the upper rim of the face to help keep the faceplate open. Final touches include some more sanding and adding more padding or felt to areas that could use more comfort.
All in all, this 3D printed Ironman mask is a difficult yet rewarding way to celebrate the release of Avengers: Infinity Wars. You might not have the riches or charm of Tony Stark, but with this project, you can at least match his powers.
Internet star PewDiePie, real name Felix Kjellberg, has just got engaged to his long-term girlfriend Marzia Bisognin.
The pair both have significant internet fame, and both posted the same photo on their separate social media channels to announce the good news.
In the pic, you can see Felix leaning in for a kiss while Marzia shows off the glam ring, which she posted with the simple caption ‘Felix proposed!’
It is currently thought by their fans that the proposal took place in Japan, as the couple have been openly documenting their travels their in recent days.
The couple have been together for the past seven years, with fans thinking they started seeing each other in late 2011.
PewDiePie’s channel is one of the largest on YouTube, his videos rack up millions of views every time, and he takes home a huge pay packet as a result.
Fans have been congratulating the couple on their engagement since the news broke, with one writing:
Pewdiepie getting engaged, North and South Korea Ending their war, the Gaming House 2 about to start construction~ 2018 seems to be brightening up a little 🙂
Another wrote simply:
PEWDIEPIE PROPOSED TO MARZIA ARE U JOKING IM GONNA SCREAM
PEWDIEPIE PROPOSED TO MARZIA ARE U JOKING IM GONNA SCREAM
While the couple are clearly raking in the dollar, PewDiePie fell from the top spot as the most paid YouTuber in the world in 2017, but he’s still rolling in the money.
At the end of each year Forbes releases their list of the highest-paid YouTube stars and since PewDiePie caused repeated controversy in 2017, it is to no-one’s surprise that he has been knocked off the top spot.
Real name Felix Kjellberg, PewDiePie saw himself dropped by advertisers after he came under fire for posting several videos that included racist language and anti-semitic imagery.
Last year the Swedish YouTuber’s earnings were around $15 million but in 2017 they dropped to $12 million after Google took him off its preferred program and Disney dropped him from their multi-channel network Maker Studios which no longer exists.
Many other companies also blacklisted him leading to a significant drop in revenue but PewDiePie can’t really complain as $12 million is still a jaw dropping amount of money.
And even though he lost advertisers his subscribers were clearly not put off by his behaviour as his videos are still watched by nearly 60 million people.
Replacing him as the highest paid YouTuber is someone you may have never even heard of – DanTDM.
Daniel Middleton is in a league of his own, earning a rather sweet $16.5 million last year thanks to a sold-out world tour, 17 million subscribers and over 11 billion views on his channel, which is unfathomable.
But still, at least PewDiePie has put the last year behind him, and is clearly looking to the future with this big decision.
Those itching to get to grips with neural networks are in luck: Google offshoot AIY Projects has recently revamped its Voice and Vision Kits. These project-in-a-pack kits give you all you need to build an intelligent speaker or camera.
In 2017 Google offshoot AIY Projects launched its first products, the AIY Voice and the AIY Vision.
Primarily aimed at STEM education and the maker community, these DIY kits brought the concepts of neural networks, visual recognition and voice recognition into a form factor accessible to just about anyone.
Available in two versions — AIY Voice Kit and AIY Image Kit — last year’s packs contained all one needed to get to grips with the bare-bones of their respective offshoot of artificial intelligence — minus the computer boards, SD card storage and a host of other small accessories required to get up and running.
And while the kits provided enough incentive to capture the imaginations of educators and hobbyists alike, Google clearly felt it could be better.
So, for 2018 the everything giant (can we really refer to them simply as a search giant anymore?) has updated the Voice Kit and Vision Kit with new hardware, spruced up the build instructions and released an accompanying Android app to help make the setup effortless.
Jump below the break for what exactly one gets in a Voice or Image Kit.
Google Makes AI for Makers
The two kits obviously, given their naming cater to two particular branches of neural networks.
AIY Vision Kit contains the parts to create an intelligent camera that, depending on the model (the term given to the particular skill, or set of things to learn to recognize) loaded into it, will recognize objects, people, animals, food and plants in front of it. The open nature of the kits mean that with the right know-how, you can mix, match or ever create your own models for the neural network to use.
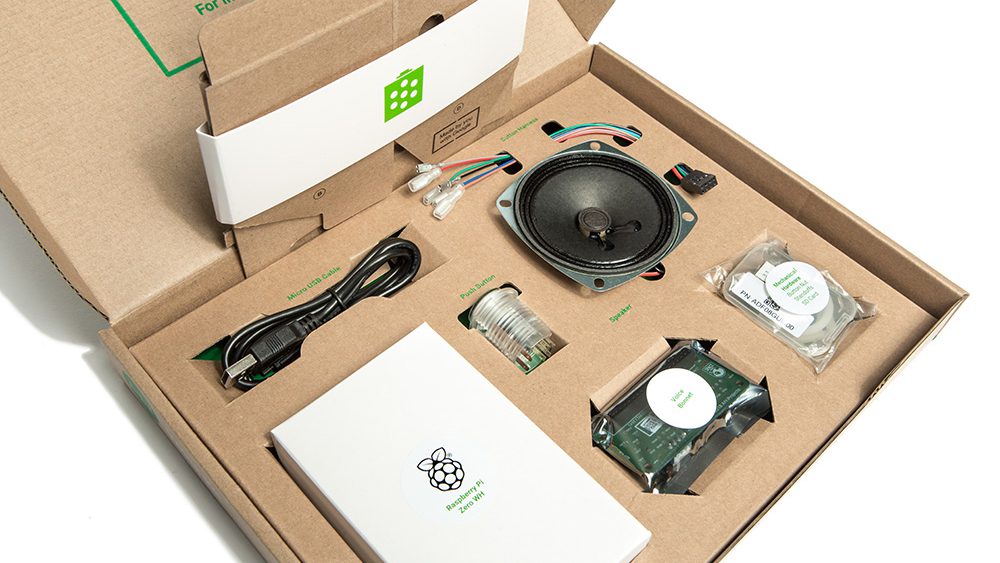
In terms of hardware, the new AIY Vision Kit now comes with a Raspberry Pi Zero WH (a RaspPi with pre-soldered GPIO header), in addition to a RaspPi Camera V2, lens, a Vision Bonnet, a Piezo buzzer, LED, nuts, cables cardboard enclosure and Micro SD card.
Meanwhile, the AIY Voice Kit comes with you need to build a the physical body for a Google Voice assistant from scratch. Essentially a voice-controlled speaker, it should be able to recognize your requests and serve up pertinent information.
The new Voice Kit’s parts list is basic in comparison to the Vision Kit, but still makes a leap over its older version with the inclusion of the Raspberry Pi Zero WH, SD card and other gubbins previously left out. There is also a Voice Bonnet, speaker, button, nut, spacer, cabling and the cardboard box housing (a signature feature of Google’s DIY-offerings).
As is often the case with Google products and ventures, it is a hearty stab at introducing new branches of technology in the consumer space. And while the stinging memory of Google Glass and its persistent personal assistant never caught on as some had prophesied, many are lauding machine learning and artificial intelligence as an assured fixture in our technological near future.
At $49 and $89 respectively, the Voice and Vision kits seem like a fun and, most importantly, accessible way to get acquainted with the concepts and hardware of such self-contained AI systems.
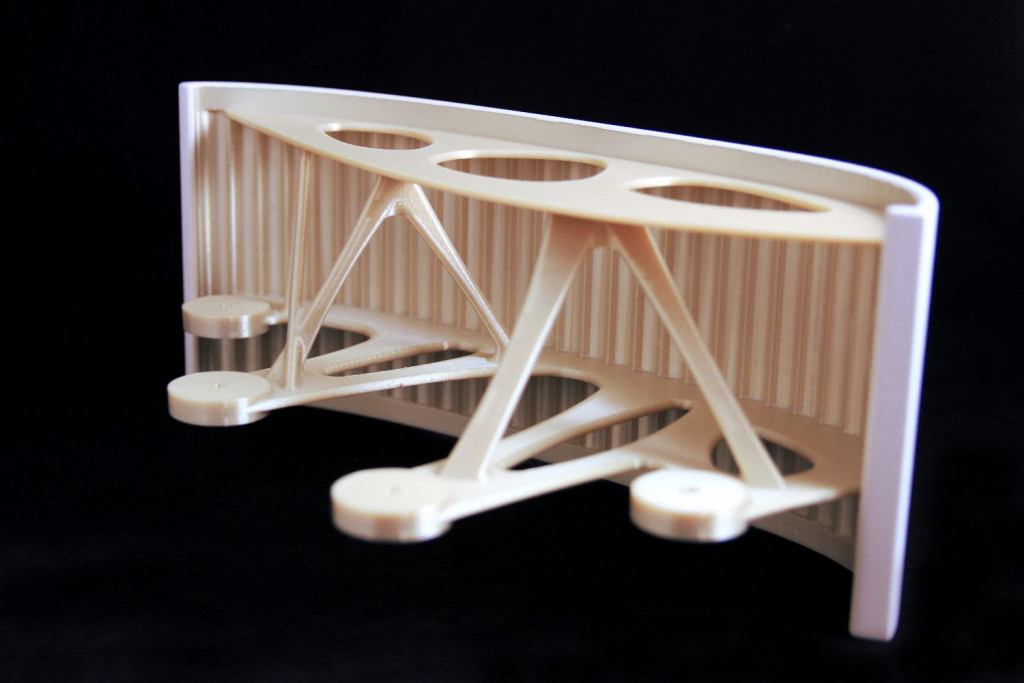
A partnership between aircraft manufacturer Airbus and additive manufacturing service Materialise is now producing in-cabin parts. A divider with an organic form, it is Airbus’ first use of 3D printed parts in plain sight within its commercial aircraft.
In 2015 Airbus and Materialise entered into a partnership to create 3D printed parts for aircraft. Going all in on proving the viability of additive manufacturing’s benefit to aerospace, the partnership quickly bore fruit in the news that the 3D printing firm gained a raft of certifications enabling them to product airworthy parts.
This announcement went hand in hand with notice of Materialise beginning production of plastic parts for Airbus’ A350 XWB aircraft. These parts, however, were for the behind-the-scenes workings of the aircraft, where function takes precedence over form.
Fast forward three years, and the relationship between the companies has taken another step, this time focusing on the fit and finish of in-cabin upgrades to a tight timeline.
3D Printing Airbus Cabin Dividers
Passenger liners can remain in operation for many years, and throughout that lifetime can see multiple refreshes to their interiors. That means replacing wall panels, seating and all manner of other passenger facing elements.
These retrofitting operations are a delicate balance between the aircraft manufacturer, the authorities overseeing the vehicle’s airworthiness and the airlines with their own specific branding and cabin concepts. For the manufacturer, it’s a process that necessitates quick turnarounds on small batches of parts.
Airbus and Materialise’s partnership came to bear in a project retrofitting Airbus aircraft for Finnair. One of the parts to be replaced was the spacer panels — curved sheets adjoining structural armatures. Materialise’s Certified Additive Manufacturing service produced the parts, which were designed to be a light as possible and adhere to a full bionic design specification by Airbus.
The resulting panels, printing using FDM 3D printing tech by Materialise, are not only of sufficient strength and fit for the job, but possible to finish to in-cabin standards — i.e. treated with flame retardant materials and finished to integrate seamlessly in the existing cabin aesthetic.
For Airbus, the part is a first. And yet another exciting example of the proliferation of 3D printing in aerospace.
In a new crowdfunding project on Kickstarter, Hyderabad-based iSquare Mobility has developed a module called Kiteboard for building a modular Android smartphone.
Now the concept of a modular smartphone is nothing new; efforts by companies as diverse as Jolla, LG, Fairphone and Motorola were bought to market with varying degrees of success.
But the Kite smartphone is pitched more as a platform to enable students, hackers, and researchers to build and develop a phone of their very own. And you can 3D print a custom shell to house your phone in whatever material you choose.
iSquare already has a working prototype called “Poorna” which is built around an older Qualcomm Snapdragon 410 quad-core processor.
If the campaign is successful, however, backers will receive a second-generation Kiteboard called as Kite v2. The KiteBoard v2 has a slightly more powerful Snapdragon 450 octa-core processor.
Moreover, the Kite v2 runs Android 6.0, will have a 5-inch screen, a 12MP rear camera, a 3,000mAh battery, and a good old fashioned 3.5mm audio jack.
But moving past the conventional specs and build, Kite has also demonstrated a proof of concept called the PianoPhone. As the name implies, this has a built-in piano on the backside of the phone.
Should You Back Kite on Kickstarter?
In terms of rewards, Early Bird specials for $274 for a Kiteboard v2 are still available. A shipping date of January 2019 is promised. Thereafter, the rewards scale up to a standard $299 Kite on Kickstarter exclusive.
iSquare pledges to supply all the necessary components, software, and documentation to assemble the Kite phone. 3D printing parts from the supplied STL files looks to be most complex part, since the whole phone can be put together “in five minutes” using a screwdriver.
The KiteBoard v2 also supports up to two displays and two cameras for more advanced projects. Also of interest is the Raspberry Pi HAT compatibility (which is what makes the PianoPhone above possible).
So should you back the Kite on Kickstarter? An encouraging sign is the “Project We Love” designation from in-house Kickstarter curators. This is typically a solid endorsement of a project’s viability.
But what might hold it back is the ambitious goal of $941,000. Since launch on 23 April, the project has only raised $11,516 from 45 backers. It looks as though there will be a bit of an uphill climb for the Kite on Kickstarter.
And that’s disregarding the fact that for $299 you can get a significantly more powerful and established make of smartphone. That’s not to discourage any potential backers out there, but it’s best to approach this project as an educational tool above all else.
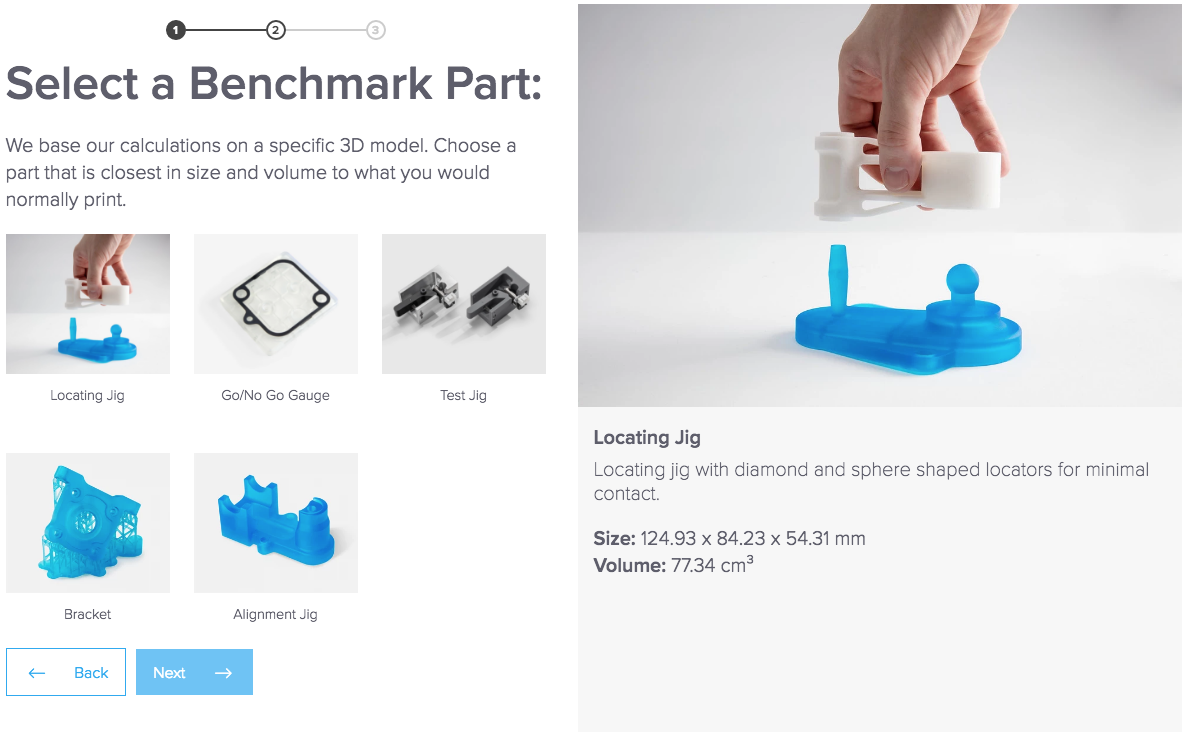
Businesses planning to purchase a 3D printer to boost parts production may want to give the new Formlabs ROI calculator a go-to determine long-term costs.
When it comes to acquiring a 3D printer for your business, it pays to consider the cost and return on investment (ROI). However, calculating whether the purchase makes sense economically can be a strenuous task.
Now, Formlabs, the US 3D printing technology developer and manufacturer, has launched an ROI calculator tool. It’s a simple yet effective interactive tool that lets anyone calculate the cost per part and lead time. Therefore, businesses can compare time and cost savings of different methods of production.
Step by step assessment of the 3D printer purchase
As a first step, businesses should decide if outsourcing of production services compared to in-house manufacture is a more viable option. For companies that only occasionally require 3D printing to produce parts, outsourcing can be more economical. As demand grows, a company may be better off acquiring a desktop 3D printer. Furthermore, installation of multiple machines may be enhance manufacturing flexibility and productivity.
Another important aspect of calculating ROI is to consider the costs of materials and the labor required to maintain production standards. This breaks down into equipment ownership, materials and consumables, and labor.
Equipment ownership costs tend to be fixed but can include installation costs, service and maintenance contracts. Although desktop 3D printers are now 10x to 100x cheaper than industrial machines, it’s worth adding up the costs of accessories.
In addition, businesses should calculate the materials and consumables required to print parts. These costs can vary dramatically depending on the prototype or end product. Certain machines may also be more suitable for only a small number of material types.
Lastly, buyers should factor in the actual workflow of printing a part. This, in turn, helps to assess the cost of labor required. Some tasks are more time-consuming than others and companies need to take this into account.
Formlabs adds that there are a number of indirect costs such as production lead times (e.g. Will they be improved when purchasing a desktop 3D printer?). The actual quality of the end product should be carefully trialed before committing to acquiring a 3D printer. Furthermore, copyright-sensitive parts may require extra protection.
The Formlabs ROI calculator considers all these options and can now be tested on the company’s website.
Final report based on production needs and specified labor costs. (Image: Formlabs)
If you act fast you can snag a Creality CR-10 (shipping for free inside the US) from GearBest’s LA warehouse for $389.99.
The printer that needs no introduction. We like CR-10, most of the wider printing community has at some point or another expressed some fondness of it. And now it’s on sale.
Shipping from GearBest’s LA warehouse, you can snag a Creality CR-10 for just $389.99, a significant reduction over this big printer’s usual ~$500 price point.
It would appear that there’s only a limited number at this price point, so better be fast.
Alternatively, if you can stick the waiting time, shipping costs and potential customs charges, GearBest is also selling the CR-10 from its Chinese warehouse for $359.99 — a deeper reduction, but one likely negated by the additional charges those outside of China will face. Depending on where you are in the world, ymmv.
All3DP is an editorially independent publication. Occasionally we need to pay our bills, so we affiliate some product links through which we may receive a small commission. For the full spiel, check out our Terms of Use.
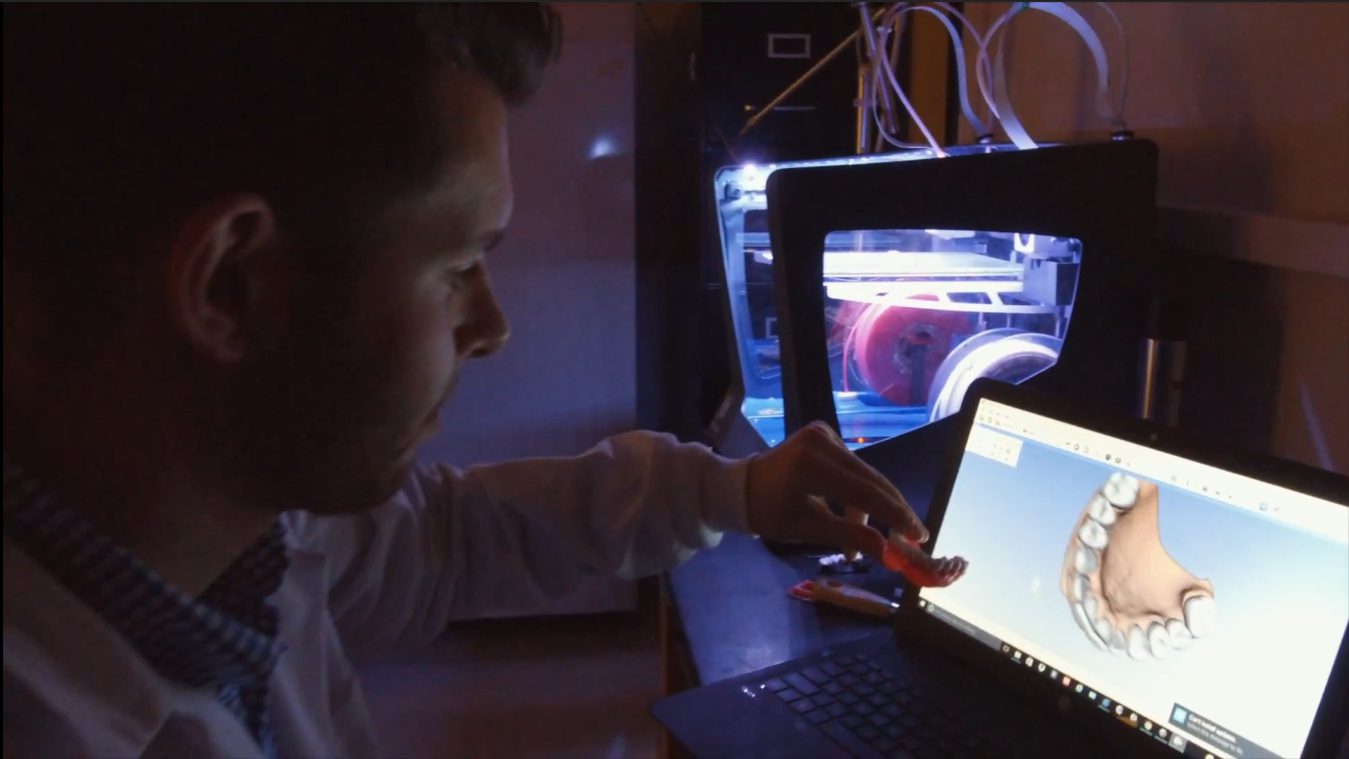
Researchers at the University of Buffalo have invented 3D printed dentures which can be used to deliver drugs among those highly susceptible to infection, such as the elderly, hospitalized or disabled patients.
For folks wearing dentures, an unfortunate side-effect can be fungal infections which cause inflammation, redness and swelling in the mouth. The condition is called denture-related stomatits, and according to some studies it impacts up to 70% of the denture-wearing population in the US.
To better treat these infections, researchers at the University at Buffalo have fabricated a set of 3D printed dentures filled with microscopic capsules that periodically release Amphotericin B, an antifungal medication.
In tests, the team found that the 3D printed dentures can reduce fungal growth. Unlike current treatment options — ranging from antiseptic mouthwashes, baking soda and microwave disinfection — the new development can also help prevent infection while they’re still in use.
“The major impact of this innovative 3D printing system is its potential impact on saving cost and time,” says Praveen Arany, DDS, PhD, the study’s senior author and an assistant professor in the Department of Oral Biology in the University of Buffalo School of Dental Medicine.
“The antifungal application could prove invaluable among those highly susceptible to infection, such as the elderly, hospitalized or disabled patients,” he continues.
Applications from this research could also be applied to other clinical therapies, including splints, stents, casts and prosthesis.
These 3D Printed Dentures Bite Back… at Infection
The researchers fabricated their dentures with acrylamide, the current go-to material for denture fabrication, on a BCN3D Sigma dual extruder 3D printer. The study sought to determine if these dentures maintained the strength of conventional dentures, and if the material could effectively release antifungal medication.
To test the strength of the teeth, researchers used a flexural strength testing machine to bend the dentures and discover their breaking points. A conventional lab-fabricated denture was used as a control. Although the flexural strength of the 3D printed dentures was 35 percent less than that of the conventional pair, the printed teeth did not fracture.
To examine the release of medication in the printed dentures, the team filled the antifungal agent into biodegradable, permeable microspheres. The microspheres protect the drug during the heat printing process, and allow the release of medication as they gradually degrade.
The dentures were tested with one, five and 10 layers of material to learn if additional layers would allow the dentures to hold more medication. The researchers found the sets with five and 10 layers were impermeable and were not effective at dispensing the medication. Release was not hindered in the more porous single layer, and fungal growth was successfully reduced.
Future research aims to reinforce the mechanical strength of 3D printed dentures with glass fibers and carbon nanotubes, and focus on denture relining. This is the term for the readjustment of dentures to maintain proper fit.
San Diego-based Robo 3D has just announced a lifeline for customers of recently-shuttered New Matter. Owners of New Matter’s Mod-T 3D printer can now turn to Robo for technical support, parts and troubleshooting.
Back in February, Pasadena-based 3D printer manufacturer New Matter announced its imminent closure. In a statement, the company claimed that “It has become clear that our aspirations to transform the industry simply don’t fit profitably into the current market dynamics in desktop 3D printing.”.
It was a lamentable demise, for sure. And one that left owners of the company’s MOD-t 3D printer in doubt about the long-term future of their machines. New Matter posted a lengthy FAQ addressing the matter, promising technical support up to mid-Summer 2018.
Well, it’s not quite summer, but already the future is looking a little brighter for MOD-t owners, as fellow Californian 3D printer maker Robo 3D has stepped in with the announcement that it will take over technical support duties.
New Matter MOD-t
Robo Tech Support for MOD-t Printers
Indeed, owners of New Matter’s MOD-t 3D printer can rest easy with the knowledge that should anything go awry, at least someone will answer the phone.
Despite the necessity for such a move coming off the back of bad news (New Matter closing down), the reality of Robo stepping is a decidedly positive one. It turns out that Robo was looking to grow at the time and reached out to New Matter CEO Steve Schell and a number of the defunct company’s staff to join the Robo team.
Now a number of former New Matter employees can now be found at Robo, including some of the MOD-t customer support team. Speaking on the matter, Braydon Moreno, co-founder of Robo 3D said: “New Matter was a great company with a brand reputation that we admired, with a particularly strong presence in education, so we will work hard to take care of New Matter’s many customers and provide them with the best possible customer service that we can.”
For folks looking to self-diagnose their MOD-t issues, Robo points them to New Matter’s original online troubleshooting materials. There is also a limited pool of off-the-shelf spare parts at Robo’s disposal, but this will eventually run out. Beyond that point, replacements for the MOD-t will be impossible but the company will still be able to offer troubleshooting and technical support.
Looking forward to the release of Avengers: Infinity Wars? Why not become the most powerful villain in the Marvel universe with your own 3D printed Infinity Gauntlet.
This weekend, Marvel fans will be flocking to the theatre to see the highly anticipated superhero film Avengers: Infinity Wars. The movie puts the Avengers up against the all-powerful villain Thanos, a mad titan that has his heart set on stealing the Infinity Gems held by the Elder of the Universe, using them to destroy the team of heroes and life as we know it.
Once the six ‘Soul Gems’ are inserted into the Infinity Gauntlet, the wearer gains both omnipotence and omniscience, not exactly something you’d want an infamous supervillian to have in their possession. However, you can use your 3D printer to acquire this unprecedented power by creating your own Infinity Gauntlet.
In anticipation of Avengers: Infinity Wars, which is officially released on April 27th, a team of professional 3D designers called Do3D have unveiled a 3D printable Infinity Gauntlet. One YouTuber known as The Broken Nerd recently obtained the STL files and produced an insanely accurate version of this powerful movie prop.
Want to be the most intimidating member in the cinema this weekend? Celebrate the release of Avengers: Infinity Wars by 3D printing the Infinity Gauntlet.
3D Printed Infinity Gauntlet: Putting it Together
In order to 3D print the Infinity Gauntlet, you’ll need to purchase the STL files from Do3D. You can find the price and receive the model by contacting the design firm at [email protected] Although you’ll have to pay for the model, you can’t really put a price on such unlimited power.
Once you have 3D printed the Infinity Gauntlet at your selected scale (the bigger the better), it’s time to make this prop look like the real deal. If you want to follow The Broken Nerd’s assembly and post-processing method, you’ll need a few items:
After 3D printing the Infinity Gauntlet, The Broken Nerd coats the prop with XTC 3D, which is a high performance 3D print coating solution. Then, he goes onto spray an even coat of primer across the 3D printed prop, preparing it for painting. In order to achieve a rustic, bronzed effect, the maker uses a few layers of different colored paints. He starts with black gloss spray paint, followed with a gold/bronze spray paint. Finally, he weathers the model down by adding some black acrylic paint in certain areas.
Unfortunately, the YouTuber doesn’t go into detail on how he fused the glowing Infinity Stones into his model. However, other tutorials suggest using different colored plastic gems and LEDs to make the prop shine with galactic power as it does in the film.
If you want to learn more about the project, check out The Broken Nerd’s video below, and get ready to save (or destroy) the universe with your 3D printed Infinity Gauntlet.
In an exciting new study, researchers at the University of Minnesota demonstrate how a customized, low-cost 3D printer can print electronics onto a moving hand.
Researchers at the University of Minnesota have used a customized low-cost 3D printer to apply electronic circuitry to a human hand.
A potential use for the technology is for soldiers on the battlefield to print temporary sensors on their bodies. These can detect chemical or biological agents, or feature solar cells to charge gadgets.
“We are excited about the potential of this new 3D printing technology using a portable, lightweight printer costing less than $400,” said Michael McAlpine, the study’s lead author and Associate Professor of Mechanical Engineering at the University of Minnesota.
“We imagine that a soldier could pull this printer out of a backpack and print a chemical sensor or other electronics they need, directly on the skin. It would be like a ‘Swiss Army knife’ of the future with everything they need all in one portable 3D printing tool.”
One of the 3D printer’s key innovations is that it can adjust to small movements of the body during fabrication. Temporary markers are placed on the skin and the skin is scanned. The printer then uses these markers to calibrate real-time adjustments to any movement.
“No matter how hard anyone would try to stay still when using the printer on the skin, a person moves slightly and every hand is different,” McAlpine explains.
“This printer can track the hand using the markers and adjust in real-time to the movements and contours of the hand, so printing of the electronics keeps its circuit shape.”
3D Print Electronics with Ink Made from Silver Flakes
This 3D printing technique has another unique feature; it uses a specialized ink made of silver flakes that can cure and conduct at room temperature.
This is distinct from other 3D printing inks because they typically require curing at high temperatures. These can be as high as 100 degrees Celsius or 212 degrees Fahrenheit. Needless to say, temperatures that hot would burn the skin when applied.
To remove the electronics, the user can simply peel it off using tweezers. Alternatively, they can wash it off with soap and water.
In addition to electronics, the new 3D printing technique has the potential to print cells to help those with skin diseases. For this aspect of the study, McAlpine’s team partnered with pediatrics doctor Dean Jakub Tolar, a world-renowned expert on treating rare skin disease.
The team successfully used a bioink to print cells onto the skin wound of a mouse. These results could lead to advanced medical treatments and grafts for those with skin diseases.
“I’m fascinated by the idea of printing electronics or cells directly on the skin,” McAlpine enthuses. “It is such a simple idea and has unlimited potential for important applications in the future.”
Would you like to learn more? The research study has been published in the academic journal Advanced Materials.
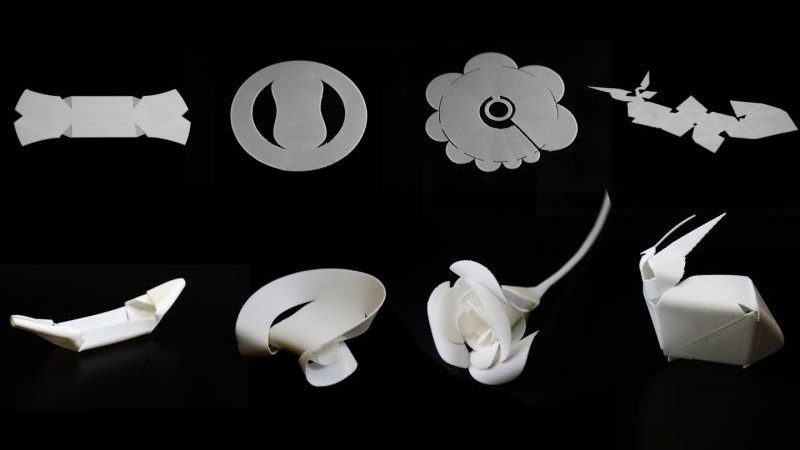
Researchers from Carnegie Mellon University are using a desktop FDM 3D printer, off-the-shelf filament and a design editor to create flat prints which self-fold into different shapes when heat is applied. This technique is called Thermorph.
In an effort to imbue objects with the ability to self-assemble, researchers from Carnegie Mellon University have developed a technique in which 3D printed thermoplastic composites fold themselves into predetermined shapes. With the simple application of heat the researchers’ flat 3D printed objects jump to life, folding along predetermined lines into the prescribed three dimensional object.
The research was conducted with the goal of opening the door to tangible real world products with accessible assembly processes. With the help of a heat gun or even the warmth of the sun, future furniture or even emergency shelters that are shipped flat could pop up and fold into their final shape.
The researchers argue that producing such self-folding materials with off-the-shelf filaments and an FDM 3D printer is both cheaper and quicker than creating solid 3D objects. Therefore, creating prototypes would be easier and could save companies a lot of money.
This certainly isn’t the first 4D, self-folding technique around. In fact, All3DP has covered many in the past. However, the researchers claim that what makes Thermorph special is its cost effectiveness.
“We wanted to see how self-assembly could be made more –democratic—accessible to many users,” Lining Yao, assistant professor in the Human-Computer Interaction Institute and director of the Morphing Matter Lab, said in a statement.
Thermorph Saves Money and Time
Why use FDM 3D printers? Firstly, they’re an inexpensive option. For many users, an issue arises with prints warping as they cool on the print bed.
The researchers used this phenomenon to their advantage, varying their print speeds to deposit combinations of thermoplastics and rubber-like materials that resist contracture. When the prints are placed in hot (but not too hot) water, they become soft and rubbery and begin to fold.
To ensure prints would fold in a particular way, the researchers used their own code, instead of the FDM printer’s open source software. Byoungkwon An, a research affiliate in HCII, explains:
“The software is based on new curve-folding theory representing banding motions of curved area… The software based on this theory can compile any arbitrary 3D mesh shape to an associated thermoplastic sheet in a few seconds without human intervention.”
The researchers designed and printed self-folding geometries with up to 70 faces to demonstrate the technique. The prints included self-curved geometric primitives and 4 self-curved applications. For example, the simplified Stanford Bunny, chairs and flowers.
Finally, the researchers add in their study abstract: “Compared to the standard 3D printing, our method saves up to 60% – 87% of the printing time for all shapes chosen.” To find out more, read their study published in ACM Digital Library.
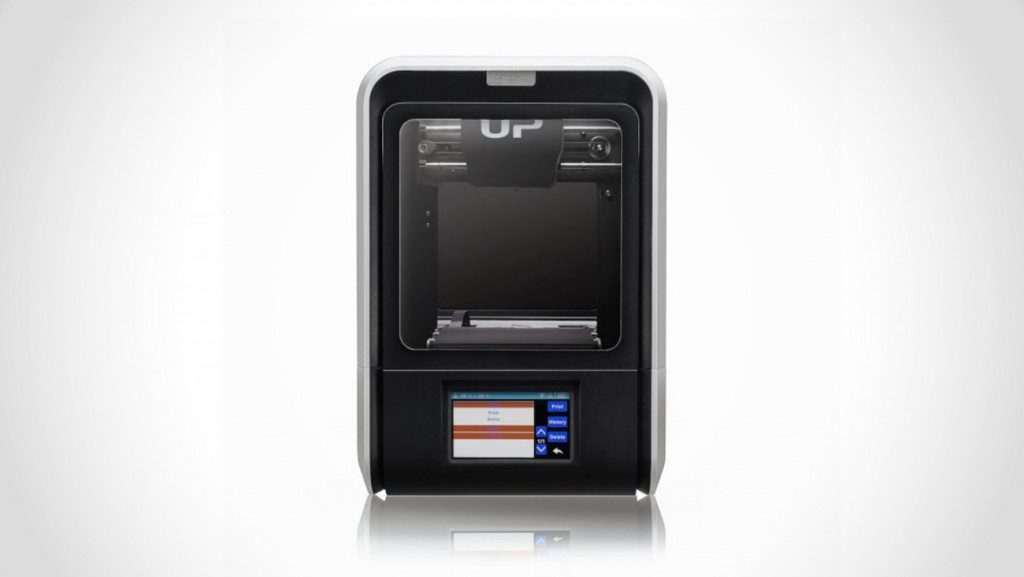
At the Rapid + TCT show in Texas, Tiertime shone a light on not one but three new 3D printers. One sees an upgrade to a familiar face — the company’s popular Up Mini 2 — while the other two are all-new, including a 12-print-bed toting beast.
The Rapid + TCT show is a veritable wonderland of 3D printing and additive manufacturing tech. So it stands to good reason that there are a few curtains raises on eye-catching new 3D printers and products.
One company looking to make a splash at the show is Tiertime. Self-proclaimed as China’s first 3D printer manufacturer, the company has used the show to debut three new 3D printers.
Dubbed the UP Mini 2 ES, UP300 and X5, the printers each cater to differing 3D printing needs. The two UP machines appear to be the more consumer-oriented of the three, with the X5 taking a small-business/low-volume manufacturing route with an interesting print bed automation feature we’ll detail below.
Taking aim at three different use cases, the UP Mini 2 ES, UP300 and X5 all share a few commonalities that are new to the Tiertime ecosystem. In addition to being FDM filament-based 3D printers, they all feature what the company calls an “advanced touchscreen” for user interface, plus dedicated USB memory stick ports, Ethernet port and integration with the new Tiertime Print Queue software.
Like its predecessor, the UP Mini 2 ES features a HEPA filtration system to remove ultra fine particles (UFPs) from the emissions released when printing. We’ve yet to see a specification breakdown of the UP Mini 2 ES, but would surmise it to be mostly identical to the existing UP Mini 2.
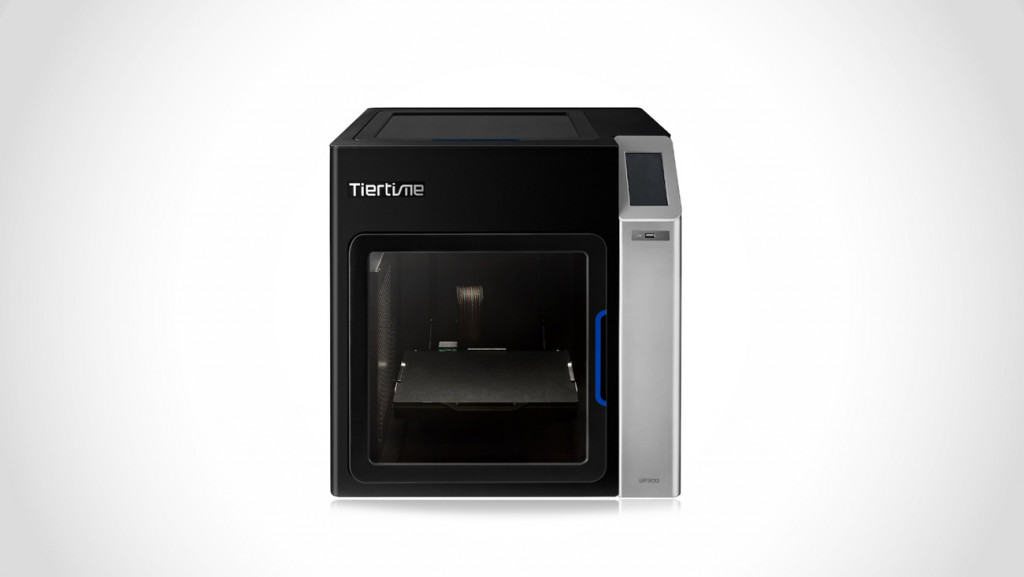
In addition to the beginner friendly UP Mini 2 ES, Tiertime revealed the UP300. A 3D printer that is “more industrial” than the company’s previous machines, it’s clear that Tiertime mean business with the all-new printers it has announced.
The Tiertime UP300
Featuring a 205 x 255 x 225mm print area and HEPA and Carbon air filters, the UP300 also debuts a couple of company-firsts: double-sided removable print plates and three material specific print heads.
The three prints heads are custom-designed to specifically handle the printing of 1.75mm PLA, ABS and TPU filaments. Meanwhile, for print adhesion the removable print bed is glass on one side with an adhesion-friendly perforation on the other. Other quality of life features include automatic bed-leveling and calibration, filament run out detection and blackout-foiling print resume functionality.
The Tiertime X5
Tiertime X5, a Short-Run Workhorse
Capping off a producterific Rapid + TCT for Tiertime is the X5 3D printer. A decidedly more robust offering positioned as a “short-run workhorse”, the TierTime X5 boasts one particularly cool party trick in its print job automation.
To complement the new print queuing ability Tiertime is adding to its machines with the Tiertime Print Queue software, the X5 has the physical capability to automatically eject a completed print on its print plate, load in a fresh one from its internal magazine and continue straight on to the next print.
The X5 can accommodate 12 print beds at once and, best of all, print beds that have been cleaned of completed prints can simply be loaded back into the system from the other side. This should add up to virtually endless printing with minimal intervention require on the user’s part.
At 180 x 230 x 200mm, the X5’s print area doesn’t quite match up to the UP300, but it does retain the quality of life features and air filtration system of the aforementioned printers.
No word yet on pricing or release dates, but we’ll provide further coverage as we learn more.
Engineers at Temple University in Philadelphia take inspiration from the insect kingdom for their 3D printed surgical needle design; the stinger of the humble honeybee.
While exploring a new concept for a 3D printed surgical needle at Temple University in Philadelphia, Associate Professor of Mechanical Engineering Parsaoran Hutapea and PhD candidate Mohammad Sahlabadi cast their net far and wide.
“I told (Sahlabadi) we should try to look at nature, such as mosquitos, honeybees, wasps,” says Hutapea, who’s been using 3D printing technology to develop surgical needles since 2011 with the support of a US Department of Defense grant.
“We brought some honeybees into the lab, and took out and inspected their stingers using a microscope. The way honeybees sting human skin is very attractive for what we’re trying to develop, because, due mainly to the stinger’s barbs, it goes relatively smoothly straight through the skin and into the tissue.”
In developing the surgical needles — fabricated from a blend of polymers — Hutapea and Sahlabadi hope to create more precise instruments that can also reduce tissue damage.
Using the honey bee stingers as a template, they devised a design with small barbs carved into the needle. These barbs reduce the insertion and extraction forces of the needle, which further minimizes damage to tissue.
“Generally, a surgical needle will curve due to its tip design when inserted into tissue. The needle deviates from its planned path on the way to the target, such as a cancerous tissue or tumor. With this shape, the curve is limited—it makes it easier to control in a robotics setting,” explains Hutapea.
“It’s critical, because if the needle curves, you miss the target.”
Honey Bee Surgical Needle is More Precise, Less Invasive
The 3D printed surgical needle isn’t yet usable in practice, however. Both the honey bee design and 3D printing technology used will require further refinement. This is especially the case to make metal needles with sub-millimeter size and high aspect ratio.
But eventually the goal is to develop a Honey Bee surgical needle that is usable in practice, and have them approved by the US Food and Drug Administration. Thereafter, they can be used to improve minimally invasive surgical procedures.
“The big question is whether we can manufacture 3D printed metal needles, and that technology is not here yet,” says Hutapea.
“In the meantime, we are currently developing a compromise by looking at a manufacturing method to develop a hybrid metal-polymer needle. The hope is that in two to three years, we have that technology.”
Um dir ein optimales Erlebnis zu bieten, verwenden wir Technologien wie Cookies, um Geräteinformationen zu speichern und/oder darauf zuzugreifen. Wenn du diesen Technologien zustimmst, können wir Daten wie das Surfverhalten oder eindeutige IDs auf dieser Website verarbeiten. Wenn du deine Einwillligung nicht erteilst oder zurückziehst, können bestimmte Merkmale und Funktionen beeinträchtigt werden.
Funktional
Immer aktiv
Die technische Speicherung oder der Zugang ist unbedingt erforderlich für den rechtmäßigen Zweck, die Nutzung eines bestimmten Dienstes zu ermöglichen, der vom Teilnehmer oder Nutzer ausdrücklich gewünscht wird, oder für den alleinigen Zweck, die Übertragung einer Nachricht über ein elektronisches Kommunikationsnetz durchzuführen.
Vorlieben
Die technische Speicherung oder der Zugriff ist für den rechtmäßigen Zweck der Speicherung von Präferenzen erforderlich, die nicht vom Abonnenten oder Benutzer angefordert wurden.
Statistiken
Die technische Speicherung oder der Zugriff, der ausschließlich zu statistischen Zwecken erfolgt.Die technische Speicherung oder der Zugriff, der ausschließlich zu anonymen statistischen Zwecken verwendet wird. Ohne eine Vorladung, die freiwillige Zustimmung deines Internetdienstanbieters oder zusätzliche Aufzeichnungen von Dritten können die zu diesem Zweck gespeicherten oder abgerufenen Informationen allein in der Regel nicht dazu verwendet werden, dich zu identifizieren.
Marketing
Die technische Speicherung oder der Zugriff ist erforderlich, um Nutzerprofile zu erstellen, um Werbung zu versenden oder um den Nutzer auf einer Website oder über mehrere Websites hinweg zu ähnlichen Marketingzwecken zu verfolgen.


![[DEAL] Print Big with the Creality CR-10 3D Printer, on Sale at GearBest](https://www.blogdot.tv/wp-content/uploads/2018/04/deal-print-big-with-the-creality-cr-10-3d-printer-on-sale-at-gearbest.jpg)


![God of War – Kratos und Atreus in Übergröße: Making of [PS4, deutsch]](https://www.blogdot.tv/wp-content/uploads/2018/04/God-of-War-Graffiti-Berlin-Adresse-GamesWirtschaft.jpg)