Schlagwort: tech

  • Electrically assisted scooter senses forward kicks

    Electrically assisted scooter senses forward kicks

    Reading Time: < 1 minute

    Electrically assisted scooter senses forward kicks

    Arduino TeamOctober 25th, 2018

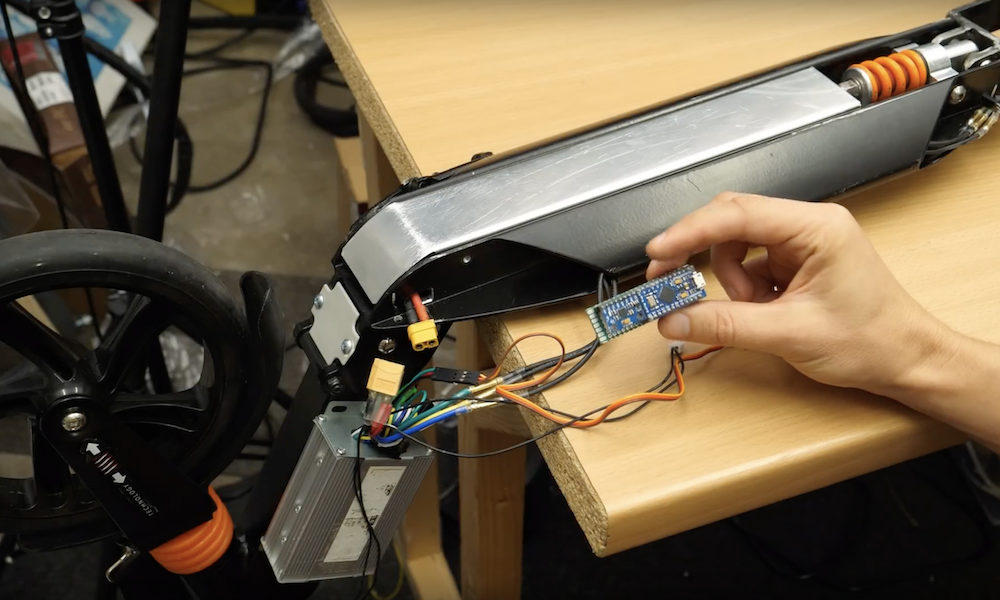
    Maker Bitluni wanted an electric scooter, but he lives in Germany, where electric vehicles of that type are illegal. Motor-assisted bicycles, however, are not. So he set to work making a sort of hybrid that is controlled not by a throttle directly, but provides assistance when the rider kicks the scooter forward.

    The scooter uses an accelerometer to sense forward pushes, along with an Arduino Micro that regulates speed via PWM output. A brake assembly is also implemented as a secondary input, starting up the device and powering it down as needed. 

    Bitluni’s build and testing process can be seen in the videos below, and Arduino code is available on GitHub.

    [youtube https://www.youtube.com/watch?v=videoseries?list=PLjUbKCHhzPEyLdycsl0JJv-v3YPya3sPf&w=500&h=281]

    [youtube https://www.youtube.com/watch?v=RG7bqsHGtEk?feature=oembed&w=500&h=281]

    [youtube https://www.youtube.com/watch?v=QhxD5owuN8g?feature=oembed&w=500&h=281]

    Website: LINK

  • Custom weather station enhances and modifies electronic music

    Custom weather station enhances and modifies electronic music

    Reading Time: 2 minutes

    Custom weather station enhances and modifies electronic music

    Arduino TeamOctober 25th, 2018

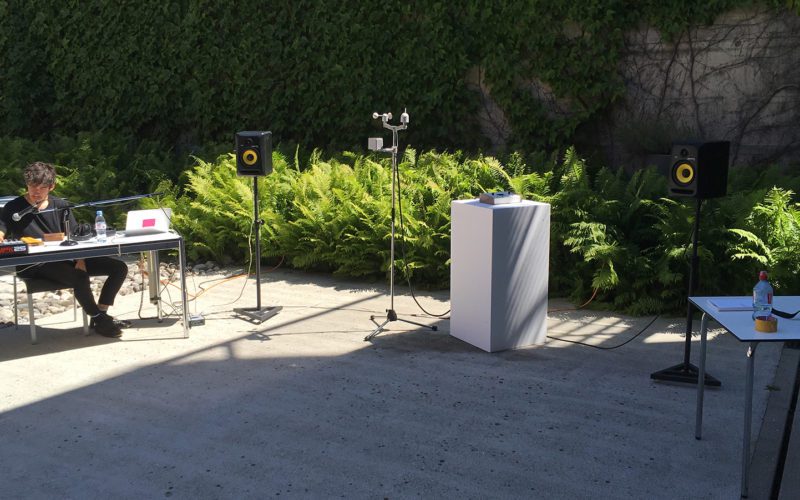
    While the environment is important for any musical performance, generally it’s not an active part of the show. Adrien Kaeser, though, has come up with a device called the “Weather Thingy that integrates climate-related events directly into electronic music performances. It’s able to sense wind direction and speed, light intensity, and rain, translating this data into MIDI inputs.

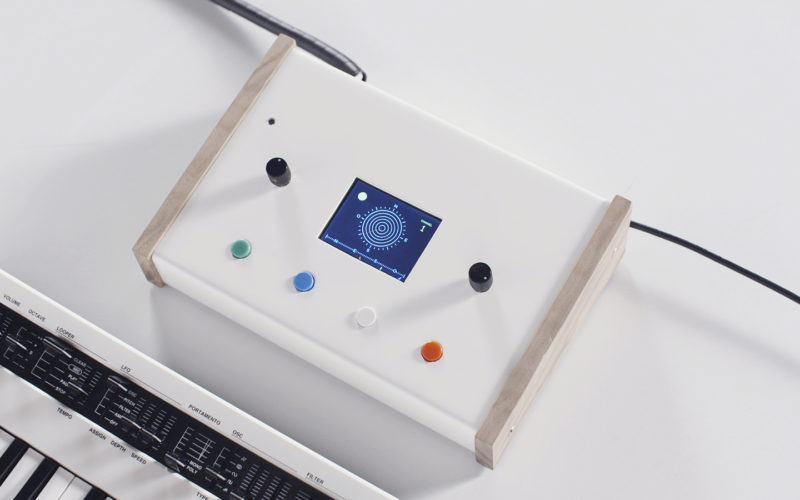
    The system, which was created at ECAL, consists of two parts: a compact weather station on top of a portable stand, as well as a small console with buttons and knobs to select and modify environmental effects on the music. 

    Hardware for the project includes an Arduino Mega and Leonardo, a TFT screen to display the element under control and its characteristics, an ESP32 module, a SparkFun ESP32 Thing Environment Sensor Shield, a SparkFun MIDI Shield, high speed optocouplers, rotary encoder knobs, and some buttons.

    Be sure to see the demo in the video below, preferably with the sound on!

    [embedded content]

    Website: LINK

  • Turn an Atari 2600 into a MIDI drum machine

    Turn an Atari 2600 into a MIDI drum machine

    Reading Time: 2 minutes

    Turn an Atari 2600 into a MIDI drum machine

    Arduino TeamOctober 24th, 2018

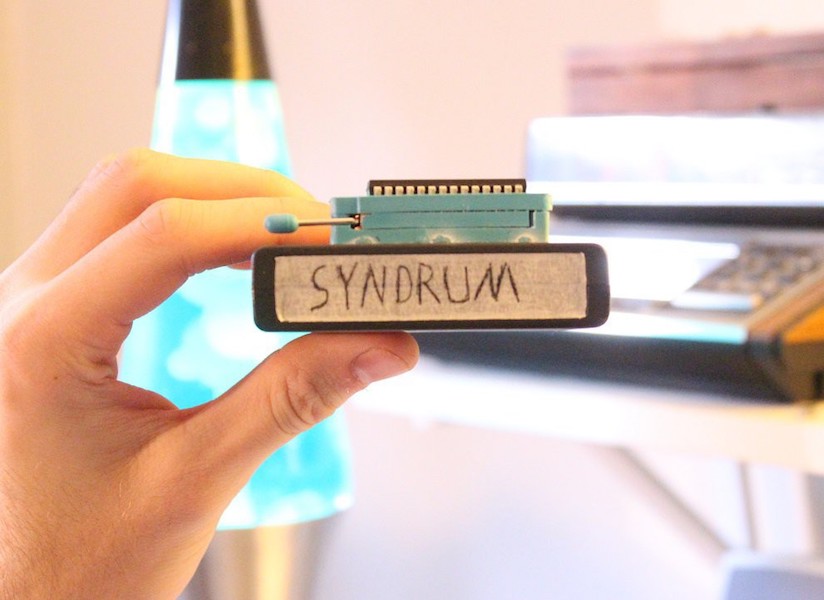
    While not known for its musical prowess, John Sutley decided to turn an Atari 2600 into a simple four-note drum machine dubbed “SYNDRUM.”

    While an interesting exercise in creating a custom cartridge out of repurposed components, pushing buttons to activate four tones and an onscreen VU meter can only keep one’s attention for so long.

    To turn this project’s musical entertainment level up to 11, he programmed an Arduino Nano to take MIDI signals and translate them into the equivalent electrical signals that would normally come from a controller. 

    The results, as seen in the video below, are spectacular. If you’d like to try something similar yourself, code for the SYNDRUM can be found here.

    [youtube https://www.youtube.com/watch?v=rJQEGqaRtjs?feature=oembed&w=500&h=281]

    Website: LINK

  • Communicate using your ear with Orecchio

    Communicate using your ear with Orecchio

    Reading Time: 2 minutes

    Communicate using your ear with Orecchio

    Arduino TeamOctober 23rd, 2018

    When conversing face-to-face, there are a wide range of other emotions and inflections conveyed by our facial and body expressions. But what if you can’t express emotion this way, whether due to a physical impairment, or simply because of a covering—like a dust mask—temporarily hides your beautiful smile, and perhaps your hands are otherwise occupied?

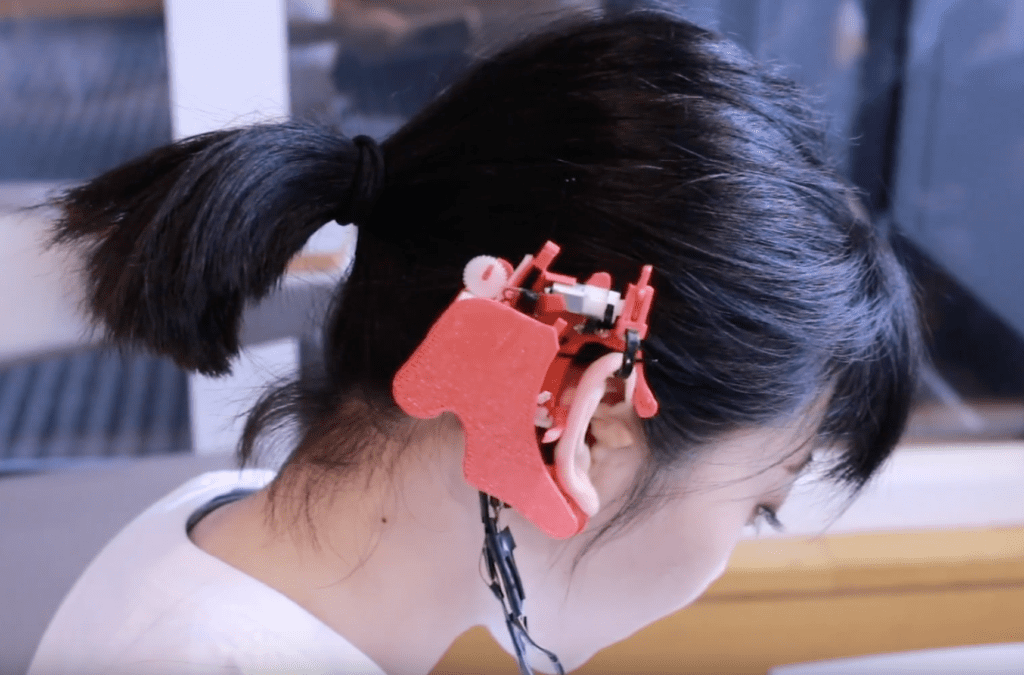
    As a solution to this dilemma, a team of researchers has been working on Orecchio, a robotic device that attaches to the ear and bends it to convey emotion. Three motors allow the ear to be bent in 22 distinct poses and movements, indicating 16 emotional states. Control is accomplished via an Arduino Due, linked up with a windows computer running a C# program. 

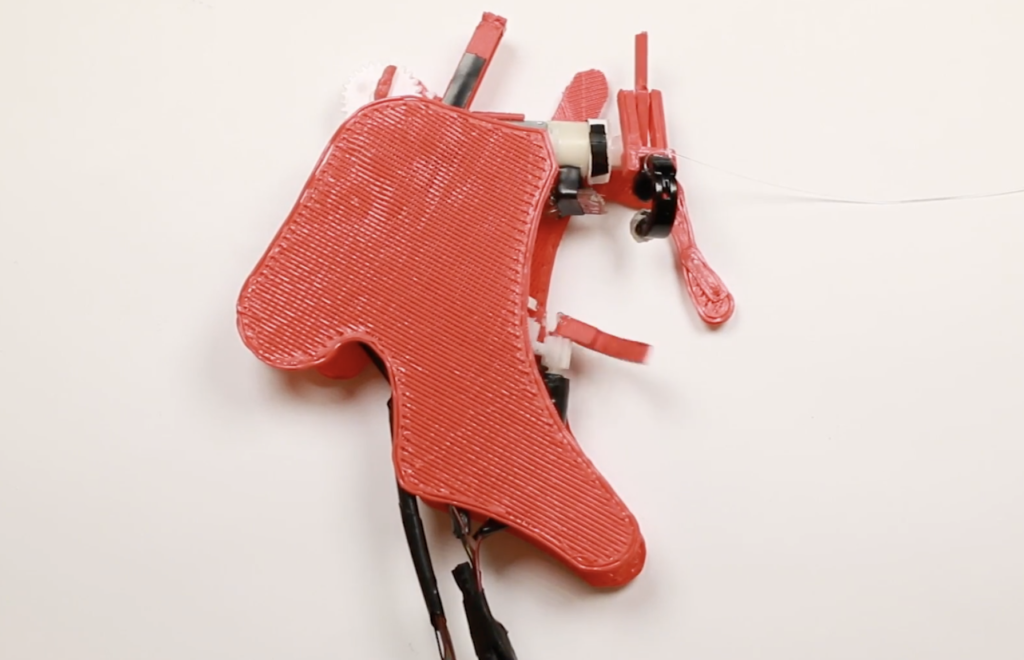
    The prototype was implemented using off-the-shelf electronic components, miniature motors, and custom-made robotic arms. The device has a micro gear motor mounted on the bottom of a 3D-printed ear hook loop clip. The motor drives a plastic arm against the side of the helix, able to bend it towards the center of the ear. Rotating the plastic arm back to its rest position allows the helix to restore to its original form. Near the top of the earpiece is another motor that drives a one-joint robotic arm that is attached to the top of the helix, using a round ear clip. Rotating the motor extends the robotic arm from its resting position, to bend the top helix downwards the center of the ear. The motor together with the one-joint robotic arm is mounted on a linear track that can be moved vertically through a rack-and-pinion mechanism, driven by a third motor. Moving the rack upwards stretches the helix.

    The prototype is demonstrated in the video below, and more info is available in the project’s research paper.

    [youtube https://www.youtube.com/watch?v=uGnGSEcgi4E?feature=oembed&w=500&h=281]

    Website: LINK

  • DualPanto is a non-visual gaming interface for the blind

    DualPanto is a non-visual gaming interface for the blind

    Reading Time: 2 minutes

    DualPanto is a non-visual gaming interface for the blind

    Arduino TeamOctober 22nd, 2018

    While there are tools that allow the visually impaired to interact with computers, conveying spacial relationships, such as those needed for gaming, is certainly a challenge. To address this, researchers have come up with DualPanto.

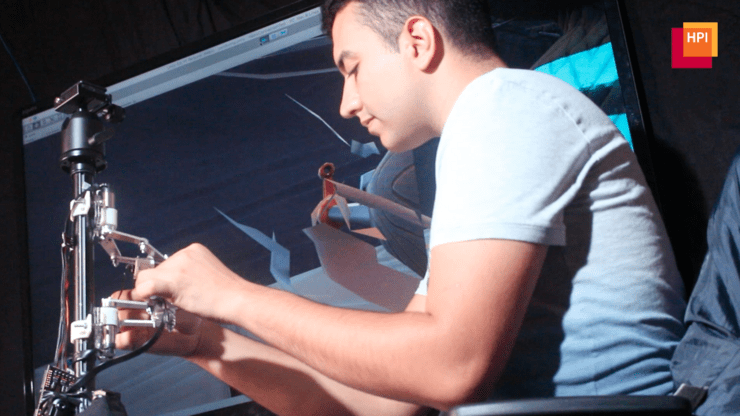
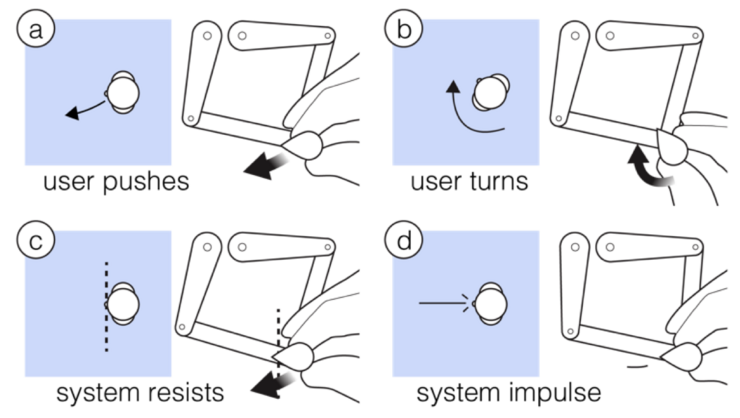
    As the name implies, the system uses two pantographs for location IO, and on the end of each is a handle that rotates to indicate direction. One pantograph acts as an output to indicate where the object is located, while the other acts as a player’s input interface. One device is positioned above the other, so the relative position of each in a plane can be gleaned. 

    The game’s software runs on a MacBook Pro, and an Arduino Due is used to interface the physical hardware with this setup. 

    DualPanto is a haptic device that enables blind users to track moving objects while acting in a virtual world.

    The device features two handles. Users interact with DualPanto by actively moving the ‘me’ handle with one hand and passively holding on to the ‘it’ handle with the other. DualPanto applications generally use the me handle to represent the user’s avatar in the virtual world and the it handle to represent some other moving entity, such as the opponent in a soccer game.

    Be sure to check it out in the video below, or read the full research paper here.

    [youtube https://www.youtube.com/watch?v=Ot55D3WD-Tc?feature=oembed&w=500&h=281]

    Website: LINK

  • Create shapes over and over with the Dynablock 3D Printer

    Create shapes over and over with the Dynablock 3D Printer

    Reading Time: 2 minutes

    Create shapes over and over with the Dynablock 3D Printer

    Arduino TeamOctober 22nd, 2018

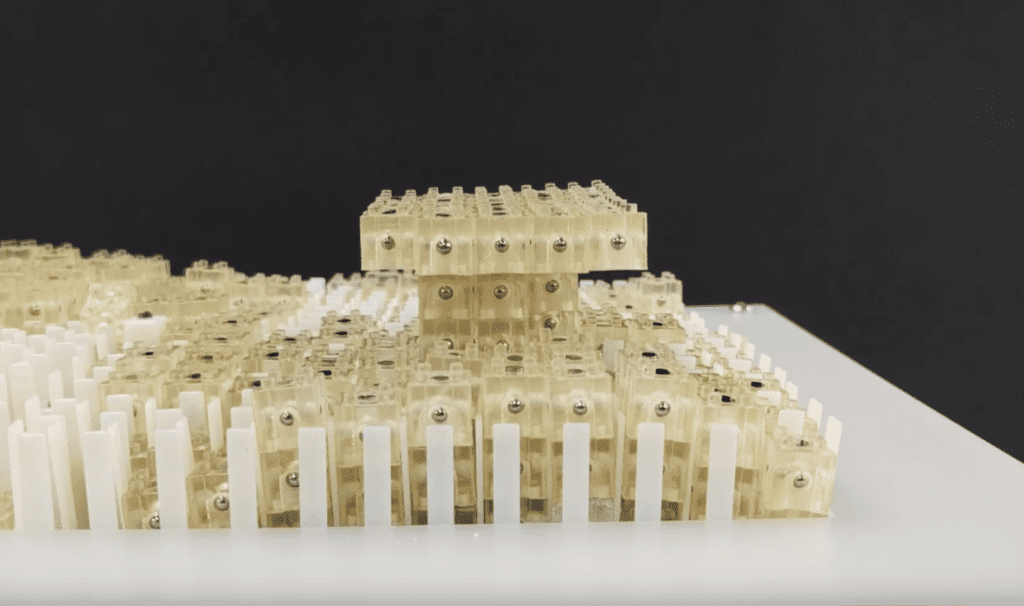
    3D printing, while revolutionary in many aspects, generally means you’re stuck with what you print. Researchers at the University of Colorado Boulder and the University of Tokyo, however, have created a printing system called Dynablock, which attaches specialized magnetic blocks together that can used over and over.

    The system uses an array of 24 x 16 motors to push the blocks into position one layer at a time, giving a possible “print” resolution of 384 blocks per layer. An Arduino Uno, along with shift registers and motor drivers are used to directly control the block placement motors, and user interface is handled by a JavaScript-based application.

    Dynamic 3D Printing combines the capabilities of 3D printers and shape displays: Like conventional 3D printing, it can generate arbitrary and graspable three-dimensional shapes, while allowing shapes to be rapidly formed and reformed as in a shape display. To demonstrate the idea, we describe the design and implementation of Dynablock, a working prototype of a dynamic 3D printer. Dynablock can form a three-dimensional shape in seconds by assembling 3,000 9 mm blocks, leveraging a 24 x 16 pin-based shape display as a parallel assembler. Dynamic 3D printing is a step toward achieving our long-term vision in which 3D printing becomes an interactive medium, rather than the means for fabrication that it is today. In this paper, we explore possibilities for this vision by illustrating application scenarios that are difficult to achieve with conventional 3D printing or shape display systems.

    More info can be found in the project’s research paper here, or check it out in action in the video below:

    [youtube https://www.youtube.com/watch?v=7nPlr3O9xu8?feature=oembed&w=500&h=281]

    Website: LINK

  • Animate a soda bottle structure with TrussFormer and Arduino

    Animate a soda bottle structure with TrussFormer and Arduino

    Reading Time: 2 minutes

    Animate a soda bottle structure with TrussFormer and Arduino

    Arduino TeamOctober 19th, 2018

    While you may not give soda bottles much thought beyond their intended use, researchers in Germany and the U.S. have been working on a way to turn empty bottles into kinetic art. 

    The result of this work is a program called “TrussFormer,” which enables one to design a structure made out of soda bottles acting as structural beams. The structure can then be animated using an Arduino Nano to control a series of pneumatic actuators.

    TrussFormer not only allows for animation design, but analyzes stresses on the moving assembly, and even generates 3D-printable files to form the proper joints.

    TrussFormer is an integrated end-to-end system that allows users to 3D print large-scale kinetic structures, i.e., structures that involve motion and deal with dynamic forces.

    TrussFormer builds on TrussFab, from which it inherits the ability to create large-scale static truss structures from 3D printed hubs and PET bottles. TrussFormer adds movement to these structures by placing linear actuators and hinges into them.

    TrussFormer incorporates linear actuators into rigid truss structures in a way that they move “organically”, i.e., hinge around multiple points at the same time. These structures are also known as variable geometry trusses. This is illustrated on the on the example of a static tetrahedron that is converted into a moving structure by swapping one edge with a linear actuator. The only required change is to introduce connections at the nodes that enable rotation, i.e. hinges.

    As for what you can build with it, be sure to check out the bottle-dinosaur in the video below! 

    [youtube https://www.youtube.com/watch?v=PGibr3rJB0Y?feature=oembed&w=500&h=281]

    Website: LINK

  • A linear actuator that won’t break the bank

    A linear actuator that won’t break the bank

    Reading Time: < 1 minute

    A linear actuator that won’t break the bank

    Arduino TeamOctober 19th, 2018

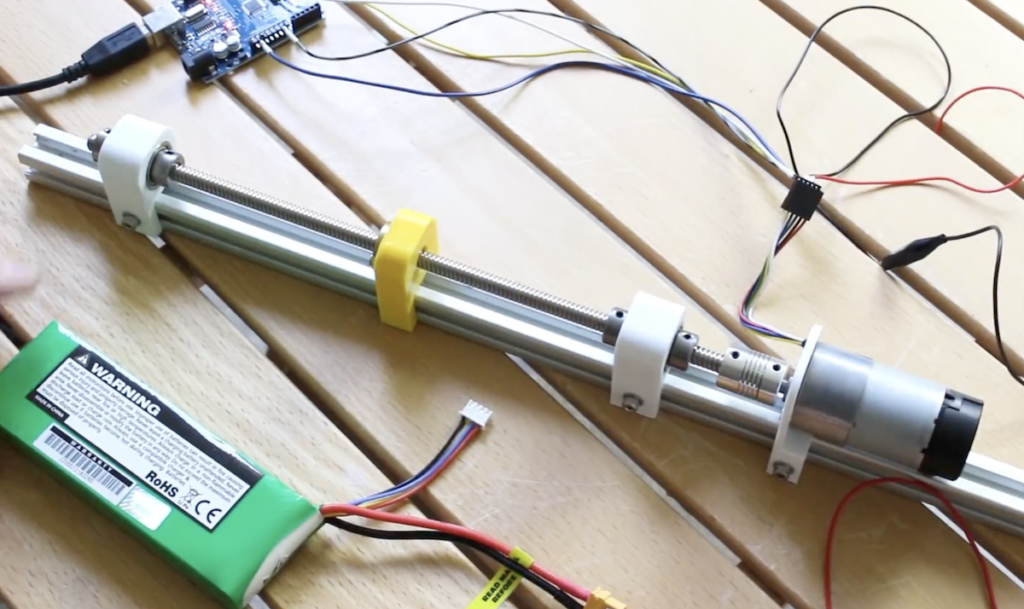
    Extremely good linear actuators can be expensive and heavy, but what if you need something for relatively light applications? In the video below, James Bruton explains how you can make one using parts including a DC motor with a quadrature encoder, 3D-printed mounting, and a lead screw assembly.

    His device uses an Arduino Uno for control, using pins 2 and 3 as interrupts to ensure correct rotation—and thus linear travel—sensing. Proper movement is facilitated with a pair of PID loops to regulate both the position and velocity, even under differing load and battery conditions. 

    Arduino code and CAD information can be found on GitHub, while an explanation of the project is seen in the video below. 

    [youtube https://www.youtube.com/watch?v=WJkf264yxTU?feature=oembed&w=500&h=281]

    Website: LINK

  • InfiniTouch: Interact with both sides of your smartphone

    InfiniTouch: Interact with both sides of your smartphone

    Reading Time: 2 minutes

    InfiniTouch: Interact with both sides of your smartphone

    Arduino TeamOctober 19th, 2018

    Besides, perhaps a longer battery life, what would make your smartphone experience better? If you said a more versatile interaction method than poking one side with your thumb, researchers in Germany may have just the thing.

    InfiniTouch morphs two LG Nexus 5 phones into one, with their touchscreens stacked back-to-back. This allows for not only thumb interaction, but also program control with the four fingers that normally only grip the device. It can even tell what finger your using via a convolutional neural network. 

    In order to save space, most of the electronics are housed in a separate hardware container, including the phone boards as well as an Arduino MKR1000. 

    More info is available in the project’s research paper, and a short demo can be seen in the video below.

    [youtube https://www.youtube.com/watch?v=Qu0H5wzxSuY?feature=oembed&w=500&h=281]

    Website: LINK

  • 3D wire bending with Arduino!

    3D wire bending with Arduino!

    Reading Time: < 1 minute

    3D wire bending with Arduino!

    Arduino TeamOctober 17th, 2018

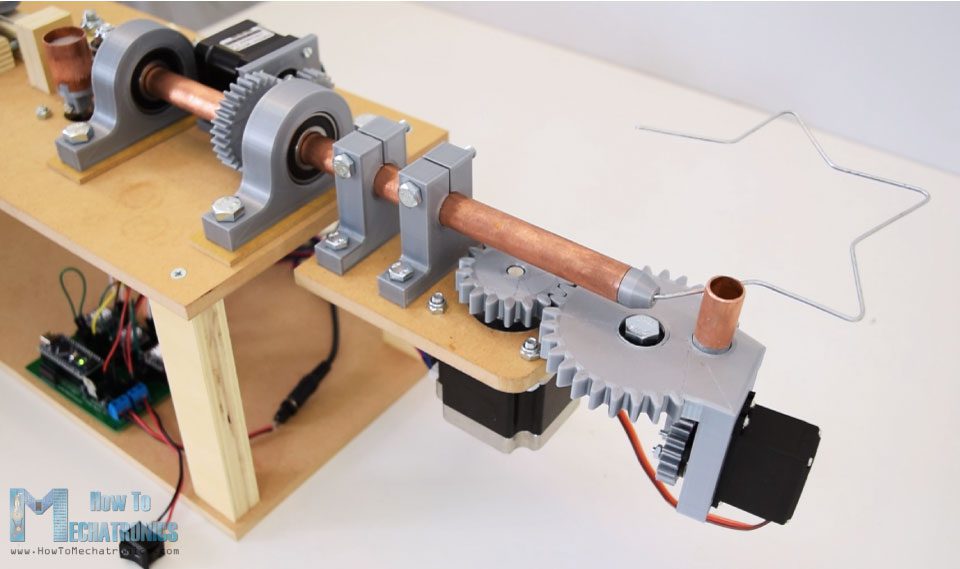
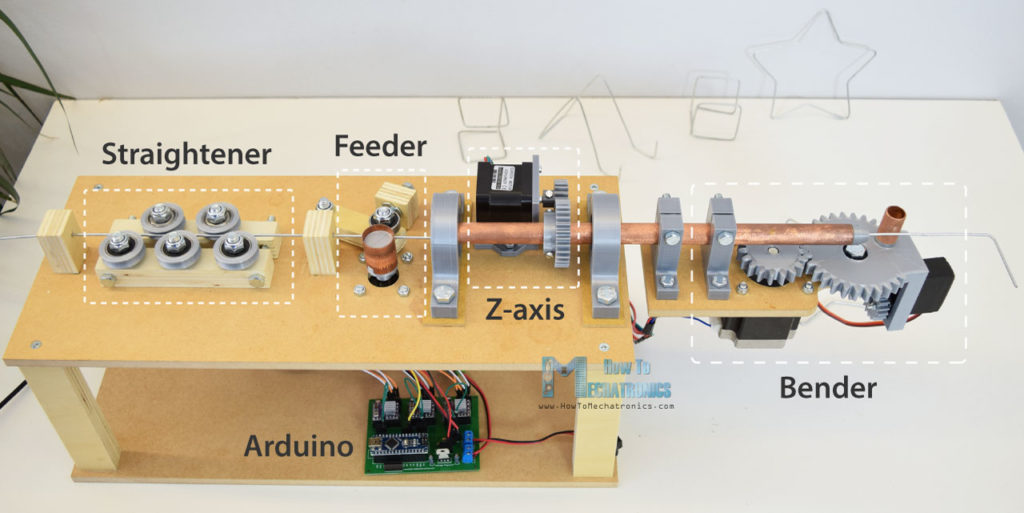
    If you thought that automatic wire bending was solely the purview of expensive industrial machinery, think again. How To Mechatronics has come up with a bender that not only twists wire left and right, but can rotate to create three-dimensional shapes.

    The heart of the system is an Arduino Nano, which controls three stepper motors for wire manipulation via DRV8825 driver boards. A servo motor is also implemented in order to push a piece of copper tubing into place to physically bend the wire. 

    As noted, the device does have some trouble moving the wire when its straightening rollers are tight, but this likely could be perfected with a little more work. If you’d like to take a crack at it, code and build files are available here.

    [youtube https://www.youtube.com/watch?v=HPQbKTJPsU4?feature=oembed&w=500&h=281]

    Website: LINK

  • Arduino Uno controls a trio of singing pumpkins

    Arduino Uno controls a trio of singing pumpkins

    Reading Time: < 1 minute

    Arduino Uno controls a trio of singing pumpkins

    Arduino TeamOctober 16th, 2018

    Halloween is just around the corner, and to celebrate, fadecomic decided to set up a trio of singing animatronic pumpkins to belt out scary songs. 

    The project uses a Raspberry Pi for high level control and browser interface, and sends animation commands to an Arduino Uno via USB serial.

    The Uno takes this data and translates it into actual pumpkin movements coordinated with music. The resulting trio of pumpkins each use their own servo to lift the top of the foam gourd up like a gigantic mouth, and also feature PWM-driven LED eyes. A light show controlled by SSRs completes the spooky musical effect. 

    Build info is available here and the Arduino code can be found on GitHub.

    [youtube https://www.youtube.com/watch?v=hlFKTc7b4Gs?feature=oembed&w=500&h=281]

    Website: LINK

  • Paper-cut light box replicates the Philadelphia skyline and its actual moon phases

    Paper-cut light box replicates the Philadelphia skyline and its actual moon phases

    Reading Time: < 1 minute

    Paper-cut light box replicates the Philadelphia skyline and its actual moon phases

    Arduino TeamOctober 16th, 2018

    Rich Nelson wanted to make a unique gift for his brother, and decided on a paper-cut light box of Philadelphia’s skyline, the city where he lives. 

    The resulting device is controlled by an Arduino Nano, and not only features a trio of lights and layers to represent buildings and foliage, but also a moving sun and moon display that changes depending on the actual time and date.

    Timing is accomplished via an RTC module, while the sun/moon is displayed on a small TFT screen that moves across the sky using a servo motor and extension arm. The build can be seen in the video below, and code as well as CAD info is on GitHub for your perusal.

    [youtube https://www.youtube.com/watch?v=Sy7FVV2LId8?feature=oembed&w=500&h=281]

    Website: LINK

  • FacePush adds extra realism to your VR experience

    FacePush adds extra realism to your VR experience

    Reading Time: < 1 minute

    FacePush adds extra realism to your VR experience

    Arduino TeamOctober 16th, 2018

    Haptic feedback is something commonly used with handheld controllers and the like. However, in a virtual reality environment, it could also be used with the other interface surface attached to your body: the VR headset itself.

    That’s the idea behind FacePush, which employs an Arduino Uno-powered pulley system to place tension on the straps of an HTC Vive headset. A corresponding pushing force is felt by the wearer through the headset in response to this action, creating yet another way to help immerse users in a virtual world. 

    Applications tried so far include a boxing game, dive simulator, and 360-degree guidance You can check it out in a short demo below, and read more about it in the full research paper here.

    [youtube https://www.youtube.com/watch?v=IPLVCdbvWyI?feature=oembed&w=500&h=281]

    Website: LINK

  • Neon skulls illuminate to the MIDI beat

    Neon skulls illuminate to the MIDI beat

    Reading Time: 2 minutes

    Neon skulls illuminate to the MIDI beat

    Arduino TeamOctober 15th, 2018

    LEDs, whether single-color or programmable, have enabled makers to create a wide variety of vibrant projects at a reasonable price. Neon sign projects, which require sophisticated glass making techniques as well as high voltage for control aren’t as common, but do still have their adherents. Some have even experimented with making them sound reactive.

    Up until now, sound control meant using a microphone to detect audio signals and flash accordingly. David Garges, however, is using an Arduino Leonardo equipped with an Olimex MIDI shield to individually activate three neon skulls, crafted by artist Dani Bonnet. 

    His setup can be programmed via MIDI directly, or can use beat analysis software to activate the proper lights depending on audio output. 

    There has been much desire in the Neon Art community for clean and responsive musical interaction with high-voltage Neon Signs. Currently, the existing infrastructure uses a microphone to detect audio and flash accordingly. Unfortunately, due to this method of processing the Neon always responds with a small delay. Clapping and shouting can also disrupt the interaction when using an on-board microphone.

    This project solves that problem by transmitting musical data via MIDI protocol to a controller which activates then activates Neon Tubes accordingly. I have designed and built a system that takes a slightly different approach but accomplishes what the Neon Art community desires.

    This project offers two performance modes: one that allows for electronic artists to perform seamlessly using MIDI instruments, and one that allows DJs to feed BPM analysis to the system to synchronize the Neon flashing with actual recorded music which enables Real-Time Audio-Controlled Neon.

    Be sure to check out the demo in the video below!

    [youtube https://www.youtube.com/watch?v=OF9CwCswp7Y?feature=oembed&w=500&h=375]

    Website: LINK

  • Announcing Arduino’s Coordinated Vulnerability Disclosure Policy

    Announcing Arduino’s Coordinated Vulnerability Disclosure Policy

    Reading Time: 3 minutes

    Announcing Arduino’s Coordinated Vulnerability Disclosure Policy

    gvariscoOctober 10th, 2018

    A little less than a month ago, I joined Arduino as their Chief Information Security Officer. I’ve been in touch with the team for the past couple of months and feel incredibly lucky to be part of such a talented and driven group of people.

    We’re working hard on developing a robust, well-rounded security program that fits our organisation and busy improving our security posture across all departments. I am a true believer that it all starts from introducing a strong culture of security awareness — where employees feel confident and empowered to take action against security issues.  

    Today, I’m thrilled to announce the first release of Arduino’s Coordinated Vulnerability Disclosure (CVD) Policy.

    We used some great references when putting it together and we’d like to give them a shout out here: HackerOne’s VDP guidelines, CEPS’ report on “Software Vulnerability Disclosure in Europe,” and the US DoJ Cyber Security unit’s VDP framework. We also took into consideration recent Senate testimony of experts in vulnerability disclosure in the role hackers can play in strengthening security, Dropbox’s announcement on protecting researchers and 18F’s own policy. I even wanted to publicly thank Amit Elazari Bar On, a doctoral law candidate (J.S.D.) at UC Berkeley School of Law and a Lecturer at UC Berkeley School of Information Master in Cybersecurity program for her useful advices and for providing the amazing “#legalbugbounty” standardisation project.

    We’re also happy to announce that all of the text in our policy is a freely copyable template. We’ve done this because we’d like to see others take a similar approach. We’ve put some effort in to this across our teams and if you like what you see, please use it. Similarly, if you have improvements to suggest, we’d love to hear from you.

    What is CVD?

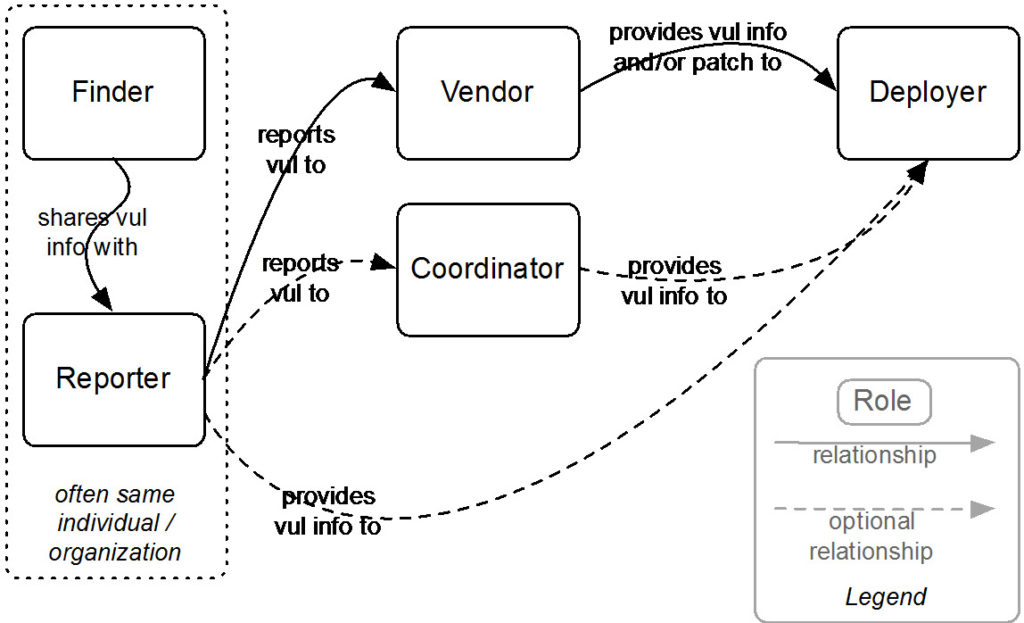
    Coordinated vulnerability disclosure (CVD) is a process aimed at mitigating/eradicating the potential negative impacts of vulnerabilities. It can be defined as “the process of gathering information from vulnerability finders, coordinating the sharing of that information between relevant stakeholders, and disclosing the existence of vulnerabilities and their mitigation to various stakeholders, including the public.”

    Figure 1: Relationships among actors in the CVD process. Source: “The CERT Guide to Coordinated Vulnerability Disclosure,” Software Engineering Institute, Carnegie Mellon University

    Why is it important for us?

    At Arduino, we consider the security of our systems and products a top priority. No technology is perfect, and Arduino believes that working with skilled security researchers across the globe is crucial in identifying weaknesses in any technology. We want security researchers to feel comfortable reporting vulnerabilities they’ve discovered, as set out in this policy, so that we can fix them and keep our information safe.

    If you believe you’ve found a security issue in our products or services, we encourage you to notify us. We welcome working with you to resolve the issue promptly.

    This policy describes how to send us vulnerability reports and how long we ask security researchers to wait before publicly disclosing vulnerabilities.

    Where can I find it?

    A copy of the policy is published on our Vulnerability Disclosure Policy page. The official document lives in GitHub. If you would like to comment or suggest a change to the policy, please open a GitHub issue.

    Thank you for helping keep Arduino and our users safe!

    — Gianluca Varisco

    Website: LINK

  • When in Rome: Join us at Europe’s Biggest Maker Faire!

    When in Rome: Join us at Europe’s Biggest Maker Faire!

    Reading Time: 3 minutes

    We’re just days away from Maker Faire Rome — The European Edition, where we will be partnering with Microchip in Pavilion 8.  This year’s booth will be broken up into three areas:

    • Education: The Arduino Education team will be exhibiting the flagship CTC 101 program and the Engineering Kit. Starting at 11am, there will be 15-minute demos every hour that address the ways Arduino can be implemented as a learning tool from primary schools all the way up to universities.
    • Makers: We have been working on a pair of new projects to highlight the key specs and possible use cases of the Uno WiFI. Moreover, visitors will have the opportunity to meet the winner of the Arduino /Distrelec Robotics & Automation Contest.
    • Internet of Things: This section will be focused around a smart greenhouse connected to the Arduino IoT Cloud, along with two demos of the MKR Vidor 4000. Finally, we will be showcasing some practical demos on how startups and companies have turned to Arduino to bring their products and services to market.

    The Arduino booth will also include a special station dedicated to the Arduino Store, where will be giving away 500 discount vouchers for online purchases on a first come, first serve basis.

    But that’s not all! Members of the Arduino team can be found throughout Maker Faire Rome’s program all weekend long. The schedule is as follows:

    Friday, October 12th

    10:30am: Opening Conference (Pavilion 10 – Room 1/Sala Alibrandi): Massimo Banzi, Arduino co-founder, will join Maker Faire’s opening conference ‘Groundbreakers: Pioneers of the Future’ with the talk Democratizing Industry 4.0. Register here.


    2:30pm – 5:30pm
    (Room 17 SC3): Debugging with Arduino: A hands-on workshop with Microchip’s Wizard of Make, Bob Martin, and Arturo Guadalupi, Arduino Hardware Design Engineer, which will explore advanced debugging techniques for Arduino sketches. More info here.


    2:30pm – 3:30pm
     (Pavilion 9 – Room 11): CTC: Bring Open-Source into Your Classroom: In partnership with Campus Store Academy, this informative workshop will walk you through implementing Arduino in the classroom with Arduino CTC 101. Register here.

    Saturday, October 13th

    11:30am – 12:30pm (Pavilion 7 – Room 7): Arduino MKR Vidor: Democratizing FPGA: Led by Martino Facchin, Arduino Senior HW Engineer, this session will discuss how the MKR Vidor combines the power and flexibility of an FPGA with the ease of use of Arduino. More info here.

    11:45am – 12:45pm  (Pavilion 9 – Room 11): In partnership with Campus Store Academy, this informative workshop will walk you through implementing Arduino in the classroom with Arduino CTC 101. Register here.

    2:15pm – 3:15pm (Pavilion 7 – Room 7) Arduino IoT Cloud: The  Internet of Things Revolution: Luca Cipriani, Arduino CIO, will focus on the potential of the Arduino IoT Cloud, the latest developments in the Arduino ecosystem, as well as how to build connected objects in a quick, easy, and secure manner. More info here.

    4:15pm – 5:15pm ( Pavilion 9 – Room 13): Arduino Engineering Kit: Advanced Programming and Learning Applications: In collaboration with Campus Store Academy, this workshop is concentrated on helping tomorrow’s engineers approach mechatronics and automated control. Register here.

    5:45pm – 6:45pm ( Pavilion 9 – Room 11): STEAM with Arduino: In collaboration with Campus Store Academy, this session will introduce you to the Arduino Starter Kit Classroom Pack and how Arduino is being used as a flexible learning tool. More info here.

    Sunday, October 14th

    2:45pm – 3:45pm: Shape Your Future with MATLAB and the Arduino Engineering Kit: In collaboration with the MathWorks team and Jose Garcia, HW Engineer at Arduino, this talk will feature live demos of a robot designed and controlled with Arduino and MATLAB. More info here.

    4:15am – 5:45pm (Pavilion 9 – Room 11): CTC: Bring Open-Source into Your Classroom: In partnership with Campus Store Academy, this informative workshop will walk you through implementing Arduino in the classroom with Arduino CTC 101. Register here.

    Want to learn more? The entire agenda and all other important information is available on Maker Faire Rome’s website. Planning to attend? Save on admission using the code: MFR18EBGMT.

    Website: LINK
  • CasioKeyBot plays electronic keyboard with automated fingers

    CasioKeyBot plays electronic keyboard with automated fingers

    Reading Time: 2 minutes

    CasioKeyBot plays electronic keyboard with automated fingers

    Arduino TeamOctober 8th, 2018

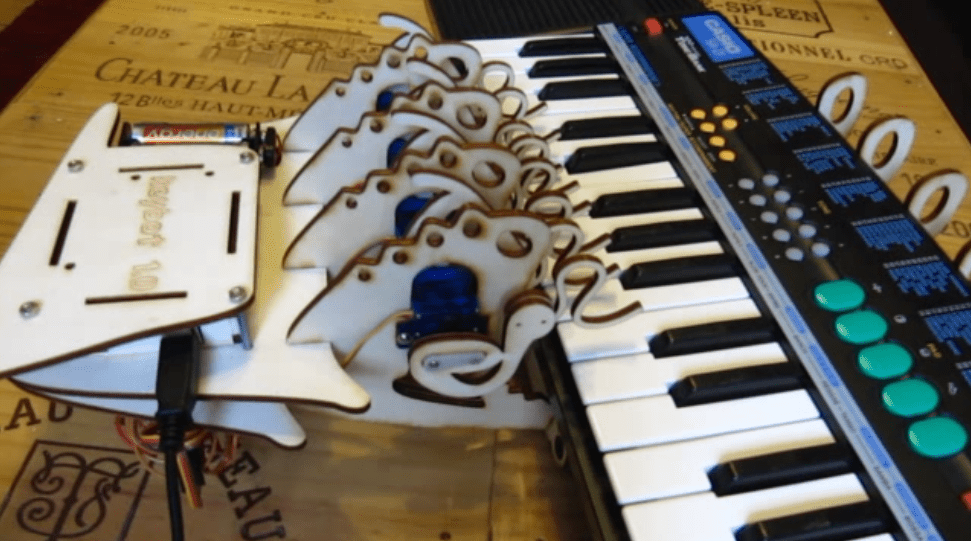
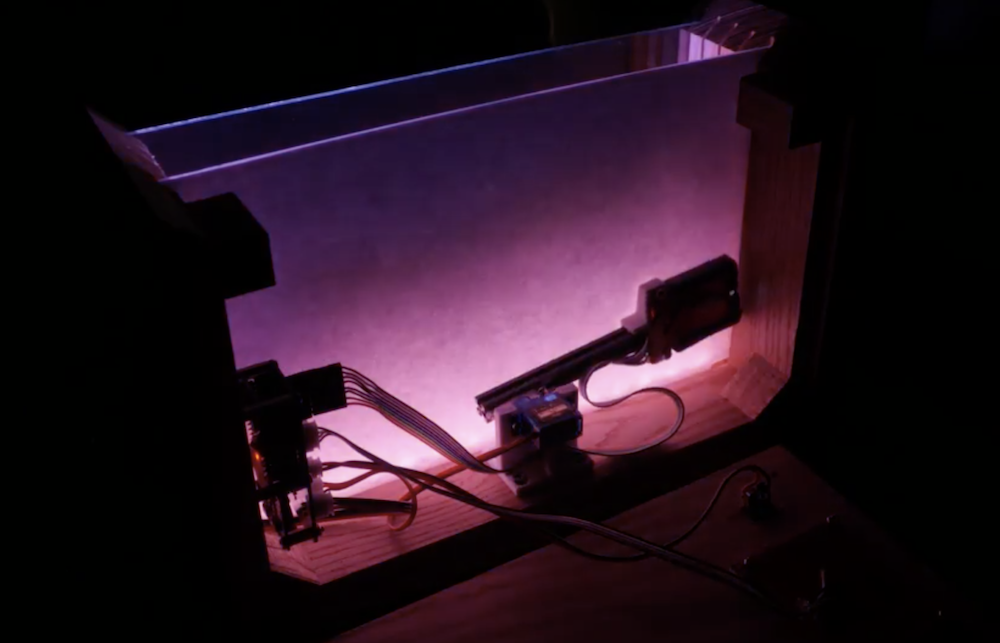
    Electronic keyboards have been around for many years, taking human input and translating it into a variety of sounds. In a strange twist on this technology, Igor Angst has decided to substitute a robot in to push the synthesizer’s keys, using a laser-cut finger setup controlled by an Arduino Uno.

    The MIDI sequence/notes to be played are supplied by a computer running ALSA (Advanced Linux Sound Architecture), and interpreted by a C program that translates it into USB serial signals that the Uno can use. It then actuates its wooden fingers, producing a pleasing tune along with apparently keyboard-provided accompaniment in the video below.

    I really like the crappy sound of those ‘80s toy keyboards. Unfortunately, I am a lousy live keyboarder and I only have so many hands. So I thought about adding MIDI capability to my good old Casio SA-21. The simplest way to do this is obviously building a robotized hand with 8 servo motors controlled by an Arduino microcontroller, which in turn receives its commands through the serial-over-USB interface sent by a tiny C application that connects to the ALSA sequencer world of my Linux live music setup.

    Laser cutter files are available on the project’s write-up and code can be found on GitHub.

    KeyBot playing on a CASIO SA-21 from Das Grind on Vimeo.

    Website: LINK
  • Twinky, the Arduino robot assistant

    Twinky, the Arduino robot assistant

    Reading Time: 2 minutes

    Twinky, the Arduino robot assistant

    Arduino TeamOctober 5th, 2018

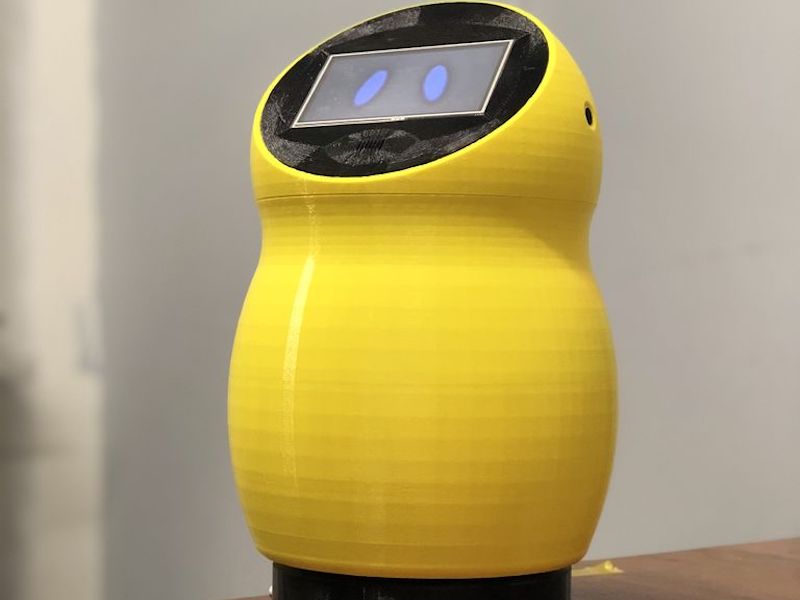
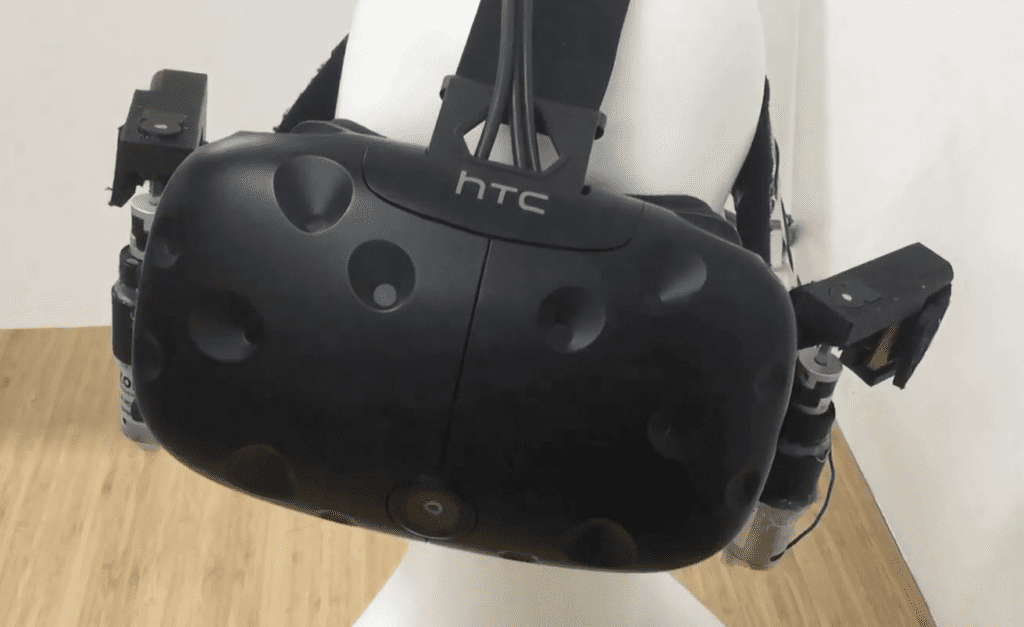
    In the middle of a project, you may find that what you’re making is similar to something that’s been done before. Such was the case with Adrian Lindermann when he started constructing his “Twinky” robot and found the Jibo social bot had a similar design. 

    Like any good hacker, he pressed ahead with his build, creating a small yellow companion that can respond to voice commands via a SpeakUp click module, along with pressure on its face/touchscreen.

    Control is provided by an Arduino Mega, and Twinky can interact with other devices using a Bluetooth module. The robot’s head can even turn in order to point the display in the needed direction, and it’s able to play sound through an audio amplifier and speaker. 

    IT CAN SPEAK! PLAY MUSIC, SET TIMERS, ALARMS, TURN ON/OFF THE LIGHTS OR OTHER APPLIANCES. IT HAS A CALCULATOR AND A WEATHER STATION! DATE & TIME, BLUETOOTH 4.0, EVERYTHING WITH VOICE COMMANDS!!! And also with a touchscreen, it has one little motor so it can turn around when one of the two microphones hear you talk or make a noise.

    For more on this wonderful little robot, check out the project’s write-up and and build files here.

    [youtube https://www.youtube.com/watch?v=NLzlS3UOq9Q?feature=oembed&w=500&h=375]

    Website: LINK

  • Measure noise levels in your home with the Hello Light

    Measure noise levels in your home with the Hello Light

    Reading Time: 2 minutes

    Measure noise levels in your home with the Hello Light

    Arduino TeamOctober 3rd, 2018

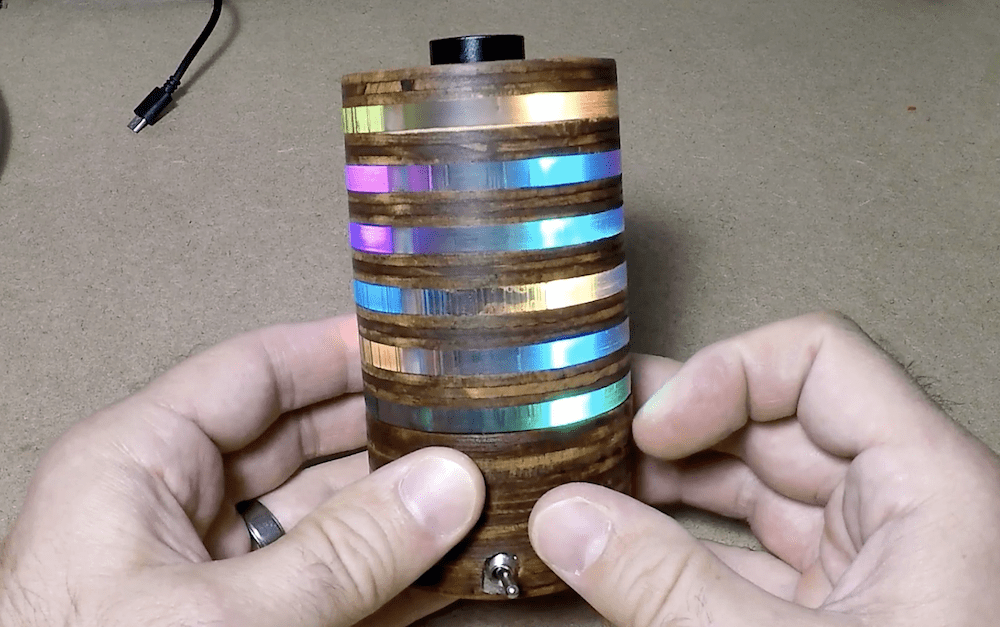
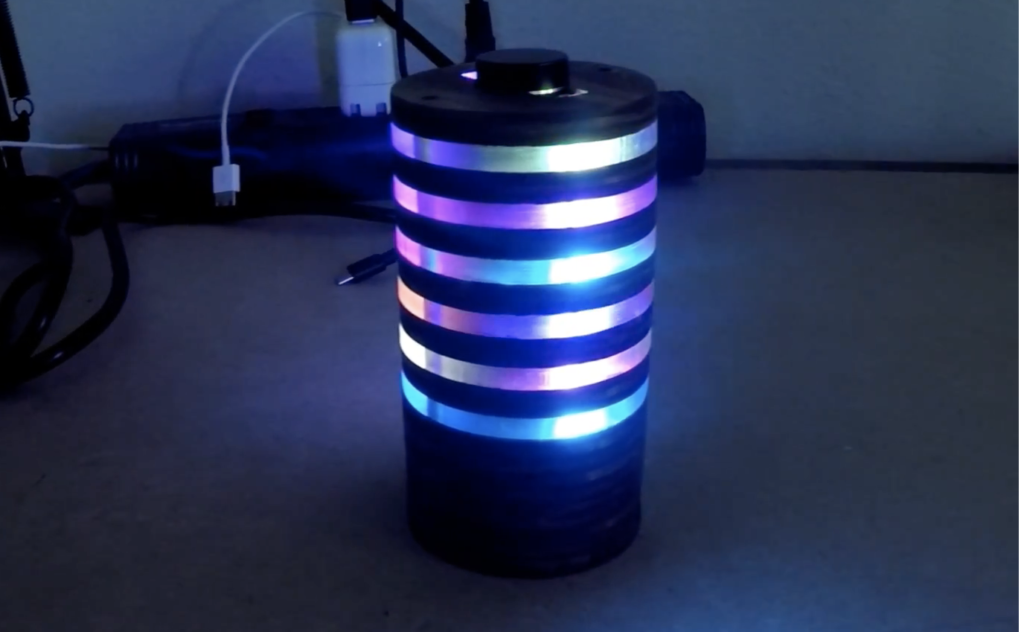
    After realizing that asking his kids to keep the noise down was meaningless without some sort of standard, maker Jeremy S. Cook decided to construct the “Hello Light.”

    This cylindrical device measures sound with an electret microphone and an Arduino Nano, then commands a set of RGBW lights to progressively light up depending on the noise level.  

    In the end, the Hello Light eventually ended up as more of a game to see who could trigger the flashing volume limit warning—not particularly effective for its intended purpose. It does, however, make a fun interactive decoration, and also features a random lighting mode, and a slowly blinking white light setting.

    Code for the project is available on GitHub, and the build process can be seen in the clip below.

    [youtube https://www.youtube.com/watch?v=hvRX9n95TBY?feature=oembed&w=500&h=281]

    Website: LINK

  • MobiLimb is a robotic finger that plugs into your smartphone

    MobiLimb is a robotic finger that plugs into your smartphone

    Reading Time: 2 minutes

    MobiLimb is a robotic finger that plugs into your smartphone

    Arduino TeamOctober 2nd, 2018

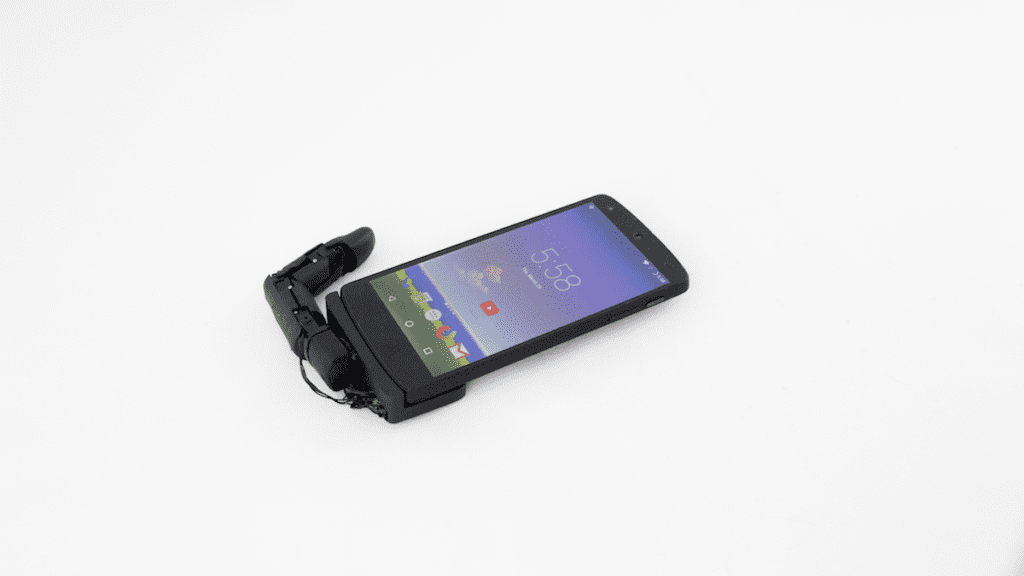
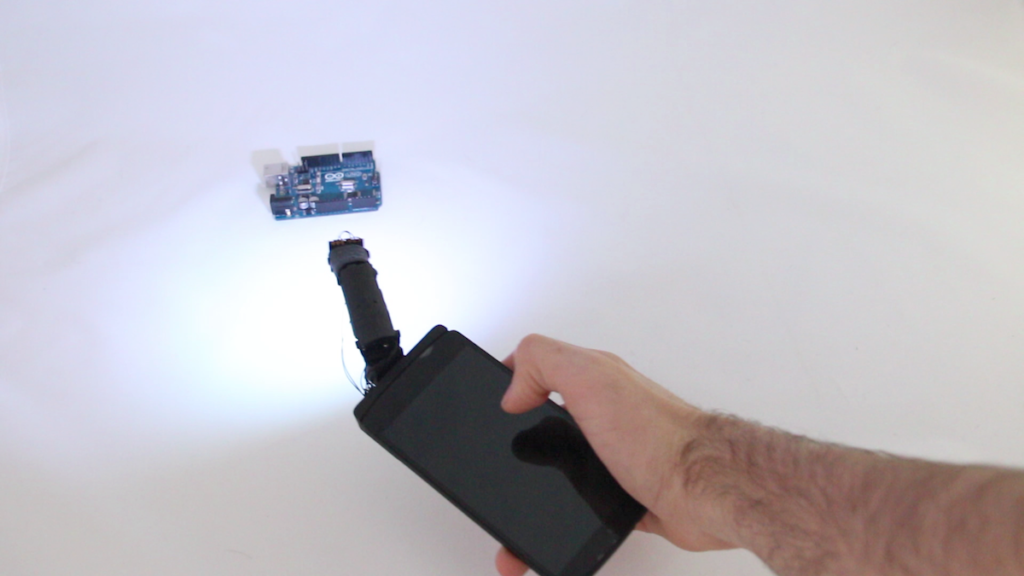
    You’re constantly poking and prodding your smartphone throughout the day, but have you ever wondered what would happen if this little computer could poke back? Well now that’s actually possible, with the MobiLimb accessory by Marc Teyssier and a team stretching across two universities in France.

    The device uses an Arduino to interface with the phone or other smart device via its micro USB port, and powers a servo-actuated robotic manipulator with five degrees of freedom. The servos give the artificial finger enough power to pull the phone itself across the ground, and for other interactions like acting as a physical avatar, propping the phone up as a stand, or even taking input as a joystick apparatus.

    MobiLimb is a new shape-changing component with a compact form factor that can be deployed on mobile devices. It is a small 5 DoF serial robotic manipulator that can be easily added to (or removed from) existing mobile devices (smartphone, tablet). In the spirit of human augmentation, which aims at overcoming human body limitations by using robotic devices, our approach aims at overcoming mobile device limitations (static, passive, motionless) by using a robotic limb.

    This approach preserves the form factor of mobile devices and the efficiency of their I/O capabilities while introducing new ones:

    • The users can manipulate and deform the robotic device (input)
    • They can see and feel it (visual and haptic feedback), including when its shape is dynamically modified by the mobile device.
    • As a robotic manipulator, it can support additional modular elements (LED, shells, proximity sensors).

    More info is available in Teyssier’s write-up, and you can see it in action in the video below.

    [youtube https://www.youtube.com/watch?v=Ej0B1dSnqOg?feature=oembed&w=500&h=281]

    Website: LINK

  • Talking Baymax inflatable robot greets kids at the pediatrician’s office

    Talking Baymax inflatable robot greets kids at the pediatrician’s office

    Reading Time: < 1 minute

    Talking Baymax inflatable robot greets kids at the pediatrician’s office

    Arduino TeamOctober 2nd, 2018

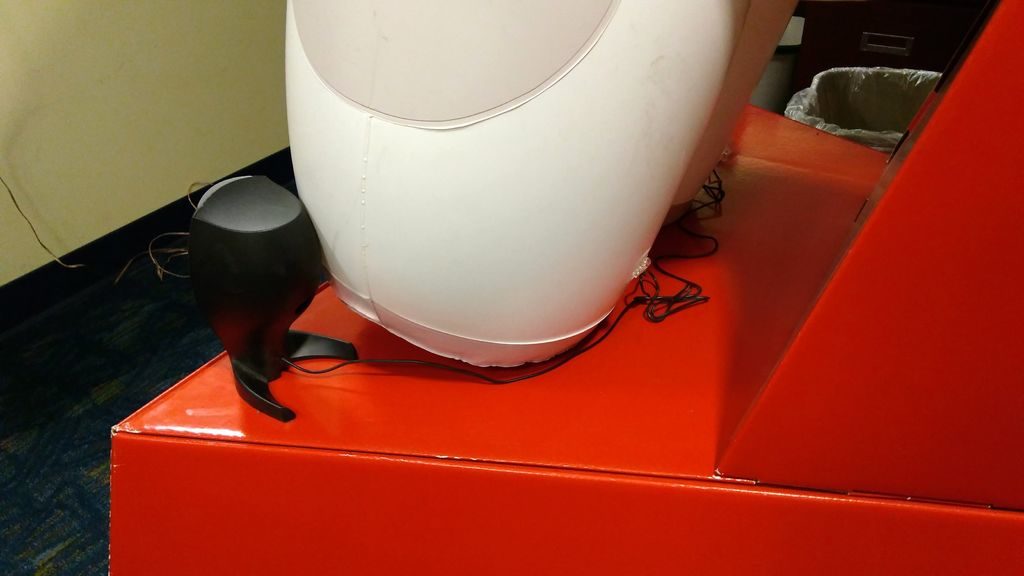
    At Jason Poel Smith’s local pediatrician’s office, they have a variety of movie posters and displays to help make the environment more welcoming to kids. The most popular of them all is a huge inflatable Baymax robot character from the Disney movie Big Hero 6. 

    While a beautiful display, Smith decided that what would make it even better is if it could talk, and went to work adding this functionality with an Arduino Uno, an MP3 shield, and a very large button. 

    Now when kids arrive, they can hit the button to hear Baymax welcome them to the office as their “personal healthcare companion” via a pair of powered speakers. 

    Arduino code and more info is available here, if you’d like to build something similar!

    Website: LINK
  • Augment RC vehicle control with an IMU-based transmitter

    Augment RC vehicle control with an IMU-based transmitter

    Reading Time: 2 minutes

    Augment RC vehicle control with an IMU-based transmitter

    Arduino TeamOctober 2nd, 2018

    When piloting a vehicle remotely, it’s only natural to tilt your controller one way or the other to “help” guide it in the right direction. While usually this has no effect whatsoever, YouTuber Electronoobs decided to take this concept and run with it, creating a remote control transmitter that responds to an onboard MPU-6050 inertial measurement unit.

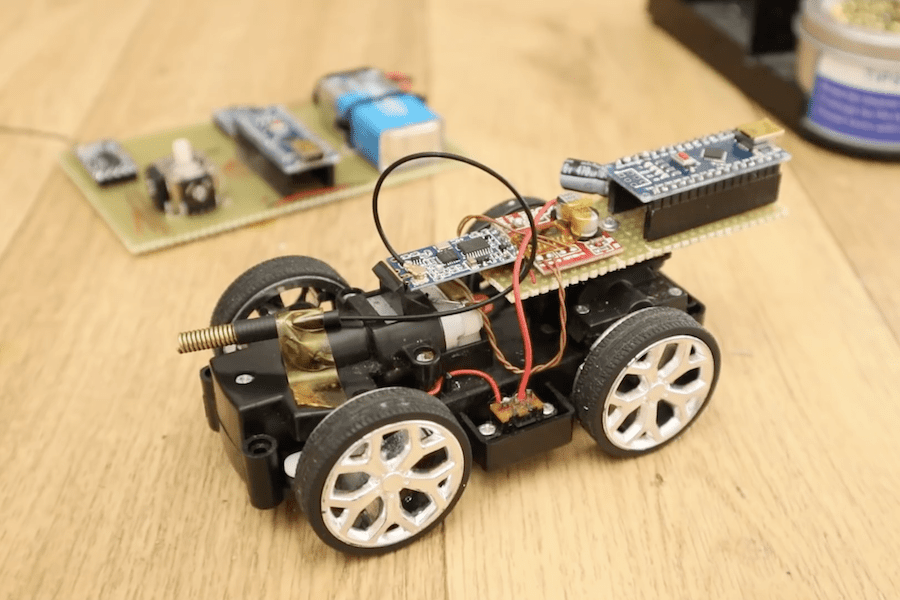
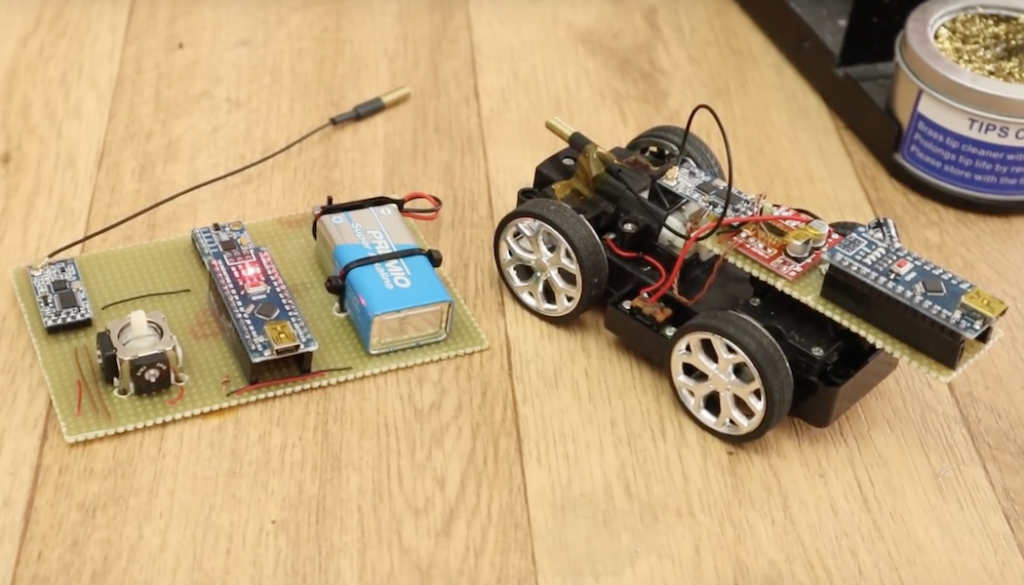
    The transmitter’s Arduino Nano takes movement data, and sends the corresponding signals to a custom receiver board on the RC car via a pair of HC-12 wireless modules. A second Arduino mounted in the car then commands the vehicle’s DC motors with the help of an H-bridge. 

    This is a radio controller that has 2 analog channels and the data is out from a MPU-6050 gyro module. So, we could control a toy car for example just by rotating the controller. I usually use the nRF24 module, but in this project I also want to show you how to use the HC-12 module. You will learn how to get the IMU data, how to use the HC-12 radio connection and how to control 2 DC motors using PWM signals and an H-bridge.

    It’s quite a versatile build, and it can even be set up to output PWM signals if you need to interface with more advanced electronics.

    [youtube https://www.youtube.com/watch?v=3GhNX7gTP4M?feature=oembed&w=500&h=281]

    Website: LINK