Schlagwort: tech

  • Keyboard dampener prototype aims to reduce typing injuries

    Keyboard dampener prototype aims to reduce typing injuries

    Reading Time: 2 minutes

    Keyboard dampener prototype aims to reduce typing injuries

    Arduino TeamNovember 29th, 2018

    While we don’t normally think of typing on a computer as a dangerous job, the U.S. Department of Labor reports that workers spend 25,000 hours away from work due to repetitive strain injuries, such as using a computer. Part of this could be due to the fact that the average computer user applies two to seven times the necessary force needed to activate a keyboard’s keys, slamming them down, then experiencing a sudden stop.

    In order to help cushion these small blows, researchers Alec Peery and Dušan Sorma at Ohio University have been exploring a mechanical keyboard concept with a 3D-printed dampener built in. Testing has been undertaken using the popular Cherry MX switches, with typing simulated by dropping a 150 gram cylinder from 125mm, then measured using an Arduino Uno and force sensing resistor.

    This paper is a demonstration of how 3D printing can be used to create a composite (plastic and rubber) keyboard switch that is ergonomically superior to a traditional injection moulded plastic switch. The prototype switch developed in this project aims to reduce impact forces from keyboard use exerted on user’s fingers by “cushioning” the act of bottoming out the switch during a key press. This concept is significant to industry because it aims to reduce overuse injuries caused from work on computer, a portion of the $20 Billion a year owed in worker compensation in the United States. A commercial Cherry MX keyboard switch has been modified through CAD modelling and 3D printing to incorporate damping regions in the lower half of the switch housing. The switch housings were simultaneously 3D printed with plastic and rubber and their force damping properties were tested with an Arduino UNO microcontroller and force sensing resistor resting on the key tops.

    The full research paper is available here.

    Website: LINK

  • Bit clicks away to illustrate complex interrelationships

    Bit clicks away to illustrate complex interrelationships

    Reading Time: 3 minutes

    Bit clicks away to illustrate complex interrelationships

    Arduino TeamNovember 29th, 2018

    Aseen here, Bit by Jonghong Park at the University of the Arts Bremen is a beautiful visualization of how everything is linked together using the Markov chain principle. This installation uses an Arduino Mega for control, rotating arms that hold a pair of microswitches around coaxial gear-shaped cylinders.

    In the sequence, one arm turns, then lobes on these “gears” that represent a two-bit number push the microswiches. This number is used to choose the following stepper to be turned in the sequence. The next selected arm then rotates in the same manner. This predictable cycle continues on and on clicking in a way that’s related, but not without careful observation.

    The installation ‘bit’ represents a natural random process based on the principle of a Markov chain. Each machine consists of “information” engraved on the read head and an “event” caused by the operation of the motor. Machines are linked together based on a Markov chain algorithm to influence events, and eventually we can predict which of the four machines will move in the next turn. The movements of these four machines are shown as a random process, but in fact they are sequence of events. Like an invisible chain, all things and events in our world are connected.

    Each of the four machines has its own state, which have been named ( 0,0 / 0,1 / 1,0 / 1,1 ), respectively. Each machine is equipped with a wooden read head with binary information on the surface and a microswitch to read the current state of the read head. The microswitch is connected to the stepper motors located in the center of the machine. A machine whose state is called moves the stepper motors by 1/240 of a degree. The microswitch turns on / off (1/0) along the surface of the read head each time the motor moves and calls the next machine corresponding to the state (2-Bit) of the current position of the read head. At this time, the machine corresponding to the measured state goes through the same process and calls another machine or itself.

    These four machines symbolize another system separate from ours. We observe machines separate from the world as if we were watching computer simulations. The binary digits recorded in the read head are the smallest units of unspecified information possible, called bits. The bit, as the smallest particle that can make up the world and not simply as a digital recording unit, symbolizes the basis of this world. The things that we call noise, the information that we think of as meaningless, the information from which we cannot find the pattern, and the information that we cannot decode are called “chance”. When this information can be observed from outside our own world, we have proven through the Markov chain that all events are linked together.

    The interplay concept is certainly interesting, and it’s pleasing to watch in the video below from a purely aesthetics point of view as well.

    [embedded content]

    Website: LINK

  • Suspend particles in midair with this acoustic levitation setup

    Suspend particles in midair with this acoustic levitation setup

    Reading Time: 2 minutes

    Suspend particles in midair with this acoustic levitation setup

    Arduino TeamNovember 29th, 2018

    Of course Styrofoam floats on water, but have you ever seen it float in midair? That’s exactly what Julius Kramer’s 3D-printed acoustic levitator does, using an array of 72 40kHz ultrasonic transducers to form standing waves of low and high pressure. When turned on, he’s able to simply insert a tiny foam ball which hovers like magic.

    If this seems familiar, his Arduino Nano-powered device is based on work by Asier Marzo, Adrian Barnes, and Bruce W. Drinkwater. What’s interesting about Kramer’s build is that he does a great job illustrating how it works, starting at around 3:00 with an oscilloscope, and continuing on with diagrams, and even a visualization of the waves using steam. He also shows off a miniature version at around 6:00, which while less capable, could make this type of project approachable for those that don’t feel like soldering six dozen small speakers together!

    [youtube https://www.youtube.com/watch?v=s1B-AKGadJA?feature=oembed&w=500&h=281]

    Website: LINK

  • Designing an omni wheel robot platform with Arduino

    Designing an omni wheel robot platform with Arduino

    Reading Time: < 1 minute

    Designing an omni wheel robot platform with Arduino

    Arduino TeamNovember 27th, 2018

    Omni wheels are devices that look like wheels with extra rollers positioned along their circumference. This allows robots to move forwards and backwards, as well as slide and spin depending on how the wheels are powered. Maker Jeremy S. Cook decided to create his own version, and after some consideration and careful design work, constructed a cylindrical frame out of MDF and PLA.

    The Roomba-like unit features an Arduino Nano, which controls four NEMA 17 stepper motors via Easy Driver boards, while a Bluetooth module enables smartphone operation. Once a few intermittent motion issues are worked out, the stepper motors should provide precise positioning for further robotics experimentation.

    [youtube https://www.youtube.com/watch?v=Z3M38egxzrE?feature=oembed&w=500&h=281]

    Code for the build can be found here.

    Website: LINK

  • Hack a cheap remote light switch with an Arduino Leonardo

    Hack a cheap remote light switch with an Arduino Leonardo

    Reading Time: < 1 minute

    Hack a cheap remote light switch with an Arduino Leonardo

    Arduino TeamNovember 27th, 2018

    Chris Lovett used a cheap remote plug to control his Christmas lights; however, when the fob’s A53G 12V battery died, he decided to go a different direction. Rather that just replace the battery, he hooked up an Arduino Leonardo for complete lighting automation.

    For this hack, he bypassed the onboard IC and instead sent a simulated signal produced by the Leonardo through the wireless transmitter. The appropriate signals were decoded by a logic analyzer, then sent using one output pin to power the transmitter and a second to output the correct pulses. Full automation was accomplished via a Python Script running on a computer to activate the Leonardo at sunset and sunrise. 

    [youtube https://www.youtube.com/watch?v=SLlqlntYcEg?feature=oembed&w=500&h=281]

    Arduino code can be found here, along with the Python script, if you’d like to try something similar.

    Website: LINK

  • Stream weather conditions to the cloud!

    Stream weather conditions to the cloud!

    Reading Time: < 1 minute

    Stream weather conditions to the cloud!

    Arduino TeamNovember 26th, 2018

    Weather reports on the news, your computer, or smartphone are very good—something that people 100 years ago could only dream of—but what if you want to know the exact weather in a fixed location from anywhere in the world? One solution would be Jakub Nagy’s excellent cloud-connected station.

    It uses an Arduino Uno to collect data from temperature, humidity, pressure, and UV index sensors, along with a Nano to read a rain gauge. The data, with images from a webcam, are passed along to a service called Weathercloud, where this report out of the Slovak Republic can be viewed remotely. 

    If you’d like to assemble a similar device to measure conditions in your area, instructions are available in his write-up, including a parts list that will run around $130.

    Website: LINK

  • Rotary phone transformed into home automation device

    Rotary phone transformed into home automation device

    Reading Time: 2 minutes

    Rotary phone transformed into home automation device

    Arduino TeamNovember 26th, 2018

    While once an essential communication tool, rotary phones in the wild are quite a rarity today. Still, they do hold a certain charm, and hacker Kristiaan N. decided to turn one of these units into a clever home automation interface.

    The original idea was to use the phone as a doorbell. Like many projects, this simple job turned into something much more involved, with an Arduino Nano and a bevy of complimentary electronics being installed in the housing. This allows it to respond to doorbell presses as intended, and it’s now also able to ring in different patterns via wireless input from a smartphone. 

    Most impressively, the modified phone can signal up to 10 devices using the rotary input, using the MySensors Arduino library and a Domoticz setup. The system’s capabilities are demonstrated in the video below, switching lights, and showing off its multi-ring capability.

    The current version features the following functions:

    • Doorbell function with simple button
    • MySensors integration with NRF24 radio
    • Wirelessly activate 5 different ringtones
    • Alarm signal
    • Working dial with 10 virtual switches

    The idea is basically that it will ring just like a old phone when somebody presses the doorbell button. If you don’t want any wires for that, you can just sent a command from any button attached to your Domoticz controller. You can also set your Domoticz controller to ring different ringtones for any events like a door that has open, or a set timer that has passed.

    The dial also acts like 10 virtual switches. Your Domitcz controller will see these as 10 different switches that will be turned on and immediately be turned off again. You can use this to trigger events like turning a light on, or set the heating to a different setpoint.

    The wireless function is done by the incredible MySensors library. In my opinion its one of the best platforms for home build sensors and actors. Its cheap to build, very reliable, and the possibilities are endless. You will need a MySensors gateway attached to your Domiticz controller. I’m using the USB version. Building one is very easy and doesn’t require knowledge of MySensors, Arduino, or electronics. If you just want the doorbell, don’t worry about all the other functions. Just leave out the radio and the connections to the dial. The Arduino code will work fine without.

    [youtube https://www.youtube.com/watch?v=cv_NBRw28k4?feature=oembed&w=500&h=281]

    Website: LINK

  • Upgrade a sewing machine into an automatic embroidery rig

    Upgrade a sewing machine into an automatic embroidery rig

    Reading Time: 2 minutes

    Upgrade a sewing machine into an automatic embroidery rig

    Arduino TeamNovember 26th, 2018

    A needle and thread is extremely useful if you need to fasten a few pieces of fabric or sew on a button, and a sewing machine takes things up several notches in speed an accuracy. This venerable machine, however, can now be enhanced with a trio of stepper motors under Arduino Uno GRBL control to take things to an entirely new level.

    The “Self-Made Embroidery Machine” employs a setup very similar to a 3D printer or CNC router. Two steppers move the fabric around, while a third actuates the needle. This allows the user to program in decorative shapes and patterns as shown in the video below, and the build process is well documented if you’d like to create your own!

    Sewing machine part is any old or new sewing machine. Only change for original is stepper motor with synchronised pulley system (chain/belt drive) and more embroidery friendly presser foot. It is recommended to use older sewing machine, way more convenient to mount stepper motor to cast iron and prices are relatively cheap.

    XY movement consists mainly 3D printed parts, 12 pcs and similar parts known from self build 3D printers. Both axes use GT2 belts, NEMA 17 steppers and both directions are fully scalable.

    Synchronous movement comes from Arduino powered GRBL G-code interpreter, it is mouthful, but basically machine moves using G-code send to Arduino. It is not that complicated and it is only carrier like any other one when going from system to another one.

    Now we have movement and code, but how to make nice shapes and export to G-code. It is nothing to do with medieval sorcery, it is a matter of downloading Inkscape and extension called Inkstitch.

    Help and examples how to use Inkstitch extension can be found address above. End result should be really close to hobby level embroidery machines, just slower speed. After all, embroidery machine is nothing more than overgrown sewing machine.

    [youtube https://www.youtube.com/watch?v=0lERsPc5gEk?feature=oembed&w=500&h=281]

    Website: LINK

  • Convert a Dremel tool into an Arduino-controlled CNC machine

    Convert a Dremel tool into an Arduino-controlled CNC machine

    Reading Time: 2 minutes

    Convert a Dremel tool into an Arduino-controlled CNC machine

    Arduino TeamNovember 26th, 2018

    3D printers get most of the attention in maker-fabrication news, but other computerized tools, like laser cutters and CNC routers, can also be extremely useful. In fact, Nikodem Bartnik decided to create his own Dremel-based machine constructed out of 3D-printed parts and aluminum profiles. 

    Electronics include an Arduino Uno and CNC stepper shield running GRBL for control, along with some NEMA 17 steppers and motor drivers, a relay for the Dremel, and a 12V / 30A power supply.

    As with many other projects, his build went through several iterations, but the final results—seen in the video below—are quite good. The machine, which only cost him around $300, is able to mill MDF and acrylic.

    If you’d like to make your own, Bartnik outlines his design in the first video below, then shows how to use it in the second. 

    [youtube https://www.youtube.com/watch?v=239aFAqYBpQ?feature=oembed&w=500&h=281]

    [youtube https://www.youtube.com/watch?v=TXEHunJmjcg?feature=oembed&w=500&h=281]

    Website: LINK

  • Customize your coffee cups with the Mug-O-Matic!

    Customize your coffee cups with the Mug-O-Matic!

    Reading Time: 2 minutes

    Customize your coffee cups with the Mug-O-Matic!

    Arduino TeamNovember 25th, 2018

    In order to inspire the next generation of scientists and engineers, Michael Graham (AKA EngineerDog) has come up with a robot that automatically draws on coffee mugs with a marker—and potentially much more. 

    In its nominal configuration, the Mug-O-Matic is controlled by an Arduino Nano with a custom TinyCNC board, and uses a trio of small servo motors for cup plotting.

    Additionally, the device can be reconfigured into a wide variety of robotic forms, and features 60+ compatible parts with which to do so. 

    Mug-O-Matic is a 3-axis drawing robot that can customize coffee mugs! This capable little robot can draw anything you want via manual control, Bluetooth, calculated algorithms, or even G-code. So you can enjoy your custom mug creation, then wipe it clean. You could make it totally different every day for a year, and not make the same thing twice!

    Its little buddy, the Desktop Sentry, is a pan-tilt turret that guards your desk! Also controlled via joystick, Bluetooth, algorithms, or G-code, this device can automatically guard your space with a laser or a rubber band launcher, or be used for light writing.

    The intent of this project is to produce fun and accessible educational tools. We want to encourage people to engage in tinkering and making things, because the creative process is a powerful way to learn.

    [youtube https://www.youtube.com/watch?v=qGnSIqSJ9gQ?feature=oembed&w=500&h=281]

    If you’d like to get to work on your own Mug-O-Matic, more info can be found here, including a parts list for the build. It is also slated for a release on Crowd Supply, which will likely make things easier and less expensive if you’re willing to wait!

    Website: LINK

  • (Almost) autonomous kids’ vehicle with Arduino

    (Almost) autonomous kids’ vehicle with Arduino

    Reading Time: < 1 minute

    (Almost) autonomous kids’ vehicle with Arduino

    Arduino TeamNovember 14th, 2018

    While the world seems to be focusing on self-driving cars, maker Sieuwe Elferink has instead turned his attention to creating a semi-autonomous kids’ four-wheeler. As of now, the modified device can steer itself within a set of lines, and stop for pedestrians and inanimate objects.

    The augmented vehicle uses an Arduino Nano for control, plus a pair of TCRT5000 sensors attached to tubing on the sides to pick up boundary lines. Obstacle avoidance is via an ultrasonic sensor on the front. Four relays are used to activate a former windshield wiper motor for steering through a chain and sprocket system, along with the vehicle’s original motor for propulsion.

    The build process is documented here, while code and an electrical schematic is available on GitHub.

    [youtube https://www.youtube.com/watch?v=bVIsolkEP1k?feature=oembed&w=500&h=281]

    [youtube https://www.youtube.com/watch?v=x573-DXd6lk?feature=oembed&w=500&h=281]

    Website: LINK

  • Creep out guests with an Arduino-controlled teddy bear

    Creep out guests with an Arduino-controlled teddy bear

    Reading Time: < 1 minute

    Creep out guests with an Arduino-controlled teddy bear

    Arduino TeamNovember 14th, 2018

    Halloween has become something of a hacker holiday, giving creative people the world over a chance to show off their spooky animatronic inventions outside without neighborhood scrutiny. This year, Instructables user “gocivici” created a display inspired by the doll in a rocking chair featured in the movie Annabelle, but decided to use an Arduino-infused teddy bear instead. 

    The setup is simple but effective, using an Arduino Nano and solenoid to rock the chair. The bear’s head rotates using another Arduino board—an Uno this time—along with a second solenoid and 3D-printed assembly stuffed inside. Control is accomplished via a small wireless remote, though a motion sensor could also be employed.

    [youtube https://www.youtube.com/watch?v=R9Il16HriTQ?feature=oembed&w=500&h=375]

    Website: LINK

  • Arduino PRO Gateway for LoRa now available for pre-order

    Arduino PRO Gateway for LoRa now available for pre-order

    Reading Time: 2 minutes

    Arduino PRO Gateway for LoRa now available for pre-order

    Arduino TeamNovember 14th, 2018

    We are very happy to announce the Arduino PRO Gateway for LoRa!

    Combined with Arduino MKR WAN 1300 IoT nodes, it makes an ideal solution for a wide range of applications, like smart agriculture, smart cities and building automation – and many other remote monitoring use cases requiring long range, low power wireless connectivity.

    The gateway can be used globally and enables multiple channel management. By supporting advanced features like Listen Before Talk (LBT), it allows users to transmit at higher power on the first free channel, achieving longer ranges than conventional gateways for LoRa. 

    Arduino continues its mission of making complex technology easy enough for anyone to use. Customers of the Arduino PRO Gateway will be given exclusive beta access to the Arduino IoT Cloud, which makes installation, provisioning and remote management of the gateway incredibly simple through the popular Arduino Create cloud platform.

    The gateway features the advanced Embit EMB-LR1301-mPCIe module, hosted by a Raspberry Pi 3 B+ SBC, in a rugged aluminum enclosure. The gateway comes pre-installed with an optimized packet forwarder and a carrier grade Network server for LoRa WAN that is running on the Arduino Cloud provided by A2A Smart City (part of the A2A Group).

    Technical Specifications

    • Chipset: Semtech SX1301
    • Modulation: LoRa Spread Spectrum, FSK, GFSK 868MHz (EU) / 915MHz (US)
    • Number of Channels: 8 LoRa Channels
    • Operating Frequency: 868MHz (EU) / 915MHz (US)
    • Frequency Range: 860MHz to 1020MHz
    • Operating Temperature: -40°C to +85°C
    • RF Output Power: Up to +27dBm
    • Sensitivity: Up to -137dBm
    • Interfaces for the LoRa Module:  mPCIe (SPI / I2C / UART / GPIOs) :
    • Dimensions: 71x40x1mm
    • Operating Voltage: +5V
    • Additional Features:
      • Listen Before Talk (LBT) Capability (for improved transmission power management),
      • On-board uFL antenna connector
      • FPGA support for LoRa Spectral Scan

    The Arduino Pro Gateway for LoRa (868 MHz , EU version) can be pre-ordered from the Arduino Store.

    Website: LINK

  • Dual Arduino “CNC” control

    Dual Arduino “CNC” control

    Reading Time: 2 minutes

    Dual Arduino “CNC” control

    Arduino TeamNovember 13th, 2018

    Generally when you work with CNC machinery, you program it on a computer, then allow a controller to automatically run through a cutting routine. Arduino boards have long been used for this kind of control through the grbl software package, but YouTuber Electronoobs decided to do things a bit differently.

    His setup takes input from a potentiometer and several buttons, enabling manual control of his stepper motor-driven router. An Arduino Nano powers the motors through a pair of stepper drivers, while a second Nano is then used to output distance information on an LCD screen, letting him view exactly where his cutter is at a glance.

    Why use 2 Arduinos? Well, if I use only one, the code would be very difficult with too much interruptions. We have to create pulses for the motors and print on the LCD at the same time. I’ve done that and each time I was printing on the LCD, there was a small pause in the motor rotation, and if the refresh rate is fast, the motors will have a pause each time and we don’t want that. That’s why I use 2 Arduinos. One will create the pulses for the motors and the other one will count the steps and print the distance and speed.

    We have 2 step motors. I’ve used NEMA 17. Each with a A4988 driver. This driver needs 3 signals from the Arduino. Enable, direction and steps. The enable pin is connected to a toggle switch so we could start to stop the motors manually. The toggle switch is also connected to the Arduinos so we could know when the motors are enabled or not. To control speed we use a lineal potentiometer and to move axis and reset position, some push buttons with pulldowns. To print the distance, I’ve used an I2S LCD screen of 20×4 but you will have the code for the 16×2 version of LCD as well.

    Besides adding a nice readout to the machine, this concept could certainly form the basis for all manner of other stepper-driven devices.

    [youtube https://www.youtube.com/watch?v=r4s-v2ZJy-Y?feature=oembed&w=500&h=281]

    Website: LINK

  • Arduino Mega controls this amazing water organ

    Arduino Mega controls this amazing water organ

    Reading Time: 2 minutes

    Arduino Mega controls this amazing water organ

    Arduino TeamNovember 7th, 2018

    Earlier this year, artist Niklas Roy was invited to participate in the Drehmoment art festival that takes place in the south-west of Germany. The “catch” to this festival is that each artist was invited to team up with a local company to take advantage of their products and resources. Of these was cleaning equipment brand Kärcher, known for their pressure washers.

    With this company’s backing, Roy put together a musical water fountain powered by eight pressure washers, dubbing it the “Wasserorgel von Winnenden,” or “Water Organ of Winnenden”—the location of Kärcher’s headquarters. 

    The installation is controlled by an Arduino Mega, along with supporting electronics including a Music Maker Shield and solid state relays to activate the pressure washers. During the festival, passerby were invited play some tunes using a 3D-printed keyboard made to withstand the elements and less-than-gentle interactions.

    The brain of the Wasserorgel was an Arduino MEGA 2560, stacked with an Adafruit Music Maker Shield. The MIDI synthesizer of the shield generated the instrument sounds based on the input coming from a self-built, 3D-printed keyboard. The keyboard was designed solid enough to withstand weather and the misguided enthusiasm of drunk people at 3 ‘o clock at night. The program on the Arduino translated the keystrokes into water and light effects by switching 12V RGB LEDs via darlington transistors and the eight pressure sprayers via solid state relays. Five of the pressure sprayer fountains were installed on top of the main basin, one was installed on top of an existing fountain and two were installed on the roof of the Kronenplatz-building.

    You can find more information in Roy’s project write-up, and see it in action below!

    [youtube https://www.youtube.com/watch?v=Erm-MfetKx8?feature=oembed&w=500&h=281]

    Website: LINK

  • Vintage-style clock made from individual LEDs

    Vintage-style clock made from individual LEDs

    Reading Time: 2 minutes

    Vintage-style clock made from individual LEDs

    Arduino TeamNovember 6th, 2018

    If you’ve ever wanted a vintage-style timepiece, or to test your soldering abilities, this clock by YouTuber Electronoobs will let you do both at once. 

    It features four display modules that resemble Nixie tubes, each made out of LED filaments soldered onto a steel wire frame. If you find soldering enjoyable and relaxing, this is likely a good project for you; though if not, there are of course other options. 

    The device is controlled by an Arduino Nano, along with a MAX7219 display driver to power the LEDs as needed. An RTC module keeps things “ticking” at the correct pace, and a pair of buttons on top of the wooden enclose allow the time to be adjusted as needed.

    I’ve made some “Nixie” tubes. These are actually 7-segment displays made with filament LEDs but placed in a plastic bottle so it will have a more vintage nixie look. To control the LEDs I’m using the MAX7219 driver that could control 4 x 7-segment displays. To get the real time, I’m using the DS3231 module that works with an I2C communication so it’s easy to use. The project also has 2 push buttons to set the hour and minute. All is inside a wood case painted with varnish so it will look more vintage.

    Check it out in the video below, or see the build write-up for more info.

    [youtube https://www.youtube.com/watch?v=LkrGmI_SAOs?feature=oembed&w=500&h=281]

    Website: LINK

  • RDR2 upgrade for the PS5 and Xbox Two could be ready by 2020

    RDR2 upgrade for the PS5 and Xbox Two could be ready by 2020

    Reading Time: 4 minutes

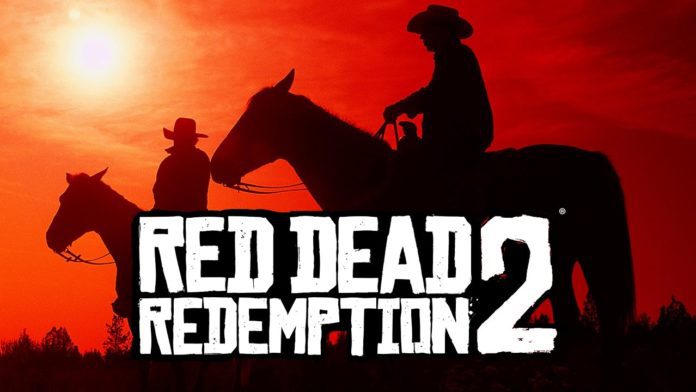
    PS5 release news this week includes details on how one of the most highly anticipated games for PS4 and Xbox One is being primed for a big PlayStation 5 upgrade. This week has seen new rumours surface that claim one of the biggest games from PS4 and Xbox One could be ready in time for the PS5 release date.

    It’s well known just how popular the PS4 and PS4 Pro consoles have proven with gamers, with over 86 million units sold so far.

    Sony has even updated their profits forecast due to the success of the PlayStation brand, which has been driven by hardware sales and the PS Plus subscription service.

    And according to new reports, a huge new port is currently in the works for the PlayStation 5.

    The PS5 release date has not been confirmed by Sony, who have only gone as far as to say that a next-gen project is in the works.

    Rumours suggest that the PlayStation 5 will be officially announced in 2019, followed by a launch in 2020.

    Other predictions claim the PS5 could launch next year, with respected analysts Ace Securities saying it could be “introduced” by the end of 2019.

    And when it does, it could boast a big Red Dead Redemption 2 port.

    A new online “source” says that an RDR2 upgrade for the PS5 and Xbox Two could be ready by 2020.

    And if this proves true, it would mean it being available the same year the PS5 will reportedly launch.

    It should be noted that this news doesn’t come from either company and means that it needs to be taken with a big pinch of salt.

    Rockstar Games did a similar thing with GTA 5, launching a new version of the game for PS4 and Xbox One, as well as PC.

    These became the new standard, with many fans deciding to buy the game again on the newer consoles.

    However, while Rockstar Games has a track record in doing these kinds of projects, it doesn’t prove this latest rumour true.

    The post from Reddit reads: “Below is some information I obtained from a friend of mine who works at Rockstar.

    “They gave me permission to post this as they are 100% confident that enough Rockstar employees know of the information that it won’t trace back to them.

    “Some will be sceptical, and I understand, but all I can say is that I’ve been around for a while, have over 60k karma, have been gifted gold several times for my posts, and have never made a post with false information.”

    Here are the main points from the post, which states:

    Following Red Dead Redemption 2 going gold a relatively small group of employees immediately began work on a remaster which will release at the end of 2020 to coincide with the release of next-gen consoles (Rockstar had to pull back on a lot of things because of current-gen limits, as surprising as it may sound given how amazing it looks)

    Most of Rockstar has begun working full-time on Bully 2, which will release in the first half of 2020; this seems soon, but they already have the engine in place and plan to have a game-world that’s only slightly bigger than the first Bully, allowing them to finish the game much faster than GTA or Red Dead.

    Preliminary work has begun on GTA VI, but it won’t be until the release of Bully 2 that pretty much all of Rockstar will focus on it, similar to what they did with RDR2.

    The plan is to release GTA VI in at the end of 2023, but the team knows that 2024 may be a more realistic goal.

    Whatever the validity of this new rumour, it would undoubtedly prove very popular with fans if this was real.

    The likelihood that a new version of Red Dead Redemption 2 will be released for PS5, Xbox Two and PC does seem high.

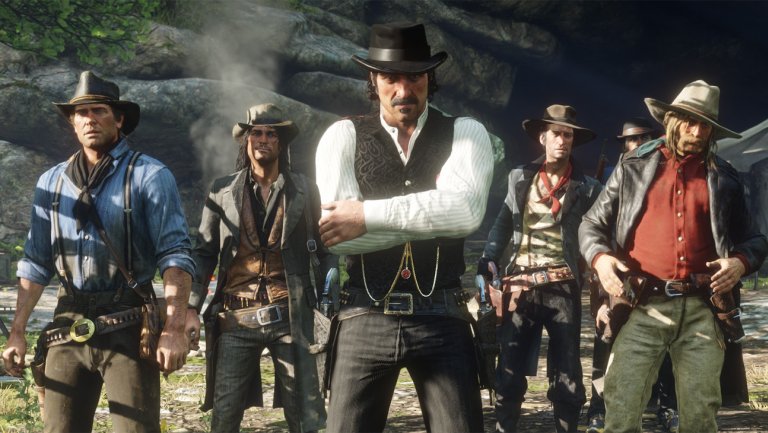
    The game has proven a big hit on PS4 and Xbox One, having sold enough copies to make it comparable to GTA 5.

    While not surpassing Grand Theft Auto in overall sales during the first three days, it has been revealed that the game has broken some major milestones.

    Sony Interactive Entertainment (SIE) has confirmed that Red Dead Redemption 2 set new records on the PlayStation Network for highest ever pre-orders, highest day one sales and highest sales for the first three days on the market.

    And with over $725 million in worldwide retail sell-through during its first three days, Red Dead Redemption 2 is the second-highest grossing entertainment launch of all time next to Rockstar Games’ previously released title, Grand Theft Auto V, which achieved over $1 billion in retail sell-through in three days.

    Website: LINK

  • Dad-daughter MechWarrior suit ready for trick-or-treating

    Dad-daughter MechWarrior suit ready for trick-or-treating

    Reading Time: < 1 minute

    Dad-daughter MechWarrior suit ready for trick-or-treating

    Arduino TeamOctober 31st, 2018

    The idea of a mechanized walking suit to carry you around seems like a great idea, but having a practical leg assembly for it is still a futuristic concept. As seen here however, if you’re still a kid, you might be able to get your dad to carry you around in a custom suit fashioned after a MechWarrior vehicle.

    The suit is beautifully designed by creator Gridlock Cosplay, and features an Arduino-powered control system. This allows the little pilot to command the mech’s human “engine” via a joystick and system of lights. The suit also features exterior and interior lights, a pilot cooling fan, spinning “radar” assembly, retractable pilot cage, and of course a cell phone holder in the padded engine compartment.

    [youtube https://www.youtube.com/watch?v=rCpMaoVx4uY?feature=oembed&w=500&h=281]

    Website: LINK

  • Linear movement with Arduino and 3D printing

    Linear movement with Arduino and 3D printing

    Reading Time: 2 minutes

    Linear movement with Arduino and 3D printing

    Arduino TeamOctober 29th, 2018

    Arduino boards are great for controlling small servo motors, but what if you need something to provide linear travel? As spotted on Reddit, while the answer here is a little less straightforward, YouTuber Potent Printables has a great solution. It uses 3D-printed components, along with a dab of epoxy and fastener hardware to convert either a micro or standard continuous rotation servo into a rack-and-pinion mechanism.

    The project can be seen in the video below with an Arduino Uno and motor shield, though any Arduino capable of PWM output should have no problem with this setup. Since the servos used here are meant for continuous rotation, travel distance is based only on timing. Depending on the application, you may want add a simple microswitch or other sensing mechanism for feedback.

    This is a general purpose linear servo actuator (pusher style). Two sizes have been designed, for different space constraints and force outputs.

    These use continuous rotation servos which helps keep the cost very low. Off the shelf actuators of this type can cost around $70 USD.

    The “mini” version will fit in smaller spacers, but has a much lower force output. The “large” version has a higher force output, but is…larger in size than the “mini.”

    [youtube https://www.youtube.com/watch?v=2vAoOYF3m8U?feature=oembed&w=500&h=281]

    Website: LINK

  • Dragon Ball Z head-mounted Scouter computer replica

    Dragon Ball Z head-mounted Scouter computer replica

    Reading Time: 2 minutes

    Dragon Ball Z head-mounted Scouter computer replica

    Arduino TeamOctober 26th, 2018

    Those familiar with the Dragon Ball Z franchise will recognize the head-mounted Scouter computer often seen adorning character faces. As part of his Goku costume, Marcin Poblocki made an impressive replica, featuring a see-through lens that shows the “strength” of the person he’s looking at, based on a distance measurement taken using a VL53L0X sensor. 

    An Arduino Nano provides processing power for the headset, and light from a small OLED display is reflected on the lens for AR-style viewing.

    It’s not exactly perfect copy but it’s actually working device. Inspired by Google virtual glasses I made virtual distance sensor.

    I used Arduino Nano, OLED screen and laser distance sensor. Laser sensor takes readings (not calibrated yet) and displays number on OLED screen. Perspex mirror reflects the image (45 degrees) to the the lens (used from cheap Google Cardboard virtual glasses) and then it’s projected on clear Perspex screen.

    So you will still see everything but in the clear Perspex you will also see distance to the object you looking at. On OLED screen I typed ‘Power’ instead distance because that’s what this device suppose to measure in DBZ. 😀

    Print files as well as code and the circuit diagram needed to hook this head-mounted device up are available on Thingiverse. For those that don’t have a DBZ costume in their immediate future, the concept could be expanded to a wide variety of other sci-fi and real world applications.

    Website: LINK

  • Constructing an hourglass lamp with Arduino

    Constructing an hourglass lamp with Arduino

    Reading Time: 2 minutes

    Constructing an hourglass lamp with Arduino

    Arduino TeamOctober 26th, 2018

    With the proliferation of all sorts of digital timers, the need for an hourglass to keep track of whatever activity you’re working on seems like a relic of the past. Still, the hourglass is an interesting form factor, so YouTuber Emiel Noorlander (aka The Practical Engineer) has decided to take it into the 21st century.

    His device is about the size and shape of a rectangular picture frame, with the outline of an hourglass in wood attached to white polycarbonate. This diffuses programmable LEDs on the other side, controlled by Arduino Nano to simulate sand falling. The project is powered by a four AA battery pack, cleverly allowed to float in the internal structure, activating the on/off switch when positioned correctly.

    In this week’s video I’m making an hourglass lamp with light effects that simulate the falling sand when you turn the lamp upside down.

    Another cool feature I build into it is the on / off switch, this is hidden inside the lamp and turns on by putting the lamp on the right side. Turning it upside down then turns off the light.

    The outside frame of the lamp is made of 40×6 mm metal strip that I cut to size and then welded as a frame. When this was done I went over to the bandsaw to cut the hourglass shape out of the wood. The semi-transparent panel where the light shines through is made from 3 mm opaque white polycarbonate sheet.

    [youtube https://www.youtube.com/watch?v=YDdSF9bRtMA?feature=oembed&w=500&h=281]

    Website: LINK

  • Salvaged Arduino powers animated House Party

    Salvaged Arduino powers animated House Party

    Reading Time: 2 minutes

    Salvaged Arduino powers animated House Party

    Arduino TeamOctober 25th, 2018

    What can you do with items that are destined for the dump? As seen here, if you’re Neil Mendoza, you transform old furniture, TVs, computers, art, and even an Arduino Zero that somehow ended up in the trash into a musical installation.

    His resulting “House Party” features decorations and control components that according to the project’s write-up are entirely salvaged. A MIDI interface, software written in openFrameworks, and a JSON file are used to coordinate sound and movements, which include spinning picture frames and flowers, tapping shoes, and a television that loops through a rather dreary weather report snippet. 

    House Party is a musical installation that explores prized possessions in their native habitat. All the materials used to create this artwork, from the furniture to the computers, were scavenged from the discarded trash. The music is a mix of mechanical and synthesized sounds. The piece was created while an artist in residence at Recology SF.

    The actuators in the installation are controlled by an Arduino Zero (also found in the trash) and each screen is connected to a computer running custom software written in openFrameworks (OF). Composition was done in Logic where a MIDI environment was set up to send MIDI data to the Arduino and an OF control program. The control program then sent the data to the other computers over ethernet as OSC. For the final installation, the control program read the data from a JSON file, triggered the screens and Arduino and played the synthesized parts of the music.

    Be sure to see all the zany action in the video below!

    [embedded content]

    Website: LINK