Schlagwort: tech articles

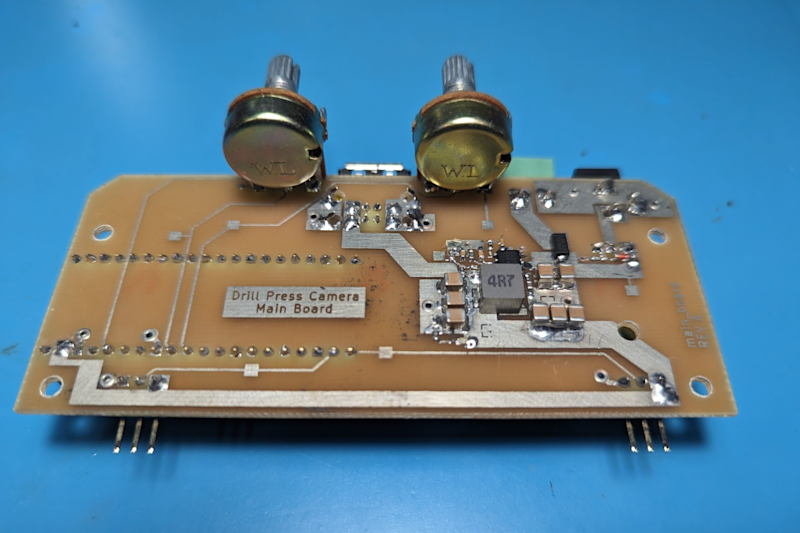
  • Drill Press Camera

    Drill Press Camera

    Reading Time: 3 minutes

    Practicalities

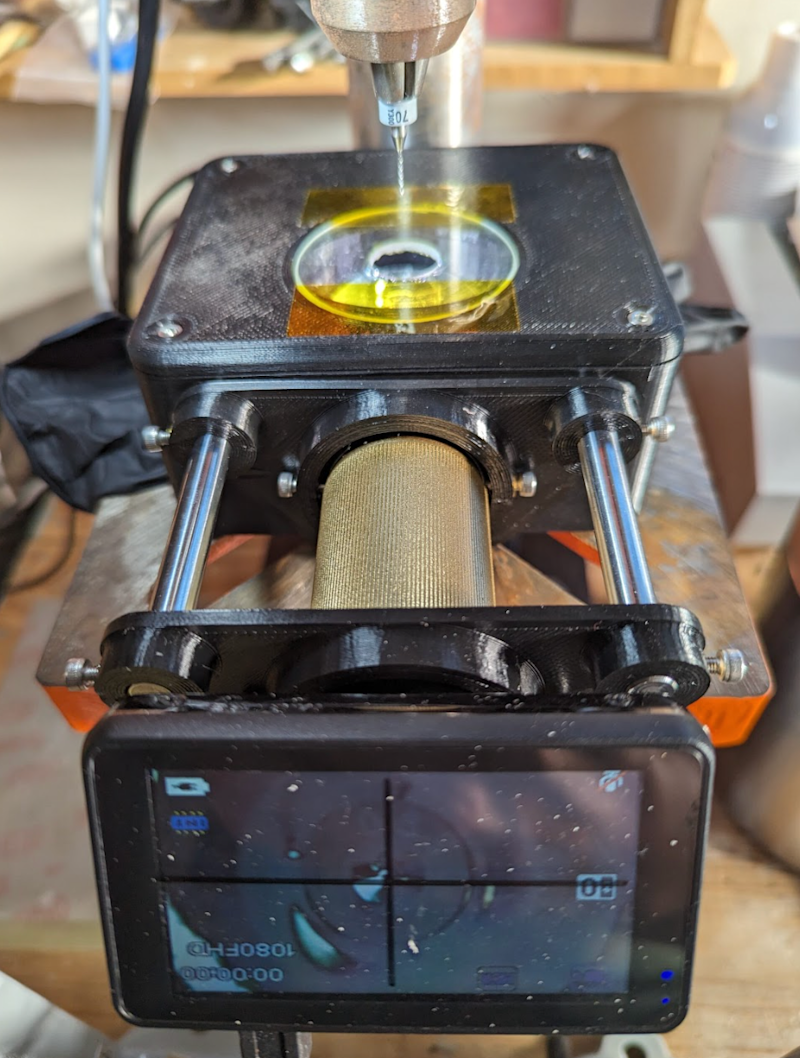
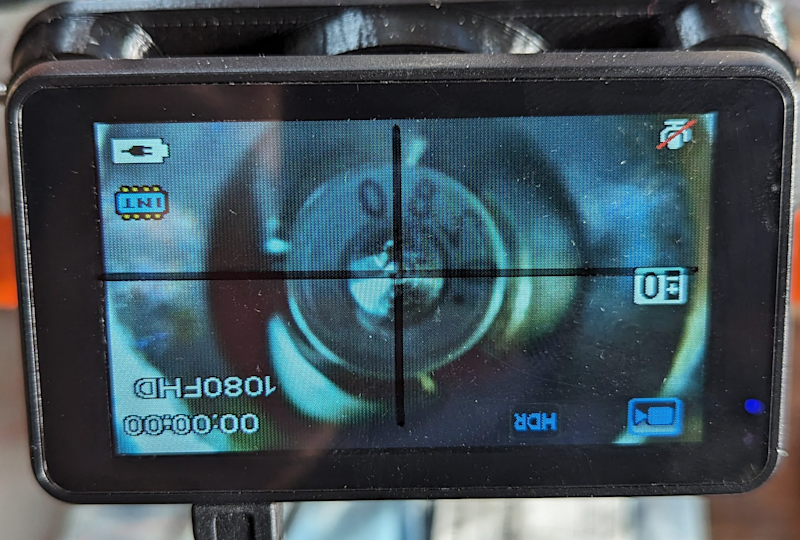
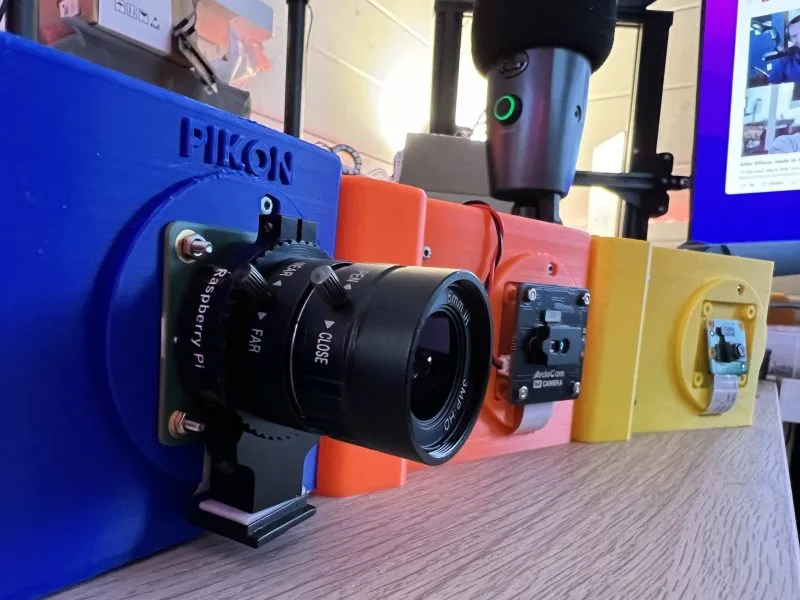
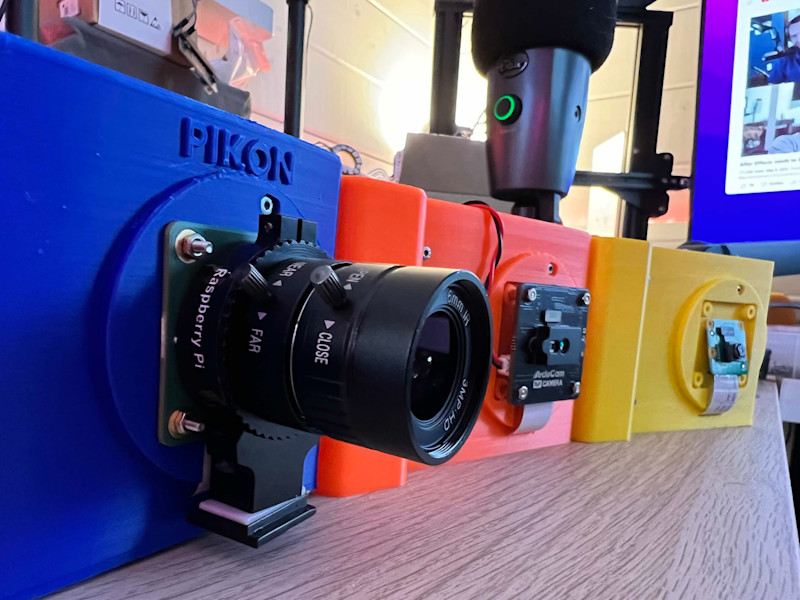
    John’s project works by using an angled, mirrored periscope to point a microscope camera at the underside of a drilling platform. “The position of the Drill Press Camera is adjusted until the crosshairs on its screen are lined up with the centre of the drill bit,” he says. “Once a PCB is placed on top of the drilling platform, the user can see a magnified view of the traces and intended drilling location.” Since the position where the drill bit will make a hole is indicated by the crosshairs on the camera screen, “lining up holes with the centre of the drill bit is about as easy as point and shoot.”

    Connected to Pico, a custom PCB features two potentiometers to adjust the colour and brightness of the LEDs

    A Raspberry Pi Pico is used to control the LED strips that illuminate the underside of the PCB, and John has written a simple MicroPython script that “reads brightness and hue values from two potentiometers on the control board, and sends the corresponding NeoPixel commands to the high-density LED strips embedded in the periscope.” John wanted the ability to dim the LEDs and also added colour control: “With some experimentation, I found out that controlling the colour of the LEDs was a cool way to improve contrast on some material types.”

    Reviving concepts

    John estimates that he is now twice as fast at drilling holes than when he was aligning by eye, and “my holes are also much more accurate.” Unsurprisingly, the project has garnered a good deal of enthusiastic reaction, especially regarding the periscope configuration. “One [Hackaday] user pointed out that I had pretty much reinvented something from the 1970s called a ‘Target Drill’, which is pretty cool.”

    A periscope-style section features an angled mirror to enable the camera to see the underside of the platform

    John is more than happy to have reintroduced a drilling concept to a new generation: “There’s a lot of really neat fabrication equipment from the good old days, when people made PCBs by hand, that has since faded away.” After taking this project to Open Sauce in San Francisco earlier this year, he found that “lots of maker types were curious about it, and then quite enthusiastic about the concept once they saw how it worked! Drilling precise holes in flat things is apparently not a problem that is unique to PCB fabrication.”

    If you’d like to build your own, John is more than encouraging, claiming this design is easy to build if you have access to a 3D printer and some soldering supplies. “Most of the stuff is pretty easy to get, but I’ve only been able to find one supplier for 2-inch glass circles of the right thickness. Since the microscope camera’s field of view passes almost entirely through the hole drilled in the glass disc, I think that a 3D-printed disc with a hole in it could substitute for the custom glass part just fine.” Go forth and create, as John would love to see what you come up with.

  • CM4 XGO-Lite Robot Dog Kit review

    CM4 XGO-Lite Robot Dog Kit review

    Reading Time: 2 minutes

    Smart dog

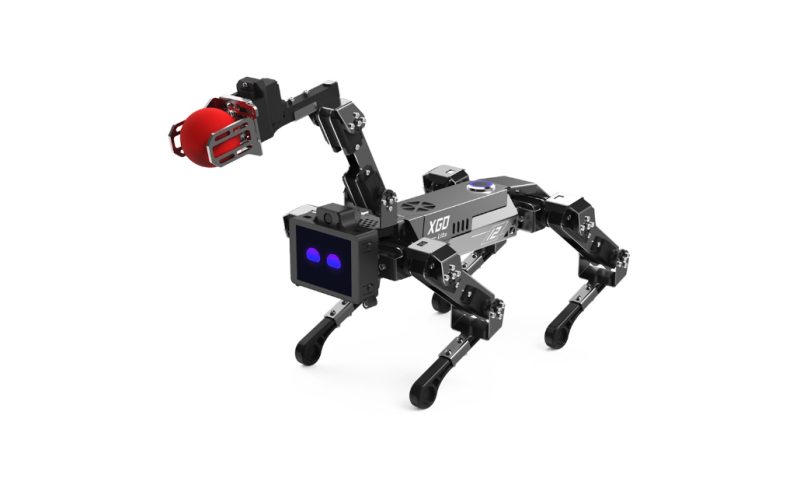
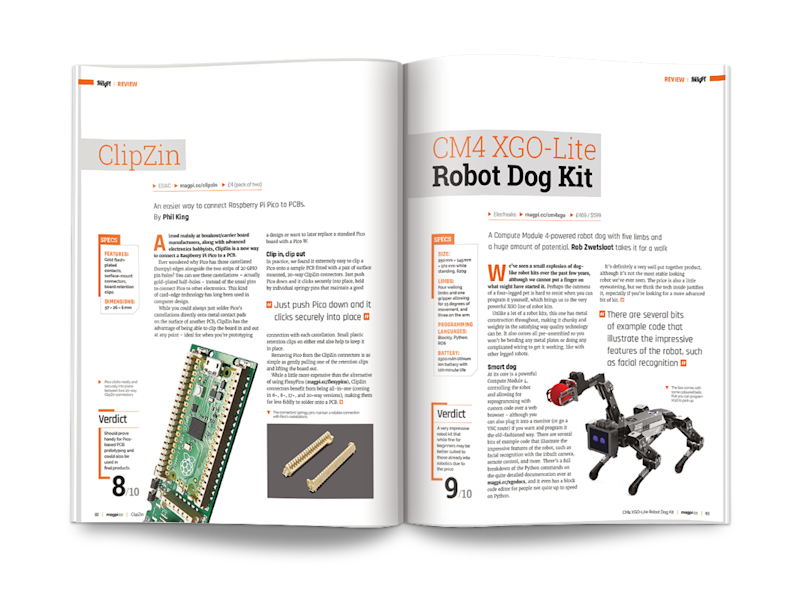
    At its core is a powerful Compute Module 4, controlling the robot and allowing for reprogramming with custom code over a web browser – although you can also plug it into a monitor (or go a VNC route) if you want and program it the old-fashioned way. There are several bits of example code that illustrate the impressive features of the robot, such as facial recognition with the inbuilt camera, remote control, and more. There’s a full breakdown of the Python commands on the quite detailed documentation, and it even has a block code editor for people not quite up to speed on Python.

    It’s definitely a very well put together product, although it’s not the most stable looking robot we’ve ever seen. The price is also a little eyewatering, but we think the tech inside justifies it, especially if you’re looking for a more advanced bit of kit.

    Verdict

    9/10

    A very impressive robot kit that while fine for beginners may be better suited to those already into robotics due to the price.

    Specs

    Size: 250 mm × 145 mm × 170 mm while standing, 620g

    Limbs: Four walking limbs and one gripper allowing for 15 degrees of movement, and three on the arm

    Programming languages: Blockly, Python, ROS

    Battery: 2500 mAh lithium ion battery with 120 minute life

  • Blackberry Pi

    Blackberry Pi

    Reading Time: 4 minutes

    “The idea started from my Game Boy Zero Plus build that was based on a stripped Raspberry Pi 3A computer,” Zhou explains, referring to a project in which a new Game Boy handheld was built by inserting a thinned-down Raspberry Pi 3A into an original case. “After completing it, I decided that I would then love to make use of Raspberry Pi in a handheld format for testing and debugging in the field. But I did not have a clear plan for the keyboard design until I recently found the BBQ20KBD from Solder Party.”

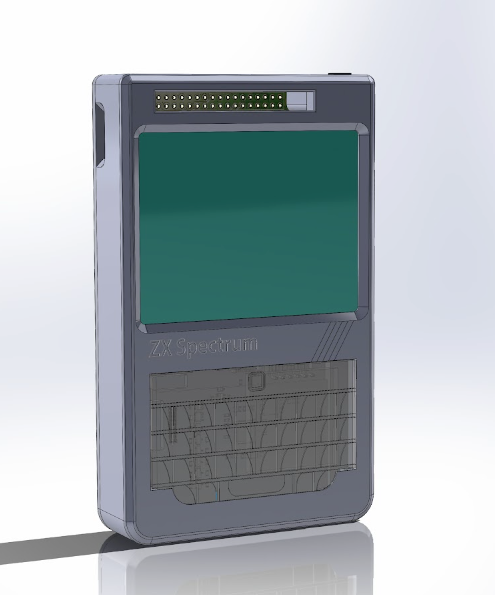
    The case was designed in SolidWorks, a 3D CAD package for Windows that dates back to 1995!

    Key components

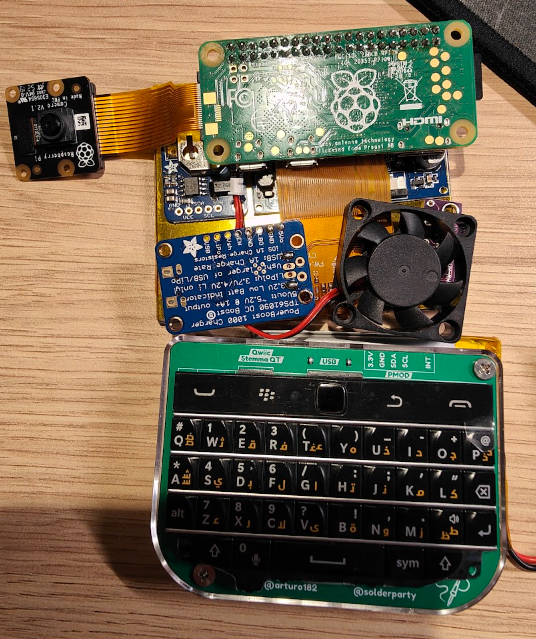
    The BBQ20KBD is a QWERTY keyboard and optical track pad device powered by an RP2040 microcontroller. Identical to the BB Q20 used in the BlackBerry Classic released in 2014, the tiny set of keys is placed onto a custom-printed circuit board and, because it has a USB Type-C socket, it’s easy to hook up to Raspberry Pi.

    The keyboard gave Zhou’s Blackberry Pi a strong direction. “The design was heavily inspired by many other Raspberry Pi handheld projects, such as Beepy and ClockworkPi,” he adds. There were some other requirements. “One of the aims for this design was to test an SDR radio antenna in my backyard. A battery-powered handheld is so much easier for this job,” he says.

    Zhou gathered all of the components together before considering the design of the case

    Zhou chose a 2500 mAh LiPo battery, as well as an Adafruit PowerBoost 1000C power supply. He also took a GearBest 3.5 composite LCD display out of his Game Boy Zero Plus build, and added a Raspberry Pi Camera Module 2 NoIR. Of all the components, though, selecting to use a Raspberry Pi Zero W was the easiest decision.

    “I started playing with Raspberry Pi with the original version so I’m very comfortable tinkering with the config files and soldering the pins,” Zhou says. “Even though many Raspberry Pi models were still out of stock at the time when I started this project, I still wanted to use one (and I’ll be upgrading to Raspberry Pi Zero 2 W). I find the comprehensive documentation provided by the Raspberry Pi Foundation is so much more useful than starting from scratch on the other counterparts.”

    Mod man

    Rather than use an existing case to fit the components, Zhou felt he would have much more control if he designed his own. As such, he drafted a case using the 3D CAD package SolidWorks, with the aim of outputting the design to his Creality Ender-3 3D printer.

    “Ever since my Game Boy project, I find it so much easier to build things from the ground up,” he explains. “Modding an existing enclosure can take quite some extra effort and I’m now getting more confident in CADing.

    “Besides, if I’d have used an existing BlackBerry case, squeezing the components in there would be very challenging. That said, recently I’ve started to teach myself to use KiCad for designing customised PCBs. Perhaps it would be possible to make one that fits in a BlackBerry case using a [Raspberry] Pi Compute Module 4.”

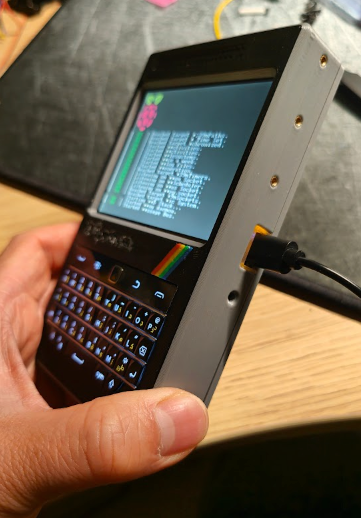
    Not that the project is any worse for having a freshly designed case. In fact, it looks amazing, made all the prettier by having the classic rainbow stripes as seen on the Sinclair ZX Spectrum from 1982. “That was a bit of a random decision,” Zhou says. “ZX matches my initials and I’ve always liked retro-style designs.”

    Clever case

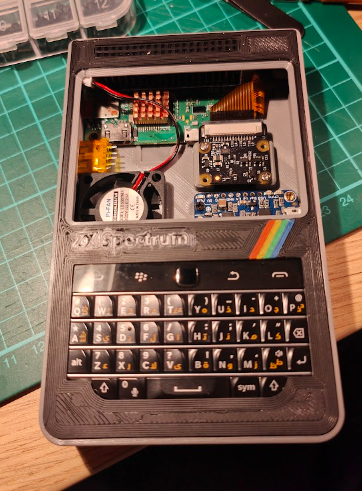
    A lot of thought went into the case. “I’m pretty proud to point out that all the GPIO pins are accessible from the top of the screen and I have added a few peripheral mounting points around the enclosure for future add-ons such as [Raspberry] Pi HATs,” Zhou adds. “I’m also very excited about the outcome of the enclosure printing. This was the first time I have ever played with the six-colour manual change on my Klipperised Ender-3 printer.”

    It nevertheless proved very challenging. “I spent quite some time trying to optimise the arrangement of different components, especially the position of the GPIO pins and other connection ports so that they can be easily accessible,” he continues. “It was also very tricky to squeeze all the components into such a tight space. But I guess one thing that differentiates this project from the others is that all of the components can be purchased off-the-shelf, and it does not require any PCB design experience.”

    The end result is a stunning, expandable machine that boots, by default, into the command-line interface. The frame buffer is enabled in the /boot/config.txt file to display 320×240 resolution and, as well as being great for entering code, the Blackberry Pi is able to capture photos. It’s proving to be quite a useful Linux handheld.

    But Zhou is not yet finished. “As I mentioned earlier, I’ll be adding a Sense HAT and an SDR dongle. I also recently added a light guide to the USB charging port using translucent 3D-printing filament, so that the Adafruit PowerBoost status LED lights can be visible from outside the enclosure (green being fully charged, orange charging, and red showing low battery).

    “Unfortunately, the progress has been slow lately because there are a few other projects which have been keeping me busy, including using a Raspberry Pi to remote-control an electron microscope and optical filters, but everything seems to be working very well.”

  • Where Raspberry Pis are made

    Where Raspberry Pis are made

    Reading Time: 2 minutes

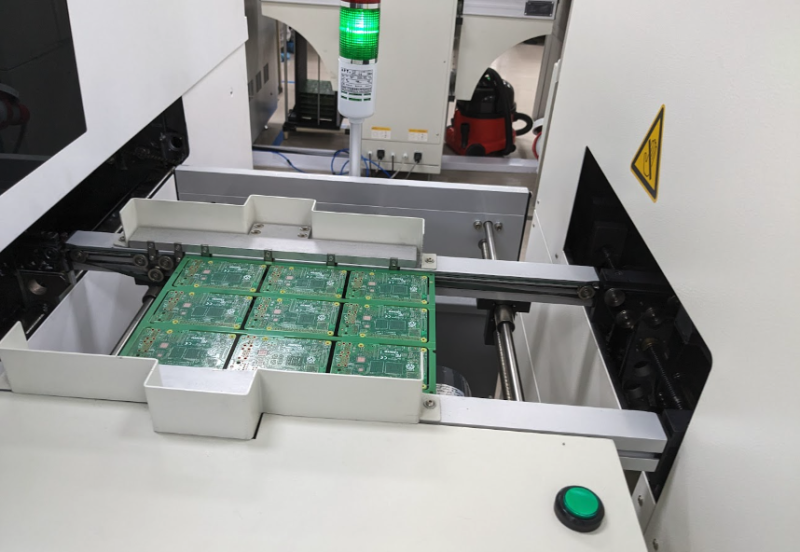
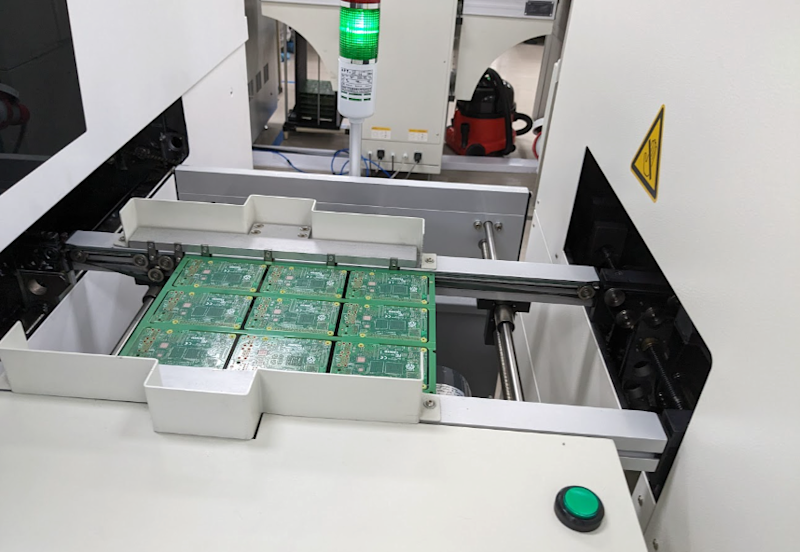
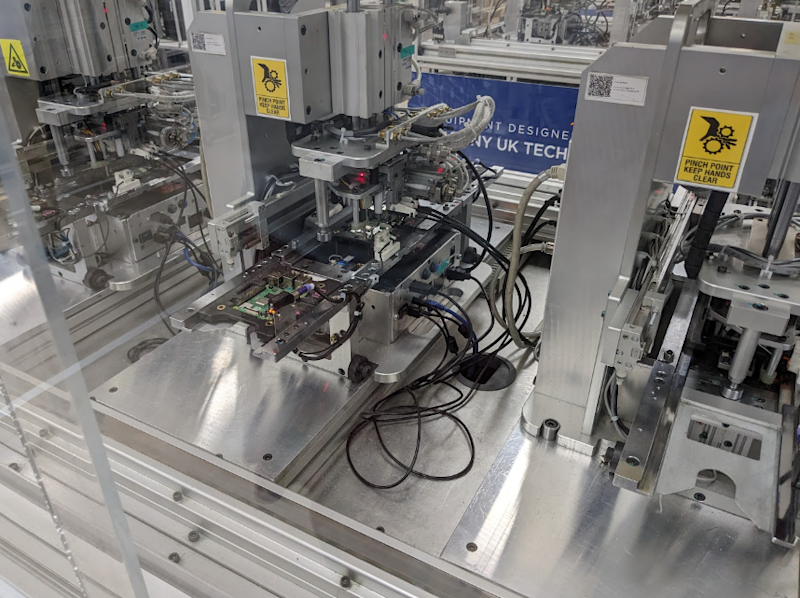
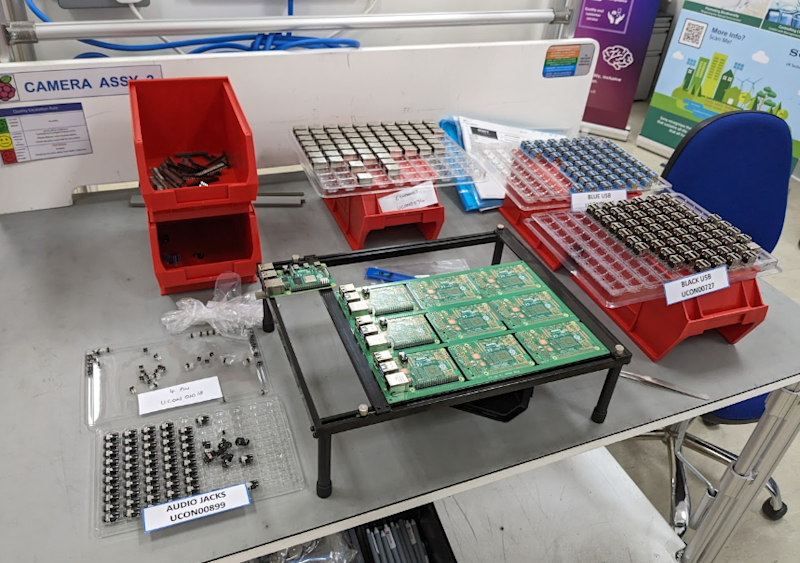
    We were lucky to be given a tour of the facilities where machines, robot arms, and real people make 250,000 Raspberry Pi computers a week – from board to box. Have you ever seen a machine put a little computer in a box? It’s very cute, and the mechanism to fold the lid is a very simple angled piece of metal that runs along the line, maintaining the key engineering philosophy of KISS (keep it super-simple, as our friends at the Raspberry Pi Foundation like to say it).

    Eco friendly

    A (rightful) concern of many people is the environmental impact of manufacturing products, and a key part of the operation of the Pencoed site is meeting sustainability targets which are set every five years. From using more green energy to reducing waste of all kinds, Sony is taking active steps towards reducing its environmental impact.

    You can see this along the lines, with (human-supervised) automated checks to make sure all chips are installed correctly. Misaligned chips can usually be reset which cuts down on waste and overall improve yield, and the reflow soldering methods (described in our engineering interview in The MagPi 134 in the new Raspberry Pi 5 manufacturing process (referred to by a codename of Hydrogen in the factory) that also improve the number of working boards.

    The factory floor itself is divided up into areas with clear signs on what section is which. On one station you’ll have someone building a broadcast camera from scratch, with two a week going out the doors, and in another section you’ll have people snapping boards off runners to be fed into the boxing machine. The complexity is impressive to behold, with a lot of custom machines built and maintained by Sony to make the humble Raspberry Pi.

  • Raspberry Pi 5 launch special! The MagPi magazine #135

    Raspberry Pi 5 launch special! The MagPi magazine #135

    Reading Time: 2 minutes

    Raspberry Pi 5 Launch Special

    Raspberry Pi 5 launch special

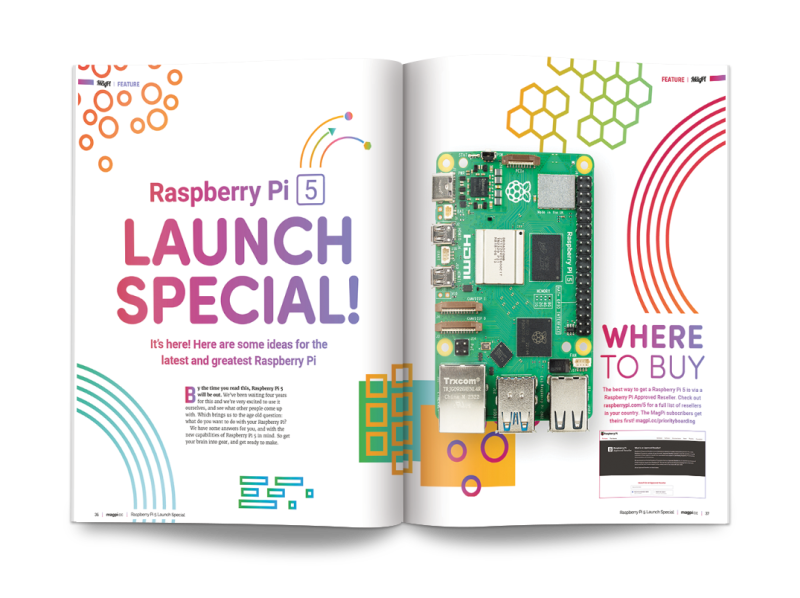
    The highlight of this issue is undoubtedly the launch of Raspberry Pi 5. We’ve got a special launch feature celebrating this innovative piece of technology that brings speed parity with traditional desktop computers. The feature starts on page 36, promising to fuel your creativity with quickstart setup guides, build ideas, and an accessories guide.

    50 Phenomenal Raspberry Pi Projects in The MagPi magazine #135

    50 Phenomenal Raspberry Pi Projects

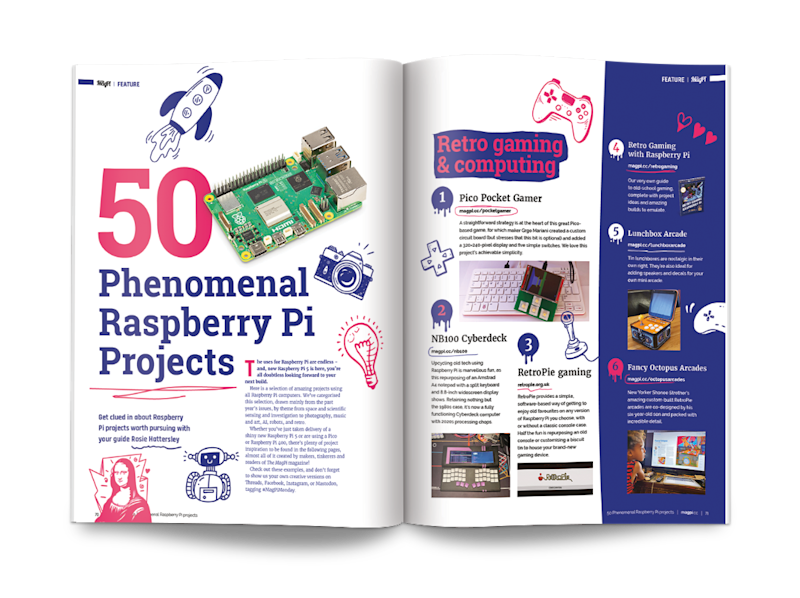
    If you’re looking for inspiration, check out these 50 Raspberry Pi project ideas. Whether you’re a beginner or a seasoned maker, these projects are sure to spark your imagination, ranging from music, and gaming, to space and robotics projects.

    The latest Project Showcase articles in The MagPi magazine

    The latest innovative projects

    This issue spotlights several creative projects from the community. This stunning ScreenDress adds animated eyes to fashion with LED screens. The Blackberry Pi project combines nostalgia with modern tech, featuring a Raspberry Pi Zero W computer operating on a BlackBerry-style keyboard. Meanwhile, the Drill Press Camera enhances precision in creating holes in PCB boards.

    Learn to use Ubuntu and other tutorials in The MagPi magazine

    Learn to make with our tutorials

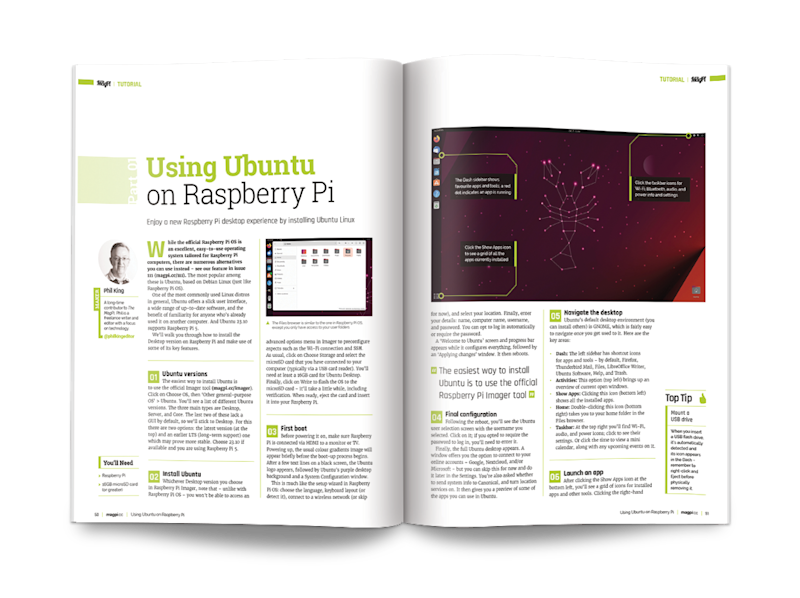
    For those eager to learn, the tutorials section is a treasure trove. It includes an introduction to MQTT, guidance on building a Mecanum robot, and a starter guide to using Ubuntu as an alternative Raspberry Pi operating system.

    Reviews in The MagPi magazine #135: ClipZin and CM4 XB0-Lite Robot Dog Kit

    Reviews and resources

    Don’t miss out on the comprehensive reviews, including an in-depth look at the CM4 XGO-Lite robot dog kit and ClipZin kit. Plus discover the best learning resources available for circuit and electronic projects.

    Subscribe today

    Ready to dive in? Subscribe to The MagPi today to get your hands on this fantastic issue and many more. Join us in exploring, creating, and celebrating the world of Raspberry Pi! Subscribers get Raspberry Pi 5 first with Priority Boarding.

  • Win one of ten official Raspberry Pi 5 cases!

    Win one of ten official Raspberry Pi 5 cases!

    Reading Time: < 1 minute

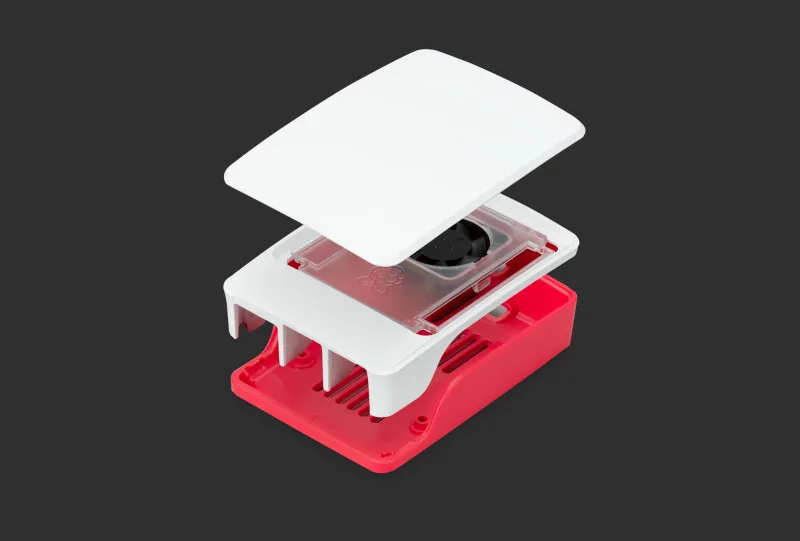
    When the case fan for Raspberry Pi 4 was released, it was a sign to come of better airflow and ventilation for Raspberry Pi cases going forward. You can see this in the new official case for Raspberry Pi 5, which includes advanced ventilation with a blower and space for air to flow. You can enter to win one below…

  • Zelda Guardian security camera

    Zelda Guardian security camera

    Reading Time: 3 minutes

    What a character!

    Although Naomi and her partner can’t bear to be parted from their poodle, when they are they generally set up an old phone through which they can watch him. However, “our living room is connected to a kitchen and there is no way to set up a phone camera to capture the entire room. If Ernie moves out of view of the camera, we can’t see him,” she explains.

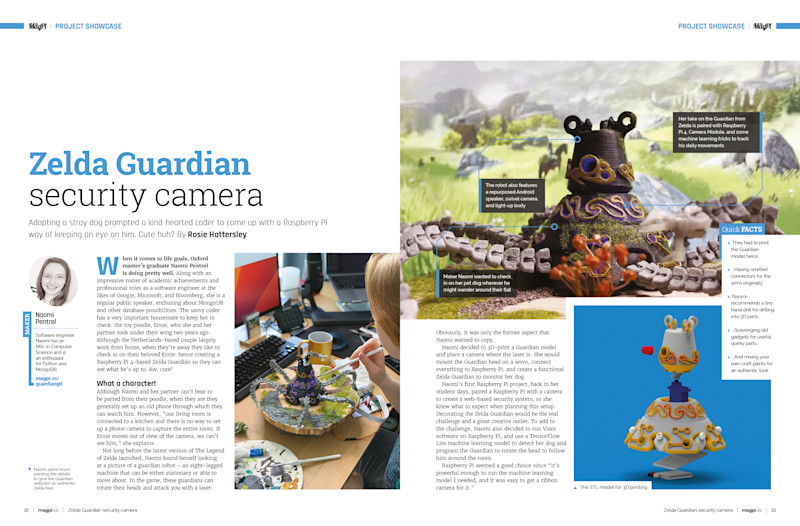
    Not long before the latest version of The Legend of Zelda launched, Naomi found herself looking at a picture of a guardian robot – an eight-legged machine that can be either stationary or able to move about. In the game, these guardians can rotate their heads and attack you with a laser. Obviously, it was only the former aspect that Naomi wanted to copy.

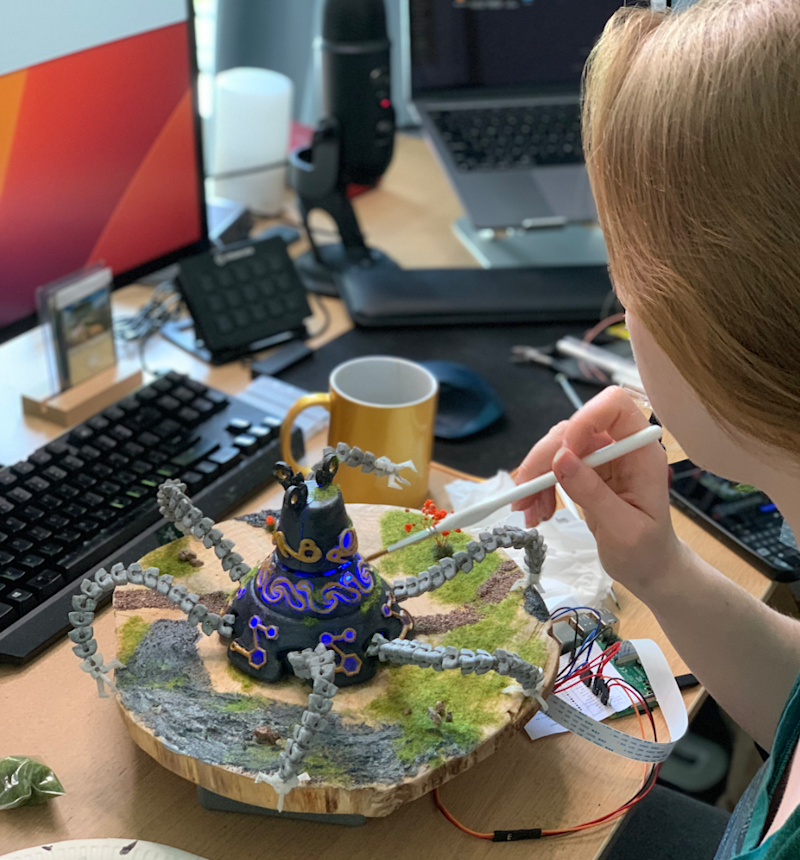
    Naomi spent hours painting the details to give the Guardian webcam an authentic Zelda feel

    Naomi decided to 3D-print a Guardian model and place a camera where the laser is. She would mount the Guardian head on a servo, connect everything to Raspberry Pi, and create a functional Zelda Guardian to monitor her dog.

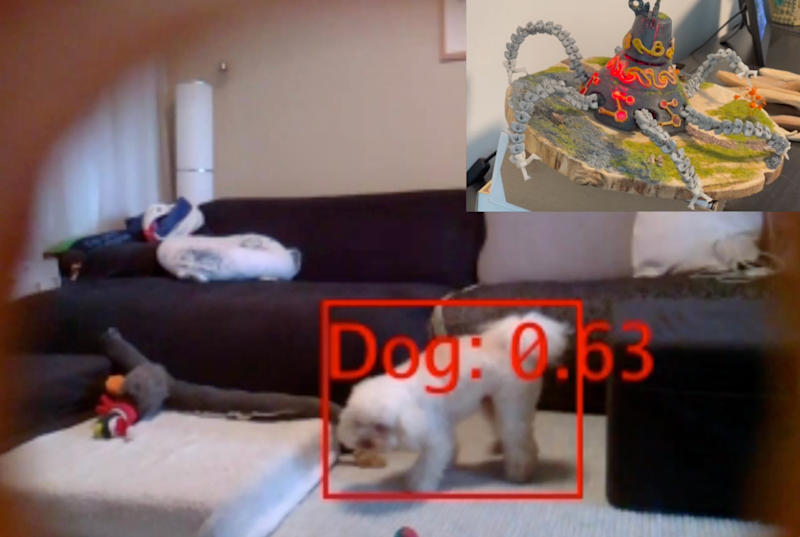
    Naomi’s first Raspberry Pi project, back in her student days, paired a Raspberry Pi with a camera to create a web-based security system, so she knew what to expect when planning this setup. Decorating the Zelda Guardian would be the real challenge and a great creative outlet. To add to the challenge, Naomi also decided to run Viam software on Raspberry Pi, and use a TensorFlow Lite machine learning model to detect her dog and program the Guardian to rotate the head to follow him around the room.

    Raspberry Pi seemed a good choice since “it’s powerful enough to run the machine learning model I needed, and it was easy to get a ribbon camera for it.”

    Team effort

    “Luckily, I am not the first one to have the idea to build a Zelda Guardian and there was already a brilliant Guardian 3D model on Thingiverse with space for LEDs and a servo,” says Naomi. She chose a different Guardian head.

    Naomi asked her friend Hugh Rawlinson to help with the 3D printing using a filament that allows the light to shine through. Naomi then painted the parts that shouldn’t let any light through.

    The Zelda Guardian camera successfully recognises Ernie

    Next, came the dual challenges of fitting components such as Raspberry Pi 4 and ensuring the camera stayed inside the head. Hugh helped her tweak the Guardian head’s design to include mount holes so she could attach a ribbon to a Raspberry Pi Camera Module v1.3. “Because they’d used the ribbon cable, the head couldn’t spin freely. However, for the space I wanted the Guardian for, 180 degrees of movement is enough, so I used a 180-degree servo,” explains Naomi.

    Raspberry Pi itself needed some form of box to keep it upright inside the Guardian’s head. She hit on the idea of slotting it inside a tranche of tree trunk, and was able to recruit her partner to assist with the woodwork, cutting into the tree slice and giving the Guardian a beautiful base. Naomi then put it all together and painted it to look like the real thing.

  • CM4 Nano review

    CM4 Nano review

    Reading Time: 2 minutes

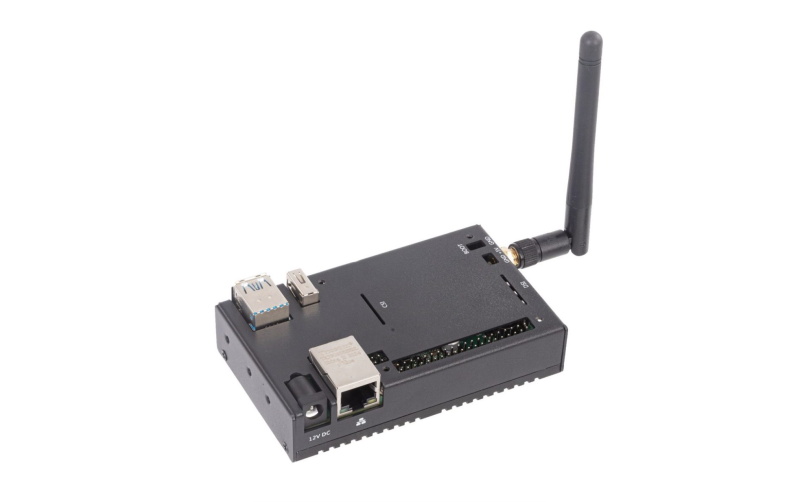
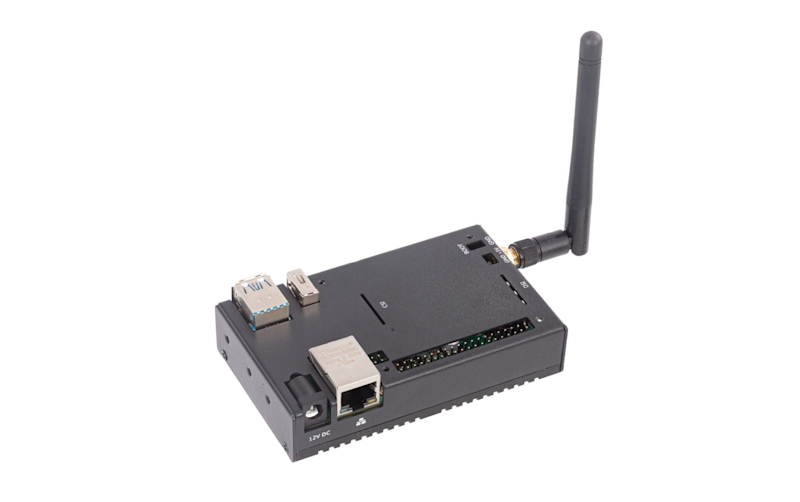
    The device is available with optional Wi-Fi and Bluetooth – with an external screw-in antenna to boost the signal – and in several storage and RAM configurations.

    On-board OS

    The on-board eMMC storage (from 8GB to 32GB) is pre-installed with standard 32-bit Raspberry Pi OS and a BSP (board support package). It’s updatable in the usual ways (including Apt), but the OS can be re-flashed if you need a different version (such as 64-bit).

    With a rugged metal case, heatsink base, and external Wi-Fi antenna, CM4 Nano is designed for industrial settings

    There’s also a microSD slot, purely for extra storage, although we found it tricky to insert the card without opening the case – ditto for the CSI (camera) and DSI (touchscreen) connections.

    Once powered up, the unit boots up with the usual desktop GUI, although we needed to manually enable Wi-Fi in the taskbar. SSH is enabled by default, but you’ll want to change the password for the default ‘pi’ user for security reasons.

    Apart from a slight hum, it all worked similarly to a Raspberry Pi 4. The CM4 Nano’s main advantage is that it’s more suited to industrial settings, with an improved ambient temperature range of -25 to 60°C.

    Verdict

    8/10

    A CM4-based, ruggedised alternative to Raspberry Pi 4 with plenty of configuration options for your exact needs.

    Specs

    Features: CM4 with 8GB, 16GB, or 32GB eMMC storage; 1GB, 2GB, 4GB, or 8GB RAM; optional Wi-Fi/Bluetooth

    Ports: 2 × USB 3.0, 1 × USB 2.0, 1 × USB-C, Ethernet, GPIO, CSI, DSI, PoE, 5 V output

    Dimensions: 95 × 58 × 24 mm

  • Meet Nicholas Provenzano: the Nerdy Teacher

    Meet Nicholas Provenzano: the Nerdy Teacher

    Reading Time: 2 minutes

    When did you decide to become a teacher?

    I was first recognized as being neurodivergent (dyslexic) at university. I struggled with reading and writing, but it was something that I still enjoyed and found ways to make happen despite my unknown issues. Once I was able to put a name on it, get the support I needed, and not feel so bad about myself and how I learned, I was able to be successful. A friend suggested I take an intro to education course and see how I liked it. From there, I found my passion in helping students who have a passion for learning, but struggle like I did. I want to support those learners that never matched the perfect learning profile many people expected from students.

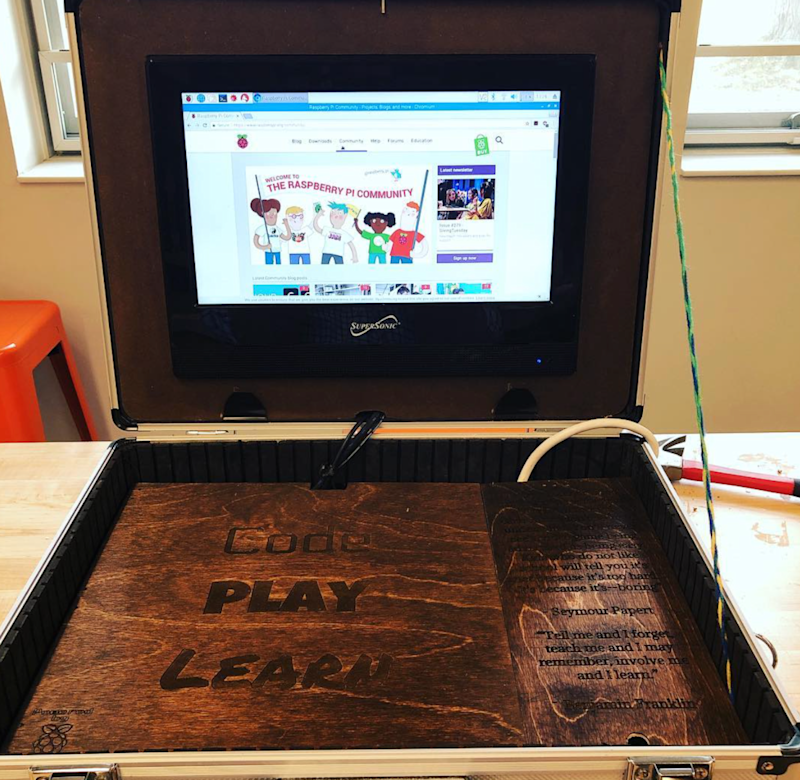
    This briefcase laptop has more wood than we’d usually see in a briefcase, but it gives it some retro tech charm

    When did you learn about Raspberry Pi?

    I started a design class for grade 11 and 12 students and we would explore problems in the school and find creative ways to solve them. I had never coded or worked with electronics before, so when a student suggested using Raspberry Pi to create an automated system for students to use to check them in and out of the classroom, I was very intrigued. I dove into Python coding and loved what I saw. The first North American Picademy was announced shortly after the students introduced me to [Raspberry] Pi and I signed up and had one of the very best professional development experiences in my career.

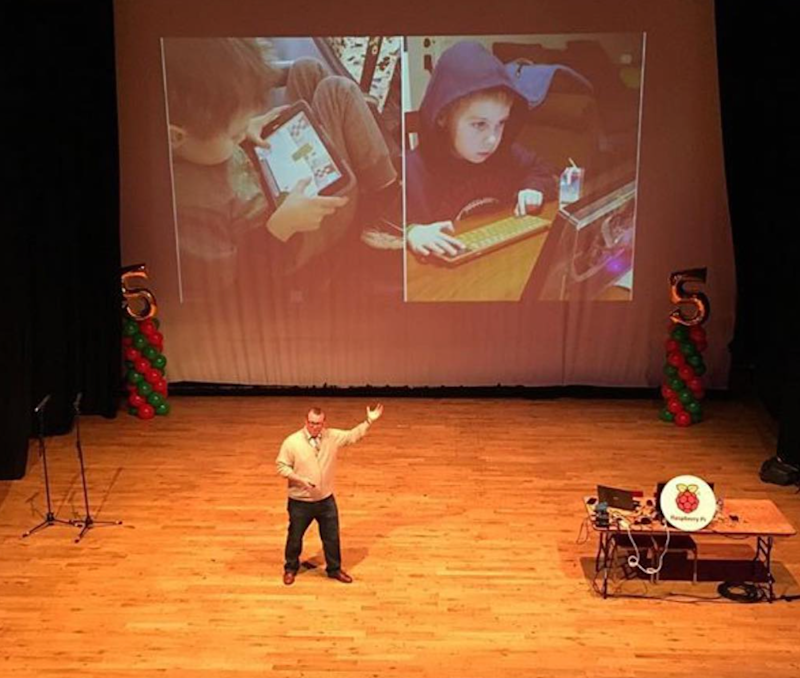
    Nicholas came all the way to Cambridge for the fifth birthday party in 2017

    How did you bring Raspberry Pi into class?

    I took what I learned from Picademy and explored how project-based learning, with and without Raspberry Pi, can be executed in a technology-based class and my Literature classes. I spent time with my students exploring the different ways Raspberry Pi could be leveraged to solve problems, and how we can code sensors to interact with Raspberry Pi and observe the environment around us and track that data.

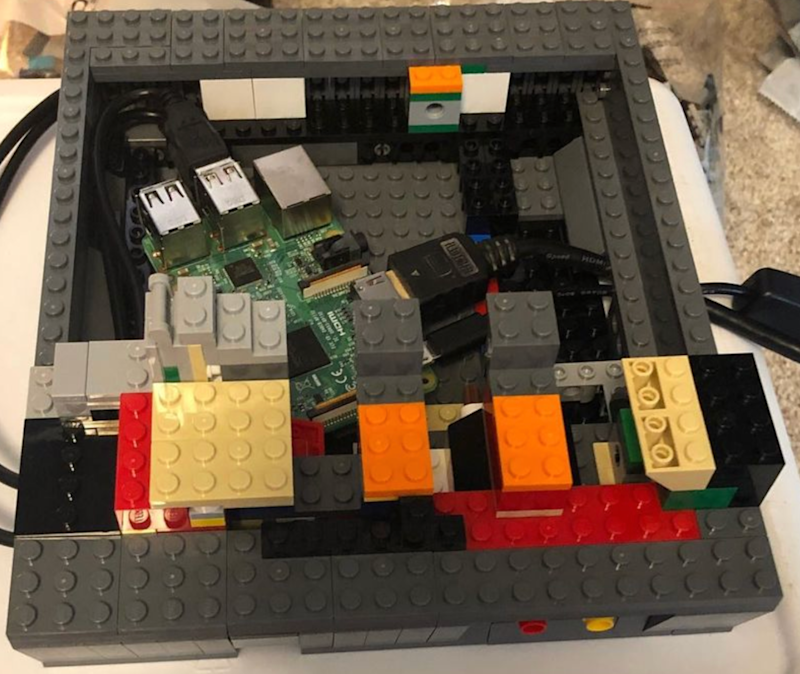
    A LEGO NES upgraded with a Raspberry Pi so you can play actual games on it

    “Going to Picademy and learning to code for the first time, and taking that skill into physical computing, is something that will stay with me. Matt Richardson, Carrie Anne Philbin, Ben Nuttall, James Robinson, and others really made an impact on me and how I view instruction and the value of code.”

  • DispatchPi

    DispatchPi

    Reading Time: 3 minutes

    She’s the one

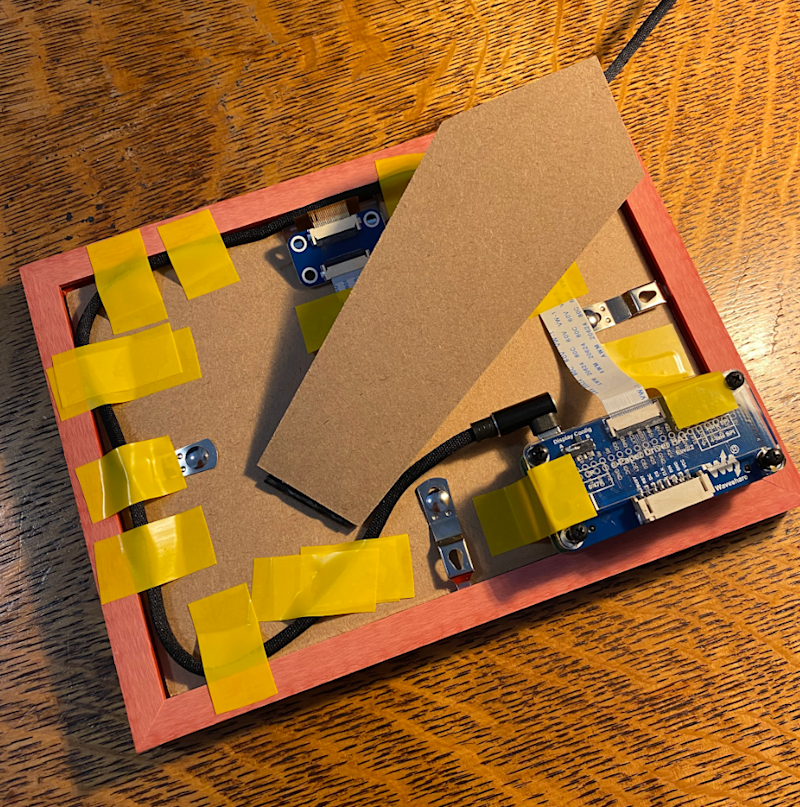
    The answer, he figured, would be a system that made image-sharing simple, so he came up with the concept for a pair of custom-made digital photo frames that made use of e-ink displays. Although the couple would be limited to sharing black-and-white images, this approach had many benefits, notably low power consumption and simplicity.

    “It had to be energy-efficient because Nunavik is mostly powered by diesel that’s brought in by boat,” Olivier says. “It also needed to require very little bandwidth as my fiancée’s internet would probably come from an unstable satellite link. The project had to be easy to use too and required, at most, a couple of seconds to share a picture, much like texting or writing an email. And I didn’t want my fiancée to fuss with a complicated app after completing a night shift and on-call duty.”

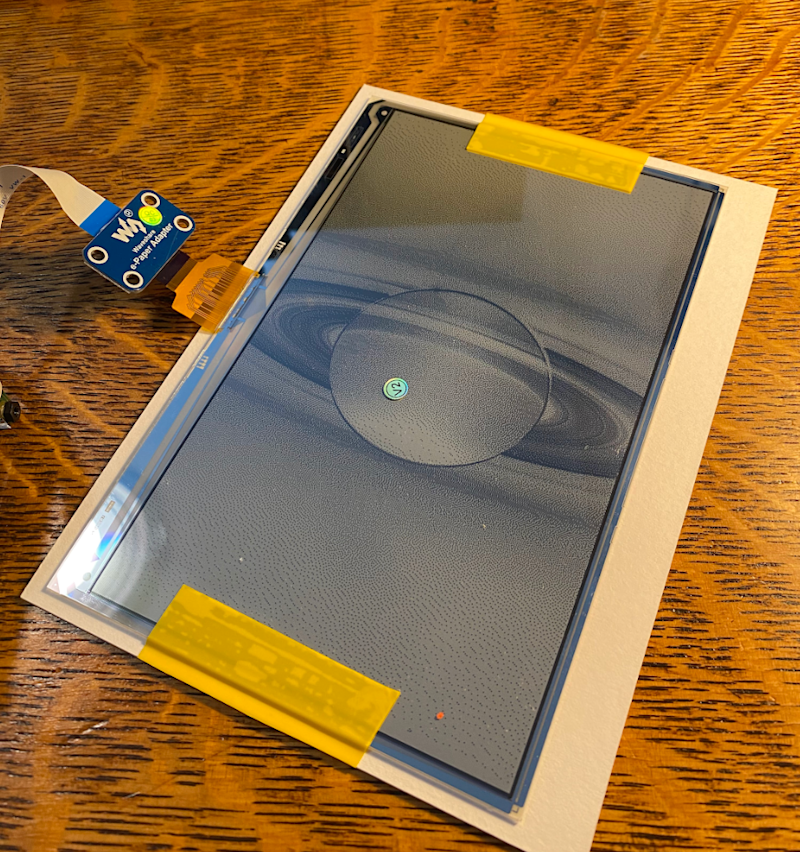
    With that in mind, Olivier began to plan. A frame would consist of a Raspberry Pi Zero W computer and a 7.5-inch Waveshare e-ink display, and the idea was to allow images to be emailed to a Google inbox with a program written to make use of them at regular intervals.

    “I like e-ink technology,” Olivier continues. “Each pixel on an e-ink display hosts tiny pigments that are physically jolted around by an electrical charge and they stay in place even if power is disconnected, which means the screen will continue displaying the same image until it is refreshed.”

    Life through a lens

    Olivier thought the project would be straightforward. It wasn’t. “I didn’t think writing a script to automatically read attachments from a Gmail inbox would prove so tricky,” he laments. “I definitely underestimated this part of the project because it took me a long time to figure out how a Flash web application written in Python can use and refresh Google authentication tokens.”

    He used the industry-standard protocol for authorisation, OAuth 2.0, instead of a simpler email-password login strategy. “It was a way of future-proofing the project because it’s a robust and secure protocol directly supported by Google,” he says. He also added the ability to include custom messages which would be overlaid on to the images. “It was hard to speak on the phone, and internet audio calls were patchy, so I wanted a way to explain the context of each photo,” he adds.

    For greater user-friendliness, Olivier created iPhone shortcuts too. “It simplified the process of selecting and emailing a recent image to the dedicated Gmail inbox,” Olivier says. “A click is enough to launch the whole process.” This addition proved an elegant way of stitching together all of the application’s parts and it proved effective.

    “My fiancée was delighted when I gave it to her as a Christmas present,” Oliver recalls. “We spent a year swapping pictures to and fro, and I was able to discover the north through her lens as well before flying up to visit her.”

  • Inventor HAT Mini review

    Inventor HAT Mini review

    Reading Time: 2 minutes

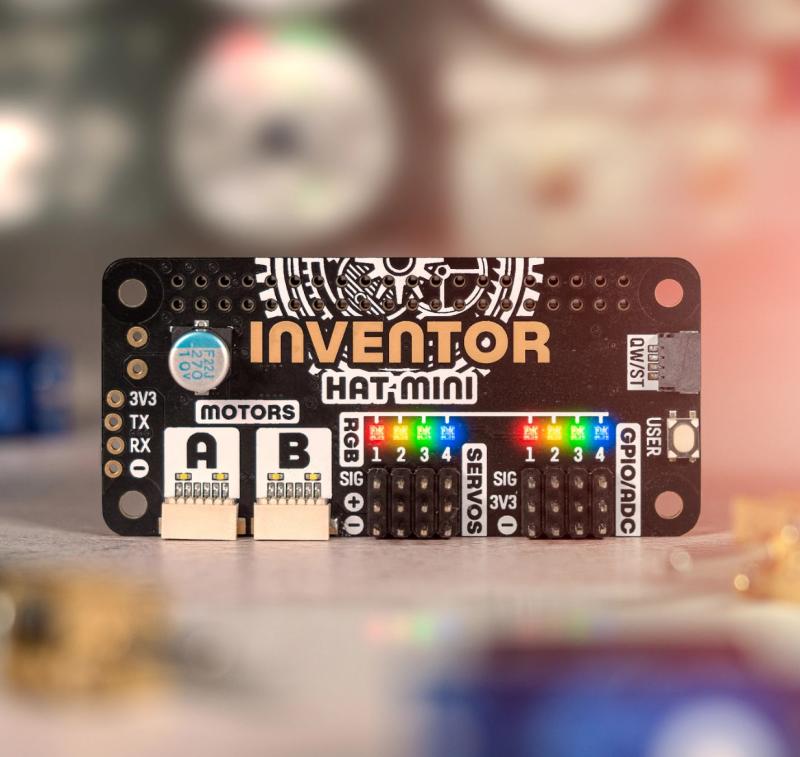
    Four extra GPIO channels, each with a three-pin header, are ADC capable, so can be used as analogue inputs for sensors etc. Best of all, the board’s Nuvoton microcontroller handles all I/O, so the board only uses a handful of GPIO pins on Raspberry Pi – and it has a pass-through header so you could stack another board on top by using a stacking header.

    Light and sound

    Each set of header pins even has its own RGB NeoPixel, while the motor ports have direction LEDs. There’s also a user button and other connections include a single Qwiic/STEMMA QT for breakouts, external power and UART serial headers (both unpopulated), and an audio port (two-pin Picoblade) to connect a mini speaker.

    Pimoroni’s comprehensive Python library makes programming the board easy, and a bunch of code examples help you get started. We can see this board being used with a Raspberry Pi Zero for fun mini robots, but it’s versatile enough for many other electronics projects.

    Verdict

    9/10

    Packing an impressive array of features into a small footprint, this versatile board is ideal for mini robots and a lot more.

    Specs

    Inputs/Outputs: 4 × GPIO/ADC headers, 4 × servo headers, 2 × JST-SH  (6-pin) motor ports, 2 × regular motor outputs, 1 × Qwiic/STEMMA QT port, audio output, external power input, UART header

    Features: Nuvoton microcontroller, 8 × WS2812B RGB LEDs, User button, DRV8833 dual H-bridge motor driver, motor direction LEDs, pass-through header

    Dimensions: 65 × 30.5 × 15.5 mm

  • Giant Dot Matrix Printer

    Giant Dot Matrix Printer

    Reading Time: 3 minutes

    An impermanent print

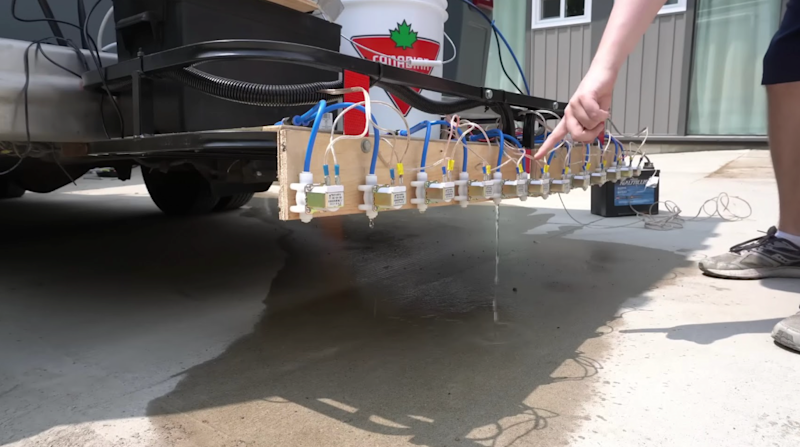
    Armed with, amongst other things, some solenoid valves, wood to attach the valves to his truck, a good length of hosing, speaker wire, hose splitters, and a bilge pump, Ryder set to work.

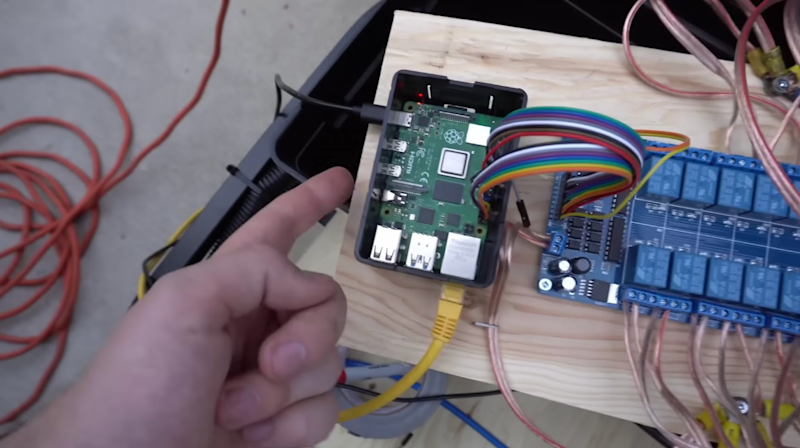
    “The ‘printer’ runs off 12 V direct from the car’s cigarette lighter,” he explains. “There’s a Raspberry Pi 4 that runs a web server that accepts input text, an input speed and font and, from that, turns the text into a picture and iterates over it left-to-right to create a bit of a map. From that map, it then determines which solenoid valve (1–12) to open or close, at a particular time.”

    Raspberry Pi’s GPIO pins are used to open and close valves via a relay board to manage the higher voltage. It also controls a windshield washer pump that turns on just before printing and just after completion to pressurise the lines. The water is then pumped out of a large bucket, into the lines, and out through the solenoid valves onto the road.

    Writing the required Python code himself, Ryder didn’t find it the most challenging part of the build. “Code is my talent; that part comes easy to me. Wiring, debugging wiring, and everything electrical on the other hand, I struggle with and it takes me a while.”

    The solenoid valves are situated about 1.5 ft above the ground on a trailer hitch, but this height will vary depending on the vehicle. In terms of the amount of water utilised, Ryder says it’s “surprisingly efficient. I can usually write messages for about 10–15 minutes before it runs out.”

    Interestingly, he claims that you can drive any speed, “as long as it’s a constant speed, and you input it into the web server before you drive. We tested it up to about 20 km/h, and I’m hoping to get the speed way up in version two.”

    Truckloads of inspiration

    Ryder describes this make as being of “moderate difficulty”, but would encourage anyone to have a go, “maybe trying a project with one pump and one solenoid (like a sprinkler).”

    Looking to make new versions of the printer, he has ordered a considerably more powerful pump in the hope it will improve the aesthetic of the printing. “I’m even looking at doing colour in some way that I’ve yet to figure out – I don’t want to have to clean up a mess or leave anything behind.”

    While feedback from the maker community has been wholeheartedly positive, some locals were a little bemused. “My neighbours have seen me doing a lot weirder projects, so they’re used to it, but I did get some weird looks from people on the street, as the machine itself – with its wires, hoses, and dripping water – looks a bit strange.”

    Ryder confirms that we can expect more offbeat Raspberry Pi-linked projects from him, but “I’m keeping them secret until I actually build them.” Watch this space…

  • Raspberry Pi 5

    Raspberry Pi 5

    Reading Time: 2 minutes

    Power of potential

    A lot of people here at Raspberry Pi are very excited for the addition of PCI Express. NVME storage is one thing, a very cool thing that will make for some very low-profile home file servers, but we’re looking forward to seeing what people connect to it over time. How soon until someone has an RTX 4090 hooked up to it? Then we’ll truly be playing with power.

    While I’ll definitely be using it myself for retro game stuff, desktop computing, and media server stuff (the new VideoCore is very nice!), what I’m most excited for is to see what folks in the community come up with. Alasdair Allan, Head of Documentation here at Raspberry Pi, has already mentioned wanting to do more machine learning tests on it using the extra oomph the chipset provides. What else will you all come up with? As always, flood The MagPi social media accounts with what you do make so that I can see.
    Out soon

    I have to remind myself that, although everyone knows about it, it’s not out just yet! For the next issue, we’re already working on cool stuff you can do with Raspberry Pi 5, so you will be well fed with inspiration and tutorials to get you started. In the meantime, what do you want to make with Raspberry Pi 5? We’re all ears/eyes. Drop us a social media message or an email – we’re on Mastodon, Threads, Facebook, etc.

  • Bristol Braille Canute 360

    Bristol Braille Canute 360

    Reading Time: 3 minutes

    Keeping it local

    Founder and MD of Bristol Braille Technology Ed Rogers has been working on “refreshable Braille technology” since 2008 and co-invented the Canute multiline Braille display. He is also a co-founder and trustee of the Braillists Foundation, a community of more than 1500 people who help each other with projects to promote Braille use. Ed drew on this community’s expertise when designing the Canute 360 to ensure it would meet their needs and expectations. Having closely followed Raspberry Pi’s success for many years, he was convinced from the outset that it would be the ideal component for the embryonic Braille reader. “We didn’t want to distract ourselves by reinventing the wheel, or having to support our own OS,” so the dedicated OS and thriving Raspberry Pi community were vital factors.

    Bristol Braille started with a standalone, “functional” book-reading prototype, says Ed, and the 14 major revisions over an eight-year development cycle each involved Raspberry Pi and Python. The folks at Raspberry Pi loved the concept, and Ed says individuals “bent over backwards” in a bid to ensure Canute made it to market. This is refreshing for a small company working in a supply chain that likes scale. While some components for the Canute are made in places such as China and India, the circuit boards are made by Philtronics in Wales, and the final build is done in-house in Bristol and Exeter. “By taking advantage of the proximity, we are able to be much more hands-on,” says Ed.

    Ed describes Raspberry Pi Zero as Canute’s ‘brains’. It runs Raspberry Pi OS, along with the Braille custom user interface. The interface was Bristol Braille’s biggest design hurdle, especially since the final product needed to be relatively affordable. Although it has a £2000 price tag, many are destined for libraries and educational institutes and, thus, will have multiple users.

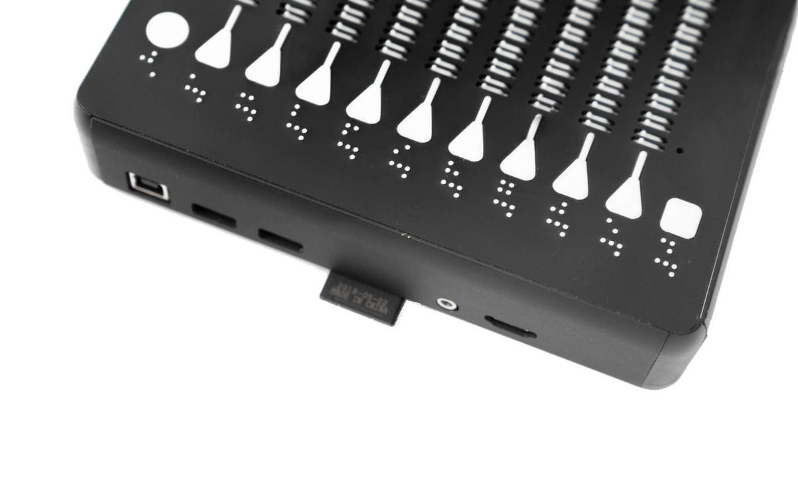
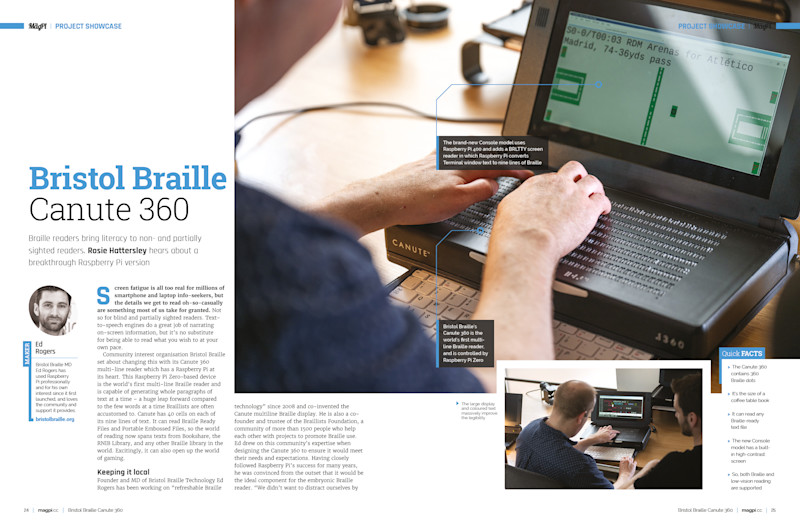
    Raspberry Pi Zero is connected to media ports on the main circuit board, and is able to read the BRF (Braille Ready Files), interpret them as Braille, and send them to an Atmel chip on the main board to convert into dot patterns. Each Braille cell is made up of six dots which can either be up or down. There is virtually no margin for error, and a stuck dot can change the entire meaning of a word.

    Incredible touch

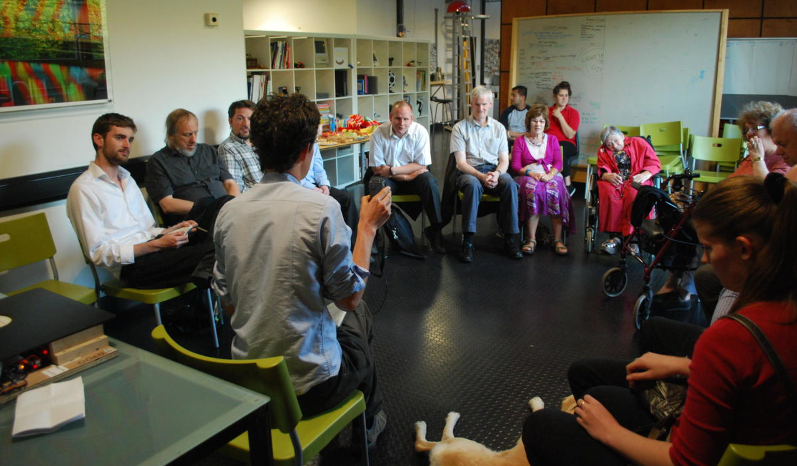
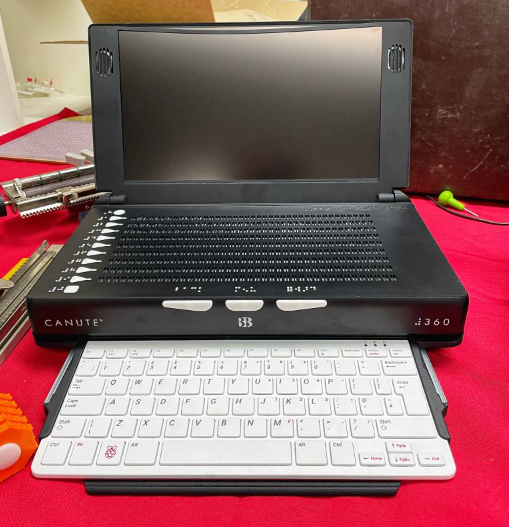
    Bristol Braille’s Canute 360 has been enthusiastically embraced by the Braillist community, with several hundred already sold. This summer, the team embarked on a roadshow demonstrating the 360 and its successor, the Canute Console. This is based around Raspberry Pi 400, meaning greater processing power as well as an integrated keyboard. A hardware add-on that includes a Canute 360, it adds a BRLTTY screen-reader. Ed says the Console enables them to do “far more exciting things with tactile graphics, using Raspberry Pi 400 to interpret sports matches as tactile animated pitches [and] to draw maps of cities in a top-down GTA 2 fashion.”

    This recently launched model has a technical graphics focus, and is aimed at computer science students and those familiar with using Linux or willing to learn it. Every pre-existing multi-line Linux terminal application shows up in digital Braille for the first time. The new device has generated much excitement, with the first pre-orders currently being delivered. Watch the demo video showing a football match replay.

  • Win a brand new Raspberry Pi 5!

    Win a brand new Raspberry Pi 5!

    Reading Time: < 1 minute

    Subscribe

  • Priority Boarding – get your Raspberry Pi 5 first

    Priority Boarding – get your Raspberry Pi 5 first

    Reading Time: 2 minutes

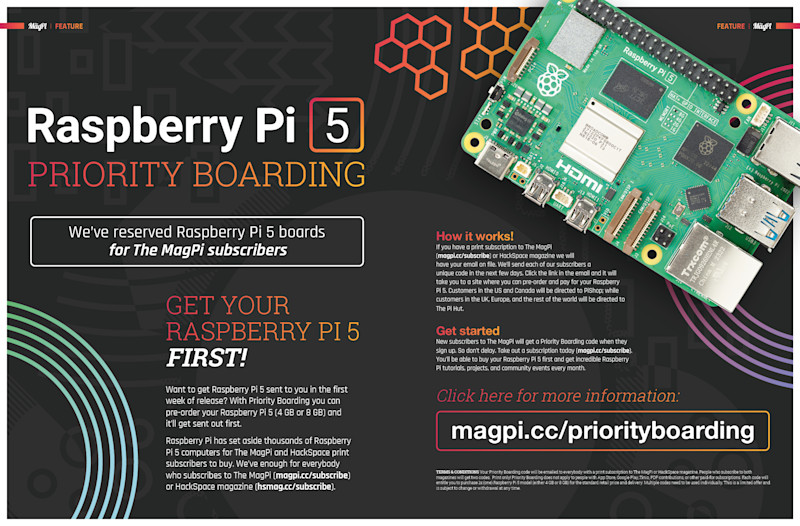
    Raspberry Pi has reserved a massive stock of Raspberry Pi 5 units specifically for subscribers of The MagPi and HackSpace magazines. Every subscriber to these publications will get a code via email to pre-order Raspberry Pi 5.

    Subscribe today to The MagPi or HackSpace magazine and your Priority Boarding code will be emailed to you when your subscription starts. Current subscribers will start getting their codes soon.

    How Priority Boarding works

    If you’re a print subscriber of The MagPi or HackSpace magazine, your email is already on our records. Expect a unique Priority Boarding code in your inbox soon. This link will guide you to the pre-order page for the Raspberry Pi 5. US and Canadian subscribers will be directed to PiShop, while those in the UK, Europe, and elsewhere will be directed to The Pi Hut. Enter your Priority Boarding code and pay for Raspberry Pi 5. A board will be sent to you as soon as delivery starts (in late October). 

    Don’t miss out! Subscribe now to pre-order your Raspberry Pi 5, and you get a free Raspberry Pi Pico along with invaluable Raspberry Pi tutorials, projects, and monthly community events every month. Don’t miss your chance to be at the forefront of the Raspberry Pi movement!

    Terms & Conditions. Your Priority Boarding code will be emailed to everybody with a print subscription to The MagPi or HackSpace magazine. People who subscribe to both magazines will get two codes.  Print only! Priority Boarding does not apply to people with App Store, Google Play, Zinio, PDF contributions, or other paid-for subscriptions. Each code will entitle you to purchase 1x (one) Raspberry Pi 5 model (either 4 GB or 8 GB) for the standard retail price and delivery. Multiple codes need to be used individually. This is a limited offer and is subject to change or withdrawal at any time.

  • Raspberry Pi 5 in The MagPi magazine issue 134

    Raspberry Pi 5 in The MagPi magazine issue 134

    Reading Time: 4 minutes

    Up to three times faster, absolutely packed with new features, and available to The MagPi subscribers first

    Introducing… Raspberry Pi 5

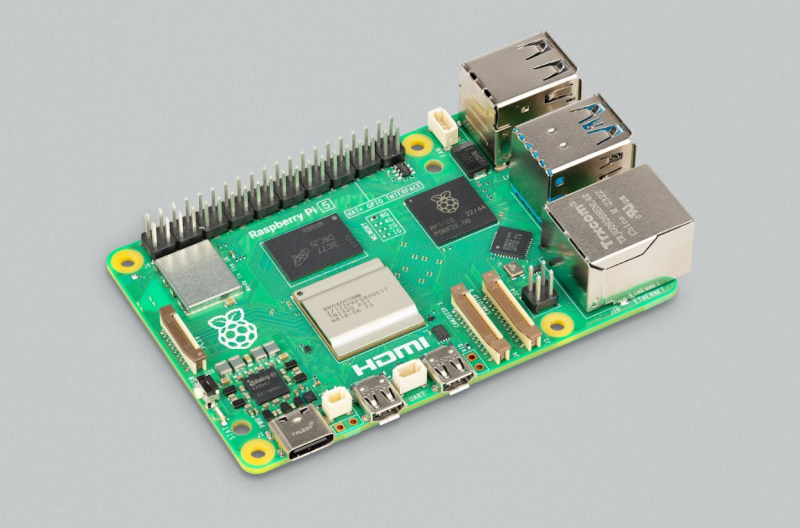
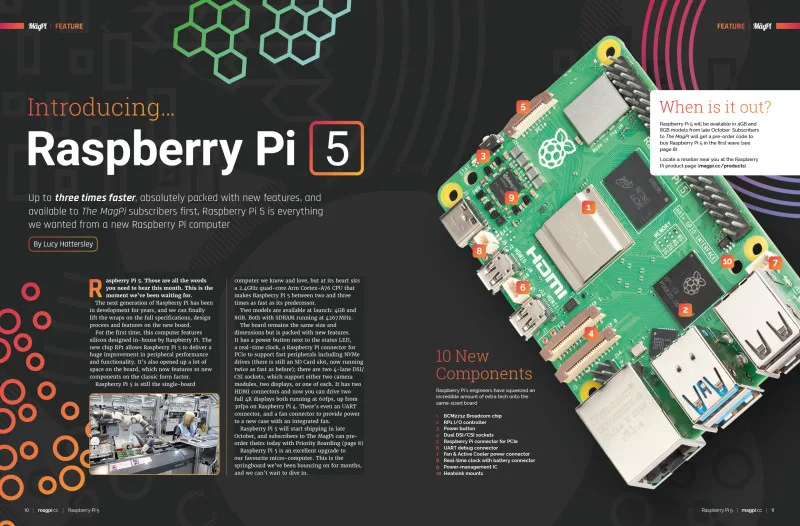
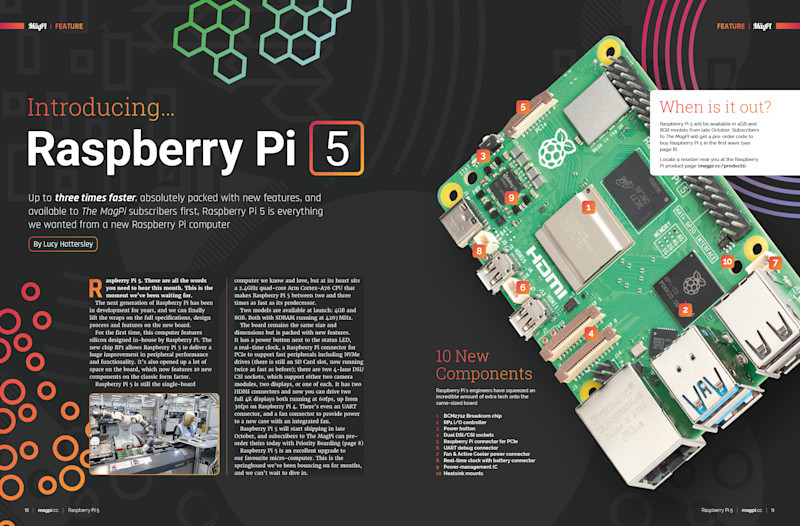
    The incredible new computer from Raspberry Pi is a giant leap forward in features and performance. Now running a 2.4GHz ARM CPU inside a brand new BCM2712 Broadcom chip, Raspberry Pi is up to three times faster than Raspberry Pi 4. And a new Raspberry Pi RP1 chip takes over most of the I/O, freeing up space for a raft of new features: a power button, Dual DSI/CSI sockets, a Raspberry Pi connector for PCIe (along with an upcoming HAT to offer super-fast M.2 drive storage), a real-time clock with a battery connector and a custom power management chip. All this alongside amazing new accessories including a redesigned Raspberry Pi Case with fan, an Active Cooler attachment, and PoE and M.2 accessories coming soon. 

    There’s a lot to learn about this exciting new computer, and you’ll find out all about it in this month’s edition of The MagPi.

    We've reserved Raspberry Pi 5 boards
for The MagPi subscribers

    Raspberry Pi 5 Priority Boarding

    We’ve reserved Raspberry Pi 5 boards for subscribers to The MagPi magazine and HackSpace to pre-order. If you’ve got a print subscription to one of our magazines, you’ll be able to buy your Raspberry Pi 5 first. See Priority Boarding for more information.

    Building new hardware, new silicon, and new docs for Raspberry Pi 5

    Engineering and documentation interviews

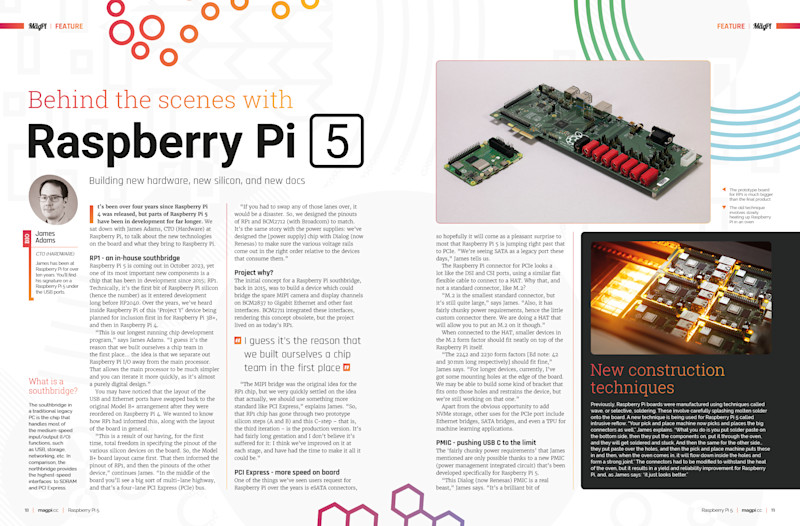
    Rob sat down with James Adams, CTO (Hardware) and Alasdair Allan (Head of Documentation) for an exclusive interview on the new hardware. They cover in-depth the new RP1 chip, and why it’s such an important feature in Raspberry Pi 5 and with the new Raspberry Pi connector for PCIe and M.2 implementations. The new power chip is explained in depth. Our feature digs deep into the Raspberry Pi 5 hardware and explains why it’s designed just the way it is.

    Raspberry Pi braille readers bring literacy to non- and partially sighted readers.

    Bristol Braille Canute 360

    We’re incredibly proud of the variety of projects the Raspberry Pi community comes up with. Bristol Braille, developed the Canute 360, is the world’s first multi-line Braille reader and is powered by Raspberry Pi Zero. This innovative device generates entire paragraphs of copy, and converts a Terminal window into Braille for non- and partially-sighted people. It provides a significant advance over traditional Braille devices.
    Keeping a watch on things in style

    Zelda Guardian Security Camera

    Naomi has recreated a model of a Guardian from The Legend of Zelda to monitor her dog. This working model has a rotating head and uses a Raspberry Pi Camera instead of firing a laser. The result is a fantastic camera project that’s lovingly recreated and painted to look just like the real thing.  

    Control a model railway

    Control a model railway

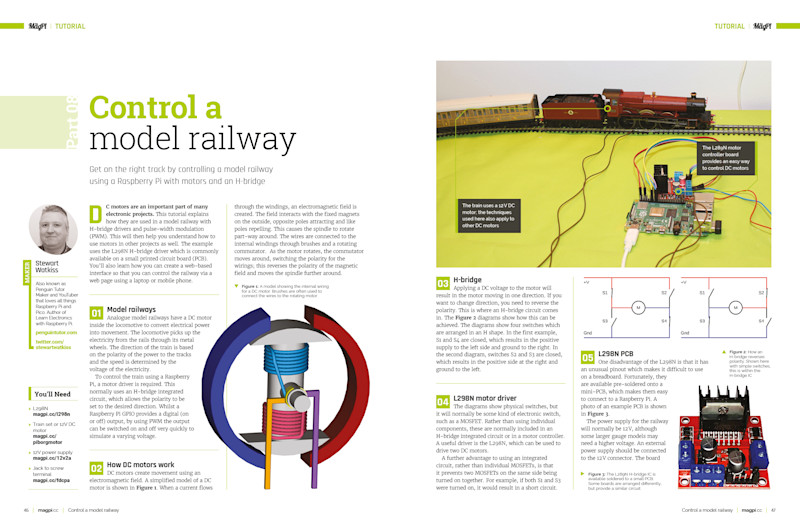
    Stewart Watkiss has spent the last few issues of The MagPi explaining electronics and circuit control. Now it’s time to put it to use by controlling a model railway. This tutorial features servo motors and Raspberry Pi along with an L289N H-bridge driver on a motor control board. This enables Raspberry Pi to power and control the train directly on the track. 

    Trick or Treat with Raspberry Pi

    Trick or Treat

    It’s nearly time for Halloween and Rob has created this fangtastic feature packed with ghoulish projects. It’s got everything from haunted mirrors to talking doorbells and an automated candy dispenser. 

    Learn robotics with Raspberry Pi

    Learn robotics with Raspberry Pi

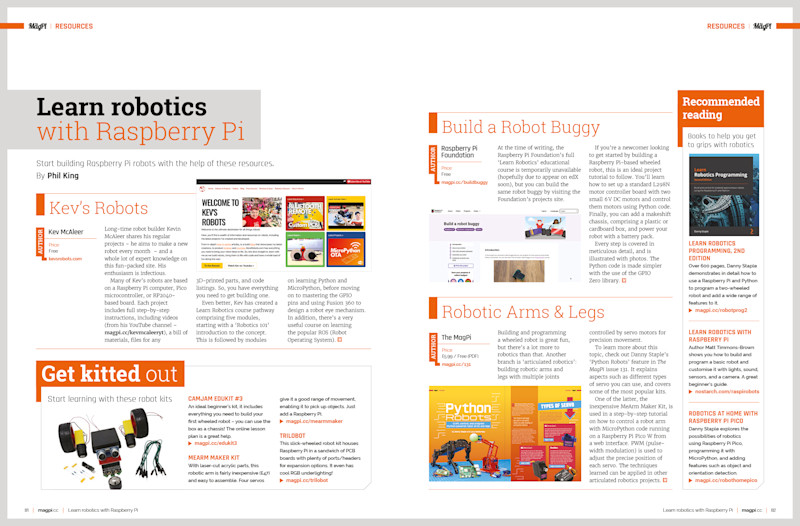
    If you’ve ever fancied making a robot, either the wheeled variety or one with arms and legs, then our Learn Robotics spread has all the resources you need. Discover some of the best makers around, along with easy-to-use kits and tutorials, books and websites

  • Pironman mini PC tower case review

    Pironman mini PC tower case review

    Reading Time: 2 minutes

    Putting it together

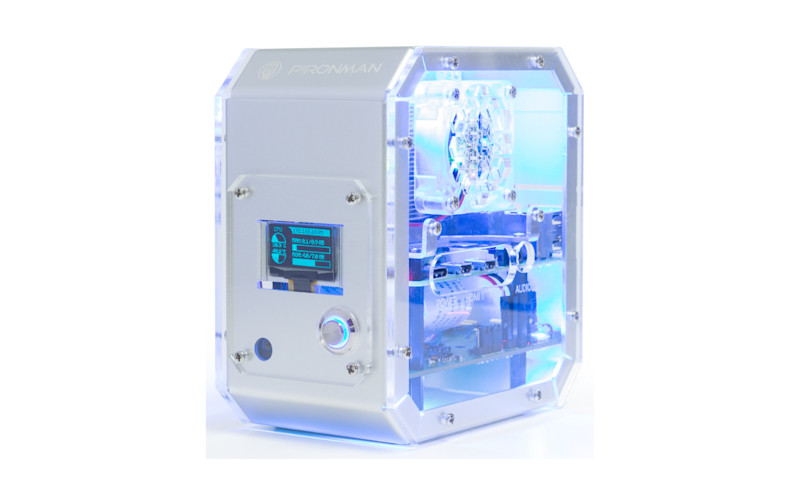
    The build process for Pironman is long and fiddly. The case itself comes partially assembled, but immediately requires disassembly to fit your Raspberry Pi inside. There then follows a 24-step assembly process that involves multiple flat conductor cables (FCC) to wire together the OLED display, SD card extender, and GPIO connector.

    There are also multiple standoffs to connect the Pironman board underneath your Raspberry Pi 4 board. In total, we counted 28 different types of component in the case.

    There are multiple opportunities for the build to go wrong. In this instance, however, ours booted up and worked the first time. Still, the build took us around three careful hours to complete.

    The end result is cute, in a slightly hacked-together way with plenty of screws and gaps. It’s nowhere near as polished as some of the other cases on the market. But it is packed with components with a unique charm.

    Verdict

    8/10

    A complex build results in a charming, if slightly hacky, micro PC-tower-style case with a range of interesting components.

    Specs

    Case: Aluminium tower case for Raspberry Pi 4 Model B (not compatible with Raspberry Pi 3)

    Internals: Ice tower cooler with 5 mm copper pipe; Silent RGB fan with temperature control; On-board USB to M.2 SATA SSD, Supports TRIM and UASP; Available SSD Lengths: 22 mm × 30 mm, 42 mm, 60 mm, and 80 mm; Programmable 0.96˝ OLED

    I/O: IR receiver for media centre; Power button for safe shutdown

  • EPIC Satellite

    EPIC Satellite

    Reading Time: 3 minutes

    When Matt saw the 2.1-inch HyperPixel Round Touch Display in the Pimoroni shop, he decided it looked perfect. “This screen is designed for use with Raspberry Pi, so I used a Raspberry Pi Zero W.” Matt explains that he needed the wireless capabilities to download the photos from NASA. His approach would be similar to that used in his ‘Game Boy Camera Fast Wifi Adapter’ project (featured in The MagPi issue #110), which saw Matt find a way to pull the photos from the handheld console onto his smartphone.

    EPIC sends back photos of Earth from its vantage point a million miles away

    Rounded approach

    Although Raspberry Pi Zero W is “way overpowered for the job,” Matt chose it because it offers a quick and easy way for him to bring the project into being. “As always, with anything I’ve made with a Raspberry Pi, the hard bit for me was getting the code to run by itself at startup without any warnings or windows popping up over the top.” Matt also praises Pimoroni, who “have done the hard work of making the round screen so easy to use.” An alternative option would have been to use a microcontroller and a different round screen, but this would have taken far longer, as so many aspects would have needed to have been written or designed from scratch.

    Another piece of good fortune was that someone else had already created a really good-looking case for the HyperPixel display that would look great sitting on a desk.

    Matt wrote a Python script that checks the Blue Marble API for new EPIC photos, downloads them, and then loops showing each one in sequence on the screen using the Pygame library. The EPIC Daily Blue Marble API is provided by NASA and provides information about the images that the DSCVOR EPIC equipment collects here. Its Earth-Sun Lagrange positioning ensures that it is not just the acronym that is EPIC! It captures unique perspectives of astronomical events, such as lunar transits, using a 2048 × 2048 pixel CCD, coupled to a 30 cm aperture Cassegrain telescope.

    Case work

    The HyperPixel display was useful on its own, but needed something to hold it at a convenient viewing angle. Matt was about to design his own case, but did a quick check online to see whether anyone else in the community had designed a 3D-printable case for the round screen and Raspberry Pi combo. Happily, he found Cults3D user named ‘Printminion’ who had designed the perfect case.

    Matt’s infectiously enthusiastic videos convey his love of space and tech

    Since Printminion’s case was specifically designed for the HyperPixel display, Matt was able to focus on how to make use of NASA’s Blue Marble API to get the incredible NASA photos on the screen. The API is named after the famous Blue Marble photo of Earth captured by the Apollo 17 space mission in 1972.

    As well as daily images used to form Matt’s EPIC slide show, the API can serve up noteworthy images depicting our exploration of near space, and important images such as partial lunar eclipses and transits.

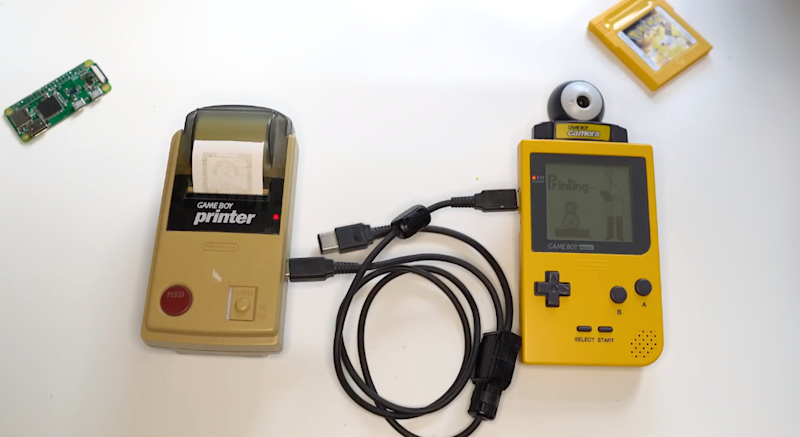
    Matt’s previous Pi Zero W projects include this Game Boy photo printer

    Matt has created a making-of video for the EPIC Satellite project on his YouTube channel. Look out for updates as he begins to make it even more epic, by adding options to view images of the moon and other planets.

  • Witty Pi 4 vs Adafruit Feather RP2040 with RFM95 LoRa Radio

    Witty Pi 4 vs Adafruit Feather RP2040 with RFM95 LoRa Radio

    Reading Time: 2 minutes

    Witty Pi 4

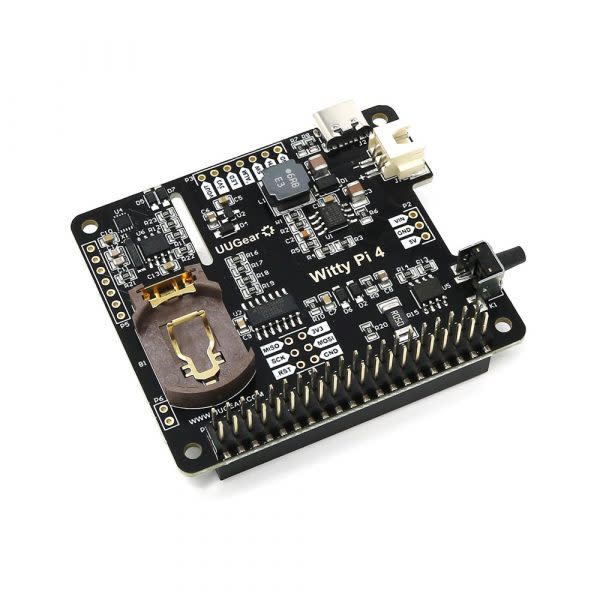
    The Witty Pi 4 ($27.63) from UUGear is a great solution for all your Raspberry Pi timing, scheduling, and power management needs. No longer will you need to worry about the accuracy of your Raspberry Pi clock thanks to the on-board real-time clock and temperature sensor that allows for additional accuracy and temperature compensation. And anyone who has worked with the Raspberry Pi knows about power management and the relatively difficult nature of powering your Raspberry Pi on or off, and this is where the Witty Pi really shines.

    Unlike a microcontroller that you simply power-off, you need to go through a powering-off sequence with your Raspberry Pi, similar to your desktop computer. And the Witty Pi can do that too! Now your Raspberry Pi can shut down and only wake up when needed, saving lots of power. If you have a remote monitoring project, or one that runs off battery power, the Witty Pi should be something to consider adding to the build.

    Verdict

    9/10 Great addition to a Raspberry Pi.

    Adafruit Feather RP2040 with RFM95 LoRa Radio

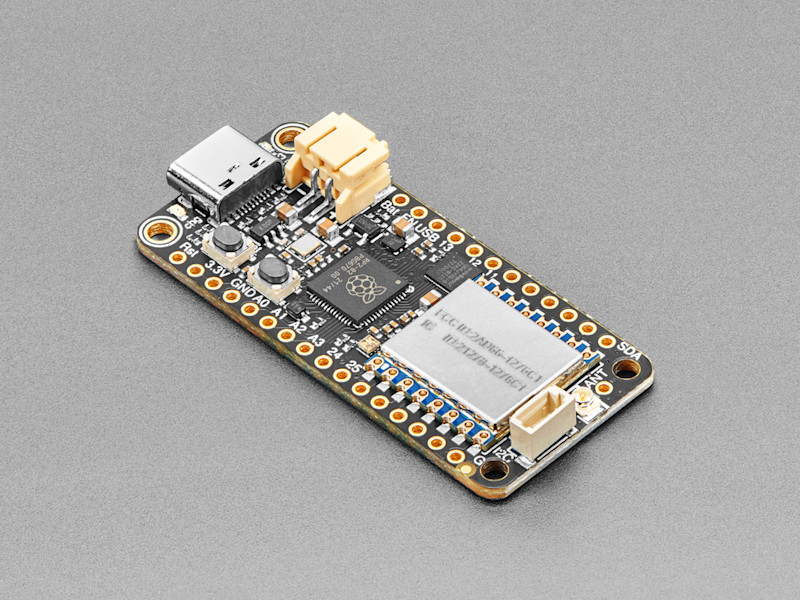
    The Adafruit Feather RP2040 RFM95 LoRa Radio board ($29.95), aka ‘RadioFruits’, is Adafruit’s take on a microcontroller with integrated long-range (LoRa) packet radio transceiver, along with a built-in USB and battery charging system. This is the perfect microcontroller board for creating wireless sensors that have a longer range and require less power than other wireless solutions like Bluetooth.

    The board features an RP2040 chip running at 133MHz, the same as you can find on a Raspberry Pi Pico. You also get a generous 8MB of on-board QSPI flash and 264kB of RAM, plus on-board RGB LED, STEMMA QT connector, and lots of GPIO pins. Between the on-board battery management, LoRa radio, and RP2040, it would be hard to beat this little board for creating an outdoor sensor network.

    Verdict

    10/10

    Simple long-range sensing.

  • Learning by making

    Learning by making

    Reading Time: 2 minutes

    Still, that just means I need to dig down into the documentation, and read the manual. I tried using Bard and ChatGPT to create working code, but it was all out-of-date or simply incorrect. I’m enjoying hacking through it all.

    In the meantime, I’ve got it up and running with a direct Ethernet connection. This is handy, as I helped take some photos of Babbage (the Raspberry Pi mascot) for Part 5 of our Camera Module tutorial (issue 133, page 54).

    On the whole, I’m pretty happy with how my little camera is coming along. Even if it looks a bit shonky and doesn’t fully work yet. That’s not always the point. Making my own camera is a fun project, but it’s also an important learning experience. You never quite learn as much as when making. I’ve learned more about the Raspberry Pi Camera Module and integration with Python and the picamera2 library, Raspberry Pi power requirements, and the windowing system over the last few weeks than I ever would just reading the documentation. Making remains quite humbling.

    Live and learn

    Another feature that really interested me this month is Work & Learn with Raspberry Pi (page 64). Raspberry Pi is increasingly becoming my go-to work computer, and I bought a 60% mechanical keyboard to keep my desk tidy and type better with Raspberry Pi.

    It’s always interesting to me that Raspberry Pi was designed as a computer for making and hacking, but is increasingly useful for everyday computing tasks. It’s a perfect little Linux machine for doing the regular task of writing, editing, and commissioning all the other great people who work on this magazine. Of course, it helps that a lot of my work involves writing about Raspberry Pi, so doing that with Raspberry Pi feels nicely circular.

    Learning has always been a fairly central part of my life. It’s always felt important to me to be developing myself. Sometimes it’s just personal development; sometimes on a professional front. But, as long as I end the day having a little more nounce than before, I can go to sleep happy.

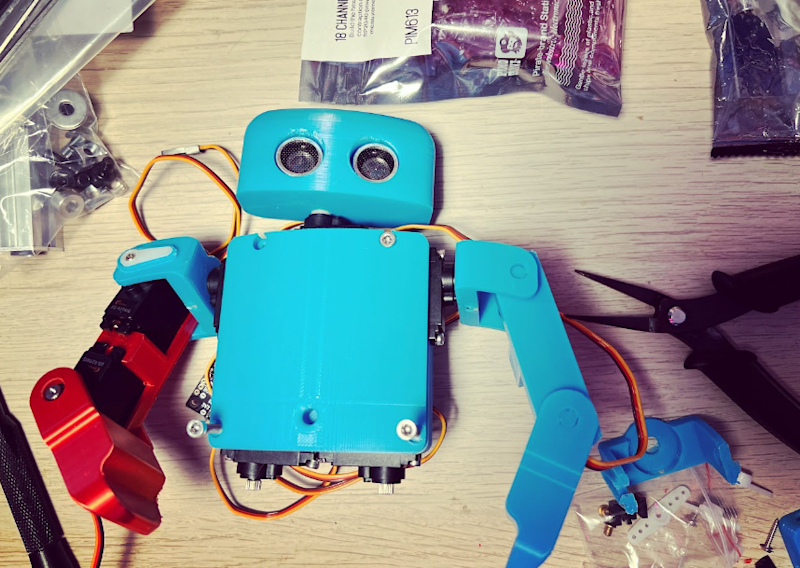
  • Chip Bipedal Companion Robot

    Chip Bipedal Companion Robot

    Reading Time: 3 minutes

    Walk the walk

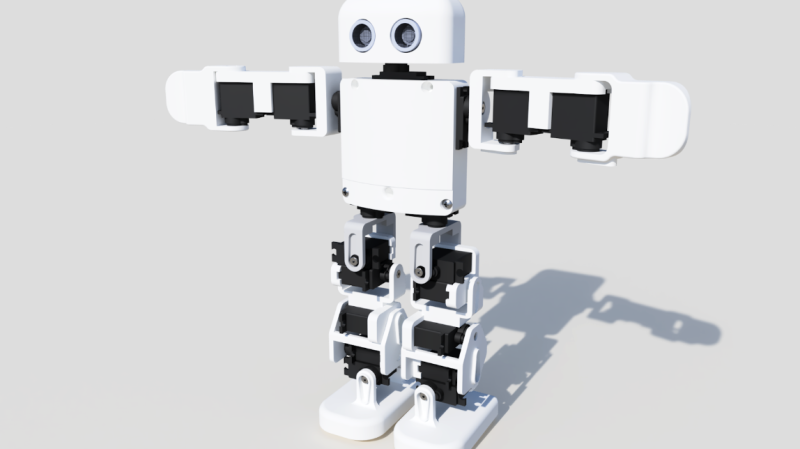
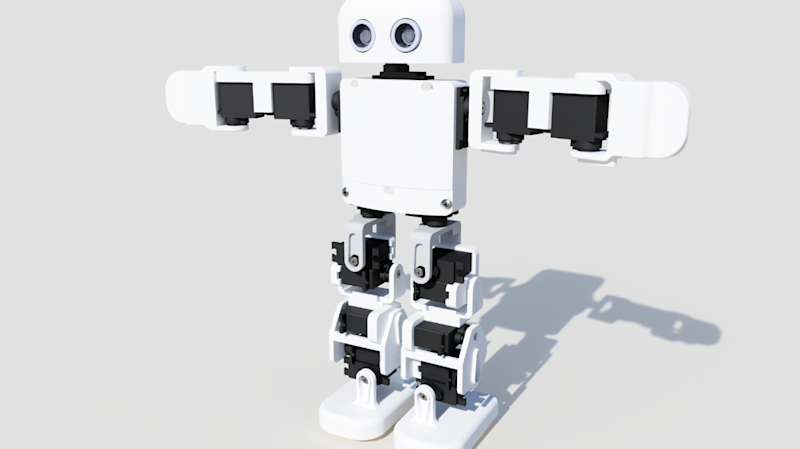
    Kevin wanted to create a small bipedal robot so he could develop his expertise with walking and gestures. He relished the idea of designing something that would quite literally stand or fall depending on whether he was able to get the balance right, but also the instability needed to allow his electronic biped to walk. He envisaged a robot similar in looks to Plen (the first open-source, 3D-printable robot), with nods to Robosen (which makes the likes of Optimus Prime and Buzz Lightyear robots) and EZ-Robot, a self-assembly robot for educational use. Walking and smoothly extending the limbs were key, and meant Kevin would need to consider the robot’s aesthetic design and be vigilant about 3D-printing tolerances.

    Chip shows off his many moves

    The ambitious robot design will provide “18 degrees of freedom” proclaimed Kevin part-way through the build, “and move in 18 different ways.” The hands, arms and shoulders, hips, upper leg, knee, lower leg, shin, and foot will all articulate, while the neck will be able to rotate. All of this necessitates a board with 18 servo sockets, hence Kevin’s choice of Pimoroni’s Servo 2040 board based on the RP2040 chip. A clear advantage for Kevin was being able to program everything in MicroPython, his first choice of programming language due to its simplicity. The straightforward code is pretty important as Kevin aims to put together a tutorial for Chip which all ages will be able to follow. He also rates Pimoroni’s documentation and support, and says “Pimoroni includes some great servo classes that have servo easing to make motion really buttery smooth.” Even so, he needed to adjust the tolerance (distance between the two arms between each servo) so the servos would move freely.

    Rock solid foundations

    Kevin says using the RP2040-powered Pimoroni Servo 2040 board meant he could get straight to the interesting part of this project, designing the parts and constructing them. The Raspberry Pi RP2040 chip at its heart “has plenty of power and flexibility to enable me to add extra sensors, such as an IMU (inertia measurement unit), so the robot can balance and keep itself upright.” However, it didn’t all go quite to plan: “I burned out a couple of servos making this project; the joints were too stiff, and I cranked up the amperage to see if they could move it better, and magic smoke appeared.”

    Despite his experience in 3D printing and robot design, Kevin found he had to print several versions of each part to get the fit just right. “Designing the model in 3D doesn’t always highlight the issues you find after 3D-printing the model,” he explains. He was able to reduce the printing time as he has two 3D printers, but one uses red filament, so the pieces then didn’t match, necessitating a complete body spray to give Chip the intended look.

    We think Chip looks great and will be keeping an eye on Kevin’s blog to see how the self-balancing feature based on the PID algorithm comes along. Having splurged on 19 servos costing £9 each, Kevin admits Chip is an expensive build, but loved bringing him to life: “Seeing a little human-like robot walking around is too much fun!”