Schlagwort: Assistive Technology
-

A gamified approach to therapy and motor skills testing
Reading Time: 2 minutesFor children who experience certain developmental delays, specific types of physical therapies are often employed to assist them in improving their balance and motor skills/coordination. Ivan Hernandez, Juan Diego Zambrano, and Abdelrahman Farag were looking for a way to quantify the progress patients make while simultaneously presenting a gamified approach, so they developed…
-

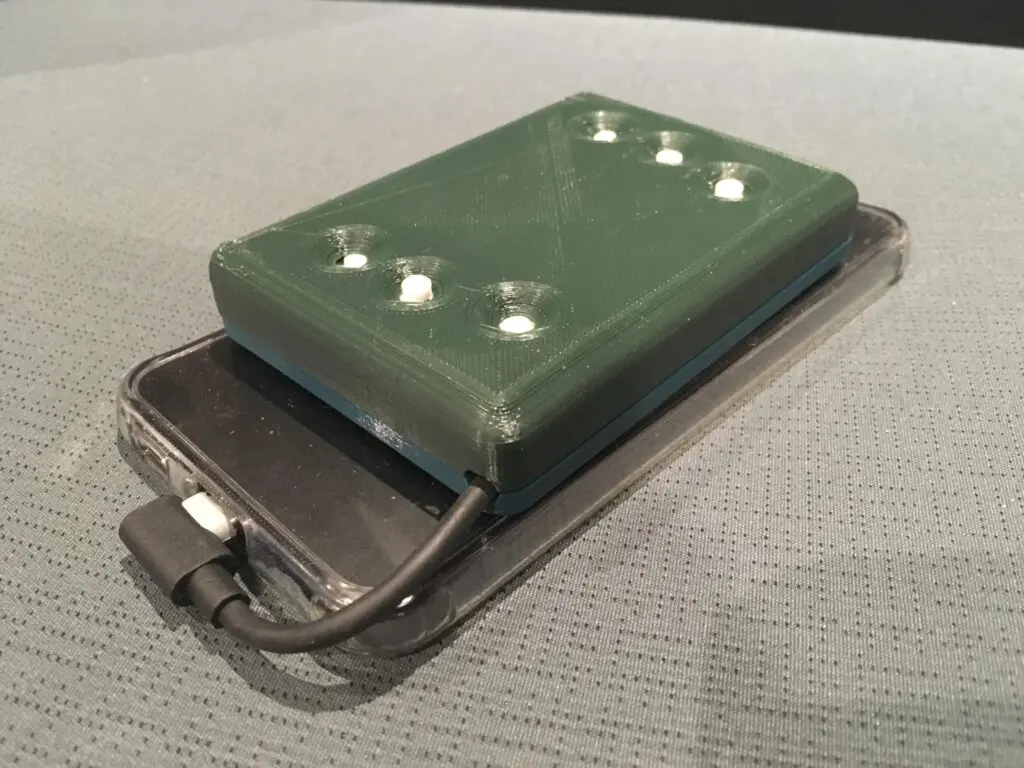
This small device enables users to feel braille through haptics
Reading Time: 2 minutesFor the visually impaired community, most of their interactions on mobile phones are confined to text-to-speech (TTS) interfaces that read portions of the screen aloud. Dynamic braille displays also exist as a tactile means of communication, but their prices can get close to $15,000, putting them out of reach for most people.…
-

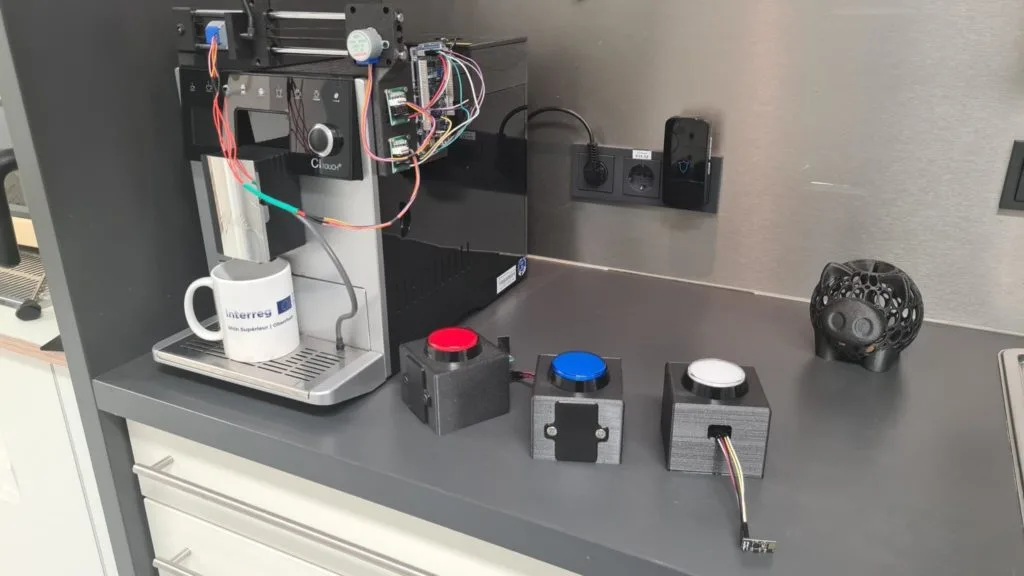
This Arduino GIGA R1 WiFi project turns a coffee maker into a more accessible appliance
Reading Time: 2 minutesWhile many of the things we interact with every day have become more usable by people with disabilities, the kitchen remains as one important area of our lives that still lacks many accessibility features. One of these commonplace appliances is the coffee maker and its array of small buttons or even a…
-

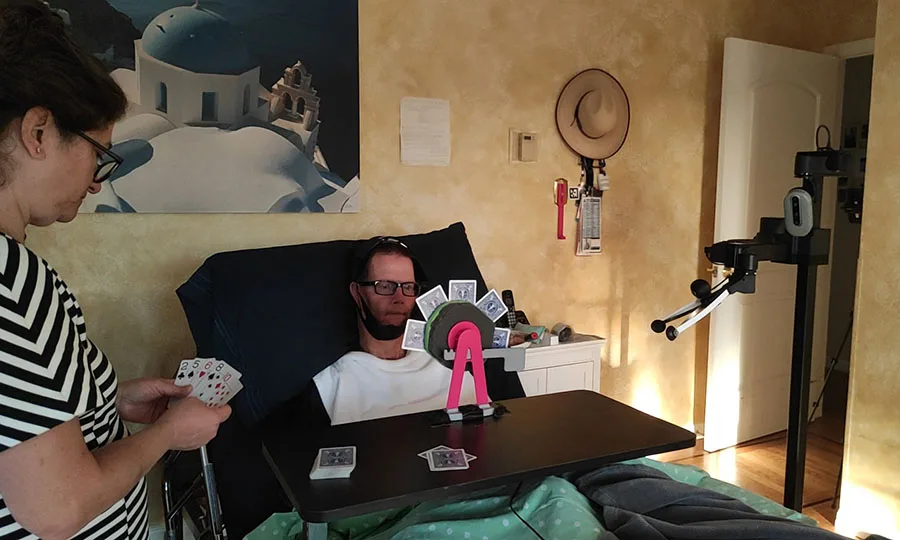
Motion control interface facilitates robot operation for those with paralysis
Reading Time: 2 minutesHenry Evans suffered a brain-stem stroke 20 years ago that left him paralyzed with quadriplegia. He can move his head, but other than a small amount of movement in his left thumb, he can’t control the rest of his body. To help Evans live a more independent life, researchers from Carnegie Mellon…
-
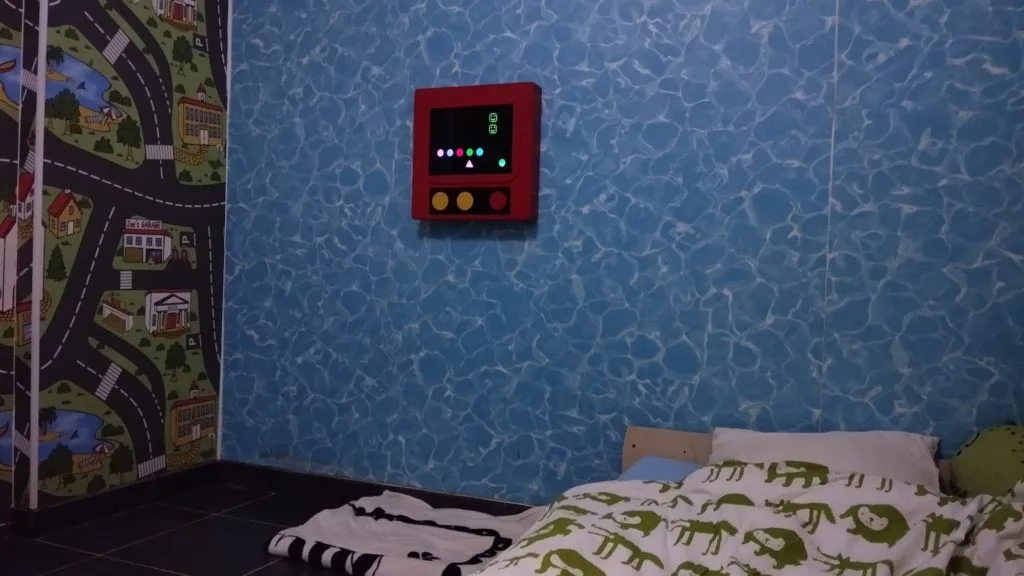
A gaming platform tailored to those with special needs
Reading Time: 2 minutesAs a society, we have decided to enact some measures to make our world more accessible to those with disabilities. Wheelchair ramps, for example, are often legal requirements for businesses in many countries. But we tend to drop the ball when it comes to things aren’t necessities. For instance, entertainment options are…
-
Voice-enabled controller makes video games more accessible
Reading Time: 2 minutesAlmost all modern video games require either a gamepad or a keyboard and mouse, which means that they’re inaccessible to many people with disabilities that affect manual dexterity. Bob Hammell’s voice-enabled controller lets some of those people experience the joy of video games. This is a simplified video game controller with a…
-

RoboCup is an assistive drinking device for people living with cerebral palsy
Reading Time: 2 minutesOne of the many realities of living with cerebral palsy is limited upper body dexterity, as almost every activity requires the help of a caregiver. That includes something that most of us take for granted: drinking water. To restore at least that little bit of independence, Rice University engineering students Thomas Kutcher…
-

This AI system helps visually impaired people locate dining utensils
Reading Time: 2 minutesPeople with visual impairments also enjoy going out to a restaurant for a nice meal, which is why it is common for wait staff to place the salt and pepper shakes in a consistent fashion: salt on the right and pepper on the left. That helps visually impaired diners quickly find the…
-

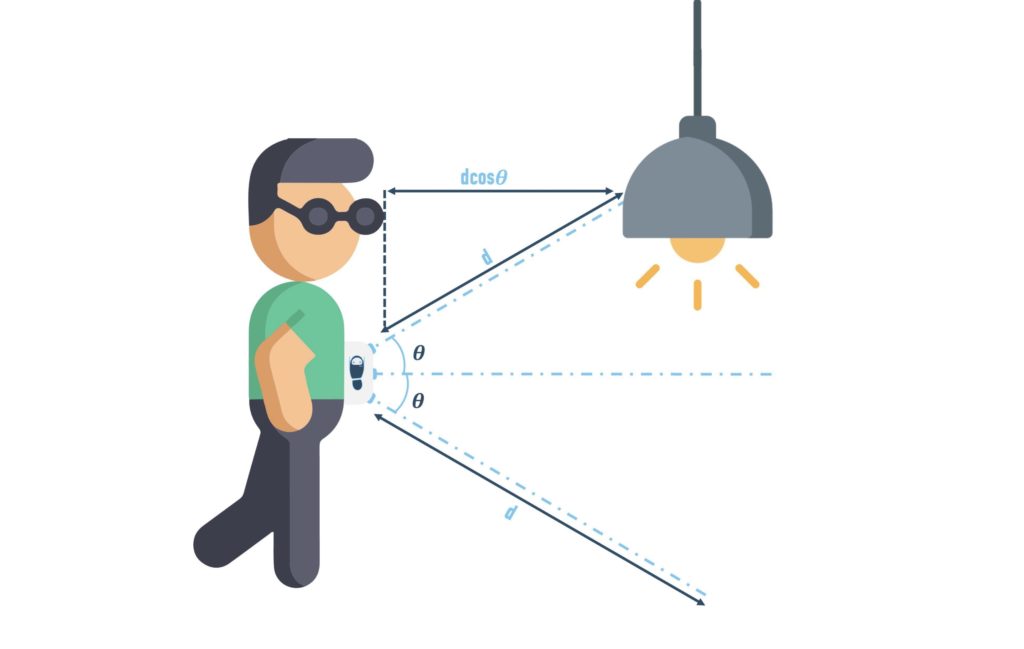
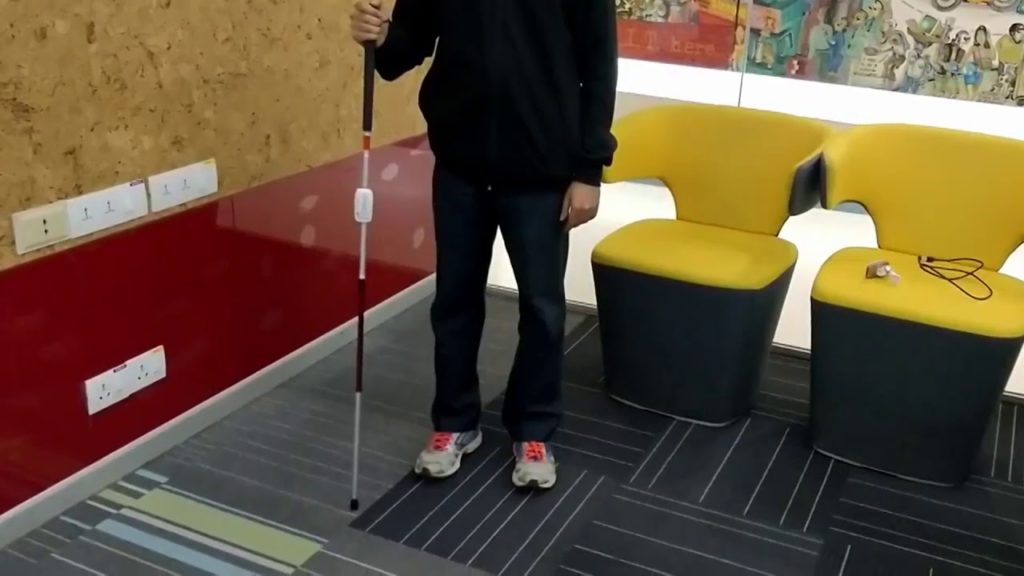
Walk-Bot helps people with visual impairments navigate safely
Reading Time: 2 minutesIt is no secret that visual impairments — even those that don’t result in complete blindness — make it very difficult for people to live their lives. White canes can help people get around, but they require physical contact. Seeing eye dogs provide very valuable assistance, but they’re expensive and need care…
-

The smartChair is a Nano 33 IoT-based stand-up and walking aid
Reading Time: 2 minutesArduino Team — September 2nd, 2021 Over time, people age and naturally tend to lose some or most of their mobility, leading to a need for a wheelchair, walker, or other assistive device. This led hitesh.boghani to submit his project, which he calls the smartChair, to element14’s Design for a Cause 2021 contest. This build…
-
Speak4Me is an eye-to-speech module designed to assist those unable to communicate verbally
Reading Time: 2 minutesArduino Team — September 1st, 2021 People who suffer from physical disabilities that leave them unable to speak or communicate effectively can end up frustrated or largely ignored. In response to this issue, Hackaday users Malte, Marco, and Tim R wanted to create a small device that can turn small eye movements into simple commands and…
-

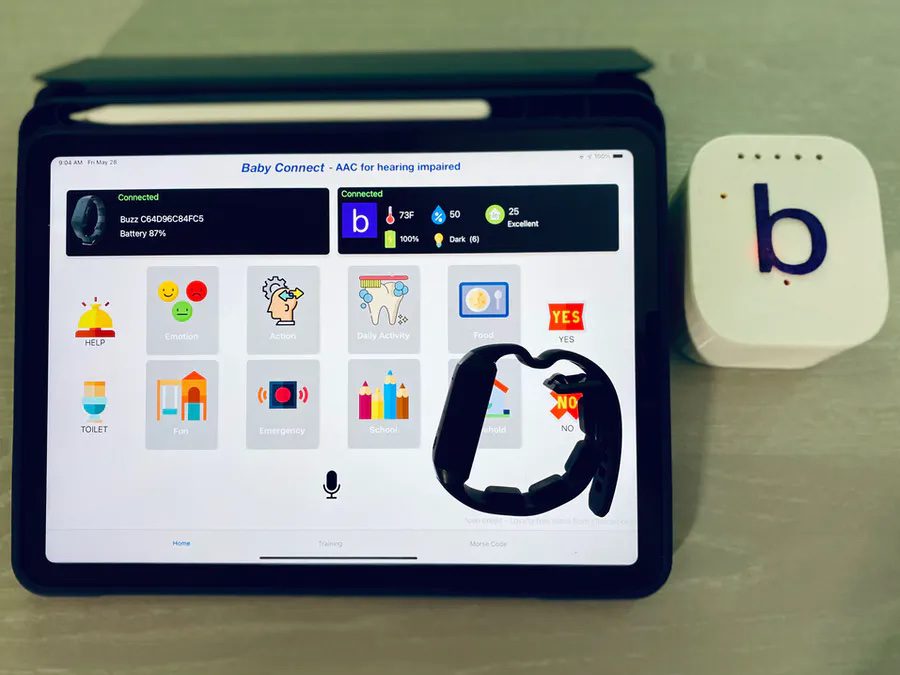
This system uses machine learning and haptic feedback to enable deaf parents to communicate with their kids
Reading Time: 2 minutesArduino Team — June 10th, 2021 For the hearing impaired, communicating with others can be a real challenge, and this is especially problematic when it is a deaf parent trying to understand what their child needs, as the child is too young to learn sign language. Mithun Das was able to come up…
-
This dad built an adaptive USB keyboard for his son and other kids with muscular conditions
Reading Time: 2 minutesArduino Team — June 3rd, 2021 Having a disability can severely impact one’s ability to perform tasks that others do regularly, such as eating, walking, or even speaking. One maker by the name of ‘gtentacle‘ has a son who needs to use a ventilator constantly in order to breathe as he suffers…
-

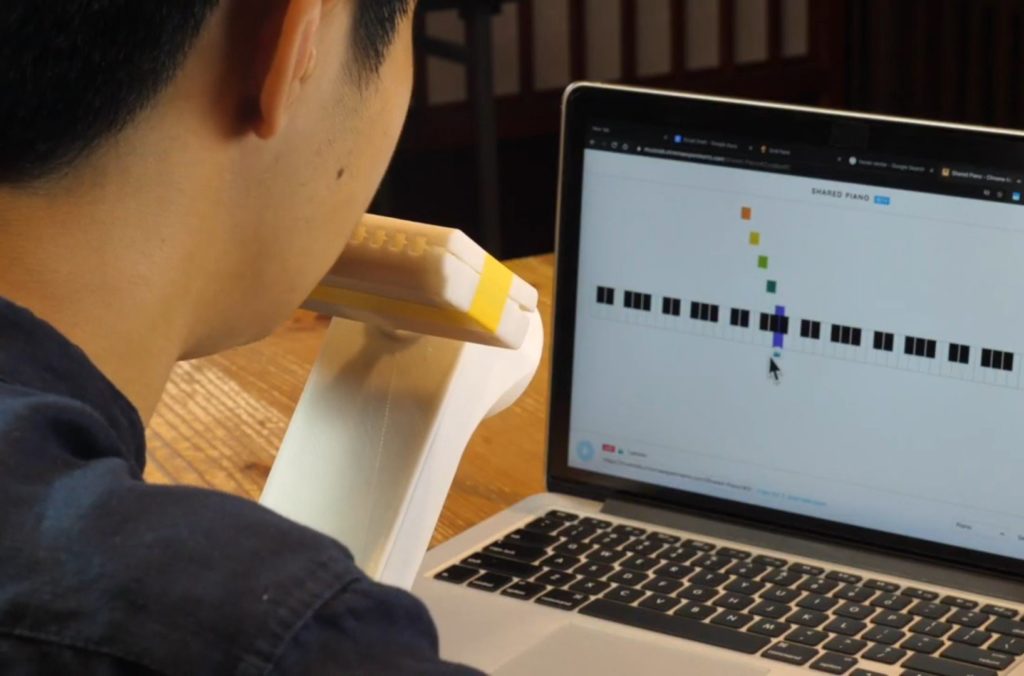
Magpie MIDI is an adaptive harmonica-style computer interface
Reading Time: 2 minutesMagpie MIDI is an adaptive harmonica-style computer interface Arduino Team — September 15th, 2020 For those with certain physical restrictions, interfacing with a computer can be a difficult task. As a possible solution, Shu Takahashi and Pato Montalvo have come up with the Magpie MIDI hands-free interface. The adaptive tool, inspired in part by…
-

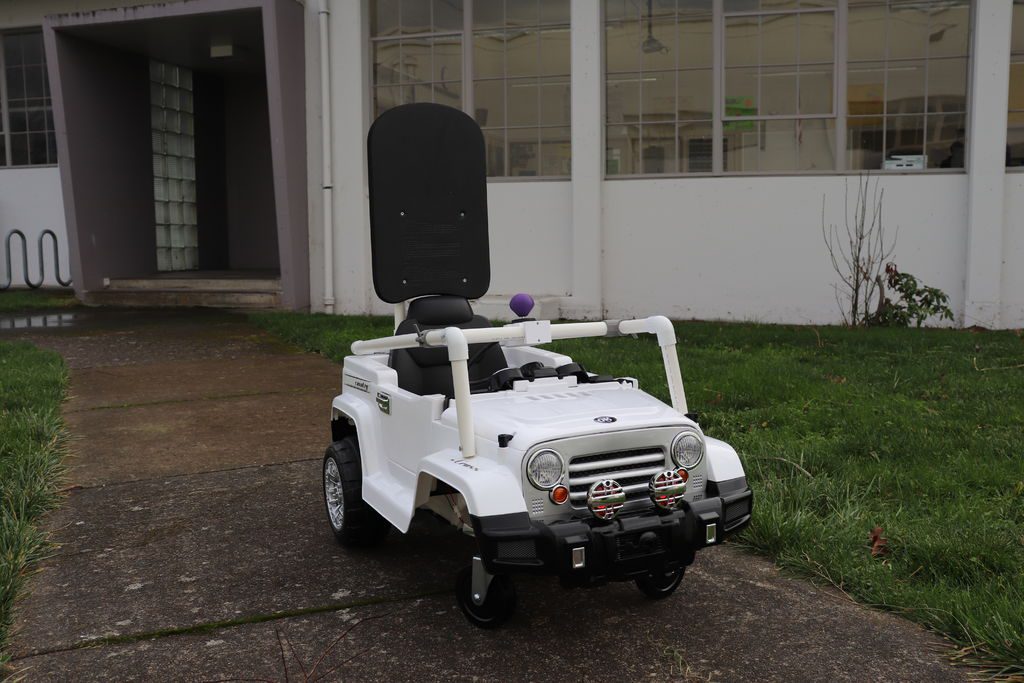
Upgrading a ride-on car to a joystick-controlled assistive device
Reading Time: 2 minutesUpgrading a ride-on car to a joystick-controlled assistive device Arduino Team — January 9th, 2020 Child-sized wheelchairs can be difficult to come by, and unfortunately aren’t as much fun as something like a ride-on car. The South Eugene Robotics Team, or FRC2521, decided to address both challenges by building a mini Jeep…
-
GesturePod is a clip-on smartphone interface for the visually impaired
Reading Time: 2 minutesGesturePod is a clip-on smartphone interface for the visually impaired Arduino Team — November 6th, 2019 Smartphones have become a part of our day-to-day lives, but for those with visual impairments, accessing one can be a challenge. This can be especially difficult if one is using a cane that must be put…
-

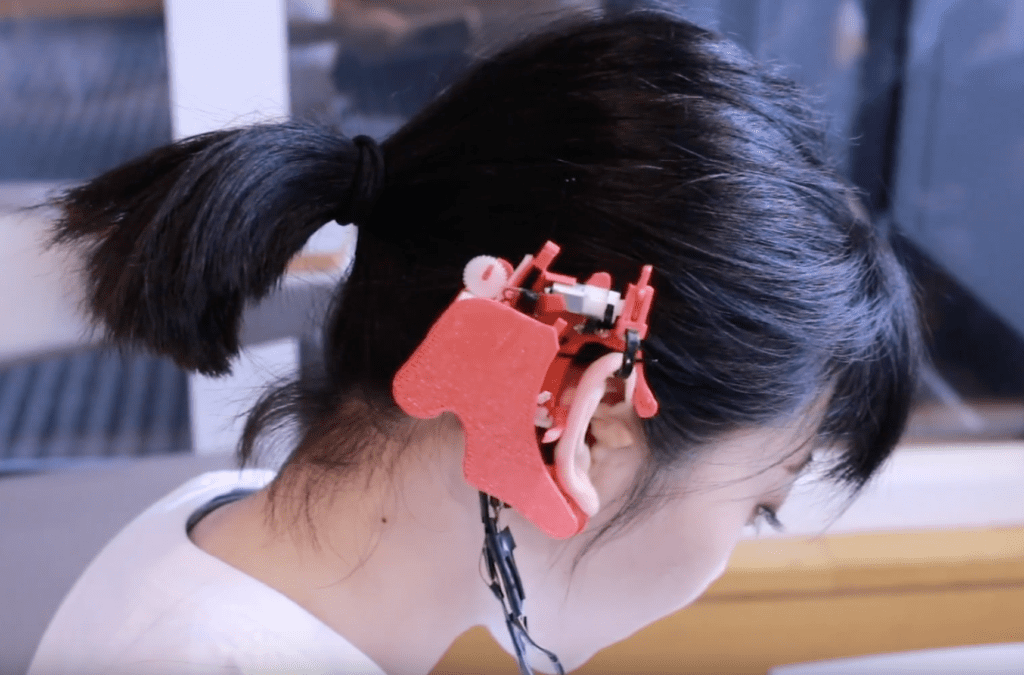
Communicate using your ear with Orecchio
Reading Time: 2 minutesCommunicate using your ear with Orecchio Arduino Team — October 23rd, 2018 When conversing face-to-face, there are a wide range of other emotions and inflections conveyed by our facial and body expressions. But what if you can’t express emotion this way, whether due to a physical impairment, or simply because of a…
-

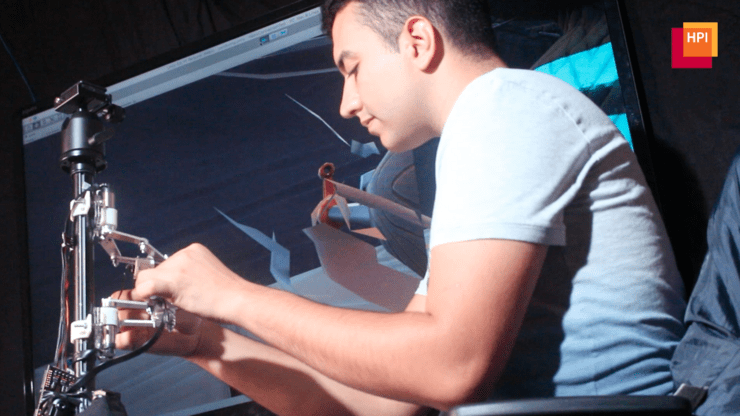
DualPanto is a non-visual gaming interface for the blind
Reading Time: 2 minutesDualPanto is a non-visual gaming interface for the blind Arduino Team — October 22nd, 2018 While there are tools that allow the visually impaired to interact with computers, conveying spacial relationships, such as those needed for gaming, is certainly a challenge. To address this, researchers have come up with DualPanto. As the…
-
Ariadne Headband is a wearable device for haptic navigation
Reading Time: 3 minutesAriadne Headband is a wearable device for haptic navigation Arduino Team — September 17th, 2018 In a new take on haptic navigation, makers Vojtech Pavlovsky and Tomas Kosicek have come up with a novel feedback system called the “Ariadne Headband.” This device—envisioned for use by people with visual impairments, as well as…
-

Robust wheelchair model with treads!
Reading Time: < 1 minuteRobust wheelchair model with treads! Arduino Team — September 14th, 2018 Most people accept that a wheelchair is, in fact, a chair with wheels. This, however, didn’t stop recent Galileo Galilei Technical Institute graduate Davide Segalerba from turning this concept on its head and producing a “wheelchair” scale model driven instead…
-

Sip and puff Morse code entry with Arduino
Reading Time: < 1 minuteSip and puff Morse code entry with Arduino Arduino Team — September 10th, 2018 Those that need a text entry method other than a traditional keyboard and mouse often use a method where a character is selected, then input using a sip or puff of air from the user’s mouth. Naturally…
-

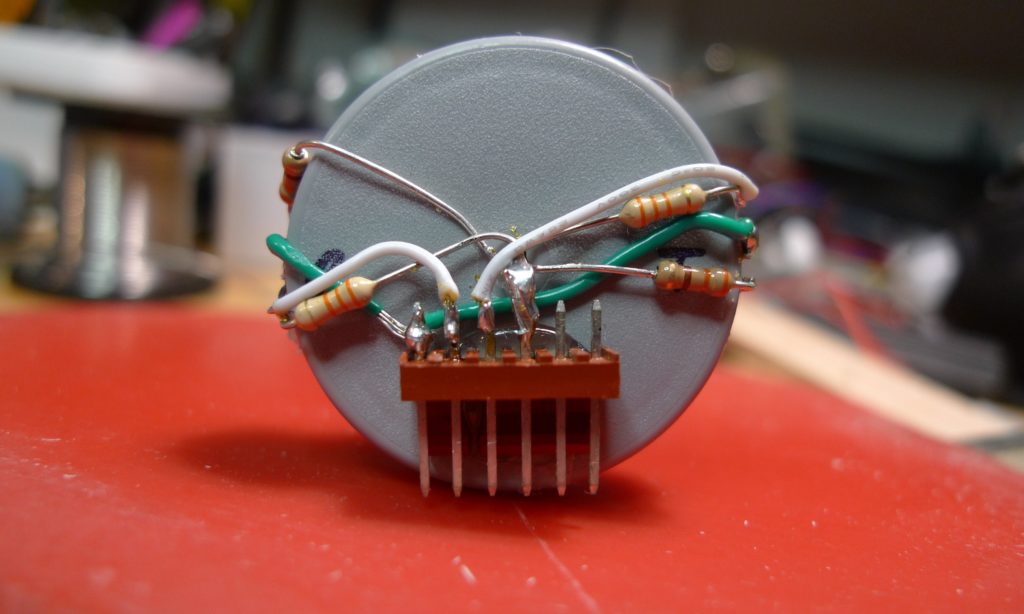
Notable Board Books are an Arduino-powered way to enjoy music
Reading Time: < 1 minuteNotable Board Books are an Arduino-powered way to enjoy music Arduino Team — August 6th, 2018 Annelle Rigsby found that her mother, who suffers from Alzheimer’s, is delighted to hear familiar songs. While Annelle can’t always be there to help her enjoy music, she and her husband Mike came up with…