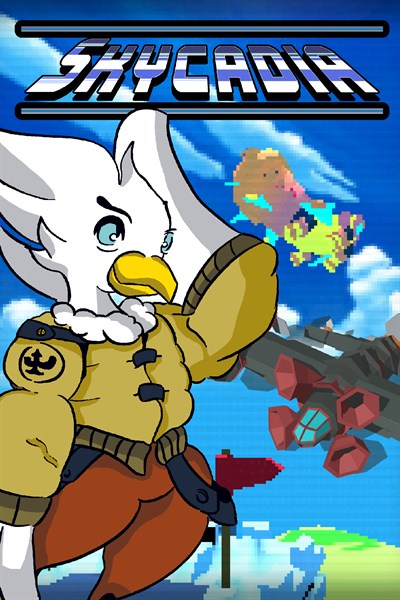
The world of Skycadia is overrun with sky pirates — and there’s profit to be made!
Take to the skies and collect bounties by shooting down the scoundrels in this light-hearted flying adventure.
Hand-crafted with love out of pastel pixels and chunky retro flavor
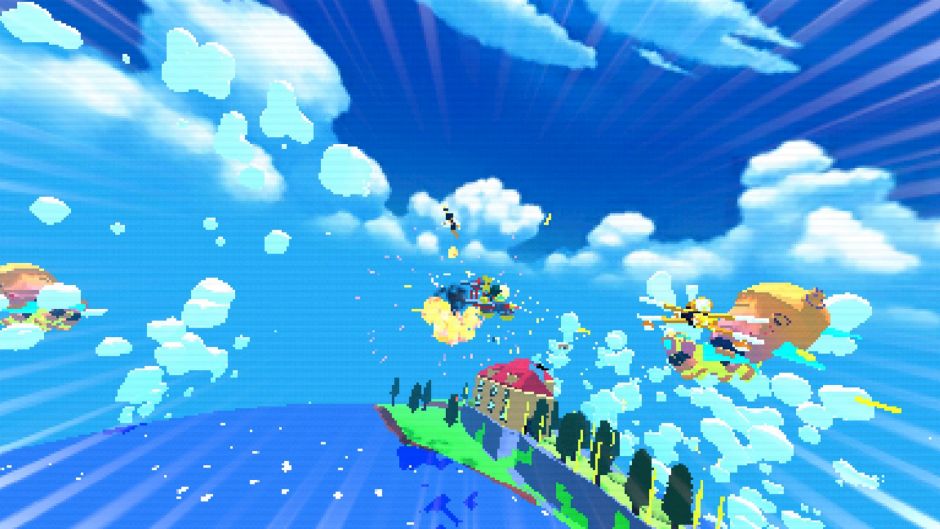
Skycadiais a fast-paced arcade dogfighting game where you compete to collect the highest bounty in a colorful, pixelated world. It’s been percolating for several years, going through many different iterations, and it’s finally ready for you to enjoy.
I’m a full-time instructor of Game Development at a community college in the Midwest, married father of 4, and I’ve spent the last 15 years in professional game development, from co-founding two indie game studios, to working at large companies as an artist and senior game designer. Throughout my career I’ve had the fortune to share my passion for game development with hundreds of students and mentees.
The earliest idea I had for Skycadia was a mix of the depth of Mount & Blade with the arcade gameplay of Starfox. After creating a simple prototype flying around shooting enemies with colorful spacey visuals, I felt I was on to something interesting. I started adding things to do between combat, navigating a world map with item shops and enemies, but after playtesting it was clear that the real fun was to focus on the frenetic flying and shooting.
After getting the game playable enough to show to other people, I brought a build to the Game Developers Conference in San Francisco and pitched it to the awesome team at Microsoft. I was nervous, but they were encouraging and liked the concept, so they gave me the go-ahead to develop Skycadia for Xbox One. It was a dream come true to be developing my own game for a major console!
A former student, McGuire Leiting, very graciously agreed to help me finish the game by contributing his art skills, so we started brainstorming how to take what I’d already done and polish it into a complete package. We had a lot of ideas, but we focused on arcade action and the high score chase. McGuire developed the distinct visual style that it has today to reinforce the vibe of the game. He also kept me on track to finally finish the project!
As a life-long game developer, I’ve been playing and making games for many years, but this is my first major console release of a personal project. I can’t wait for you to get your hands on Skycadiaand let me know what you think. Feel free to message me on Twitter with your feedback, and I look forward to seeing your high scores above mine on the leaderboards.
The world of Skycadia is overrun with sky pirates — and there's profit to be made! Take to the skies and collect bounties by shooting down the scoundrels in this light-hearted flying adventure.
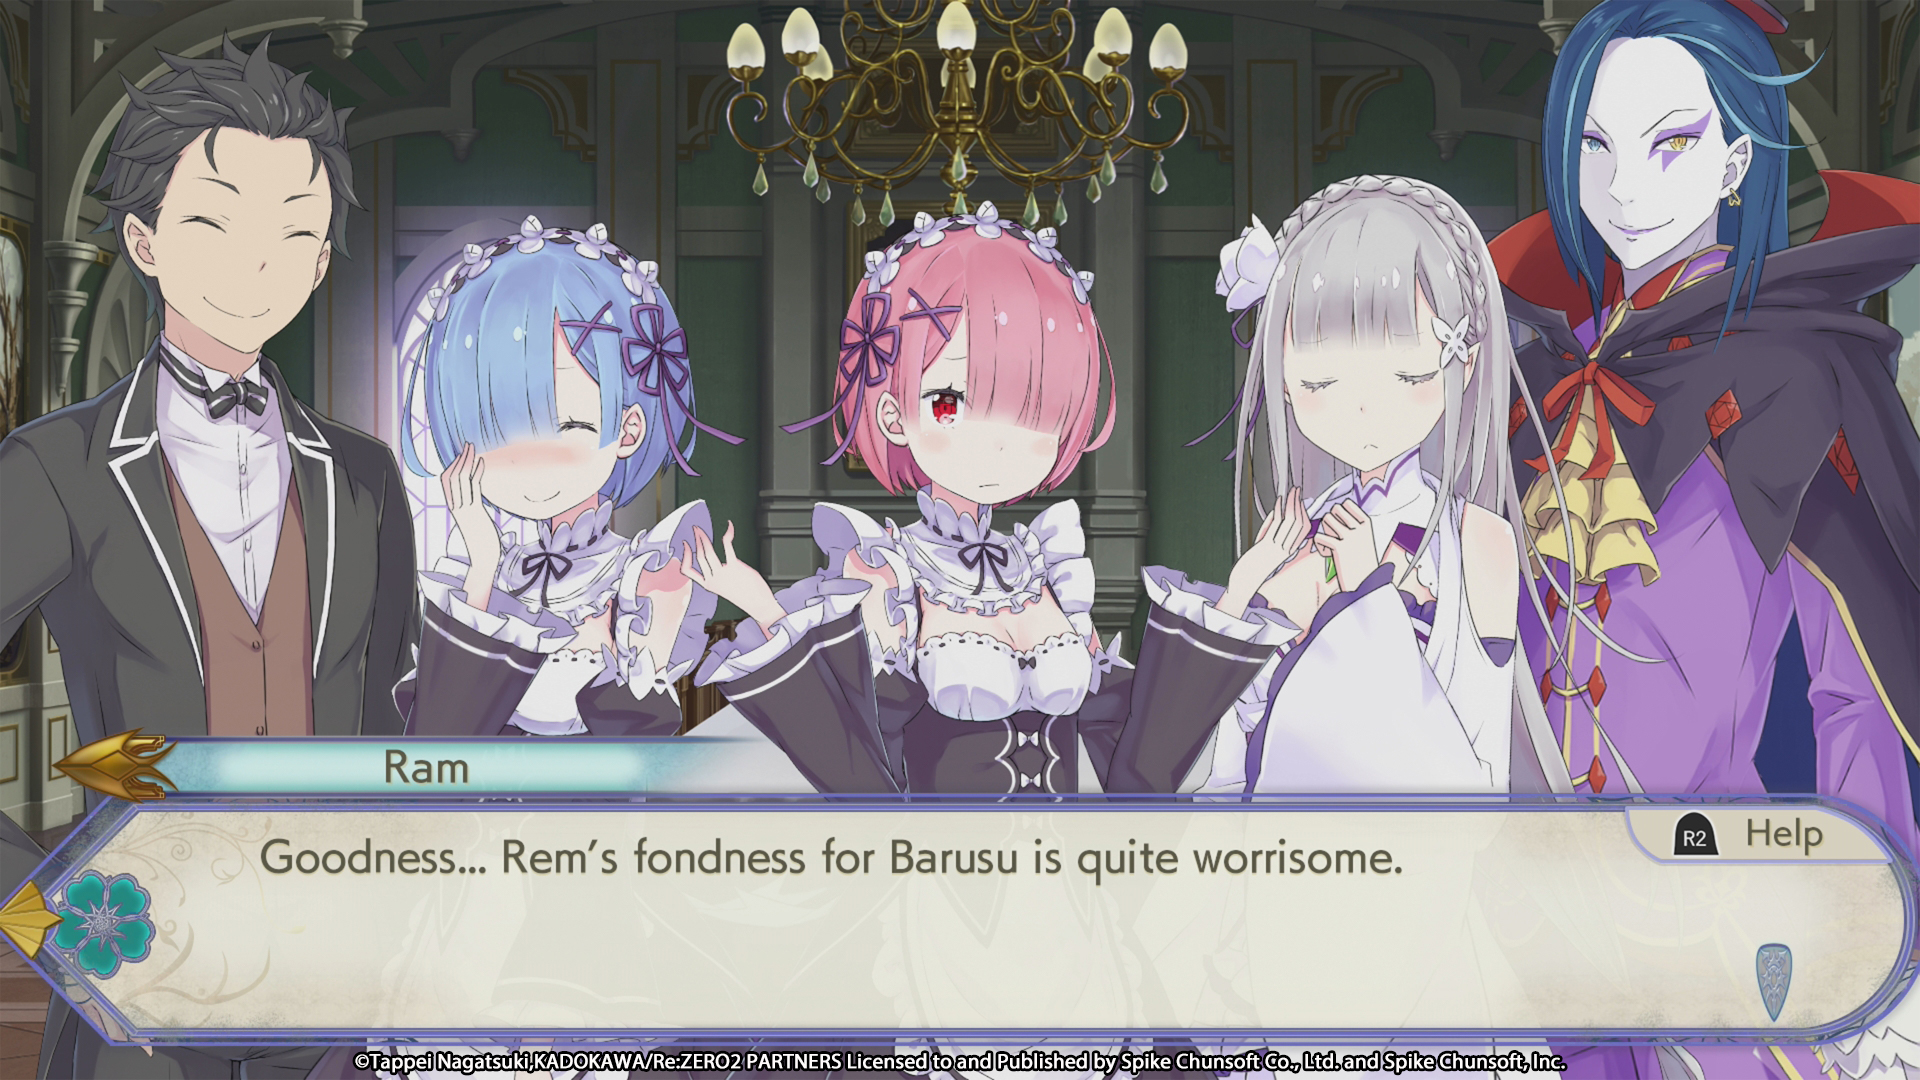
Re:Zero follows Subaru Natsuki, an average high school student who is magically transported to another world where he has the power to “Return by Death,” or literally the ability to turn back time by dying. Season 1 and 2 have been very popular at anime streaming sites. If you are a fan of the anime, light novel, or manga, you do not want to miss the video game adaptation of Re:Zero.
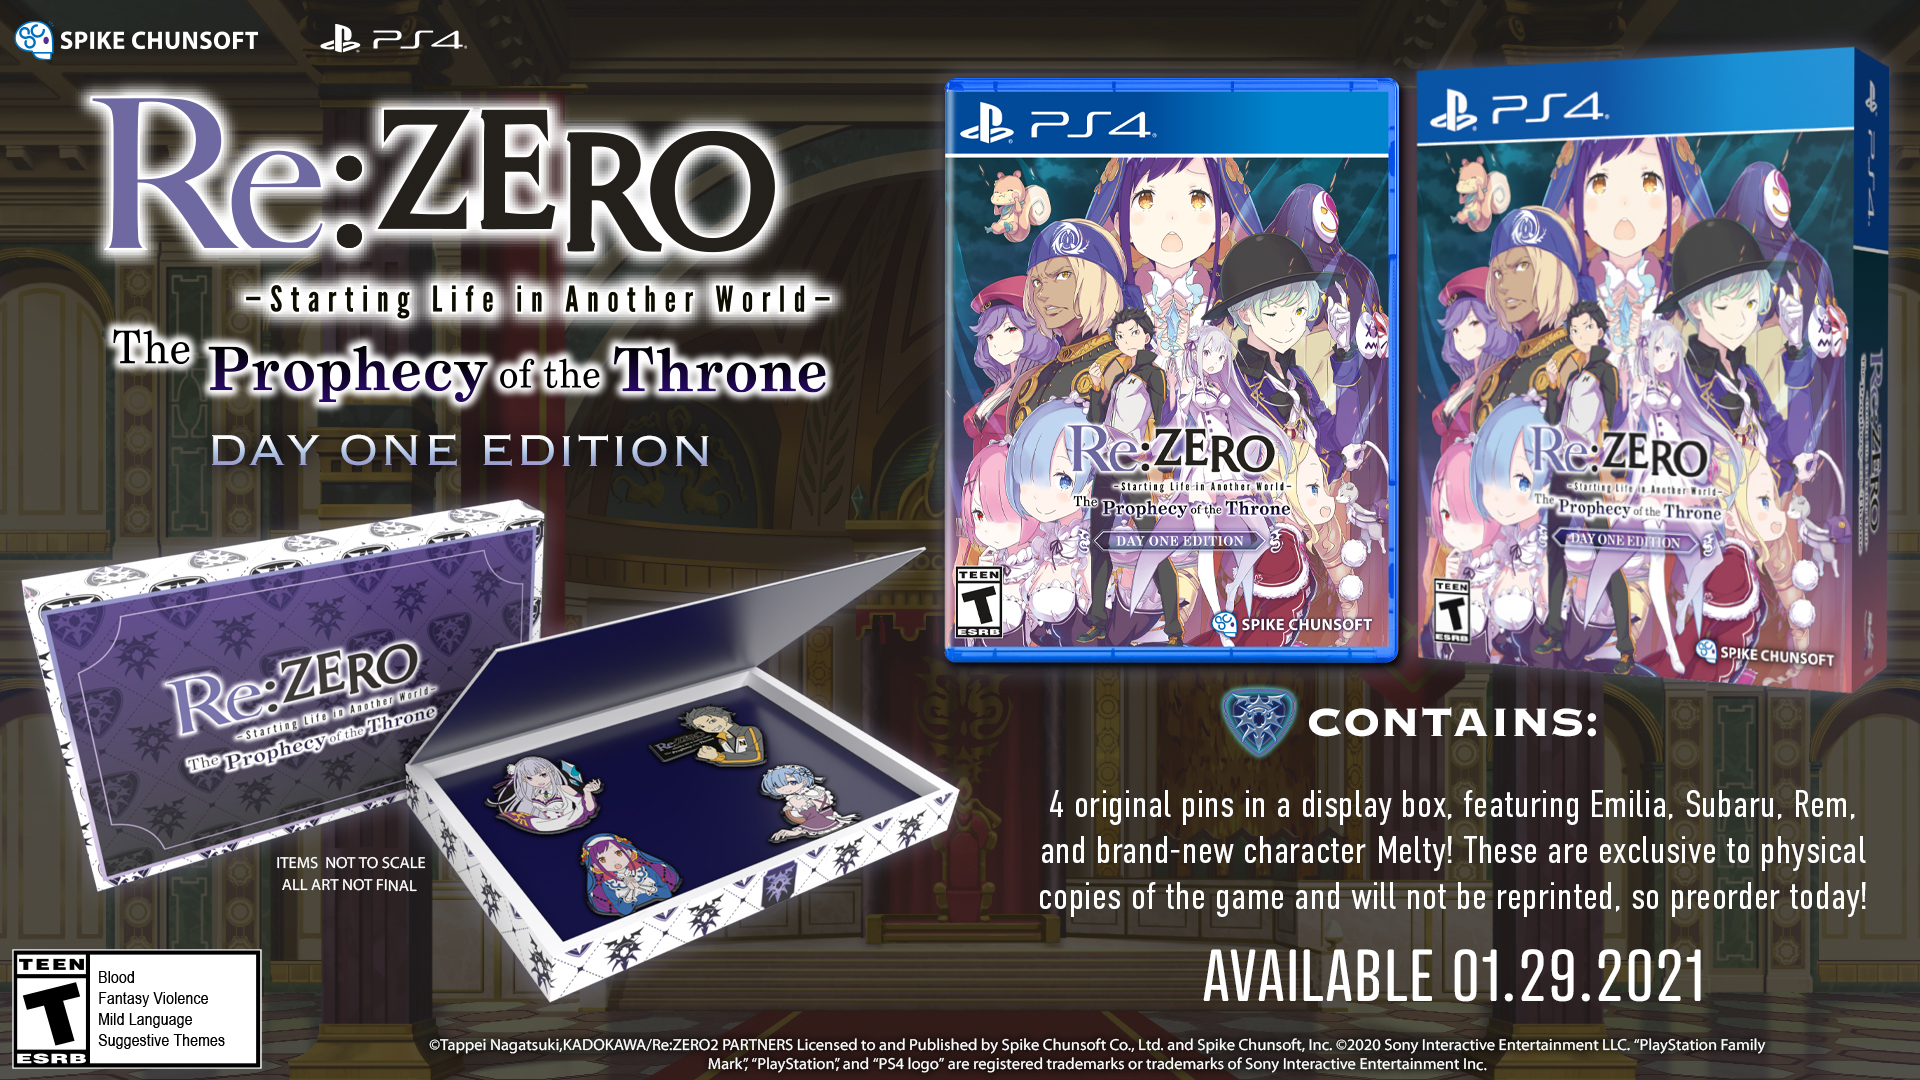
Re:Zero – Starting Life in Another World – The Prophecy of the Throne is coming to PS4 on January 29 for North America and February 5 for Europe. Check out the game overview trailer we just released!
Today I have Alex Flagg and Hiro Watanabe, the localization producers for Re:Zero – Starting Life in Another World – The Prophecy of the Throne to talk about what goes into creating a video game adaptation of Re:Zero.
Since the Re:Zero anime and light novel are very popular in the West, a lot of people might know this already… But just in case some people are not familiar with Re:Zero, can you tell us a little bit about the overall storyline and how the anime and the video game adaptation are linked?
Hiro Watanabe: Re:Zero follows the story of Subaru, a shut-in living in Japan who finds himself transported to another world. He eventually falls for a silver-haired half-elf girl, who happens to be a candidate to become the next ruler of the kingdom, and discovers that he has the ability to go back in time whenever he dies, allowing him to redo the mistakes of his past. I don’t want to give too much away, but he ends up getting involved in a series of events involving assassins, cultists, witches, and some other eccentric characters.
I heard the English dub cast of the Re:Zero -Starting Life in Another World- anime will return to reprise their roles! Was it difficult to do the recording while we were under quarantine?
Hiro: Recording under quarantine definitely came with its difficulties. Most of the work was done remotely, but we worked closely with the same studio that recorded the anime dub for this series, and the VAs and directors are all fantastic at what they do. We did have some technical hiccups along the way, but I think the end result turned out great.
We know that there are six new characters. Can you tell us a little bit about Melty and how she is involved in the royal selection?
Hiro: Melty is the nun that’s been featured in a lot of the promo material for this title. She’s a candidate of the royal selection, but has a more gentle and reserved personality compared to the other royal candidates who tend to be more headstrong. She and her camp bring an interesting dynamic to the cast, and those who are familiar with the series might enjoy seeing how events play out differently with their involvement.
We know there is already a big fan base for Re:Zero. Was there any challenge to make the game appealing to the existing Re:Zero fans?
Alex: There were certain things we knew fans would be expecting from this title. Like, “this has to be in a Re:Zero game.” One of those key points would be Return by Death. It’s such an interesting and unique part of Re:Zero, so we are happy to say it is implemented into this game.
Hiro: Return by Death is an iconic part of the series, and works well as a game mechanic in which one of the main objectives is to gather intel and items to help you get through obstacles. I think fans also enjoy Re:Zero for the storyline and character interactions, so I think they’ll appreciate that this title was fully supervised by the original author, Tappei Nagatsuki. It was a challenge with so many mediums of this series using different terms and phrasing, but we (especially our editor) put extra care into researching the characters and story for this game.
What do you think is the biggest draw of this game? Who do you think will enjoy playing?
Alex: I think the biggest draw of the game is being able to see your favorite Re:Zero characters in new situations and storylines. They’re expanding the world a bit with this title so that will be very cool for fans of the series.
Hiro: With the script having been supervised by the original author Tappei Nagatsuki, the character designs done by the series artist Shinichirou Otsuka, and both the Japanese and English cast reprising their roles for this title, I think there’s a lot for fans who are looking forward to more Re:Zero content to enjoy. Also, it’s always fun to see your favorite characters in new situations like Alex mentioned.
Thank you Alex and Hiro!
Re:Zero – Starting Life in Another World – The Prophecy of the Throne will be available on January 29 for North America and February 5 for Europe.
With digital pre-order, you can get PS4 exclusive avatars and PlayStation Plus users will receive 10% off.
The physical Day One Edition includes 4 exclusive, limited run only original pins in a display box, featuring Emilia, Subaru, Rem, and brand-new character Melty. These are exclusive to physical copies of the game and will not be reprinted, so pre-order today.
The physical Collector’s Edition includes four exclusive, limited run only original pins in a display box, featuring Emilia, Subaru, Rem, and a brand-new character Melty, a full-color art book including concept art, sketches, and commentary with a special foreword from the creators, a SteelBook collector’s display case, the official soundtrack containing original music from the game, and the Collector’s Edition outerbox!
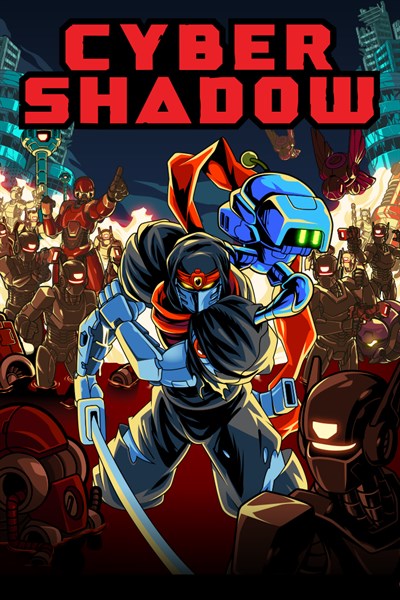
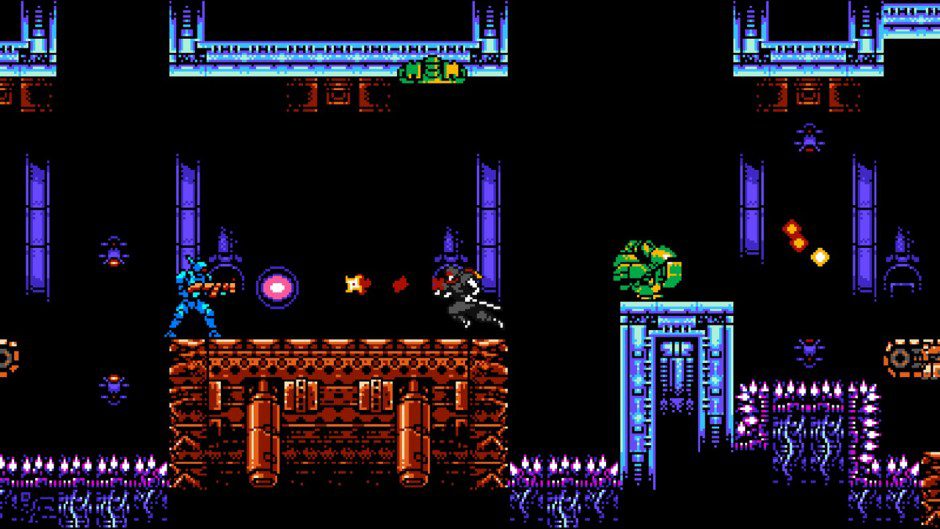
Cyber Shadow is slashing, dashing, and leaping its way onto Xbox One and Xbox Series X|S and with Xbox Game Pass on January 26! We’re proud to have collaborated with Mechanical Head Games to create a platforming experience that returns to the simple yet challenging old-school fun in the 8-bit era of gaming (with an added convenience or two!)
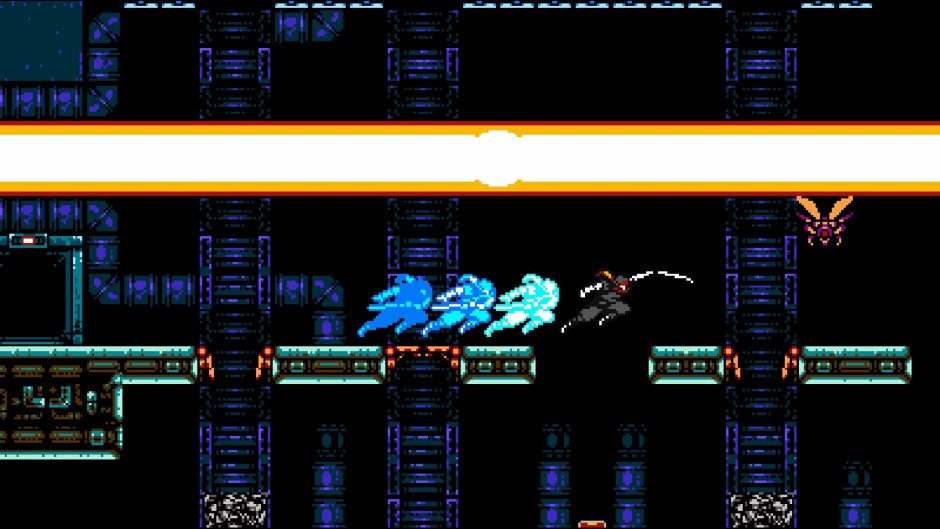
In Cyber Shadow, you will rise from the depths of a desolate world where mysterious synthetic life forms have taken over. As Shadow, you must unlock the secrets of his clan’s ancient powers and defeat nefarious enemies before it’s too late.
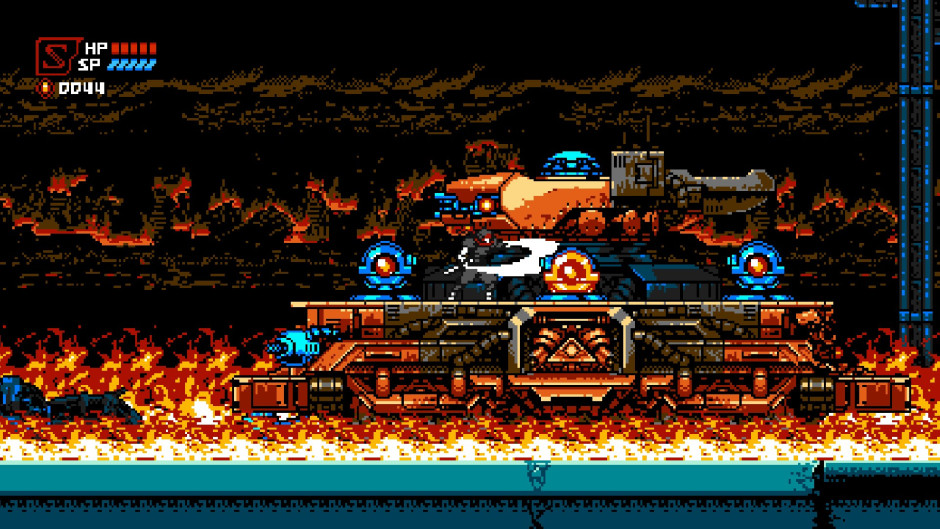
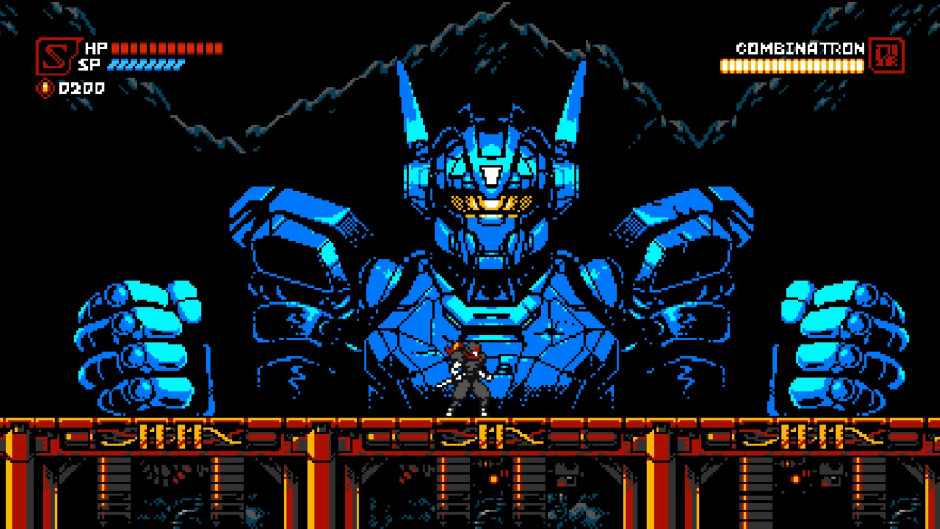
Dash, slice, and leap through masterfully designed levels filled with vigorous close-quarters combat and defeat over a dozen challenging bosses to rescue your clan and unlock Ninjutsu skills and abilities.
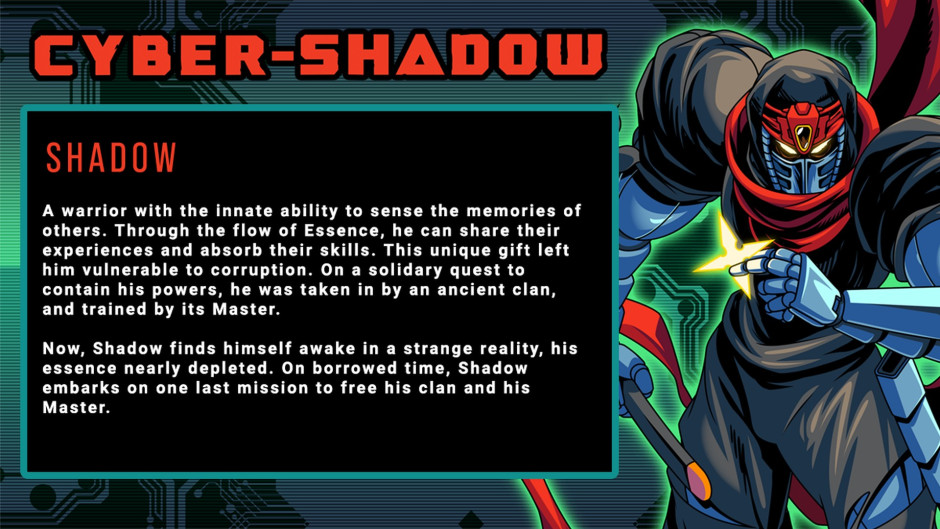
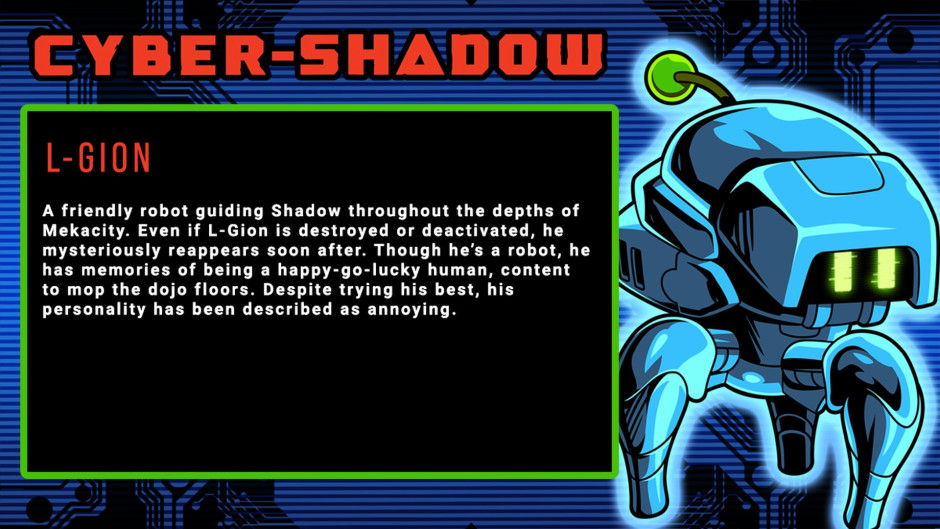
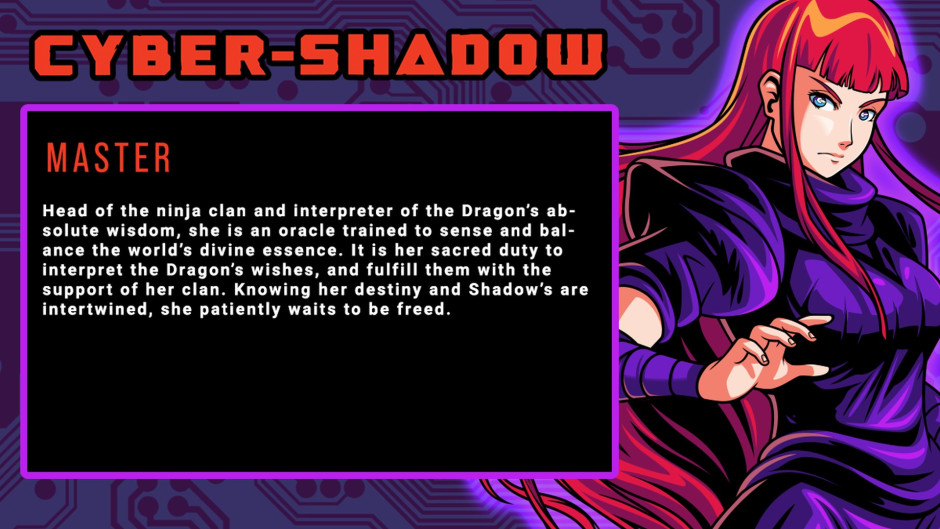
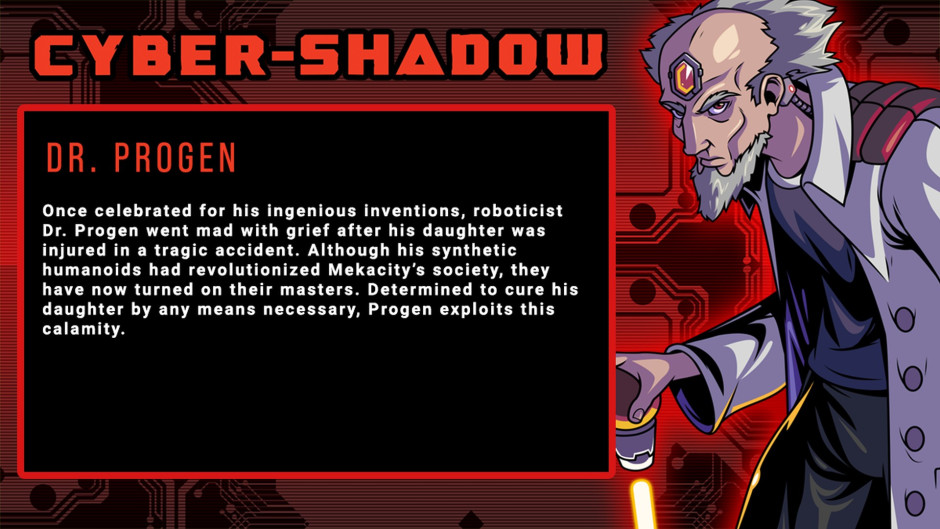
We’d like to unveil a few of the characters you’ll meet on your ninja action-adventure:
Cyber Shadow cuts to the cybernetic heart of what we love about pixel-perfect platformers and we can’t wait to share it with you!
The world has been taken over by the evil Dr. Progen and his merciless synthetic army. A desperate plea for help sets Shadow, the sole survivor of his clan, on one last mission to uncover what started the path to perpetual ruin. Your robotic companion, L-Gion, is your only guide through the ruins of Mekacity. How far will Shadow go to protect his clan and the one he loves? Is there more to their bond than meets the eye? Only you can unlock the secrets to your clan's ancient powers. Hurry before you run out of time! The road to redemption awaits in Cyber Shadow, the quintessential Ninja Action game.
Mit dem Launch von Xbox Series X|S bieten sich Entwicklern auf der ganzen Welt völlig neue Möglichkeiten und sie können das Potenzial ihrer Ideen noch mehr ausreizen. Das gilt sowohl für neue Titel, die nativ in der Xbox Series X|S-Entwicklungsumgebung entstehen, als auch für bereits veröffentlichte Titel, die speziell an das Leistungsvermögen der neuen Konsole angepasst wurden. In unserer Reihe “Optimiert für Xbox Series X” berichten Entwickler, wie sie ihre Titel für Xbox Series X optimieren und was das für die Zukunft der Spiele bedeutet. Heute sprechen wir mit Maurizio de Pascale, CTO bei IOI, über die Optimierung von Hitman 3 für Xbox Serie X|S.
F: Was reizt Dich besonders daran, Hitman 3 auf Hardware der nächsten Generation zu entwickeln und zum Leben zu erwecken? A: Die Leistungsfähigkeit von Xbox Series X|S bietet uns die Möglichkeit, unsere Ideen genau so auf den Bildschirm zu bringen, wie wir es uns ursprünglich vorgestellt hatten – ganz ohne Kompromisse und Einschränkungen durch fehlende CPU-Zyklen oder die IO-Bandbreite einer weniger leistungsfähigen Hardware.
F: Abgesehen von der reinen Leistungsfähigkeit – die beispielsweise Ladezeiten massiv verkürzt – welche Funktionen von Xbox Series X|S haben Euch bei der Entwicklung von Hitman 3 am meisten begeistert? A: Ich würde sagen, die höheren Frameraten. Durch sie wird das Geschehen unglaublich flüssig wiedergeben. Ich liebe Hitman für seine Stealth-Elemente, genieße aber auch ab und an die Action einer gepflegten Schießerei. Die konstant hohe Framerate von Xbox Series X|S macht es mir leichter, zu zielen – und lebend davonzukommen! Wenn ich darüber nachdenke, könnten die 60 FPS geübten Spielern im direkten Duell einen deutlichen Vorteil verschaffen. So können sie die unterschiedlichen Herausforderungen noch schneller abschließen.
F: Wie werden sich diese Verbesserungen konkret auf das Spielerlebnis von Hitman 3 auswirken? A: Die Verbesserungen bieten uns die Möglichkeit, den Detailreichtum der Welt von Hitman zu erhöhen, damit diese weit über das hinaus geht, was Gamer von Hitman 2 kennen. So werden zum Beispiel die NPCs in jeder Location schneller und öfter aktualisiert, was bedeutet, dass die Kleidung der Protagonisten noch realistischer wirkt und bei der Zerstörung eines Gebäudes mehr Scherben und Partikel fliegen.
F: Warum hat sich das Entwicklerteam dazu entschieden, sich bei der Entwicklung von Hitman 3 auf die Verbesserung der Auflösung und der Framerate zu konzentrieren? A: Da viele unserer Modelle und Assets bereits 4K-ready entwickelt wurden und für die Hardware vorheriger Konsolen-Generationen herunterskaliert werden mussten, machte es für uns am meisten Sinn, uns auf die Verbesserung der Auflösung und der Frameraten zu konzentrieren. Auf der Hardware von Xbox Series X|S können wir das Potenzial unseres vorliegenden Materials endlich voll ausspielen.
F: Wie glaubst Du, werden die Fans auf die optimierte Version von Hitman 3 reagieren? A: Die Spieler werden den Unterschied sofort merken. Das Spielerlebnis ist flüssiger, schneller und insgesamt einfach besser. Sie werden noch tiefer in eine Welt eintauchen können, die mit ihren lebensechten Charakteren und Locations so faszinierend und lebendig wie noch nie wirkt.
F: Wie ist es, auf Xbox Series X|S zu entwickeln? A: Der gesamte Entwicklungsprozess auf Xbox Series X|S war im Vergleich zu vorherigen Generationen ein deutlicher Fortschritt. Wir haben das Game Developer Kit schon früh angenommen, was uns die Möglichkeit gab, Teile unserer Codebasis massiv zu vereinfachen.
F: Auf welche Verbesserungen hast Du Dich am meisten gefreut? A: Wir sehen Hitman als ständig wachsendes Spiel. Der offizielle Launch am 20. Januar war also erst der Anfang einer Reise, die durch die regelmäßige Ergänzung neuer Features fortgesetzt wird. Es ist großartig, dass die GPU von Xbox Series X|S Ray-Tracing unterstützt. Wir haben bereits damit begonnen, an der Technologie für das Rendering unserer Glacier Engine zu arbeiten. Sobald diese einsatzbereit ist, werden wir sie auf die Hardware von Xbox Series X|S bringen.
F: Welche Bedeutung hat Smart Delivery für das Spiel und wie kommt Hitman 3 zu den Fans? A: Smart Delivery ist ein großartiges Feature. Es erleichtert den Übergang zwischen unterschiedlichen Konsolen-Generationen und lässt Spielern die Wahl, wie und wo sie ihre Games spielen. Hitman 3 unterstützt das Feature in vollem Umfang. So haben wir beispielsweise das Spielerprofil so eingerichtet, dass es von Spielern auf Xbox One und Xbox Series X|S gemeinsam genutzt werden kann. So können Hitman 3-Spieler nahtlos zwischen den Konsolen wechseln, ohne den Spielfortschritt zu verlieren.
F: Inwiefern trägt Xbox Series X|S zur Realisierung zukünftiger Projekte bei, die auf früheren Konsolen-Generationen nicht umsetzbar gewesen wären? A: Wir sind überzeugt, dass Xbox Series X|S eine neue Form des Spielerlebnisses ermöglichen wird, bei dem Gameplay und Storytelling nahtlos ineinander übergehen – und Ladebildschirme mit nervenaufreibenden Wartezeiten ein für alle Mal der Vergangenheit angehören.
One of the biggest benefits of all that power in the hardware is giving developers the ability to make games that are Xbox Series X|S Optimized. This means that they’ve taken full advantage of the unique capabilities of Xbox Series X|S, both for new titles built natively using the Xbox Series X|S development environment as well as previously released titles that have been rebuilt specifically for the console. In our Inside Xbox Series X Optimized series, these creators will share the behind-the-scenes accounts of how they’re optimizing their titles for Xbox Series X|S and what that means for the future of gaming. Today, we’ll be chatting with Maurizio de Pascale, CTO at IOI about optimizing Hitman 3 for Xbox Series X|S.
Q: What excites you most about developing and bringing Hitman 3 to life on next-generation hardware?
A: The power of the new Xbox makes it possible to bring our games to life (on screen) exactly as the development team originally intended, without the compromises and constraints from lack of CPU cycles or IO bandwidth of lesser hardware.
Q: In addition to benefiting from the power and performance of Xbox Series X|S for quicker load times etc.what Xbox Series X|S features were you most excited to explore leveraging in the development of Hitman 3?
A: I would say that the higher frame rates bring unparalleled fluidity to the experience.
Personally, I love playing Hitman for the stealth aspects, but I indulge in the action of a nice shootout when I get cornered. The steady frame rate on the Xbox Series X makes it easier to aim… and to walk away alive 🙂
Thinking about it, the 60 FPS might even give action players an advantage in the competitive aspect of our game, and let them complete challenges faster.
Q: How will these enhancements impact a player’s experience with Hitman 3?
A: The enhancements we’ve added for the new consoles allowed us to increase the fidelity of our simulation, beyond what players have seen when playing Hitman 2 on the previous generation.
For instance, the NPCs in each location are updated at a higher frequency and in larger numbers, our cloth runs more iterations, destruction uses more shards and particles, and so on.
Q: Why did your development team choose to focus on improved resolution and frame rates as enhancement areas for Hitman 3?
A: It made a lot of sense for us to focus on improving resolution and frame rates because a lot of our source assets were already created as 4K-ready, but for obvious reasons had to be scaled down on the previous generation hardware.
On the Series X|S hardware, we can finally take advantage of those extra details in the source textures.
Q: How do you expect fans of Hitman 3 will respond to playing it on Xbox Series X|S with these enhancements?
A: Players will immediately feel the difference. The experience is smoother, faster and simply better overall. They’ll be able to immerse themselves even more in the world, with our realistic locations and characters looking even more lifelike than before.
Q: What is it like developing on Xbox Series X|S?
A: We’ve found that developing on Series X|S has been a further improvement compared to the previous generation. We embraced the GDK early on and it allowed us to simplify parts of our codebase significantly.
Microsoft support has also been exceptional, being nice and professional at the same time.
Q: Which enhancement were you most excited about to explore leveraging for Hitman 3 on Xbox Series X|S?
A: We see Hitman as a ‘live game’ and our launch date on January 20 is just the beginning of a journey, in which we’re going to keep working on the game and adding new features. It’s great that the GPU in the Series X|S has hardware support for Ray-Tracing. We’ve already started working on RT technology for the renderer in our Glacier engine, and once that’s deemed ready for prime time, we’ll definitely bring it to the Series X|S hardware.
Q: What does Smart Delivery mean for your game and how you’re bringing Hitman 3 to fans?
A: Smart Delivery is a great feature that we believe is both going to help the transition between generations but also let players choose how and where they want to play games.
For Hitman 3, we fully embraced this feature and set-up the player profile to be shared between the Xbox One and the Xbox Series X|S. This will allow Hitman 3 players to easily move between generations and keep their progress.
Q: What does Xbox Series X|S development enable in current or future projects that you could not have achieved with the previous generation of consoles?
A: We’re confident that the Xbox Series X|S consoles will really enable a new generation of cinematic experiences in which gameplay and storytelling blend seamlessly, with loading screens and waiting time finally relegated to bed-time stories to scare our kids.
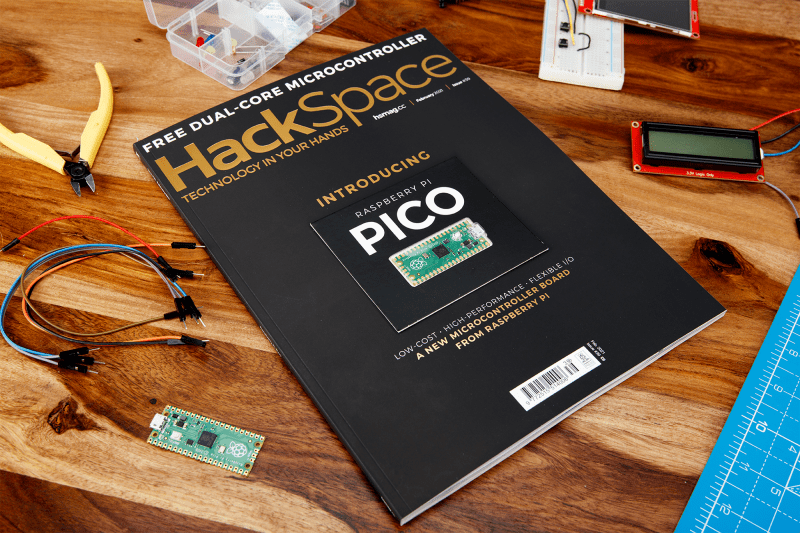
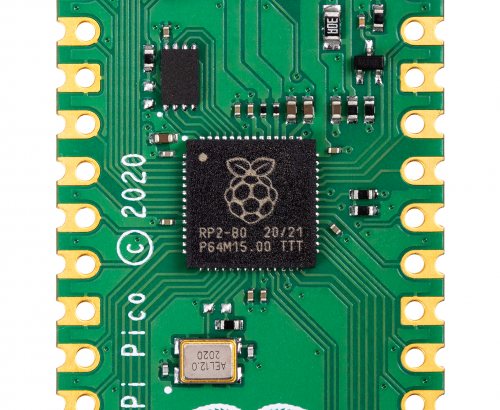
In the extra special Raspberry Pi Pico launch issue of HackSpace magazine, editor Ben Everard shows you how to get extra levels of brightness out of your LEDs with our new board.
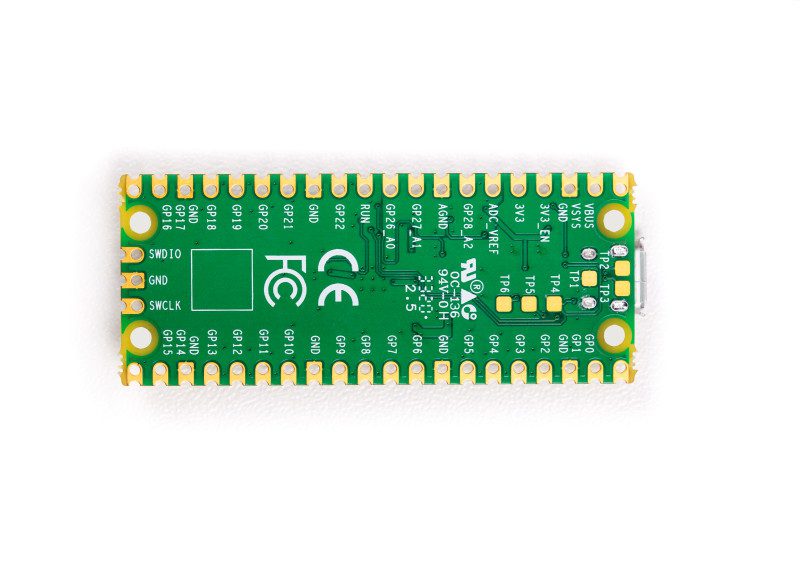
WS2812B LEDs, commonly known as NeoPixels, are cheap and widely available LEDs. They have red, green, and blue LEDs in a single package with a microcontroller that lets you control a whole string of them using just one pin on your microcontroller.
The three connections may be in a different order on your LED strip, so check the labels to make sure they’re connected correctly
However, they do have a couple of disadvantages:
1) The protocol needed to control them is timing-dependent and often has to be bit-banged.
2) Each colour has 8 bits, so has 255 levels of brightness. However, these aren’t gamma-corrected, so the low levels of brightness have large steps between them. For small projects, we often find ourselves only using the lower levels of brightness, so often only have 10 or 20 usable levels of brightness.
There will usually be wires already connected to your strip, but if you cut it, you’ll need to solder new wires on
We’re going to look at how two features of Pico help solve these problems. Firstly, Programmable I/O (PIO) lets us implement the control protocol on a state machine rather than the main processing cores. This means that we don’t have to dedicate any processor time to sending the data out. Secondly, having two cores means we can use one of the processing cores to dither the NeoPixels. This means shift them rapidly between different brightness levels to make pseudo-levels of brightness.
For example, if we wanted a brightness level halfway between levels 3 and 4, we’d flick the brightness back and forth between 3 and 4. If we can do this fast enough, our eyes blur this into a single brightness level and we don’t see the flicker. By varying the amount of time at levels 3 and 4, we can make many virtual levels of brightness. While one core is doing this, we still have a processing core completely free to manipulate the data we want to display.
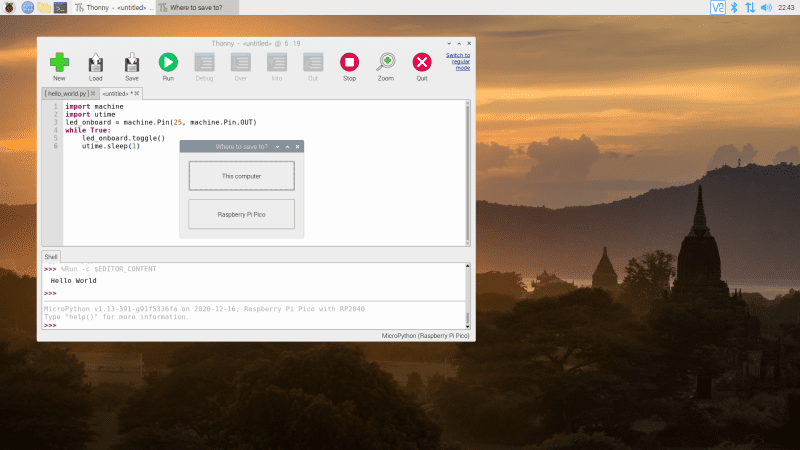
First, we’ll need a PIO program to communicate with the WS2812B LEDs. The Pico development team have provided an example PIO program to work with – you can see the full details here, but we’ll cover the essentials here. The PIO code is:
.program ws2812
.side_set 1
.define public T1 2
.define public T2 5
.define public T3 3
bitloop: out x, 1 side 0 [T3 - 1] jmp !x do_zero side 1 [T1 - 1] do_one: jmp bitloop side 1 [T2 - 1] do_zero: nop side 0 [T2 - 1]
We looked at the PIO syntax in the main cover feature, but it’s basically an assembly language for the PIO state machine. The WS2812B protocol uses pulses at a rate of 800kHz, but the length of the pulse determines if a 1 or a 0 is being sent. This code uses jumps to move through the loop to set the timings depending on whether the bit (stored in the register x) is 0 or 1. The T1, T2, and T3 variables hold the timings, so are used to calculate the delays (with 1 taken off as the instruction itself takes one clock cycle). There’s also a section in the pio file that links the PIO code and the C code:
This line sets up the output shift register which holds each 32 bits of data before it’s moved bit by bit into the PIO state machine. The parameters are the config (that we’re setting up and will use to initialise the state machine); a Boolean value for shifting right or left (false being left); and a Boolean value for autopull which we have set to true. This means that whenever the output shift register falls below a certain threshold (set in the next parameter), the PIO will automatically pull in the next 32 bits of data.
Using a text editor with programmer’s features such as syntax highlighting will make the job a lot easier
The final parameter is set using the expression rgbw ? 32 : 24. This means that if the variable rgbw is true, the value 32 is passed, otherwise 24 is passed. The rbgw variable is passed into this function when we create the PIO program from our C program and is used to specify whether we’re using an LED strip with four LEDs in each (using one red, one green, one blue, and one white) or three (red, green, and blue).
The PIO hardware works on 32-bit words, so each chunk of data we write with the values we want to send to the LEDs has to be 32 bits long. However, if we’re using RGB LED strips, we actually want to work in 24-bit lengths. By setting autopull to 24, we still pull in 32 bits each time, but once 24 bits have been read, another 32 bits are pulled in which overwrite the remaining 8 bits.
sm_config_set_fifo_join(&c, PIO_FIFO_JOIN_TX);
Each state machine has two four-word FIFOs attached to it. These can be used for one going in and one coming out. However, as we only have data going into our state machine, we can join them together to form a single eight-word FIFO using the above line. This gives us a small buffer of time to write data to in order to avoid the state machine running out of data and execution stalling. The following three lines are used to set the speed the state machine runs at:
int cycles_per_bit = ws2812_T1 + ws2812_T2 +
ws2812_T3; float div = clock_get_hz(clk_sys) / (freq *
cycles_per_bit); sm_config_clkdiv(&c, div);
The WS2812B protocol demands that data is sent out at a rate of 800kHz. However, each bit of data requires a number of state machine cycles. In this case, they’re defined in the variables T1, T2, and T3. If you look back at the original PIO program, you’ll see that these are used in the delays (always with 1 taken off the value because the initial instruction takes one cycle before the delay kicks in). Every loop of the PIO program will take T1 + T2 + T3 cycles. We use these values to calculate the speed we want the state machine to run at, and from there we can work out the divider we need to slow the system clock down to the right speed for the state machine. The final two lines just initialise and enable the state machine.
The main processor
That’s the code that’s running on the state machine, so let’s now look at the code that’s running on our main processor cores. The full code is on github. Let’s first look at the code running on the second core (we’ll look at how to start this code running shortly), as this controls the light levels of the LEDs.
We start by defining a virtual bit depth. This is how many bits per pixel you can use. Our code will then attempt to create the necessary additional brightness levels. It will run as fast as it can drive the LED strip, but if you try to do too many brightness levels, you’ll start to notice flickering.
We found twelve to be about the best with strings up to around 100 LEDs, but you can experiment with others. Our code works with two arrays – pixels which holds the values that we want to display, and errors which holds the error in what we’ve displayed so far (there are three of each for the different colour channels).
If you just want to see this in action, you can download the UF2 file from hsmag.cc/orfgBD and flash it straight to your Pico
To explain that latter point, let’s take a look at the algorithm for determining how to light the LED. We borrowed this from the source code of Fadecandy by Micah Scott, but it’s a well-used algorithm for calculating error rates. We have an outer while loop that just keeps pushing out data to the LEDs as fast as possible. We don’t care about precise timings and just want as much speed as possible. We then go through each pixel.
The corresponding item in the errors array holds the cumulative amount our LED has been underlit so far compared to what we want it to be. Initially, this will be zero, but with each loop (if there’s a difference between what we want to light the LED and what we can light the LED) this error value will increase. These two numbers (the closest light level and the error) added together give the brightness at the pseudo-level, so we need to bit-shift this by the difference between our virtual level and the 8-bit brightness levels that are available.
This gives us the value for this pixel which we write out. We then need to calculate the new error level. Let’s take a look at what this means in practice. Suppose we want a brightness level halfway between 1 and 2 in the 8-bit levels. To simplify things, we’ll use nine virtual bits. 1 and 2 in 8-bit is 2 and 4 in 9 bits (adding an extra 0 to the end multiplies everything by a power of 2), so halfway between these two is a 9-bit value of 3 (or 11 in binary, which we’ll use from now on).
In the first iteration of our loop, pixels is 11, errors is 0, and shift is 1.
value = 11 >> 1 = 1
errors = 11 – 10 = 1
So this time, the brightness level of 1 is written out. The second iteration, we have:
value = 100 >> 1 = 10
errors = 100 – 100 = 0
So this time, the brightness level of 10 (in binary, or 2 in base 10) is written out. This time, the errors go back to 0, so we’re in the same position as at the start of the first loop. In this case, the LED will flick between the two brightness levels each loop so you’ll have a brightness half way between the two.
Using this simple algorithm, we can experiment with different virtual bit-depths. The algorithm will always handle the calculations for us, but we just have to see what creates the most pleasing visual effect for the eye. The larger the virtual bit depth, the more potential iterations you have to go through before the error accumulates enough to create a correction, so the more likely you are to see flicker. The biggest blocker to increasing the virtual bit depth is the sleep_us(400). This is needed to reset the LED strip.
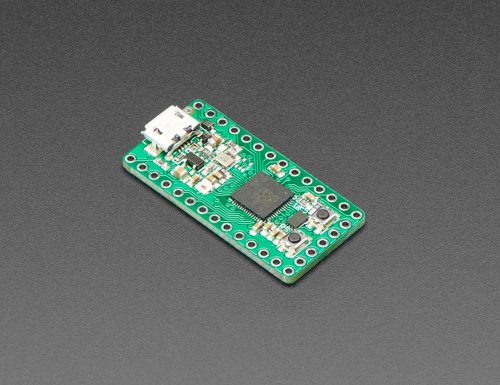
NeoPixels come in many different shapes and sizes
Essentially, we throw out bits at 800kHz, and each block of 24 bits is sent, in turn, to the next LED. However, once there’s a long enough pause, everything resets and it goes back to the first LED. How big that pause is can vary. The truth is that a huge proportion of WS2812B LEDs are clones rather than official parts – and even for official parts, the length of the pause needed to reset has changed over the years.
400 microseconds is conservative and should work, but you may be able to get away with less (possibly even as low as 50 microseconds for some LEDs). The urgb_u32 method simply amalgamates the red, blue, and green values into a single 32-bit string (well, a 24-bit string that’s held inside a 32-bit string), and put_pixel sends this to the state machine. The bit shift there is to make sure the data is in the right place so the state machine reads the correct 24 bits from the output shift register.
Getting it running
We’ve now dealt with all the mechanics of the code. The only bit left is to stitch it all together.
int main() { PIO pio = pio0; int sm = 0; uint offset = pio_add_program(pio, &ws2812_
program); ws2812_program_init(pio, sm, offset, PIN_TX,
1000000, false); multicore_launch_core1(ws2812b_core); while (1) { for (int i = 0; i < 30; ++i) {
pixels[i] = i; for (int j=0;j<30;++j){ pixels[0] = j; if(j%8 == 0) { pixels[1] = j; } sleep_ms(50); } for (int j=30;j>0;--j){ pixels[0] = j; if(j%8 == 0) { pixels[1] = j; } sleep_ms(50); } } } }
The method ws2812_program_init calls the method created in the PIO program to set everything up. To launch the algorithm creating the virtual bit-depth, we just have to use multicore_launch_core1 to set a function running on the other core. Once that’s done, whatever we put in the pixels array will be reflected as accurately as possible in the WS2812B LEDs. In this case, we simply fade it in and out, but you could do any animation you like.
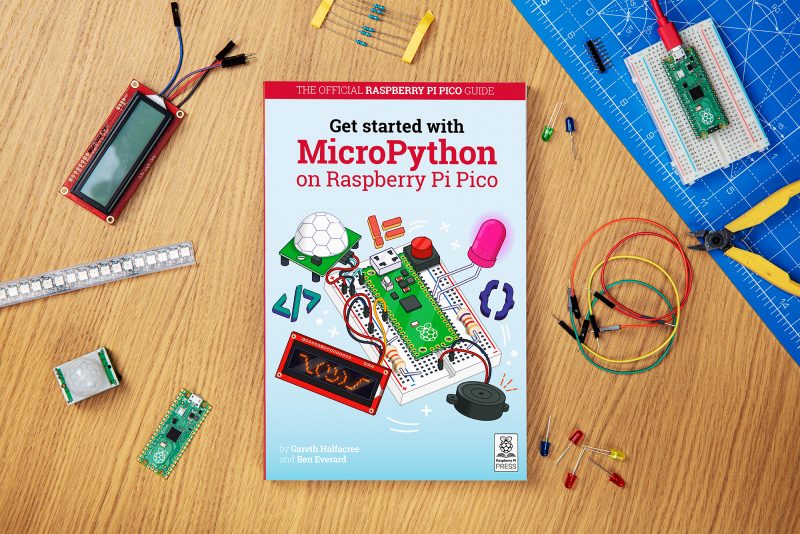
Get a free Raspberry Pi Pico
Would you like a free Raspberry Pi Pico? Subscribe to HackSpace magazine via your preferred option here, and you’ll receive your new microcontroller in the mail before the next issue arrives.
Willkommen bei Next Week on Xbox. Wie immer stellen wir Dir alle neuen Spiele vor, die bald für Xbox Series X, Xbox Series S und Xbox One erhältlich sind! In der kommenden Woche erscheinen wieder eine Menge Spiele für Deine Lieblingskonsole – hier siehst Du, welche neuen Games Dich erwarten. Klick Dich einfach durch die Spiel-Details, um mehr zu möglichen Vorbestellungen zu erfahren (Änderungen vorbehalten).
Xbox Game Pass – Synthetische Lebensformen haben die Welt erobert. Als er einen verzweifelten Hilferuf erhält, beschließt Shadow – der einzige Überlebende seines Klans – aufzubrechen und dem Geheimnis auf den Grund zu gehen. Kämpfe Dich durch mechanische Horden von Gegnern, weiche Fallen aus vergangenen Zeiten aus und reise durch die Ruinen von Mekacity. In Cyber Shadow tauchst Du ein in ein actionreiches Ninja-Abenteuer, in dem Du der Letzte bist, der die Geheimnisse des Cyber Shadow-Klans enthüllen kann.
Übersinnliche Gäste sorgen für Schrecken und Chaos, suchen die verschiedensten Häuser heim, hinterlassen verfluchte Objekte und erschrecken unschuldige Sims fast zu Tode. Nur Du kannst die außer Kontrolle geratenen übernatürlichen Phänomene noch stoppen. Glücklicherweise hast Du Hilfe in Form von Guidry dem Geist, der liebend gern dafür sorgt, seine spukenden Mitbewohner loszuwerden. Räume das Chaos auf und vertreibe die Toten. Wenn Du Deine Aufträge erfolgreich abschließt, winkt eine Karriere als professioneller paranormaler Ermittler! Das Basisspiel The Sims 4 wird zum Spielen benötigt.
Stelle Dich Deinem Schicksal! Quälende Alpträume, dunkle Visionen, mysteriöse Todesfälle – seit das Königreich Andergast von einer Krähenplage heimgesucht wird, findet das abergläubische Volk keine Ruhe. Ausgerechnet jetzt erwartet König Efferdan hochrangige Würdenträger aus dem benachbarten Nostria, um die jahrelange Fehde zwischen den beiden Ländern zu beenden und den dauerhaften Frieden zu sichern – spiele die kostenlose Demo schon heute!
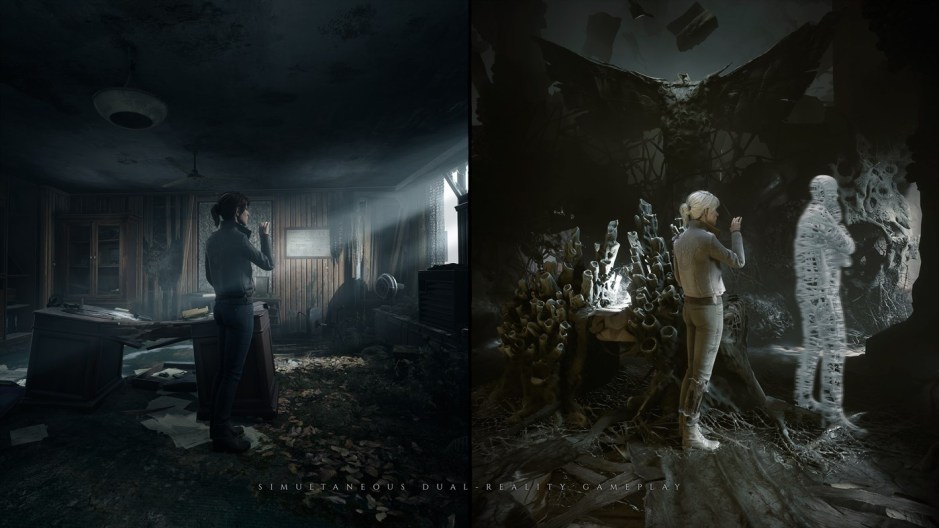
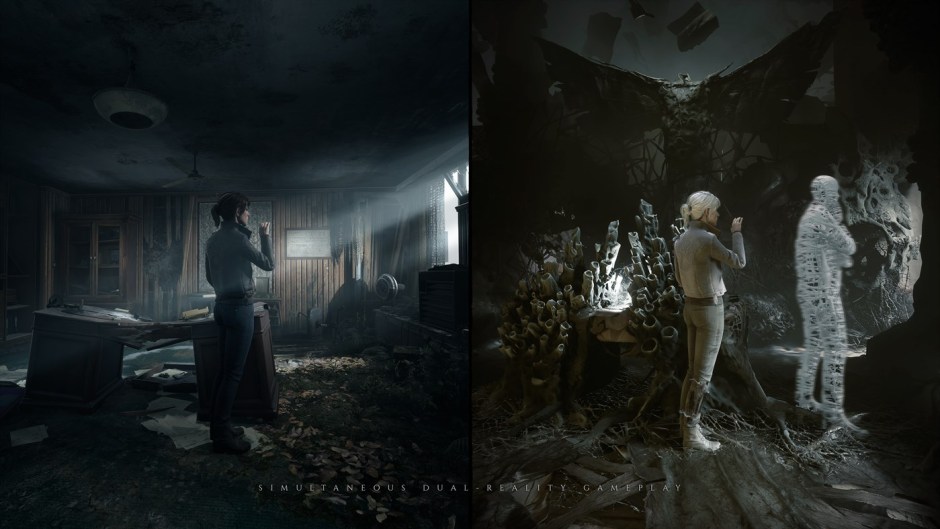
Xbox Game Pass, Xbox Series X|S Optimized – Im Xbox Game Pass ab dem ersten Tag verfügbar! In The Medium löst Du ein dunkles Geheimnis, das sich nur durch ein Medium entschlüsseln lässt. Du findest Dich in einem verlassenen Hotel-Ressort wieder, wo Du mithilfe Deiner übernatürlichen Fähigkeiten zutiefst beunruhigende Geheimnisse aufdeckst. Dabei tauchst Du in zwei unterschiedliche Welten ein, in denen ungelöste Rätsel und unheimliche Gespenster auf Dich warten.
Jan 28, 2021
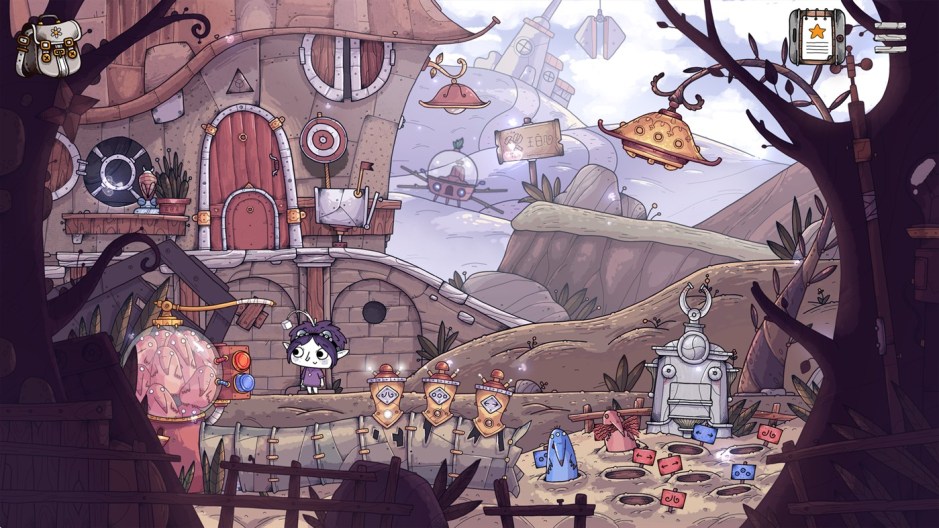
Erlebe ein brandneues Abenteuerspiel in einer Welt bizarrer, wunderbarer Fischplaneten. Erkunde wunderschöne Umgebungen und löse ausgefeilte Rätsel, um die Wahrheit über ein geheimnisvolles kleines Mädchen und Cubus, ihr mechanisches Alter Ego, herauszufinden.
Xbox Game Pass – Um ihrer blutigen Vergangenheit zu entkommen, verlassen Kazuma Kiryu und seine Adoptivtochter Haruka Sawamura die gefährlichen Straßen Kamurochos und ziehen auf die Insel Okinawa, um dort das Waisenhaus Morning Glory zu leiten. Doch Kiryu wird weiterhin von Schwierigkeiten verfolgt und so wird das Waisenhaus schon bald in einen tödlichen Konflikt verwickelt. Kann Kiryu das Waisenhaus retten und seine Vergangenheit endlich hinter sich lassen?
Xbox Game Pass – Kazuma Kiryus ruhiges neues Leben als Taxifahrer findet ein abruptes Ende, als der Friede zwischen dem Tojo-Clan und der Omi-Allianz zusammenbricht. Wieder einmal muss der Drache von Dojima mit seiner Vergangenheit abrechnen und in die kriminelle Unterwelt eintauchen, um jene zu schützen, die ihm wichtig sind. Folge Kiryu und seinen Verbündeten in fünf Städten und verhindere einen gefährlichen Bandenkrieg.
Jan 29, 2021
In diesem tierisch verrückten Couch-Koop steppt der Affe! Versammle Deine Freunde, schnapp Dir Deinen Roboterarm und Deinen bananenbetriebenen Raketenrucksack und errichte im ganzen Kosmos wackelige Gebäude zu Ehren der Affenschaft!
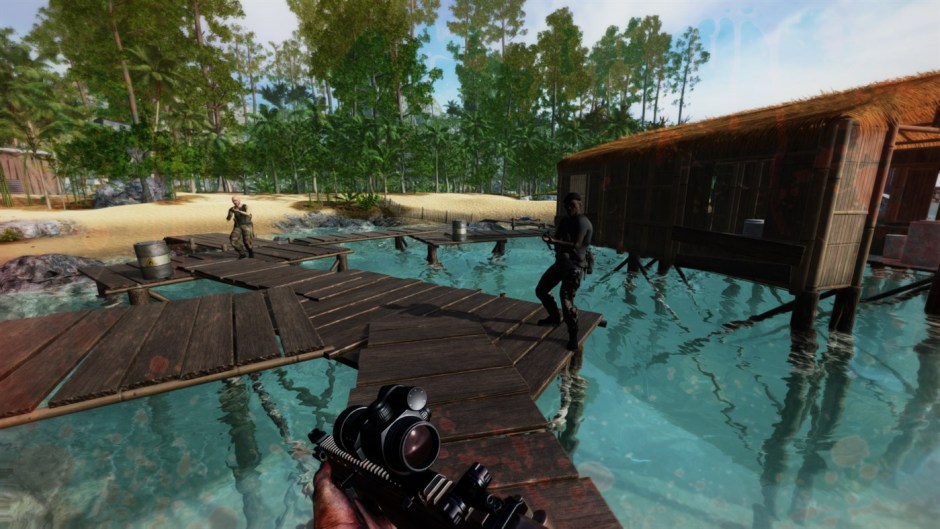
Ein ruhiger Urlaub auf einer tropischen Insel wird plötzlich zu Deinem schlimmsten Albtraum, als eine rücksichtslose kriminelle Vereinigung Deine Familie entführt. Kämpfe gegen Hunger, Durst, skrupellose Söldner und wilde Kreaturen, um am Leben zu bleiben und Deine Liebsten zu retten!
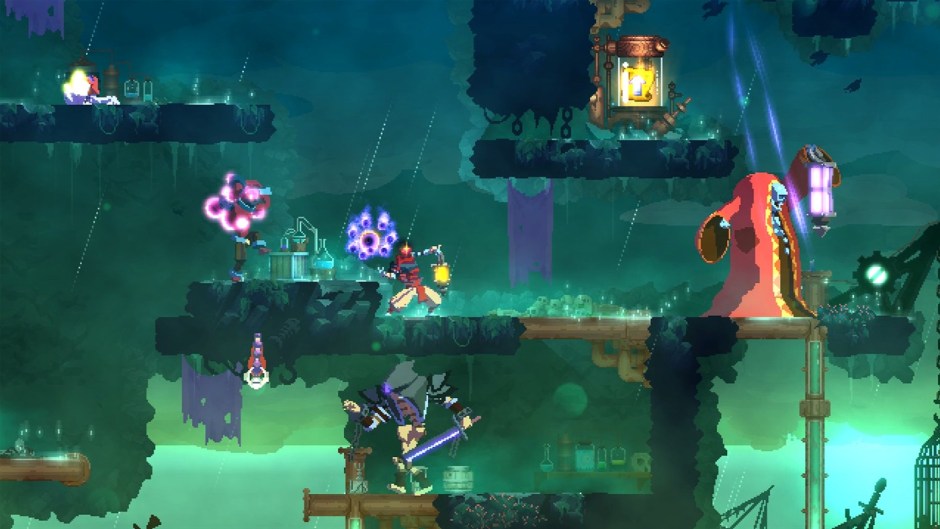
Nimm in diesem DLC zu Dead Cells zwei neue Levels und einen neuen Boss in Angriff! Entrinne neuen Fallen und Gegnern und erfahre mehr über die Geschichte der Insel. Die neuen Inhalte verleihen dem Mittelteil des Spiels noch mehr Komplexität und bringen zusätzliche Abwechslung in Deine Spieldurchläufe.
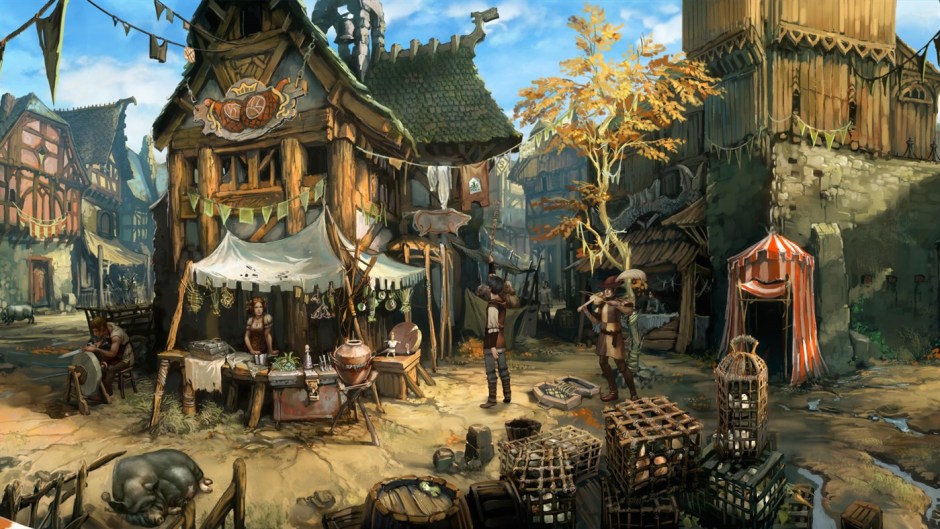
Zwei Handlungen, zwei Helden, ein großes Abenteuer: In Memoria begleitest Du Sadja, eine südländische Prinzessin auf der Suche nach Abenteuern, und Geron, einen Vogelfänger, der seine Freundin von einem schrecklichen Fluch befreien will. Begib Dich auf eine Zeitreise durch ein grafisch opulentes Aventurien, der Welt von Das Schwarze Auge. Spiele die kostenlose Demo schon heute!
Eine listige künstliche Intelligenz hat zusammen mit einem cleveren Virus jeden Computer der Welt übernommen! Es gibt nur eine Chance, sich zu wehren: Bestehe die Tests des digitalen Dämons und verhindere das Ende des modernen Kommunikationszeitalters! Hyposphere ist mit seiner technisierten Ästhetik und dem hammerharten Schwierigkeitsgrad viel mehr als ein klassischer Kugel-Plattformer.
Muscle Island war ein friedlicher, paradiesischer Ort – bevor der Demon King seine Klauen nach dem Eiland ausstreckte. Der dunkle Machthaber hat seine Armee positioniert und terrorisiert mithilfe seiner finsteren Generäle die wehrlose Bevölkerung. Als die Händler der Golden Force die letzten Goldmünzen ihres Urlaubs in der Taverne verprassen, erhalten sie einen neuen Auftrag: Besiegt den dämonischen Tyrannen und erobert den Berg des Goldes von ihm zurück!
Jan 28, 2021
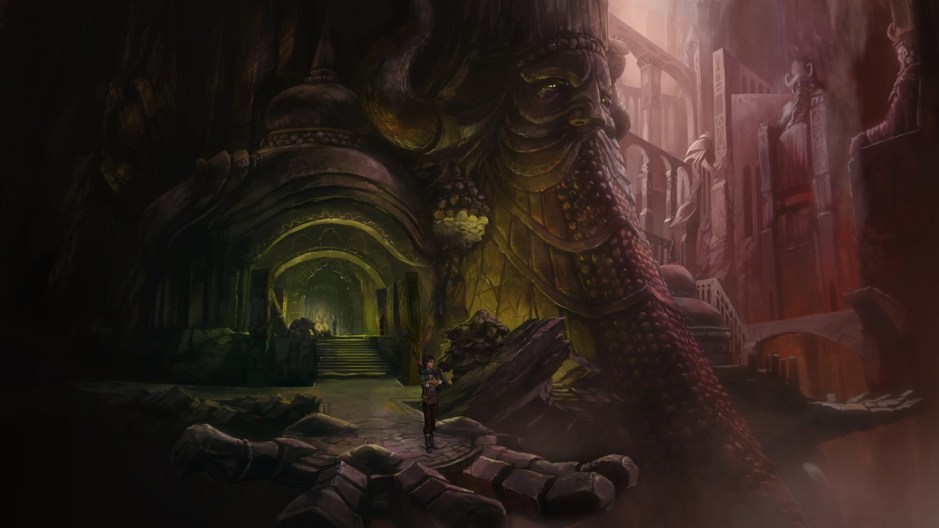
Erkunde eine geheimnisvolle, handgezeichnete Welt, die von den Legenden der Seeleute und Fantasien Asiens inspiriert ist. Als Seemann Faraday führst Du eine legendäre Harpune und findest gemeinsam mit anderen Schiffbrüchigen neue Möglichkeiten, Dich durch Kämpfe, durch Rätsel und über Plattformen zu bewegen. Durch abenteuerliche Erkundung, atmosphärische Erzählungen und messerscharfe Kämpfe lernst Du die geheimnisvolle fremde Welt immer besser kennen – inklusive der mysthischen Lady Olija, mit der Faraday nach und nach eine Verbindung aufbaut.
Xbox Game Pass – Nach einem Mord im Tojo-Clan nimmt eine kleine Untergruppe, bestehend aus Kazuma Kiryu, Masayoshi Tanimura, Shun Akiyama und Taiga Saejima, die Ermittlung auf. Schlüpfe in eine der vier Rollen und enthülle einen verborgenen Kampf um Geld, Macht, Status, Ehre und eine mysteriöse Frau, um die sich alles zu drehen scheint. Die Mächte des Untergrunds schrecken vor nichts zurück, um ihre Geheimnisse zu wahren.
Die Orks haben die Ressourcen ihres Territoriums erschöpft und es ist nur eine Frage der Zeit, bis sie versuchen, Dein Königreich in ihre schmutzigen Klauen zu kriegen. Es wurden bereits Diplomaten geschickt, doch sie sind nie zurückgekehrt. Sichere Deine Stellungen und wappne Dich für den Angriff der Orks – für Verhandlungen ist es jetzt zu spät.
Seit Jahrtausenden herrschen die Götter über die Menschheit. Sie verlangen blinde Verehrung und wer nicht gehorcht, den erwartet ein qualvoller Tod. Hilf acht keltischen Kriegern, die Menschheit aus ihrem Griff zu befreien. Jeder, der ein Schwert besitzt, wird Dir folgen und gegen die Legionen der Götter kämpfen. Siege und erlebe, wie Legenden entstehen. Versage und sieh zu, wie Leben zu Staub zerfallen.
Seit der Veröffentlichung von Xbox Live vor 18 Jahren arbeiten wir daran, das fortschrittlichste Multiplayer-Netzwerk für die beste Community von Spielern bereitzustellen. Millionen Menschen versammeln sich auf Xbox, spielen mit Freunden und entdecken täglich neue Games. Wir investieren in unsere Community und verbessern die digitale Sicherheit unserer Spieler. Darüber hinaus etablieren wir neue Optionen, Inhalte zu teilen, mit anderen Spielern zu kommunizieren sowie Maßnahmen, die für den Industrie-Standard an Zuverlässigkeit in unserem Netzwerk sorgen.
In regelmäßigen Abständen beurteilen wir den Wert und die Preismodelle unserer Services, um auf Veränderungen in den jeweiligen Märkten einzugehen und weiterhin in die Xbox-Community zu investieren. Vor diesem Hintergrund wird das Preismodell für Xbox Live Gold in ausgewählten Märkten angepasst. In einem Großteil der Märkte hat sich der Preis für Xbox Live Gold über viele Jahre hinweg nicht verändert, in einigen Märkten ist der Preis seit mehr als zehn Jahren konstant.
Was heißt das für dich?
Wenn Du eine bestehende 6-monatige oder 12-monatige Mitgliedschaft als Xbox Live Gold-Mitglied hast, erwartet Dich keine Preiserhöhung. Erneuerst Du Deine Mitgliedschaft, greift das neue Preismodell.
Wertest Du Deine Gold-Mitgliedschaft zum Xbox Game Pass Ultimate auf, wird Dein Gold-Guthaben in Ultimate-Guthaben umgewandelt – bis zu 36 Monate. Ein Beispiel: Wenn Du aktuell 11 Monate Xbox Live Gold besitzt und Dich für den Xbox Game Pass Ultimate entscheidest, werden diese 11 Monate in Ultimate-Guthaben umgewandelt – ohne zusätzliche Kosten.
Das neue Preismodell in Deutschland:
1-monatige Xbox Live Gold-Mitgliedschaft von 6,99 Euro auf 8,99 Euro
3-monatige Xbox Live Gold-Mitgliedschaft von 19,99 Euro auf 23,99 Euro
6-monatige Xbox Live Gold-Mitgliedschaft von 39,99 Euro auf 47,99 Euro
Das neue Preismodell in Österreich:
1-monatige Xbox Live Gold-Mitgliedschaft bleibt bei 8,99 Euro
3-monatige Xbox Live Gold-Mitgliedschaft von 19,99 Euro auf 23,99 Euro
6-monatige Xbox Live Gold-Mitgliedschaft von 39,99 Euro auf 47,99 Euro
Das neue Preismodell in der Schweiz:
1-monatige Xbox Live Gold-Mitgliedschaft von 9 Schweizer Franken auf 9,99 Schweizer Franken
3-monatige Xbox Live Gold-Mitgliedschaft von 25 Schweizer Franken auf 27,99 Schweizer Franken
6-monatige Xbox Live Gold-Mitgliedschaft von 49 Schweizer Franken auf 55,99 Schweizer Franken
Mitglieder aus Deutschland, Österreich und der Schweiz erhalten eine E-Mail zur Änderung des Preismodells und einen Hinweis über die Nachrichtenzentrale im Laufe des nächsten Monats. Die Preise werden nicht angepasst bis mindestens 60 Tage nach Erhalt dieser Information in Deutschland und 45 Tage in Österreich und der Schweiz. Änderungen zu Deiner Mitgliedschaft nimmst Du über Deinen Account vor.
Welcome to Next Week on Xbox! Here we cover all the new games coming soon to Xbox Series X|S, Xbox One, and Windows 10 PC as well as upcoming Xbox Game Pass and soon-to-be released ID@Xbox titles! Get more details on the games below and click their profiles for pre-order details when available (release dates are subject to change). Jump in!
The world has been taken over by synthetic lifeforms. A desperate plea for help sets Shadow on a journey to uncover what started the path to perpetual ruin. Slash through the techno hordes, leap past traps, and nimbly navigate the ruins of Mekacity. Only you can unlock the secrets to your clan’s ancient powers in Cyber Shadow, the quintessential Ninja Action game.
Take on two new levels and a boss as you dodge new traps, enemies and discover more of the lore of the island. This is mid game content designed to continue to add variety to your runs and continue support for the development of the game.
The Sims 4: Paranormal Stuff Pack – January 26
Spectral guests cause mischief and mayhem on Haunted House Lots, leaving behind accursed objects and scaring innocent Sims. With spooky activity on the rise, it’s up to you to put a stop to it. Luckily, Guidry the Ghost is happy to offer advice for sending these ghastly roommates packing. Perform séances, clean up the lot, and commune with the dead to clear them out. Once the lot is back to serenity, consider a career as a Paranormal Investigator to help other Sims! Requires The Sims 4.
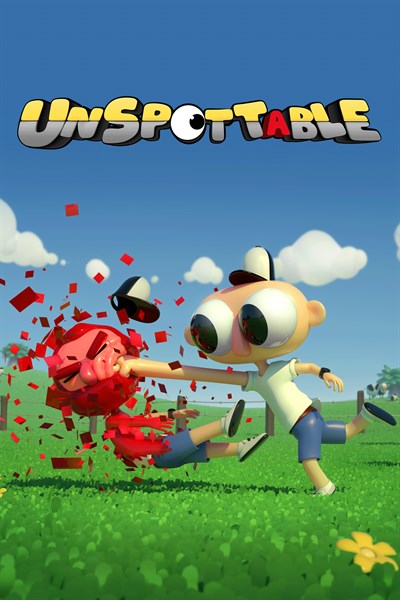
A platformer puzzle game with an interesting gimmick. You can’t jump, so you need to bounce off your enemies or use tubes to your advantage. Both platformer skills and logic are required to complete 40 challenging levels! Deft fingers and quick reactions are required. Sweaty neck guaranteed.
Face your Destiny! In Andergast, whose inhabitants are notoriously superstitious, King Efferdan awaits a state visit from high-ranking dignitaries. For centuries, the kingdom has been at odds with neighboring Nostria, but now first steps are being undertaken toward a lasting peace. Play the free demo today.
In Memoria, players travel through different time periods, following two distinct protagonists: Sadja, a southern princess who wants to be a war hero, and Geron, a bird catcher who wants to lift a curse from his girlfriend. Play the free demo today.
Hyposphere is not simply a classic “marble” platformer, it may also be the most beautiful and one of the most hardcore marble ball games ever! A cunning AI, along with the help of a clever virus, has taken over every computer in the world. There is only one chance to fight back: pass the tests generated by this dastardly digital demon.
Project Starship is back with a wacky take on cosmic horror. In this rogue-lite shooter, you’ll take the role of the tentacled-yet-hip Swagthulhu as you destroy comical abominations in flashy 16-bit style! With multi-purpose dodge mechanics and tons of crazy pick-ups, you’ll be able to crash your ship straight through the enemy and emerge unscathed.
Take on the role of Vera Blanc, a young woman with the ability to read other people’s minds. The game is a mixture of visual novel and adventure game with a collection of challenging minigames, you can also play as a pure visual novel. In this episode, our heroine travels to a small village in central Italy.
The Demon King has set his sights on Muscle Island, a previously heavenly and peaceful place where life was good. This dark figure has installed his army there and persecutes the population with the help of his generals. Wasting their last coins in taverns, the mercenaries of the dreaded Golden Force take advantage of their last vacation moments when they receive a new contract: to defeat this evil new ruler and reclaim the mountain of gold in his possession.
Available with Xbox Game Pass on day one! Discover a dark mystery only a medium can solve. Travel to an abandoned hotel resort and use your unique psychic abilities to uncover its deeply disturbing secrets, solve dual-reality puzzles, survive encounters with sinister spirits, and explore two realities at the same time.
Inspired by swashbuckling tales and cinematic adventure games, Olija is a story about facing the unknown in adversity. Armed with a legendary harpoon, Olija and other castaways will try to leave a hostile country to return to their homelands. Through adventurous exploration, narration, and razor-sharp combat, the player will discover a strange world and its inhabitants, including Olija, an enigmatic lady that Faraday finds himself bound to over time.
Set across 20 challenging levels specialized tower upgrades, enter a land where orcs have expanded their reach to impact your borders. With their depleted resources, it’s only a matter of time before they try to put their hands on your kingdom. Diplomats were already sent to peacefully ask orcs to back off, but they’ve never returned. The sign was clear – there is no place for negotiations…
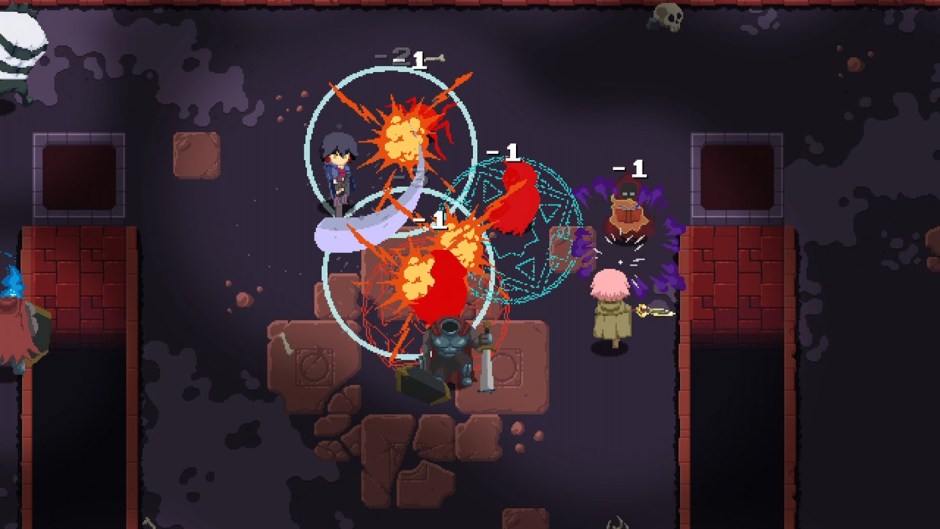
Sword of the Necromancer is a dungeon-crawler action RPG with rogue-like elements where you can revive your defeated enemies to make them fight alongside you. Turn your foes into allies using the forbidden powers of the Sword of the Necromancer and help Tama reach the dungeon’s depths in order to gain enough power to bring his love back from the dead.
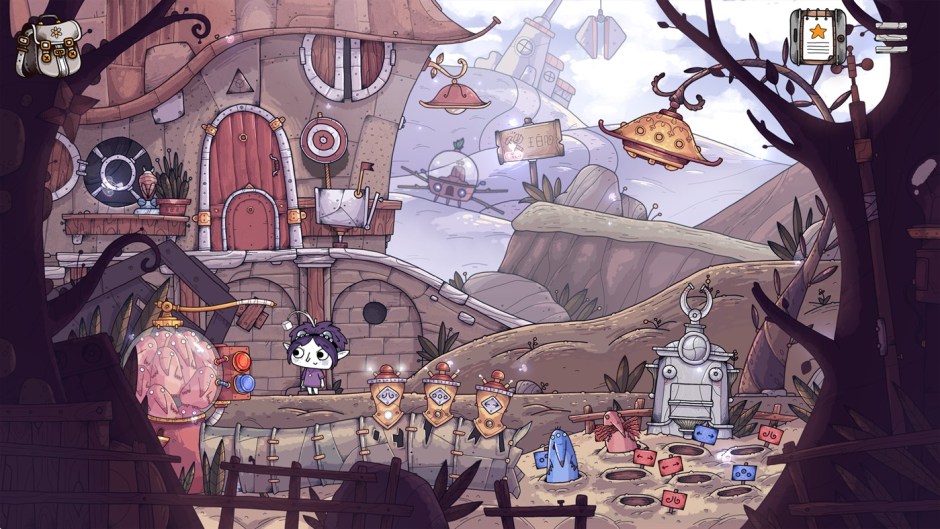
Experience a brand-new adventure game set amongst a world of weird and wonderful fish planets. Explore beautiful environments, solve intricate puzzles, and discover the truth about a mysterious little girl and her mechanical alter-ego, Cubus.
Celebrate Kazuma Kiryu’s saga with the beautifully remastered Yakuza 3, 4, and 5. With restored content and updated localization in 1080p and 60fps, the story of the Dragon of Dojima is yours to complete. Purchase Yakuza 3-5 individually or all together in The Yakuza Remastered Collection or play on Xbox Game Pass or Xbox Game Pass for PC:
Yakuza 3 Remastered (Console and PC) – January 28 – Xbox Game Pass In a quest to abandon their bloody past, Kazuma Kiryu and adoptive daughter Haruka Sawamura leave the unforgiving streets of Kamurocho for the island of Okinawa to run the Morning Glory Orphanage. Despite his efforts, trouble shadows Kiryu and the orphanage is soon entangled in a deadly power struggle. Can Kiryu rescue the children’s home and escape his past for good?
Yakuza 4 Remastered (Console and PC) – January 28 – Xbox Game Pass A murder in Tojo Clan territory soon sets off an investigation by a small Tojo branch consisting of Kazuma Kiryu, Masayoshi Tanimura, Shun Akiyama, and Taiga Saejima. Follow the four playable protagonists as they unravel a hidden battle over money, power, status, and honor and a mysterious woman at the center of it all. With underground forces readily willing to kill to protect their secrets, the search seems to lead to more questions than answers.
Yakuza 5 Remastered (Console and PC) – January 28 – Xbox Game Pass Kazuma Kiryu’s newfound calm as an unassuming cab driver comes to a sudden end as the standing peace between the Tojo Clan and Omi Alliance disintegrates. Forced to reckon with his past once more, the Dragon of Dojima returns to the criminal underworld to protect those he holds dear. With five playable protagonists across five major cities, follow Kiryu and his allies in their quest to navigate the corrupt underbelly and prevent an all-out turf war.
A quiet holiday on a tropical island suddenly becomes your worst nightmare when a ruthless criminal organization kidnaps your family. Battle against hunger, thirst, unscrupulous mercenaries, and wild creatures in order to stay alive and save your beloved!
Bonkies is a jolly, couch co-op party game with a pinch of construction building! Gather your prime mates, equip your banana-fueled jetpack and robo-arm, and raise wacky buildings all over the cosmos for the glory of ape kind! Become the CHIMPion of space construction!
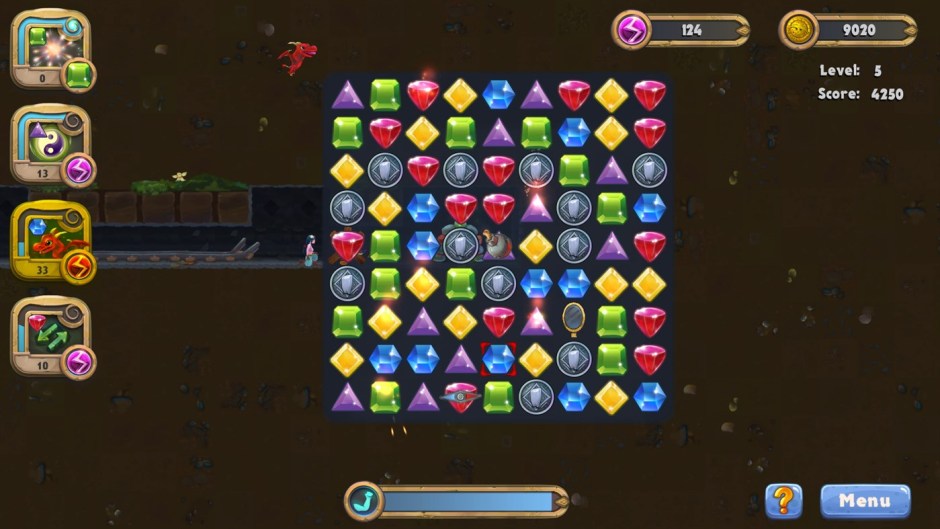
Find adventure beyond your imagination and riches untold as you descend into the caves beneath an ancient castle! Match gems to remove obstacles, collect keys to unlock new passages and build your strength as fast as you can to break through barriers in Caves and Castles: Underworld, a sometimes relaxing, sometimes heart-racing match-three game!
Play as Flux Dabes, a galactic delivery truck driver whose latest shipment gets interrupted by a megalomaniacal alien named “Hewgodooko” who tears her ship to pieces looking for useful tech. Crashlanded on Woanope, you must fight, tame, craft, quest, bossfight, and adventure your way to domination of all the things so that you and JuiceBox, your trusty sidekick/supervisor/robotic cargo palette, can send a message to the Bureau of Shipping and get those packages delivered!
The gods’ rule over humanity has lasted for millennia. They demand to be worshipped and to those who don’t submit to the gods’ will; merciless death awaits. Experience the trials of 8 Celtic warriors in their plight to sever the gods’ grip on humanity. Every man and woman who can muster a blade will form your clan and take on legions of beasts in each of the gods’ realms. Succeed and see legends born. Fail, and lives turn to dust.
Join Rack on an epic adventure across a world filled with magic and wonder. Then watch in astonishment as Rack befouls, corrupts, slaughters, and brings about a general air of misfortune to everything and everyone he confronts. Chaos reigns in this top-down action adventure RPG that’s infused with the intensity of a classic shoot ’em up.
Greetings, Travelers! Genshin Impact’s developers here. As we march on into 2021, Teyvat will see its own new year arrive in an update to be released on February 3. We would like to invite all Travelers to celebrate Lantern Rite in Liyue Harbor and usher in a new year of adventure!
Travelers will have the chance to immerse themselves in every aspect of this historic Liyue tradition, from the preparations in the days leading up to the event to the celebrations on the big day itself. Participation will be richly rewarded, with over 1,600 Primogems, a free four-star Liyue character, and other rewards on offer to help you fully prepare for the year ahead — whatever adventures it may bring.
Remembering the past and welcoming the future
As the biggest festival in Liyue’s calendar, the Lantern Rite is packed with festivities, culminating in a spectacular ceremony on the first full moon of the year that sees every household release specially made Xiao Lanterns into the night sky. Liyue locals believe that as well as lighting up the sky, these lanterns deliver their wishes to the heavens and guide the lost souls of fallen heroes back home.
Xiao Lanterns are crafted according to a traditional technique and are able to float thanks to a unique kind of ore called Plaustrite — the same material that was widely used in the construction of the Jade Chamber. Each year, a giant Mingxiao Lantern built in the image of an adeptus is the first lantern to be sent into the sky at the ceremony, followed by thousands of smaller Xiao Lanterns and a beautiful firework display.
Like any good festival, the Lantern Rite is also a time to relax and have some fun. The Lantern Rite gala lasts for several days and is packed with all kinds of exciting festive activities for Paimon and the Traveler to enjoy.
The more lanterns, the merrier
Before getting too engrossed in the fun and games of the festival, we must call on the Traveler and Paimon to once again lend a helping hand to the locals of Liyue, this time to help them prepare for the festival. As always, Travelers’ generous assistance will be generously rewarded. Lantern Rite is the most important festival of the year, and every household from Liyue Harbor, to Wangshu Inn, to Qingce Village must make meticulous preparations. The Lantern Rite event will be divided into three stages, each with a series of requests from citizens of all walks of life to help them and their loved ones get ready for the Lantern Rite. Complete requests to raise the Festive Fever level and unlock further quests and stories.
The grand finale of the festive period comes on the final night, when countless lanterns are released into the sky, carrying with them the wishes of Liyue’s citizens. With your help, it is sure to be an even more spectacular sight this year — maybe even one that the Vigilant Yaksha, Xiao, will pause to take in. Either way, if you use an HDR screen with your PS4 or PS5, we highly recommend that you take this opportunity to put our HDR Display function to the test!
A time for games, good food, and rewards
No festival is complete without games, food, and rewards, so be sure to chat to the street vendors and see what they’ve got in store! During the Lantern Rite gala, the brightly lit streets of Liyue are filled with festival-exclusive games, snacks, and activities. Don’t miss out!
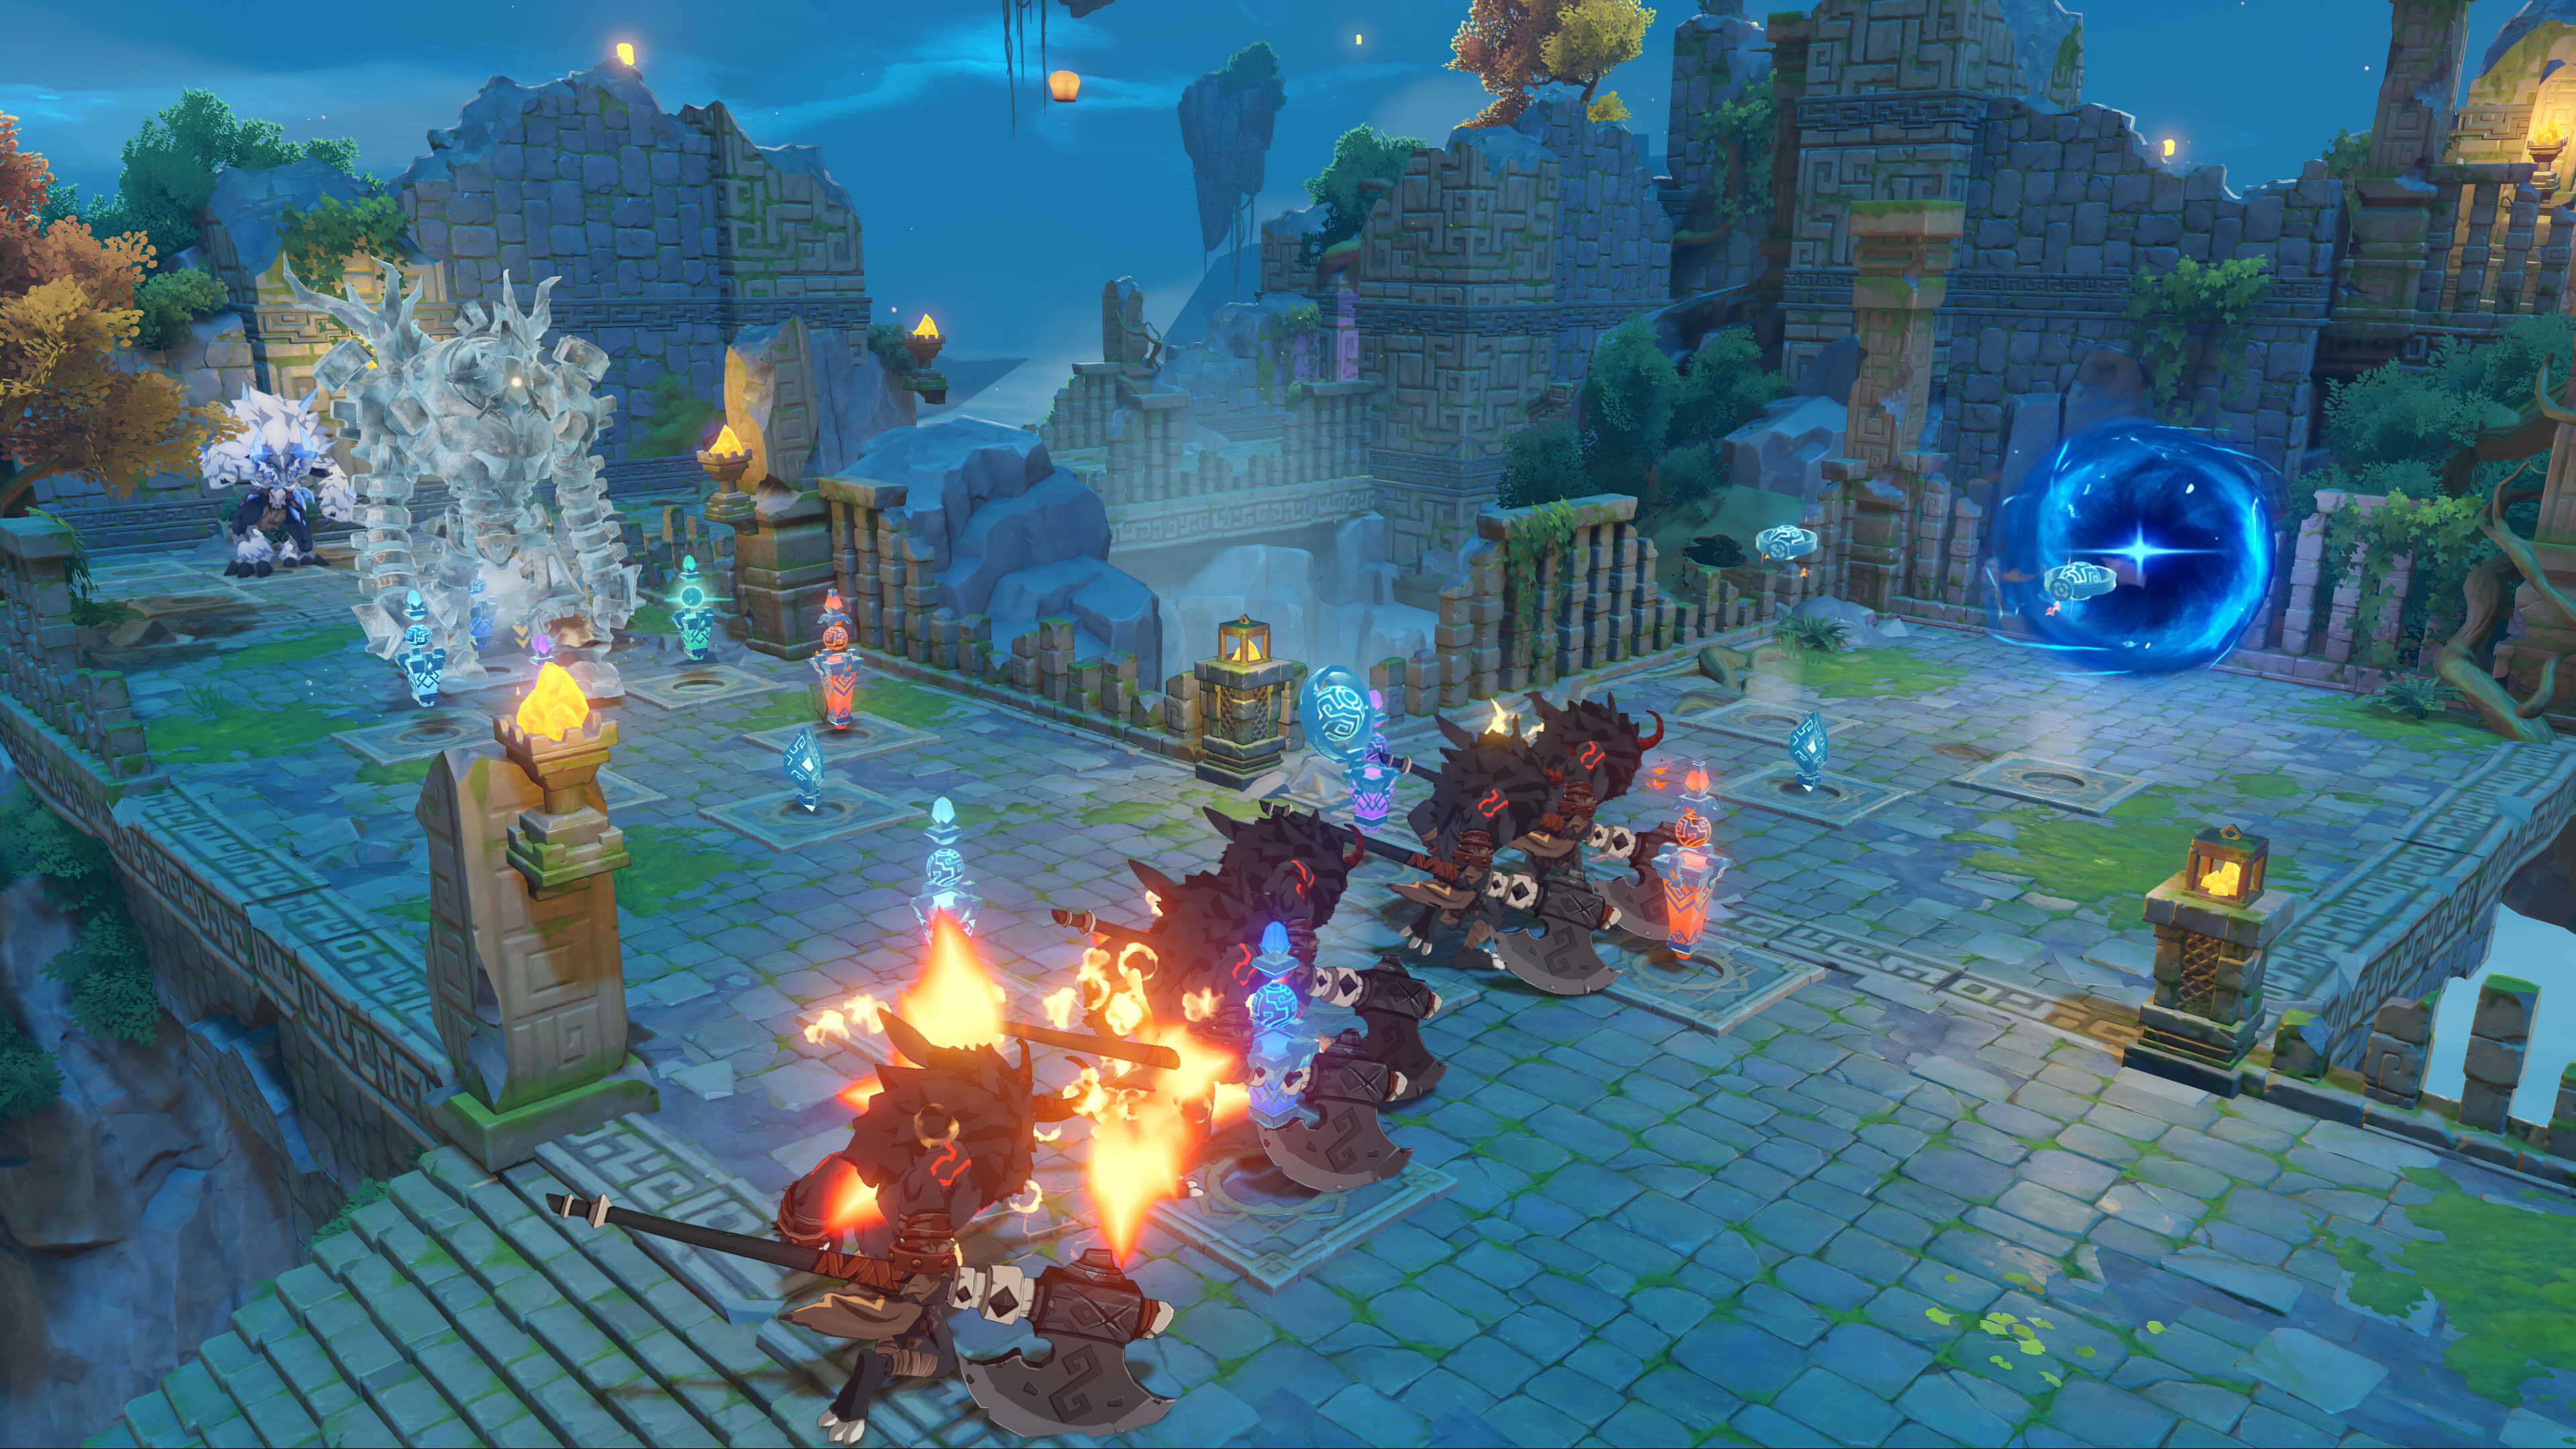
The highlight of this year’s many festive activities is Theater Mechanicus, a tower defense strategy game which you can play solo or with friends. Beat Theater Mechanicus at different difficulty levels to win Peace Talismans, which can be spent at the Xiao Market on rewards including the Crown of Insight, a new namecard style, and more.
We also recommend trying out some other daily events available only during the Lantern Rite period. Fans of photography simply mustn’t miss “Five Flushes of Fortune,” which will have you claim a certain Kurious Kamera from Ji Tong, take pictures of specific targets, and exchange the photos with Ji Tong for troves of treasure. Surplus photos can be sent to friends.
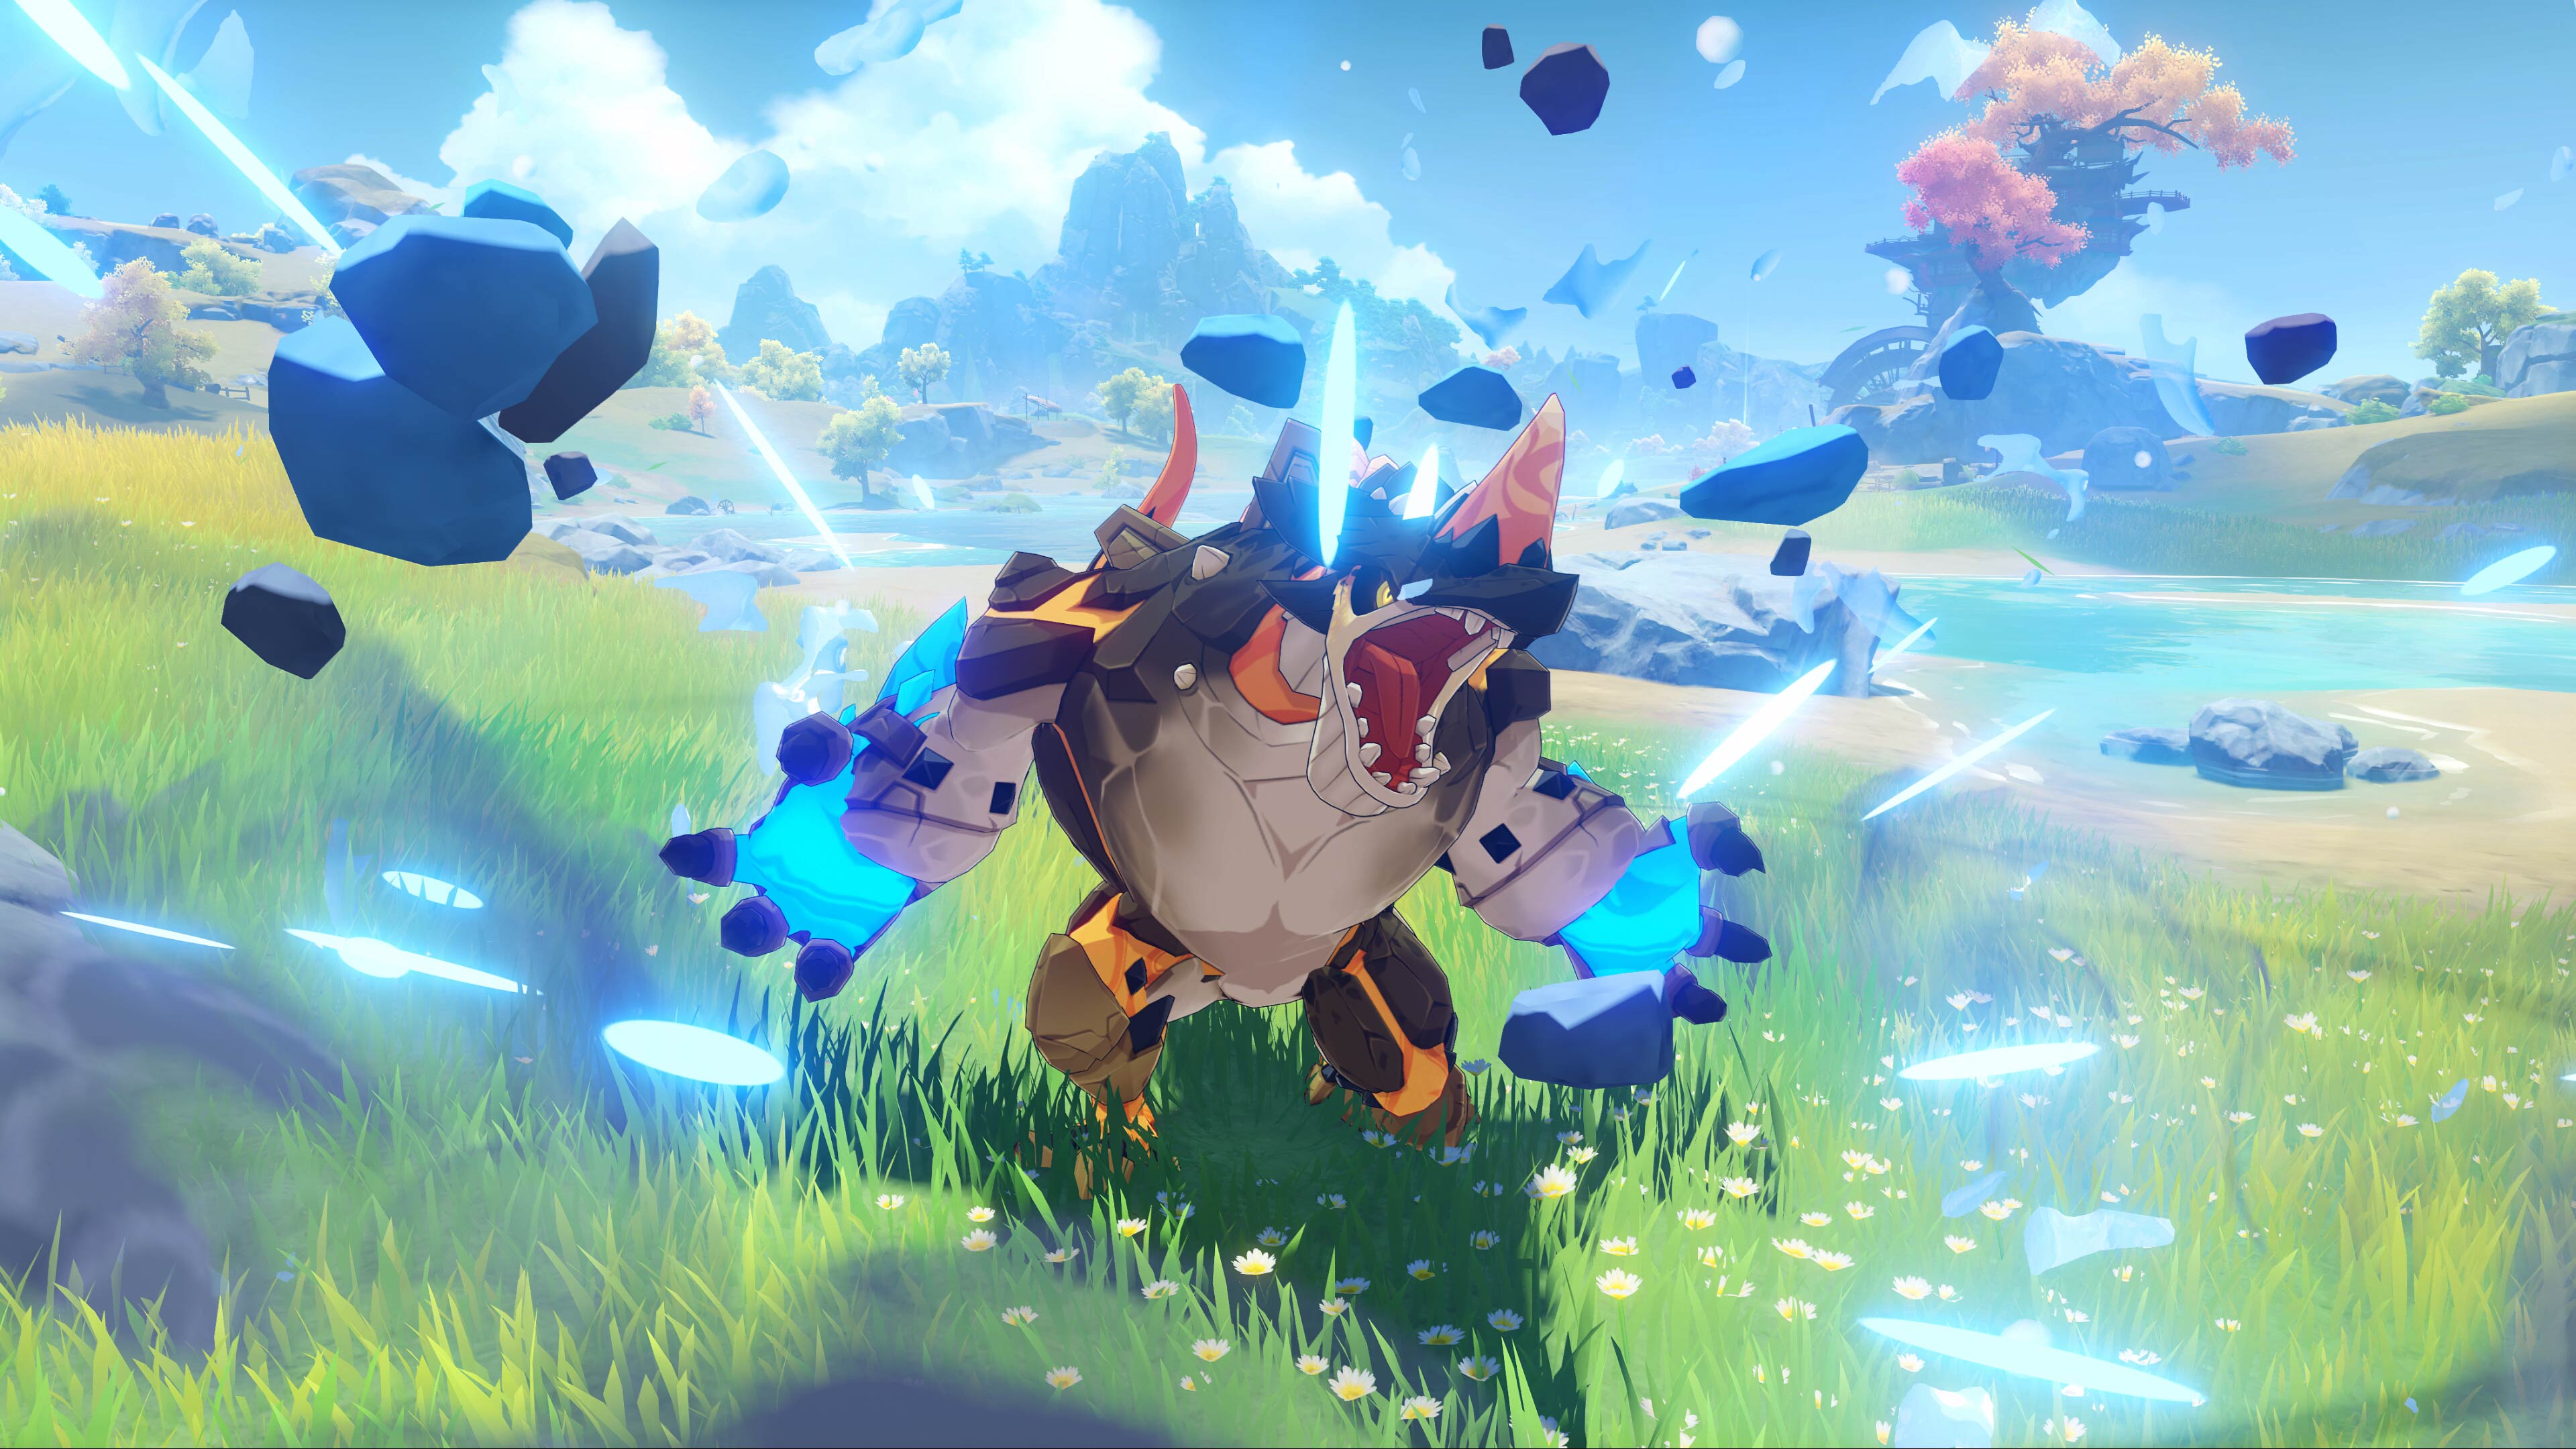
Meanwhile, avid adventurers may be interested in a new proposition from Katheryne of the Adventurers’ Guild. In “Vishaps and Where to Find Them,” available from Adventure Rank 20, Travelers can accept investigative expeditions to hunt down the dangerous Geovishaps threatening Liyue in return for rewards.
Suffice to say, Lantern Rite is a golden opportunity to experience the richness of life and culture in Liyue. Travelers who manage to accomplish all the seasonal events mentioned above can earn plenty of resources and over 1,600 Primogems.
Finally, we’ve prepared some extra little surprises to thank everyone for your ongoing support and to help you get ready for a busy year of adventuring ahead: a daily login event, in which you can claim a total of 10 free Intertwined Fate, and an event challenge offering the chance to win a four-star Liyue character of your choice.
May the flames of virtue spread to all, and never be extinguished!
The February Games with Gold lineup is here! On Xbox Series X|S and Xbox One, experience one of gaming’s most acclaimed sagas in Gears 5, survive against the living dead in the horror-thriller title that started it all with Resident Evil, and experience the gorgeous and imaginative world of Salt in the action-adventure platformer Dandara: Trials of Fear Edition. And for our classic lineup via Backward Compatibility, crack your whip and get ready to explore in Indiana Jones and the Emperor’s Tomb, and return to the troubled world of E.D.N III in the action-shooter, Lost Planet 2.
Xbox Live Gold members will have exclusive access to these games for a limited time as part of Games with Gold. Xbox Game Pass Ultimate members will also receive all the fantastic benefits of Gold plus access to over 100 high-quality games with Xbox Game Pass.
Lost Planet 2 ($19.99 ERP): Available February 16 to 28
Gears 5 Experience the celebrated campaign and multiplayer, now fully optimized for Xbox Series X|S. With all-out war descending, Kait Diaz breaks away to uncover her connection to the enemy and discovers the true danger to Sera… herself.
Resident Evil It’s the game that defined the genre. In this remastered version, join the special forces team, S.T.A.R.S., and investigate a mysterious mansion on the outskirts of Raccoon City. Stay alert because supplies are scarce, and the living dead are all around.
Dandara: Trials of Fear Edition Discover secrets, dangers, and an array of unique characters in the world of Salt. In this metroidvania-style platformer, a heroine arises out of the aether of fear to help a world on the brink of collapse. Featuring stunning handcrafted pixel art and original soundtrack compositions that bring a visual and auditory wonderland to life.
Indiana Jones and the Emperor’s Tomb It’s time to put on your fedora and help Indy recover one of the most powerful artifacts known to man. In epic, globe-spanning fashion, take on Nazis and the Asian underworld to track down the mysterious Heart of the Dragon before it falls into hostile hands.
Lost Planet 2 After 10 years removed from the original title, return to the troubled planet torn apart from the ongoing battle for thermal energy. Play four player co-op and customize your character with an arsenal of weapons and vehicles to pilot.
Read more about our Games with Gold program here and stay tuned to Xbox Wire for all the latest news on Xbox. Like we said before, if you’re an Xbox Game Pass Ultimate member, you get all the benefits of Xbox Live Gold, over 100 high-quality games you can play on console, PC, and Android devices with cloud gaming (Beta, where available), and access to EA Play at no extra cost. New games are added all the time, so you’re never without something new to play when you’re looking to find your next favorite game. If you’re new, or if you’re an existing Xbox Live Gold and Xbox Game Pass for Console member, join or upgrade today for just $1.
Since we launched Xbox Live (18 years ago!), we’ve been working to make it the most advanced multiplayer network available, for the greatest community of gamers — and there are a lot of you. Millions of people come together on Xbox to play with friends and discover great games. We invest in our community by strengthening the digital safety of our players, enabling new ways to share, communicate and play with your friends, and delivering industry leading reliability across our network.
Periodically, we assess the value and pricing of our services to reflect changes in regional marketplaces and to continue to invest in the Xbox community; we’ll be making price adjustments for Xbox Live Gold in select markets. In many markets, the price of Xbox Live Gold has not changed for years and in some markets, it hasn’t changed for over 10 years.
So, what does this mean for you?
If you’re an existing online 12-month or 6-month Xbox Live Gold member, there’s no price change. If you choose to renew your membership, it will renew at the current price.
The price of a 1-month Gold membership is increasing $1 USD and the price of a 3-month membership is increasing $5 USD or the equivalent amount in your local market.
If you’d like to upgrade your Gold membership to Xbox Game Pass Ultimate your remaining Gold time will also convert directly to Ultimate (up to 36 months). For example, if you have 11 months of Xbox Live Gold now, and you upgrade to Xbox Game Pass Ultimate, those 11 months convert to 11 months of Ultimate at no additional cost.
Members have already been notified in some regions. If you’re in a region where prices are being adjusted, you will receive an email and a message center notification over the next month letting you know what the new pricing is for your membership. Going forward, new pricing will be 1-month for $10.99, 3-months for $29.99, and 6-months for $59.99, or your local market equivalent. You can always visit your account to manage your membership, and prices won’t adjust until at least 45 days after you receive the messages.
To borrow a line from Barry Burton in the original Resident Evil, “Wow, what a showcase!” To all the old-school fans and those who were welcomed to the family with Resident Evil 7 biohazard, we hope you enjoyed today’s presentation.
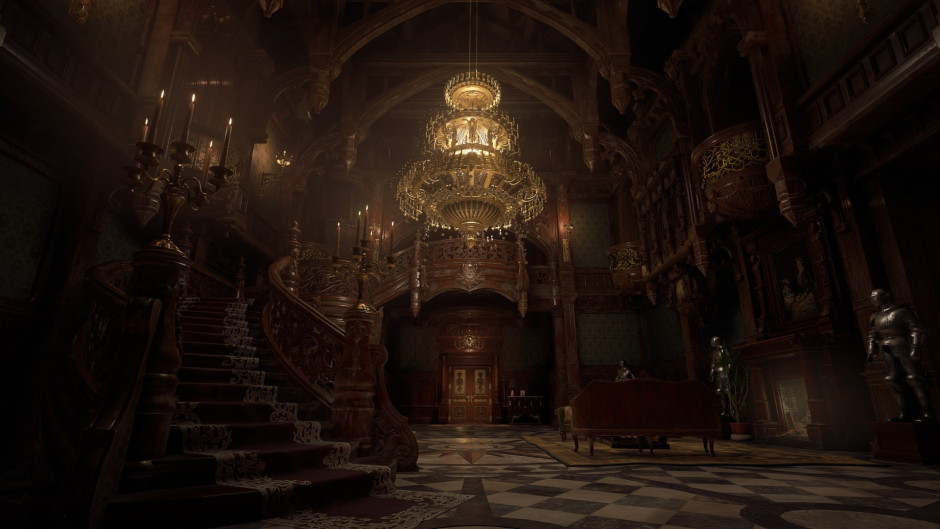
Now that the Resident Evil Showcase is a wrap, there’s quite a lot to talk about. We’ve revealed the launch date of Resident Evil Village as May 7, 2021 on PlayStation 5 and PlayStation 4, presented gameplay footage of a timeworn castle and its deranged denizens, put the spotlight on a new trailer that sheds a bit of light on the world of Resident Evil Village, revealed the rotund merchant known only as The Duke, and hinted at another malevolent person that Ethan Winters will have to contend with. And, of course, for the 25th anniversary of Resident Evil, we unveiled Resident Evil Re:Verse, an online multiplayer game featuring fan-favorite characters that will be available for free to those that buy Resident Evil Village. We’ll have more on that soon.
Watch the full Resident Evil Showcase.
For those of you wondering about that tall, mysterious woman that’s been featured in various RE Village trailers so far… don’t worry, we see you. She’s the highlight of the latest trailer, literally standing head and shoulders above a trio of other women that also seem to call the gothic castle their home. The identities of all four remain shrouded in mystery, but for now, one thing we can give you is a name for everyone’s favorite towering mistress: Lady Dimitrescu. One thing we can’t give you: How she can find a hat in her size.
The imposing Lady Dimitrescu towers over protagonist Ethan Winters.
Of course, we had one more major drop to share with you all: a stand-alone demo for Resident Evil Village, known as Maiden, that’s available for download only on PlayStation 5 starting today. As Resident Evil Village Producer Peter Fabiano mentioned in the Resident Evil Showcase, you don’t play as Ethan Winters in this demo. Rather, you’ll be playing as a character known only as “the maiden.” Unable to fight or even block, you’ll be in control of this character as she attempts to escape from Dimitrescu Castle. This is a stand-alone separate experience from the main game that is a kind of short story set within the world of RE Village.
Because of this unique take on a demo, we asked Peter why the team decided to create a demo separate from the main game, and how they used the power of PS5 to make it happen. So, without further ado….
The maiden
We asked Peter about who the protagonist of this demo is, as she’s only known as “the maiden.” As Peter explains it, “Maiden is not the name of any person, but instead it symbolizes the protagonist, a girl who’s trapped in Dimitrescu Castle.” Rather than playing as Ethan and seeing a part of his story, the character in this demo is separate from the main story of Resident Evil Village. According to Peter, both the maiden’s story and Ethan’s story take place at different times.
“The Maiden demo doesn’t take place during the main story of Resident Evil Village. Maiden was originally designed as a visual demo that would allow you to explore the inside of Dimitrescu Castle, but it evolved to include a short story and puzzle solving.” Long-time fans of Resident Evil are familiar with various castles that have appeared throughout the series, so they should feel right at home in this one, too. With RE Village and Maiden taking place in the same place but not the same time, it left us wondering if the two would be tied together somehow.
The experience
There might be a few things that eagle-eyed players should look out for as they wander the castle in search of an exit, so we asked Peter if there was anything the team wanted them to notice as they explore. “Maiden is a demo that’s separate from Resident Evil Village,” he explained. “However, it does take place in the same world as RE Village does.” He even suggests that there are a few nods between the demo and the full game, ones that you’ll only be able to catch if you play both. “When you play Resident Evil Village, or, perhaps, you come back to Maiden after playing the main game, you might discover the connections they have to each other.”
We won’t spoil the fun of figuring out the links between the two games, of course, but we do hope you have fun exploring both the demo for now, and then come back to it with fresh eyes once the full game is released so you can find out for yourself what those links are!
Resident Evil Village’s inventory shares some similarities with RE4’s.
The technology
Finally, we asked about the Maiden demo being on PlayStation 5, and how the team took advantage of the technology that the PS5 offers. Simply put, “you’ll be able to enjoy the ray tracing and 3D Audio that PS5 offers,” according to Pete. The demo is designed to take full advantage of tech that will also be included in RE Village, so Maiden also functions as a sneak peek at the next-gen leap for survival horror. Of course, we also had to press Peter a bit about his comments during the RE Showcase about how art design and technology come together to create such a hauntingly beautiful and detailed environment.
“For Maiden, or rather, for Resident Evil Village, we wanted to create a game with beautiful graphics, high frame rate, and short loading times that don’t spoil people’s immersive experience of the game. The technology we mentioned in the showcase aided the director in realizing his vision of how the game is played, and the art director’s vision of how he wanted the game to look.” You’ll see this reflected in both the full game and the demo in the environments, objects, and character models, right down to the smallest details.
Buy, sell, and upgrade weapons with RE Village’s enigmatic merchant, The Duke.
That about wraps it up for now; as a reminder, the Maiden demo for Resident Evil Village will be available starting today on PS5. You can also pre-order the game on PlayStation 5 and PlayStation 4 via PS Store to secure a bonus exclusive mini soundtrack. Don’t have a PS5 yet? Don’t worry; PS4 purchases of Resident Evil Village will be entitled to a digital upgrade to the PS5 version at no additional cost.* A Deluxe Edition is also available for both platforms, which will include various in-game perks reminiscent of Resident Evil 7 biohazard. This includes swapping save room music, changing the device you save on from a typewriter to a tape recorder, a “found footage” visual filter, and other fun bonuses.
For those looking for the ultimate conversation starter, a Collector’s Edition is available for both platforms from select retailers that includes all of the above, plus a Chris Redfield figure, art book, reversible cloth map, a special Collector’s Edition box and SteelBook case. Keep an eye out for the Maiden demo, and don’t forget – Resident Evil Village will launch on PlayStation 5 and PlayStation 4 on May 7, 2021. Purchase of the game also includes access to the online multiplayer game Resident Evil Re:Verse.
*Offers may differ per region. Please check with your local retailer for details.
Today, during a digital showcase event, Capcom revealed new details about Resident Evil Village, its upcoming and highly anticipated entry in the Resident Evil franchise launching May 7, 2021 for Xbox Series X|S and Xbox One via backward compatibility. Also announced was Resident Evil Re:Verse, a new multiplayer game where players battle each other in unique deathmatch battles set across iconic game locations.
In addition to the release date announcement, Capcom also shared significant gameplay footage that featured Resident Evil 7 biohazard’s Ethan Winters, who returns as the primary protagonist of Resident Evil Village. Promising pulse-pounding action combined with Resident Evil’s signature survival horror gameplay, the development team also shared new details from the upcoming game that will call back to fan-favorite elements from prior Resident Evil games.
New for Ethan will be the ability to purchase and sell items, buy recipes for crafting, and customize weapons thanks to a merchant known only as The Duke. Think of him as your in-game gunsmith who, by utilizing resources that you find throughout the game, provides you with recipes for you to craft consumables and other provisions to help you survive the dreaded village.
One of the most talked about teases heading into today’s Resident Evil news was Lady Dimitrescu (aka Tall Vampire Lady), whose mysterious daughters can transform into swarms of insects (no thanks). How those characters will play a role in the larger story of Resident Evil Village remains to be seen. We anticipate, like other entries in the series, to come face to face with other unique adversaries that will each have their own unique and horrifying ways to attack us. Bring it on!
As a thank you to fans in celebration of the 25th anniversary of the franchise, access to the free multiplayer experience Resident Evil Re:Verse will be included with a purchase of Resident Evil Village. This mode will set popular Resident Evil characters against each other in unique four to six-player deathmatch battles set across iconic game locations. Each character will have their owns skills for gamers to master, like playing as a bioweapon when they respawn to unleash vengeance upon other players. Resident Evil Re:Verse will be available at some point after the release of Resident Evil Village.
Resident Evil Village also supports Smart Delivery, giving you both the Xbox One and Xbox Series X|S versions of the game for one price; the best version of the game will automatically be delivered to your console – no extra steps required by you.
We’ll have more to share about Resident Evil Village in the coming months, so keep it tuned here to Xbox Wire.
Pre-order bonuses: – Mr. Raccoon Weapon Charm – Survival Resources Pack Experience survival horror like never before in the eighth major installment in the storied Resident Evil franchise – Resident Evil Village. Set a few years after the horrifying events in the critically acclaimed Resident Evil 7 biohazard, the all-new storyline begins with Ethan Winters and his wife Mia living peacefully in a new location, free from their past nightmares. Just as they are building their new life together, tragedy befalls them once again. This pack includes the following content: • Resident Evil Village • Resident Evil Re:Verse Details of the operational period for Resident Evil Re:Verse, including commencement of availability and any potential announcements relating to the end of service, can be found on the official website: https://www.residentevil.com/reverse/ Please note that, depending on the timing of your purchase of Resident Evil Village, Resident Evil Re:Verse may already no longer be available, and/or the title may become available through other means in the future.
The imagination is a powerful tool. Imagination can be the catalyst for new ideas, it can be the bridge to new worlds and experiences. It can be a beacon of inspiration and action. Imagination is unique while at the same time shared by all. Most importantly, imagination is an owned and sacred trait. But, what if you want others to share in your imagination? What if others want you to experience their imagination?
How can you take something so vivid in your mind and make it real for others?
Well, that was a core question that drove the development of HTC VIVE. A group of passionate individuals who all asked the same question, “How do we make imagination real?” With the goal of making imagination real, HTC VIVE was born as we set upon creating tangible experiences from the dreams and ideas of developers, artists, tinkerers, movie makers, and so many more.
Five years later, that question is still at the foundation of every VR device we develop. Though now, through the advancement of technology, we’ve been able to diversify our VR lineup to meet the specific needs of individuals and their imaginations. We have VR solutions that help scientists splice the atom, ones that help map the universe, we have virtual reality kits that bring the rest of the world to students who have never traveled outside their villages; and yes, we even have ones that put you face to face with a horde of angry zombies. But, if you’re new to VR how do you know which kit is right for you and your imagination?
We’d like to introduce you to VIVE Cosmos, our most versatile headset to date. VIVE Cosmos is packed with the most advanced virtual reality technology, yet easy enough to just pop on and let your imagination run wild. In fact, if you ever need a break from your imagination, just flip up the front to take a breather. But, VIVE Cosmos doesn’t just have to be for you, its ergonomic fit and halo design means it can be easily shared with friends and family, so you can have them share in the experience of what fuels your imagination. And, due to its versatility, VIVE Cosmos can offer a host of immersive experiences, from casual gaming to productivity, to videos; VIVE Cosmos is a tremendous first step into the world of VR.
As powerful and versatile was when it first launched, VIVE Cosmos continues to grow and offer more immersive experiences through our periodic updates, ensuring you will always be on the forefront of virtual reality technology and have a seamless experience.
VIVE Cosmos will soon be receiving an upgrade to DirectX 12 for Nvidia GPUs and while that may not mean much, it gives your computer’s CPU an average of 15-20% improvement; now you can fly through the universe even faster.
But, that was only the start. Latency, the process at which your movement in real-life transfers to movement in your headset is very important – you don’t want you disconnected from reality for the wrong reasons – so we optimized frame timings offering 10% better latency.
We also know the hallmark of a great VR experience is in the details, so we refactored our runtime which improves your computer’s graphics processing by 10%, allowing you to see every detail.
Lastly, we want you to be safe while your imagination is whisked away to a far-off realm, so we created a new chaperone to passthrough behavior in order to reduce interruptions, but still keep you safe.
In addition to the great features mentioned above, if you find yourself in the mood to tinker, we will soon be releasing beta access to OpenXR, offering you an opportunity to let your imagination turn to action. OpenXR support will also be coming to VIVE Wave later this year. Check out our social media channels for more information as it becomes available.
As the real cosmos is seemingly unending, we are also continuing to improve upon the already (inter)stellar features of the VIVE Cosmos, ensuring your imagination never goes uninterrupted. If you would like to learn more about VIVE Cosmos, check more details here https://www.vive.com/cosmos.
Attention all strategy battlers, a new challenge awaits. The highly competitive online strategy game Auto Chess will be free to play on PS4 on January 27. Get ready to test your tactical skill along with every last one of your wits as you square off against opponents from all around the world in Season 10.
Excited? Us too!
But before you charge onto the battlefield, check out our tips and need-to-know info to help you get the edge against your latest wave of new opponents joining the cross-platform battle.
You’re in control
First things first: controls. Playing on PlayStation offers you a unique way to approach Auto Chess. With this simple layout, you’ll find learning the controls easy, allowing you to focus on the true challenge of developing and mastering your own personal style and strategy.
Now, hold your controller tight. Let’s jump into the world of Auto Chess!
Explore the land of Rune
You’ll find yourself battling across Rune. After several wars, the citizens of Rune finally live in an era of relative peace. The warriors you’ll meet from each race are the ones who brought Rune out of the dark period of war. Those very same legendary warriors will be the chess pieces at your disposal as you fiercely battle for victory in Auto Chess.
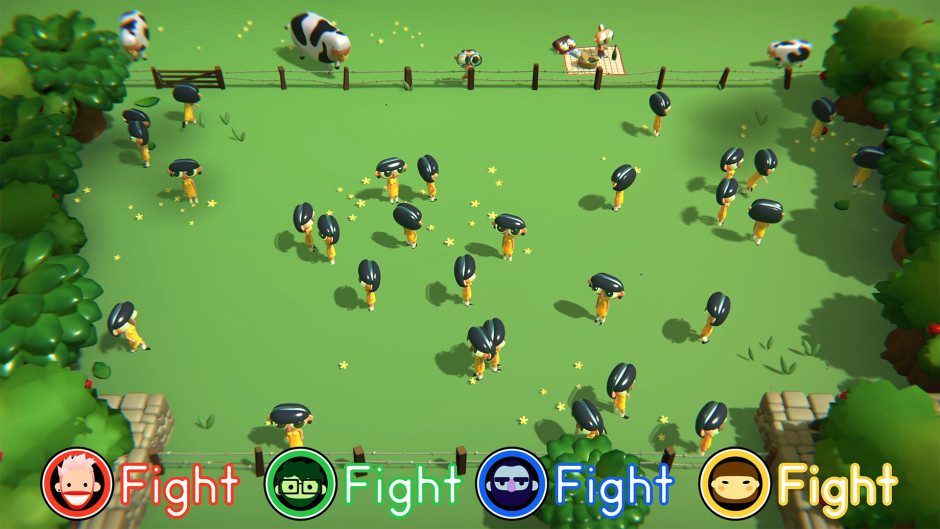
And with the advent of Season 10, a brand-new race has arrived on the battlefield –the Pandaman. Get ready for three Pandaman heroes to join the battle in their quest to protect the homeland and families.
Fight as a Warrior
In each battle, you’ll fight against seven other opponents as well as creeps. Simply maintain your HP while eliminating other opponents and victory will be yours. How do you do that exactly? Well, let’s cover off five essential points to get you started, including the chess pieces, their races and classes, the basic line-up mechanism along with gold, synergy and items. After this crash course, you’ll be battling in no time.
1. Upgrade the chess pieces
The starting level of a chess piece is 1-star. The very best level is 3-star. You combine three 1-star chess pieces to upgrade a 2-star chess piece. And it takes three 2-star chess pieces to upgrade to a 3-star chess piece. Every upgrade improves that piece’s skill and makes for a more powerful chess piece in your line-up.
Gold can be used to purchase chess pieces for upgrading. Gold can also be used to purchase experience for the chess player, which allows you to place more chess pieces on the battlefield.
2. Active the synergies
Activating the bonus effects of synergy can help give you tactical advantages, the trick is knowing the right time. You can decide to activate it in the early stages for an early lead, or you could choose to wait until it has an even stronger effect for late stage game changer. However, if you care more about the attributes of your line-up, you can upgrade a chess piece and make it the key component of your strategy instead. The choice is yours.
3. Acquire items
Early on, you’ll obtain some basic items which will come in handy as you battle. Items are also dropped in the creep rounds. As you play, you’ll learn the all-important combinations of items that will upgrade them and make them far more powerful.
Always remember – strategy is key in this game, so think about your line-up in future rounds and never forget to maintain your gold and experience.
4. Analyze the line-up
To guarantee victory in battle, you’ll need to focus on your line-up as well as your opponents’ line-ups. Since chess pieces are all drawn from a shared piece pool, forming a dream line-up can be difficult if your opponent is pursuing a similar strategy. Some hints to keep alive: place chess pieces tactically, manage gold at all times, and make sure you take full advantage of the creep round for extra goodies.
5. Manage gold
Gold is as scarce as it is significant. You’re given a certain amount of gold when you start and you’ll be able to obtain more from interest, winning streaks as well as losing streaks. The interest you earn is based on the amount of gold left at the end of each round with the most being five. You obtain the same amount of interest from a losing streak as a winning streak, but of course, winning streaks are always more fun.
PlayStation Plus exclusive content
Auto Chess hasn’t forgotten about you, PlayStation Plus members. The awesome (and exclusive) chess player, Chiyome Mochizuki will be free to redeem for all PlayStation Plus members on the PlayStation Store. And that’s not all. Once you visit the Auto Chess in-game store, you’ll find it packed with even more exclusive content like chess players Matryoshka and Yi Sun-sin as well as Goblin Workshop Chessboard. Matryoshka, Yi Sun-sin and the Goblin Workshop Chessboard will be available for purchase by all PlayStation players starting on official launch day January 27!
Time to join the battle
That’s all you need to know to begin your journey to become an Auto Chess champion. All that’s left is to make sure you download Auto Chess for free when it hits PlayStation Store on January 27.
And if you want the winning edge right from the start, make sure you get the valuable Auto Chess: Founder’s Pack before the game’s full release. You’ll get exclusive in-game items and a whole lot of legendary content that’ll be gone soon, so act fast! Last chance is January 27.
Now it’s time to join the battle, dig in deep and get involved with in-game championships and international tournaments. See you on the battlefield.
Launching our first game production, our goal was to create an experience everybody could enjoy, no matter their gaming experience, and where players would laugh and chat together while playing.
Unspottable ended up being just that, a game very easy to play but with enough depth that players can replay, improve, and still have fun. It has been so great to hear feedback from couples and families with young children playing together.
I came up with this mix of hide-and-seek and modified Turing test party game idea while experiencing a bug in a fighting game. The game stopped showing the user interface and left me confused on who I was controlling and who the opponent was. Having to guess which character was mine and try to understand who the real opponent was amongst the NPCs (non-playing characters) was very fun! This idea allowed us to build a core gameplay very easy to pick up and still have plenty of options to twist the concept to decline the fun in many different ways.
The key mechanic of the game is to guess who the real players are amongst a crowd of AI. All players share the same screen though, so there can’t be any visual indication to show which characters are controlled by players. For that reason, the first task for each player is to guess who they are controlling while still blending in the crowd. Then they must observe to find the opponents and sneak towards them to punch.
As a game developer, my favorite aspect of the game was experimenting with AI in a way that is very different from other games. Instead of working towards more and more accurate and realistic AIs with complex behavior, I was able to simplify it as much as possible and just make it the player’s goal to copy the AI to blend in.
I even pushed it further, in the factory level (my personal favorite), where the AI is broken on purpose. The characters move faster and erratically, spin in circles or get stuck against walls. That forces the players to do the same if they want to blend in and was super fun to see as a game designer when players run against walls pretending to be broken robots!
The first game demo was released Xbox One as part of the Summer Festival 2020 and we were overwhelmed with the response from players with almost 10k downloads and so many great comments from Xbox One players. That response was a great push for a very small team like us. There are only three of us: Maxime Granger, Yohan Lebret, and myself, and it really helped finding the motivation to handle the many different challenges we faced this year.
I’m so happy with what we achieved this year, releasing our first game, getting great responses from players and now releasing on an Xbox console which has always been a dream of mine. It shows that it’s more accessible than ever for small independent studios to be seen on platforms like this one.
If you like fun couch party games to play with friends or family, please check out Unspottable.
Unspottable is a competitive couch party game for 2 to 4 players. Blend in the crowd of AI characters, hunt down the other players and use the many different environment specific rules to win the game. Walk like a robot and punch like a human!
Uncover the secrets of Amalur, become a Ghost and join your friends in combat, and take part in all out brawls as your favorite wrestler, all in this weekend’s Free Play Days. Kingdoms of Amalur: Re-Reckoning,Tom Clancy’s Ghost Recon Breakpoint, andWWE 2K Battlegroundsare all available for Xbox Live Gold and Xbox Game Pass Ultimate members to play from Thursday, January 21 at 12:01 a.m. PST until Sunday, January 24 at 11:59 p.m. PST.
How to Start Playing
Find and install the games here on Xbox.com. Clicking through will send you to the Microsoft Store, where you must be signed in to see the option to install with your Xbox Live Gold membership. To download on console, click on the Subscriptions tab in the Xbox Store and enter the Gold member area to locate the Free Play Days collection on your Xbox One.
Keep the Fun Going
Purchase the games and other editions at a limited time discount and continue playing while keeping your Gamerscore and earned achievements during the event! Please note that discount percentage may vary by region.
Kingdoms of Amalur: Re-Reckoning From the minds of R.A. Salvatore, Todd McFarlane, and Ken Rolston, comes an intense RGP set across a vast sprawling world, from the vibrant city of Rathir to the grim dungeons of Brigand Hall Caverns. Remastered with refined gameplay and stunning visuals, uncover the secrets of Amalur and control the keys to immortality. And be sure to check out the fantastic savings on the Standard and Fate Editions in the Microsoft store.
Tom Clancy’s Ghost Recon Breakpoint In the exciting Ghost Recon X Rainbow Six: Siege live event, it’s been discovered that Sentinel is selling a dangerous neurotoxic gas to world arms dealers. R6 Operators Ash, Finka, and Thatcher are sent to Auroa to fight this new threat. After sneaking onto the island posing as potential buyers, they team up with Nomad. Can they breach Sentinel’s lab, stop the production and find intel on an antidote? Play Tom Clancy’s Ghost Recon Breakpoint with your friends for free from January 21 to 24 and check out all the action the game has to offer, including the Operation Amber Sky live event! For a limited time, purchase the game for an unbelievable up to 85% off and carry over your progress after the free weekend ends.
WWE 2K Battlegrounds WWE 2K Battlegrounds is an over-the-top, arcade-brawler featuring all your favorite WWE Superstars and Legends like Hulk Hogan, Roman Reigns, Ric Flair, Becky Lynch, John Cena, and Goldberg! Dominate your friends in online or offline multiplayer mayhem using outlandish moves in interactive environments.
Don’t miss out on this exciting Free Play Days for Xbox Live Gold and Xbox Game Pass Ultimate members! Learn more about Free Play Days here and stay tuned to Xbox Wire to find out about future Free Play Days and all the latest Xbox gaming news.
Programs written for other MicroPython-compatible microcontroller boards will work on Raspberry Pi Pico, and vice versa – sometimes needing minor modification for different features between boards – giving Raspberry Pi Pico a healthy library of projects and tutorials beyond those developed by Raspberry Pi itself.
Meanwhile, the C/C++ SDK is fine-tuned to RP2040 and has all the headers, libraries, and build systems necessary to write programs in C, C++, or assembly language. Additionally, the C/C++ SDK provides higher-level libraries for dealing with timers, USB, synchronisation, and multicore programming, along with additional high-level functionality built using PIO such as audio.
Beginners looking to get started with the MicroPython port should start with the Raspberry Pi Pico Python SDK documentation and be sure to pick up a copy of Getting Started with MicroPython on Raspberry Pi Pico.
Get Started with MicroPython on Raspberry Pi Pico
For more physical computing projects to try on your Raspberry Pi Pico, grab a copy of the new book, Get Started with MicroPython on Raspberry Pi Pico. As well as learning how to use Raspberry Pi Pico’s pins as inputs and outputs, you’ll build a simple game, measure temperatures, save and load data to your Pico’s file system, and even make a burglar alarm for your room
.
Make sure to read, and bookmark, these new Raspberry Pi Pico and 2040 data sheets.
Program Raspberry Pi Pico with MicroPython
Raspberry Pi Pico is set up, by default, for use with the C/C++ Software Development Kit (SDK). The C/C++ SDK is an extremely flexible and powerful way to interact with your Raspberry Pi Pico. However, there’s a more beginner-friendly method: MicroPython, a port of the Python programming language designed specifically for microcontrollers.
In this tutorial we’re going to switch the Pico firmware from C/C++ to MicroPython and create our first program, which flashes the LED on the board.
You’ll need
Open Raspberry Pi Pico in boot mode
Take your Raspberry Pi Pico and a micro USB to USB-A cable, and connect the small micro USB end of Pico. Hold down the small button on your Raspberry Pi Pico marked ‘BOOTSEL’ and plug the larger USB-A cable end into your computer (we are using a Raspberry Pi).
Wait a few seconds, then let go of the BOOTSEL button. You will see your computer mount a removable drive. Click OK in the ‘Removable medium is inserted’ window to open Raspberry Pi Pico’s on-board storage.
Flash the MicroPython firmware
Double-click the INDEX.HTM file displayed in Pico’s mounted storage. Your browser will open and display the ‘Welcome to your Raspberry Pi Pico’ webpage. Choose the ‘Getting started with MicroPython’ tab, and click ‘Download UF2 file’ to download the MicroPython firmware. It’s a small file, so it’ll only take a few seconds.
Open File Manager and locate the micropython-16-DEC-2020.uf2 file in the Downloads folder (the file name may have been updated with a later date). Drag-and-drop the UF2 file to the Raspberry Pi Pico’s removable drive (named ‘RPI-RP2’). After a few seconds, the drive will disappear as the new MicroPython firmware is recognised and installed.
Switching the back end
The best way to program in MicroPython on your Raspberry Pi Pico is with the Thonny Python IDE (integrated development environment). Open the Raspberry Pi menu and choose
Programming > Thonny Python IDE.
Thonny is normally used to write programs that run on the same computer you’re using Thonny on; to switch to writing programs on your Raspberry Pi Pico, you’ll need to choose a new Python interpreter. Look at the bottom-right of the Thonny window for the word ‘Python’ followed by a version number: that’s your current interpreter.
Click ‘Python’ and look through the list that appears for ‘MicroPython (Raspberry Pi Pico)’ – or, if you’re running an older version of Thonny, ‘MicroPython (generic)’.
Tip! Update Thonny
If you don’t see MicroPython (Raspberry Pi Pico) in the interpreter list, you’ll need to update Thonny. Open a Terminal window and type:
sudo apt update && sudo apt full-upgrade -y
Code Hello World in MicroPython
Writing a program for your Raspberry Pi Pico is a lot like writing a program for your Raspberry Pi. You can type commands in the Shell area at the bottom of the window to have them immediately executed, or you can write a program in the main part of the window to run on-demand.
Click in the Shell area, next to the >>>> symbols, and type:
print("Hello, World!")
When you press ENTER at the end of the line, you’ll see your Raspberry Pi Pico respond. Try typing the same line again, but in the main part of the Thonny window – then click the Run icon. You’ll be asked whether you want to save your program to ‘This computer’ or ‘Raspberry Pi Pico’. Click on ‘Raspberry Pi Pico’, give your program the name hello_world.py, then click OK to save and run your first program.
Create a program that blinks Raspberry Pi Pico’s LED
While Raspberry Pi Pico can run Python programs like the one above, its true power comes from interfacing with external hardware like buttons and LEDs. You can start programming a physical computing project without any extra hardware, too, thanks to an on-board LED (assigned to the non-broken-out GP25 pin).
Click the New icon and type in the blinky_led.py code. Click Run, save the program to your Raspberry Pi Pico, and watch the LED on Raspberry Pi Pico: it will turn on for one second, then off for one second, then repeat.
The easiest way to use Pico, though, is to attach it to a breadboard – and for that, you’ll need to attach pin headers. You’ll need a soldering iron with a stand, some solder, a cleaning sponge, Raspberry Pi Pico, and two 20-pin 2.54 mm male header strips. If you already have a solderless breadboard, you can use it to make the soldering process easier.
Sometimes 2.54 mm headers are provided in strips longer than 20 pins. If yours are longer, just count 20 pins in from one end and look at the plastic between the 20th and 21st pins: you’ll see it has a small indentation at either side. This is a break point: put your thumbnails in the indentation with the headers in both your left and right hands and bend the strip. It will break cleanly, leaving you with a strip of exactly 20 pins. If the remaining header strip is longer than 20 pins, do the same again so you have two 20-pin strips.
Turn Raspberry Pi Pico upside-down, so you can see the silkscreen pin numbers and test points on the bottom. Take one of the two header strips and push it gently into the pin holes on the left-hand side of your Pico. Make sure that it’s properly inserted in the holes, and not just resting in the castellations, and that all 20 pins are in place, then take the other header and insert it into the right-hand side. When you’ve finished, the plastic blocks on the pins should be pushed up against your Pico’s circuit board.
Pinch your Pico at the sides to hold both the circuit board and the two pin headers. Don’t let go, or the headers will fall out! If you don’t have a breadboard yet, you’ll need some way to hold the headers in place while you’re soldering – and don’t use your fingers, or you’ll burn them. You can hold the headers in place with small alligator clips, or a small blob of Blu Tack or other sticky putty (Figure 1).
Solder one pin, then check the alignment: if the pins are at an angle, melt the solder as you carefully adjust them to get everything lined up.
Use a breadboard
If you have a breadboard, simply turn Raspberry Pi Pico upside down – remembering to keep the headers pinched – and push both the headers and your Pico into the holes on the breadboard. Keep pushing until your Pico is lying flat, with the plastic blocks on the pin headers sandwiched between your Pico and your breadboard (Figure 2).
Look at the top of your Pico: you’ll see a small length of each pin is sticking up out of the pin holes. This is the part you’re going to solder – which means heating up both the pins and the pads on Pico and melting a small amount of a special metal, solder, onto them.
Put your soldering iron in its stand, making sure the metal tip isn’t resting up against anything, and plug it in. It will take a few minutes for the tip of the iron to get hot; while you’re waiting, unroll a small length of solder – about twice as long as your index finger. You should be able to break the solder by pulling and twisting it; it’s a very soft metal.
If your soldering stand has a cleaning sponge, take the sponge to the sink and put a little bit of cold water on it so it softens. Squeeze the excess water out of the sponge, so it’s damp but not dripping, and put it back on the stand. If you’re using a cleaner made of coiled brass wire, you don’t need any water.
Warning! Hot solder!
Soldering irons get very hot, and stay hot for a long time after they’re unplugged. Make sure that you put the iron in the stand when you’re not using it and don’t touch the metal parts – even after it’s unplugged. See Getting started with soldering for more information.
Start to solder
Pick up your soldering iron by the handle, making sure to keep the cable from catching on anything as you move it around. Hold it like a pencil, but make sure your fingers only ever touch the plastic or rubber handle area: the metal parts, even the shaft ahead of the actual iron tip, will be extremely hot and can burn you very quickly.
Before you begin soldering, clean the iron’s tip: brush it along your sponge or coiled wire cleaner. Take your length of solder, holding it at one end, and push the other end onto the tip of your iron: it should quickly melt into a blob. If it doesn’t, leave your soldering iron to heat up for longer – or try giving the tip another clean.
Putting a blob of solder on the tip is known as tinning the iron. The flux in the solder helps to burn off any dirt still on the end of the iron, and gets it ready. Wipe the iron on your sponge or cleaning wire again to clean off the excess solder; the tip should be left looking shiny and clean.
Put the iron back in the stand, where it should always be unless you’re actively using it, and move your Pico so it’s in front of you. Pick up the iron in one hand and the solder in the other. Press the tip of the iron against the pin closest to you, so that it’s touching both the vertical metal pin and the gold-coloured pad on your Pico at the same time (Figure 3).
It’s important that the pin and the pad are both heated up, so keep your iron pressed against both while you count to three. When you’ve reached three, still keeping the iron in place, press the end of your length of solder gently against both the pin and pad but on the opposite side to your iron tip (Figure 4). Just like when you tinned the tip, the solder should melt quickly and begin to flow.
The solder will flow around the pin and the pad, but no further: that’s because Pico’s circuit board is coated in a layer called solder resist which keeps the solder where it needs to be. Make sure not to use too much solder: a little goes a long way.
Remove solder first
Pull the remaining part of your solder away from the joint, making sure to keep the iron in place. If you pull the iron away first, the solder will harden and you won’t be able to remove the piece in your hand; if that happens, just put the iron back in place to melt it again. Once the molten solder has spread around the pin and pad (Figure 5), which should only take a second or so, remove the soldering iron. Congratulations: you’ve soldered your first pin!
Clean the tip of your iron on your sponge or brass wire, and put it back in the stand. Pick up your Pico and look at your solder joint: it should fill the pad and rise up to meet the pin smoothly, looking a little like a volcano shape with the pin filling in the hole where the lava would be, as shown in Figure 6.
Once you’re happy with the first pin, repeat the process for all 40 pins on your Pico – leaving the three-pin ‘DEBUG’ header at the bottom empty.
Remember to clean your iron’s tip regularly during your soldering, too, and if you find things are getting difficult, melt some solder on it to re-tin the tip. Make sure to keep refreshing your length of solder, too: if it’s too short and your fingers are too close to the soldering iron’s tip, you can easily burn yourself.
When you’re finished, and you’ve checked all the pins for good solder joints and to make sure they’re not bridged to any nearby pins, clean and tin the iron’s tip one last time before putting it back in the stand and unplugging it. Make sure to let the iron cool before you put it away: soldering irons can stay hot enough to burn you for a long time after they’ve been unplugged!
Finally, make sure to wash your hands – and celebrate your new skill as a soldering supremo!
Tip! Four corners first
Solder the four corner pins first. Take your time, don’t rush, and remember that mistakes can always be fixed.
Soldering issues
If the solder is sticking to the pin but not sticking to the copper pad, as in example A in Figure 7, then the pad wasn’t heated up enough. Don’t worry, it’s easily fixed: take your soldering iron and place it where the pad and pin meet, making sure that it’s pressing against both this time. After a few seconds, the solder should reflow and make a good joint. On the other hand, if the solder is too hot, it won’t flow well and you’ll get an overheated joint with some burnt flux (example B). This can be removed with a bit of careful scraping with the tip of a knife, or a toothbrush and a little isopropyl alcohol.
If the solder is entirely covering the pin, as in example C, you used too much. That’s not necessarily going to cause a problem, though it doesn’t look very attractive: so long as none of the solder is touching any of the pins around it, it should still work. If it is touching other pins (as in example D), you’ve created a bridge which will cause a short circuit.
Again, bridges are easy to fix. First, try reflowing the solder on the joint you were making; if that doesn’t work, put your iron against the pin and pad at the other side of the bridge to flow some of it into the joint there. If there’s far too much solder still, you’ll need to remove the excess before you can use your Pico: you can buy desoldering braid, which you press against the molten solder to suck the excess up, or a desoldering pump to physically suck the molten solder up.
Another common mistake is too little solder: if you can still see copper pad, or there’s a gap between the pin and the pad which isn’t filled in with solder, you used too little (example E). Put the iron back on the pin and pad, count to three, and add a little more solder. Too little is always easier to fix than too much, so remember to take it easy with the solder!
Buy Get Started with MicroPython on Raspberry Pi Pico
This tutorial is also included in our new book, Get Started with MicroPython on Raspberry Pi Pico. Pick up your copy of Get Started with MicroPython on Raspberry Pi Pico and learn about all the great things you can make with Pico.
Raspberry Pi Pico is a development board built around this powerful yet low-cost RP2040 microcontroller.
Like Raspberry Pi computers, Raspberry Pi Pico features a pin header with 40 connections, along with a new debug connection enabling you to analyse your programs directly from another computer (typically by connecting it directly to the GPIO pins on a Raspberry Pi).
Pico is an incredibly interesting new device from Raspberry Pi. It offers a wealth of connectivity for external hardware – and enough processing power to handle complex tasks. All this in a compact board which costs less than a cup of coffee. You can pick up a Pico from just $4 / £3.60, or free on the latest edition of HackSpace magazine.
Built with everyone from absolute beginners to professional engineers in mind, Raspberry Pi Pico represents the start of a new era for Raspberry Pi. We can’t wait to see what you all make with it.
Get to know Raspberry Pi Pico
Raspberry Pi Pico is a brand new, low-cost, yet highly flexible development board designed around a custom-built RP2040 microcontroller chip designed by Raspberry Pi.
Raspberry Pi Pico – ‘Pico’ for short – features a dual-core Cortex-M0+ processor (the most energy-efficient Arm processor available), 264kB of SRAM, 2MB of flash storage, USB 1.1 with device and host support, and a wide range of flexible I/O options.
The castellated pin headers ensure Pico is equally at home on a breadboard for experimentation as it is soldered onto a circuit board and driving a finished product. The high-performance processor cores coupled with RAM and storage give it impressive flexibility.
A real highlight comes in the form of Programmable Input/Output (PIO) capabilities: bridging the gap between software and hardware, Pico’s PIO allows developers to define new hardware features in software – expanding its capabilities beyond any fixed-function device.
Pico is set to prove itself not just an impressive new tool for Raspberry Pi users, but a must-have gadget for anyone investigating physical computing projects.
Microcontroller
RP2040 is a custom-built dual-core microcontroller, designed in-house at Raspberry Pi
USB
A micro USB port provides power and data, letting you communicate with and program Raspberry Pi Pico (by dragging and dropping a file)
Bootsel
Hold the BOOTSEL (boot select) button when powering up Pico to put it into USB Mass Storage Mode. From here, you can drag-and-drop programs, created with C or MicroPython, into the RPI-RP2 mounted drive. Pico runs the program as soon as it is switched on (without BOOTSEL held down)
Labelling
Silkscreen labelling on the top provides orientation for the 40 pins, while a full pinout is printed on the rear
Debugging
A Serial Wire Debug (SWD) header provides hardware debugging capabilities, letting you quickly track down problems in your programs
Pins
Raspberry Pi Pico’s pins are castellated, allowing pin headers to be fitted for breadboard use or the entire board to be soldered as a flat module
Raspberry Pi Pico specifications
RP2040 microcontroller chip designed by Raspberry Pi in the United Kingdom
Dual-core ARM Cortex-M0+ processor, flexible clock running up to 133MHz
264kB of SRAM, and 2MB of on-board flash storage
Castellated module allows soldering direct to carrier boards
USB 1.1 Host and Device support
Low-power sleep and dormant modes
Drag & drop programming using mass storage over USB
8× Programmable IO (PIO) state machines for custom peripheral support
Say hello to RP2040
RP2040 is a low-cost microcontroller device, with the same focus on quality, cost, and simplicity that characterises the ‘big’ Raspberry Pi. Microcontrollers interact with the hardware of a board much like an application processor does in a larger device.
Application processors like the Broadcom BCM2711 used in Raspberry Pi 4 are designed to run multiple programs under an operating system, like Raspberry Pi OS. These programs access external hardware through interfaces provided by the operating system.
In contrast, microcontrollers like RP2040 interact directly with external hardware and typically run a single program from the moment you turn them on.
Just as Raspberry Pi is an accessible computer, RP2040 is an accessible microcontroller, containing almost everything makers need to embed it inside a product.
RP2040 is supported by both C/C++ and MicroPython cross-platform development environments, including easy access to runtime debugging. It has a built-in UF2 bootloader enabling programs to be loaded by drag-and-drop. The built-in USB can act as both device and host. Meanwhile, floating-point routines are baked into the chip for ultra-fast performance. It has two symmetric processor cores and high internal bandwidth, making it useful for signal processing and video applications. The chip has a relatively large amount of internal RAM but uses external flash storage, allowing you to choose how much memory you need.
Microcontrollers are an exciting new area for Raspberry Pi fans to explore. See the RP2040 data sheet for more information.
Behind the name 2040
The post-fix numeral on RP2040 comes from the following:
Number of processor cores (2)
Loosely which type of processor (M0+)
The amount of RAM, from the function floor(log2(RAM / 16kB)); in this case it’s 256kB
The amount of non-volatile storage, from the function floor(log2(non-volatile / 16kB)), or 0 if no on-board non-volatile storage
Today, we’re launching our first microcontroller-class product: Raspberry Pi Pico. Priced at just $4, it is built on RP2040, a brand-new chip developed right here at Raspberry Pi. Whether you’re looking for a standalone board for deep-embedded development or a companion to your Raspberry Pi computer, or you’re taking your first steps with a microcontroller, this is the board for you.
You can buy your Raspberry Pi Pico today online from one of our Approved Resellers. Or head to your local newsagent, where every copy of this month’s HackSpace magazine comes with a free Pico, as well as plenty of guides and tutorials to help you get started with it. If coronavirus restrictions mean that you can’t get to your newsagent right now, you can grab a subscription and get Pico delivered to your door.
Oops!… We Did It Again
Microcomputers and microcontrollers
Many of our favourite projects, from cucumber sorters to high altitude balloons, connect Raspberry Pi to the physical world: software running on the Raspberry Pi reads sensors, performs computations, talks to the network, and drives actuators. This ability to bridge the worlds of software and hardware has contributed to the enduring popularity of Raspberry Pi computers, with over 37 million units sold to date.
But there are limits: even in its lowest power mode a Raspberry Pi Zero will consume on the order of 100 milliwatts; Raspberry Pi on its own does not support analogue input; and while it is possible to run “bare metal” software on a Raspberry Pi, software running under a general-purpose operating system like Linux is not well suited to low-latency control of individual I/O pins.
Many hobbyist and industrial applications pair a Raspberry Pi with a microcontroller. The Raspberry Pi takes care of heavyweight computation, network access, and storage, while the microcontroller handles analogue input and low-latency I/O and, sometimes, provides a very low-power standby mode.
Until now, we’ve not been able to figure out a way to make a compelling microcontroller-class product of our own. To make the product we really wanted to make, first we had to learn to make our own chips.
Raspberry Si
It seems like every fruit company is making its own silicon these days, and we’re no exception. RP2040 builds on the lessons we’ve learned from using other microcontrollers in our products, from the Sense HAT to Raspberry Pi 400. It’s the result of many years of hard work by our in-house chip team.
We had three principal design goals for RP2040: high performance, particularly for integer workloads; flexible I/O, to allow us to talk to almost any external device; and of course, low cost, to eliminate barriers to entry. We ended up with an incredibly powerful little chip, cramming all this into a 7 × 7 mm QFN-56 package containing just two square millimetres of 40 nm silicon. RP2040 has:
Dual-core Arm Cortex-M0+ @ 133MHz
264KB (remember kilobytes?) of on-chip RAM
Support for up to 16MB of off-chip Flash memory via dedicated QSPI bus
DMA controller
Interpolator and integer divider peripherals
30 GPIO pins, 4 of which can be used as analogue inputs
1 × USB 1.1 controller and PHY, with host and device support
8 × Raspberry Pi Programmable I/O (PIO) state machines
USB mass-storage boot mode with UF2 support, for drag-and-drop programming
And this isn’t just a powerful chip: it’s designed to help you bring every last drop of that power to bear. With six independent banks of RAM, and a fully connected switch at the heart of its bus fabric, you can easily arrange for the cores and DMA engines to run in parallel without contention.
For power users, we provide a complete C SDK, a GCC-based toolchain, and Visual Studio Code integration.
As Cortex-M0+ lacks a floating-point unit, we have commissioned optimised floating-point functions from Mark Owen, author of the popular Qfplib libraries; these are substantially faster than their GCC library equivalents, and are licensed for use on any RP2040-based product.
With two fast cores and and a large amount of on-chip RAM, RP2040 is a great platform for machine learning applications. You can find Pete Warden’s port of Google’s TensorFlow Lite framework here. Look out for more machine learning content over the coming months.
For beginners, and other users who prefer high-level languages, we’ve worked with Damien George, creator of MicroPython, to build a polished port for RP2040; it exposes all of the chip’s hardware features, including our innovative PIO subsystem. And our friend Aivar Annamaa has added RP2040 MicroPython support to the popular Thonny IDE.
Raspberry Pi Pico
Raspberry Pi Pico is designed as our low-cost breakout board for RP2040. It pairs RP2040 with 2MB of Flash memory, and a power supply chip supporting input voltages from 1.8-5.5V. This allows you to power your Pico from a wide variety of sources, including two or three AA cells in series, or a single lithium-ion cell.
Pico provides a single push button, which can be used to enter USB mass-storage mode at boot time and also as a general input, and a single LED. It exposes 26 of the 30 GPIO pins on RP2040, including three of the four analogue inputs, to 0.1”-pitch pads; you can solder headers to these pads or take advantage of their castellated edges to solder Pico directly to a carrier board. Volume customers will be able to buy pre-reeled Pico units: in fact we already supply Pico to our Approved Resellers in this format.
The Pico PCB layout was co-designed with the RP2040 silicon and package, and we’re really pleased with how it turned out: a two-layer PCB with a solid ground plane and a GPIO breakout that “just works”.
Reely good
Whether Raspberry Pi Pico is your first microcontroller or your fifty-first, we can’t wait to see what you do with it.
Raspberry Pi Pico documentation
Our ambition with RP2040 wasn’t just to produce the best chip, but to support that chip with the best documentation. Alasdair Allan, who joined us a year ago, has overseen a colossal effort on the part of the whole engineering team to document every aspect of the design, with simple, easy-to-understand examples to help you get the most out of your Raspberry Pi Pico.
You can find complete documentation for Raspberry Pi Pico, and for RP2040, its SDK and toolchain, here.
To help you get the most of your Pico, why not grab a copy of Get Started with MicroPython on Raspberry Pi Pico by Gareth Halfacree and our very own Ben Everard. It’s ideal for beginners who are new (or new-ish) to making with microcontrollers.
Our colleagues at the Raspberry Pi Foundation have also produced an educational project to help you get started with Raspberry Pi Pico. You can find it here.
Partners
Over the last couple of months, we’ve been working with our friends at Adafruit, Arduino, Pimoroni, and Sparkfun to create accessories for Raspberry Pi Pico, and a variety of other boards built on the RP2040 silicon platform. Here are just a few of the products that are available to buy or pre-order today.
Adafruit Feather RP 2040
RP2040 joins the hundreds of boards in the Feather ecosystem with the fully featured Feather RP 2040 board. The 2″ × 0.9″ dev board has USB C, Lipoly battery charging, 4MB of QSPI flash memory, a STEMMA QT I2C connector, and an optional SWD debug port. With plenty of GPIO for use with any FeatherWing, and hundreds of Qwiic/QT/Grove sensors that can plug and play, it’s the fast way to get started.
Feathery goodness
Adafruit ItsyBitsy RP 2040
Need a petite dev board for RP2040? The Itsy Bitsy RP 2040 is positively tiny, but it still has lots of GPIO, 4MB of QSPI flash, boot and reset buttons, a built-in RGB NeoPixel, and even a 5V output logic pin, so it’s perfect for NeoPixel projects!
Small is beautiful
Arduino Nano RP2040 Connect
Arduino joins the RP2040 family with one of its most popular formats: the Arduino Nano. The Arduino Nano RP2040 Connect combines the power of RP2040 with high-quality MEMS sensors (a 9-axis IMU and microphone), a highly efficient power section, a powerful WiFi/Bluetooth module, and the ECC608 crypto chip, enabling anybody to create secure IoT applications with this new microcontroller. The Arduino Nano RP2040 Connect will be available for pre-order in the next few weeks.
Get connected!
Pimoroni PicoSystem
PicoSystem is a tiny and delightful handheld game-making experience based on RP2040. It comes with a simple and fast software library, plus examples to make your mini-gaming dreams happen. Or just plug it into USB and drop the best creations from the Raspberry Pi-verse straight onto the flash drive.
Pixel-pushing pocket-sized playtime
Pimoroni Pico Explorer Base
Pico Explorer offers an embedded electronics environment for educators, engineers, and software people who want to learn hardware with less of the “hard” bit. It offers easy expansion and breakout along with a whole bunch of useful bits.
Go explore!
SparkFun Thing Plus – RP2040
The Thing Plus – RP2040 is a low-cost, high-performance board with flexible digital interfaces featuring Raspberry Pi’s RP2040 microcontroller. Within the Feather-compatible Thing Plus form factor with 18 GPIO pins, the board offers an SD card slot, 16MB (128Mbit) flash memory, a JST single-cell battery connector (with a charging circuit and fuel gauge sensor), an addressable WS2812 RGB LED, JTAG PTH pins, mounting holes, and a Qwiic connector to add devices from SparkFun’s quick-connect I2C ecosystem.
Thing One, or Thing Two?
SparkFun MicroMod RP2040 Processor
The MicroMod RP2040 Processor Board is part of SparkFun’s MicroMod modular interface system. The MicroMod M.2 connector makes it easy to connect your RP2040 Processor Board with the MicroMod carrier board that gives you the inputs and outputs you need for your project.
The Mighty Micro
SparkFun Pro Micro – RP2040
The Pro Micro RP2040 harnesses the capability of RP2040 on a compact development board with the USB functionality that is the hallmark of all SparkFun’s Pro Micro boards. It has a WS2812B addressable LED, boot button, reset button, Qwiic connector, USB-C, and castellated pads.
Go Pro
Credits
It’s fair to say we’ve taken the long road to creating Raspberry Pi Pico. Chip development is a complicated business, drawing on the talents of many different people. Here’s an incomplete list of those who have contributed to the RP2040 and Raspberry Pi Pico projects:
Dave Akerman, Sam Alder, Alasdair Allan, Aivar Annamaa, Jonathan Bell, Mike Buffham, Dom Cobley, Steve Cook, Phil Daniell, Russell Davis, Phil Elwell, Ben Everard, Andras Ferencz, Nick Francis, Liam Fraser, Damien George, Richard Gordon, F Trevor Gowen, Gareth Halfacree, David Henly, Kevin Hill, Nick Hollinghurst, Gordon Hollingworth, James Hughes, Tammy Julyan, Jason Julyan, Phil King, Stijn Kuipers, Lestin Liu, Simon Long, Roy Longbottom, Ian Macaulay, Terry Mackown, Jon Matthews, Nellie McKesson, Rod Oldfield, Mark Owen, Mike Parker, David Plowman, Dominic Plunkett, Graham Sanderson, Andrew Scheller, Serge Schneider, Nathan Seidle, Vinaya Puthur Sekar, Mark Sherlock, Martin Sperl, Mike Stimson, Ha Thach, Roger Thornton, Jonathan Welch, Simon West, Jack Willis, Luke Wren, David Wright.
We’d also like to thank our friends at Sony Pencoed and Sony Inazawa, Microtest, and IMEC for their help in bringing these projects to fruition.
Um dir ein optimales Erlebnis zu bieten, verwenden wir Technologien wie Cookies, um Geräteinformationen zu speichern und/oder darauf zuzugreifen. Wenn du diesen Technologien zustimmst, können wir Daten wie das Surfverhalten oder eindeutige IDs auf dieser Website verarbeiten. Wenn du deine Einwillligung nicht erteilst oder zurückziehst, können bestimmte Merkmale und Funktionen beeinträchtigt werden.
Funktional
Immer aktiv
Die technische Speicherung oder der Zugang ist unbedingt erforderlich für den rechtmäßigen Zweck, die Nutzung eines bestimmten Dienstes zu ermöglichen, der vom Teilnehmer oder Nutzer ausdrücklich gewünscht wird, oder für den alleinigen Zweck, die Übertragung einer Nachricht über ein elektronisches Kommunikationsnetz durchzuführen.
Vorlieben
Die technische Speicherung oder der Zugriff ist für den rechtmäßigen Zweck der Speicherung von Präferenzen erforderlich, die nicht vom Abonnenten oder Benutzer angefordert wurden.
Statistiken
Die technische Speicherung oder der Zugriff, der ausschließlich zu statistischen Zwecken erfolgt.Die technische Speicherung oder der Zugriff, der ausschließlich zu anonymen statistischen Zwecken verwendet wird. Ohne eine Vorladung, die freiwillige Zustimmung deines Internetdienstanbieters oder zusätzliche Aufzeichnungen von Dritten können die zu diesem Zweck gespeicherten oder abgerufenen Informationen allein in der Regel nicht dazu verwendet werden, dich zu identifizieren.
Marketing
Die technische Speicherung oder der Zugriff ist erforderlich, um Nutzerprofile zu erstellen, um Werbung zu versenden oder um den Nutzer auf einer Website oder über mehrere Websites hinweg zu ähnlichen Marketingzwecken zu verfolgen.