You can pick up a Raspberry Pi Pico from just $4 / £3.60, or free with the latest edition of HackSpace magazine.
The easiest way to use Pico, though, is to attach it to a breadboard – and for that, you’ll need to attach pin headers. You’ll need a soldering iron with a stand, some solder, a cleaning sponge, Raspberry Pi Pico, and two 20-pin 2.54 mm male header strips. If you already have a solderless breadboard, you can use it to make the soldering process easier.
Sometimes 2.54 mm headers are provided in strips longer than 20 pins. If yours are longer, just count 20 pins in from one end and look at the plastic between the 20th and 21st pins: you’ll see it has a small indentation at either side. This is a break point: put your thumbnails in the indentation with the headers in both your left and right hands and bend the strip. It will break cleanly, leaving you with a strip of exactly 20 pins. If the remaining header strip is longer than 20 pins, do the same again so you have two 20-pin strips.
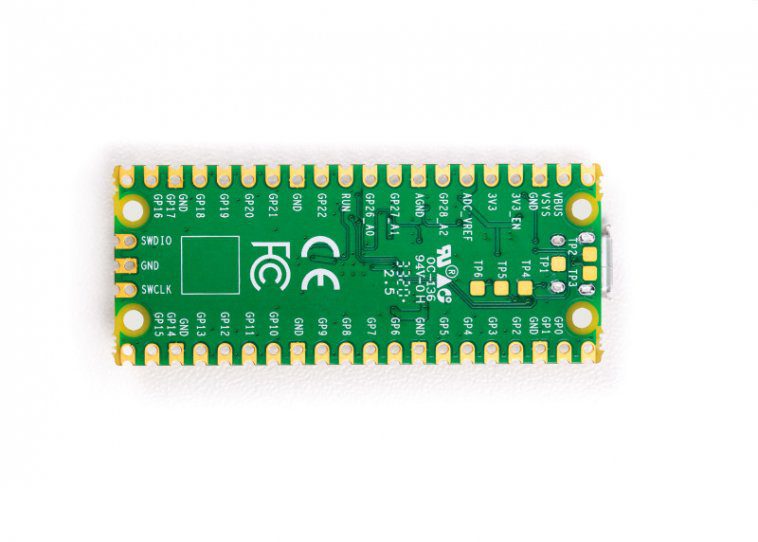
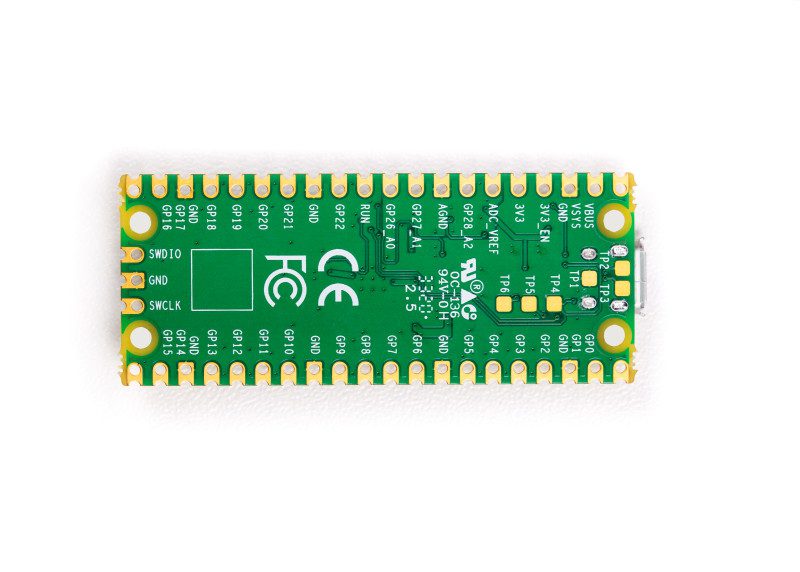
Turn Raspberry Pi Pico upside-down, so you can see the silkscreen pin numbers and test points on the bottom. Take one of the two header strips and push it gently into the pin holes on the left-hand side of your Pico. Make sure that it’s properly inserted in the holes, and not just resting in the castellations, and that all 20 pins are in place, then take the other header and insert it into the right-hand side. When you’ve finished, the plastic blocks on the pins should be pushed up against your Pico’s circuit board.
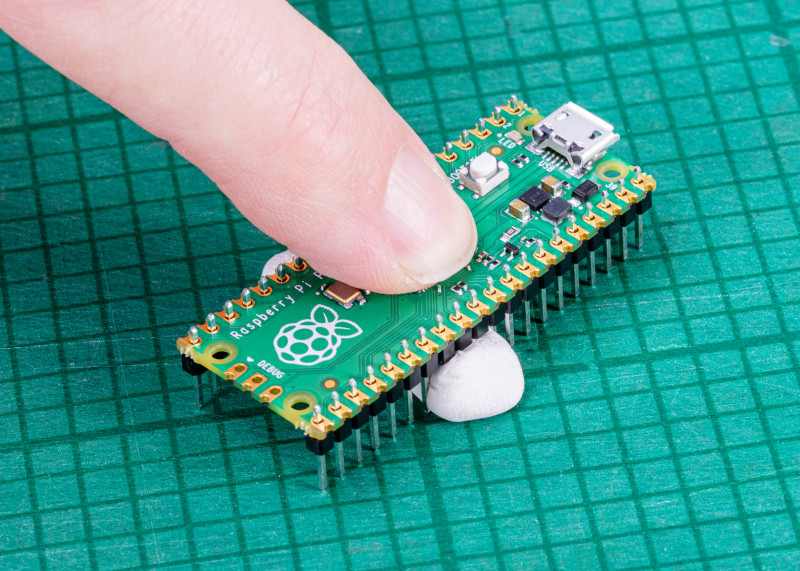
Pinch your Pico at the sides to hold both the circuit board and the two pin headers. Don’t let go, or the headers will fall out! If you don’t have a breadboard yet, you’ll need some way to hold the headers in place while you’re soldering – and don’t use your fingers, or you’ll burn them. You can hold the headers in place with small alligator clips, or a small blob of Blu Tack or other sticky putty (Figure 1).
Solder one pin, then check the alignment: if the pins are at an angle, melt the solder as you carefully adjust them to get everything lined up.
Use a breadboard
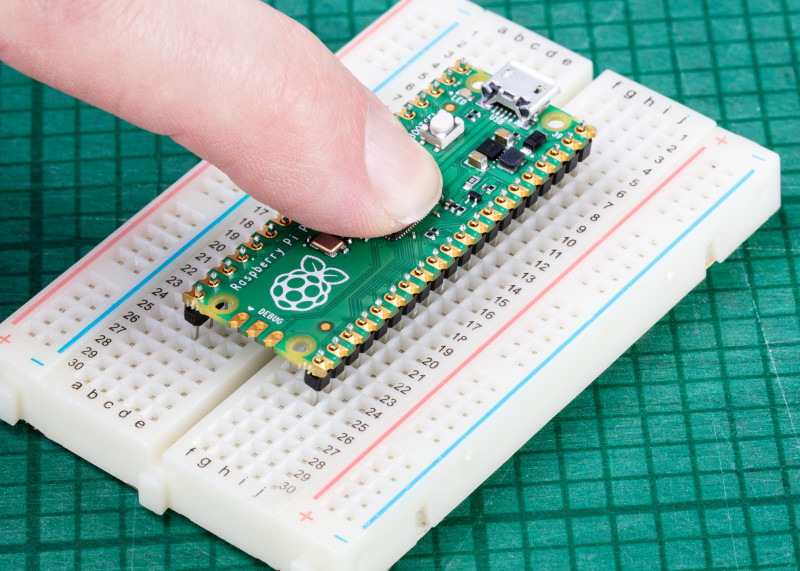
If you have a breadboard, simply turn Raspberry Pi Pico upside down – remembering to keep the headers pinched – and push both the headers and your Pico into the holes on the breadboard. Keep pushing until your Pico is lying flat, with the plastic blocks on the pin headers sandwiched between your Pico and your breadboard (Figure 2).
Look at the top of your Pico: you’ll see a small length of each pin is sticking up out of the pin holes. This is the part you’re going to solder – which means heating up both the pins and the pads on Pico and melting a small amount of a special metal, solder, onto them.
Put your soldering iron in its stand, making sure the metal tip isn’t resting up against anything, and plug it in. It will take a few minutes for the tip of the iron to get hot; while you’re waiting, unroll a small length of solder – about twice as long as your index finger. You should be able to break the solder by pulling and twisting it; it’s a very soft metal.
If your soldering stand has a cleaning sponge, take the sponge to the sink and put a little bit of cold water on it so it softens. Squeeze the excess water out of the sponge, so it’s damp but not dripping, and put it back on the stand. If you’re using a cleaner made of coiled brass wire, you don’t need any water.
Warning! Hot solder!
Soldering irons get very hot, and stay hot for a long time after they’re unplugged. Make sure that you put the iron in the stand when you’re not using it and don’t touch the metal parts – even after it’s unplugged. See Getting started with soldering for more information.
Start to solder
Pick up your soldering iron by the handle, making sure to keep the cable from catching on anything as you move it around. Hold it like a pencil, but make sure your fingers only ever touch the plastic or rubber handle area: the metal parts, even the shaft ahead of the actual iron tip, will be extremely hot and can burn you very quickly.
Before you begin soldering, clean the iron’s tip: brush it along your sponge or coiled wire cleaner. Take your length of solder, holding it at one end, and push the other end onto the tip of your iron: it should quickly melt into a blob. If it doesn’t, leave your soldering iron to heat up for longer – or try giving the tip another clean.
Putting a blob of solder on the tip is known as tinning the iron. The flux in the solder helps to burn off any dirt still on the end of the iron, and gets it ready. Wipe the iron on your sponge or cleaning wire again to clean off the excess solder; the tip should be left looking shiny and clean.
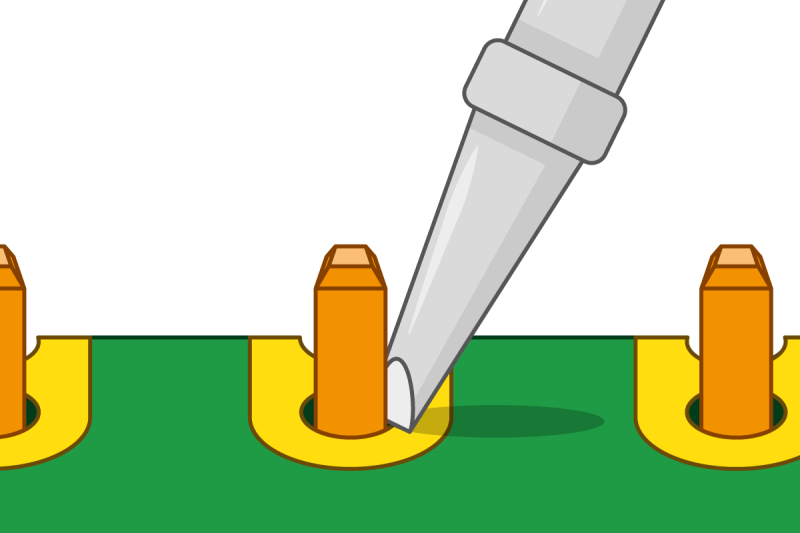
Put the iron back in the stand, where it should always be unless you’re actively using it, and move your Pico so it’s in front of you. Pick up the iron in one hand and the solder in the other. Press the tip of the iron against the pin closest to you, so that it’s touching both the vertical metal pin and the gold-coloured pad on your Pico at the same time (Figure 3).
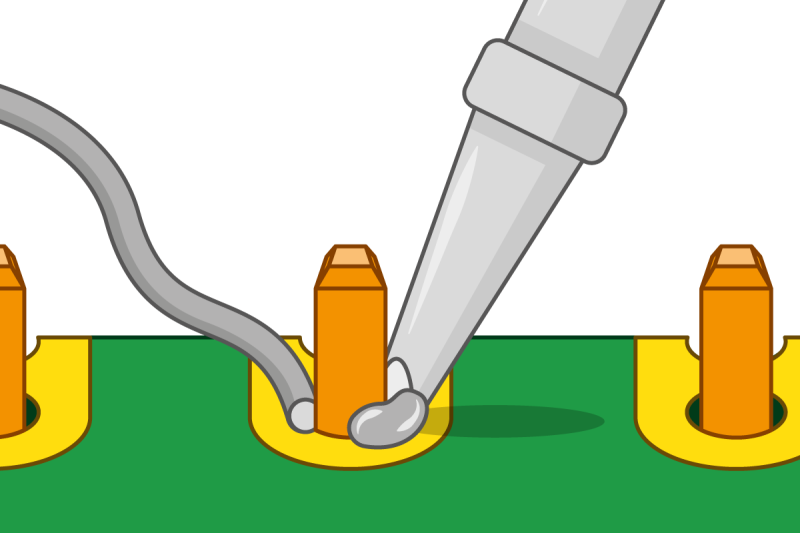
It’s important that the pin and the pad are both heated up, so keep your iron pressed against both while you count to three. When you’ve reached three, still keeping the iron in place, press the end of your length of solder gently against both the pin and pad but on the opposite side to your iron tip (Figure 4). Just like when you tinned the tip, the solder should melt quickly and begin to flow.
The solder will flow around the pin and the pad, but no further: that’s because Pico’s circuit board is coated in a layer called solder resist which keeps the solder where it needs to be. Make sure not to use too much solder: a little goes a long way.
Remove solder first
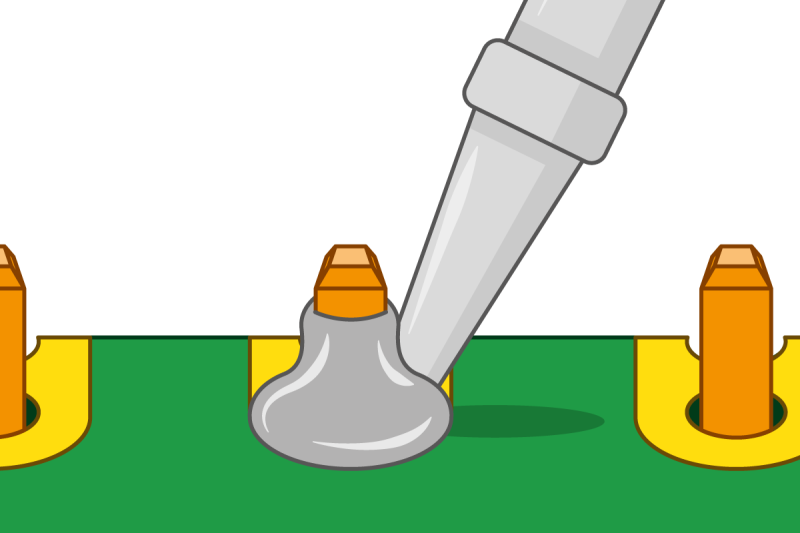
Pull the remaining part of your solder away from the joint, making sure to keep the iron in place. If you pull the iron away first, the solder will harden and you won’t be able to remove the piece in your hand; if that happens, just put the iron back in place to melt it again. Once the molten solder has spread around the pin and pad (Figure 5), which should only take a second or so, remove the soldering iron. Congratulations: you’ve soldered your first pin!
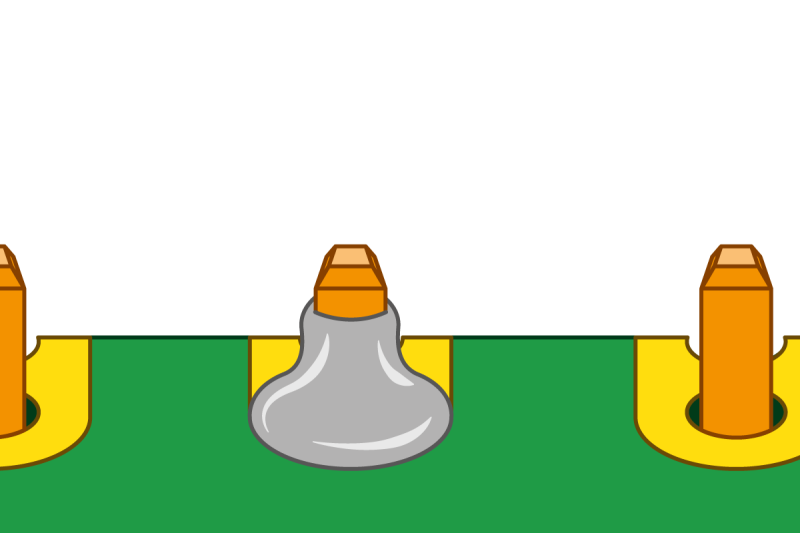
Clean the tip of your iron on your sponge or brass wire, and put it back in the stand. Pick up your Pico and look at your solder joint: it should fill the pad and rise up to meet the pin smoothly, looking a little like a volcano shape with the pin filling in the hole where the lava would be, as shown in Figure 6.
Once you’re happy with the first pin, repeat the process for all 40 pins on your Pico – leaving the three-pin ‘DEBUG’ header at the bottom empty.
Remember to clean your iron’s tip regularly during your soldering, too, and if you find things are getting difficult, melt some solder on it to re-tin the tip. Make sure to keep refreshing your length of solder, too: if it’s too short and your fingers are too close to the soldering iron’s tip, you can easily burn yourself.
When you’re finished, and you’ve checked all the pins for good solder joints and to make sure they’re not bridged to any nearby pins, clean and tin the iron’s tip one last time before putting it back in the stand and unplugging it. Make sure to let the iron cool before you put it away: soldering irons can stay hot enough to burn you for a long time after they’ve been unplugged!
Finally, make sure to wash your hands – and celebrate your new skill as a soldering supremo!
Tip! Four corners first
Solder the four corner pins first. Take your time, don’t rush, and remember that mistakes can always be fixed.
Soldering issues
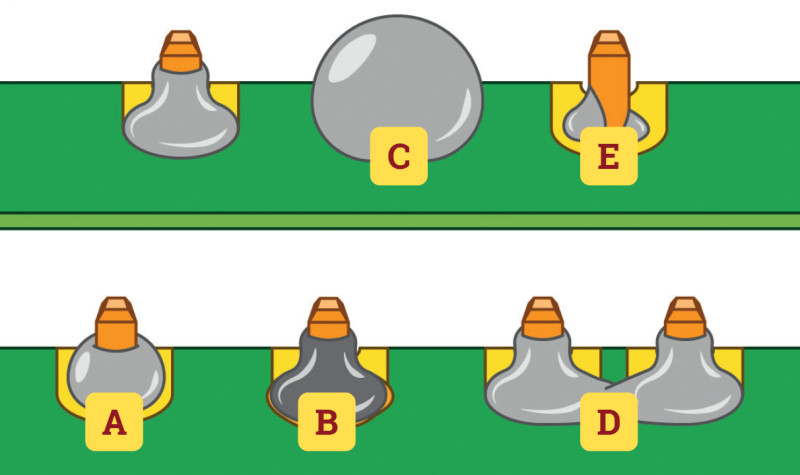
If the solder is sticking to the pin but not sticking to the copper pad, as in example A in Figure 7, then the pad wasn’t heated up enough. Don’t worry, it’s easily fixed: take your soldering iron and place it where the pad and pin meet, making sure that it’s pressing against both this time. After a few seconds, the solder should reflow and make a good joint. On the other hand, if the solder is too hot, it won’t flow well and you’ll get an overheated joint with some burnt flux (example B). This can be removed with a bit of careful scraping with the tip of a knife, or a toothbrush and a little isopropyl alcohol.
If the solder is entirely covering the pin, as in example C, you used too much. That’s not necessarily going to cause a problem, though it doesn’t look very attractive: so long as none of the solder is touching any of the pins around it, it should still work. If it is touching other pins (as in example D), you’ve created a bridge which will cause a short circuit.
Again, bridges are easy to fix. First, try reflowing the solder on the joint you were making; if that doesn’t work, put your iron against the pin and pad at the other side of the bridge to flow some of it into the joint there. If there’s far too much solder still, you’ll need to remove the excess before you can use your Pico: you can buy desoldering braid, which you press against the molten solder to suck the excess up, or a desoldering pump to physically suck the molten solder up.
Another common mistake is too little solder: if you can still see copper pad, or there’s a gap between the pin and the pad which isn’t filled in with solder, you used too little (example E). Put the iron back on the pin and pad, count to three, and add a little more solder. Too little is always easier to fix than too much, so remember to take it easy with the solder!
Buy Get Started with MicroPython on Raspberry Pi Pico
This tutorial is also included in our new book, Get Started with MicroPython on Raspberry Pi Pico. Pick up your copy of Get Started with MicroPython on Raspberry Pi Pico and learn about all the great things you can make with Pico.

