A network of more than 40 partner organisations in over 30 countries works with us to grow and sustain the worldwide Code Club and CoderDojo networks of coding clubs for young people. These organisations, our Global Clubs Partners, share our mission to enable young people to realise their potential through the power of computing and digital technologies. We support them in various ways, and recently we invited them to two calls with our researchers to discuss new research findings about computing education in primary schools.
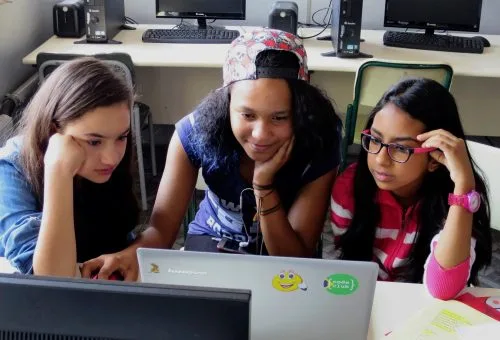
Three girls in a Code Club session in Brazil.
Supporting Global Clubs Partners with research insights
Global Clubs Partners work to train educators and volunteers, provide access to computing equipment, run clubs and events for young people at a local or national level, and much more. Our aim is to provide support that helps the Global Clubs Partners in their work, including tailored resources and regular group calls where we discuss topics such as volunteer engagement and fundraising.
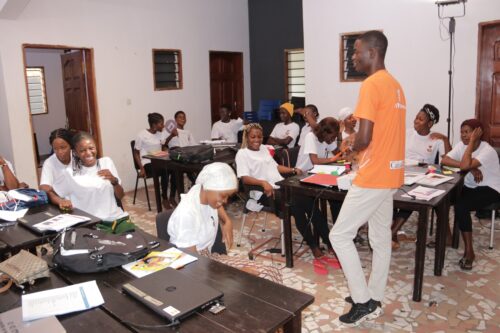
Educator training in Benin, run by Global Clubs Partner organisation Impala Bridge.
Recently, we were excited to be able to highlight research from our newest seminar series to the network. This ongoing seminar series focuses on teaching and learning in primary (K-5) computing education. Many of the Global Clubs Partners work with schools or local education bodies — some partner representatives even come from a teaching background themselves. That’s why we hoped they would be able to use insights from the seminars in their work, whether with learners and educators directly, or to grow their network of Code Clubs or CoderDojos; we know this is easier for them when they can provide evidence to show why these programmes are so beneficial for young people.
Learning from Global Clubs Partners for our future research
We were also very interested to hear the Global Clubs Partners’ perspectives, as they work in a wide variety of contexts around the world. For example, would the research resonate the same way with an organisation based in Kenya as one based in Nepal? This kind of insight is useful for making decisions about our research work in future.
Each of the two calls featured a speaker from the research seminar series summarising their work and inviting attendees to share their own thoughts. We had some fascinating conversations; with partner representatives from seven countries across four continents, the discussions were a great showcase of the different experiences in our partner network. Dr Bobby Whyte, one of the speakers, noted: “Being able to share and discuss work within a global audience has been a really valuable experience.”
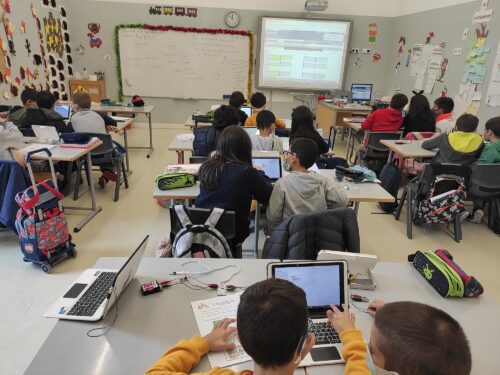
A Code Club session in a classroom in Portugal.
We found the opportunity to connect our partner network with work from other areas of the Foundation really beneficial, and the Global Clubs Partners did too: their feedback from the calls was uniformly positive. Dr Jane Waite, our Senior Research Scientist, commented that “it’s really important for us to share research with people in different contexts and so exciting to hear when findings resonate and can be used in practice.”
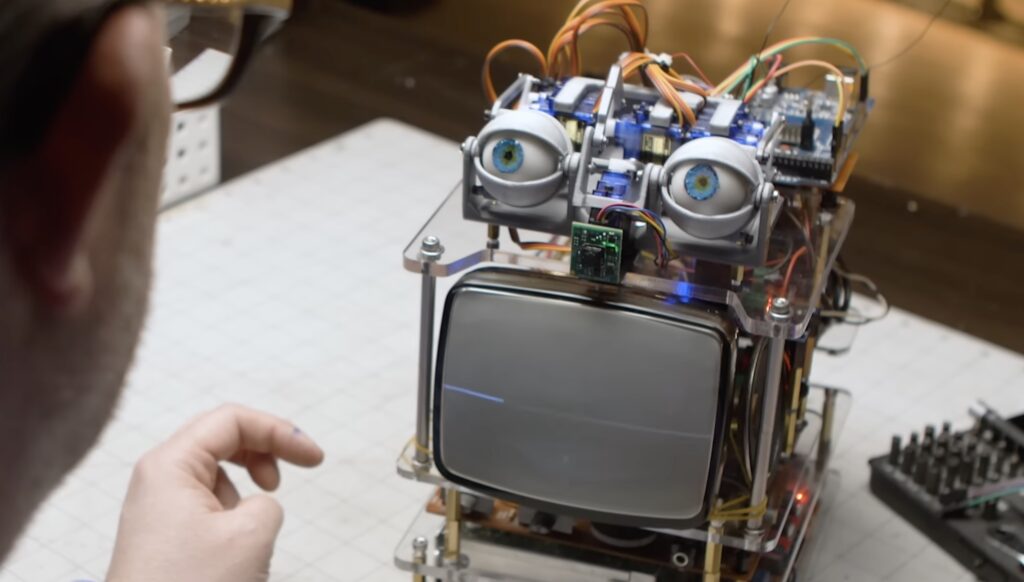
There is no shame in taking advantage of a voice assistant device, like an Amazon Echo with Alexa. Those devices are useful and can add real convenience to your life. But they lack personality and any feeling of a soul—not just because of the stilted voices, but also because of the boring industrial designs intended for mass market appeal. To inject some life into his Amazon Echo, Workshop Nation turned it into a charming animatronic robot.
At its heart, this is still an Amazon Echo and it retains all of that functionality. But the Alexa brain now inhabits a body that looks like it was made by a wacky scientist from an ’80s movie featuring robot hijinks. It was cobbled together from salvaged parts, like an old CRT TV, as well as new components. It has 3D-printed animatronic eyes based on a design by Will Cogley and actuated by servo motors. Something akin to a voice waveform appears on the CRT whenever Alexa speaks, which works by using that signal voltage to drive one of the electron beam coils.
An Arduino Mega 2560 board controls the animatronics and also monitors a Useful Sensors Person Sensor. Its purpose is to direct the movement of the eyes to follow any people in the area. The Arduino also lets the users bypass the normal “Alexa” wake word so they can ask questions starting with whatever term they prefer. Those components (the bulk of which belong to the CRT) all attach to a frame made of laser-cut clear acrylic and threaded rods.
Talking of power, you will want a portable way of supplying it. To this end, there’s a JST battery connector on the rear. If you buy the accessory kit version, you get – along with a lanyard – a 2×AA battery pack with a Velcro patch to stick it to the rear of the board.
Alternatively, you could use a standard USB power bank connected to Pico W. Both solutions are a little chunky, though, so you might prefer a slimline LiPo battery pack.
Easy to program
When first powered up, the Badger 2040 W launches into ‘Badger OS’ with a scrollable menu of icons to choose demo programs and tools. These include a badge, digital clock, e-book reader, interactive checklist, news headlines, and weather dashboard.
Naturally, you can connect Pico W to a computer via USB to customise the examples or create new programs – in MicroPython or C/C++. Pimoroni’s standard PicoGraphics library makes it easy to add bitmap images, and several fonts are supported. You’ll need to add your Wi-Fi credentials to try out examples such as news and weather, as well as setting the correct time via NTP.
Verdict
8/10
An interactive badge that doubles as a versatile mini e-ink display with a reasonably quick refresh rate and Wi-Fi connectivity.
Specs
Display: 2.9-inch e-ink, 296×128, monochrome
Features: Pico W, 5 × user buttons, reset button, LEDs, Qwiic/STEMMA QT port
Massimo Banzi and the Arduino Pro team will be crossing the Channel soon for a short tour of Southern England, touching base with long-time partners and meeting many new Arduino fans!
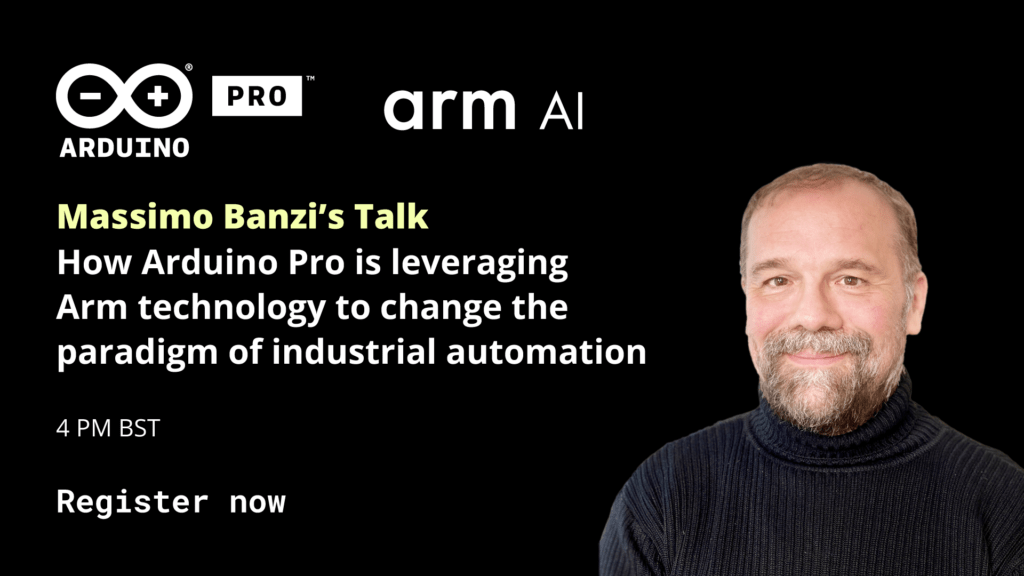
On July 11th at 4PM BST, Massimo has been invited to give a Tech Talk at Arm’s headquarters in Cambridge, as part of the company’s ongoing series where “leading experts cover topics across the industry, including artificial intelligence, automotive, consumer technology, infrastructure, and IoT.” Register now to attend the talk remotely, anywhere in the world.
Fancy a pint and a fireside chat? Come and meet us in London at the Cittie of Yorke, July 12th at 6PM in Holborn. You can learn about Arduino’s latest products and future vision, straight from the co-founder himself. The event is free and no registration is required, but admission will be regulated depending on the venue’s capacity – get there early to save your seat!
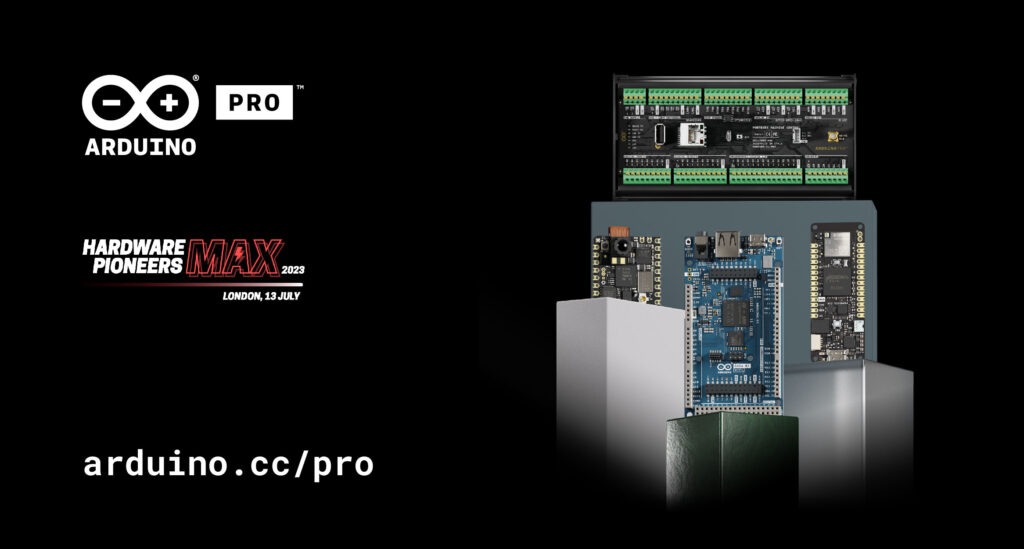
Finally, on July 13th we are excited to announce Arduino Pro will debut with a booth at Hardware Pioneers Max. Come visit us at the Business Design Center in London, booth #48, to chat with our experts. Not sure where to begin? Our demos make great conversation starters! At the show, look for these:
An industrial-grade computer built with a Portenta X8 and Max Carrier. The X8’s hybrid combination of microprocessor and microcontroller yields unprecedented flexibility to simultaneously run Linux apps and perform real-time tasks. Pair that with the Max Carrier and an 8″ screen and you have a secure and powerful computer to deploy advanced AI algorithms and ML on the edge. The Portenta X8 can also act as a multi-protocol gateway: data from onsite sensors and controllers (e.g. temperature, operation time, warning codes) are collected and processed thanks to the module’s supported industrial protocols, then sent to the Cloud or ERP system via Wi-Fi, LoRa®, NB/IoT or LTE Cat.M1.
A vibration-based condition monitoring system to detect anomalies with Nicla Sense ME. Developed in collaboration with SensiML, this solution makes great use of Nicla’s self-learning AI smart sensor – with integrated accelerometer and gyroscope – to measure vibrations generated by a computer fan. With the intelligence of a trained ML model, the system monitors the fan’s conditions and can determine whether it is on or off, if there are any shocks, and even if the airflow is simply sub-optimal.
A solution to monitor vineyard pests, thanks to Nicla Vision and MKR WAN 1310. Smart farming leverages machine vision and valuable data on pest behavior, seasonality, and population size to optimize manual interventions against the dangerous Popillia japonica. Insects are attracted by pheromones inside the trap, where a low-power sensing solution leverages an ML model trained, tested and deployed with Edge Impulse to recognize and count insects, sending real-time data via LoRa® connectivity to the Cloud for remote monitoring.
And don’t miss Massimo’s talk, “Everything you think you know about Arduino is WRONG” at 4PM (see the event agenda). It’s your chance to find out how the brand that made tech accessible for the first generation of makers is now evolving to support a new generation of innovators.
If you’ve ever found yourself in a trance while watching an episode of How It’s Made, then you understand the appeal of seeing a well-designed machine in action. But what if you didn’t have to turn on your TV or venture into a factory to get that buzz? That’s why JBV Creative built this real life “oddly satisfying GIF” machine that rolls a ball into eternity.
This project is a real life representation of the those simulation GIFs that show virtual machines moving balls in endless cycles. A simulation like that is easy to make when you don’t have to adhere to physics, but it takes some doing to accomplish the same thing in real life. Perpetual motion is, of course, impossible. So this machine utilizes motor-driven mechanisms to keep a ball moving around a vertical track. That track is clear laser-cut acrylic, while the rest of the custom parts are 3D-printed.
An Arduino Nano board controls the machine and it has two jobs: monitoring a sensor and rotating a motor. There are two mechanisms: one to lift the ball to the top of the track and one to move a “bridge” from the top track to the bottom track. A single stepper motor spins gears to actuate both mechanisms, and the Arduino controls that motor through an H-bridge. An infrared sensor tells the Arduino when the lift mechanism arm reaches a specific angle, so the Arduino can vary the motor rotation speed to ensure smooth movement.
We love hearing from members of the community and how they use their passion for computing and digital making to inspire others. Our community stories series takes you on a tour of the globe to meet educators and young tech creators from the USA, Iraq, Romania, and more.
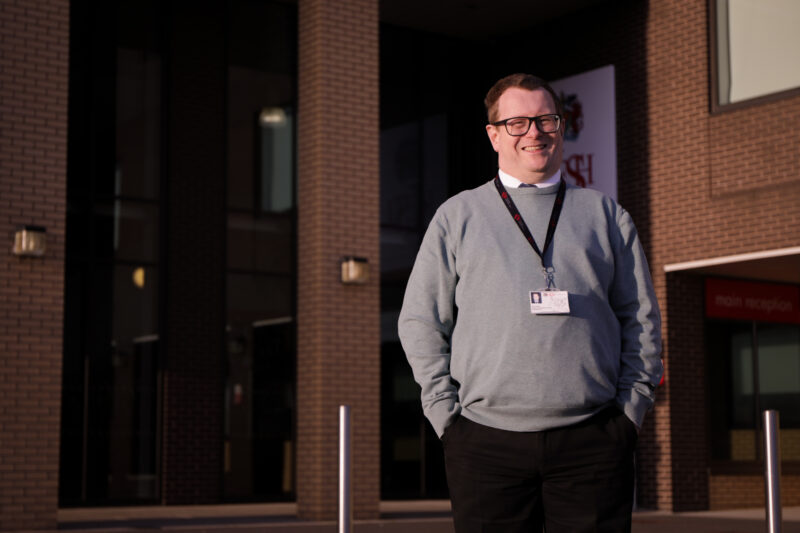
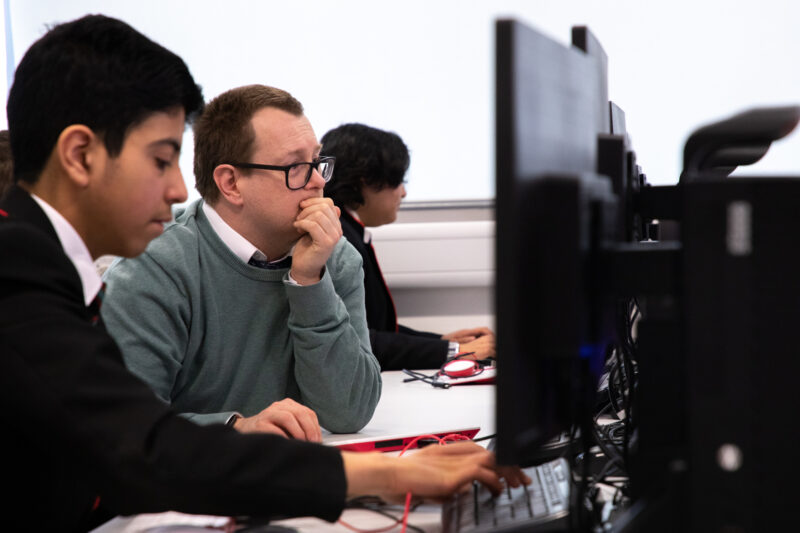
For our latest story, we are in the UK with Spencer, a Computer Science teacher at King Edward VI Sheldon Heath Academy (KESH), Birmingham. After 24 years as a science teacher, Spencer decided to turn his personal passion for digital making into a career and transitioned to teaching Computer Science.
From the moment he printed his name on the screen of an Acorn Electron computer at age ten, Spencer was hooked on digital making. He’s remained a member of the digital making community throughout his life, continuing to push himself with his creations and learn new skills whenever possible. Wanting to spread his knowledge and make sure the students at his school had access to computer science, he began running a weekly Code Club in his science lab:
“Code Club was a really nice vehicle for me to get students into programming and digital making, before computer science was an option at the school. So Code Club originally ran in my science lab around the Bunsen burners and all the science equipment, and we do some programming on a Friday afternoon making LEDs flash and a little bit of Minecraft. And from that, the students really got an exciting sense of what programming and digital making could be.”
– Spencer
While running his Code Club, Spencer really embedded himself in the Raspberry Pi community, attending Raspberry Jams, engaging with like-minded people on Twitter, and continuing to rely on our free training to upskill.
When leadership at KESH began to explore introducing Computer Science to the curriculum, Spencer knew he was the right person for the job, and just where to look to make sure he had the right support:
“So when I decided to change from being a science teacher to a computer science teacher, there were loads of course options you could find online, and a lot of them required some really specific prior knowledge and skills. The Foundation’s resources take you from a complete novice, complete beginner — my very first LED flashing on and off — to being able to teach computational thinking and algorithms. So it was a really clear progression from using the Foundation resources that helped take me from a Physics teacher, who could use electricity to light and LED on, to a programmer who could teach how to use this in our digital making for our students.”
– Spencer
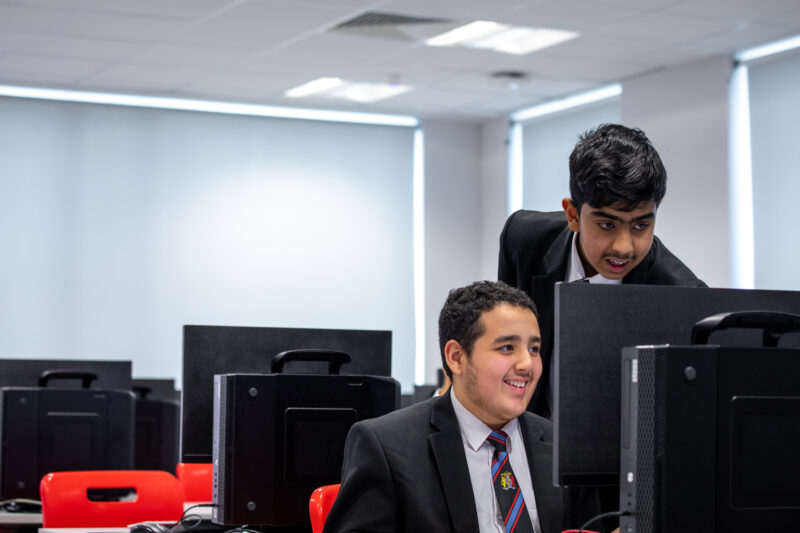
Thanks to the support from KESH and Spencer’s compelling can-do attitude, he was soon heading up a brand-new Computer Science department. This was met with great enthusiasm from the learners at KESH, with a willing cohort eagerly signing up for the new subject.
“It’s really exciting to see how students have embraced Computer Science as a brand-new subject at school. The take-up for our first year at GCSE was fantastic with 25 students, and this year I’ve really got students asking about, ‘Is there an option for next year, and how can I get on to it?’ Students are almost blown away by the resources now.”
– Spencer
Supporting all students
Spencer has a mission to make sure all of KESH’s learners can learn about computing, and making his lessons accessible to all means he’s become a firm favourite amongst the students for his collaborative teaching approach.
“Mr Organ teaches you, and then he just puts you in. If you do need help, you can ask people around you, or him, but he lets you make your own mistakes and learn from there. He will then give you help so you don’t make those mistakes the next time.”
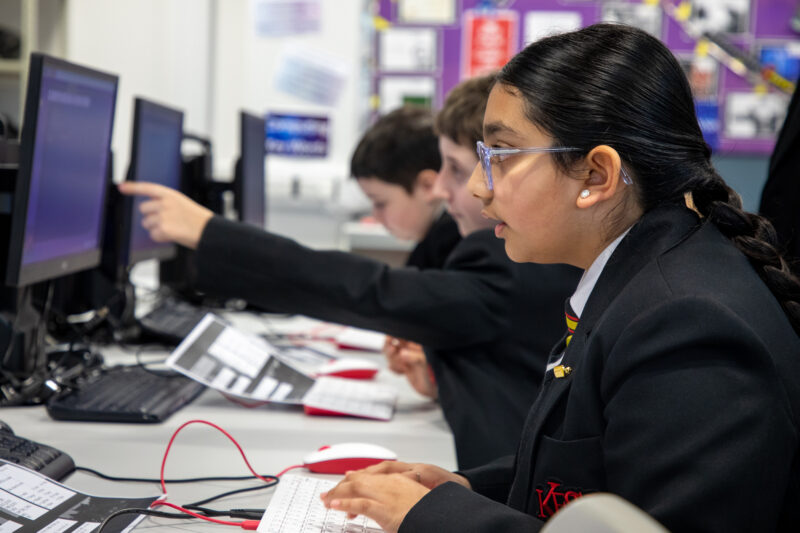
Spencer’s work is shaped by his awareness that many of the learners at KESH come from under-resourced areas of Birmingham and backgrounds that are underrepresented in computing. He knows that many of them have previously had limited opportunities to use digital tools. This is something he is driven to change.
“I want my young students here, regardless of their background, regardless of their area they’ve been brought up in, to have the same experiences as all other students in the country. And the work I do with Raspberry Pi, and the work I do with Code Club, is a way of opening those doors for our young people.”
– Spencer
Share Spencer’s story and inspire other educators
As a passionate member of the Raspberry Pi Foundation community, Spencer has been counted on as a friendly face for many years, sharing his enthusiasm on training courses, at Foundation events, and as a part of discussions on Twitter. With the goal to introduce Computer Science at A level shortly, and an ever-growing collection of digital makes housed in his makerspace, Spencer shows no signs of slowing down.
If you are interested in changing your teaching path to focus on Computer Science, take a look at the free resources we have available to support you on your journey.
Help us celebrate Spencer and his dedication to opening doors for his learners by sharing his story on Twitter, LinkedIn, and Facebook.
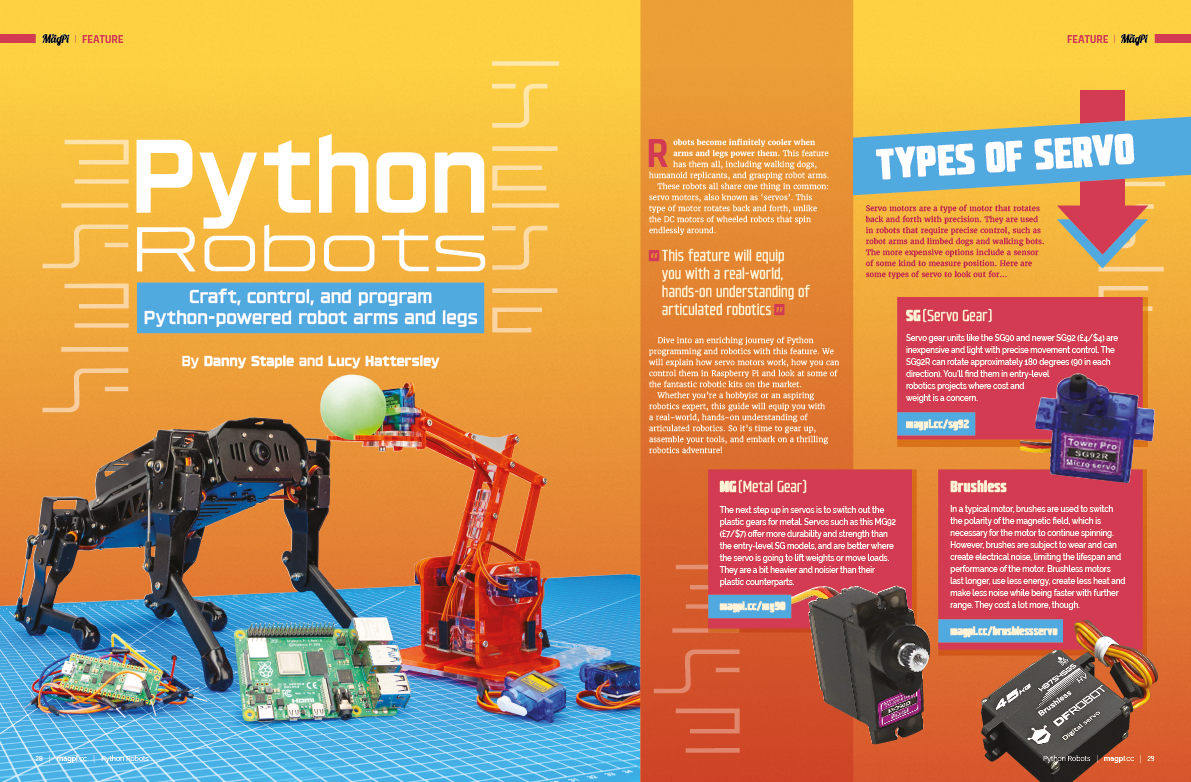
If you ever wanted to get involved with articulated robotics then this feature will hold your hand. Quite literally! We’ve gathered everything you need about servo motors, Python motor control techniques; kits and robot designs. Plus, a great tutorial on using Pico to control a robotic arm. Limber up and get ready for realistic robotics.
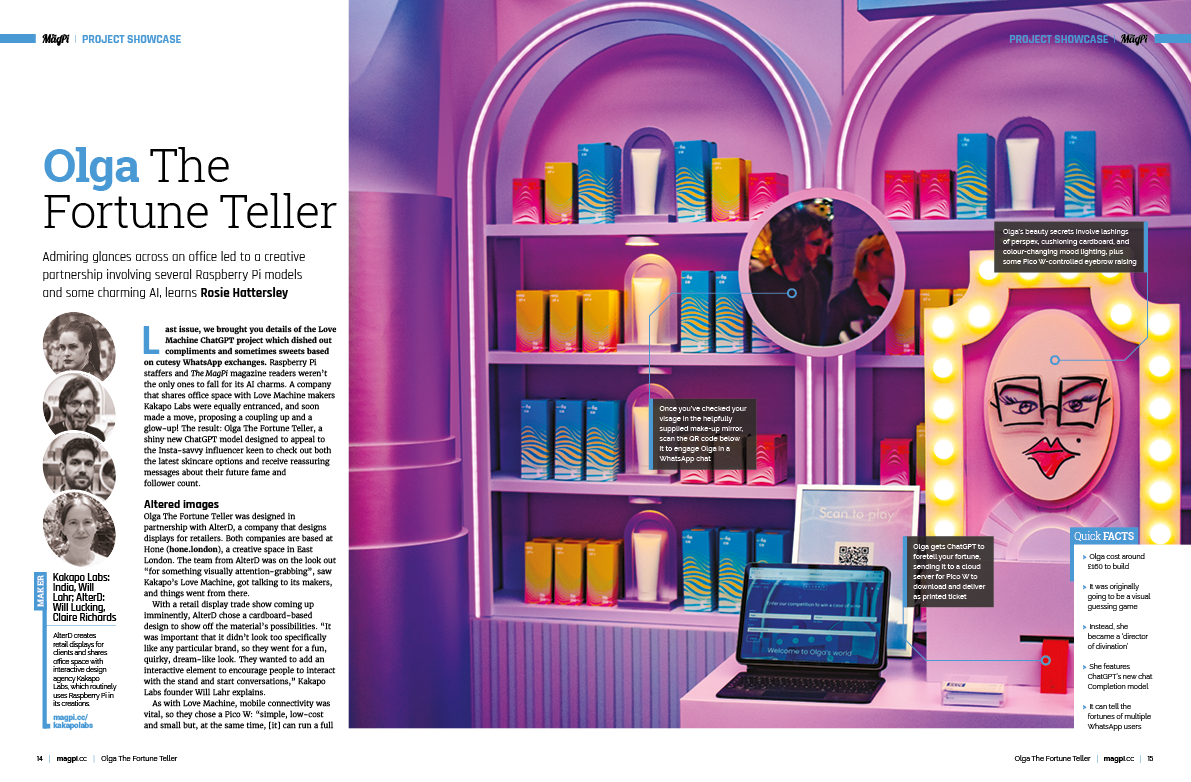
Olga The Fortune Teller
This photo booth uses ChatGPT to take a photo, post it to Instagram and tell your fortune at the same time. We think Olga looks incredible and chatted to the team behind the build.
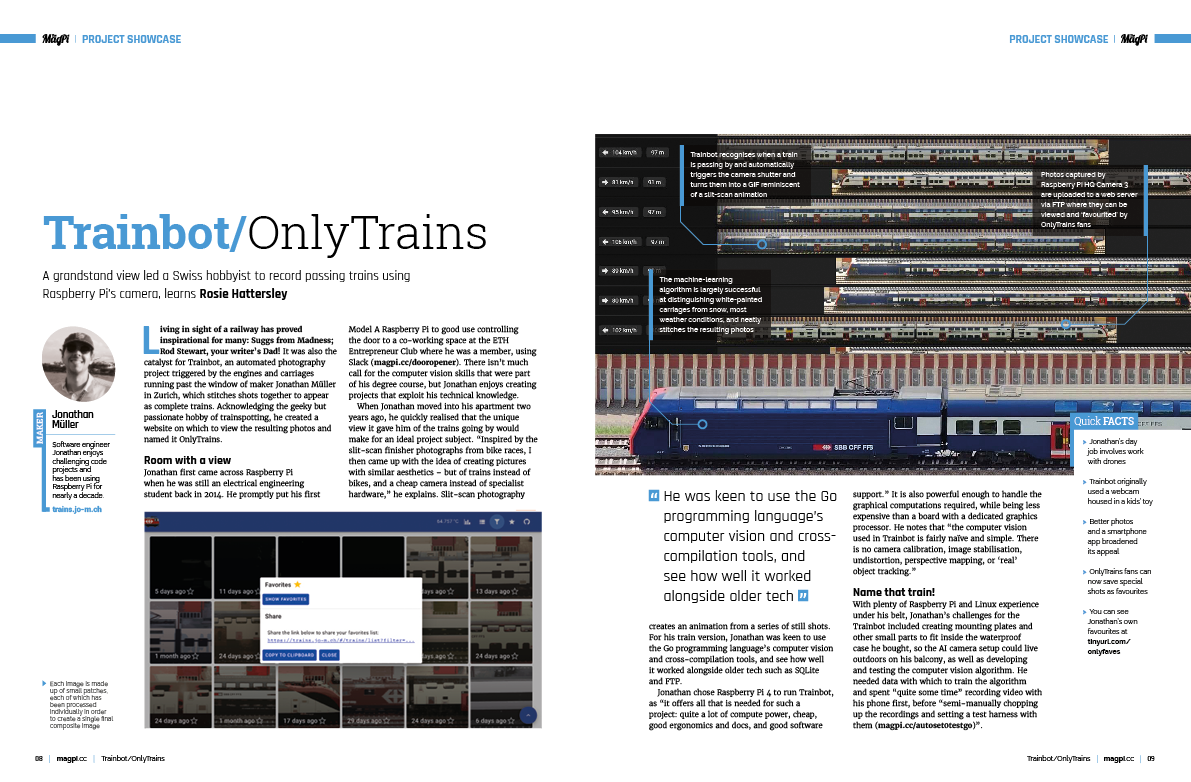
Trainbot/OnlyTrains
Software engineer Jonathan Müller has created this amazing automated project that photographs trains and stitches together the images to capture the whole train. It uses Raspberry Pi and AI to snap and stitch the trains as they roll by.
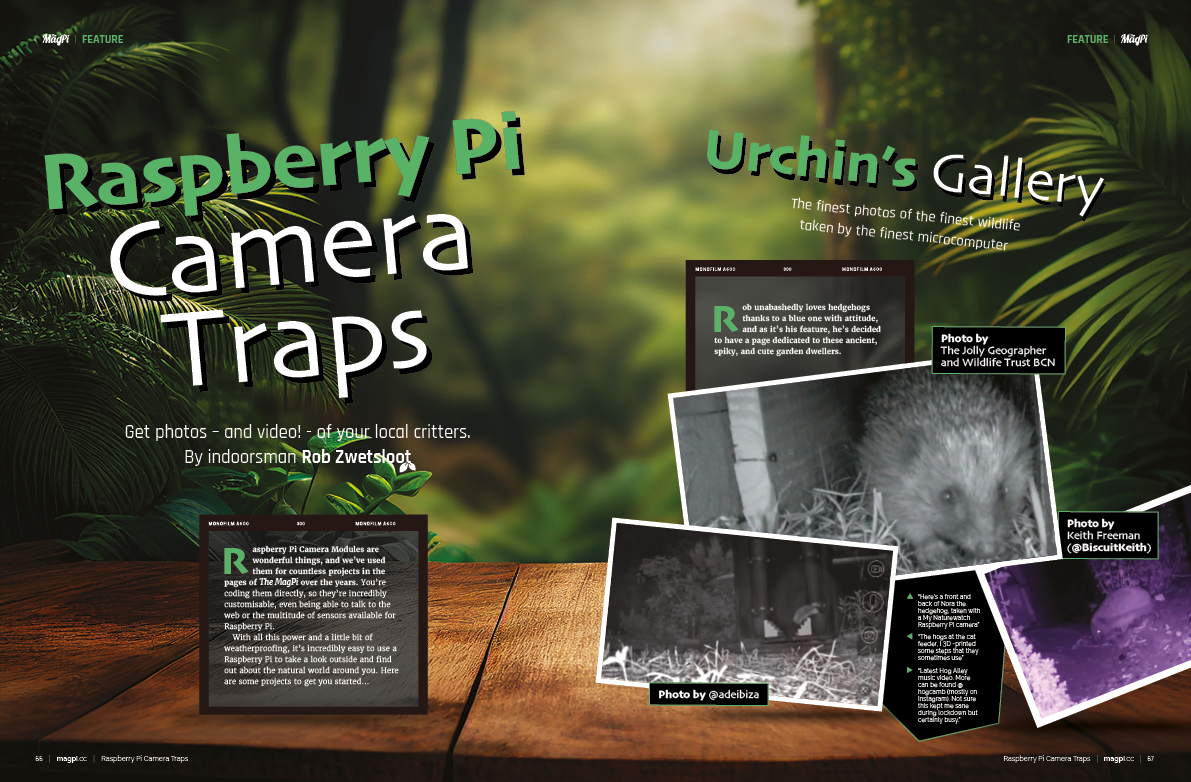
Raspberry Pi Camera Traps
Raspberry Pi and a Camera Module can be housed outside to create amazing photography traps. Don’t worry, no critters are harmed. We leave no footprints and take only photos in this great feature about capturing the natural world.
PuppyPi
Who’s a good boy? Yes, you are! We love this PuppyPi robot kit from HiWonder and take it for a good long walk as part of our robot special. We think this relatively low-cost robot kit will make a great addition to any robotics course or classroom.
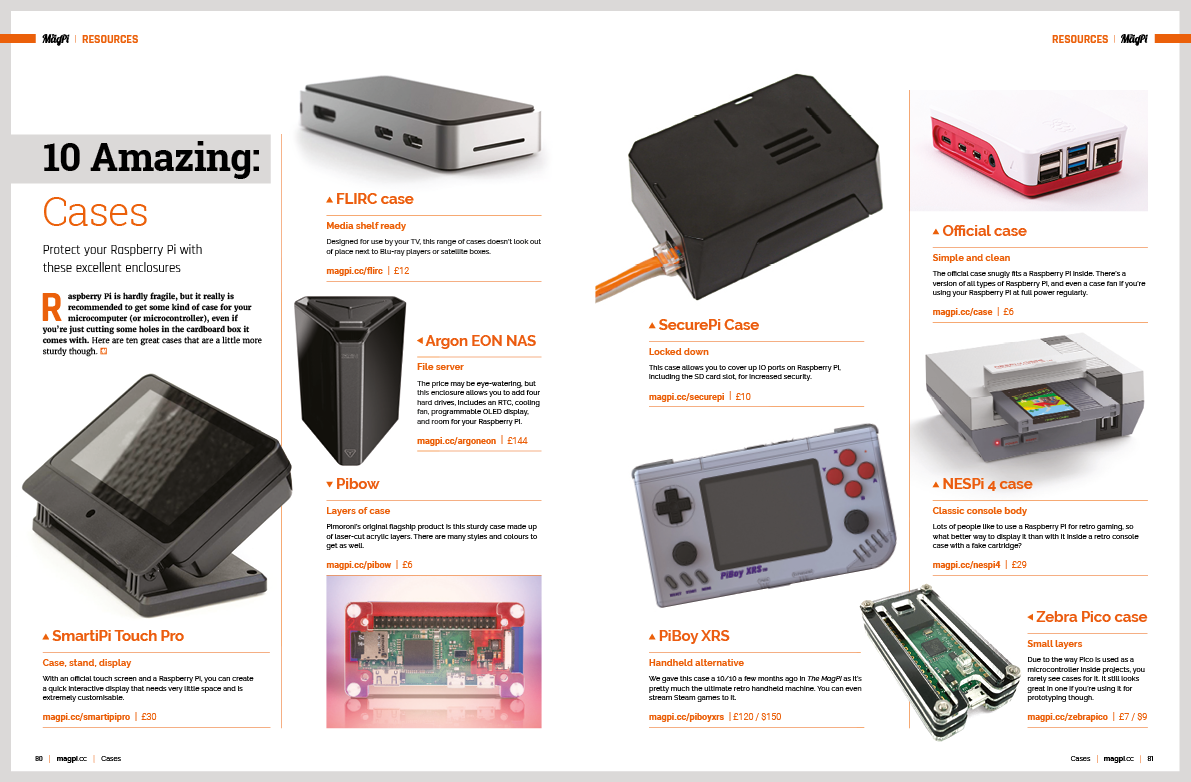
Amazing Cases
Keep your Raspberry Pi computers housed and safe with our guide to the best cases around. There are different options here for all kinds of cases.
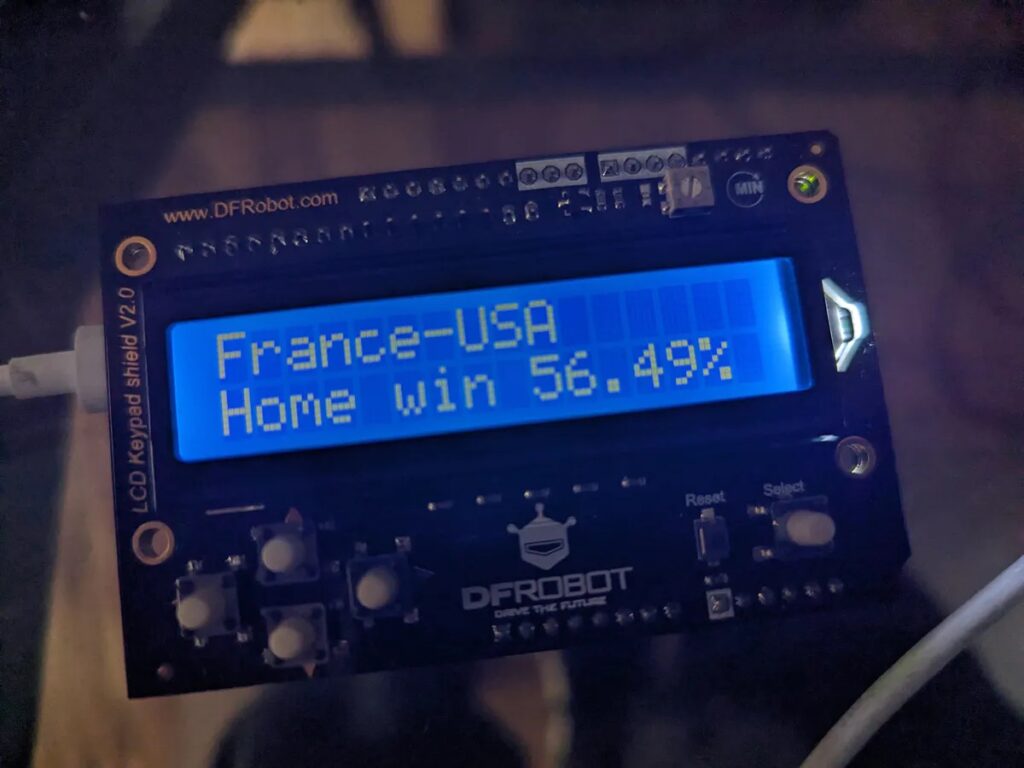
Based on the Renesas RA4M1 microcontroller, the new Arduino UNO R4 boasts 16x the RAM, 8x the flash, and a much faster CPU compared to the previous UNO R3. This means that unlike its predecessor, the R4 is capable of running machine learning at the edge to perform inferencing of incoming data. With this fact in mind, Roni Bandini wanted to leverage his UNO R4 Minima by training a model to predict the likelihood of a FIFA team winning their match.
Bandini began his project by first downloading a dataset containing historical FIFA matches, including the country, team, opposing team, ranking, and neutral location. Next, the data was added to Edge impulse as a time-series dataset which feeds into a Keras classifier ML block and produces “win” and “lose/draw” values. Once trained, the model achieved an accuracy of 69% with a loss value of 0.58.
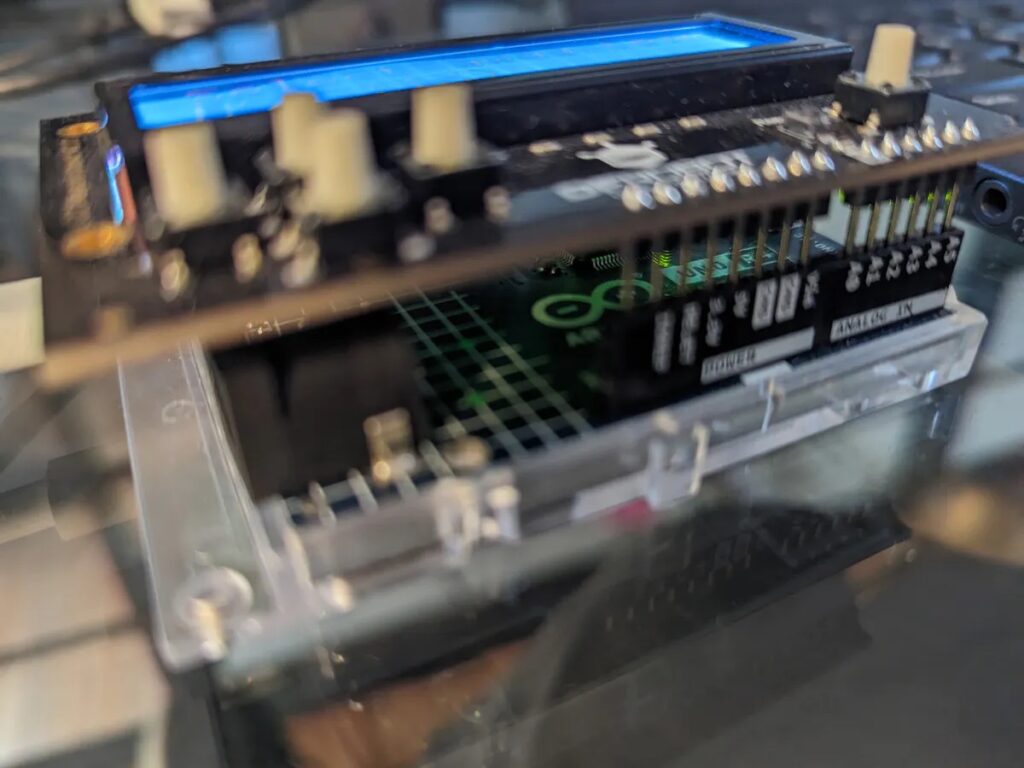
Inputting the desired country and rank to make a prediction is done by making selections on a DFRobot LCD shield, and these values are then used to populate the input tensor for the model before it gets invoked and returns its classification results. Bandini’s device demonstrates how much more powerful the Arduino UNO R4 is over the R3, and additional information on the project can be found here in his post.
Save 35% off the cover price with a subscription to The MagPi magazine. UK subscribers get three issues for just £10 and a FREE Raspberry Pi Pico W, then pay £30 every six issues. You’ll save money and get a regular supply of in-depth reviews, features, guides and other Raspberry Pi enthusiast goodness delivered directly to your door every month.
Our ‘Intro to Unity’ educational project path is a big success, sparking lots of young people’s passion for 3D game design and programming. Today we introduce the ‘More Unity‘ project path — the perfect next step for young people who have completed our ‘Intro to Unity‘ path. This new free path is designed to bridge the gap for young people before they start on the tutorials on the Unity learning platform.
Our work to create this path builds on our partnership with Unity, through which we aim to offer any young person, anywhere, the opportunity to take their first steps in creating virtual worlds using real-time 3D.
More Unity builds on foundations
After young people have tried out the Unity Engine and C# programming through the ‘Intro to Unity’ path, they’re ready for a deeper exploration of 3D game design. ‘More Unity’ helps them build on the foundational skills they learned in the ‘Intro to Unity’ path. After completing this new path, they’ll be able to add complexity, new challenges, and heaps of fun to all their 3D creations.
We’ve prepared a comprehensive Unity Guide to assist with getting ready to start either the ‘Intro to Unity’ or ‘More Unity’ path. To create with Unity, learners need access to a computer with a graphics card, the latest version of the free Unity Games Engine, and a code editor. For the extra Blender-based projects (see below), they need the latest version of the free Blender software.
Dive into the projects in the ‘More Unity’ path
The project path consists of six projects. Like in ‘Intro to Unity’, each project introduces new skills bit by bit, enabling young people to independently code their own, next-level Unity creation in the final project.
Rainbow run
This first project shows how to build an exciting 3D simulation. With ‘Rainbow run’, learners create colourful tracks and guide a marble to race along them. We also offer them an extra project guide where they can customise the look of their marble using Blender.
Disco dance floor
Next, with ‘Disco dance floor’, learners code an interactive, tilting dance floor that responds to a rolling ball with sound and colour. They can add their own style to the dance floor by following our extra Blender project.
Don’t fall through
‘Don’t fall through’ is the third project in the path. Here, learners code a two-player game that requires strategy and timing as marbles traverse a vanishing tiled floor.
Pixel art reveal
‘Pixel art reveal’ comes next in the path. It helps learners design unique pixel art on a tiled floor and reveal their awesome artwork by rolling a ball across the surface.
Track designer
In ‘Track designer’, we invite learners to truly think like game designers. This project empowers learners to design unique tilting tracks filled with obstacles, personalised effects, sounds, and more.
Marble mayhem
Finally ‘Marble mayhem’ lets young people bring to life all the principles of physics and materials in the Unity Game Engine they’ve learned about while following the ‘More Unity’ path. This is their place to create a one-of-a-kind game or digital toy that truly reflects their creativity.
Growing skills through Unity
‘More Unity’ promotes young people’s creativity, problem-solving, and independence. Each project presents them with the chance to create a virtual world of physics, materials, and mechanics. With each project they’ll learn lots of new skills in 3D modeling, gameplay design, and programming.
The path includes a community gallery where young people can share their new 3D creations and see what their peers all over the world have made.
The skills young people gain through the ‘Intro to Unity’ and ‘More Unity’ path provide them with a solid foundation to continue to learn and create with Unity. To follow their passion for 3D worlds, game design, and programming further, they can move on to the hundreds of tutorials available on Unity’s learning platform.
Get ready for ‘More Unity’: Our support for educators, volunteers and parents
Our detailed Unity guide will help you get everything set up for your young people to start with Unity, and the ‘Intro to Unity‘ path is the place for them to begin before they move on to ‘More Unity‘.
If you or your young people want to get a taste of the fun ‘More Unity’ has in store, there’s the Collision and colours Discover project to try out. This short learning experience showcases the new components the ‘More Unity’ path introduces.
To help our community of CoderDojo and Code Club volunteers bring Unity to their learners, we will host a free Unity-focused webinar on 13 July. Sign up to get a walkthrough of the path from our Learning Manager Mac Bowley, and to ask him any questions you might have.
The revolutionary UNO R4, announced on Arduino Day, is now available on the Arduino Store!
The fourth version of the iconic, beloved UNO adds a whole new dimension to the world of DIY and making revolutionized by the simple 8-bit microcontroller over a decade ago. Take your maker potential to new heights: UNO R4 has a speedy 32-bit Arm® Cortex®-M4 and offers a 16-fold increase in memory, as well as more connectors and connectivity options than ever – in two variants: UNO R4 Minima and UNO R4 WiFi.
What’s in the new UNO?
Both variants allow you to start making or easily upgrade UNO R3-based projects with more computational power, memory and speed than previous versions – courtesy of the RA4M1 microcontroller by Renesas – while maintaining the same form factor and 5 V operating voltage.
More memory and faster clock: A 16x increase in memory and 3x the clock speed mean the UNO R4 can perform more precise calculations and handle more complex and sophisticated projects than ever.
New built-in peripherals: Among several exciting new peripherals, you get a 12-bit DAC, CAN BUS, OP AMP, and SWD port – each one expanding your maker potential, allowing you to easily tackle increasingly advanced projects.
A USB-C® Connector: Embracing the smaller, more powerful, and robust cable standard!
An HID device: This feature makes interactive projects a million times cooler, allowing you to create interfaces with minimal effort and in no time.
You can get started on your next automation or audio project with the UNO R4 Minima – a top pick for first-time makers, with its combination of powerful technology and affordable price – or you can opt for the UNO R4 WiFi if you need more specific features.
Connect to your inner creativity with the UNO R4 WiFi
The UNO R4 WiFi variant is perfect for all users, from beginners to experts, wanting to explore the forefront of innovation. This full-fledged board features an ESP32-S3 coprocessor that handles Wi-Fi® and Bluetooth® Low Energy connectivity, so the RA4M1 microcontroller can focus on other tasks. On top of all the features in the Minima variant, it offers:
Wi-Fi® and Bluetooth® connectivity, plus Cloud-compatibility: build IoT projects, create interactive dashboard and control your project remotely.
A 12×8 LED matrix: imagine working on a creative project using animations or plotting sensor data, without any additional hardware!
A Qwiic connector to facilitate quick prototyping: thanks to a wide variety of compatible modules that can be connected over I2C, you can easily create custom projects and expand the capabilities of your UNO R4 WiFi.
A built-in mechanism that detects operations that might cause a crash: if it catches errors such as a division by zero, the board stops them before they can cause trouble and provides a detailed explanation on the serial monitor
The Arduino ecosystem has evolved, over the last two decades, thanks to the powerful idea of open source and the stellar community of 30+ million makers who keep sharing, building, and improving. Every new hardware product, every new software solution has added new worlds – ready to welcome everyone. Now, the UNO R4 takes the ecosystem and the community to a new dimension of performance.
– Massimo Banzi, Arduino co-founder
So, if you’re just beginning your Arduino journey, the release of the UNO R4 makes it a great time to start!
Already an UNO fan? The UNO R4 makes it easy to port existing shields and projects to a whole new level, and selected contributors are already helping us update UNO R3 libraries.
A final big thank you goes to our community and early adopters, who have supported us these past few months by contributing their efforts to porting libraries.
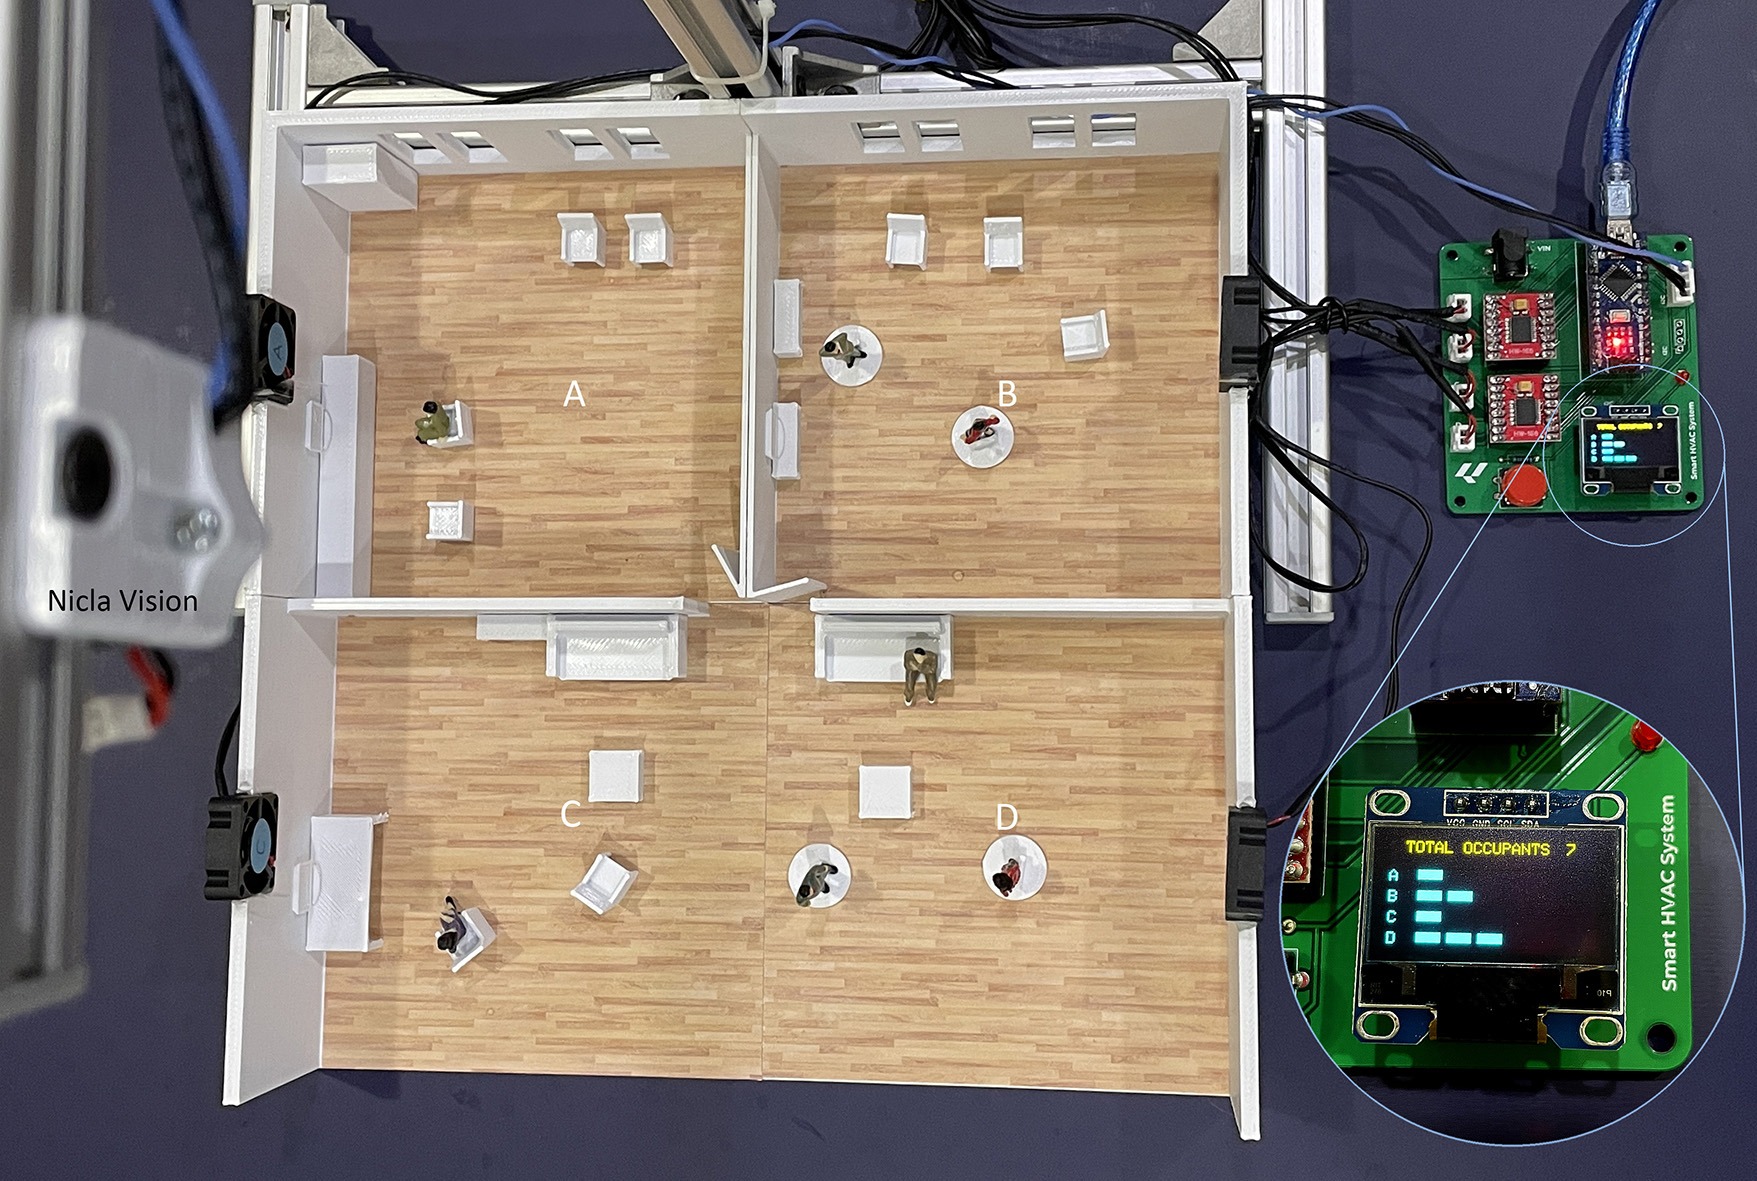
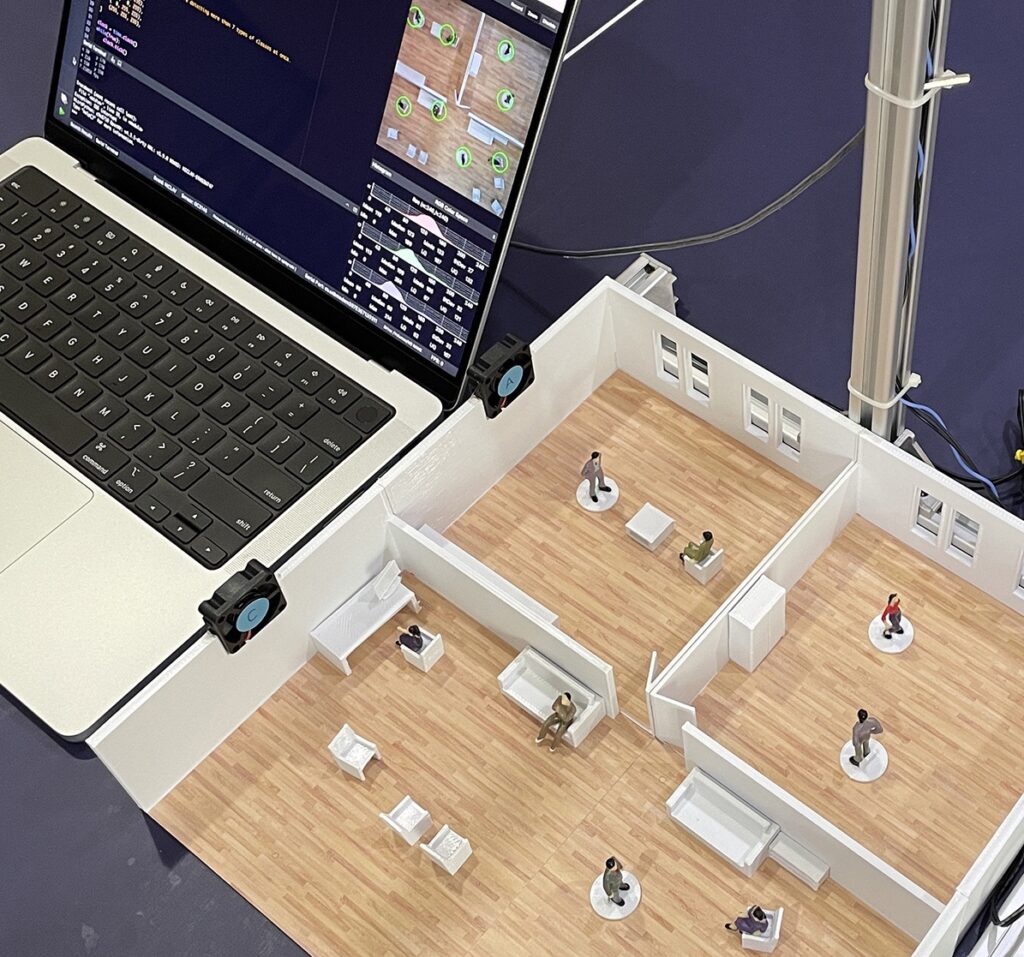
Shortly after setting the desired temperature of a room, a building’s HVAC system will engage and work to either raise or lower the ambient temperature to match. While this approach generally works well to control the local environment, the strategy also leads to tremendous wastes of energy since it is unable to easily adapt to changes in occupancy or activity. In contrast, Jallson Suryo’s smart HVAC project aims to tailor the amount of cooling to each zone individually by leveraging computer vision to track certain metrics.
Suryo developed his proof of concept as a 1:50 scale model of a plausible office space, complete with four separate rooms and a plethora of human figurines. Employing Edge Impulse and a smartphone, 79 images were captured and had bounding boxes drawn around each person for use in a FOMO-based object detection model. After training, Suryo deployed the OpenMV firmware onto an Arduino Nicla Vision board and was able to view detections in real-time.
The last step involved building an Arduino library containing the model and integrating it into a sketch that communicates with an Arduino Nano peripheral board over I2C by relaying the number of people per quadrant. Based on this data, the Nano dynamically adjusts one of four 5V DC fans to adjust the temperature while displaying relevant information on an OLED screen. To see how this POC works in more detail, you can visit Suryo’s write-up on the Edge Impulse docs page.
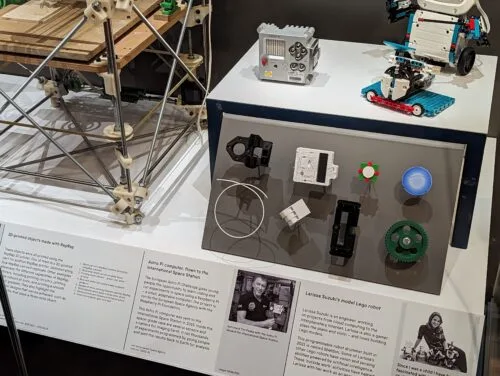
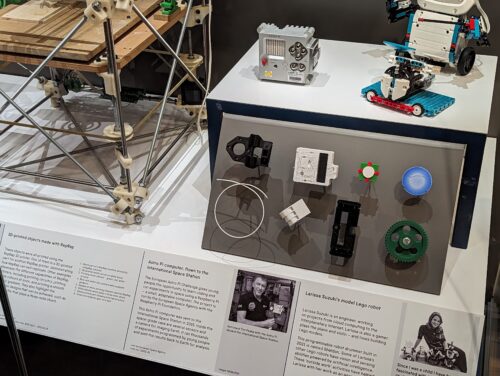
After seven successful years on the International Space Station, 250 vertical miles above our planet, the original two Astro Pi computers that we sent to the ISS to help young people run their code in space have been returned to Earth. From today, one of these Astro Pi computers will be displayed in the Science Museum, London. You can visit it in the new Engineers Gallery, which is dedicated to world-changing engineering innovations and the diverse and fascinating range of people behind them.
A challenge to inspire young people about space and computing
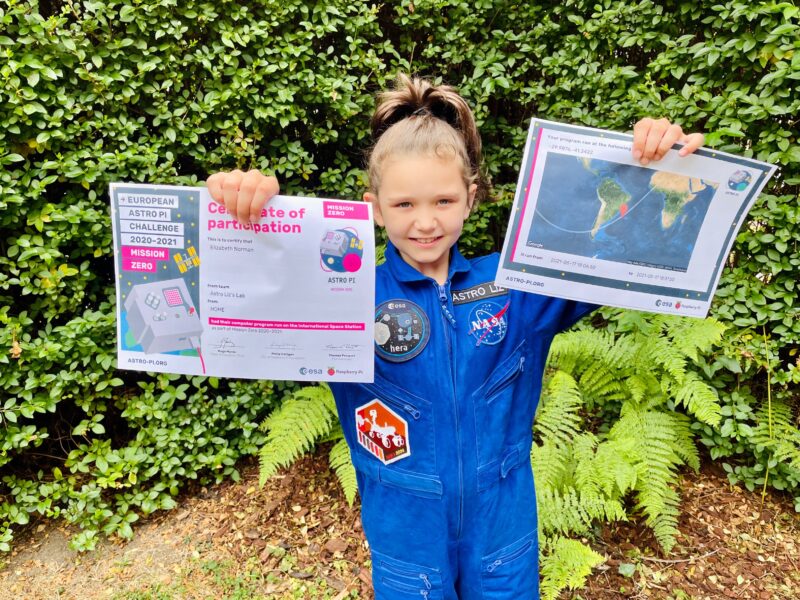
The original Astro Pis, nicknamed Izzy and Ed, have played a major part in feeding tens of thousands of young people’s understanding and passion for science, mathematics, engineering, computing, and coding. In their seven years on the International Space Station (ISS), Izzy and Ed had the job of running over 70,000 programs created by young people as part of the annual Astro Pi Challenge.
Nicki Ashworth, 21, took part in the first-ever Astro Pi challenge after hearing about the opportunity at a science fair: “I thought it sounded like an interesting project, and good practice for my programming skills. I was young and had no idea of the extent of the project and how much it would influence my future.”
Like many young people who have participated in the Astro Pi Challenge, Nicki credits the Astro Pi Challenge as an inspiration to learn more about space and programming, and to decide on a career path: “My experience with Astro Pi definitely helped to shape my future choices. I’m currently in my third year of a Mechanical Engineering degree at University of Southampton, specialising in Computational Engineering and Design. I’ve always loved programming, which is why I took part in the Astro Pi competition, but it led to a fascination with space. This encouraged me to look at engineering as a future, and led me to where I am today!”
In the beginning…
It all started in 2014, when we started collaborating with organisations including the UK Space Agency and European Space Agency (ESA) to fly two Astro Pi computers to the ISS for educational activities during the six-month Principia mission of British ESA astronaut Tim Peake.
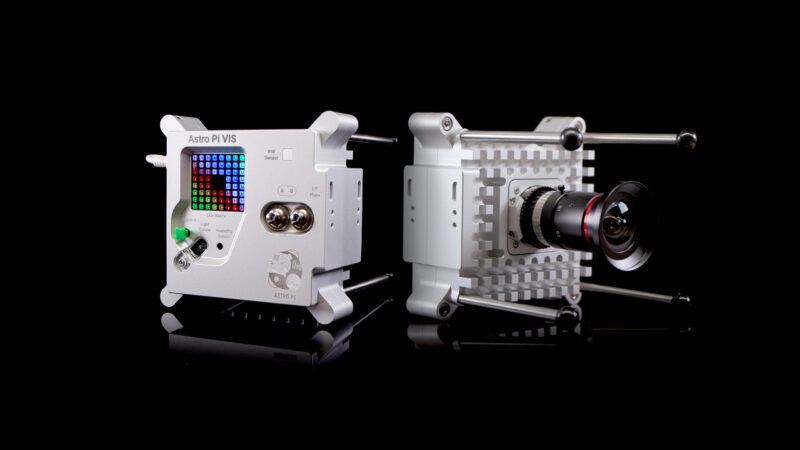
The Astro Pi computers each consist of a Raspberry Pi computer integrated with a digital camera and an add-on board filled with environmental sensors, all enclosed in a protective aluminium flight case.
Commander Tim Peake, Britain’s first visitor to the ISS, accompanied the two first Astro Pi computers on the ISS. He used them to run experiments imagined, designed, and coded by school-age young people across the UK.
We held a competition in UK schools and coding clubs to invite young people to create experiments that could be run on the Astro Pis. Students conceived experiments and coded them in Python; we tested their Python programs and eventually picked seven to run on Izzy and Ed on the ISS.
The students’ experiments ranged from a simple but beautiful program to display the flag of the country over which the ISS was flying at a given time, to a reaction-time test for Tim Peake to measure his changing abilities across the six-month mission. The measurements from all the experiments were downloaded to Earth and analysed by the students.
“I still feel incredibly honoured to have competed in the very first [Astro Pi Challenge],” says Aaron Chamberlain, 18, who was 11 years old when he took part in the first-ever Astro Pi Challenge in 2015. “The experience was incredible and really cemented my enthusiasm for all things computing and coding. Finally looking at the photos the Raspberry Pi had taken of the astronauts floating 400 km above us was a feeling of awe that I will never forget.”
The next year, 2016, we expanded our partnership with ESA Education to be able to open up Astro Pi to young people across ESA Member states. The European Astro Pi Challenge has been going from strength to strength each year since, inspiring young people and adult mentors alike.
And today…
In 2021 we decided it was time to retire Izzy and Ed and replace them with upgraded Astro Pi computers with plenty of new and improved hardware, including a Raspberry Pi 4 Model B with 8 GB RAM.
Dave Honess, STEM Didactics Expert at the European Space Agency, was engineering lead at the Foundation for the first Astro Pi Challenge, and the return of the original hardware is a special event and moment of reflection for him: “It was a strange experience to open the box and hold the original Astro Pis again after all that time and distance they have travelled — literally billions of miles. Even though their mission is over, we will continue to learn from them with a tear-down analysis to find out if they have been affected by their time in space. Since Principia, I have watched the European Astro Pi Challenge grow with pride year on year, but I still feel very fortunate to have been there at the beginning.”
Thanks to the upgraded hardware, we are able to continue to grow the Astro Pi Challenge in collaboration with ESA Education. And each year it’s so exciting to see the creative and ingenious programs tens of thousands of young people from across Europe send us; 24,850 young people took part in the Challenge in the 2022/2023 cycle.
But how have Astro Pis Izzy and Ed fared in space over these seven years? Jonathan Bell, Principal Software Engineer at Raspberry Pi Limited, had a chance to find out first-hand: “I was lucky enough to have a look inside the returned Astro Pis. I was looking for the cosmetic effects of the unit being on the ISS for so long. On the inside they still look as pristine as when I assembled them! Barely a speck of dust on the internal boards, nor any signs that the external interface ports were worn from their years of use. A few dings and scrapes on the anodised exterior were all that I could see — and a missing joystick cap (as it turns out, hot-melt glue isn’t a permanent adhesive…). It was great to see that they still worked! It made me feel proud for what the team and the Astro Pi programme has achieved over the years. It’s good to have Izzy and Ed back!”
Visit the Science Museum to see an Astro Pi for yourself
The new Engineers Gallery in the Science Museum opens today and is free to visit. Astro Pi computer Izzy is among the amazing exhibits. Learn more at: sciencemuseum.org.uk/engineers
To find out more about the Astro Pi Challenge and how to get involved with your kids at home, your school, or your STEM or coding club, visit astro-pi.org.
The next round of the Challenge starts in September — sign up for news to be the first to hear when we launch it.
The Feather ecosystem continues to grow, and the Adafruit Feather RP2040 ($11.95) still stands strong amongst all the variations of Feather boards. The board features an RP2040 32-bit Cortex-M0+ dual core running at ~125MHz, perfectly packaged into the Feather form factor. This allows you to add dozens of different shields and accessories with ease. Or, you can just design your own circuits and use up the 21 GPIO pins that feature four 12-bit ADCs, two I2C, two SPI, and two UART peripherals. It also has 16 PWM outputs that you can use for servos or LEDs. It’s an impressive board, and a great choice for most projects.
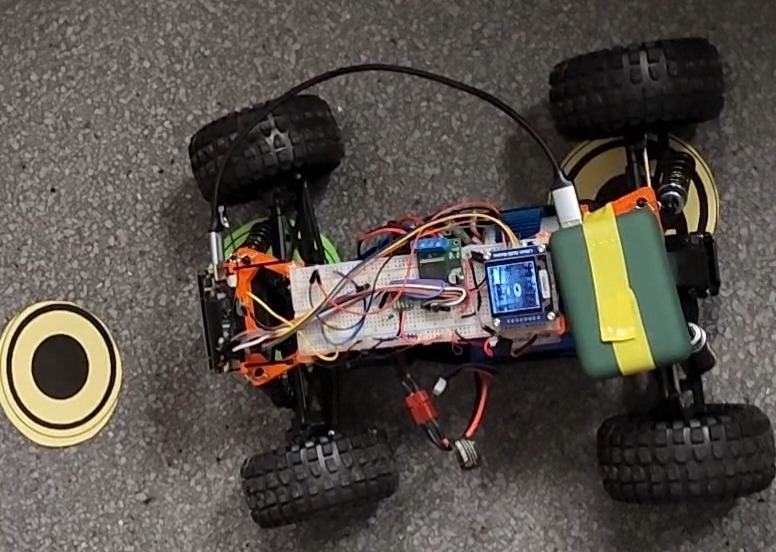
Jeremy Ellis is a teacher, and as such, wanted a longer-term project that his students could do to learn more about microcontrollers and computer vision/machine learning, and what better way is there than a self-driving car. His idea was to take an off-the-shelf RC car which uses DC motors, add an Arduino Portenta H7 as the MCU, and train a model to recognize target objects that it should follow.
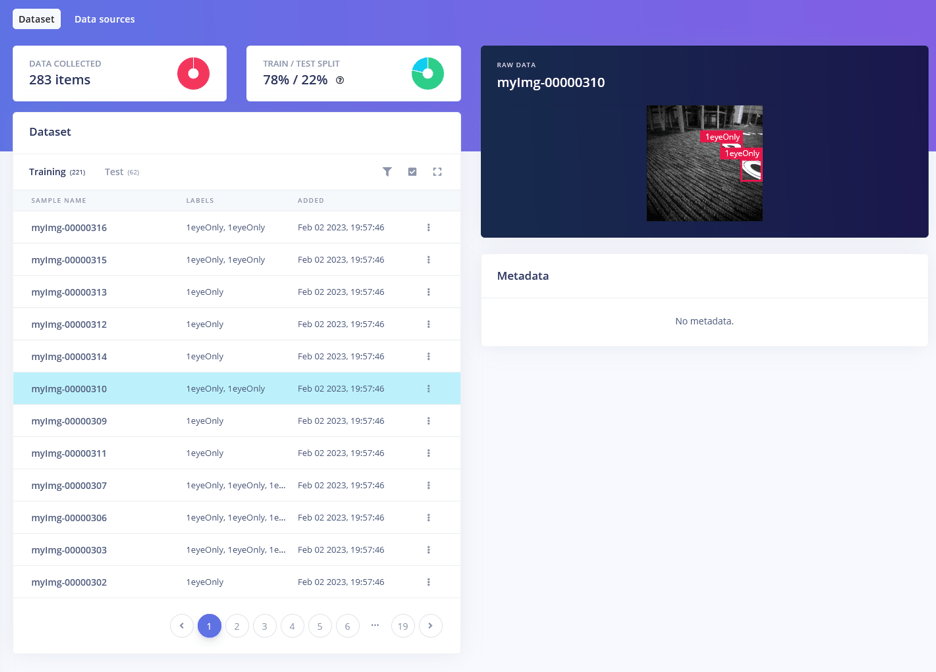
After selecting the “RC Pro Shredder” as the platform, Ellis implemented a VNH5019 Motor Driver Carrier, a servo motor to steer, and a Portenta H7 + Vision Shield along with a 1.5” OLED module. After 3D printing a small custom frame to hold the components in the correct orientation, nearly 300 images were collected of double-ringed markers on the floor. These samples were then uploaded to Edge Impulse and labeled with bounding boxes before a FOMO-based object detection model was trained.
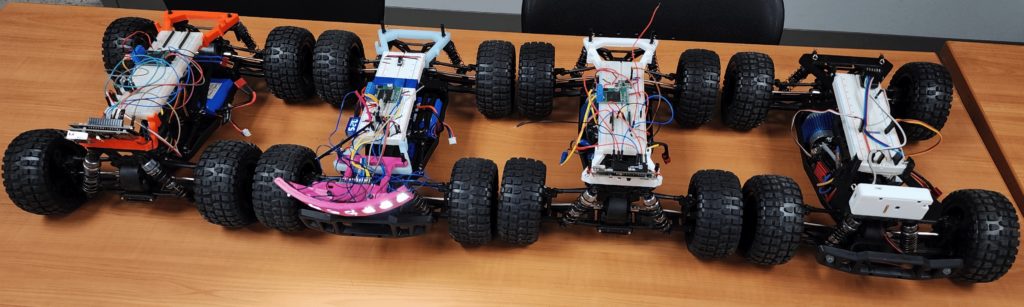
Rather than creating a sketch from scratch, the Portenta community had already developed one that grabs new images, performs inferencing, and then steers the car’s servo accordingly while optionally displaying the processed image on the OLED screen. With some minor testing and adjustments, Ellis and his class had built a total of four autonomous cars that could drive all on their own by following a series of markers on the ground.
We are delighted to announce that we’ve joined the partner network of edX, the global online learning platform. Through our free online courses we enable any educator to teach students about computing and how to create with digital technologies. Since 2017, over 250,000 people have taken our online courses, including 19,000 teachers in England alone. The move to edX builds on this success to help us bring high-quality training to many more teachers worldwide.
“I feel that this course was essential in my understanding of where I may take my students on their journey as coders. Extremely practical advice and exercises.” – Online course participant
Free training to support all educators to teach computing
Supporting teachers and educators is crucial for our mission to enable young people to realise their full potential through the power of computing and digital technologies. Through our online courses educators can learn the skills, knowledge, and confidence to teach computing in an engaging way. As a result, they empower young people to in turn develop the knowledge, skills, and confidence to use digital technologies effectively, and to be able to critically evaluate these technologies and confidently engage with technological change.
Twenty of our most popular online courses are now available for sign-up on the edX platform. They will start in two blocks of ten in August and September, respectively.
The courses are written with educators in mind, and are also useful to anyone with an interest in computing. The scope of topics is broad and includes programming in Python and Scratch, web development and design, cybersecurity, and machine learning and AI. Our aim is to support educators of all levels of experience to learn about computing, including teachers, club volunteers, youth workers, parents, and more. The courses also draw on content from our Computing Curriculum and provide support for teachers who want to engage their students with Experience AI, our pioneering education initiative about the field of AI.
“Our partnership with edX gives teachers everywhere a new way to engage with our free, expert-led computing education training. As people design and deploy new and powerful digital technologies, it’s important that no-one is left behind and we are all able to shape technology together.” – Sian Harris, Chief Education Officer at the Raspberry Pi Foundation
What are our courses like?
Designed, created, and facilitated by us, each of our courses is a cross-team project. When we put together a course we:
Use pedagogical best practice: we lead with concepts, model processes, and include activities that are ready for the classroom; add variety in terms of what content to present as text, images, or videos; and include opportunities to create projects
Use language carefully so that it is easy to follow for all participants, as are engaging with us online and may have English as an additional language
Put accessibility front and centre so that as many people as possible can learn with us
Offering our courses on the edX platform gives us flexibility in how we present the content, meaning we can better meet learner needs.
“Not only did the course present a thorough grounding in computing pedagogy, references were made to supporting research, and the structure and presentation was deceptively straightforward — despite dealing with some tricky concepts.” – Online course participant
We especially strive to exemplify the pedagogical approaches we recommend to teachers within the courses themselves. For example, semantic waves are woven throughout our learning resources and help learners to unpack new concepts, then repack them into more complex contexts to encourage knowledge acquisition. This teaching strategy, along with many others, is used widely in the courses and in all our teaching and learning resources.
How you can learn with us on edX
Taking our courses on edX you can:
Learn at your computer or on the edX mobile app
Join a course’s dedicated discussion are to discuss and collaborate with other participants
Ask our team questions — we’ll have experienced facilitators on hand
All the courses can be completed at your own pace, in your own time. Based on a commitment of between 1 to 2 hours per week, you can complete our courses in 2 to 4 weeks. You’re also welcome to work through them more quickly (or slowly) if you prefer.
On June 26th-28th, the Arduino Pro team will be in Amsterdam for the tinyML EMEA Innovation Forum – one of the year’s major events for the world where AI models meet agile, low-power devices.
This is an exciting time for companies like Arduino and anyone interested in accelerating the adoption of tiny machine learning: technologies, products, and ideas are converging into a worldwide phenomenon with incredible potential – and countless applications already.
At the summit, our team will indeed present a selection of demos that leverage tinyML to create useful solutions in a variety of industries and contexts. For example, we will present:
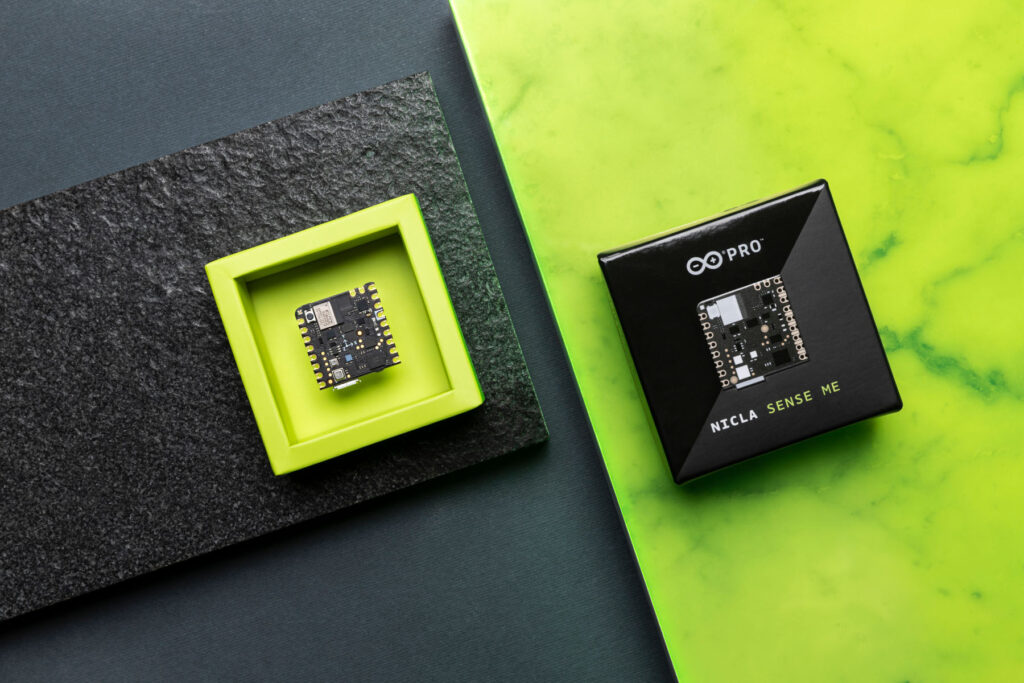
A fan anomaly detection system based on the Nicla Sense ME. In this solution developed with SensiML, the Nicla module leverages its integrated accelerometer to constantly measure the vibrations generated by a computer fan. Thanks to a trained model, condition monitoring turns into anomaly detection – the system is able to determine whether the fan is on or off, notify users of any shocks, and even alert them if its super precise and efficient sensor detects sub-optimal airflow.
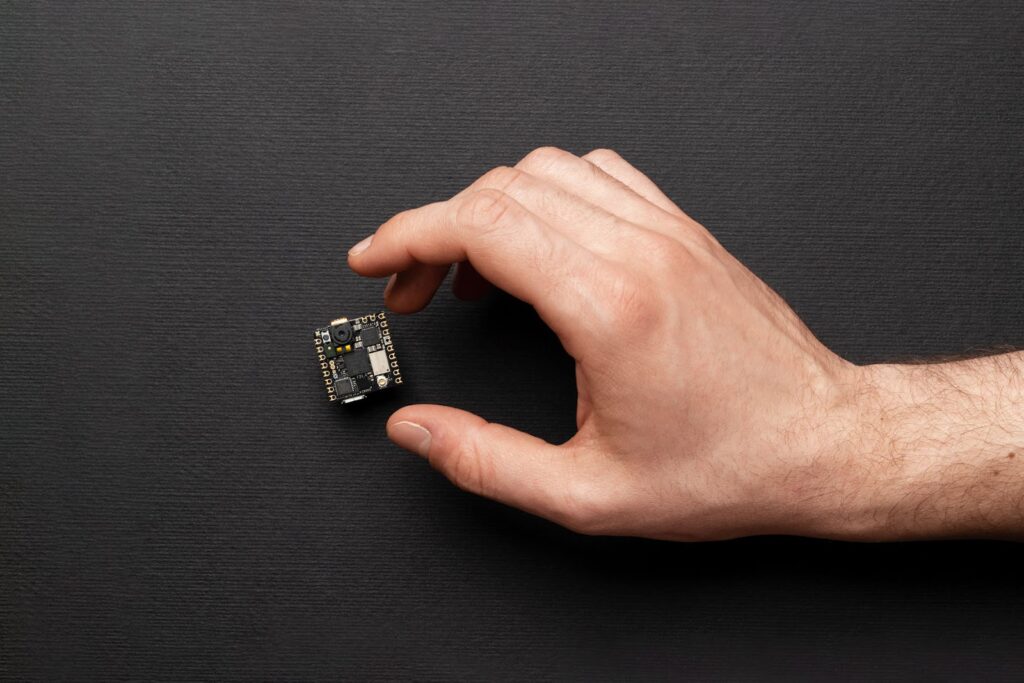
A vineyard pest monitoring system with the Nicla Vision and MKR WAN 1310. Machine vision works at the service of smart agriculture in this solution: even in the most remote field, a pheromone is used to attract insects inside a case lined with glue traps. The goal is not to capture all the insects, but to use a Nicla Vision module to take a snapshot of the captured bugs, recognize the ones that pose a real threat, and send updated data on how many specimens were found. New-generation farmers can thus schedule interventions against pests as soon as needed, before the insects get out of control and cause damage to the crops. Leveraging LoRa® connectivity, this application is both low-power and high-efficiency.
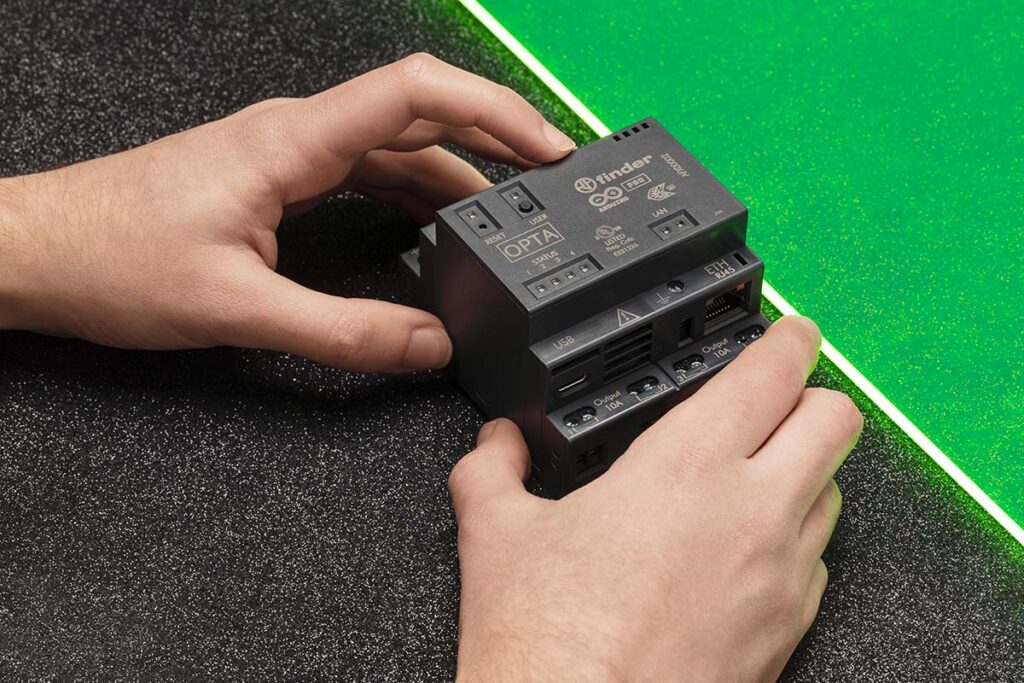
An energy monitoring-based anomaly detection solution for DC motors, with the Opta. This application developed with Edge Impulse leverages an Opta WiFi microPLC to easily implement industrial-level, real-time monitoring and fault detection – great to enable predictive maintenance, reducing downtime and overall costs. A Hall effect current sensor is attached in series with the supply line of the DC motor to acquire real-time data, which is then analyzed using ML algorithms to identify patterns and trends that might indicate faulty operation. The DC motor is expected to be in one of two statuses – ON or OFF – but different conditions can be simulated with the potentiometer. When unexpected electric consumption is shown, the Opta WiFi detects the anomaly and turns on a warning LED.
The Arduino Pro team is looking forward to meeting customers and partners in Amsterdam – championing open source, accessibility, and flexibility in industrial-grade solutions at the tinyML EMEA Innovation Forum!
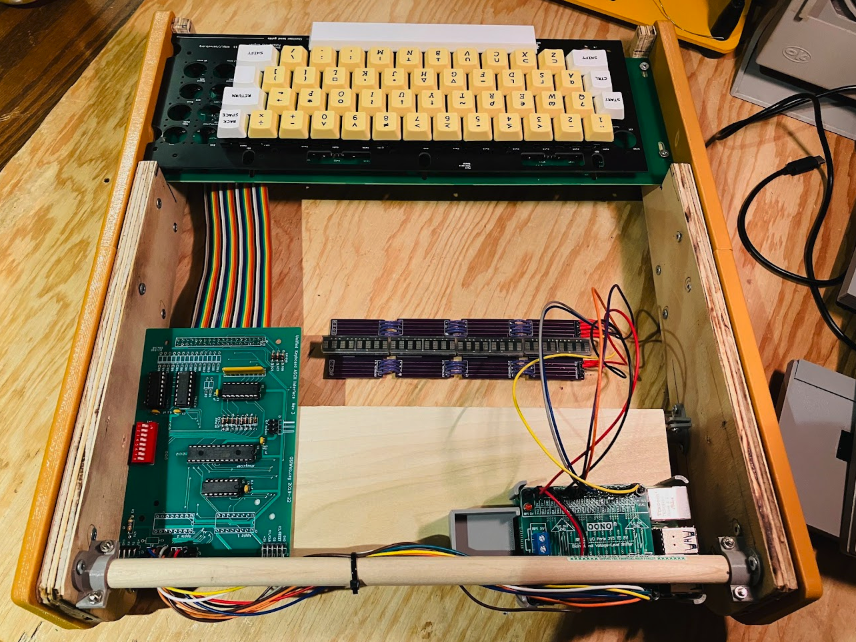
Keen to build his own repro version, Michael began to source components. While obtaining a keyboard was straightforward, from Dave at osiweb.org, he wasn’t sure how to reproduce the MCM/70’s unique APL keycaps. After considering making his own, he discovered a helpful UK supplier of custom keycaps.
Michael used Inkscape to create SVG versions of the legends that could be scaled to fit the keycaps. Detail is crucial in his reproductions, as he reflects: “With the ‘inside’ of the machine being emulated, it is very important to me for the outside to look as much as possible like the original. I want my reproductions to be clearly recognised, and operate the same as the originals they replicate.”
Michael spent some time looking for a suitable replacement for the original MCM/70’s plasma display that’s no longer manufactured, and eventually found the high-performance Broadcom HCMS-2972 dot matrix display which offered a close match. “Packaged as eight 5×7 dot matrix arrays, these modules operate at a nice safe 3.3 V and can be cascaded together side by side to create the 32×1 character display desired here.”
The aesthetically pleasing casing took Michael many hours to 3D-print, and he added two placebo cassette decks for an authentic look: “Virtually all of the online images of the MCM/70 feature the two tape deck model.”
Retro Raspberry Pi
Following a research visit to the York University Computer Museum (YUCoM), Toronto, Michael decided to use the YUCoM working MCM/70 software emulator in his project, which has “high historical accuracy” – important if his version was to work just like the original. “Thanks to the hard working folks at York University, I have a great head start with this project.”
To complement that, he needed a solution with a fairly powerful CPU to run the emulator. After first trying it on a Raspberry Pi 2 he had to hand, he found it only executed at about 33% the speed of an original MCM/70. “When I moved the project to a Raspberry Pi 4B, the emulator ran at twice the speed of the original,” he reveals.
Raspberry Pi’s large number of GPIO pins also allowed Michael to wire the emulator to interact with the display, keyboard, and cassette deck. Plus, he needed “a target system with a Linux-based OS to build and run the emulator (which was written in C). In fact, the emulator built easily on Raspberry Pi OS after a couple of required libraries were loaded.”
The result of his hard work is impressive and Michael has already put it to good use. “I’ve been using the MCM/70 Reproduction to learn APL by working my way through the MCM/70 User’s Guide. Mind you, I won’t be writing any APL programs any time soon, but I would like to get a good feel for the language.”
He has also generously shared a detailed description of his project on Instructables. It’s well worth a read, illustrating his enthusiasm for his retro subject, and taking you through how you can create your own version.
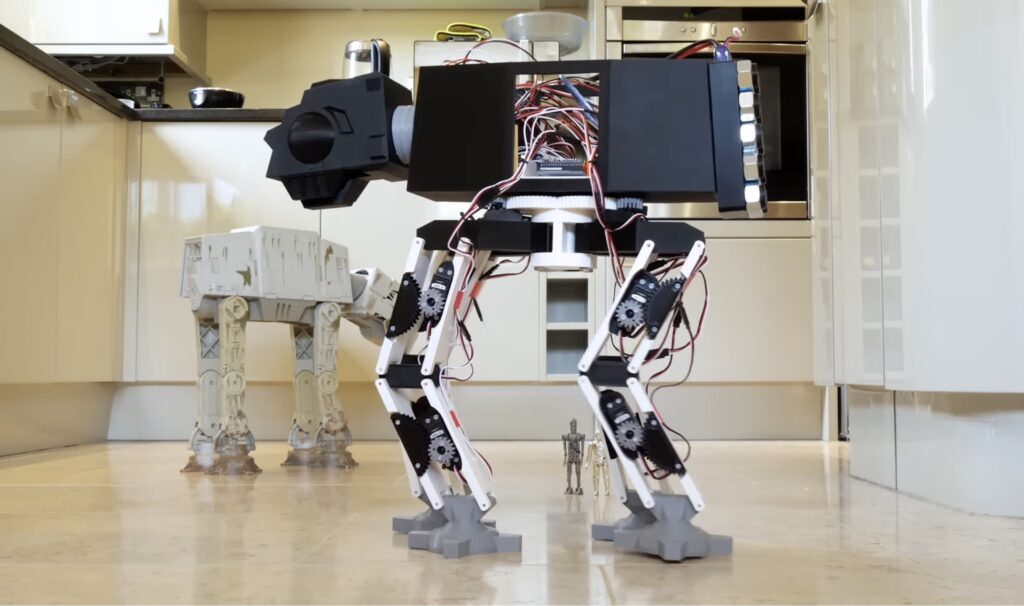
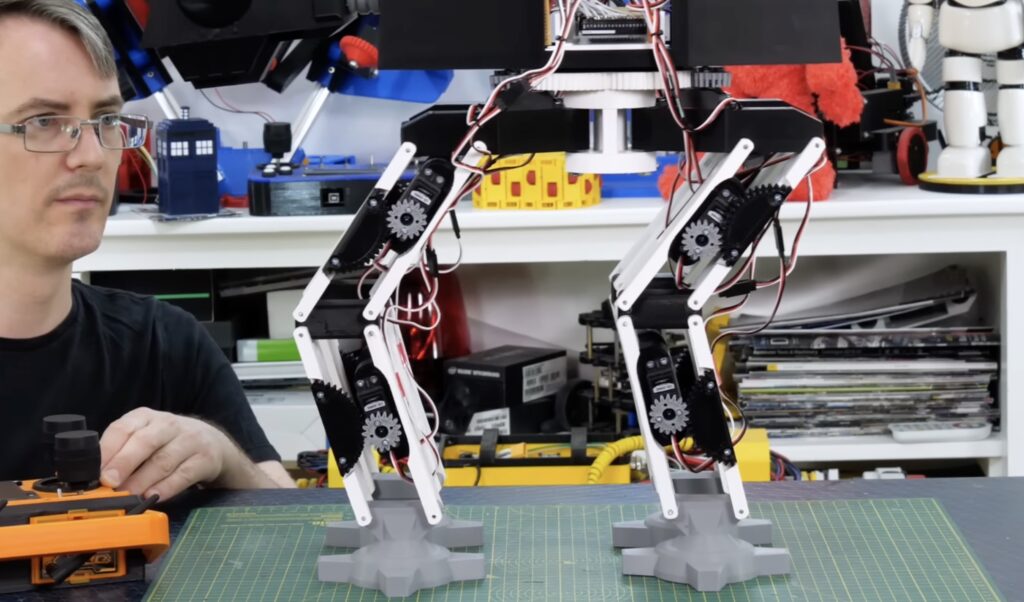
Was there anything more exciting than watching AT-ATs walk across Hoth towards the Rebel base for the first time? Those massive machines were iconic and helped to solidify The Empire Strikes Back as the best movie set in the Star Wars universe. After experiencing disappointment with AT-AT toys that couldn’t walk, James Bruton built his own AT-AT robot that strolls with the best of them.
While Bruton’s 3D-printed robot isn’t an exact replica of an AT-AT and doesn’t incorporate all of the design elements, it does walk a lot like what we all saw in the movie. Those AT-ATs had a very distinctive way of moving and the robot does a good job of mimicking their gait. It incorporates two key elements: forward knees and feet that remain level with the ground during a stride. Bruton’s robot has legs made up of parallel linkages in order to replicate that movement.
Each leg requires three servo motors: two for the hip and one for the knee. That’s a total of 12 servos, which Bruton controlled with an Arduino Mega 2560 board. It receives commands from Bruton’s own universal DSM remote through a DSM radio receiver module. The robot lacks sensors and autonomy, so Bruton has to pilot it himself. After he solved some minor balance issues caused by the weighty head, the mini AT-AT was able to walk very well and it should excite every Star Wars fan.
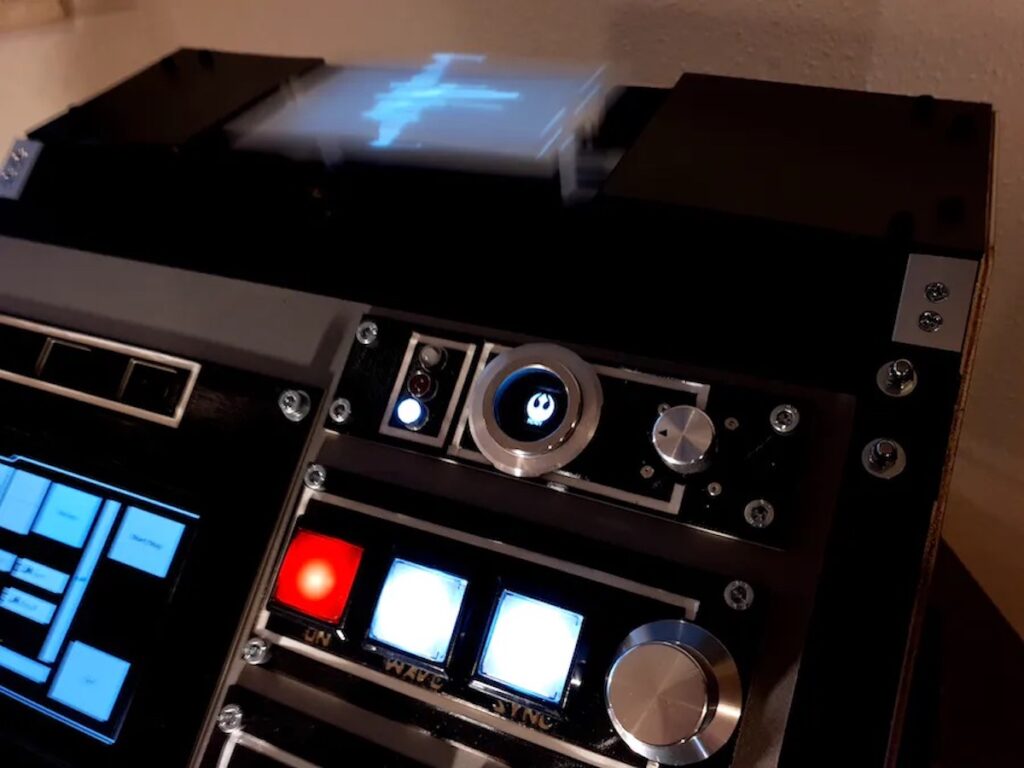
A little over a year ago, Maker Mac70 set out to build an inexpensive DIY version of a volumetric display — a system which enables users to view objects in 3D, without the need for special glasses or extremely fancy components. But unlike in the Star Wars series, this system relies on a projector that can refresh hundreds of times per second, a moving projection screen (swept volume) to show the image, and some way to synchronize everything, as the ultimate goal was a 3D persistence of vision presentation.
After modifying a standard DLP projector to output faster, monochrome images by moving the internal color wheel, Mac70 introduced an LCD shutter which either allows or blocks light in less than 1ms and could be used to precisely select the subframes being projected. Because a solenoid or motor would be too slow to move the swept volume back and forth, a pair of old speakers were repurposed, and when combined with an Arduino Mega 2560, were able to move in sync with the projector once calibrated.
The last steps involved creating a slicer utility for transforming 3D models into 2D images, using a LattePanda single-board computer to drive the projector, and making an elegant Star Wars-themed case to house all of the components. For more details about this years-long project, you can read Mac70’s excellent write-up here on Hackster.io or watch the videos below!
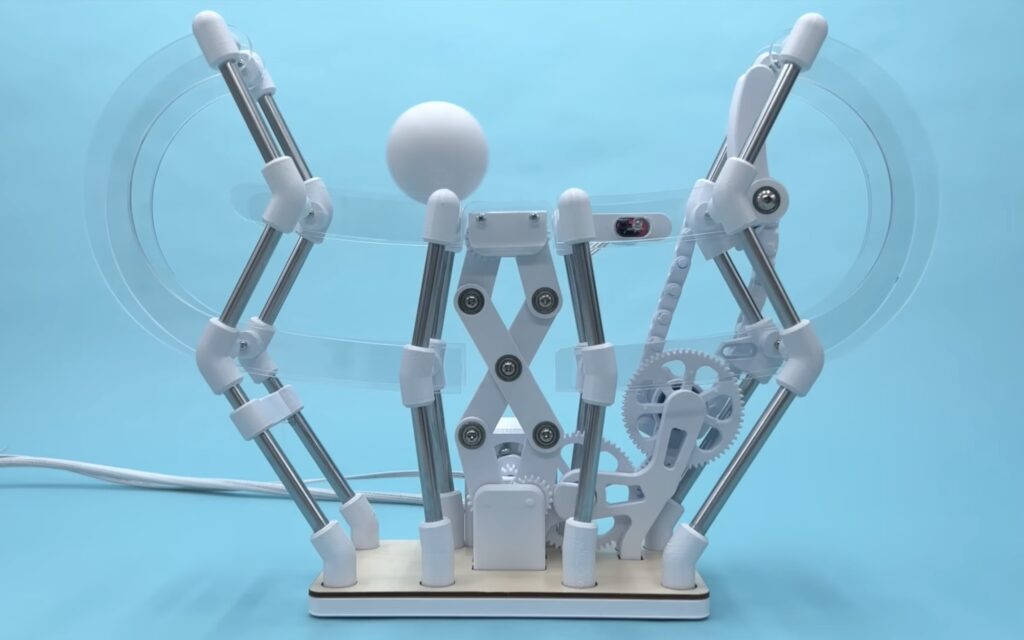
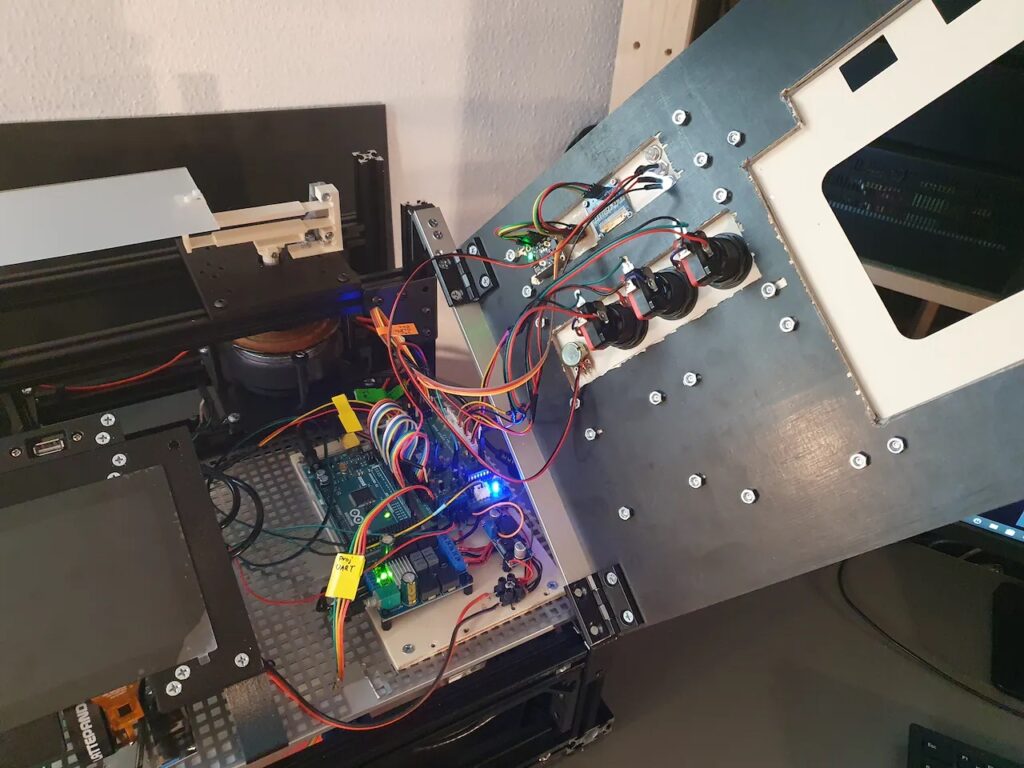
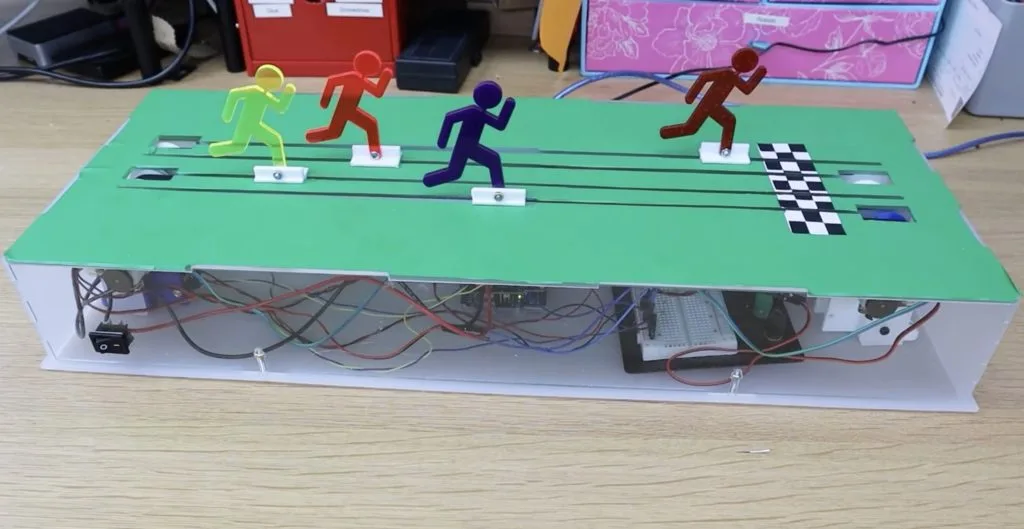
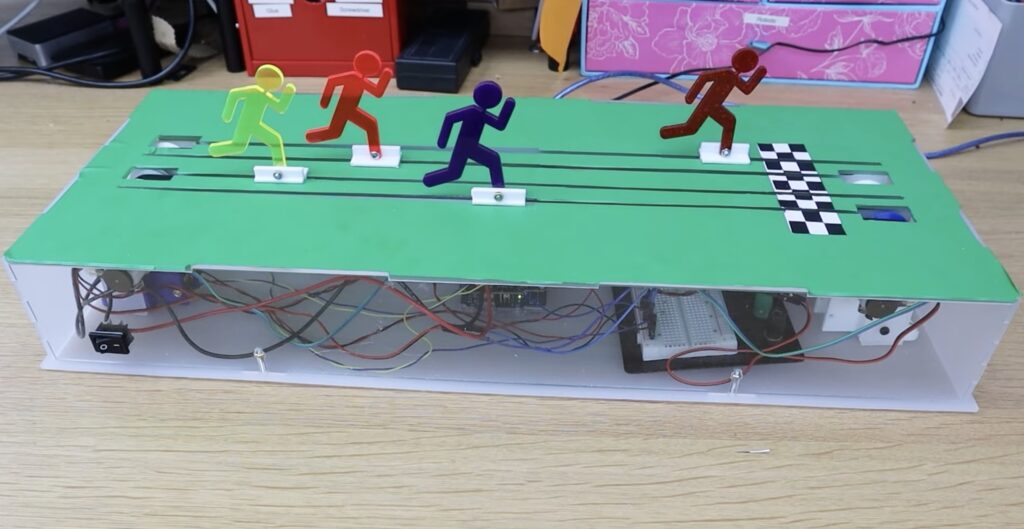
Every arcade seems to have one particular game that appeals to the gamblers among us: the horse race game. That game has several model horses and people can gamble on the outcome of their race. The results are either random or controlled by the players through some sort of input mechanism. In a new video, element14’s Lorraine Underwood explains how to recreate that game with an Arduino — but powered by people.
The game concept is similar to the horse race arcade game, except players run to influence the success of their respective racers. Those racers are little 2D people figures instead of horses. Everyone can run on their own schedule. Then, once everyone completes their run, the game shows the results by moving the figures across the track. This links to Strava, which is an app for tracking runs using popular devices like smartphones and smartwatches. Each player just has to complete a run as part of the group that Underwood set up for this purpose.
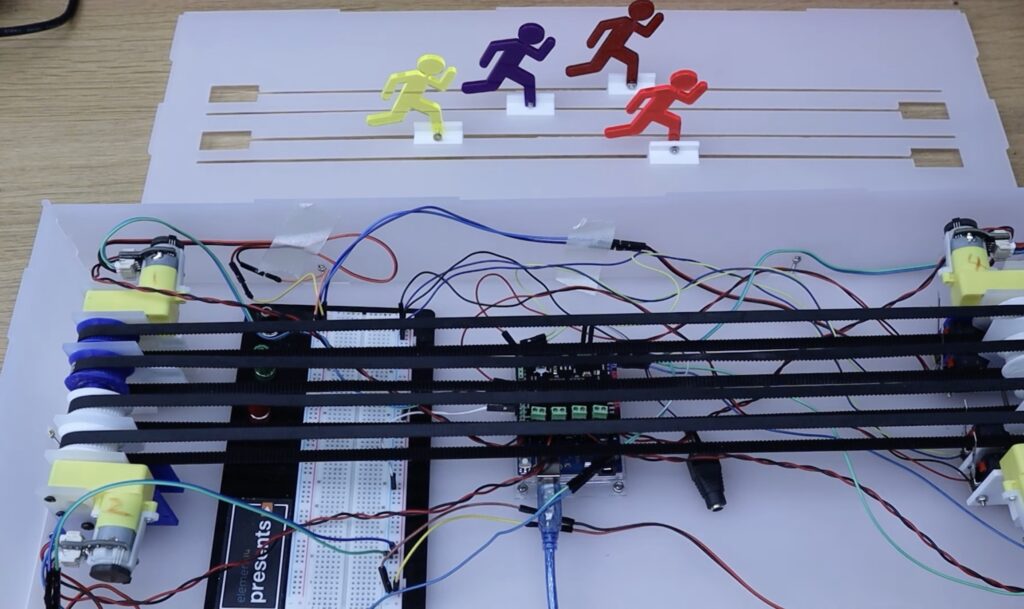
Because the game needs to pull run information from Strava’s API over the internet, Underwood chose to use an Arduino UNO WiFi Rev2 board. It controls the movement of each figure using a micro DC gearmotor with a belt. Those motors came from DFRobot and include encoders, which are helpful for ensuring the movement is exact. The game supports four players, so Underwood added a DFRobot quad DC motor shield to the Arduino to drive the motors.
The Arduino sketch connects to the local WiFi, then pulls the distance covered by each runner from the Strava API. It then scales that down to the distance of the game track and spins the motors until each figure reaches the corresponding distance.
We’ll be in California at the Santa Clara Convention Center June 20nd-22th for Sensors Converge, where the building blocks of IoT converge. As North America’s largest electronics event for design engineers, Sensors Converge brings together all the industrial components for innovative end to end commercial solutions design. Arduino will be there to give our take on open technology for industrial-grade applications at the speed of innovation.
At Arduino’s booth #1346, our experts will be on hand to showcase the Pro line of products with a few notable demonstrations. Our own Guneet Bedi to keynote on the innovation open environments offer to businesses, in addition to two other talks on agtech and the CHIPS Act. We look forward to sharing our business solutions for digital transformation with Arduino’s ease of use and open-source philosophy. We invite you to stop by the booth during the show or join us for one of our networking receptions.
The full schedule of Arduino events at Sensors Converge (all times PT):
Tuesday, June 20th
VIP conference reception sponsored by Arduino, 4-6pm, Hyatt Regency Rooftop.
Wednesday, June 21st
Keynote address “Open Source as the Future of Innovation: An Unconventional and Powerful Approach for Commercial Success,” with featured speaker Guneet Bedi (SVP and GM of the Americas), 2:40-3pm, Main Stage.
Agriculture track session “How an Open Ecosystem Promotes Smart Agriculture, Connected Irrigation, and Sustainable Natural Resource Use,” technical session from Allan Gagnon (Solutions Architect), 4:10-4:30pm, Grand Ballroom F.
Expo floor reception sponsored by Arduino, 4:30-6pm, Expo Floor.
Thursday, June 22nd
“Opportunities, Challenges and Collaboration: Government Policy Impact on the Semiconductor and Tech Industries,” panel featuring Guneet Bedi (SVP and GM of the Americas), 11:30am-12:10pm, Main Stage.
Arduino will feature its Arduino Pro ecosystem, designed for industrial and commercial environments. With a robust end-to-end ecosystem of system modules, intelligent sensors, ready-to-deploy open PLCs and cloud services, Pro ensures optimal performance and longevity, making it an ideal choice for businesses seeking dependable solutions. The company will be showcasing its Portenta, Nicla, and Opta products along with several demonstrations:
Um dir ein optimales Erlebnis zu bieten, verwenden wir Technologien wie Cookies, um Geräteinformationen zu speichern und/oder darauf zuzugreifen. Wenn du diesen Technologien zustimmst, können wir Daten wie das Surfverhalten oder eindeutige IDs auf dieser Website verarbeiten. Wenn du deine Einwillligung nicht erteilst oder zurückziehst, können bestimmte Merkmale und Funktionen beeinträchtigt werden.
Funktional
Immer aktiv
Die technische Speicherung oder der Zugang ist unbedingt erforderlich für den rechtmäßigen Zweck, die Nutzung eines bestimmten Dienstes zu ermöglichen, der vom Teilnehmer oder Nutzer ausdrücklich gewünscht wird, oder für den alleinigen Zweck, die Übertragung einer Nachricht über ein elektronisches Kommunikationsnetz durchzuführen.
Vorlieben
Die technische Speicherung oder der Zugriff ist für den rechtmäßigen Zweck der Speicherung von Präferenzen erforderlich, die nicht vom Abonnenten oder Benutzer angefordert wurden.
Statistiken
Die technische Speicherung oder der Zugriff, der ausschließlich zu statistischen Zwecken erfolgt.Die technische Speicherung oder der Zugriff, der ausschließlich zu anonymen statistischen Zwecken verwendet wird. Ohne eine Vorladung, die freiwillige Zustimmung deines Internetdienstanbieters oder zusätzliche Aufzeichnungen von Dritten können die zu diesem Zweck gespeicherten oder abgerufenen Informationen allein in der Regel nicht dazu verwendet werden, dich zu identifizieren.
Marketing
Die technische Speicherung oder der Zugriff ist erforderlich, um Nutzerprofile zu erstellen, um Werbung zu versenden oder um den Nutzer auf einer Website oder über mehrere Websites hinweg zu ähnlichen Marketingzwecken zu verfolgen.