Still, that just means I need to dig down into the documentation, and read the manual. I tried using Bard and ChatGPT to create working code, but it was all out-of-date or simply incorrect. I’m enjoying hacking through it all.
In the meantime, I’ve got it up and running with a direct Ethernet connection. This is handy, as I helped take some photos of Babbage (the Raspberry Pi mascot) for Part 5 of our Camera Module tutorial (issue 133, page 54).
On the whole, I’m pretty happy with how my little camera is coming along. Even if it looks a bit shonky and doesn’t fully work yet. That’s not always the point. Making my own camera is a fun project, but it’s also an important learning experience. You never quite learn as much as when making. I’ve learned more about the Raspberry Pi Camera Module and integration with Python and the picamera2 library, Raspberry Pi power requirements, and the windowing system over the last few weeks than I ever would just reading the documentation. Making remains quite humbling.
Live and learn
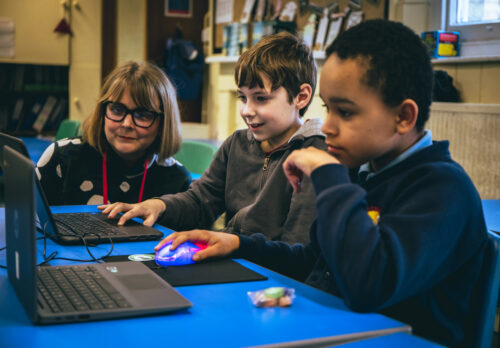
Another feature that really interested me this month is Work & Learn with Raspberry Pi (page 64). Raspberry Pi is increasingly becoming my go-to work computer, and I bought a 60% mechanical keyboard to keep my desk tidy and type better with Raspberry Pi.
It’s always interesting to me that Raspberry Pi was designed as a computer for making and hacking, but is increasingly useful for everyday computing tasks. It’s a perfect little Linux machine for doing the regular task of writing, editing, and commissioning all the other great people who work on this magazine. Of course, it helps that a lot of my work involves writing about Raspberry Pi, so doing that with Raspberry Pi feels nicely circular.
Learning has always been a fairly central part of my life. It’s always felt important to me to be developing myself. Sometimes it’s just personal development; sometimes on a professional front. But, as long as I end the day having a little more nounce than before, I can go to sleep happy.
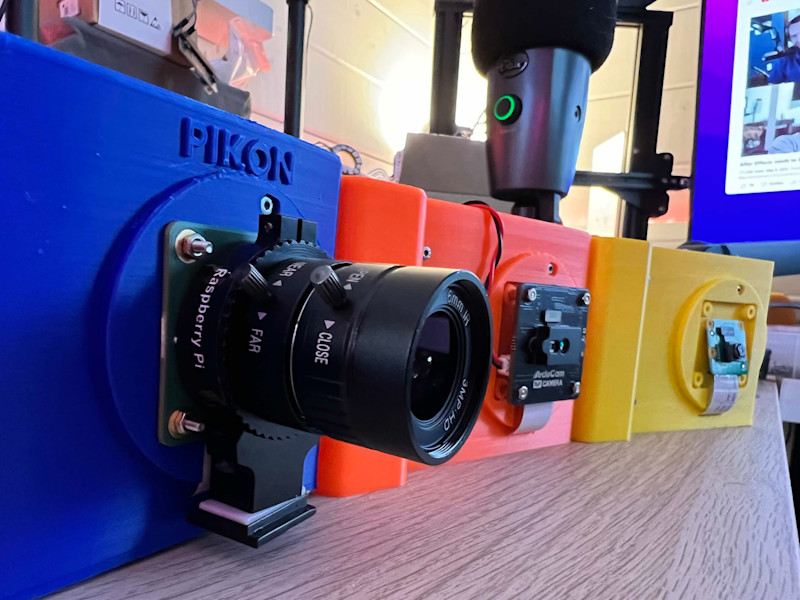
Building a robot is only half the battle, because you also need a way to control it. Something like a rover may work with a simple joystick or even typed commands. But complex robots often have many motors and controlling those all directly becomes a challenge. That’s why Will Cogley chose motion control for his bionic hand.
This is the newest iteration of a project that Cogley first started a few years ago. It is robotic hand meant to mimic a human hand as much as possible. Human fingers do not contain muscles. Instead, muscles in the forearms and palms pull on tendons to move the fingers. Cogley’s bionic hand works in a similar manner by using servo motors in the forearm to pull on cables that actuate the fingers. An Arduino UNO Rev3 moves the servos according to commands from a PC, but Cogley needed a way to streamline those commands.
Cogley chose a Leap Motion Controller for this job. It can track the motion of the user’s hand in near real-time and update a 3D model on the computer to reflect that. It displays that model in Unity, which is a 3D game engine that has the flexibility to perform in applications like this. Unity can determine the angle of each joint and Cogley was able to take advantage of the Uduino plugin to send servo commands to the Arduino based on those angles.
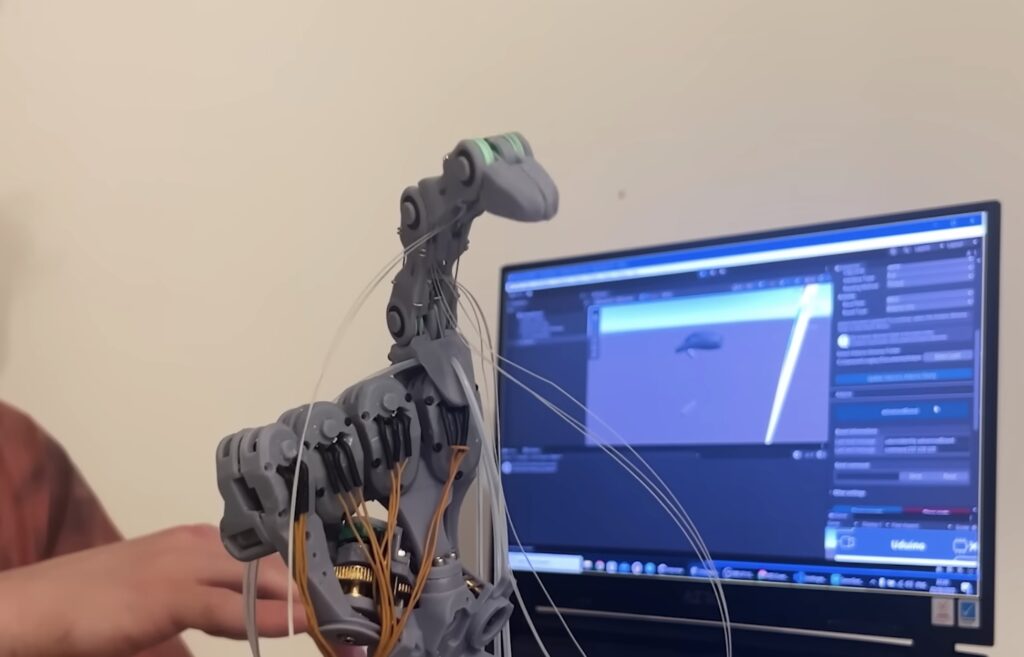
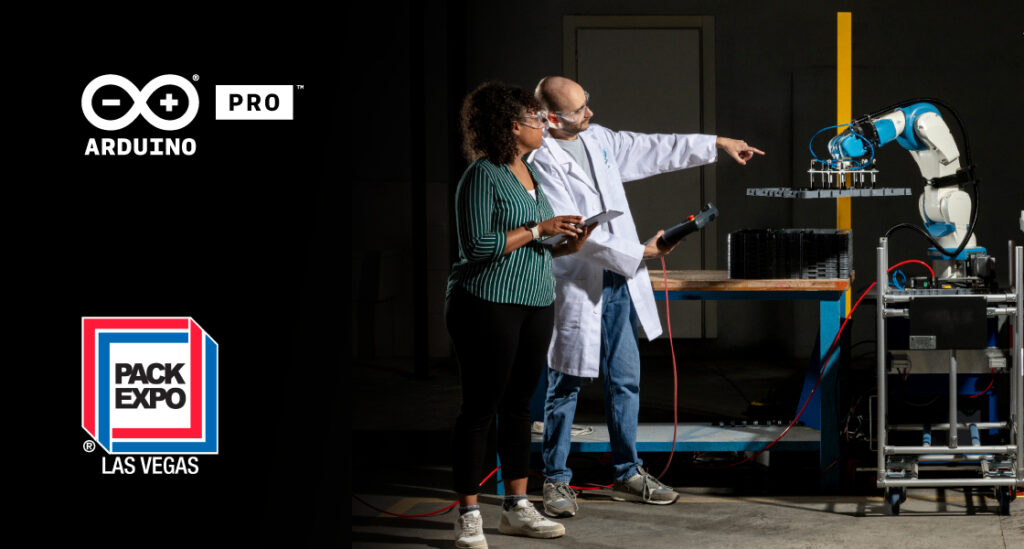
The Arduino PRO team will be exhibiting in Las Vegas next week at PACK EXPO 2023, the largest event for the packaging industry. From Monday, September 11th through to the 13th, meet our team at the Arduino PRO booth #7592 in the upper south hall.
This is the first year for Arduino PRO at PACK EXPO. The event is expected to bring over 26,000 attendees and 2,300 exhibitors from the packaging industry. Our industrial automation controllers, the Portenta Machine Controller (PMC) and Opta PLC have been particularly popular in the packaging industry. Ever since the launch of PMC, customers have recommended the expo, and we are excited to have this opportunity to exhibit.
The complete Arduino PRO product line will be featured on display, including the certified PMC and Opta PLC industrial controllers, the Portenta family of System-on-Modules, and the Nicla family of sensor boards. In addition, APS Engineering will be at the booth displaying their commercial inkjet fluid controller powered by the Portent Machine Controller.
The Arduino team will be joined by our newest system integrator partner, Dojo Five, who specializes in industrial firmware development. Throughout the event, our team of sales and solution architects are available live at the booth to walk through our solutions and discuss specific application architecture. Combined with the embedded software expertise of Dojo Five, attendees have the unique opportunity of a full end-to-end project consulting session live on the event floor.
The Arduino PRO team looks forward to meeting existing and potential new customers in Las Vegas – championing open source, accessibility, and flexibility in industrial-grade solutions at PACK EXPO.
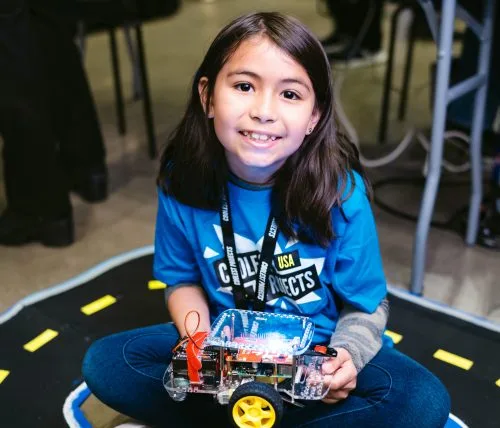
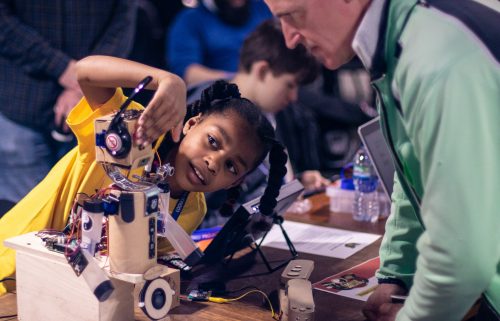
Lots of kids are excited about robotics, and we have the free resources you need to help your children start making robots.
What’s a robot anyway?
Did you know that the concept of robotics dates back to ancient Greece, where a mathematician built a self-propelled flying pigeon to understand bird flight? Today, we have robots assisting people in everything from manufacturing to medicine. But what exactly is a robot? Ask two people, and you might get two different answers. Some may tell you about Star Wars’ C3PO and R2D2, while others may tell you about self-driving cars or even toys.
In my view, a robot is a machine that can carry out a series of physical tasks, programmed via a computer. These tasks could range from picking up an object and placing it elsewhere, to navigating a maze, to even assembling a car without human interaction.
Why robotics?
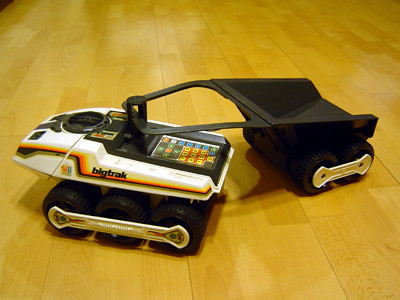
My first encounter with robotics was the Big Trak, a programmable toy vehicle created in 1979. You could program up to 16 commands into Big Trak, which it then executed in sequence. My family and I used the toy to transport items to each other around our house. It was a fun and engaging way to explore the basics of robotics and programming.
Understanding something about robotics is not just for scientists and engineers. It involves learning a range of skills that empower your kids to be creators of our digital world, instead of just consumers.
Robotics combines various aspects of science, technology, engineering, and mathematics (STEM) in a fun and engaging way. It also encourages young people’s problem-solving abilities, creativity, and critical thinking — skills that are key for the innovators of tomorrow.
Machine learning and robotics: A powerful duo
What happens when we add machine learning to robotics? Machine learning is an area of artificial intelligence where people design computer systems so they “learn” from data. This is not unlike how people learn from experience. Machine learning can enable robots to adapt to new situations and perform tasks that only people used to do.
We’ve already built robots that can play chess with you, or clean your house, or deliver your food. As people develop machine learning for robotics further, the possibilities are vast. By the time our children start their careers, it might be normal to have robots as software-driven “coworkers”. It’s important that we prepare children for the possible future that robotics and machine learning could open up. We need to empower them to contribute to creating robots with capabilities that complement and benefit all people.
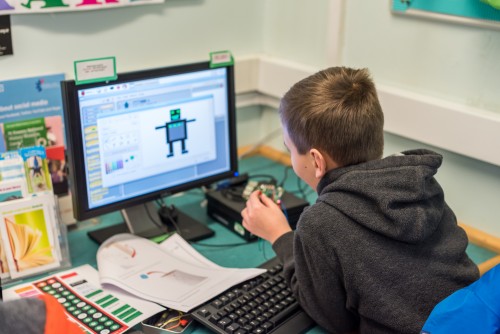
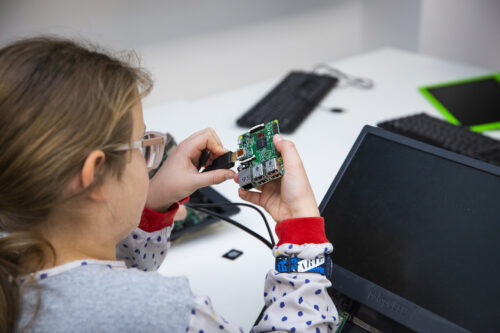
Kids will learn to create interactive stories, games, and animations, all while getting a taste of physical computing. They’ll explore how to use sound and light, and even learn how to create improvised buttons.
It’s a great way to delve deeper into the world of electronics and programming. The path includes a variety of fun and engaging projects that incorporate crafting and allow children to see the tangible results of their coding efforts.
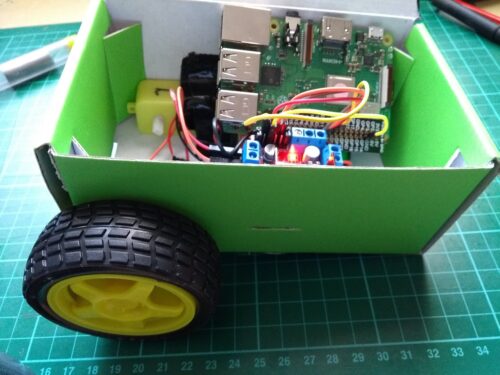
Build a robot
‘Build a robot’ is a project path that allows young people to create a simple programmable buggy. They can then make it remote-controlled and even transform it so it can follow a line by itself.
This hands-on project path not only teaches the basics of robotics but also encourages problem-solving as kids iteratively improve their robot buggy’s design.
The robot building community
Let’s take a moment to celebrate two young tech creators who love building robots. Selin is a digital maker from Istanbul, Turkey, who is passionate about robotics and AI. Selin’s journey into the world of digital making began with a wish: after her family’s beloved dog Korsan passed away, she wanted to bring him back to life. This led her to design a robotic dog on paper, and to learn coding and digital making to build that robot.
Selin has since built seven different robotics projects. One of them is IC4U, a robotic guide dog designed to help people with impaired sight. Selin’s commitment to making projects that help make the world a better place was recognised when she was awarded the Aspiring Teen Award by Women in Tech.
Jay, a young digital maker from Preston, UK, started experimenting with code at a young age to make his own games. He attended free local coding groups, such as CoderDojo, and was introduced to the block-based programming language Scratch. Soon, Jay was combining his interests in programming with robotics to make his own inventions.
Jay’s dad, Biren, comments: “With robotics and coding, what Jay has learned is to think outside of the box and without any limits. This has helped him achieve amazing things.”
Robotics and machine learning are not just science fiction — they shape our lives today in ways kids might not even realise. Whether your child is just interested in playing with robots, wants to learn more about them, or is considering a career in robotics, our free resources are a great place to start.
If a Greek mathematician was able to build a flying pigeon millennia ago, imagine what children could create today!
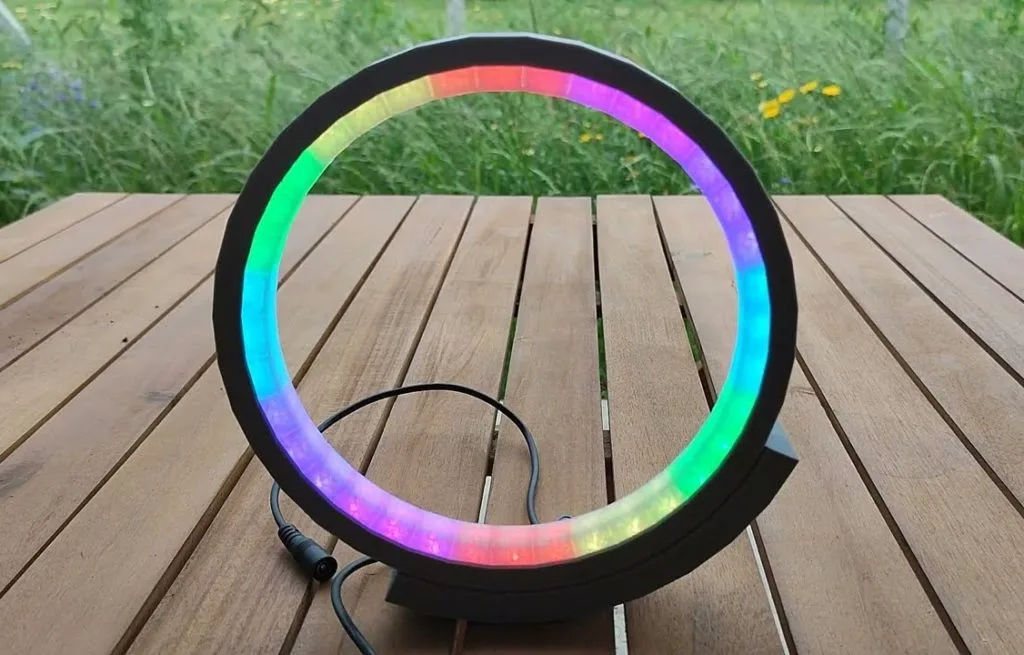
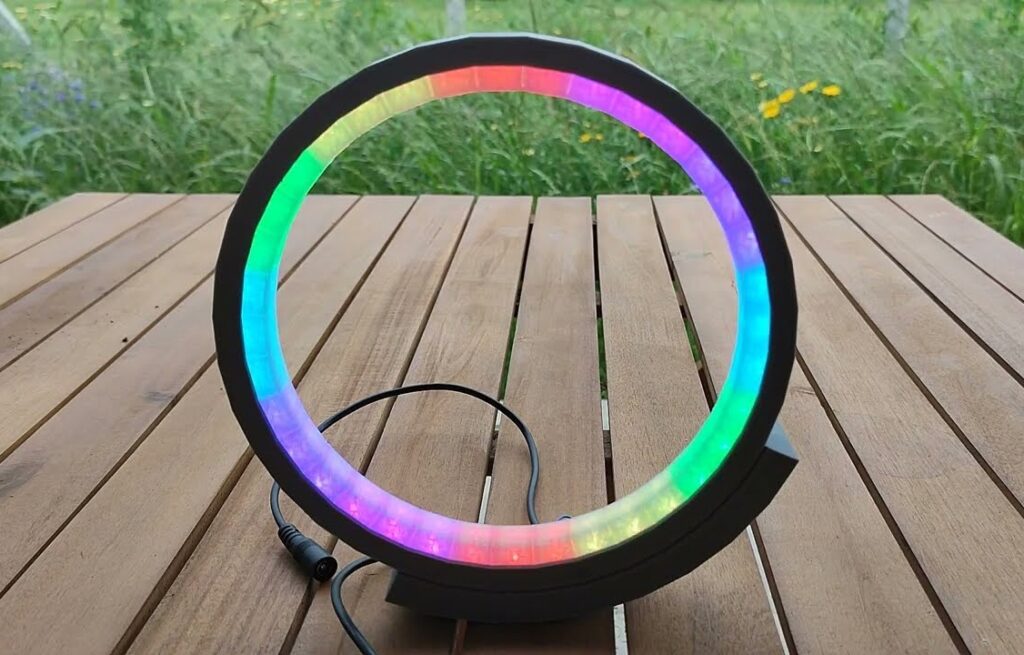
Individually addressable RGB LEDs like the WS2812B models are popular because they’re so easy to drive and don’t require any complex wiring. Each LED in the chain passes a signal on to its neighbor and you only need to know the position of an LED in the chain to control its brightness and color. This project from Andrei Erdei shows how to use that to great effect in a minimalist lamp.
This lamp is charming in its simplicity. It has an opaque outer ring with a slightly thicker base and a translucent inner ring to diffuse the LEDs. When all of the LEDs are a single color, it is a unique lamp. But because they’re WS2812B LEDs, you can take advantage of the available Arduino libraries to produce all kinds of interesting lighting effects.
The frame is entirely 3D-printable. The only required components are an Arduino Nano board, a strip of 36 WS2812B LEDs (the 60 LEDs per meter density), and a power supply. The tutorial provides a sketch with lighting effects and also explains how to work with the FastLED Arduino library. That library is fantastic for easily controlling dozens or even hundreds of LEDs, so you can create whatever effects you can imagine.
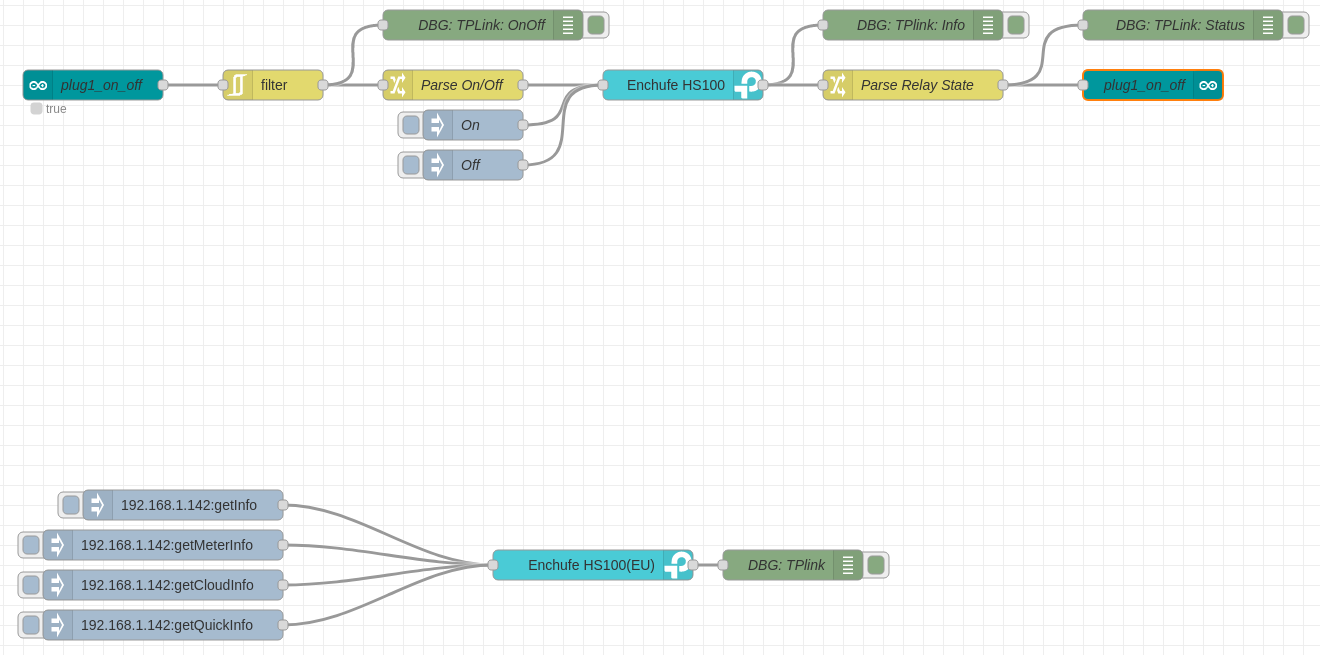
In today’s modern world, smart technology is revolutionizing the way we interact with our surroundings. From managing our home’s energy consumption to controlling appliances remotely — such as washing machines, fans, coffee makers, and even air conditioners. Smart devices offer us a level of convenience and control that was once unimaginable. However, dealing with multiple apps for various systems can be cumbersome and inefficient. This is where an integrated platform like the Arduino Cloud comes into play, offering a unified dashboard to control all your smart devices. Moreover, if you’re an Arduino enthusiast, you’ll be excited to learn how Node-RED can bridge the gap between commercial products and the Arduino Cloud. Last, but not least, you can integrate this project with the rest of your Arduino Cloud projects automating your appliance control using other devices’ data.
In this blog post, we’ll delve into a fascinating project that demonstrates how you can harness the power of the Arduino Cloud and Node-RED to control TP-Link smart plugs, giving you the ability to manage and monitor your appliances from a centralized hub.
TP-Link smart plugs and Kasa
TP-Link smart Wi-Fi plugs are intelligent devices that transform everyday appliances into smart ones, enabling remote control via your Wi-Fi network. These plugs are part of TP-Link’s smart home ecosystem, designed to offer enhanced convenience and control over your home appliances. To manage and control these smart devices, TP-Link has developed the Kasa Smart platform. Through the Kasa Smart app, you can easily schedule, automate, and control your connected devices, making your home even smarter. Importantly, Kasa Smart provides an API that facilitates seamless integration with other platforms.
Arduino Cloud: Simplifying IoT development
The Arduino Cloud is a versatile platform that simplifies the creation, deployment, and management of IoT devices. It supports a range of hardware, including Arduino boards, ESP32/ESP8266-based boards and devices programmed with Python, JavaScript or Node-RED. This platform is a boon for makers, IoT enthusiasts, and professionals, as it enables them to build connected projects without needing extensive coding skills. Arduino Cloud lets you manage and monitor connected devices through customizable dashboards, offering real-time visualizations of device data. These dashboards can be accessed remotely using your favourite browser or via the Arduino IoT Cloud Remote mobile app, available for both Android and iOS devices, ensuring that you’re in control no matter where you are.
Node-RED: Bridging the gap
Node-RED is an open-source visual programming tool designed to facilitate the connection and automation of devices, services, and APIs. Its browser-based flow editor enables users to effortlessly create workflows by dragging and dropping nodes onto a canvas and connecting them. Each node represents a specific functionality or service, such as data input/output, data transformation, or communication with external systems. Popular in the Internet of Things (IoT) realm, Node-RED simplifies the integration of sensors, devices, and cloud services, empowering users to craft sophisticated IoT applications and automation systems without traditional coding. In this blog post we will see how Node-RED can act as a middleware between TP-Link smart plugs and the Arduino Cloud.
Project setup: Getting started
To embark on this exciting journey of controlling TP-Link smart plugs with the Arduino Cloud and Node-RED, you’ll need a few prerequisites:
An instance of Node-RED (running locally or in the cloud)
No Arduino, ESP32, or ESP8266 devices are required for this project.
Step-by-step implementation
Here’s a concise overview of the steps you’ll undertake to bring your project to life:
Configure your TP-Link smart plug: Begin by adding your TP-Link smart plug to the Kasa app on your mobile device. This process connects your plug to both your Wi-Fi network and the internet, enabling remote control.
Create the device in the Arduino Cloud: In the Devices section of Arduino IoT Cloud, create a new device. This process involves selecting “Any Device” and following the instructions in the wizard. Don’t forget to save your Device ID and Secret Key.
Create the Node-RED flow: Access your Node-RED instance and import the provided code. This code configures the integration between the TP-Link smart plug, Arduino Cloud, and Node-RED.
Configure the Kasa and Arduino Cloud nodes: Within Node-RED, you’ll need to input the IP address of your TP-Link smart switch and configure the connection to Arduino Cloud using the API key you generated.
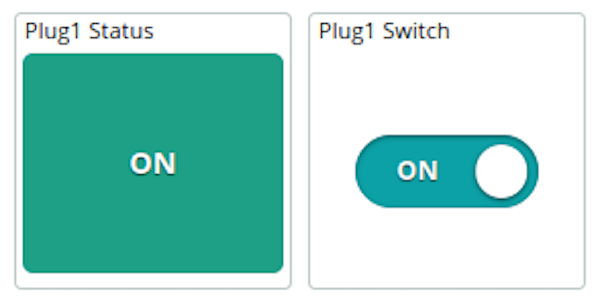
Create the Arduino Cloud dashboard: Navigate to the Dashboards section of the Arduino Cloud and create your dashboard. Customize it to your liking for easy monitoring and control.
Test the System: With everything set up, it’s time to test your creation. Access your Arduino Cloud dashboard to observe the status of your smart plug and control it using the provided button.
Try it now!
Experience the future of home control now. Discover how the Arduino Cloud and Node-RED combine to command TP-Link smart plugs. Create your Arduino Cloud account and dive in at the Project Hub project page and transform your home today!
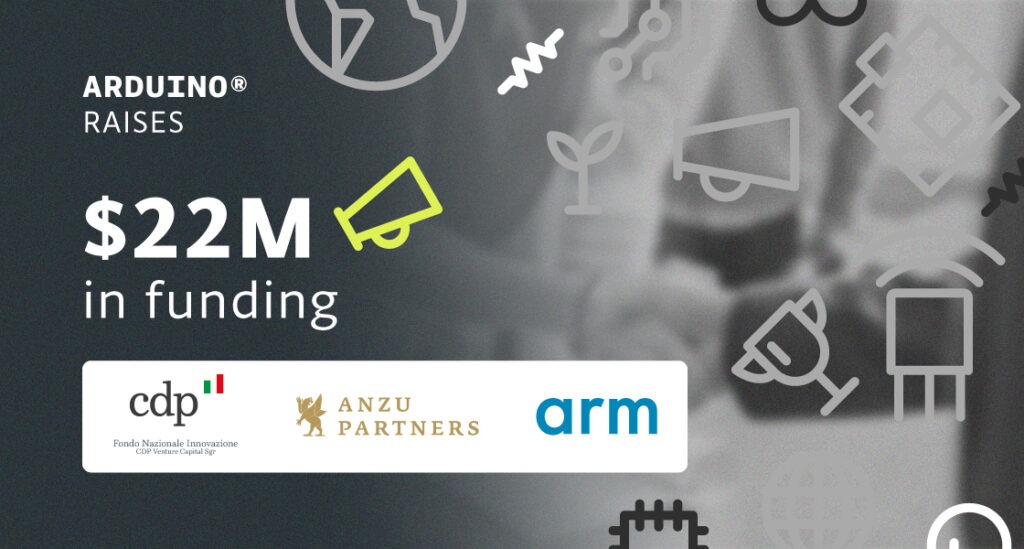
We are happy to announce that Arduino raised an additional $22 million round, taking our Series B funding to $54 million, thanks to an expansion co-led by CDP Venture Capital and Anzu Partners. Joining them is semiconductor leader Arm, following up on earlier investments.
CDP Venture Capital, Italy’s largest VC firm, invested through Large Ventures, launched in 2023 to support the scaling up of Italian global category leaders. “We are proud to support the dimensional leap of Arduino, a unique global excellence in the democratization of open-source hardware and software,” said Mario Branciforti, Head of CDP Venture Capital SGR’s Large Ventures fund.
After the first $32 million Series B financing received in 2022, “This investment will allow us to further fuel our transformational platform initiative for professional customers, lowering the barriers to entry in IoT and AI by providing a continuum from hardware to Cloud,” says Arduino’s CEO Fabio Violante.
Want to know more about how the funds will be put to good use? A major chunk will be invested to further strengthen the R&D team based in Turin, Italy, with the goal to grow enterprise application libraries and the Arduino Cloud for Business with more integrations and embedded AI features. Another consistent part is earmarked to help Arduino grow even more in the US, where we recently opened an office in Austin, TX and bolstered our presence in Chicago, IL. Finally, we will use the additional funds to accelerate go-to-market initiatives and customer support in selected areas.
“Arduino came a long way from its humble beginning, becoming a powerful industrial tool used by cutting-edge organizations all over the world. I’m honored by this investment which is a further confirmation that our original formula keeps applying to new domains.”
Massimo Banzi, Arduino’s co-founder, chairman and CMO
This continued and expanding confidence from investors reflects the quality of the work we’ve been able to do, building a global company based on the strong values we share with every user in our amazing community.
According to Jimmy Kan, Partner at Anzu Partners, “The enterprise ecosystem is on the cusp of a seismic transformation, driven by the convergence of efficient AI and IoT at the edge. Arduino stands at the heart of this revolution, and their commitment to innovation promises to redefine the industry norms.” Making technology accessible remains our mission, because the key to our success is empowering users: “Arduino supports an extensive community of developers who play a crucial role in accelerating the deployment of new computing solutions for IoT applications,” says Paul Williamson, senior vice president and general manager, IoT Line of Business at Arm.
Amidst great change, we take our role as enablers of innovation seriously, and strive to leverage every resource we can access to expand our platform, keep up our forward momentum, and always enhance our service to you – so you can create the world we will live in.
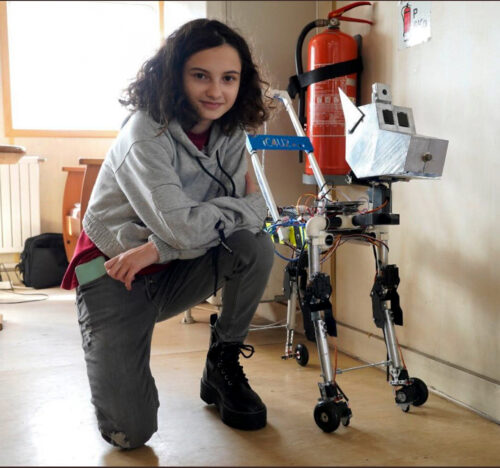
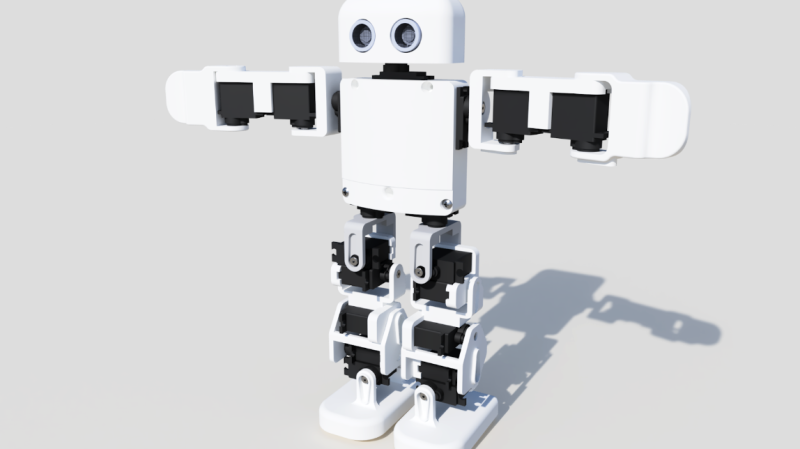
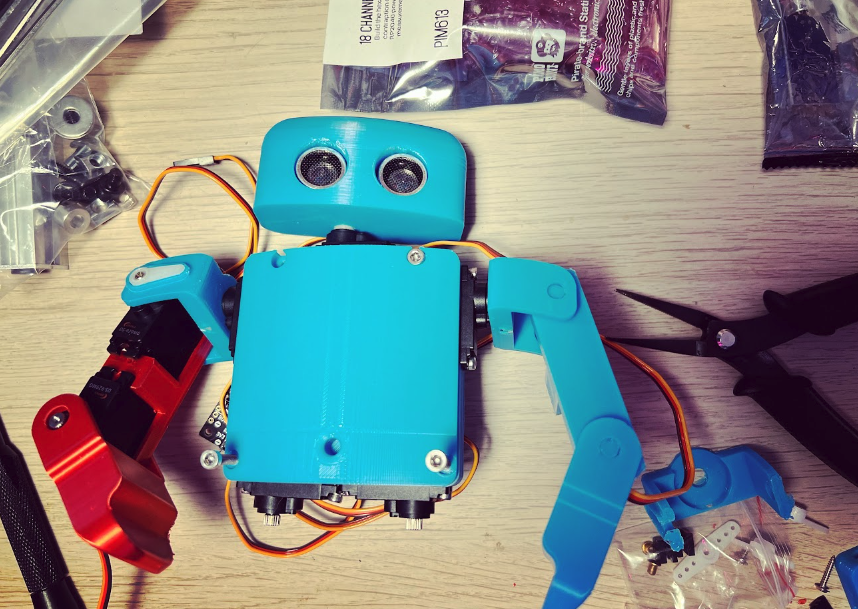
Kevin wanted to create a small bipedal robot so he could develop his expertise with walking and gestures. He relished the idea of designing something that would quite literally stand or fall depending on whether he was able to get the balance right, but also the instability needed to allow his electronic biped to walk. He envisaged a robot similar in looks to Plen (the first open-source, 3D-printable robot), with nods to Robosen (which makes the likes of Optimus Prime and Buzz Lightyear robots) and EZ-Robot, a self-assembly robot for educational use. Walking and smoothly extending the limbs were key, and meant Kevin would need to consider the robot’s aesthetic design and be vigilant about 3D-printing tolerances.
The ambitious robot design will provide “18 degrees of freedom” proclaimed Kevin part-way through the build, “and move in 18 different ways.” The hands, arms and shoulders, hips, upper leg, knee, lower leg, shin, and foot will all articulate, while the neck will be able to rotate. All of this necessitates a board with 18 servo sockets, hence Kevin’s choice of Pimoroni’s Servo 2040 board based on the RP2040 chip. A clear advantage for Kevin was being able to program everything in MicroPython, his first choice of programming language due to its simplicity. The straightforward code is pretty important as Kevin aims to put together a tutorial for Chip which all ages will be able to follow. He also rates Pimoroni’s documentation and support, and says “Pimoroni includes some great servo classes that have servo easing to make motion really buttery smooth.” Even so, he needed to adjust the tolerance (distance between the two arms between each servo) so the servos would move freely.
Rock solid foundations
Kevin says using the RP2040-powered Pimoroni Servo 2040 board meant he could get straight to the interesting part of this project, designing the parts and constructing them. The Raspberry Pi RP2040 chip at its heart “has plenty of power and flexibility to enable me to add extra sensors, such as an IMU (inertia measurement unit), so the robot can balance and keep itself upright.” However, it didn’t all go quite to plan: “I burned out a couple of servos making this project; the joints were too stiff, and I cranked up the amperage to see if they could move it better, and magic smoke appeared.”
Despite his experience in 3D printing and robot design, Kevin found he had to print several versions of each part to get the fit just right. “Designing the model in 3D doesn’t always highlight the issues you find after 3D-printing the model,” he explains. He was able to reduce the printing time as he has two 3D printers, but one uses red filament, so the pieces then didn’t match, necessitating a complete body spray to give Chip the intended look.
We think Chip looks great and will be keeping an eye on Kevin’s blog to see how the self-balancing feature based on the PID algorithm comes along. Having splurged on 19 servos costing £9 each, Kevin admits Chip is an expensive build, but loved bringing him to life: “Seeing a little human-like robot walking around is too much fun!”
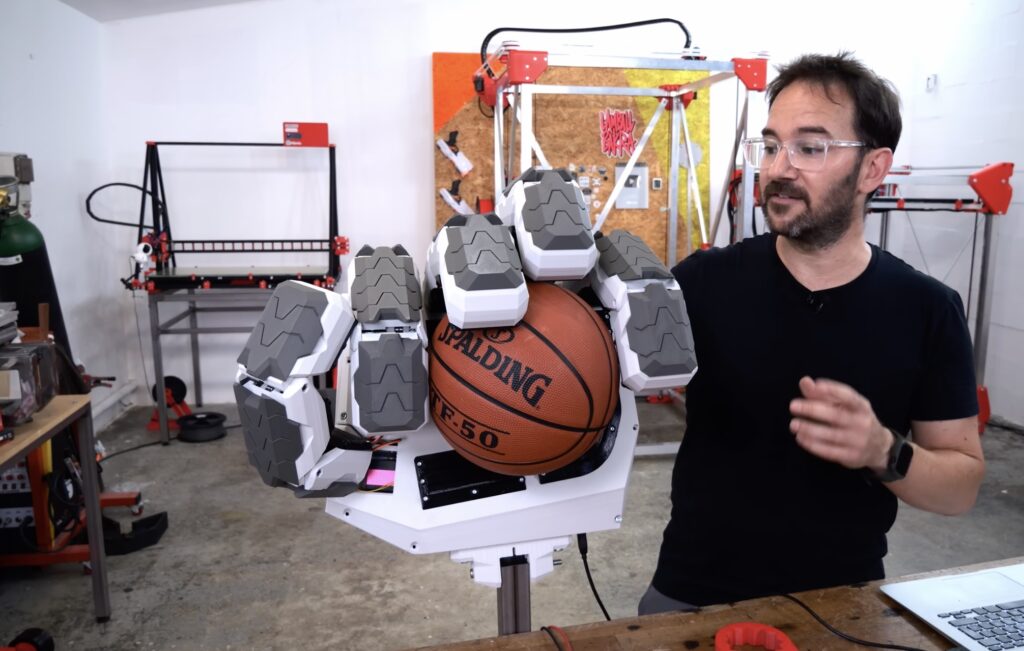
Ivan Miranda has a humble dream: he wants to build a massive 3D-printed robot that he can ride upon. In other words, he wants a mech. But that is obviously a very challenging project that will take an incredible amount of time and money. So he decided to test the waters with one piece of the mech: a huge 3D-printed robotic hand.
Miranda designed this robotic hand at the scale necessary for an enormous rideable mech, but he has only built the one hand at this point. This let him test the idea before jumping into the deep end with the full project. The structure and most of the mechanical components were 3D-printed. It has four fingers and a thumb, each with three joints (like a real human hand). It is mostly rigid PLA, but there are some flexible TPU parts that add grip.
Servos actuate all 15 of those joints. Most of them have 11kg-cm of torque, but the base of each finger has a more powerful servo with 25kg-cm of torque. An Arduino Mega 2560 controls all of the servo motors with pulse-width modulation (PWM) signals. Power, of course, comes directly from the power supply and not the Arduino.
In testing, the hand seems to work quite well. It can move and grip large objects, though the belts do slip and need to be replaced with a type that can’t stretch. We’re not sure if Miranda will complete the entire mech, but we sure hope that he does!
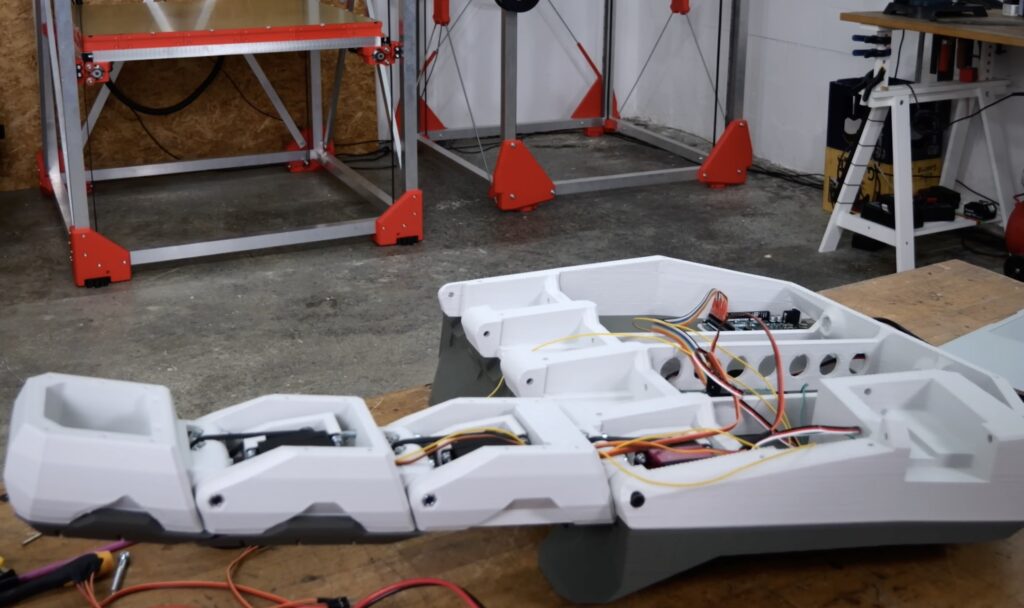
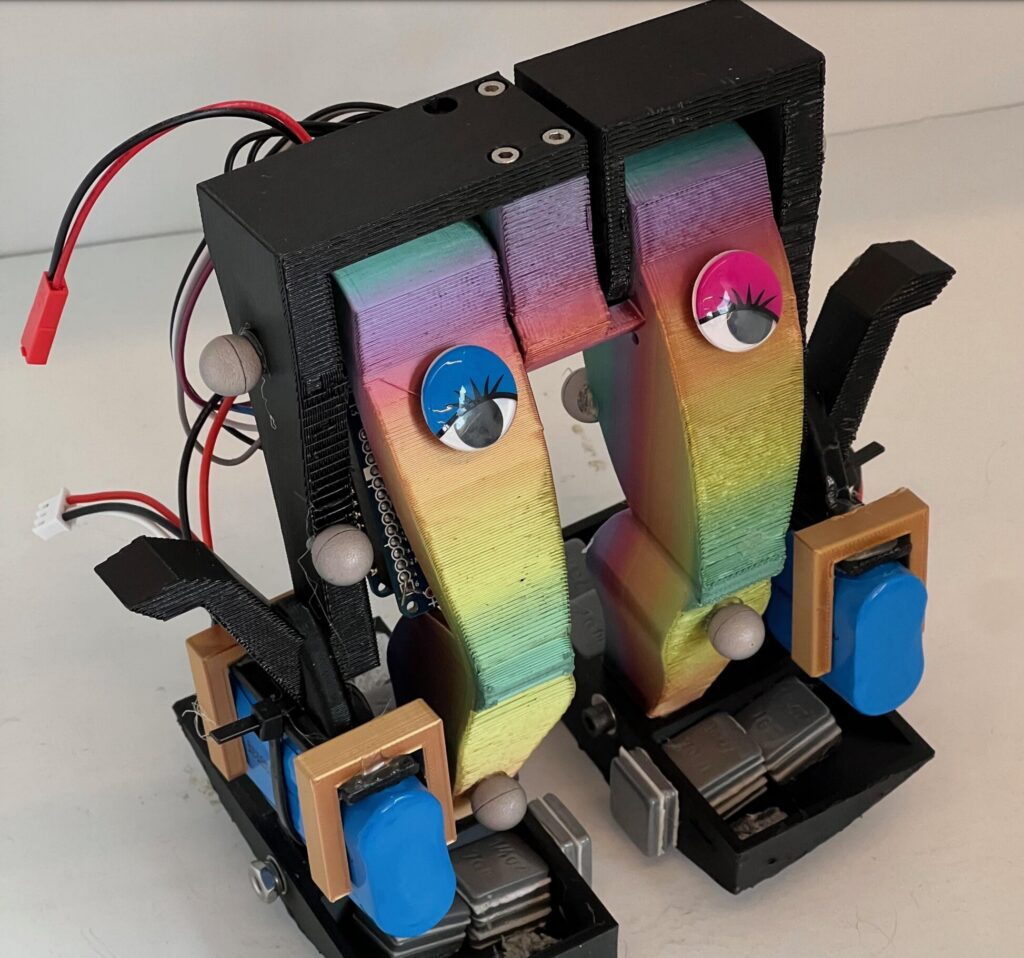
A popular goal among roboticists is animal-like locomotion. Animals move with a fluidity and grace that is very hard to replicate artificially. That goal has led to extremely complex robots that require a multitude of motors and sensors, along with heavy processing, to walk. But even those don’t quite match biological movement. Taking a new approach, engineers from Carnegie Mellon University and the University of Illinois Urbana-Champaign created a simple bipedal robot named “Mugatu” that walks using a single actuator.
This approach is counter-intuitive, but quite sensible when we actually look at the gaits of real animals. Bipedal animals, such as humans, don’t need to engage many muscles when walking on flat surfaces. We achieve that efficiency with balance and body geometry evolved for this purpose. In a sense, a walking human is always falling forward slightly and redirecting their inertia to take a step. This robot walks in a similar manner and only needs a motor to move one leg forward relative to the other.
The team built Mugatu using 3D-printed legs connected by a servo “hip” joint. An Arduino MKR Zero board controls that motor, moving it with the precise timing necessary to achieve the “continuous falling” gait. This prototype doesn’t utilize it yet, but there is also an IMU in the left leg that could provide useful feedback data in the future. For now, the robot relies on pre-programmed movements.
A few years ago, Austin Blake built an electric go-kart that looked like a Tesla Model S. It had the plastic shell from a kid’s Radio Flyer ride-on vehicle, but on top of a custom go-kart frame with a powerful electric motor. That looked like a Tesla, but it didn’t really act like one because it lacked self-driving capability. Now Blake has finally addressed that oversight and given his Tesla go-kart an Arduino-based autopilot.
Tesla’s autopilot and full self-driving features don’t allow for 100% autonomous driving, but they get pretty close. Blake’s autopilot is much more limited, but still impressive. It can steer the go-kart around a known track while Blake handles the throttle and brakes. However, it can only follow the course it was trained on and can’t deviate from that without issues. It also can’t account for unusual events, like a pedestrian in the “road.”
Blake’s autopilot works using a machine learning model running on a laptop, which controls the steering and receives steering angle information from a pair of Arduino Nano boards. The laptop looks at the road through a trio of Logitech webcams and those were also used to gather the training images. A large motor from a power chair rotates the steering column and a potentiometer monitors that rotation, so the two work together like a servo motor.
Many times every second, the machine learning model looks at a frame from the video. Based on its training data, it determines what steering angle best matches the current view. It then turns the steering motor until it reaches that steering angle. The disadvantage of this technique is that it will always attempt to follow the same route as it was trained on and is therefore unable to navigate a new route.
Today, Arduino officially announced its partnership with Amazon Web Services (AWS), offering a new path for the future of edge hardware and cloud services. The new partnership will provide Arduino products and Arduino Cloud customers more options to integrate AWS into IoT projects.
One big cloud for all
It might be news to learn that Arduino Cloud has run on AWS infrastructure from the beginning three years ago. Since that launch, Arduino has increased its investment in the product, growing the team, adding new features, and creating versions for Business and Education. It turned out to be the right decision, as we hear from our customers about how much the progress has helped them achieve both personally and professionally.
Speaking of achievements, it is incredible to report that Arduino Cloud has crossed a milestone. Our cloud now process 4 billion device messages each month! This astonishing accomplishment marks us as one of the more significant IoT SaaS platforms deployed on AWS. Thank you to all of our customers and contributors!
Businesses <3 Arduino Cloud, too
Our Cloud for Business solution is one of the areas in which we are heavily investing and growing the fastest. We have received great feedback on how quick commercial customers can realize value from the core features and our integrations with Edge Impulse and Foundaries.io.
For example, one of our customers, ABM Vapor Monitoring, built a connected contamination monitoring product for commercial buildings using the Arduino Pro Opta PLC. After evaluating different cloud options, they picked Arduino Cloud, and the feedback was great.
“Choosing Arduino Cloud for our [regulated air quality] application slashed product development time by six months and saved us over $250,000 in engineering services. Arduino Cloud has been an instrumental partner in our journey to introduce new products to the market.”
What this partnership means
Considering our professional customers was the driving motivation behind this partnership announcement with AWS. We continue to hear from businesses how they appreciate our device management, particularly the automatic industrial-grade secure connection and over-the-air firmware updates.
As these customers’ business grows and their product offerings evolve, it is easy to understand how some of the excellent cloud services from AWS could benefit their applications. As a company, Arduino wants to support everyone with an open ecosystem, and from that perspective, this partnership with AWS began.
Officially, Arduino joined the AWS ISV program. It is a program designed for SaaS providers built on AWS, like Arduino Cloud, to work with AWS in supporting medium to large customers with architecting custom solutions. Joining this program also provides access to a vast network of over 100,000 AWS Partners worldwide. This means both existing AWS and Arduino customers will experience streamlined support for integrating each cloud with one another.
In addition, Arduino currently has 12 devices in the process of achieving AWS Device Qualification status. This means our devices will officially be recognized by AWS and provide customers architectural documentation to help simplify the complexity of developing an end-to-end solution.
Just the beginning
We hope this article helped convey that this collaboration between Arduino and AWS is not just another partnership; it is a strategic effort that aims to simplify and accelerate the deployment of commercial IoT and cloud-based solutions. It’s an important step forward in connecting the capabilities of edge hardware with the immense potential of cloud computing.
The future for IoT and cloud computing looks promising, and we are eager to see what innovations this partnership will unlock for our customers.
Use ready-made emulation distributions to turn Raspberry Pi into an all-in-one emulator that can play the best classic and modern retro games. This total guide to emulation features distributions, BIOS download status, console and desktop emulation. Plus: where to get your game ROMs safely and legally.
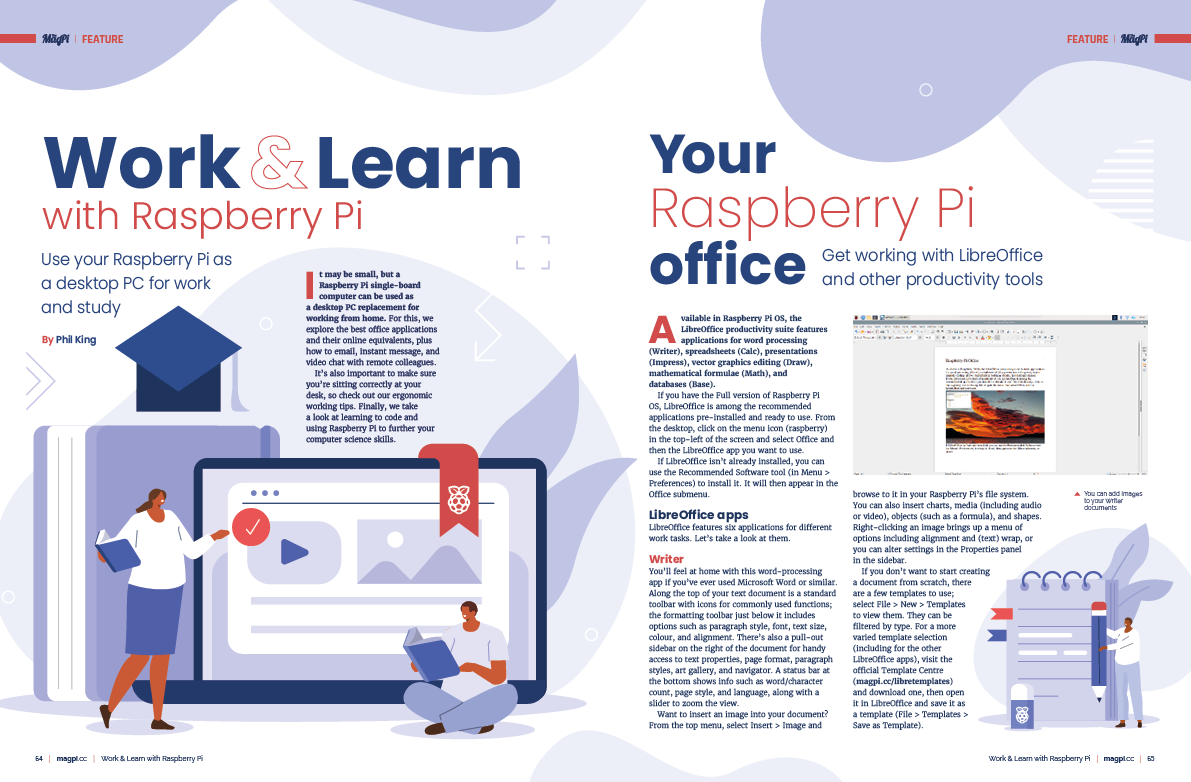
Work & Learn with Raspberry Pi
Raspberry Pi may be a small computer, but it’s packed with power and has a great operating system. In this feature, we look at using Raspberry Pi as your main computer. Discover all the productivity features in Raspberry Pi OS, and how to set up Raspberry Pi for a full day’s work.
HannahMakes
Every month we interview some of the greatest makers from Raspberry Pi’s community. Hannah is a specialist journalist turned special effects technician who makes amazing projects and shares them on YouTube.
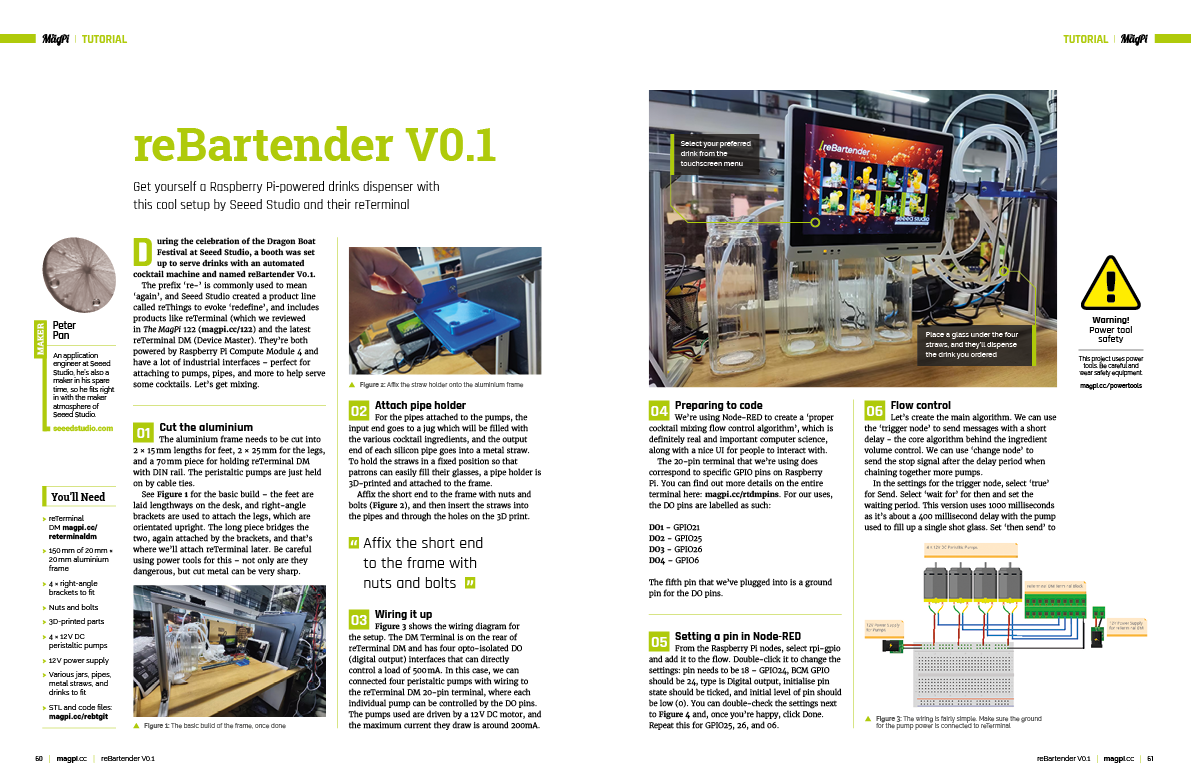
reBartender V0.1
Build your own Raspberry Pi-powered drinks dispenser with this cool setup by Seeed Studio and their reTerminal device. This step-by-step build shows you how to assemble an incredible drinks robot. Parties will never be the same!
Badgercam
Keep an eye on critters from a safe distance with minimal interference. This Badgercam shows how one maker built a solar and wind-powered camera that monitors badgers. We interview wildlife enthusiast Philip Mill about his incredible remote nature project.
Chip Bipedal Robot
Kevin McAleer is an accomplished maker and his latest build is a cute companion built from 3D-printed parts and Pimoroni’s Servo 2040 board. The result is a walking Raspberry Pi Pico-style robot with an ultrasonic range finder for eyes. We think Chip is super cute
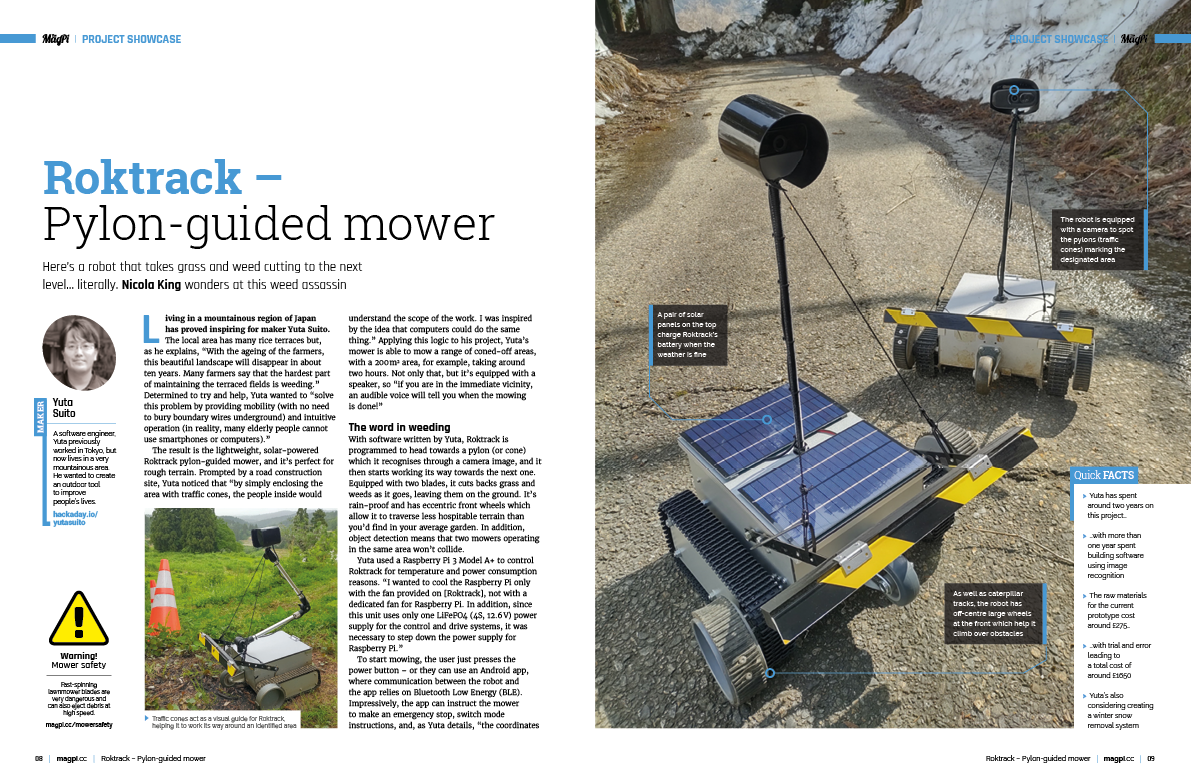
Roktrack
Living in rural Japan poses challenges. One of which is elderly farmers maintaining rice terraces and the fear that they may disappear with cultivation. Yuta Suito set about building a robot that can mow and weed. Meet Roktrack – a small solar-powered robot that can handle rough terrain and uses traffic cones for navigation.
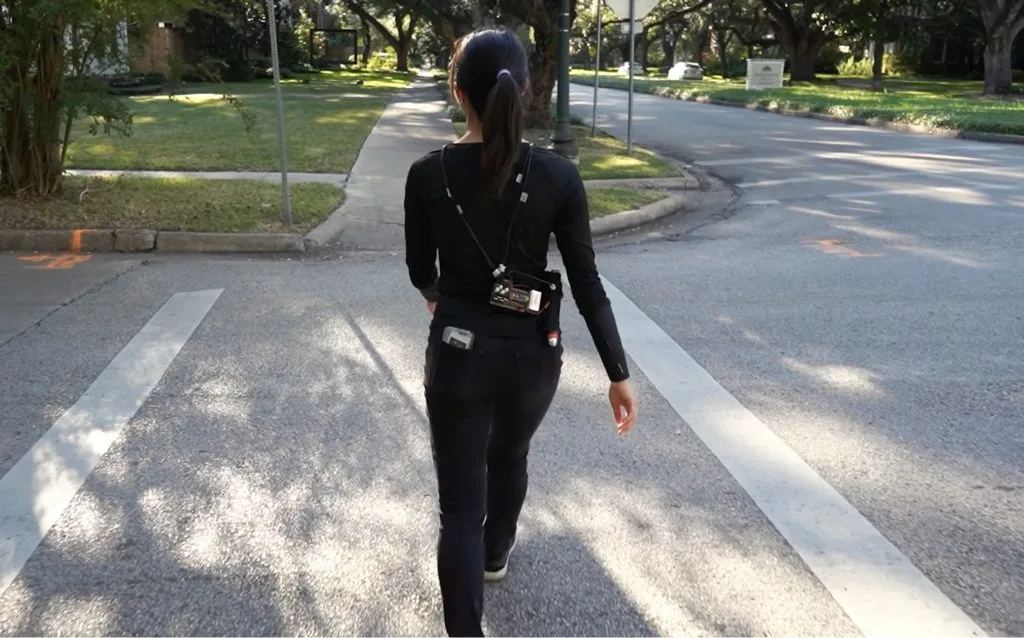
Most people today rely on technology to navigate through the world. That is practical thanks to the reliability of modern GPS. But receiving directions can be difficult for people with certain disabilities. People who are blind, for instance, cannot look at a map on a smartphone. People with missing limbs may not even be able to hold a smartphone. To help those people, Rice University engineers have developed a lightweight wearable device that uses pressurized air to provide directions.
Instead of displaying a graphical map, this device indicates to the user when they should make a turn. It does so through pneumatic haptic feedback. The device’s electronic components attach to wearable textiles, so it is out of the way. Pneumatic hoses run from the device to nozzles pointed at the user’s skin. The locations of those nozzles can be tailored to suit the user’s preferences and physiology. When the device needs to alert the user, such as when a turn is coming up, it will open a valve to the appropriate hose so air blows on their skin.
The Rice engineers designed a prototype to test this concept, which uses an Arduino Nano board for control. The Arduino opens the solenoid valves through MOSFETs and it receives commands from an external device, like a computer, via a four-channel 433MHz receiver. Air comes from canisters of compressed CO2 through a pressure regulator.
Save 35% off the cover price with a subscription to The MagPi magazine. UK subscribers get three issues for just £10 and a FREE Raspberry Pi Pico W, then pay £30 every six issues. You’ll save money and get a regular supply of in-depth reviews, features, guides and other Raspberry Pi enthusiast goodness delivered directly to your door every month.
Moonhack is a free global, online coding challenge by our partner Code Club Australia, powered by Telstra Foundation. It runs once a year for young learners worldwide. In 2022, almost 44,000 young people from 63 countries registered to take part.
This year, Moonhack will happen from 10 to 26 October, to coincide with World Space Week 2023. The challenge is open to all young learners, wherever they are in the world, and features six brand-new projects that focus on space and innovation. We caught up with Kaye North, Community and Engagement Manager at Code Club Australia, to find out more.
What’s new for 2023?
Moonhack 2023 offers access to engaging new projects for Scratch, micro:bit, and Python. For the first time ever, young people will also have the option to follow a project brief to code their own solution to a space-based issue, using a programming language of their choice.
In keeping with this year’s theme — which was inspired by the World Space Week 2023 theme of ‘Space and Entrepreneurship’ — the new Moonhack projects showcase inventions that were created for space exploration but are now used in everyday life, such as mobile phone cameras and LEDs.
Kaye shared that in Australia, inventions created for space travel and exploration are part of the science curriculum at primary school level. She hopes that this year’s Moonhack will help more young people understand how space exploration and coding are connected to their daily lives.
What will young people gain from taking part in Moonhack?
Moonhack features six unique coding projects, giving young people of all ages and experience levels the opportunity to engage and learn. The project brief introduced this year encourages participants to be creative, coding a solution on any platform they choose.
Coders who respond to the project brief will also be in with a chance of having their project selected to be developed into an official Code Club Australia project, for other young people and educators around the world to enjoy.
Kaye emphasised that Moonhack is about more than just taking part in a global event; it also helps young people to better understand the real-world opportunities that coding can offer.
“The more kids we expose this to, the better, expanding coding past just coding and having purpose behind it. And I do try to link things in so that we’re connecting with real-world context, careers…”
Kaye North
How your young coders can get involved
Registration for Moonhack 2023 is open now. The challenge runs from 10 to 26 October, and projects can be submitted until 30 November. Participation is free and open to any young coder, whether they are part of a Code Club or not. The 2023 projects are already available in English, Arabic, Croatian, Dutch, Filipino, French, Greek, Hindi, Indonesian, Mandarin, Portuguese, and Spanish, and will be available in more languages soon.
To find out more and register to take part, visit the Moonhack website.
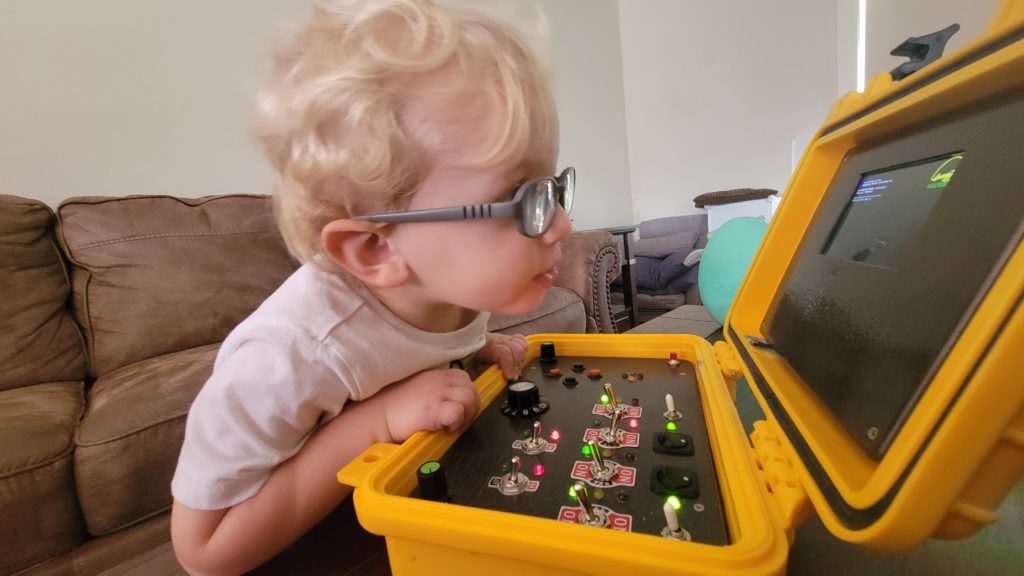
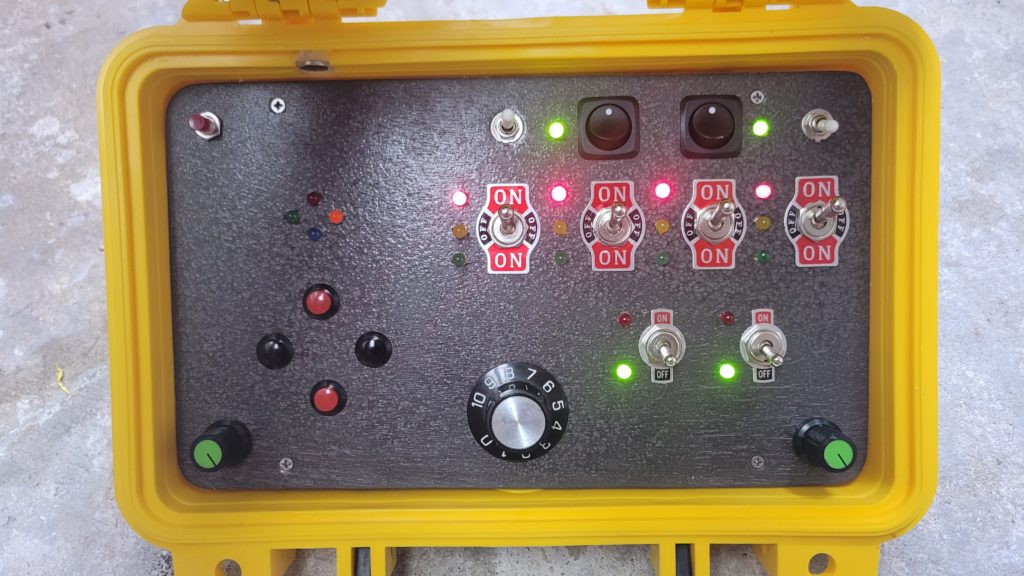
The cyberdeck community has exploded in recent years, because makers like to use their creativity to create custom machines tailored to their tastes and requirements. But the community has overlooked one very significant target market: toddlers. Young kids love fiddling with buttons and switches, and there is a plethora of evidence that suggests that interactive toys are good for development. With that in mind, a hacker dad named Josh built his son this cyberdeck for little ones.
Unlike most cyberdecks, this doesn’t actually have to do any real computing. Josh’s son won’t be performing any pentesting with Kali Linux. Instead, it just needs to be fun and engaging for a two-year-old. That means lots of switches, buttons, dials, and LEDs. The top does have a single-board computer and screen from a promotional video player, but it is self-contained and just loops videos. All of the real magic happens in the bottom half.
Josh created this cyberdeck using a waterproof hard case. The bottom half has a panel covered in buttons and switches. Each of those also has a corresponding LED. An Arduino Mega 2560 board monitors the states of the inputs, then sets the LEDs accordingly. Right now, that is just a one-to-one direct relationship, so flipping a particular switch turns a specific LED on or off. But Josh envisions more complicated relationships, like logic puzzles, that he can incorporate as his son gets older. Implementing those would be as simple as uploading new sketches to the Arduino.
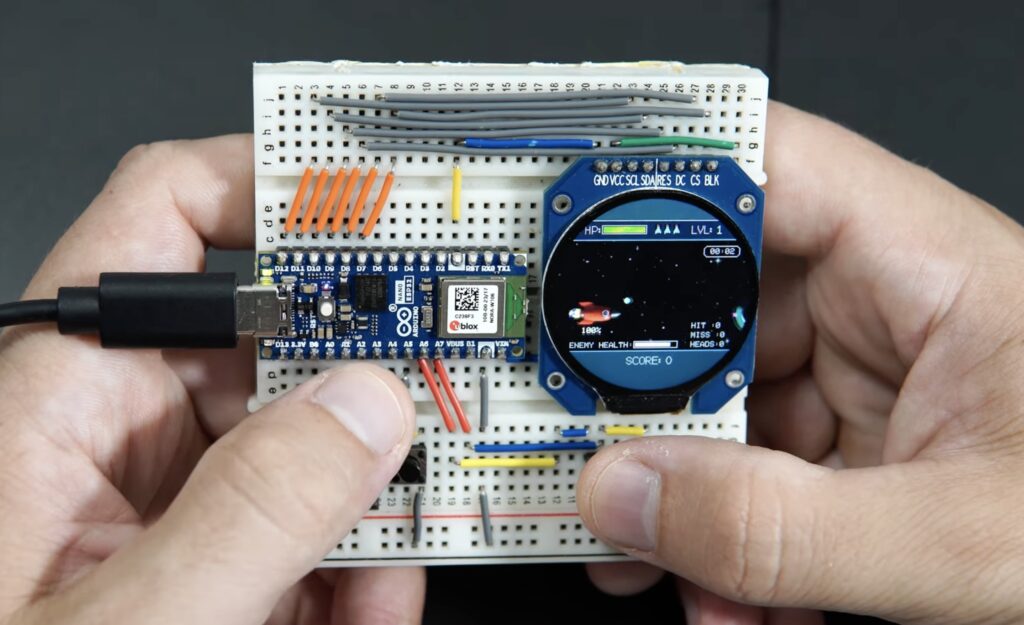
There is a thriving Arduino gaming community, with many homebrew video games developed to run on Arduino development boards. Arduboy, for example, produces custom handheld consoles with games that can also run on Arduino hardware. However, many boards have microcontrollers with limited processing power and memory, which means the graphics have to be simple. But Volos Projects took advantage of the new Nano ESP32 to build a portable gaming device with full-color graphics.
As the name suggests, the Nano ESP32 makes use of the popular Espressif ESP32. That has more processing power and memory than most other MCUs, as well as built-in Wi-Fi® and Bluetooth® adapters. In this case, the ESP32’s impressive power was enough to generate colorful video game graphics at a respectable resolution.
As a demonstration, Volos Projects put together a simple handheld system on a breadboard. Other than the Arduino, this only required a 1.28″ round GC9A01-driven TFT LCD, some jumper wires, and a few buttons. Those are two-pin momentary push buttons, which are nice because they eliminate wiring confusion. Volos Projects then programmed a basic side-scrolling space shooter game to run on this hardware.
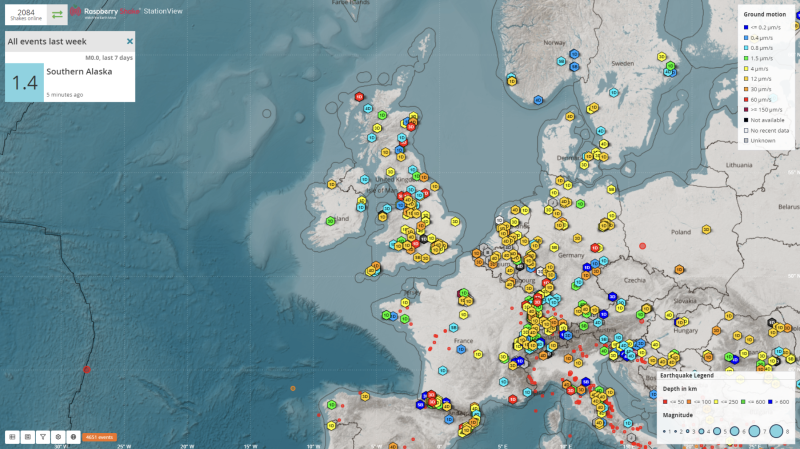
What interesting ways have people used Raspberry Shake?
Mike: The world went quiet during Covid, with everyone indoors, shut away. Our network is the largest seismic network in real time around the world and we noticed that the human noise of people walking around, traffic, etc., went quiet. It generated some buzz in our community.
It allowed for seismographs to actually detect more of the Earth’s rumble, but on the other side it was fascinating how much noise was reduced, and there was a study done on it in Science.
Branden: There were 72 authors for the paper. 71 of them are professional seismologists… and then there’s one person who is listed as a co-author who is a citizen scientist from our community.
Mike: Raspberry Shakes and Booms have been used in wildlife conservation. So for detecting elephants, how they communicate with each other, and it’s been used in a savannah in Africa.
And also for conservations efforts for the black-footed ferret. A zoo worked alongside seismologists, and what they did was try and find new habitats for the ferret. So they set up Raspberry Shakes in various habitat zones, because they’re very sensitive to vibrations so, as an endangered species, they want to make sure they’re happy.
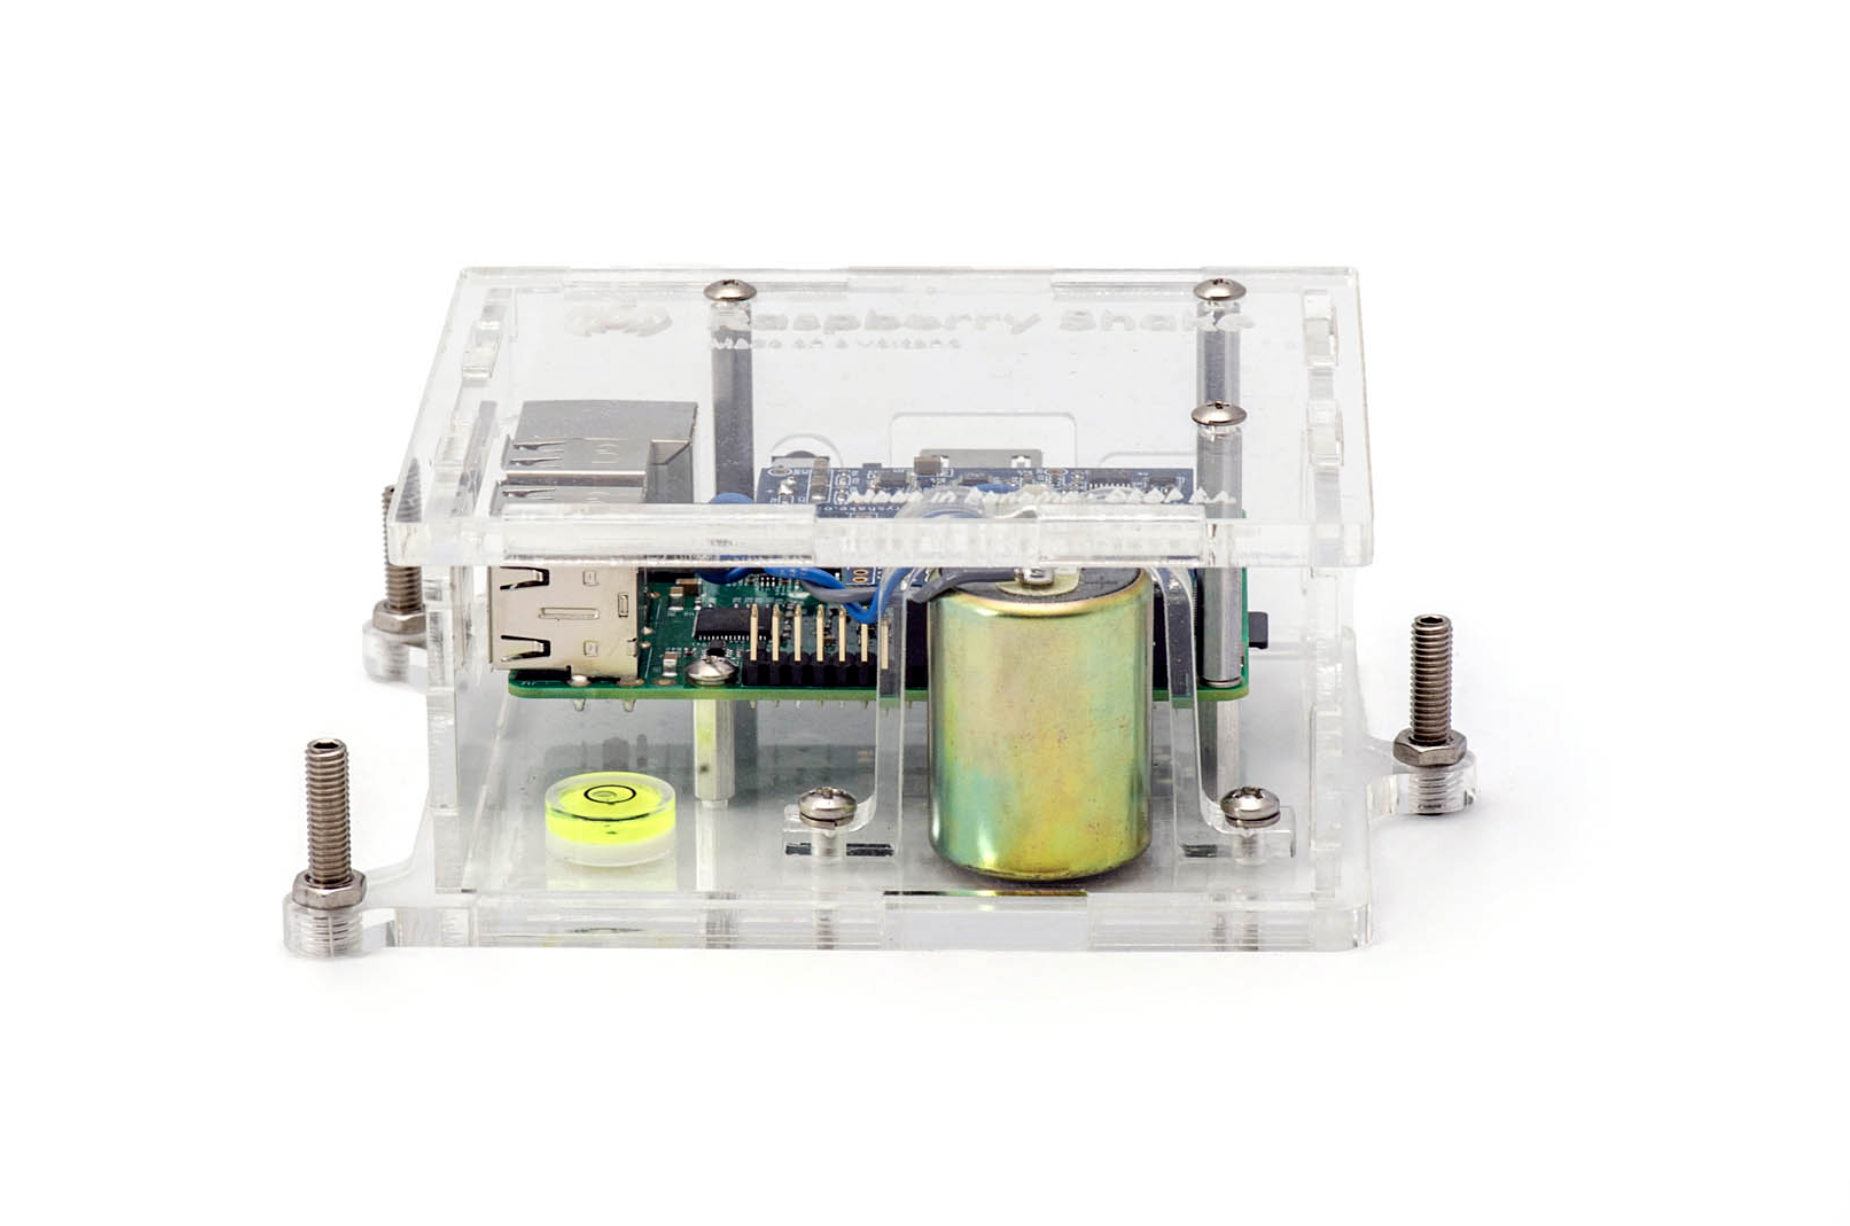
Detect earthquakes and more with this excellent kit
01. Hardware setup
With the DIY kit you have to supply your own Raspberry Pi, and get the geophone wired up to the Raspberry Shake board itself, which needs to be placed on the first 26 pins of Raspberry Pi’s GPIO. Seal it inside the enclosure and then make sure it will stand level with a spirit level and the adjustable feet in its desired location.
02. Install software
If you didn’t get the Raspberry Shake SD card, download the OS and install it with Raspberry Pi Imager. Plug in the SD card and power up Raspberry Pi, and then head to a browser on another computer and type in http://rs.local. The username is myshake, while the password is shakeme by default, so make sure to change them.
03. Listen for earthquakes
Once all set up, you can start sharing your data to the Raspberry Shake community – exact location is obfuscated so people won’t be able to find out where you live. After hitting Forward Data, your Raspberry Shake will restart and you’ll be able to see data from your station from the global station view page.
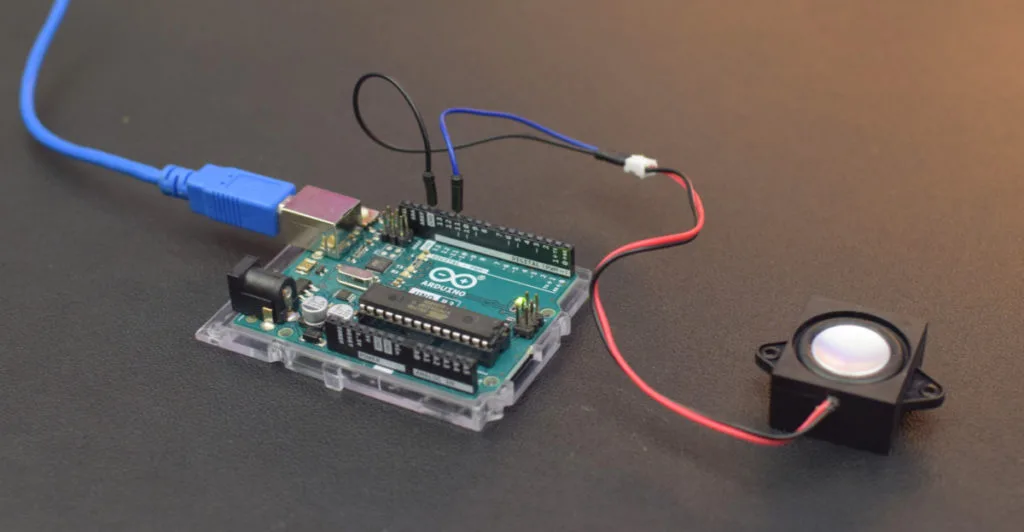
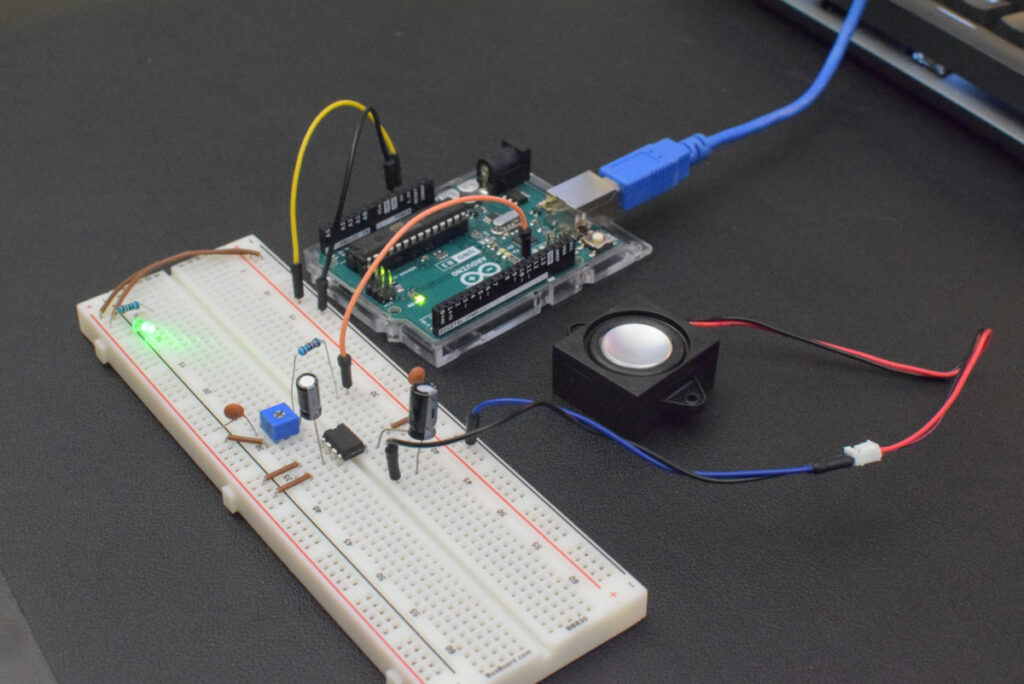
We see many Arduino projects that feature audio output, but they tend to require a substantial amount of additional hardware. Audio files take up a lot of storage space, so they require something like an SD card adapter. Audio signals are analog, so they require a DAC (digital-to-analog converter) to get good quality. And then, to make the audio signal powerful enough for a speaker, these usually need amplifiers. But Scott W Harden found a way to make an Arduino UNO Rev3 talk without any additional hardware beyond the speaker.
In this case, the Arduino can speak any number, from zero to nine, out loud through the speaker. This is possible because those are very short words (most only a single syllable) that are recognizable when the quality is very low. This audio quality wouldn’t be suitable for music or even general language, but it is enough for a sequence of numbers. By reducing the audio quality as much as possible and making the clips short, Harden was able to create audio files small enough to fit in the 32KB flash memory of the UNO‘s ATmega328 microcontroller with room to spare for the sketch.
Harden started with normal MP3 recordings of the spoken numbers. He then performed a 100Hz to 2.5kHz band-pass on the clips, resampled them to 5kHz, and then converted the waveforms to eight-bit unsigned values to store in program memory. The Arduino can then play those waveforms through PWM (pulse-width modulation). A low-pass filter, comprised of a capacitor and resistor, helps smooth the PWM output into something closer to a true analog waveform. An optional LM386 chip can amplify the output, but Harden found that he was able to drive a speaker directly without that.
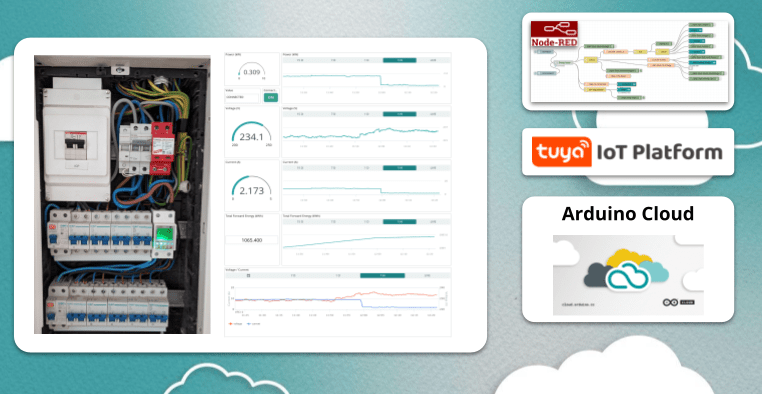
In a world where energy bills are climbing and the environment is on our minds, keeping tabs on how we use energy at home has become a smart move. Every gadget we plug in impacts our wallets and the planet. That’s where home energy monitoring comes in – giving us real-time info on how we’re using energy, so we can save money and do our bit for the Earth.
This post delves into home energy monitoring, spotlighting how to track your energy consumption using the Arduino Cloud and a Tuya-compatible energy meter with Node-RED acting as a middleware.
What’s the deal with home energy monitoring?
Home energy monitoring is all about watching how much energy we’re using at home. It’s not just about paying the bills; it’s about knowing what’s eating up energy, so we can be smarter about it.
Why does it matter? Well, first off, it helps us be more aware. When we can see which devices are energy hogs (looking at you, always-on TV), we can take action. And with energy costs going up, finding ways to save money is a no-brainer. Plus, with everyone talking about being green these days, knowing where your energy goes is like a badge of honor for doing your part.
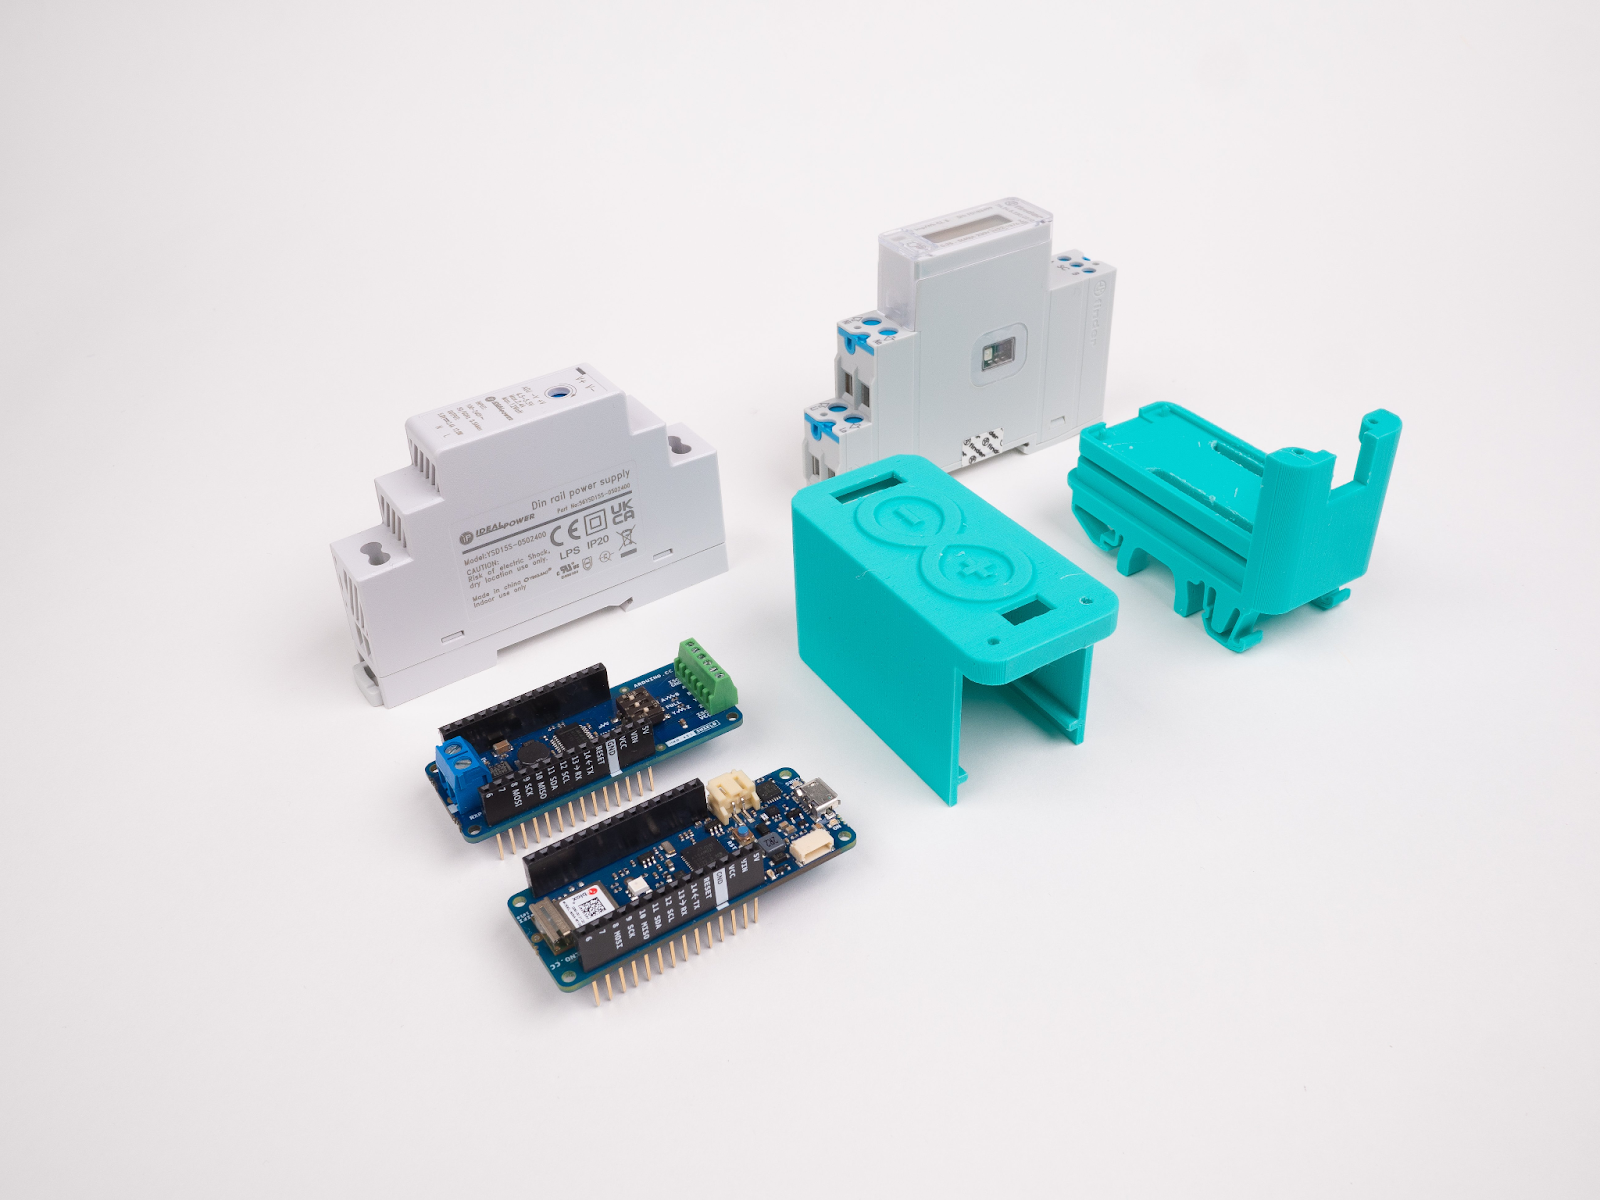
The ingredients
The key component in this setup is an energy meter designed to monitor both real-time and cumulative power consumption, along with metrics such as voltage and current. This meter is installed within your home’s electrical distribution board. Tuya-compatible devices have gained widespread popularity due to their affordability, user-friendliness, and seamless management through the SmartLife application. Moreover, these devices can also be seamlessly integrated into alternative platforms through the utilization of the Tuya API.
The Arduino Cloud stands out as a versatile and user-friendly IoT platform, supporting a wide range of hardware. It’s not only customizable and adaptable to suit different purposes and use cases, but it also streamlines the incorporation of multiple devices, facilitating smooth information exchange among them. It is a perfect tool to monitor your energy consumption, being informed when outstanding events happen and perform actions on other devices based on the energy information acquired.
While direct connection of Tuya-compatible devices to the Arduino Cloud isn’t possible, the process becomes really straightforward with the intervention of Node-RED. This intermediary acts as a bridge between the energy meter and the Arduino Cloud, ensuring seamless communication between the two. With Node-RED you can integrate almost anything with the Arduino Cloud.
The project
The following project shows how to integrate all those elements to easily build your own energy monitoring system.
Before getting started, you’ll require:
A Tuya/Smartlife-compatible energy meter
The SmartLife or Tuya app installed on your iOS/Android device
The Energy Meter added to the Tuya Smart app
An Arduino Cloud account (https://cloud.arduino.cc)
An instance of Node-RED running locally or on a cloud machine (installation guide found here)
The process is really straightforward:
Install the energy meter within your electric board.
Obtain your Tuya device API key.
Create the Device and Thing within the Arduino Cloud.
Develop the Node-RED flow to manage data traffic.
Fashion the Arduino Cloud Dashboard.
Build your own energy meter from the ground up
Monitoring energy consumption with Arduino Cloud doesn’t solely rely on Tuya-compatible energy meters. If you’re inclined to build your own solution from the ground up, consider exploring the Arduino IoT-based energy meter hosted on the Project Hub. There is additional detailed documentation available and a ready-to-use template to deploy your solution with one click.
By engaging with this project, you’ll not only gain insight into your energy consumption monitoring but also experience the simplicity of crafting practical projects that interface Arduino boards with external components such as the Modbus energy meter. All this will be seamlessly managed and monitored by the Arduino Cloud.
Ready to Get Started? Take Control of Your Energy!
The path to smarter energy consumption begins with your curiosity and action. Now armed with the knowledge of the Arduino Cloud’s potential, it’s time to embark on your own energy monitoring journey. Don’t wait – seize the opportunity to optimize your energy usage, save on bills, and contribute to a more sustainable planet. With the Arduino Cloud as your ally, you can monitor, manage, and make a positive impact starting from your own home. Create your account, dive in, tinker for free, and start your energy-saving adventure today. Your future of empowered energy management is just a click away!
Um dir ein optimales Erlebnis zu bieten, verwenden wir Technologien wie Cookies, um Geräteinformationen zu speichern und/oder darauf zuzugreifen. Wenn du diesen Technologien zustimmst, können wir Daten wie das Surfverhalten oder eindeutige IDs auf dieser Website verarbeiten. Wenn du deine Einwillligung nicht erteilst oder zurückziehst, können bestimmte Merkmale und Funktionen beeinträchtigt werden.
Funktional
Immer aktiv
Die technische Speicherung oder der Zugang ist unbedingt erforderlich für den rechtmäßigen Zweck, die Nutzung eines bestimmten Dienstes zu ermöglichen, der vom Teilnehmer oder Nutzer ausdrücklich gewünscht wird, oder für den alleinigen Zweck, die Übertragung einer Nachricht über ein elektronisches Kommunikationsnetz durchzuführen.
Vorlieben
Die technische Speicherung oder der Zugriff ist für den rechtmäßigen Zweck der Speicherung von Präferenzen erforderlich, die nicht vom Abonnenten oder Benutzer angefordert wurden.
Statistiken
Die technische Speicherung oder der Zugriff, der ausschließlich zu statistischen Zwecken erfolgt.Die technische Speicherung oder der Zugriff, der ausschließlich zu anonymen statistischen Zwecken verwendet wird. Ohne eine Vorladung, die freiwillige Zustimmung deines Internetdienstanbieters oder zusätzliche Aufzeichnungen von Dritten können die zu diesem Zweck gespeicherten oder abgerufenen Informationen allein in der Regel nicht dazu verwendet werden, dich zu identifizieren.
Marketing
Die technische Speicherung oder der Zugriff ist erforderlich, um Nutzerprofile zu erstellen, um Werbung zu versenden oder um den Nutzer auf einer Website oder über mehrere Websites hinweg zu ähnlichen Marketingzwecken zu verfolgen.