Kategorie: Linux

  • Creating a ChatGPT client with the Arduino GIGA R1 WiFi and GIGA R1 Display Shield

    Creating a ChatGPT client with the Arduino GIGA R1 WiFi and GIGA R1 Display Shield

    Reading Time: 2 minutes

    ChatGPT is certainly the best-known large language model (LLM) available today and it has a lot to offer. But you can’t run it locally and instead you must use OpenAI’s online service to access its functionality. That doesn’t, however, mean that you’re out of luck if you want to use ChatGPT on your own DIY devices. As Shakhizat Nurgaliyev shows, you can build your own ChatGPT client powered by Arduino.

    Because ChatGPT isn’t available offline, the ArduinoGPT project takes advantage of OpenAI’s API. That lets you access ChatGPT through your sketches if your development board has a network adapter. In this case, Nurgaliyev used an Arduino GIGA R1 WiFi. That can reach the OpenAI API through a wireless network in order to send prompts to ChatGPT and receive responses.

    The Arduino GIGA R1 WiFi is also ideal because it possesses a very unique feature: a USB-A port and the ability to act as a USB host. That lets the user connect a standard USB keyboard and type prompts without any other hardware.

    Nurgaliyev paired that board with a new Arduino GIGA Display Shield, which provides 3.97″ of LCD touchscreen at a resolution of 480×800. That includes additional hardware, like a microphone and inertial measurement unit (IMU), but they aren’t necessary for this project.

    The ArduinoGPT sketch connects to the user’s Wi-Fi network, then lets the user type in a prompt. It sends that prompt to ChatGPT through the OpenAI API and waits for a response. The user can choose to receive the entire response as a single block of text, or as a stream of several blocks sent as ChatGPT generates them.

    [youtube https://www.youtube.com/watch?v=pskxxXySi9w?feature=oembed&w=500&h=281]

    While it would be nice to have the ability to run ChatGPT offline, this may be the next best thing.

    The post Creating a ChatGPT client with the Arduino GIGA R1 WiFi and GIGA R1 Display Shield appeared first on Arduino Blog.

    Website: LINK

  • Analog gauge array helps evaluate compilation efficiency

    Analog gauge array helps evaluate compilation efficiency

    Reading Time: 2 minutes

    There is an old joke response in the programming industry for whenever you’re caught slacking off: “I’m waiting for the code to compile.” That still holds up, because even today’s blazing fast computers can take ages to compile. That’s true even when the compiler can run tasks across multiple CPU cores. To find out if that is as efficient as it could be, Lex built this analog gauge array that displays the utilization of each core.

    Lex created this for their own computer, which has a 12-core CPU. There is one gauge for each of those cores, plus an additional gauge for swap memory and another for RAM. The same basic idea could apply to computers that have CPUs with fewer cores — the device would just need a number of gauges equal to the number of CPU cores, plus two.

    The device contains an Arduino Mega 2560 board and it receives utilization data through serial from a PC running a custom Rust program. That program uses some resources, but it is trivial compared to everything else. The Arduino employs pulse-width modulation (PWM) to control the positions of the gauge needles. There is also a strip of WS2812B individually addressable RGB LEDs illuminating the gauges, with the colors corresponding to utilization. So high utilization will move a gauge’s needle to the right and cause it to light up red.

    [youtube https://www.youtube.com/watch?v=4J-DTbZlJ5I?feature=oembed&w=500&h=281]

    This gives Lex a quick and easy way to visualize how their computer distributes tasks across the CPU cores. That is interesting when compiling code, but it is also useful for other jobs that attempt to parallelize tasks.

    The post Analog gauge array helps evaluate compilation efficiency appeared first on Arduino Blog.

    Website: LINK

  • Creating connections at our 2023 Africa partner meetup

    Creating connections at our 2023 Africa partner meetup

    Reading Time: 3 minutes

    We partner with organisations around the world to bring coding activities to young people in their regions through Code Club and CoderDojo. Currently involving 54 organisations in 43 countries, this Global Clubs Partner network shares our passion for educating kids to create with technology.

    Global Clubs Partners in Africa.

    We work to connect our Global Clubs Partners to foster a sense of community and encourage collaboration. As part of this, we run in-person meetups to allow our partners to get to know each other better, and to help us understand how we can best support them, and what we can learn from them. Previously held in Penang, Malaysia, and Almere, the Netherlands, our latest meetup took place in Cape Town, South Africa.

    Connecting through stories and experiences

    Although we’ve seen some surprising points of commonality among all Global Clubs Partners, we also know that our partners find it helpful to connect with organisations based in their region. For the Cape Town meetup, we invited partner organisations from across Africa, hoping to bring together as many people as possible.

    Global Clubs Partners in Africa.

    Our aim was to give our partners the opportunity to share their work and identify and discuss common questions and issues. We also wanted to mitigate some of the challenges of working internationally, such as time constraints, time zones, and internet connectivity, so that everyone could focus on connecting with each other.

    Global Clubs Partners in Africa.

    The meetup agenda included time for each Global Clubs Partner organisation to present their work and future plans, as well as time for discussions on growing and sustaining club volunteer and mentor communities, strategy for 2024, and sharing resources. 

    “If the only thing rural communities have is problems, why are people still living there? … Rural communities have gifts, have skills, they have history that is wasting away right now; nobody is capturing it. They have wisdom and assets.”

    Damilola Fasoranti from Prikkle Academy, Nigeria, talking about not making assumptions about rural communities and how this shapes the work his organisation does

    A group dinner after the meetup enabled more informal networking. The next day, everyone had the chance to get inspired at Coolest Projects South Africa, a regional Coolest Projects event for young tech creators organised by partner organisation Coder LevelUp.

    Global Clubs Partners in Africa.

    The meetup gave the Global Clubs Partners time to talk to each other about their work and experiences and understand one another better. It was also very beneficial for our team: we learned more about how we can best support partners to work in their communities, whether through new resources, information about funding applications, or best practice in overcoming challenges.

    Building bridges

    After attending a previous meetup, two of our partner organisations had decided to create an agreement for future partnership. We were delighted to learn about this collaboration, and to witness the signing of the agreement at this meetup.

    Global Clubs Partners in Africa.

    By continuing to bring our partner network together, we hope to foster more cross-organisation partnerships like this around the world that will strengthen the global movement for democratising computing education.

    Could your organisation become a Global Clubs Partner?

    You can find out how your organisation could join our Global Clubs Partner network on the CoderDojo and Code Club websites, or contact us directly with your questions or ideas about a partnership.

    Website: LINK

  • PicoVision (Pico W Aboard) review

    PicoVision (Pico W Aboard) review

    Reading Time: 3 minutes

    Power is connected using Pico W’s micro USB port – as usual, you can hook this up to a computer for programming in MicroPython or C/C++, or flashing Pico W with new firmware.

    Alternatively, PicoVision can be powered via two unpopulated pins. There’s also a breakout header for CPU and GPU debugging, plus a few other GPIO pins. A single Qwiic/STEMMA QT port can be used to connect I2C breakouts or sensors.

    On the front of the board are three user buttons, an activity LED, and a handy reset button. At the rear is the bonus of a microSD card slot to provide extra storage for assets such as graphics.

    A scroll groups code example demonstrates the ability to scroll several areas of the screen independently

    Instant menu

    Getting started is as easy as connecting PicoVision to an HDMI monitor or TV and powering it up. It comes pre-flashed with MicroPython firmware that auto-runs a menu of example programs. The A and X user buttons are used to move up and down through the menu options; and a press of the Y button will select one.

    Among the example programs are a fun Flappy Bird-style game, magic mirror dashboard, and Teletext-style headlines – the last two require connection to a Wi-Fi network. Several graphical demos showcase PicoVision’s capabilities. These include a classic 3D starfield effect (remember Windows 3.1’s screensaver?), a screen modes menu with numerous resolutions (some require GPU overclocking), and a parallax scrolling animation that makes use of PicoVision’s scroll modes – up to seven groups of scanlines can be scrolled separately.

    Up to 80 sprites can be shown on screen simultaneously (or 32 with the special widescreen version of the firmware), with up to ten per any single scanline.

    Yes, you can play Doom on PicoVision! Use a splitter cable to plug a USB keyboard into Pico W

    Start coding

    When it comes to programming PicoVision yourself, a comprehensive GitHub repo provides lots of useful info, along with MicroPython and C/C++ libraries and code examples from which to learn. The most basic are Hello World programs to print text to the screen. Graphics are handled using Pimoroni’s standard PicoGraphics module, while a PicoSynth sound module is used to play simple tunes and noises using I2S audio from the board’s DAC chip.

    You’ll also want to try playing classic Doom on PicoVision – which works really well. Just flash the Doom firmware UF2 to PicoVision and add the game’s WHX file to a microSD card. For control, you’ll need to connect a USB keyboard via a splitter cable (as supplied in the optional accessory kit).

    Verdict

    9/10

    With a second RP2040 and extra RAM to boost Pico W’s capabilities, PicoVision offers plenty of possibilities for retro gaming and coding projects.

    Specs

    Features: Pico W, separate RP2040 (GPU), 2 × 8MB PSRAM, PCM5100A DAC for audio, 3 × user buttons, status LED, reset button, microSD card slot

    Connections: HDMI video out, 3.5mm audio line out, breakout header, Qw/ST port, micro USB (on Pico W)

    Dimensions: 87 × 38 × 9mm

  • Building a minimalist network-updated digital clock with an Arduino Nano ESP32

    Building a minimalist network-updated digital clock with an Arduino Nano ESP32

    Reading Time: 2 minutes

    There are almost endless variations of clocks for sale on the internet today, but it is still easy to end up in a situation where you can’t quite find a model with the style and features you want. Marco Zonca ended up with that problem while searching for a new clock to put in his music studio. Nothing on the market fit the bill, so he built this minimalist network-updated digital clock.

    Zonca wanted a simple design, the ability to adjust brightness, and NTP (Network Time Protocol) updates. There are clocks available with those features, but nothing in the style Zonca wanted. So he created the perfect clock for himself. It displays 24-hour time across a red LED matrix, lets the user control settings like brightness via Bluetooth® Low Energy communication, and always stays in sync with network time.

    An Arduino Nano ESP32 board, programmed through Arduino Web Editor, controls all of those functions. It mounts onto a custom PCB that Zonca designed for this clock. The PCB also hosts an 8×32 LED matrix display with MAX7219 driver. Three buttons on the PCB let the user select modes. The PCB fits into a black 3D-printed enclosure that reflects the overall minimalist style.

    Now Zonca has the perfect clock for his music studio. If you like the look of it, the sketch, PCB files, and 3D enclosure are all available on Hackster.io.

    The post Building a minimalist network-updated digital clock with an Arduino Nano ESP32 appeared first on Arduino Blog.

    Website: LINK

  • Real-time notifications and much more in the new Arduino IoT Cloud Remote app

    Real-time notifications and much more in the new Arduino IoT Cloud Remote app

    Reading Time: 5 minutes

    Welcome to the next chapter of our ‘Better, with You’ journey! Now it is time to present the latest updates to the IoT Remote app. These new features are all about making your time with your IoT projects smoother, more fun, and right at your fingertips. Let’s dive in!

    If you haven’t caught up on our journey so far, make sure to check out our first blog post of the series, where we reveal a brand new UI on the Arduino Cloud.

    Push notifications for real-time alerts

    As your list of projects grows and time becomes a rare commodity, checking the status of all your projects on a regular basis is nearly impossible. That’s why having a heads-up for anything significant happening in your deployments is an absolute game-changer. A few months ago, we introduced Triggers and Notifications, a feature that allows you to configure conditions in the Arduino Cloud that trigger email notifications.

    Now, with the new IoT Remote app version, you can customize and receive alerts directly on your mobile device. Because we know how life can sometimes get crazy and convenient it is to get notified directly on your phone. 

    Remember, to unlock this feature, you’ll need the Maker plan ($5.99/month). Make sure you upgrade your plan to use it.

    How to use the notifications in your phone

    The process is quite straightforward:

    • Configure your Triggers and Notifications in the Arduino Cloud
    • Enable notifications in the IoT Remote app

    Configure your Triggers and Notifications in the Arduino Cloud

    To configure a notification you just have to

    • Go to https://app.arduino.cc/triggers
    • Click on CREATE TRIGGER to start the creation of the Trigger.
    • Configure your condition selecting your variable.
    • Configure your desired action: In this case select “Send Push Notification.” Note that you can additionally configure email notifications as well for the same trigger.
    • Define the fields of your notification: Title and Body.

    Triggers set up process in Arduino Cloud

    And that’s it. You are ready to configure notifications on your mobile phone.

    Enable notifications on the mobile phone

    When you open the app with the new version for the first time, you are prompted to allow the app to send you notifications. If you accept, you are ready to go and you will receive instant alerts.

    You can change your settings at any time in the “Manage push notifications” menu to enable or disable the notifications behavior.

    Learn more about the full configuration process in the documentation article

    Improved app UI

    Activity monitor

    Explore the history of your project’s alerts with the Activity tab. It is the ideal companion to push notifications, providing you with a comprehensive overview of your notifications activity. 

    Activity tab in the Arduino IoT remote app

    Dark mode

    Finally, the long-awaited Dark Mode is here! You can now experience a more comfortable and elegant interface by simply enabling Dark Mode in the IoT Remote app. For a quick guide, refer to the documentation article.

    Change theme (light/dark)

    New bottom navigation bar

    The new bottom tab bar enhances your user experience simplifying the app navigation. This update is part of the major UX improvements implemented on the Cloud. You can seamlessly switch between sections and enjoy a more intuitive journey within the app.

    New UI with enhanced navigation bar in the Arduino IoT Remote app

    Redesigned widgets

    Widgets have been redesigned to provide a clearer and refined data visualization. These improvements are also part of the major UX enhancements implemented on the Cloud.

    Enhanced widgets in the Arduino IoT Remote app

    Devices list

    We understand the importance of simplifying device monitoring. Check the status of your devices and their associated things directly from the IoT Remote app. It’s about bringing convenience to your fingertips, contributing to better IoT project management.

    What is Arduino Cloud?

    In case you’re new to this whole concept of the Arduino Cloud, we didn’t want to miss the opportunity to remind you of it here. The Arduino Cloud is the next exciting journey for IoT enthusiasts to bring their projects to life quickly. It is an all-in-one intuitive IoT platform, supporting a wide range of hardware and backed by the vibrant Arduino community. The Arduino Cloud removes complexity to empower users from all levels of expertise to create from anywhere, and control and share their projects with amazing dashboards that can be accessible with the IoT Remote app.

    The following video provides a comprehensive quick tour of the new UI.

    [youtube https://www.youtube.com/watch?v=p9t8DYOubjg?feature=oembed&w=500&h=281]

    Download the IoT Remote app

    Ready to try alerts in your phone and explore the new look and feel? Learn more about the new IoT Remote app features, download the IoT Remote app (available for Android and iOS), and create a new account to get started with the Arduino Cloud. 

    And stay tuned for more news. We are creating a better cloud, with you! 

    The post Real-time notifications and much more in the new Arduino IoT Cloud Remote app appeared first on Arduino Blog.

    Website: LINK

  • rePalm

    rePalm

    Reading Time: 4 minutes

    With an ongoing fascination with PalmOS – “it was the first mobile OS with any sort of success and it gave the world the term ‘smartphone” – Dmitry says he wanted to see if he could put the operating system on another device with minimal changes. He looked into emulating the hardware with success (check it out here). “But that was cheating,” he continues. “The goal was to port it to new hardware, which is usually hard without source code, but I figured I’d try.

    “I knew that, in theory, most of the drivers were contained in the Device Abstraction Layer (DAL) module, with a few others being separate (SD card, serial port, DMA). I figured that if I managed to replace those modules with some I wrote myself, that the OS should, again in theory, run on any ARM device with a compatible processor – any processor supporting ARMv4T or ARMv5T architecture.” This tech adventure spanned multiple years, but the effort has certainly been worthwhile.

    Raspberry Pi Pico connected to the CortextProg (cortexprog.com), a Cortex-M debugger Dmitry created to read and write data from and to a microcontroller

    “It culminated in the release of the source earlier this year, and now one can bring up PalmOS even on processors that it never actually supported, like tiny Cortex-M0 cores,” Dmitry continues. Having tried numerous other boards from STMicroelectronics’ STM32F429 to the STM32H7, RP2040 showed the most promise. “I had never encountered a Cortex-M0 microcontroller that had enough RAM for PalmOS,” he says. “RP2040 does – barely – so I wanted to try.”

    Screen time

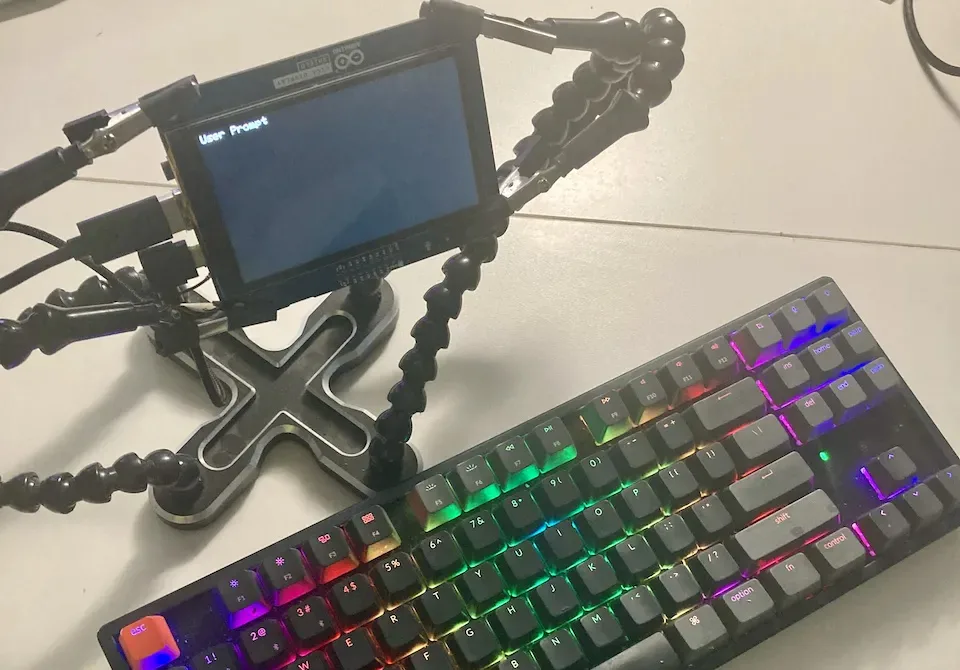
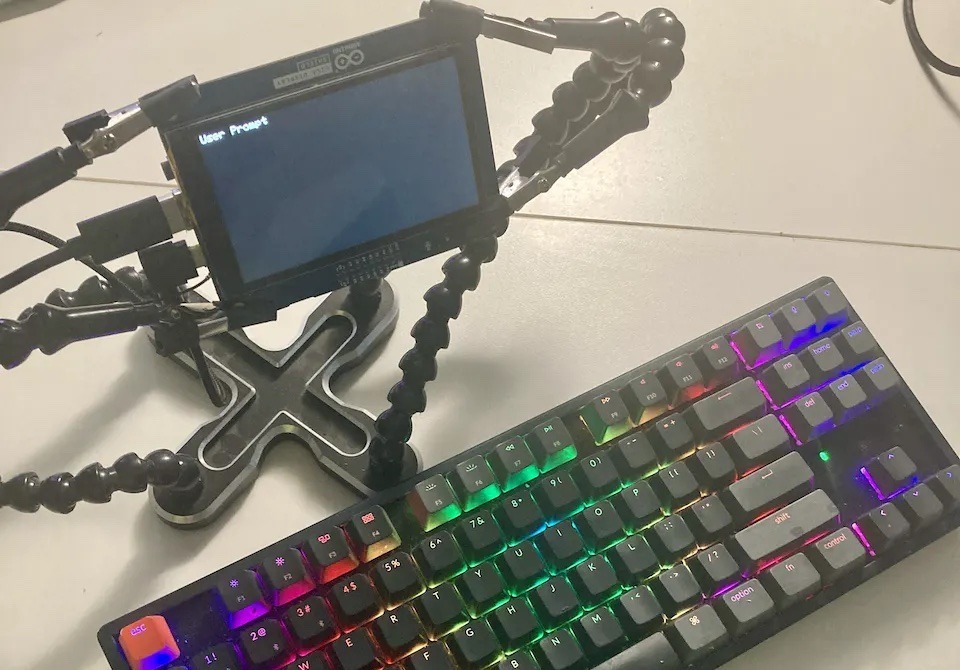
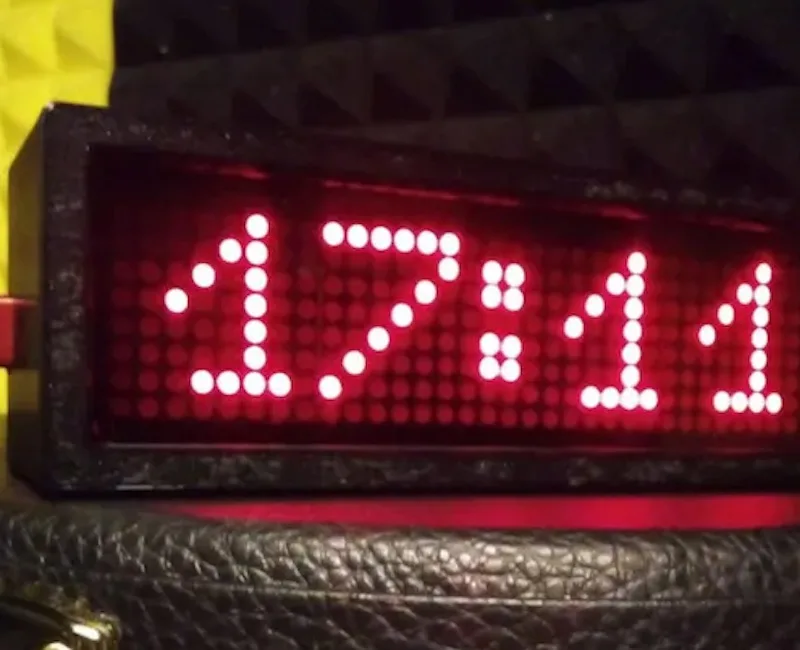
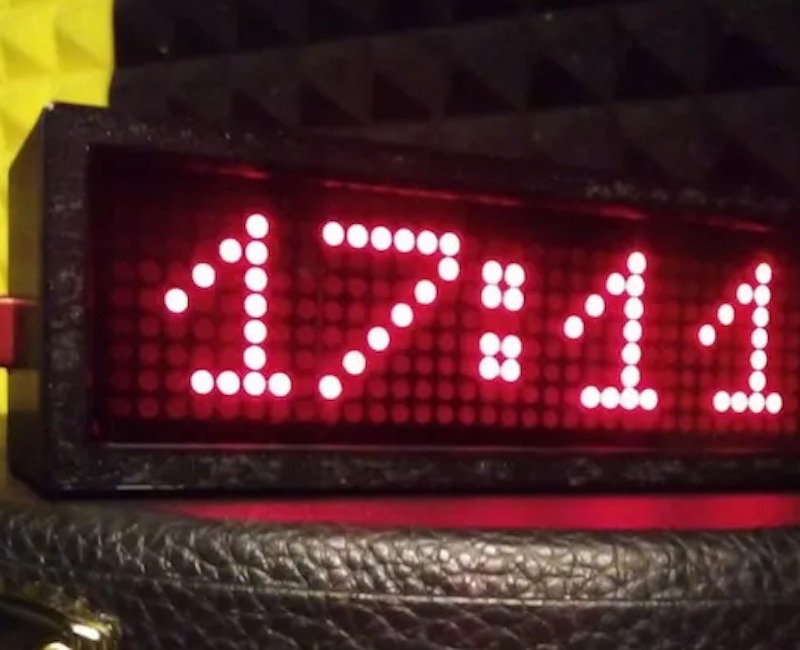
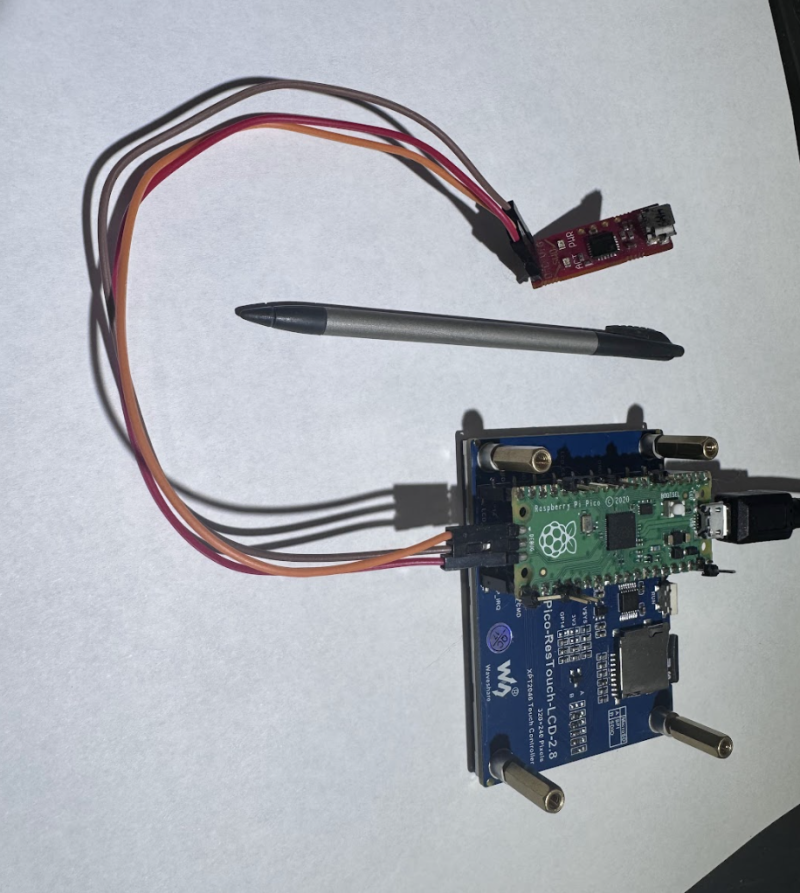
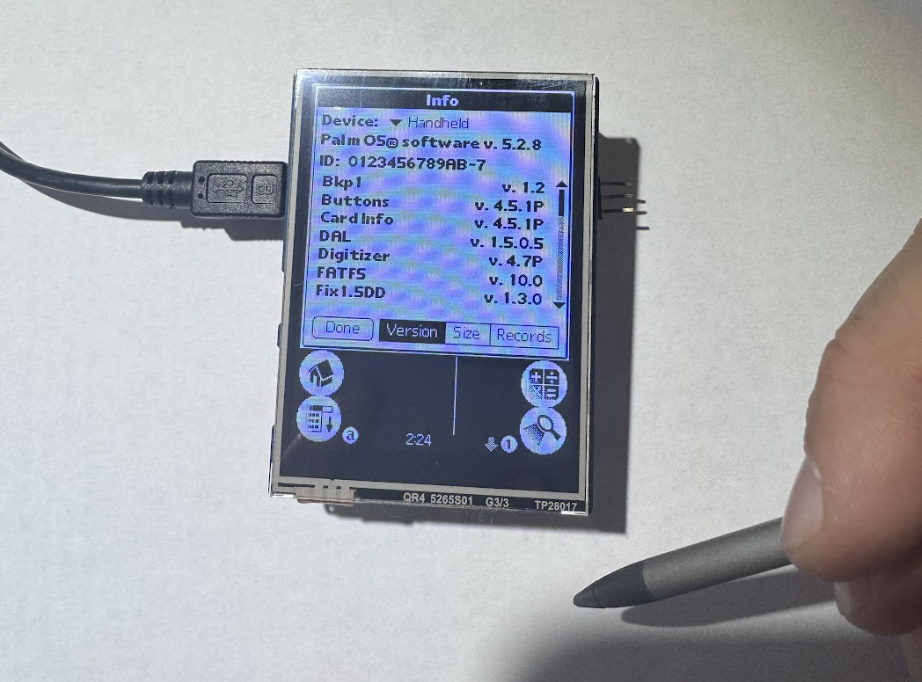
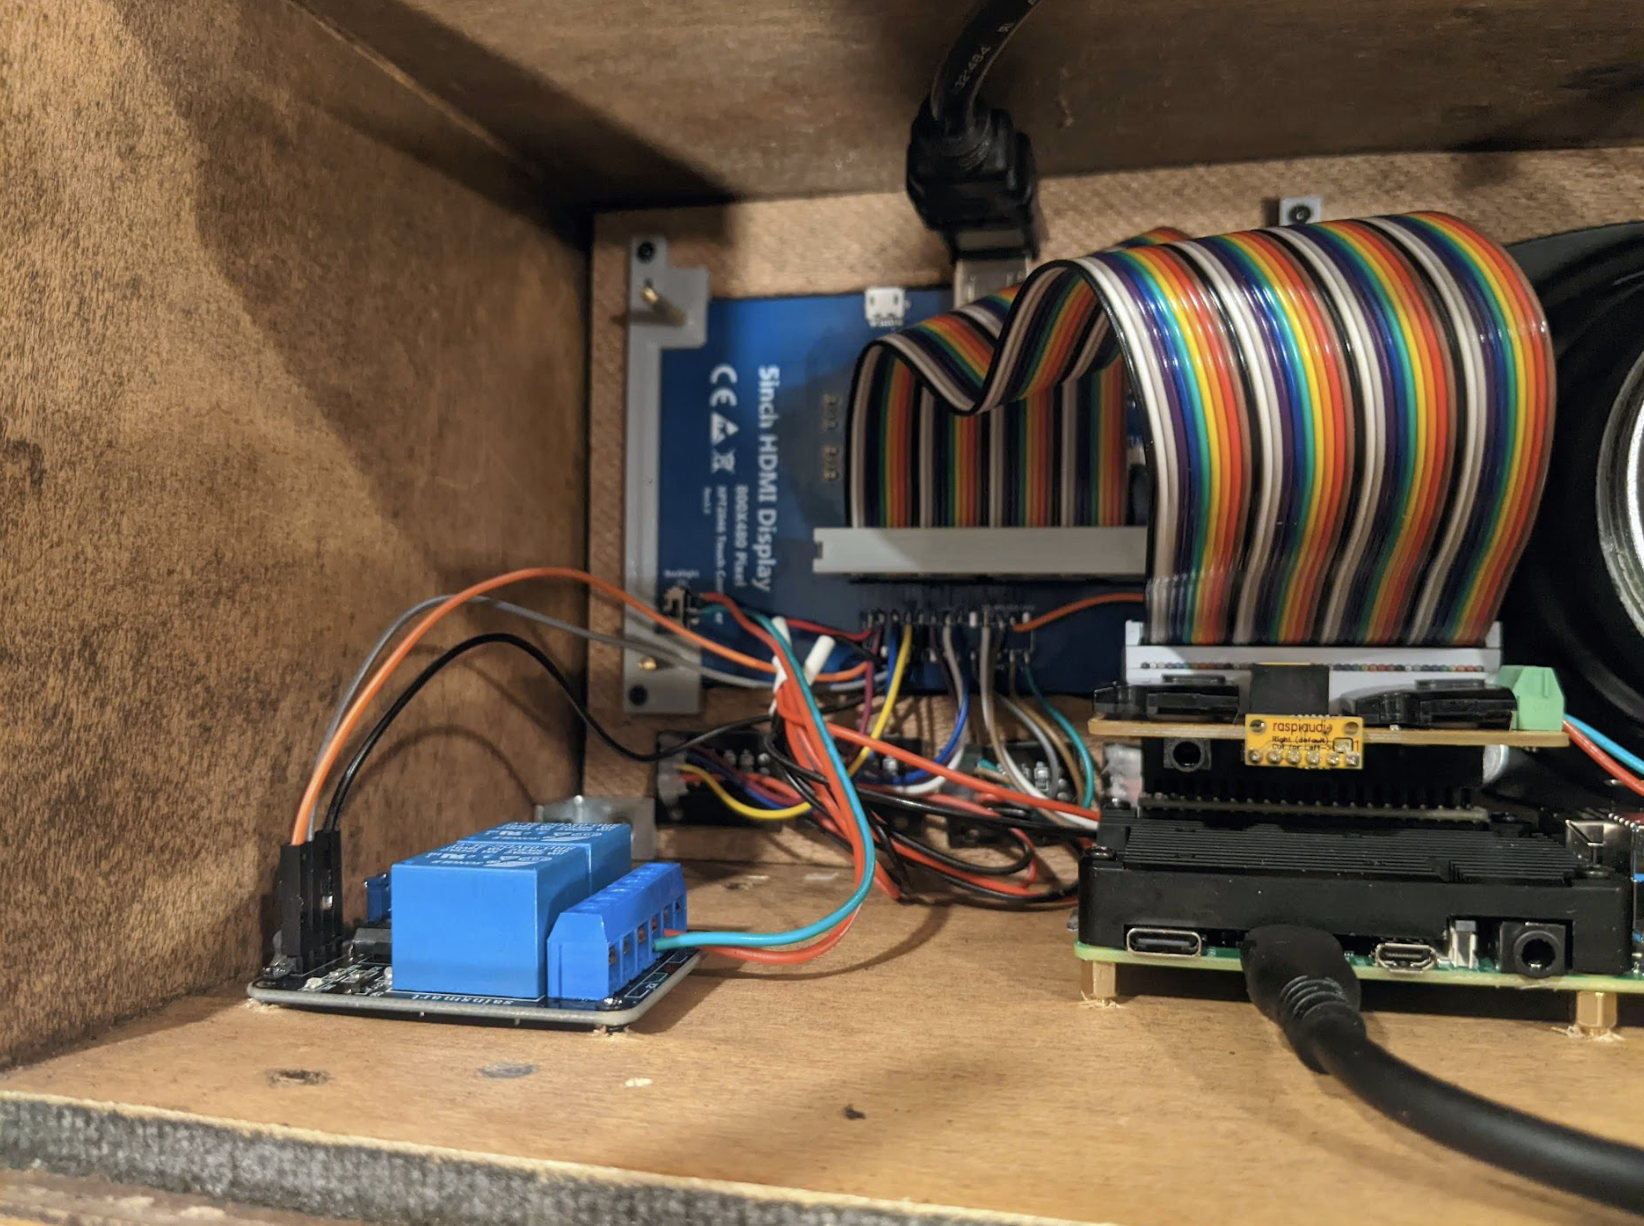
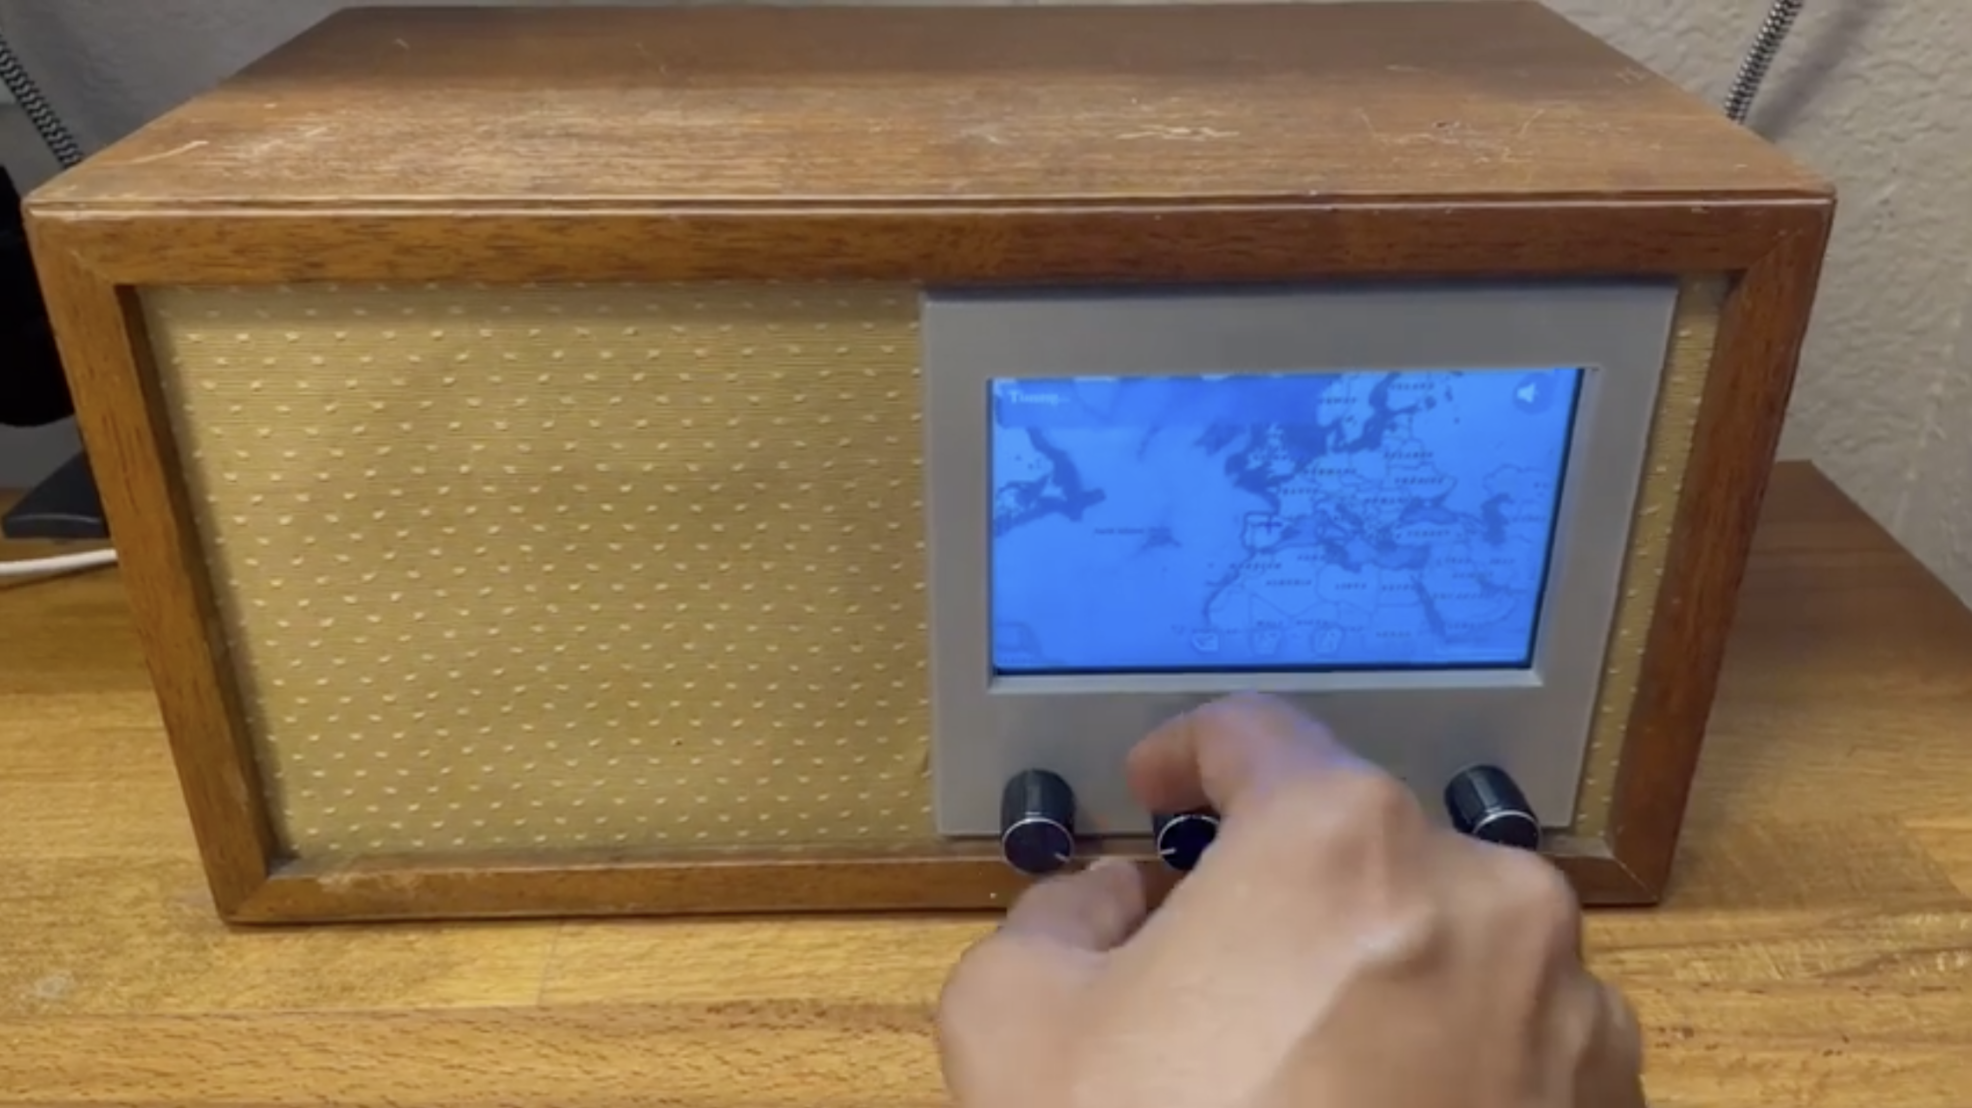
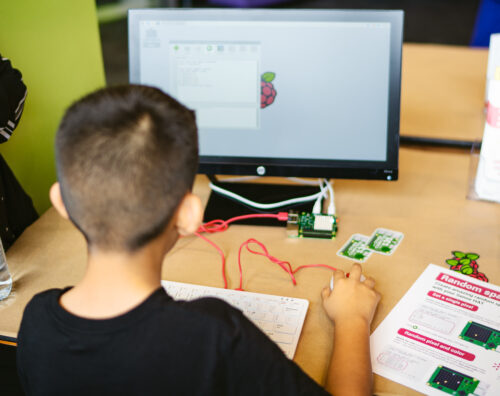
    The idea was to get PalmOS 5 running on a Raspberry Pi Pico or other RP2040-based development board and connect the device to a suitable touchscreen. Dmitry says the only one that fit his requirements was a low-cost $15.99, 2.8-inch touchscreen display from Waveshare offering a resolution of 320 × 240px.

    “It is a resolution that PalmOS supports well and really this is about the applications – the OS itself does not care about screen resolution,” he says. “Applications work best at resolutions that are integer multiples of 160 × 160, and extra space can be used for the dynamic input area. A 320 × 240 resolution is not super common but is supported relatively well.”

    The rePalm device looks very much at home here. It can force-pause threats, disable task switching, and supports local thread storage

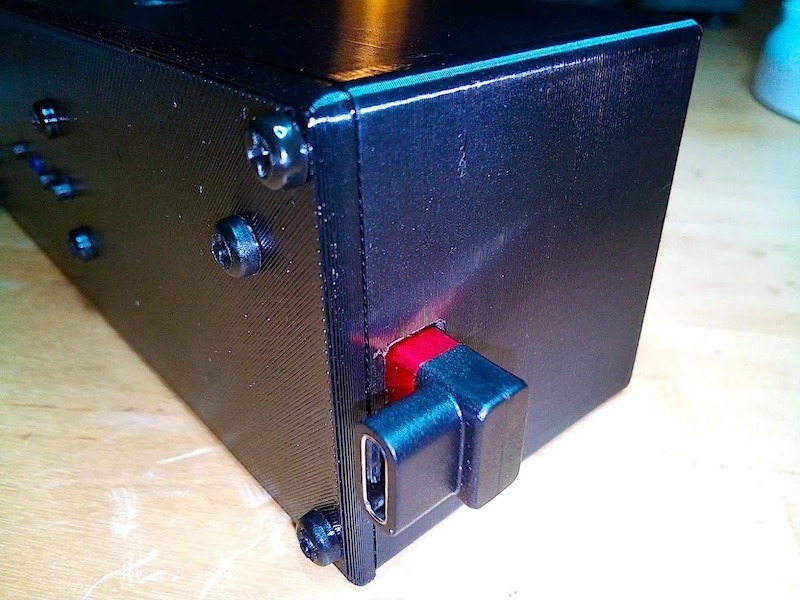
    Dmitry says it helped that the screen was easy to purchase. “It is a pet peeve of mine when people publish a project and their parts list includes ‘that one thing I bought at a garage sale once’ or ‘an old tube my grandpa left me in his will’,” he explains. But it was also important to have a resistive touchscreen.

    “Devices today are designed for capacitive touch, hence the large touch targets,” he says. “PalmOS predates cheap capacitive touch so it is designed for resistive touch screens which needed quite a bit of pressure to work, hence the fact that styluses had a fine tip. The fine tip also allowed the thing being tapped to be seen, while fingers are relatively large and obscure what you tap.”

    Ramming in RAM

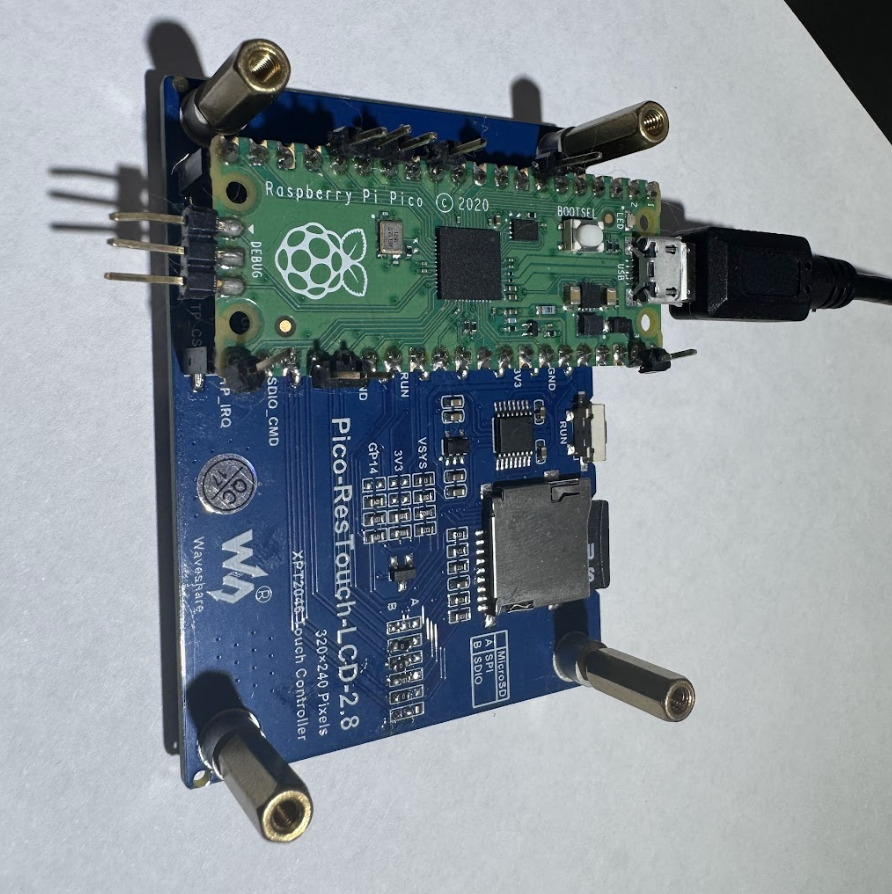
    The more Dmitry used RP2040, the more he realised it was a good fit for the project. “First, the PIO system is very versatile, allowing me to pretend to be a RAM and a ROM to the host 68k processor (in the case of PalmCard) while also driving my display with no CPU cycles needed. No other micro out there has anything quite like it,” he says.

    “Second, the performance is good. Cortex-M0 may not be a very performant core per-cycles, but the fact that I can easily run it at 200MHz+ surely papers over a lot of that! Third, the documentation does not suck, and this cannot be overstated. Whoever wrote the RP2040 docs needs a medal, a bonus or a hug because it is clear and accurate.” [That would be Alasdair Allan – Ed].

    Raspberry Pi Pico is mounted on the back of the touchscreen display. As Dmitry says, a $1 microcontroller is being used to replicate what was once a $400 device

    But that’s not to say Pico is perfect. “There is barely enough RAM to turn around in, so it’s not a practical PalmOS device,” he laments. “PalmOS 5 needs at least 64KB of RAM for the storage heap where the databases are stored and at least 128KB of dynamic heap, where temporary allocations come from, to boot.

    “My kernel and DAL need about 30KB for itself and we also need to fit at least one full frame buffer [screen image] into the RAM. At 320 × 240 × 2 bits per pixel, the framebuffer is almost 19KB. Adding that up gives us 241KB. Now, RP2040 has 256KB of RAM – the other pieces are not easily usable for various reasons. This is tight, but it fits. That 30KB was after a lot of extra work I put in to shrink that footprint. Initially, it was closer to 100KB.”

    Looking ahead

    This all means PalmOS 5 just about barely fits on Raspberry Pi Pico and, once it boots, only basic programs run with a few KB of RAM left over for a memo pad note or two. There’s not enough RAM to load a game, and Dmitry would love an RP2040 with more RAM. “It would work better,” he says.

    Still, rePalm is a huge feat that deserves a lot of applause. Hours and hours of disassembly went into its creation and using it shows how well created PalmOS was. “The rules were simple: any common activity should be no more than two device interactions away,” Dmitry says. “People who want a modern PalmOS device don’t seek to replace their phone. They seek to escape the constant advertisements and distractions.”

    With rePalm, he is showing once more what is possible. “Current plans include making a PalmOS-based smartwatch as well as a new PalmOS-based device,” he adds.

    Why? “Just because.”

  • Experience AI: Making AI relevant and accessible

    Experience AI: Making AI relevant and accessible

    Reading Time: 7 minutes

    Google DeepMind’s Aimee Welch discusses our partnership on the Experience AI learning programme and why equal access to AI education is key. This article also appears in issue 22 of Hello World on teaching and AI.

    From AI chatbots to self-driving cars, artificial intelligence (AI) is here and rapidly transforming our world. It holds the potential to solve some of the biggest challenges humanity faces today — but it also has many serious risks and inherent challenges, like reinforcing existing patterns of bias or “hallucinating”, a term that describes AI making up false outputs that do not reflect real events or data.

    A teenager learning computer science.
    Young people need the knowledge and skills to navigate and shape AI.

    Teachers want to build young people’s AI literacy

    As AI becomes an integral part of our daily lives, it’s essential that younger generations gain the knowledge and skills to navigate and shape this technology. Young people who have a foundational understanding of AI are able to make more informed decisions about using AI applications in their daily lives, helping ensure safe and responsible use of the technology. This has been recognised for example by the UK government’s AI Council, whose AI Roadmap sets out the goal of ensuring that every child in the UK leaves school with a basic sense of how AI works.

    Learner in a computing classroom.
    Every young person should have access to learning AI literacy.

    But while AI literacy is a key skill in this new era, not every young person currently has access to sufficient AI education and resources. In a recent survey by the EdWeek Research Center in the USA, only one in 10 teachers said they knew enough about AI to teach its basics, and very few reported receiving any professional development related to the topic. Similarly, our work with the Raspberry Pi Computing Education Research Centre has suggested that UK-based teachers are eager to understand more about AI and how to engage their students in the topic.

    Bringing AI education into classrooms

    Ensuring broad access to AI education is also important to improve diversity in the field of AI to ensure safe and responsible development of the technology. There are currently stark disparities in the field and these start already early on, with school-level barriers contributing to underrepresentation of certain groups of people. By increasing diversity in AI, we bring diverse values, hopes, and concerns into the design and deployment of the technology — something that’s critical for AI to benefit everyone.

    Kenyan children work on a physical computing project.
    Bringing diverse values into AI is critical.

    By focusing on AI education from a young age, there is an opportunity to break down some of these long-standing barriers. That’s why we partnered with the Raspberry Pi Foundation to co-create Experience AI, a new learning programme with free lesson plans, slide decks, worksheets and videos, to address gaps in AI education and support teachers in engaging and inspiring young people in the subject.

    The programme aims to help young people aged 11–14 take their first steps in understanding the technology, making it relevant to diverse learners, and encouraging future careers in the field. All Experience AI resources are freely available to every school across the UK and beyond.

    A woman teacher helps a young person with a coding project.
    The Experience AI resources are free for every school.

    The partnership is built on a shared vision to make AI education more inclusive and accessible. Bringing together the Foundation’s expertise in computing education and our cutting-edge technical knowledge and industry insights has allowed us to create a holistic learning experience that connects theoretical concepts and practical applications.

    Experience AI: Informed by AI experts

    A group of 15 research scientists and engineers at Google DeepMind contributed to the development of the lessons. From drafting definitions for key concepts, to brainstorming interesting research areas to highlight, and even featuring in the videos included in the lessons, the group played a key role in shaping the programme in close collaboration with the Foundation’s educators and education researchers.

    Interview for Experience AI at Google DeepMind.
    Interviews with AI scientists and engineers at Google DeepMind are part of Experience AI.

    To bring AI concepts to life, the lessons include interactive activities as well as real-life examples, such as a project where Google DeepMind collaborated with ecologists and conservationists to develop machine learning methods to study the behaviour of an entire animal community in the Serengeti National Park and Grumeti Reserve in Tanzania.

    Elephants in the Serengeti.
    One of the Experience AI lessons focuses on an AI-enabled research project in the Serengeti.

    Member of the working group, Google DeepMind Research Scientist Petar Veličković, shares: “AI is a technology that is going to impact us all, and therefore educating young people on how to interact with this technology is likely going to be a core part of school education going forward. The project was eye-opening and humbling for me, as I learned of the challenges associated with making such a complex topic accessible — not only to every pupil, but also to every teacher! Observing the thoughtful approach undertaken by the Raspberry Pi Foundation left me deeply impressed, and I’m taking home many useful ideas that I hope to incorporate in my own AI teaching efforts going forward.”

    The lessons have been carefully developed to:

    • Follow a clear learning journey, underpinned by the SEAME framework which guides learners sequentially through key concepts and acts as a progression framework.
    • Build foundational knowledge and provide support for teachers. Focus on teacher training and support is at the core of the programme.
    • Embed ethics and responsibility. Crucially, key concepts in AI ethics and responsibility are woven into each lesson and progressively built on. Students are introduced to concepts like data bias, user-focused approaches, model cards, and how AI can be used for social good. 
    • Ensure cultural relevance and inclusion. Experience AI was designed with diverse learners in mind and includes a variety of activities to enable young people to pick topics that most interest them. 

    What teachers say about the Experience AI lessons

    To date, we estimate the resources have reached 200,000+ students in the UK and beyond. We’re thrilled to hear from teachers already using the resources about the impact they are having in the classroom, such as Mrs J Green from Waldegrave School in London, who says: “I thought that the lessons covered a really important topic. Giving the pupils an understanding of what AI is and how it works will become increasingly important as it becomes more ubiquitous in all areas of society. The lessons that we trialled took some of the ‘magic’ out of AI and started to give the students an understanding that AI is only as good as the data that is used to build it. It also started some really interesting discussions with the students around areas such as bias.”

    An educator points to an image on a student's computer screen.
    Experience AI offers support for teachers.

    At North Liverpool Academy, teacher Dave Cross tells us: “AI is such a current and relevant topic in society that [these lessons] will enable Key Stage 3 computing students [ages 11–14] to gain a solid foundation in something that will become more prevalent within the curriculum, and wider subjects too as more sectors adopt AI and machine learning as standard. Our Key Stage 3 computing students now feel immensely more knowledgeable about the importance and place that AI has in their wider lives. These lessons and activities are engaging and accessible to students and educators alike, whatever their specialism may be.”

    A stronger global AI community

    Our hope is that the Experience AI programme instils confidence in both teachers and students, helping to address some of the critical school-level barriers leading to underrepresentation in AI and playing a role in building a stronger, more inclusive AI community where everyone can participate irrespective of their background. 

    Children in a Code Club in India.

    Today’s young people are tomorrow’s leaders — and as such, educating and inspiring them about AI is valuable for everybody.

    Teachers can visit experience-ai.org to download all Experience AI resources for free.

    We are now building a network of educational organisations around the world to tailor and translate the Experience AI resources so that more teachers and students can engage with them and learn key AI literacy skills. Find out more.

    Website: LINK

  • Pico Bubble Machine

    Pico Bubble Machine

    Reading Time: 2 minutes

    At its simplest, washing up liquid and a loop in which to form bubbles is all that’s needed to create this low-cost and playful distraction. But having set a precedent delighting pupils with her builds and science experiments, Aula was determined to design something that would catch their imagination while also encouraging them to build their own bubble machine. “With this project, children can explore the science behind soap bubbles while having fun building their own machine”, she reasons.

    This diagram shows how Pico is used to control the motor and rotating disc

    An amazing mentor

    Aula has been using Raspberry Pi as a teaching resource in her lab since 2014. She first encountered the low-cost computer when on the hunt for a good value processor with an easy-to-read temperature sensor inside for use in thermal studies. “Thus began my friendship with the wonderful Raspberry Pi board, and I transferred the energy of love and optimism that the Raspberry Pi gave me to my students and everyone around me.” She particularly appreciates the open-source approach, and the attitude that science is for everyone from a community that ensures others can research and overcome any technical difficulties they encounter.

    Spinning things out

    This project introduces children to basic electronics and encourages their creativity with options to customise their bubble machine, designing and decorating their own plastic discs or experiment with different fan sizes for varying bubble sizes. By programming the Raspberry Pi Pico, children can learn about coding concepts such as loops, conditionals, and functions.

    The water bath and motor prior to attaching Raspberry Pi Pico

    The heart of Aula’s bubble machine is its perforated circular plastic disc, which performs the same role as a bubble wand. When the disc rotates, it dips into a soap solution, creating a film of soap on its surface, she explains, while air from the fan blows through the holes, forming bubbles that detach from the disc and float away. A DC motor connected to an L298 driver circuit controls both the fan speed and disc rotation. These signals are provided by Raspberry Pi Pico and a potentiometer connected to it by an ADC pin.

    “Raspberry Pi Pico controls when to start and stop the motor, as well as adjusting its speed, and was the ideal choice”, says Aula. It allows her to calibrate the speed at which the disc releases the bubbles and helps to optimise energy consumption so both the battery and kids’ enjoyment lasts as long as possible.

  • Add an inexpensive digital readout to your drill press

    Add an inexpensive digital readout to your drill press

    Reading Time: 2 minutes

    A drill press is a very useful tool that lets you slowly drill holes that are perfectly perpendicular to the work piece. And good drill presses give you a readout that lets you drill to a precise depth. But the cheap drill press stands for hand drills make that difficult. To solve this problem on a budget, Minikk designed an affordable digital readout add-on.

    This digital readout is very useful. It shows exactly how far you move the drill, with a precision of 0.01 millimeters. And it lets you set the zero point (typically the top surface of the material) so you don’t have to do any math in your head.

    Minikk achieved this with an inexpensive digital caliper. That has an LCD screen without a backlight and it is hard to read, so Minikk hacked it with an Arduino Nano board to add a much more readable OLED screen. That was possible because this digital caliper, like most of the budget models on the market, has a control board that is accessible via I2C. That lets the Arduino pull the measurements to display on the OLED.

    With a 3D-printed mount and enclosure to hold everything in place, Minikk now has a reasonably accurate and precise digital readout that didn’t break the back. This lets them drill holes to exactly the required depth without any hassle. Best of all, Minikk uploaded the sketch and 3D files so you can add a digital readout to your drill press.

    The post Add an inexpensive digital readout to your drill press appeared first on Arduino Blog.

    Website: LINK

  • TAST-E is an animatronic robot head with a sense of taste and smell

    TAST-E is an animatronic robot head with a sense of taste and smell

    Reading Time: 2 minutes

    There are many theories that attempt to explain the uncanny valley, which is a range of humanoid realness that is very disconcerting to people. When something looks almost human, we find it disturbing. That often applies to robots with faces — or robots that are faces, as is the case with the TAST-E robot that has a sense of taste and smell.

    The TAST-E robot created by M. Bindhammer looks a bit like a human face, sans skin. Servo motors let it pan and tilt, flap its lips, move its unsettlingly realistic eyeballs, and waggle its eyebrows. It can even speak thanks to a Parallax Emic 2 text-to-speech module connected to an Arduino Mega 2560 board.

    But TAST-E is most intriguing because of its sense of taste and smell, which let it identify specific compounds and molecules.

    Our own tongues can only detect five distinct tastes: saltiness, sweetness, bitterness, sourness, and umami (savoriness). TAST-E can do the same by recognizing the compounds that stimulate those receptors on our tongues. It does so with colorimeters, which detect the color produced when certain reagents mix with those compounds. This is similar to how a woman might look for a blue or pink line on a pregnancy test. TASTE-E has custom colorimeters that look for the reagent colors associated with those taste compounds.

    TASTE-E’s sense of smell is a bit more straightforward, but also less analogous to human smell. Its electronic nose uses a Grove gas sensor breakout with four modules: a GM-102B for NO2, a GM-302B for ethanol, a GM-502B for VOCs, and a GM-702B for CO/H2. Those let it analyze the concentration of those compounds in an air sample.

    It isn’t clear what M. Bindhammer intends for TAST-E, but this robot is as impressive as it is chilling.

    The post TAST-E is an animatronic robot head with a sense of taste and smell appeared first on Arduino Blog.

    Website: LINK

  • Spotlight on teaching programming with and without AI in our 2024 seminar series

    Spotlight on teaching programming with and without AI in our 2024 seminar series

    Reading Time: 3 minutes

    How do you best teach programming in school? It’s one of the core questions for primary and secondary computing teachers. That’s why we’re making it the focus of our free online seminars in 2024. You’re invited to attend and hear about the newest research about the teaching and learning of programming, with or without AI tools.

    Two smiling adults learn about computing at desktop computers.

    Building on the success and the friendly, accessible session format of our previous seminars, this coming year we will delve into the latest trends and innovative approaches to programming education in school.

    Secondary school age learners in a computing classroom.

    Our online seminars are for everyone interested in computing education

    Our monthly online seminars are not only for computing educators but also for everyone else who is passionate about teaching young people to program computers. The seminar participants are a diverse community of teachers, technology enthusiasts, industry professionals, coding club volunteers, and researchers.

    Two adults learn about computing at desktop computers.

    With the seminars we aim to bridge the gap between the newest research and practical teaching. Whether you are an educator in a traditional classroom setting or a mentor guiding learners in a CoderDojo or Code Club, you will gain insights from leading researchers about how school-age learners engage with programming. 

    What to expect from the seminars

    Each online seminar begins with an expert presenter delivering their latest research findings in an accessible way. We then move into small groups to encourage discussion and idea exchange. Finally, we come back together for a Q&A session with the presenter.

    Here’s what attendees had to say about our previous seminars:

    “As a first-time attendee of your seminars, I was impressed by the welcoming atmosphere.”

    “[…] several seminars (including this one) provided valuable insights into different approaches to teaching computing and technology.”

    “I plan to use what I have learned in the creation of curriculum […] and will pass on what I learned to my team.”

    “I enjoyed the fact that there were people from different countries and we had a chance to see what happens elsewhere and how that may be similar and different to what we do here.”

    January seminar: AI-generated Parson’s Problems

    Computing teachers know that, for some students, learning about the syntax of programming languages is very challenging. Working through Parson’s Problem activities can be a way for students to learn to make sense of the order of lines of code and how syntax is organised. But for teachers it can be hard to precisely diagnose their students’ misunderstandings, which in turn makes it hard to create activities that address these misunderstandings.

    A group of students and a teacher at the Coding Academy in Telangana.

    At our first 2024 seminar on 9 January, Dr Barbara Ericson and Xinying Hou (University of Michigan) will present a promising new approach to helping teachers solve this difficulty. In one of their studies, they combined Parsons Problems and generative AI to create targeted activities for students based on the errors students had made in previous tasks. Thus they were able to provide personalised activities that directly addressed gaps in the students’ learning.

    Sign up now to join our seminars

    All our seminars start at 17:00 UK time (18:00 CET / 12:00 noon ET / 9:00 PT) and are held online on Zoom. To ensure you don’t miss out, sign up now to receive calendar invitations, and access links for each seminar on the day.

    If you sign up today, we’ll also invite you to our 12 December seminar with Anaclara Gerosa (University of Glasgow) about how to design and structure of computing activities for young learners, the final session in our 2023 series about primary (K-5) computing education.

    Website: LINK

  • Retro Pi World Radio

    Retro Pi World Radio

    Reading Time: 3 minutes

    Despite his thoroughly modern career as a software engineer in Silicon Valley and a CV that lists VMware and Google among his credits, Raju has a fondness for the old days. “I have always loved to tinker and repurpose old hardware to build something new”, he says, favouring Raspberry Pi boards because they are “perfect” for the projects he likes to work on since “they are so easy to setup and get started with”.

    Python handles the GPIO input from the rotary knobs and converts it into keyboard input events, such as scrolling for radio stations

    A nod to nostalgia

    For the retro radio build Raju wanted something that would force us to slow down in our current fast-paced digital world. He says the analogue controls of the radio are in some way the opposite of how we interact with our devices today with touch and voice. The project was also meant to remind Raju of his childhood of using analogue knobs to change stations. His lengthy search for the ideal old radio eventually led to him choosing one with a speaker to one side and enough space to cut out a window and fit a new 5in screen. His Retro World Radio can tune in to a vast collection of internet streaming radio stations from around the globe, and features a vintage map to browse and find radio streams.

    He posted a video of his project on YouTube showing station selection

    Keep on improving

    Raju had seen other retro radio upcycling projects online, and was particularly keen on creating one similar to this internet radio project. He used a 2GB Raspberry Pi 4 because he “needed the extra horsepower of Raspberry Pi 4 to get experience with the map display”. He bought the main components from online stores such as Adafruit.

    Sourcing a suitable radio and writing the software interface were his main challenges, since backend engineering is his professional forte. “I enjoyed the experience of writing all the Javascript code for the display and I am still thinking of ways to improve the overall aesthetic. Raju designed the new parts  himself including a new front face for the radio, using CAD software to design and create some 3D-printed parts. He also wrote software for the Retro World Radio, making liberal use of existing SDKs and open source or free online libraries.

    The searchable Radio Garden site serves up stations from around the globe

    He began with a development platform using a breadboard, which allowed him to test the software. The first version had three rotary knobs mapped to Raspberry Pi’s GPIO pins, but Raju later decided to use four knobs. These pull in internet streams from Radio.Garden and can be chosen by location as well as genre.

    Having completed the radio project, Raju is now gearing up to combine his love of tinkering with tech with LEGO, and has recently acquired a Raspberry Pi Zero W.

  • This DIY tool automates LED testing and current limit calculations

    This DIY tool automates LED testing and current limit calculations

    Reading Time: 2 minutes

    GPIO pins on most microcontrollers operate at low voltages, typically between 3.3V and 5V, and are unable to deliver much current — oftentimes stopping at 20-40mA. This is why, when setting up an LED, series resistors are used to limit the amount of current draw and prevent damage to the pin. Mirko Pavleski created a workbench device that helps figure out the size of this resistor and allows for an LED to be connected for live testing.

    Built around an Arduino Nano, the system presents the user with a display for selecting the desired maximum current draw and LED voltage input. The panel of buttons on the left can increment or decrement the ideal voltage/current levels that, in turn, are then used to calculate the value of the series resistor. This value appears on the bottom alongside the part number for ordering the resistor from a distributor.

    The values at the top of the LCD indicate how the connected LED currently behaves given a known voltage. By wiring the LED to a couple of sense resistors and an analog input pin, its forward voltage along with its current draw can be determined.

    [youtube https://www.youtube.com/watch?v=UEMeySv-Z_c?feature=oembed&w=500&h=281]

    More details about this project can be found in Pavleski’s Hackaday.io write-up here.

    The post This DIY tool automates LED testing and current limit calculations appeared first on Arduino Blog.

    Website: LINK

  • Controlling a power strip with a keyword spotting model and the Nicla Voice

    Controlling a power strip with a keyword spotting model and the Nicla Voice

    Reading Time: 2 minutes

    As Jallson Suryo discusses in his project, adding voice controls to our appliances typically involves an internet connection and a smart assistant device such as Amazon Alexa or Google Assistant. This means extra latency, security concerns, and increased expenses due to the additional hardware and bandwidth requirements. This is why he created a prototype based on an Arduino Nicla Voice that can provide power for up to four outlets using just a voice command.

    Suryo gathered a dataset by repeating the words “one,” “two,” “three,” “four,” “on,” and “off” into his phone and then uploaded the recordings to an Edge Impulse project. From here, he split the files into individual words before rebalancing his dataset to ensure each label was equally represented. The classifier model was trained for keyword spotting and used Syntiant NDP120-optimal settings for voice to yield an accuracy of around 80%.

    Apart from the Nicla Voice, Suryo incorporated a Pro Micro board to handle switching the bank of relays on or off. When the Nicla Voice detects the relay number, such as “one” or “three”, it then waits until the follow-up “on” or “off” keyword is detected. With both the number and state now known, it sends an I2C transmission to the accompanying Pro Micro which decodes the command and switches the correct relay.

    To see more about this voice-controlled power strip, be sure to check out Suryo’s Edge Impulse tutorial.

    [youtube https://www.youtube.com/watch?v=9PRjhA38jBE?feature=oembed&w=500&h=281]

    The post Controlling a power strip with a keyword spotting model and the Nicla Voice appeared first on Arduino Blog.

    Website: LINK

  • UNO R4 Stars: Meet Daniel Jansson

    UNO R4 Stars: Meet Daniel Jansson

    Reading Time: 3 minutes

    The launch of the Arduino UNO R4 marks a huge leap forward for our community. For us, it’s also the chance to celebrate the people who bring our ecosystem to life with their bright ideas, radiant enthusiasm, and shining insight.

    That is how the UNO R4 Stars blog post series began: to highlight makers who have not only created amazing projects with Arduino, but who are giving back to the community by sharing as they go and helping others make anything they wish.

    We invite you to discover each profile, hoping you might find a North Star to navigate around an expanding galaxy or venture into completely new universes.

    Daniel Jansson first came into contact with Arduino in 2011, while at Umeå Institute of Design for his master’s degree in interaction design. The experience was empowering to the point of being weird: “It was like, now I can create things which only engineers and developers could make before. It felt like I was doing things that I should just not be able to do.” 

    Curious by nature, he instantly realized that – while the technology could have helped him in his studies – it was a lot more fun to create quirky interactive objects that made people smile. So he kept going, experimenting with various Arduino boards to create big and small devices with connectivity, sound, lights and interactivity. 

    “There are few things I enjoy more than taking disparate subjects and joining them into new creations, oftentimes with Arduino acting as the glue to help things sense the world around them, or interact in new and unusual ways,” he says. 

    A great example of this is his favorite maker project: the YouTube Subscriber Levelometer, which repurposes a device once used to measure the level of liquid in tanks using pressure. Adding his signature blend of “physical interaction, programming, sound, connectivity and a healthy dose of humor,” Jansson built a phygital system that keeps track of his key influencer stats. He integrated speech synthesis by combining an Arduino Nano with the Talkie library, which was based on work done by Texas Instruments in the 1980s, and programmed everything via the Arduino IDE

    [youtube https://www.youtube.com/watch?v=wn6QWb816jo?feature=oembed&w=500&h=281]

    As a long-time Arduino user, Jansson was excited to try the UNO R4: “It extends the potential for new projects to places where I did not imagine the UNO platform could go. It really feels like a leap forward, without compromising on the vast library of projects created over the last 11 years since the launch of the UNO R3.” 

    We asked Jansson, “What’s your favorite part of the UNO R4?”

    • The 12-bit DAC to generate higher fidelity sound, opening up huge possibilities for musical projects – even building entirely new instruments.
    • The native HID capabilities, which make creating native USB-MIDI super easy.
    • Compatibility with the UNO R3, allowing users to revisit and update old projects.

    Beyond any specific product, it’s the global community that makes Arduino unique: “It doesn’t matter where in the world you are, you can always find someone who has run into the same challenges as you have, and find help to overcome them to make your projects come true. The wealth of knowledge makes Arduino a democratic hardware platform in ways we have never seen before.”

    The value of shared knowledge and experiences clearly resonates with Jansson, who hopes to encourage others to learn, enjoy, and broaden their mind with his projects. To keep up with his many fun and interesting ideas – bound to bring a smile to your face – follow his Instagram account or subscribe to his “Switch & Lever” YouTube channel.

    The post UNO R4 Stars: Meet Daniel Jansson appeared first on Arduino Blog.

    Website: LINK

  • Coolest Projects is back in 2024

    Coolest Projects is back in 2024

    Reading Time: 5 minutes

    Big news for young tech creators: Coolest Projects will return in 2024. The world’s leading showcase for young creators of digital tech will be open for registration in the online gallery, and we want young people worldwide to showcase their tech projects.

    In 2024, we are hosting the Coolest Projects online showcase and livestream celebration for all young creators around the world, and also in-person events in the UK and Ireland for young creators who live there.

    A girl presenting a digital making project

    Key dates for Coolest Projects 2024

    All young tech creators can take part — for free — in the Coolest Projects online showcase:

    • Registration opens: 14 February 2024
    • Registration closes: 22 May 2024
    • Celebratory livestream with announcement of the judges’ favourite projects: 26 June 2024
    A young person using Raspberry Pi hardware and learning resources to do digital making

    How does Coolest Projects work?

    Coolest Projects is an opportunity for young tech creators to share what they have made with the world. Young people register their tech creations to show them the Coolest Projects online showcase gallery. Alongside mentors, parents, friends, and family members in their local and global communities, they can explore the gallery and celebrate what they and their peers have made.

    Who can take part?

    • Coolest Projects is open to all tech creators up to age 18
    • Tech creators of all experience levels are encouraged to participate
    • Creators can take part individually or in teams of up to five
    • Creators can live in any place in the world
    • Participation is free
    A boy participating in Coolest Projects shows off his tech project together with an adult.

    What kinds of tech projects can be part of Coolest Projects?

    • All projects are welcome, whether they are beginner, advanced, or something in between
    • Projects can be registered in six categories: Scratch, games, web, mobile apps, hardware, and advanced programming
    • We love to see works in progress, so projects don’t need to be completed to be registered
    • Creators can choose any topic for their project, for example community, environment, health, fun, art, education, or identity
    A group of young women present a robot buggy they have built.

    What happens after registration?

    • The online gallery is open for young tech creators to explore to see what their peers all over the world have made
    • Judges evaluate projects based on their coolness, complexity, design, usability, and presentation, and give feedback to creators about their projects
    • Judges pick some of their favourite projects to highlight, and every participant gets a unique certificate and some fun digital swag
    • Participants and the whole global Coolest Projects community celebrates young tech creators’ ingenuity on our livestream on 26 June
    Four young coders show off their tech project for Coolest Projects.

    How can young people get started with their projects?

    If your kids want to learn about creating with technology, check out our free guided coding project paths. These paths are designed to support all young people to learn how to make their own tech projects and develop their coding skills. For example:

    • For young people who are completely new to coding, our Introduction to Scratch path is a great place to start
    • If young people would like to create their own website, for example to share information about a cause they care about, they can follow our Intro to web path
    • The Introduction to Unity path is perfect for more experienced creators who are keen to build interactive 3D world

    Young creators can take a look at the Coolest Projects 2023 online showcase gallery for inspiration if they are not sure what they want to make. You can also watch the story of Zaahra and Eesa, siblings who participated in Coolest Projects 2020.

    Coolest Projects in-person events: Ireland and the UK

    If you are a young creator in Northern Ireland, the Republic of Ireland, or the UK, then Coolest Projects is also coming to you in person in 2024. Participants will be able to meet other young tech creators, connect to their community, and celebrate each other’s creations. Young people are encouraged to take part in both the Coolest Projects global online showcase and their local in-person event.

    Coolest Projects Ireland

    • Registration opens: 31 January 2024
    • Registration closes: 20 March 2024
    • Event day: 13 April 2024
    The exhibition hall at Coolest Projects Ireland 2023.
    Coolest Projects Ireland 2023

    Coolest Projects Ireland will take place at DCU St Patrick’s College Campus, Drumcondra in Dublin. It’s open to young creators in Northern Ireland and the Republic of Ireland, and their families and friends are invited to come along to celebrate them and see all the incredible projects on show. Participants can apply for partial bursaries for the costs of attending the event.

    Coolest Projects UK

    Very soon we will announce the date and venue for Coolest Projects UK for all young creators in the UK. Sign up for email updates to be the first to hear about it. We will also share full details of each in-person event on the Coolest Projects website when registration opens.

    A young person creating a project at a laptop. An adult is sat next to them.

    If you live in another country…

    If there’s not an in-person Coolest Projects event near you, you can still join in the fun: the Coolest Projects online showcase is open to any young creator aged up to 18, from anywhere in the world. We also work with brilliant partner organisations around the world to bring Coolest Projects events to their countries and communities. Sign up to the Coolest Projects newsletter to be the first to know about any in-person event in your country.

    What’s next?

    Coolest Projects registration opens soon in 2024, and young creators can start thinking of ideas and working on their projects now. Or if young people have already made something they are really proud of, they can showcase that creation once registration is open.

    Coolest Projects logo.

    Sign up for email updates to always get the latest news about all things Coolest Projects, from event updates to the fun swag coming for 2024.

    Website: LINK

  • Complete Buyer’s Guide in The MagPi magazine #136

    Complete Buyer’s Guide in The MagPi magazine #136

    Reading Time: 2 minutes

    Your full guide to Raspberry Pi kits, components, and accessories

    Complete Raspberry Pi Buyer’s Guide

    Everything you need to have fun with Raspberry Pi in 2024. We’ve got official accessories, third-party kits, cases, projects, circuits, robots and 3D printing projects. There’s enough here to keep any Raspberry Pi fan quiet for a while.

    Keep your cool with our guide to Raspberry Pi 5 thermal control

    Heating and cooling Raspberry Pi 5

    Raspberry Pi 5 runs fast! And with speed comes thermal heating. Keep your cool with our guide to heating and cooling your new Raspberry Pi computer. We’ve got graphs and charts to back up our advice.

    Take Raspberry Pi 5 up a gear with our guide to overclocking the little board

    Overclock Raspberry Pi 5

    Let’s take Raspberry Pi 5 up a notch. We’ve got a guide and code for taking your Raspberry Pi 5’s speedy CPU up to 3.0GHz and boosting the GPU to 900MHz. The increased performance makes gaming better, compiling faster and your Raspberry Pi 5 look cooler. So put go-faster stripes on your Raspberry Pi 5 today.

    Play the latest video games without spending hundreds of pounds on a brand new console

    Cloud gaming with Raspberry Pi 5

    Did you know that Raspberry Pi can play just about anything thanks to the power of cloud gaming? You can stream Xbox games, Nvidia games and play many of the latest hits. Cloud gaming is fantastic on Raspberry Pi 5 and our guide can help you save hundreds of pounds on buying the latest consoles.

    Play sounds from around the globe with this fantastic upcycling project

    Retro Pi World Radio

    We’ve got lots of projects in this month’s edition of The MagPi. This retro radio that plays stations from around the world is a great example of upcycling. The original dial has been replaced with a screen displaying a map of the globe. This and many more projects can be found in this month’s edition of The MagPi magazine.

    Subscribe today

    Ready to dive in? Subscribe to The MagPi today to get your hands on this fantastic issue and many more. Join us in exploring, creating, and celebrating the world of Raspberry Pi! Subscribers get Raspberry Pi 5 first with Priority Boarding.

  • Win one of ten Raspberry Pi 5 accessory kits

    Win one of ten Raspberry Pi 5 accessory kits

    Reading Time: < 1 minute

    Subscribe

  • Evolving our online courses to help more people be computing educators

    Evolving our online courses to help more people be computing educators

    Reading Time: 4 minutes

    Since launching our free online courses about computing on the edX platform back in August, we’ve been training course facilitators and analysing the needs of educators around the world. We want every course participant to have a great experience learning with us — read on to find out what we’re doing right now and into 2024 to ensure this.

    Workshop attendees at a table.

    Online courses for all adults who support young people

    Educators of all kinds are key for supporting children and young people to engage with computing technology and develop digital skills. You might be a professional teacher, or a parent, volunteer, youth worker, librarian… there are so many roles in which people share knowledge with young learners.

    Young people and an adult mentor at a computer at Coolest Projects Ireland 2023.

    That’s why our online courses are designed to support any kind of educator to:

    • Understand the full breadth of topics within computing
    • Discover how to introduce computing to young people in clear and exciting ways that are grounded in the latest research

    We are constantly improving our online courses based on your feedback, the latest education research, and the insights our team members gain through supporting you on your course learning journeys. Three principles guide these improvements: accessibility, scalability, and sustainability. 

    Making our courses more relevant and accessible

    Our online courses are used by people who live around the world and bring various knowledge and experiences. Some participants are classroom teachers, others have computing experience from their job and want to volunteer at a kids’ coding club, and some may be parents who want to support their children. It’s important to us that our courses are relevant and accessible to all kinds of adult learners. 

    A parent and child work together at a Raspberry Pi computer.

    We’re currently working to: 

    • Simplify the English in the courses for participants who speak it as a second language
    • Adapt the course activities for specific settings where participants help young people learn so that e.g. teachers see how the activities work in the classroom, and volunteers who run coding clubs see how they work in club sessions
    • Ensure our course facilitators have experience in a range of different settings including coding clubs, and in a variety of different contexts around the world

    Making our courses useful for more groups of people

    When we think about the scalability of our courses, we think about how to best support as many educators around the world as possible. If we can make the jobs of all educators easier, whatever their setting is like, then we are making the right choices.

    An educator helps two young people at a computer.

    We’re currently working to: 

    • Talk with the global network of educators we’re a part of to better understand what works for them so we can reflect that in the courses
    • Include a wider range of examples for settings beyond the classroom in the courses
    • Adapt our courses so they are relevant to participants with various needs while sustaining the high quality of the overall learning experience

    Making the learning from our courses sustainable

    The educators who take our courses work to achieve amazing things, and this means they are often busy. That they take the time to complete one of our courses to learn new things is a commitment we want to make sure is rewarded. The learning you get from participating in our online courses should continue to benefit you far beyond the time you spend completing it. This is what we mean by sustainability.

    Kenyan educators work on a physical computing project.

    We’re currently working to: 

    • Lay out clear learning pathways so you can build on the knowledge you gain in one course in the next course
    • Offer course resources that are easy to access after you’ve completed the course
    • Explore ways to build communities around our courses where you can share successes and learning outcomes with your fellow participants

    Learn with us, and help us design better courses for you

    Our work to improve the accessibility, scalability, and sustainability of our courses will continue into 2024, and these three principles will likely be part of our online training strategy for the following year too. 

    If you’d like to support young people in your life to learn about computing and digital technologies, take one of our free courses now and learn something new. We have twenty courses available right now and they are totally free.

    We are also looking for adult testers for new course content. So if you’re any kind of educator and would like to test upcoming online course content and share your feedback and experiences, please send us a message with the subject ‘Educator training’. 

    Website: LINK

  • Arduino Education is a three-time Bett Awards finalist for 2024

    Arduino Education is a three-time Bett Awards finalist for 2024

    Reading Time: 4 minutes

    We are proud to announce that Arduino Education has been shortlisted as a finalist in three categories for the Bett Awards 2024:

    • COMPANY OF THE YEAR (MORE THAN £3M)
    • COLLABORATION WITH A SCHOOL for the Medellin Challenge with Colegio San Jose de Las Vegas in Colombia
    • Bett INNOVATION AWARD for innovation on the Internet of Things in education with the Arduino Cloud for Schools, the Explore IoT Kit, and the Greenhouse Kit

    The Bett Awards are a celebration of the inspiring creativity and innovation that can be found throughout technology for education. These awards recognize Arduino Education’s efforts  to nurture future talent by bringing easy to use, affordable, and skill-oriented solutions for students at school and university.

    Let’s take a look at each of the award categories we’ve been nominated for in turn…

    Innovation Award 

    Why have we been shortlisted? At Arduino Education, we epitomize the fusion of cutting-edge technology with purposeful learning. Our revamped Arduino Cloud for Schools revolutionizes STEAM education by merging coding, IoT, and accessibility into a comprehensive ecosystem. 

    Meanwhile, the renewed Explore IoT Kit R2 is not just technologically advanced; it also aligns with the UN’s Sustainable Development Goals, promoting practical solutions to global challenges. The kit empowers students to delve deep into data communication, management, and societal problem-solving.

    Our innovative Greenhouse Kit addresses urban farming issues, turning students into active participants in sustainability endeavors. 

    Across our products and solutions, Arduino Education’s commitment isn’t merely to educate; it’s to inspire, empower, and lead, paving the way for a brighter, informed, and sustainable future. 

    Our nomination for the Innovator of the Year award is a testament to this enduring commitment to innovation that truly matters.

    Collaboration with a School 

    Arduino Education collaborated with the Colegio San Jose de Las Vegas for the Medellín Challenge 2023. Students participating in the challenge experienced a transformative arc during an intensive three months. From the early days of choosing their challenges to turning their innovative ideas into tangible prototypes, their journey was supported at every step by Arduino Education’s state-of-the-art technology resources, including the Explore IoT Kit and the Arduino Cloud. 

    An experienced Arduino Education trainer teamed up with the teachers and students during the prototyping stage to provide direct in-person technical support throughout the design phase, and provide ongoing feedback.

    Just some of the sustainability solutions that the teams of students devised with Arduino included:

    • Building a smart farm and designing tutorials so children in the Medellín communities could learn how to grow their own food, and potentially create a way to make an income.
    • Creating a virtual platform linked to a solar-powered car that visits local communities to bring learning experiences, such as environmental, technological, and entrepreneurship education to children.
    • A device that makes use of the water lost from natural sources in different activities: washing clothes, watering gardens and fish tanks. 

    Company of the Year (more than £3m)

    There’s a significant gap between education and the job market, where technology, methodology, and mindset for educating future talents are generally missing. Arduino Education strives to bring easy-to-use, affordable, and skill-oriented solutions to bridge this gap. We want to continuously redefine the horizons of STEAM education and push for innovation in the classroom. 

    Always looking forward, we pioneer educational tools that reflect real-world applications, like our collaboration on machine learning content with Harvard, and our Explore IoT Kit which ties to the UN’s Sustainable Development Goals. We champion diversity, sustainability, and corporate social responsibility. Efforts such as supporting ‘Jenga Labs‘ in Ghana and local manufacturing demonstrate our broader vision.

    Arduino Education’s focus on customer service and a thriving teacher community are testaments to our commitment to the education sector. 

    Dan Hubacz, a U.S. high school teacher, sums up Arduino Education’s approach perfectly: “I want my students to be working on things that are real and matter to them, and that also potentially have an impact on the community.”

    What’s next for Arduino Education

    Further to receiving this recognition from the Bett Awards for our continuous focus on innovative solutions, we’d like to say thank you to all the students and educators who use Arduino Education kits and solutions in their classrooms. It’s your enthusiasm and desire for learning that makes this possible and worthwhile. 

    With the newly-released Science Kit R3 and even more exciting kits to come in 2024, we’ll keep striving to innovate, bridge the STEM skill gaps, and nurture future talent.

    The post Arduino Education is a three-time Bett Awards finalist for 2024 appeared first on Arduino Blog.

    Website: LINK

  • Support for new computing teachers: A tool to find Scratch programming errors

    Support for new computing teachers: A tool to find Scratch programming errors

    Reading Time: 5 minutes

    We all know that learning to program, and specifically learning how to debug or fix code, can be frustrating and leave beginners overwhelmed and disheartened. In a recent blog article, our PhD student Lauria at the Raspberry Pi Computing Education Research Centre highlighted the pivotal role that teachers play in shaping students’ attitudes towards debugging. But what about teachers who are coding novices themselves?

    Two adults learn about computing at desktop computers.

    In many countries, primary school teachers are holistic educators and often find themselves teaching computing despite having little or no experience in the field. In a recent seminar of our series on computing education for primary-aged children, Luisa Greifenstein told attendees that struggling with debugging and negative attitudes towards programming were among the top ten challenges mentioned by teachers.

    Luisa Greifenstein.

    Luisa is a researcher at the University of Passau, Germany, and has been working closely with both teacher trainees and experienced primary school teachers in Germany. She’s found that giving feedback to students can be difficult for primary school teachers, and especially for teacher trainees, as programming is still new to them. Luisa’s seminar introduced a tool to help.

    A unique approach: Visualising debugging with LitterBox

    To address this issue, the University of Passau has initiated the primary::programming project. One of its flagship tools, LitterBox, offers a unique solution to debugging and is specifically designed for Scratch, a beginners’ programming language widely used in primary schools.

    A screenshot from the LitterBox tool.
    You can upload Scratch program files to LitterBox to analyse them. Click to enlarge.

    LitterBox serves as a static code debugging tool that transforms code examination into an engaging experience. With a nod to the Scratch cat, the tool visualises the debugging of Scratch code as checking the ‘litterbox’, categorising issues into ‘bugs’ and ‘smells’:

    • Bugs represent code patterns that have gone wrong, such as missing loops or specific blocks
    • Smells indicate that the code couldn’t be processed correctly because of duplications or unnecessary elements
    A screenshot from the LitterBox tool.
    The code patterns LitterBox recognises. Click to enlarge.

    What sets LitterBox apart is that it also rewards correct code by displaying ‘perfumes’. For instance, it will praise correct broadcasting or the use of custom blocks. For every identified problem or achievement, the tool provides short and direct feedback.

    A screenshot from the LitterBox tool.
    LitterBox also identifies good programming practice. Click to enlarge.

    Luisa and her team conducted a study to gauge the effectiveness of LitterBox. In the study, teachers were given fictitious student code with bugs and were asked to first debug the code themselves and then explain in a manner appropriate to a student how to do the debugging.

    The results were promising: teachers using LitterBox outperformed a control group with no access to the tool. However, the team also found that not all hints proved equally helpful. When hints lacked direct relevance to the code at hand, teachers found them confusing, which highlighted the importance of refining the tool’s feedback mechanisms.

    A bar chart showing that LitterBox helps computing teachers.

    Despite its limitations, LitterBox proved helpful in another important aspect of the teachers’ work: coding task creation. Novice students require structured tasks and help sheets when learning to code, and teachers often invest substantial time in developing these resources. While LitterBox does not guide educators in generating new tasks or adapting them to their students’ needs, in a second study conducted by Luisa’s team, teachers who had access to LitterBox not only received support in debugging their own code but also provided more scaffolding in task instructions they created for their students compared to teachers without LitterBox.

    How to maximise the impact of new tools: use existing frameworks and materials

    One important realisation that we had in the Q&A phase of Luisa’s seminar was that many different research teams are working on solutions for similar challenges, and that the impact of this research can be maximised by integrating new findings and resources. For instance, what the LitterBox tool cannot offer could be filled by:

    • Pedagogical frameworks to enhance teachers’ lessons and feedback structures. Frameworks such as PRIMM (Predict, Run, Investigate, Modify, and Make) or TIPP&SEE for Scratch projects (Title, Instructions, Purpose, Play & Sprites, Events, Explore) can serve as valuable resources. These frameworks provide a structured approach to lesson design and teaching methodologies, making it easier for teachers to create engaging and effective programming tasks. Additionally, by adopting semantic waves in the feedback for teachers and students, a deeper understanding of programming concepts can be fostered. 
    • Existing courses and materials to aid task creation and adaptation. Our expert educators at the Raspberry Pi Foundation have not only created free lesson plans and courses for teachers and educators, but also dedicated non-formal learning paths for Scratch, Python, Unity, web design, and physical computing that can serve as a starting point for classroom tasks.

    Exploring innovative ideas in computing education

    As we navigate the evolving landscape of programming education, it’s clear that innovative tools like LitterBox can make a significant difference in the journey of both educators and students. By equipping educators with effective debugging and task creation solutions, we can create a more positive and engaging learning experience for students.

    If you’re an educator, consider exploring how such tools can enhance your teaching and empower your students in their coding endeavours.

    You can watch the recording of Luisa’s seminar here:

    [youtube https://www.youtube.com/watch?v=ITbIVUc2Rxc?feature=oembed&w=500&h=281]

    Sign up now to join our next seminar

    If you’re interested in the latest developments in computing education, join us at one of our free, monthly seminars. In these sessions, researchers from all over the world share their innovative ideas and are eager to discuss them with educators and students. In our December seminar, Anaclara Gerosa (University of Edinburgh) will share her findings about how to design and structure early-years computing activities.

    This will be the final seminar in our series about primary computing education. Look out for news about the theme of our 2024 seminar series, which are coming soon.

    Website: LINK