
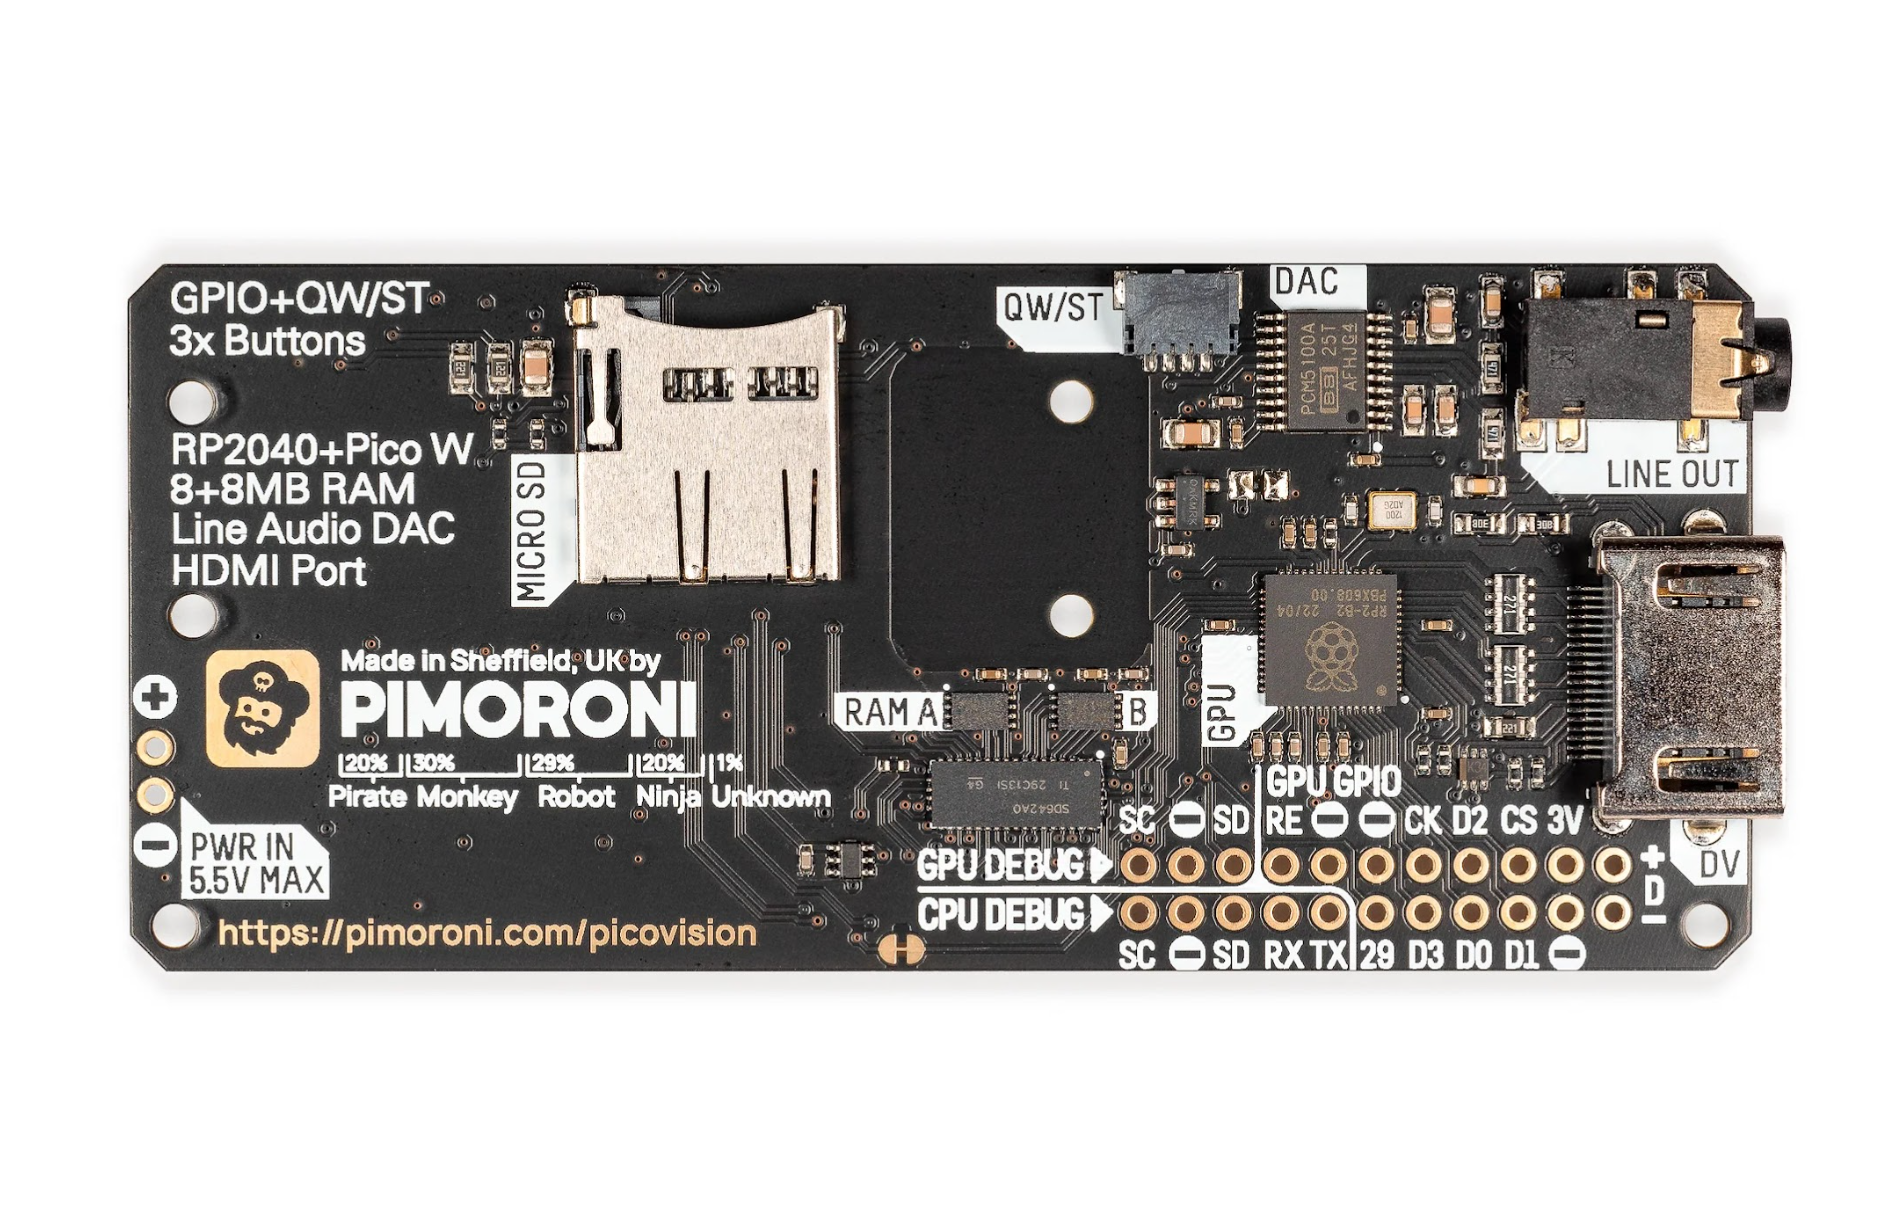
Power is connected using Pico W’s micro USB port – as usual, you can hook this up to a computer for programming in MicroPython or C/C++, or flashing Pico W with new firmware.
Alternatively, PicoVision can be powered via two unpopulated pins. There’s also a breakout header for CPU and GPU debugging, plus a few other GPIO pins. A single Qwiic/STEMMA QT port can be used to connect I2C breakouts or sensors.
On the front of the board are three user buttons, an activity LED, and a handy reset button. At the rear is the bonus of a microSD card slot to provide extra storage for assets such as graphics.

Instant menu
Getting started is as easy as connecting PicoVision to an HDMI monitor or TV and powering it up. It comes pre-flashed with MicroPython firmware that auto-runs a menu of example programs. The A and X user buttons are used to move up and down through the menu options; and a press of the Y button will select one.
Among the example programs are a fun Flappy Bird-style game, magic mirror dashboard, and Teletext-style headlines – the last two require connection to a Wi-Fi network. Several graphical demos showcase PicoVision’s capabilities. These include a classic 3D starfield effect (remember Windows 3.1’s screensaver?), a screen modes menu with numerous resolutions (some require GPU overclocking), and a parallax scrolling animation that makes use of PicoVision’s scroll modes – up to seven groups of scanlines can be scrolled separately.
Up to 80 sprites can be shown on screen simultaneously (or 32 with the special widescreen version of the firmware), with up to ten per any single scanline.
Start coding
When it comes to programming PicoVision yourself, a comprehensive GitHub repo provides lots of useful info, along with MicroPython and C/C++ libraries and code examples from which to learn. The most basic are Hello World programs to print text to the screen. Graphics are handled using Pimoroni’s standard PicoGraphics module, while a PicoSynth sound module is used to play simple tunes and noises using I2S audio from the board’s DAC chip.
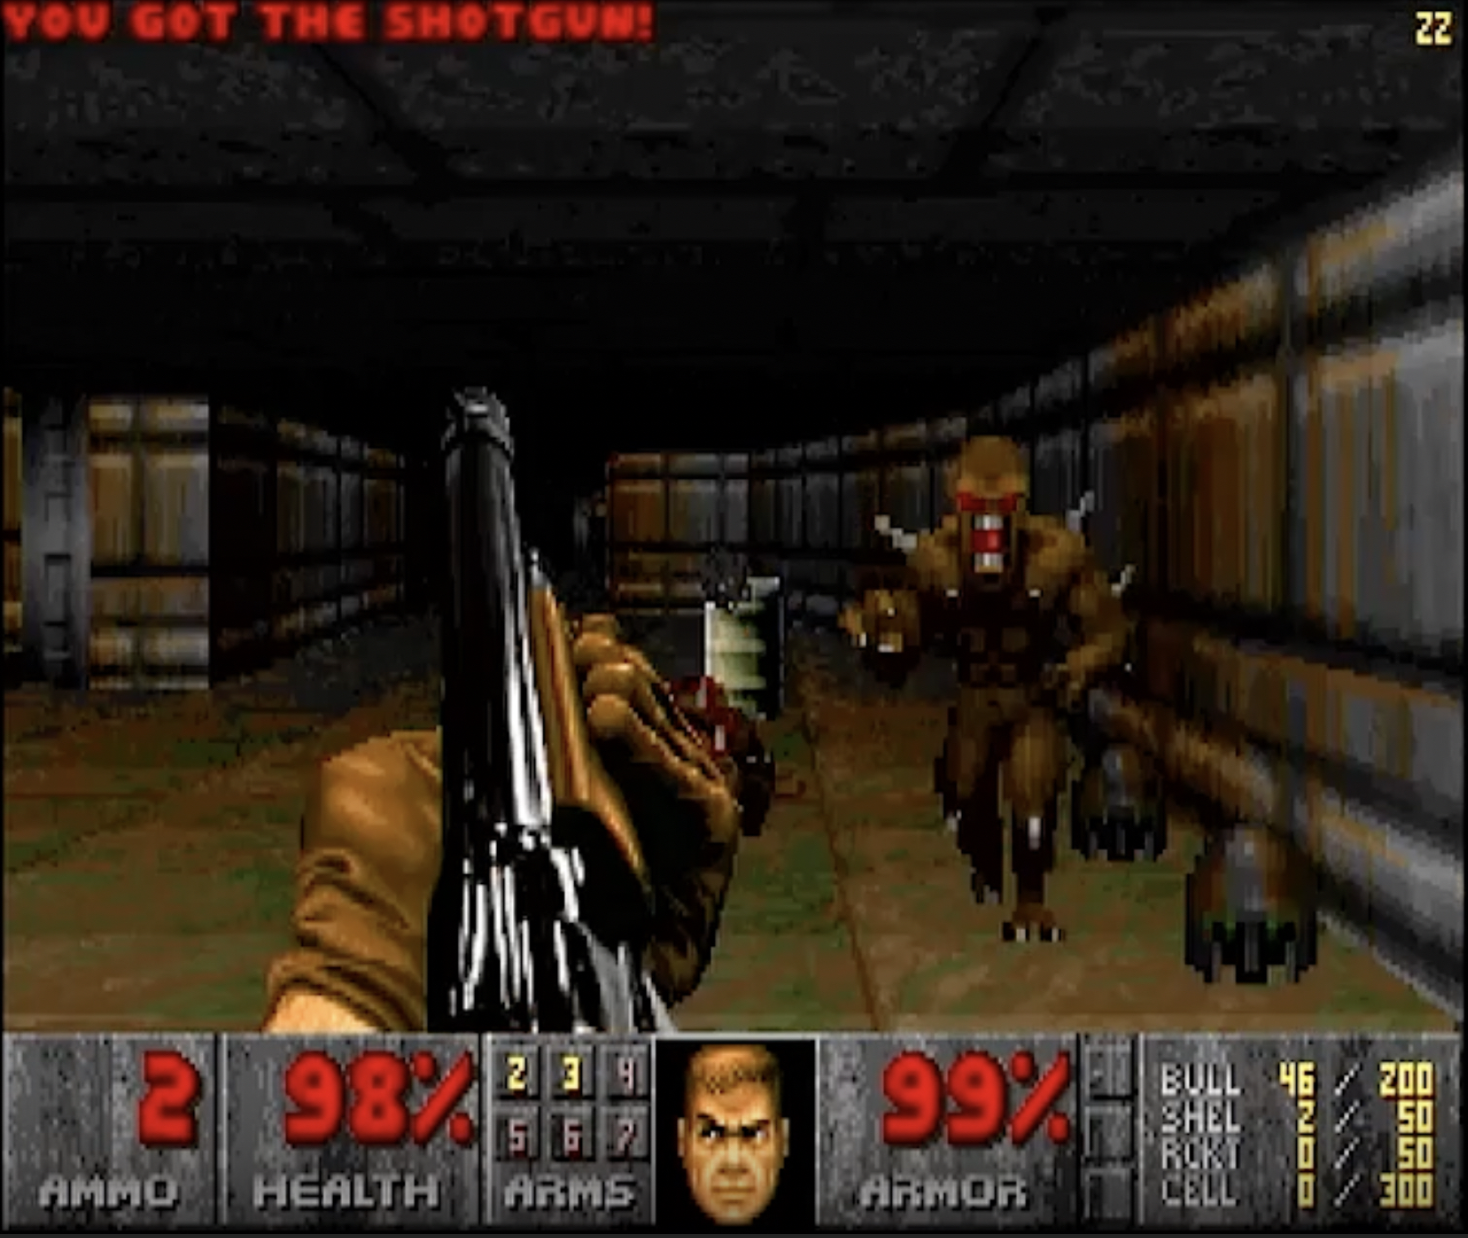
You’ll also want to try playing classic Doom on PicoVision – which works really well. Just flash the Doom firmware UF2 to PicoVision and add the game’s WHX file to a microSD card. For control, you’ll need to connect a USB keyboard via a splitter cable (as supplied in the optional accessory kit).
Verdict
9/10
With a second RP2040 and extra RAM to boost Pico W’s capabilities, PicoVision offers plenty of possibilities for retro gaming and coding projects.
Specs
Features: Pico W, separate RP2040 (GPU), 2 × 8MB PSRAM, PCM5100A DAC for audio, 3 × user buttons, status LED, reset button, microSD card slot
Connections: HDMI video out, 3.5mm audio line out, breakout header, Qw/ST port, micro USB (on Pico W)
Dimensions: 87 × 38 × 9mm
Schreibe einen Kommentar
Du musst angemeldet sein, um einen Kommentar abzugeben.