Create your own arcade-style continue screen | Wireframe #19
> INITIATING DECRYPTION SEQUENCE...
Raspberry Pi’s Rik Cross shows you how to create game states, and rules for moving between them.

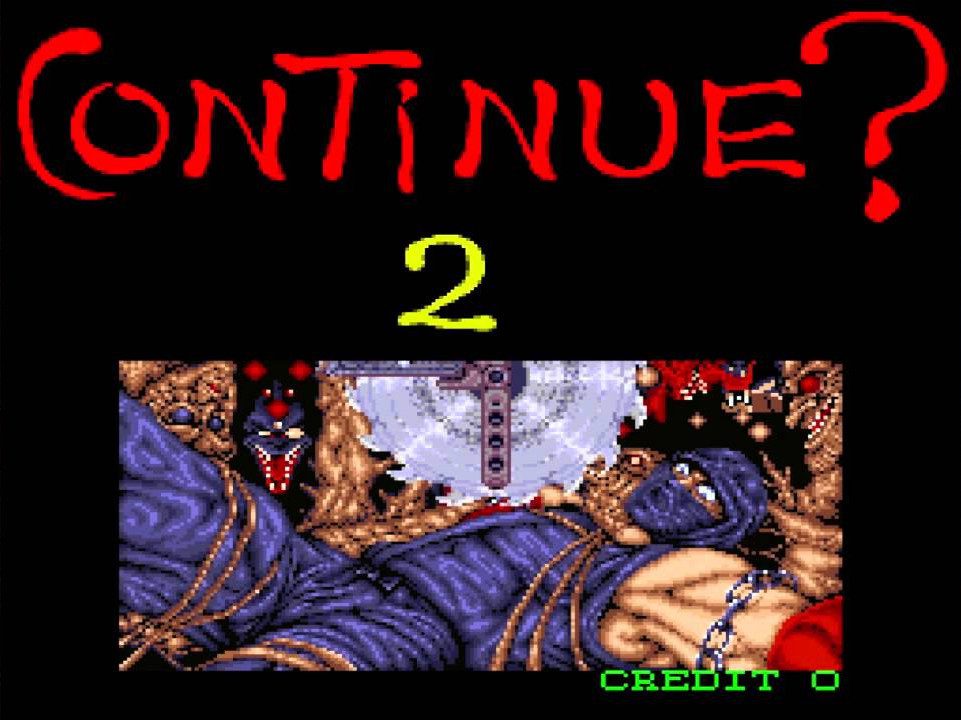
Ninja Gaiden’s dramatic continue screen. Who would be cruel enough to walk away?
The continue screen, while much less common now, was a staple feature of arcade games, providing an opportunity (for a small fee) to reanimate the game’s hero and to pick up where they left off.
Continue Screens
Games such as Tecmo’s Ninja Gaiden coin-op (known in some regions as Shadow Warriors) added jeopardy to their continue screen, in an effort to convince us to part with our money.
Often, a continue screen is one of many screens that a player may find themselves on; other possibilities being a title screen or an instruction screen. I’ll show you how you can add multiple screens to a game in a structured way, avoiding a tangle of if…else statements and variables.
A simple way of addressing this problem is to create separate update and draw functions for each of these screens, and then switch between these functions as required. Functions are ‘first-class citizens’ of the Python language, which means that they can be stored and manipulated just like any other object, such as numbers, text, and class instances. They can be stored in variables and other data types such as lists and dictionaries, and passed as parameters to (or returned from) other functions.
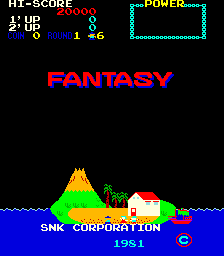
SNK’s Fantasy, released in 1981, was the first arcade game to feature a continue screen.
We can take advantage of the first-class nature of Python functions by storing the functions for the current screen in variables, and then calling them in the main update() and draw() functions. In the following example, notice the difference between storing a function in a variable (by using the function name without parentheses) and calling the function (by including parentheses).
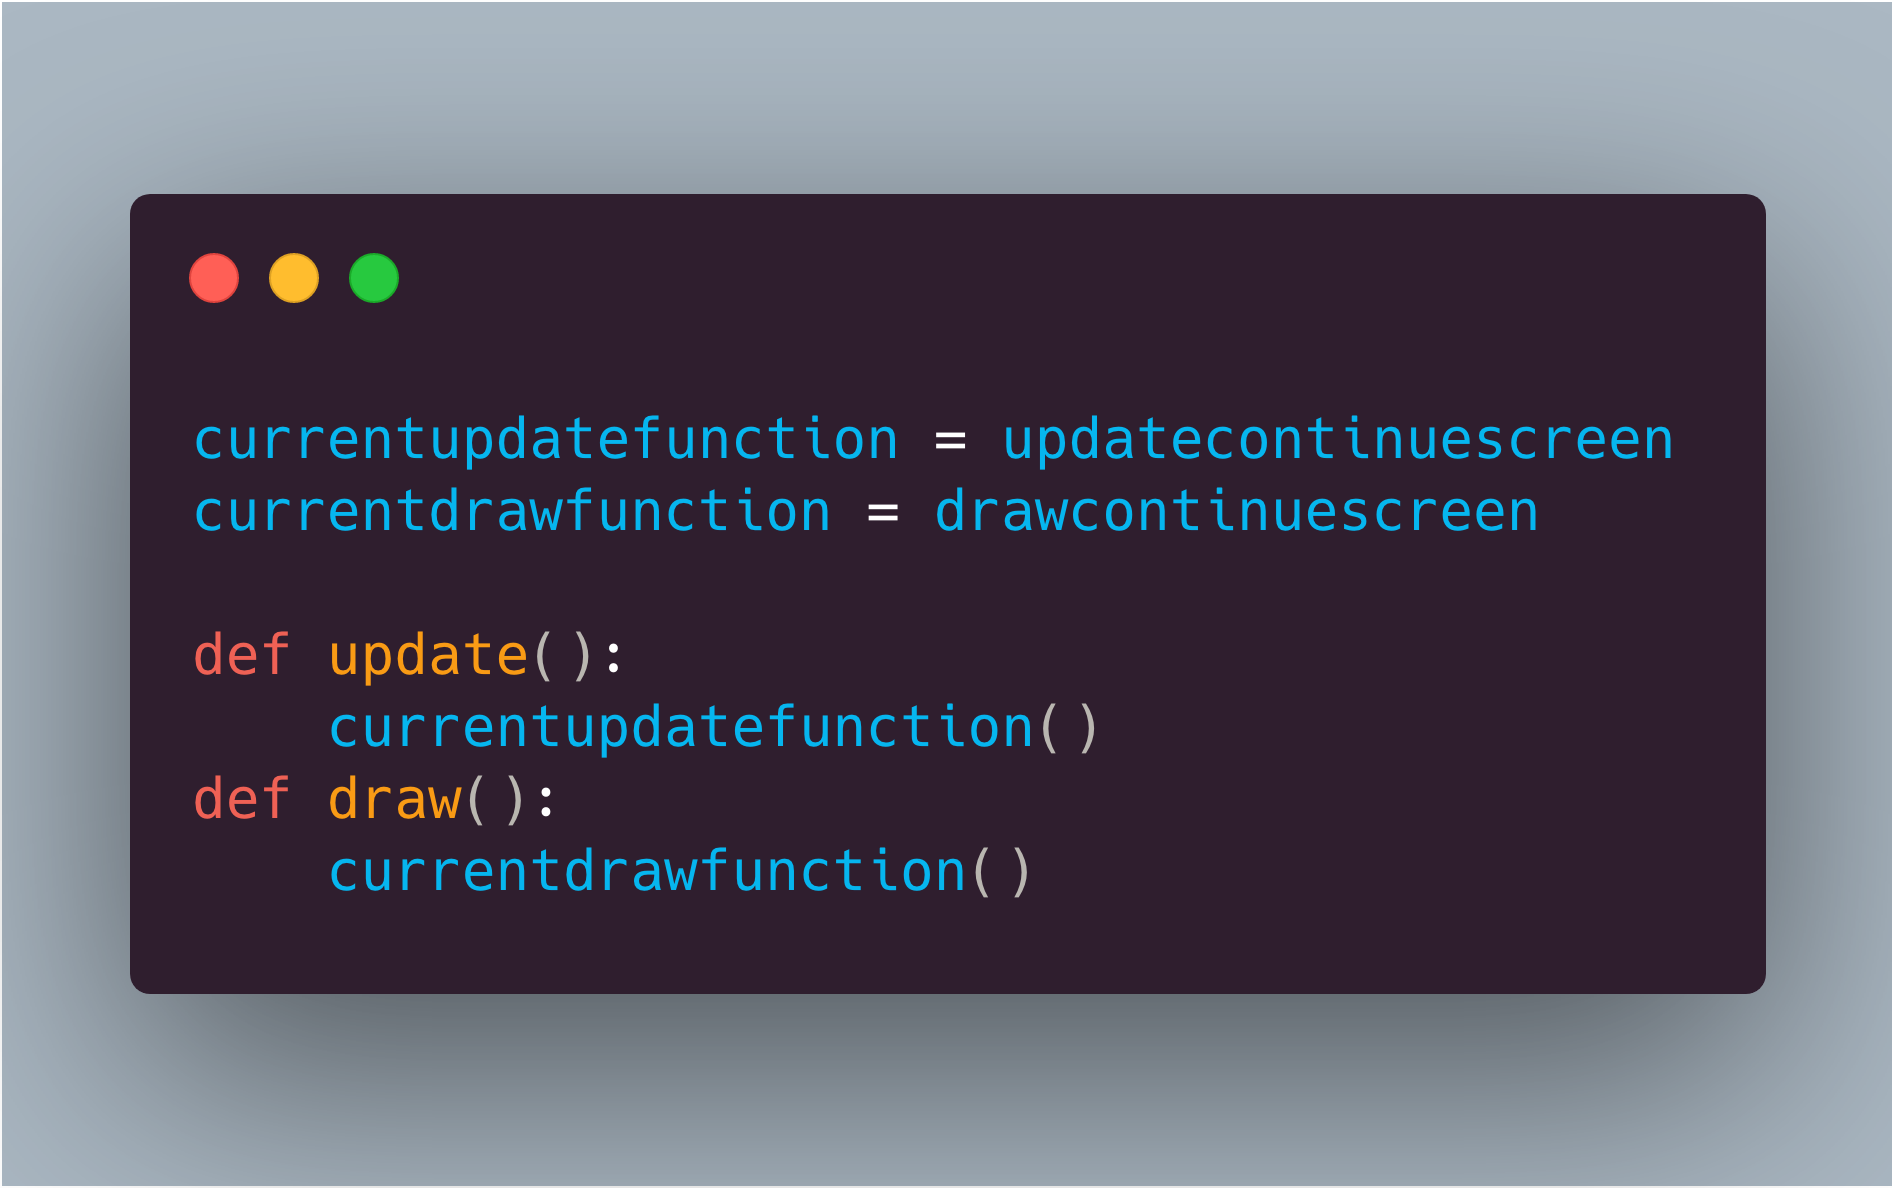
[Ed. comment: We have to use an image here because WordPress doesn’t seem to allow code indentation. We know that’s annoying because you can’t copy and paste the code, so if you know a better solution, please leave us a comment.]
The example code above calls currentupdatefunction() and currentdrawfunction(), which each store a reference to separate update() and draw() functions for the continue screen. These continue screen functions could then also include logic for changing which function is called, by updating the function reference stored in currentupdatefunction and currentdrawfunction.
This way of structuring code can be taken a step further by making use of state machines. In a state machine, a system can be in one of a (finite) number of predefined states, and rules determine the conditions under which a system can transition from one state into another.
Rules define conditions that need to be satisfied in order to move between states.
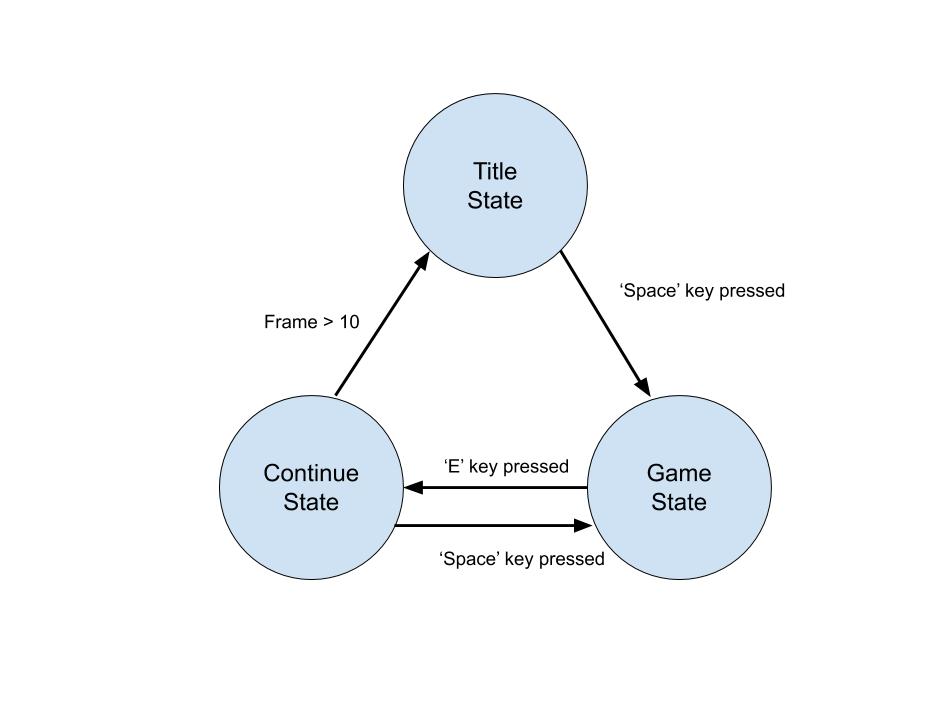
A state machine (in this case a very simplified version) can be implemented by first creating a core State() class. Each game state has its own update() and draw() methods, and a rules dictionary containing state:rule pairs – references to other state objects linked to functions for testing game conditions. As an example, the continuescreen state has two rules:
- Transition to the
gamescreenstate if theSPACEkey is pressed; - Transition to the
titlescreenstate if the frame timer reaches 10.
This is pulled together with a StateMachine() class, which keeps track of the current state. The state machine calls the update() and draw() methods for the current state, and checks the rules for transitioning between states. Each rule in the current state’s rules list is executed, with the state machine updating the reference to its current state if the rule function returns True. I’ve also added a frame counter that is incremented by the state machine’s update() function each time it is run. While not a necessary part of the state machine, it does allow the continue screen to count down from 10, and could have a number of other uses, such as for animating sprites.
Something else to point out is the use of lambda functions when adding rules to states. Lambda functions are small, single-expression anonymous functions that return the result of evaluating its expression when called. Lambda functions have been used in this example simply to make the code a little more concise, as there’s no benefit to naming the functions passed to addrule().
State machines have lots of other potential uses, including the modelling of player states. It’s also possible to extend the state machine in this example by adding onenter() and onexit() functions that can be called when transitioning between states.
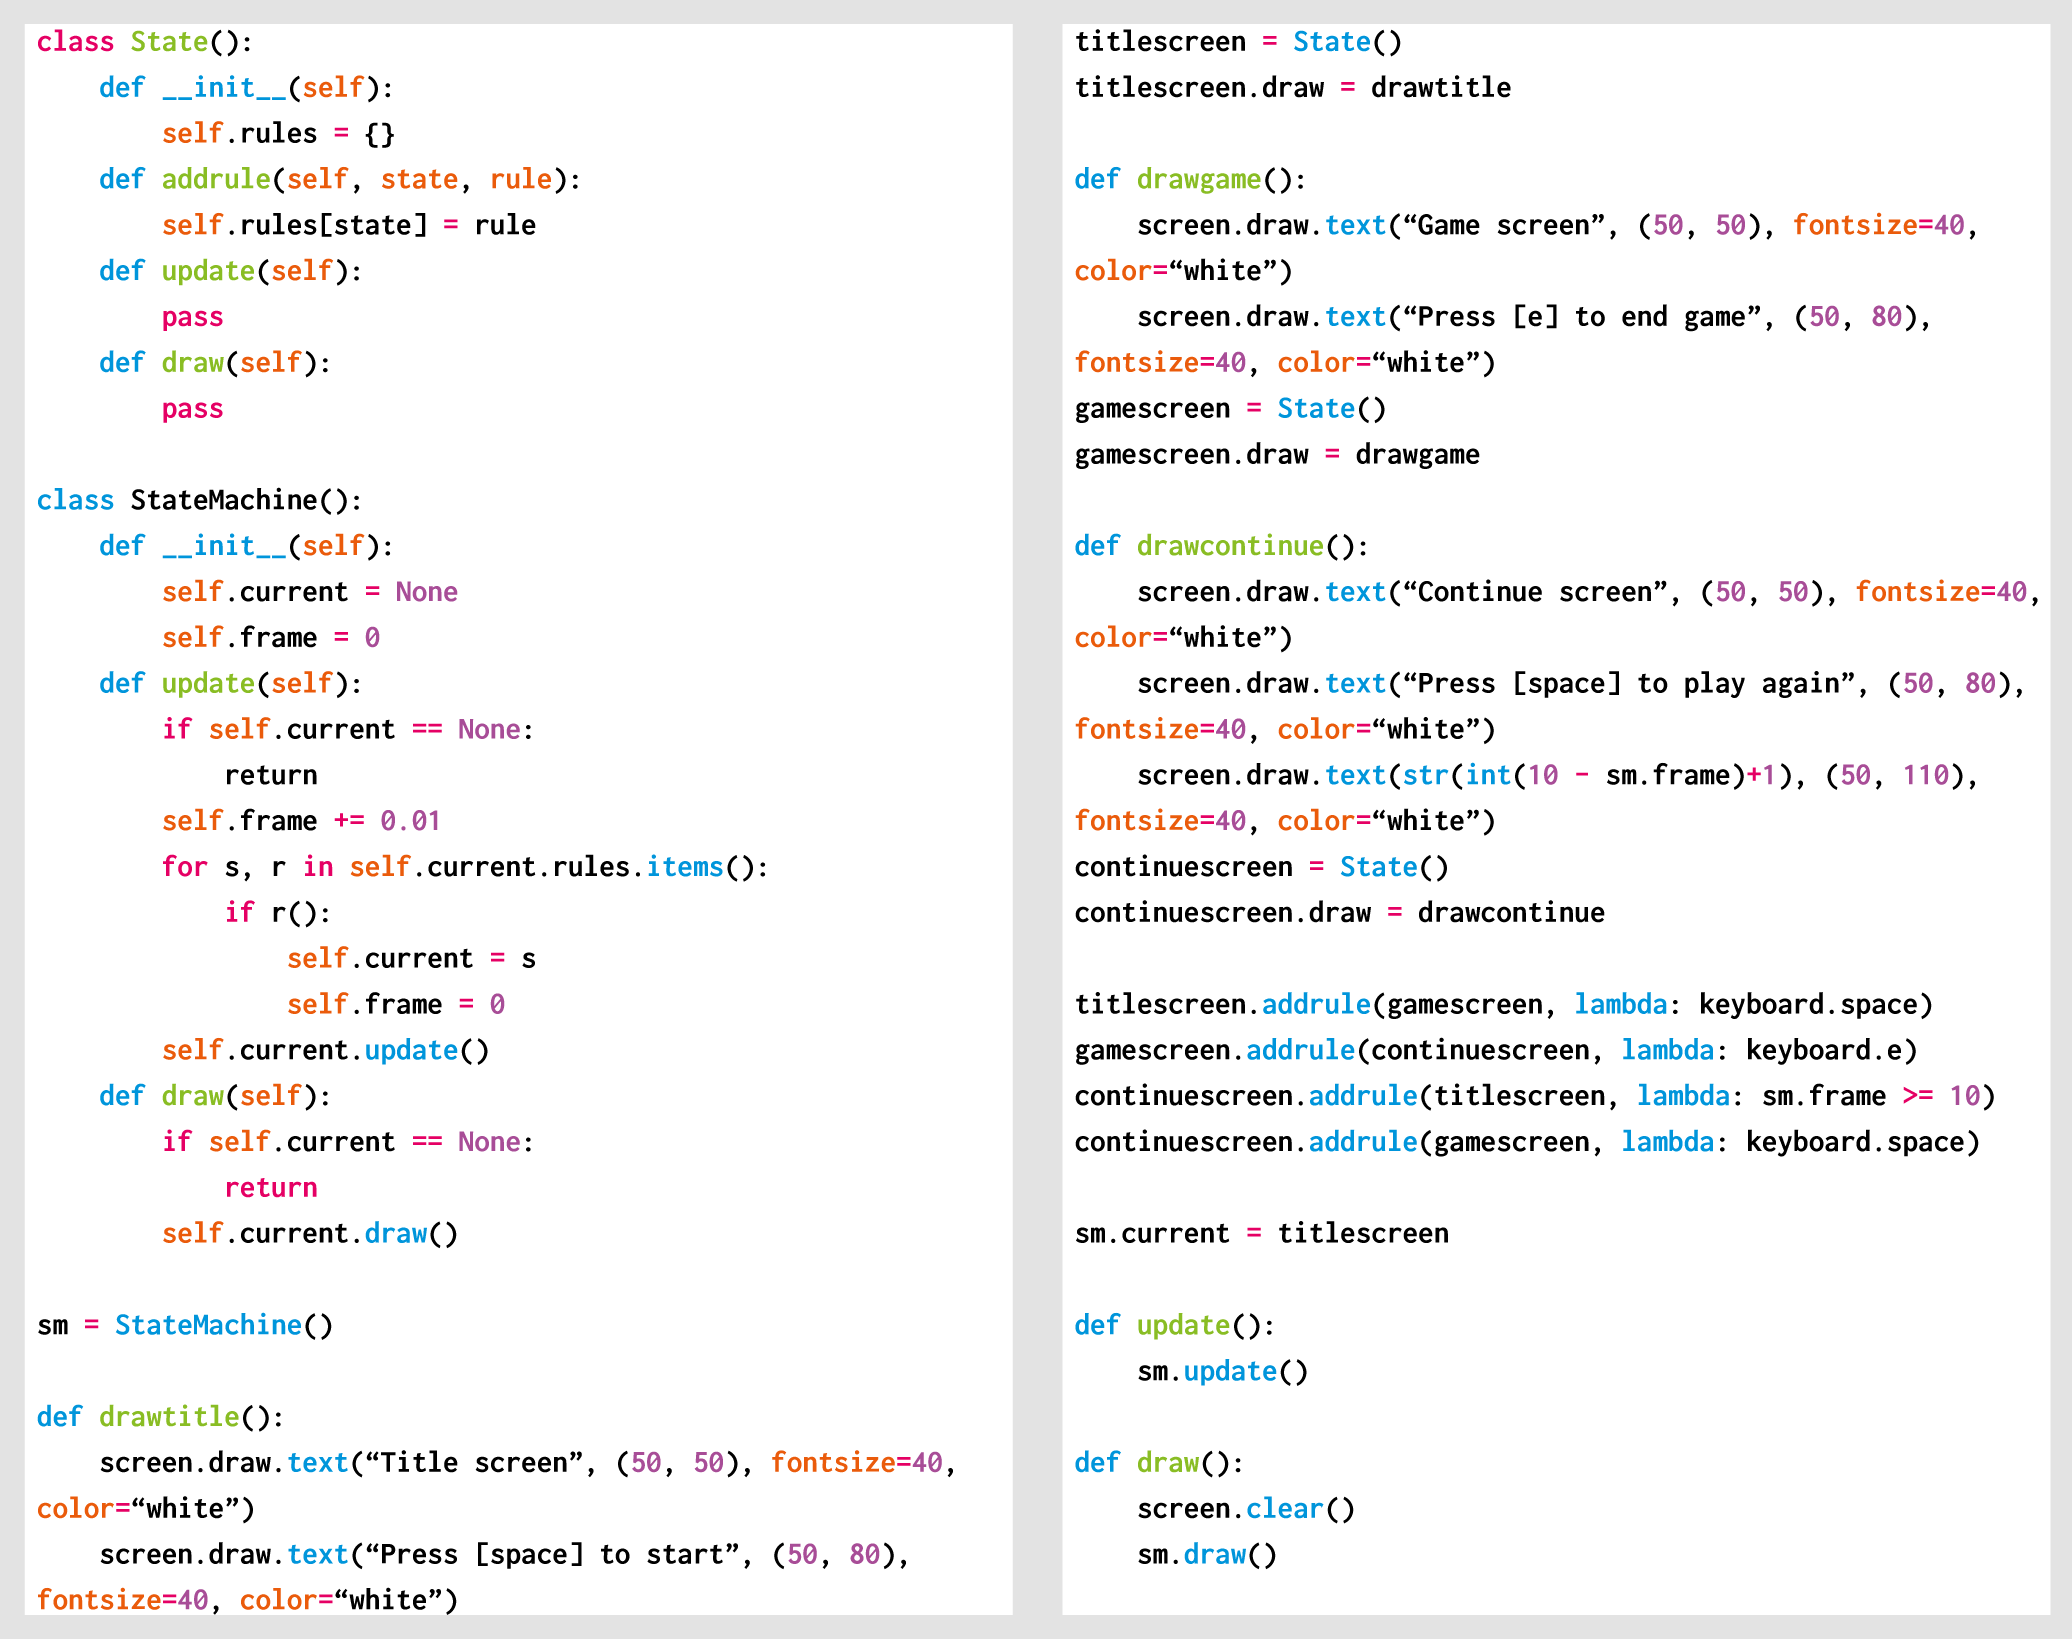
Here’s Rik’s code, which gets a simple continue screen up and running in Python. To get it working on your system, you’ll need to install Pygame Zero. And to download the full code, visit our Github repository here.
Get your copy of Wireframe issue 19
You can read more features like this one in Wireframe issue 19, available now at Tesco, WHSmith, and all good independent UK newsagents.
Or you can buy Wireframe directly from Raspberry Pi Press — delivery is available worldwide. And if you’d like a handy digital version of the magazine, you can also download issue 19 for free in PDF format.

Make sure to follow Wireframe on Twitter and Facebook for updates and exclusive offers and giveaways. Subscribe on the Wireframe website to save up to 49% compared to newsstand pricing!
Website: LINK