Schlagwort: Uncategorized

  • Gestaltet die Zukunft: Jett: The Far Shore kommt Weihnachten 2020 auf die PS5

    Gestaltet die Zukunft: Jett: The Far Shore kommt Weihnachten 2020 auf die PS5

    Reading Time: 3 minutes

    Es war lange genug still um uns. Endlich ist die Zeit gekommen, euch etwas ganz Neues zu zeigen!

    Heute enthüllen wir Jett: The Far Shore, ein neues, kinoreifes Action-Adventure, das euch zu einem interstellaren Rundflug einlädt. Schafft eine Zukunft für ein Volk, das am Rande der Auslöschung steht, und jagt über ein Meer aus Musik und 3D-Sound dahin.

    In Jett: The Far Shore gibt es jede Menge zu erleben. Wir hoffen, dass ihr Spaß daran haben werdet!

    Jett: The Far Shore hat einen langen Entwicklungsweg hinter sich. Viele Jahre waren wir nicht mehr als ein winziges Team mit großen Träumen, das sich bemühte, ein Design und Konzept für Jett: The Far Shore auszuarbeiten. Jett: The Far Shore begann mit mir und meinem alten Freund Patrick McAllister von Pine Scented. Gemeinsam hatten wir uns zum Ziel gesetzt, genau die Art Videospiel zu entwickeln, die wir selbst gerne spielen wollten. Die Sache kam erst richtig ins Rollen, als Scntfc sich uns schon sehr früh anschloss, um den Soundtrack und die Audiokonzepte von Jett: The Far Shore zu komponieren.

    Damit Jett: The Far Shore ein fertiges Spiel wird, holten wir weitere Leute an Bord, bis wir schließlich ein All-Star-Team aus alten und neuen Freunden auf der ganzen Welt zusammen hatten. Gemeinsam legte sich diese Truppe bei der Entwicklung von Jett: The Far Shore richtig ins Zeug und ergründete neue Horizonte.

    Aber worum geht es bei Jett: The Far Shore eigentlich? Manche von euch ziehen es vielleicht vor, im Ungewissen zu bleiben und sich blind ins Spiel zu stürzen, wenn Jett: The Far Shore Ende des Jahres herauskommt.

    Wenn ihr jedoch einen Einblick in einige der Konzepte von Jett: The Far Shore bekommen möchtet, solltet ihr jetzt weiterlesen.
    Jett: The Far Shore beginnt mit der Protagonistin Mei, die sich auf eine interstellare Reise begibt und an Bord des Mutterschiffs in Stasis versetzt wird. Tausend Jahre verstreichen, bis die erste Spähereinheit wieder erwacht, darunter auch Mei. Gemeinsam brechen sie zu einem mythischen Ozeanplaneten am Ufer eines Sternenmeeres auf, um ein potenzielles Schutzgebiet für Menschen am Rande der Auslöschung zu suchen.

    Hier schlüpft ihr in die eng anliegenden Raumstiefel der Jett: The Far Shore-Späherin Mei, die damit beauftragt wird, in ihr Hochgeschwindigkeits-Flugzeug zu steigen und knapp über dem Boden das Gelände abzusuchen.

    Mei und ihr Jett: The Far Shore-Co-Pilot Isao wurden von Jao, dem Leiter des Weltraumprogramms, dazu „auserwählt“, als Erste auszurücken. Zusammen mit der Spähereinheit, der sie angehören, sollen sie die ferne Küste absuchen, um die Quelle einer interstellaren Übertragung zu finden, die als „Hymne“ bezeichnet wird. Ab dort entfaltet sich sein spannendes, kosmisches Rätsel.

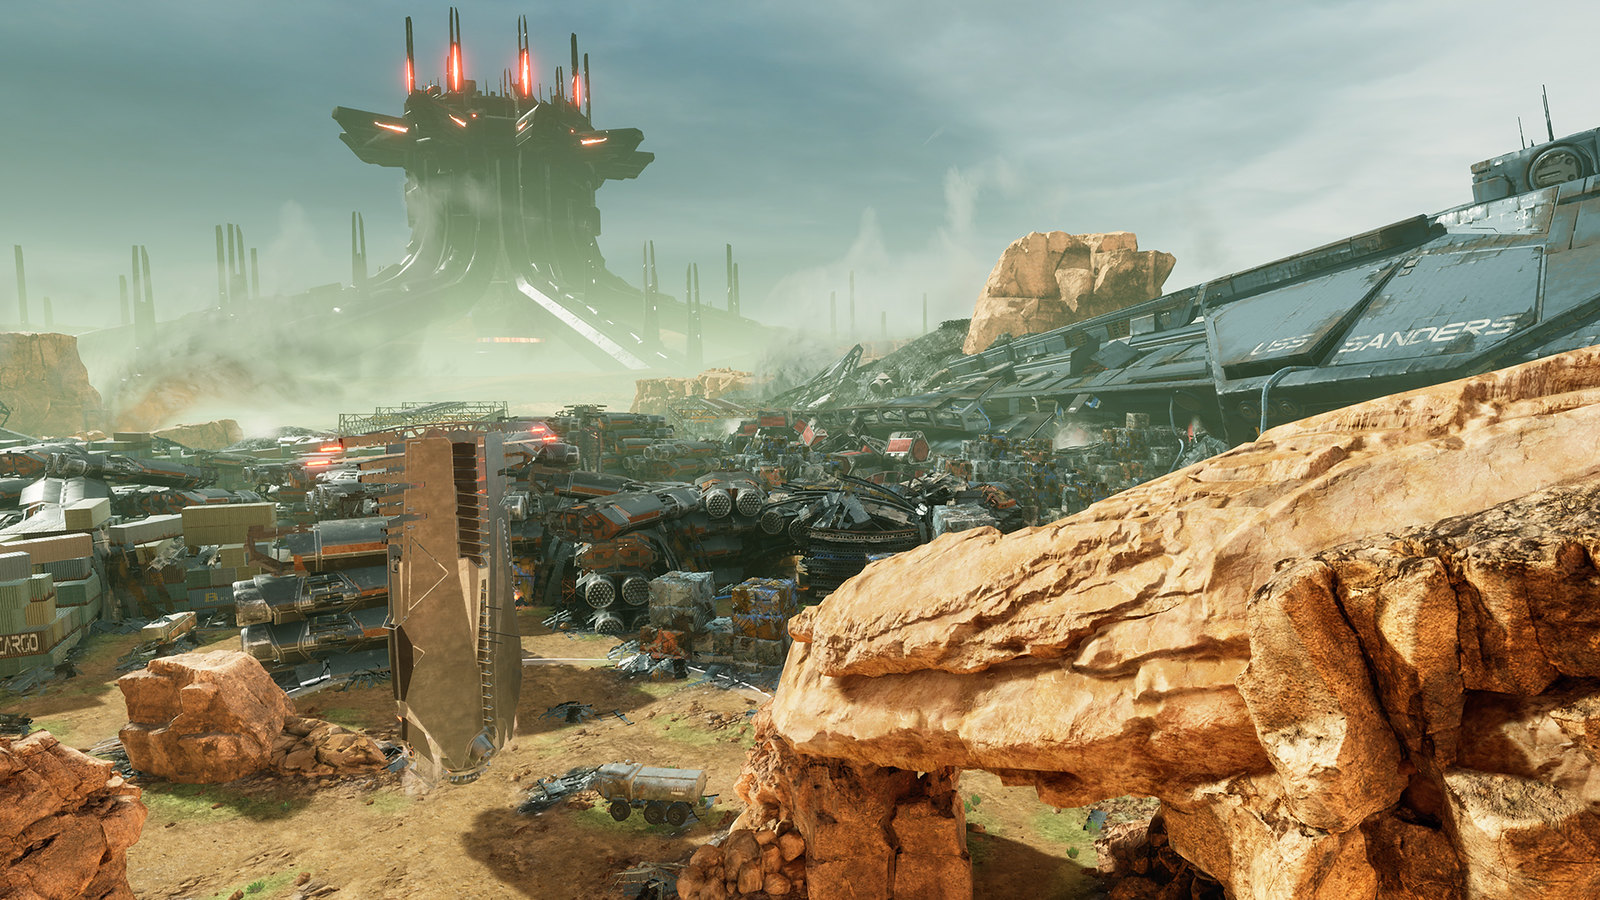
    Spieler müssen sich mit der Bewegung und dem Toolset von Jett: The Far Shore vertraut machen und versuchen, ihre Umgebung zu verstehen. Schauplatz von Jett: The Far Shore ist eine Inselgruppe mit unberührten Küsten und fremdartigen Wäldern, die euch eine ziemlich große offene Welt zum Erkunden bieten, während ihr immer wieder in Schwierigkeiten geratet und eure Verfolger abschütteln müsst. Haltet Ausschau nach riesigen Kreaturen, die euch hin und wieder begegnen werden – den Kolos. Ihr Anblick ist wirklich atemberaubend. Das Spiel folgt einer linearen Story, in der Späher sich zusammentun, um Widrigkeiten zu überwinden, während die Geschichte an Dynamik gewinnt und schließlich ihr dramatisches Ende erreicht. Bleibt auf jeden Fall auch nach den Credits dran, denn Jett: The Far Shore hat allen, die tiefer in die Geschehnisse eintauchen möchten, so Einiges zu bieten.

    Audio und Haptik standen schon zu Beginn der Entwicklung von Jett: The Far Shore im Vordergrund, daher sind wir natürlich von dem neuen DualSense-Controller begeistert. Im Hinblick auf die 3D-Audioverarbeitung bietet die PS5 eine einzigartige Leistung, weshalb sie perfekt zu Jett: The Far Shore passt. Das klingt vielleicht albern, aber mit der PS5 ist es fast so, als könnte man zum ersten Mal in einem Videospiel etwas hören. Plötzlich gibt es eine noch nie da gewesene Klangtreue, die die Wahrnehmung von akustischen Räumen ermöglicht.

    Haltet die Augen offen, denn es gibt noch viel mehr über Jett: The Far Shore zu sagen. Und brecht unbedingt diese Weihnachten auf PS5 und PS4 mit uns zu Jett: The Far Shore auf!

    Website: LINK

  • Der erste offizielle Gameplay-Trailer für Godfall auf PlayStation 5

    Der erste offizielle Gameplay-Trailer für Godfall auf PlayStation 5

    Reading Time: 2 minutes

    Heute war ein aufregender Tag für das gesamte Team bei Counterplay Games. Wir haben hart an unserem demnächst erscheinenden PlayStation 5-Titel Godfall gearbeitet und sind begeistert, bei der digitalen Veranstaltung „Die Zukunft des Gamings“ den ersten offiziellen PS5-Gameplay präsentieren zu können.

    Der Trailer vermittelt Spielern einen Einblick in die Welt von Aperion, Waffenklassen, eine Auswahl an Valorplates sowie die rasanten Nahkampfschlachten, die euch in Godfall erwarten.

    In Godfall befindet sich Aperion am Rande des Untergangs. Ihr spielt den letzten der valorianischen Ritter, götterähnliche Krieger, die sich mit Valorplates ausrüsten können – legendäre Rüstungssets, die den Träger zu einem unaufhaltsamen Meister des Nahkampfs machen. Spieler schlagen sich auf dem Weg durch die elementaren Reiche durch Gegnerscharen und fordern die wahnsinnigen Gott Macros heraus, der sie auf der Spitze schon erwartet.

    Meistert fünf Waffenklassen, schaltet verschiedene Valorplates im Spiel frei, steigt im Level auf, erlernt neue Fähigkeiten und entscheidet euch, ob ihr allein oder zusammen mit Freunden im PvE-Online-Koop-Modus für bis zu drei Spieler in den Kampf ziehen möchtet.

    Es gibt noch so Vieles, das wir euch zu Godfall zeigen und sagen möchten. Haltet also in den kommenden Tagen die Augen offen, um mehr über Valorplates, Waffenklassen und vieles mehr zu erfahren.

    Wir arbeiten immer noch hart daran und können es kaum erwarten, dass die Spieler Godfall erleben, wenn es Ende des Jahres sein Konsolendebüt auf der PS5 feiert und für den PC veröffentlicht wird.

    Website: LINK

  • Official PlayStation Podcast 365: Host of Tsushima

    Official PlayStation Podcast 365: Host of Tsushima

    Reading Time: < 1 minute

    Email us at blogcast@sony.com!

    Subscribe via Apple Podcasts, Spotify, Google or RSS, or download here


    This week, Sucker Punch’s Nate Fox and Jason Connell join us to talk about that sweet new Ghost of Tsushima gameplay footage premiered during State of Play. Plus, Brett kicks the tires on hosting the show, next week’s new release highlights, and more. Listen in!

    Stuff We Talked About

    • Ghost of Tsushima
    • Gorn
    • Mortal Kombat 11: Aftermath
    • Tony Hawk’s Pro Skater 1 + 2
    • The Wonderful 101 Remastered
    • PlayStation Studios

    The Cast


    Thanks to Cory Schmitz for our beautiful logo and Dormilón for our rad theme song and show music.

    [Editor’s note: PSN game release dates are subject to change without notice. Game details are gathered from press releases from their individual publishers and/or ESRB rating descriptions.]

    Website: LINK

  • Sink every shot with this robotic backboard

    Sink every shot with this robotic backboard

    Reading Time: < 1 minute

    Sink every shot with this robotic backboard

    Arduino TeamMay 12th, 2020

    With many years of practice and discipline, you too can improve your basketball skills. Or you could just choose to play with Shane Wighton’s automated backboard that sinks nearly any shot that you take.

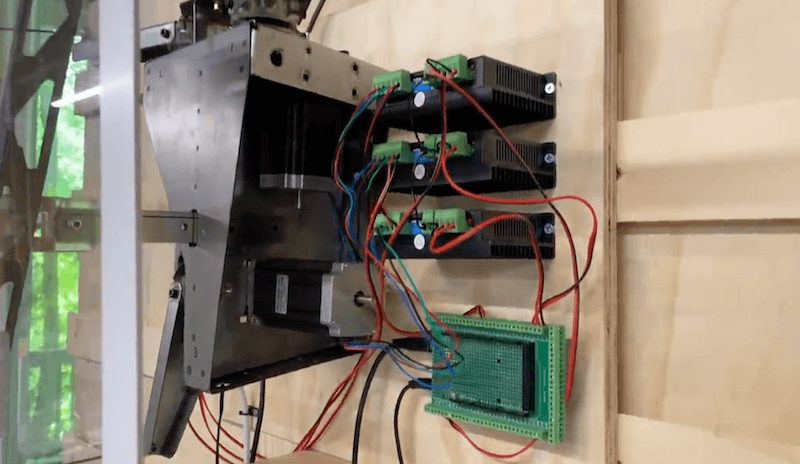
    The setup uses a Microsoft Kinect, along with a Windows-based computer to calculate the inbound ball’s trajectory. On approach it passes data to an Arduino, which then moves the hoop into position via three large steppers and a linkage system. 

    While this compensates for the “occasional” error, as shown in the excellent explainer/demo video below, you do have to actually hit the backboard for it to work!

    [youtube https://www.youtube.com/watch?v=FycDx69px8U?feature=oembed&w=500&h=281]

    Website: LINK

  • RetroPie for Raspberry Pi 4: video game emulation on our fastest-ever device

    RetroPie for Raspberry Pi 4: video game emulation on our fastest-ever device

    Reading Time: 2 minutes

    For many of you out there, your first taste of Raspberry Pi is using it as a retro gaming emulator running RetroPie. Simple to install and use, RetroPie allows nostalgic gamers (and parents trying to educate their kids) the ability to play old-schoolskool classics on any monitor in their home, with cheap USB game controllers or models from modern consoles.

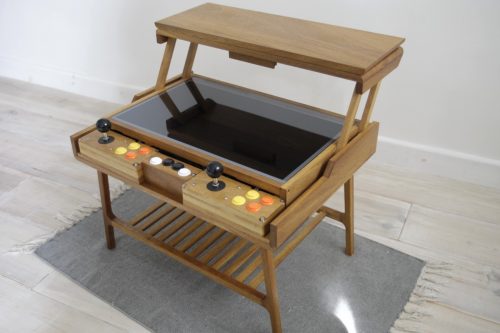
    GuzziGuy RetroPie Table

    Mid-century-ish Retro Games Table’ by Reddit user GuzziGuy

    And because our community is so wonderfully inventive, Raspberry Pis running RetroPie have found themselves in homebrew gaming cabinets, old console casings, and even game cartridges themselves.

    [Original Showcase Video] Pi Cart: A Raspberry Pi Retro Gaming Rig in an NES Cartridge

    I put a Raspberry Pi Zero (and 2,400 vintage games) into an NES cartridge and it’s awesome. Powered by RetroPie. — See the full build video: https://www.yo…

    Along came Raspberry Pi 4

    When we announced Raspberry Pi 4 last year, a much faster device with more RAM than we’d previously offered, the retro gaming enthusiasts of the world quickly took to prodding and poking the current version of the RetroPie software to get it to work on our new, more powerful computer. And while some succeeded, those gamers not as savvy with manually updating the RetroPie software had to wait for a new image.

    Retro Pie 4.6

    And so yesterday, to much hurrah from the Raspberry Pi and retro gaming community, the RetroPie team announced the release of image version 4.6 with beta Raspberry Pi 4 support!

    One of the biggest changes with the update is the move to Raspbian Buster, the latest version of our operating system, from Raspbian Stretch. And while they’re currently still advertising the Raspberry Pi 4 support as in beta, version 4.6 works extremely well on our newest model.

    Update today!

    Visit the RetroPie website today to download the 4.6 image, and if you have any difficulties with the software, visit the RetroPie forum to find help, support, and a community of like-minded gamers.

    Website: LINK

  • Official PlayStation Podcast Episode 361: Remade

    Official PlayStation Podcast Episode 361: Remade

    Reading Time: 2 minutes

    Email us at blogcast@sony.com!

    Subscribe via Apple Podcasts, Spotify, Google or RSS, or download here


    We’re back with the first-ever episode of the Official PlayStation Podcast! In this inaugural outing, we share our spoiler-free final impressions of Final Fantasy VII Remake and interview Illfonic, the studio behind next week’s Predator: Hunting Grounds. Listen in!

    Stuff We Talked About

    • Final Fantasy VII Remake — we finished it!
    • Our favorite remakes
    • Predator: Hunting Grounds interview with Illfonic
    • Trials of Mana (out next week!)

    The Cast

    Tim Turi – Senior Content Communications Specialist, SIE


    Thanks to Cory Schmitz for our beautiful logo and Dormilón for our rad theme song and show music.

    [Editor’s note: PSN game release dates are subject to change without notice. Game details are gathered from press releases from their individual publishers and/or ESRB rating descriptions.]

    Website: LINK

  • Working from home with your Raspberry Pi

    Working from home with your Raspberry Pi

    Reading Time: 11 minutes

    Raspberry Pi 4 is more than powerful enough to serve as replacement desktop computer while you’re working from home. Or as a secondary desktop to help you out while you’re doing other things, such video conferencing, on your main computer.

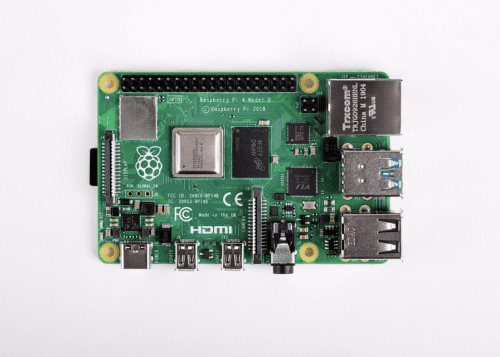
    The Raspberry Pi 4, Model B

    Raspberry Pi 4 Model B

    If you’re pulling your Raspberry Pi out of a drawer right now, you should make sure you update it with the latest version of Raspbian; if it’s been a while since you used this Raspberry Pi, you might even want to install a new copy of Raspbian so you know you’re working from a good base image. Fortunately, you can use our new imaging utility, which makes installing a fresh copy of the operating system much easier.

    Connecting a monitor, keyboard, and Mouse

    I normally use my Raspberry Pis headless as a server. But working from home, and using Raspberry Pi as your primary computer, you’re going to need a monitor, keyboard, and mouse.

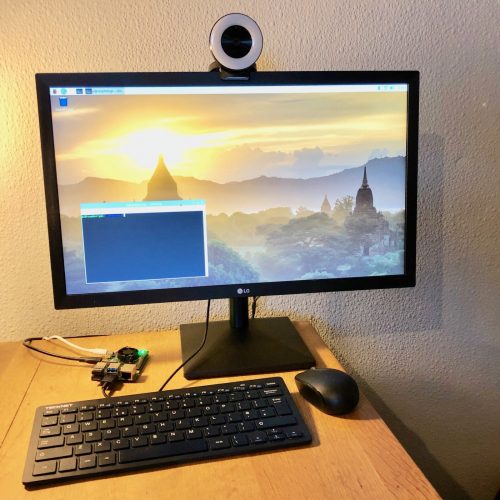
    My Raspberry Pi 4 which I use for video calls perched on the edge of my desk at home

    My Raspberry Pi 4, which I use for video calls, perched on the edge of my desk at home

    Except for the monitor, the Raspberry Pi Desktop Kit has everything you need to get you going, including a USB-C power supply and all the necessary cables.

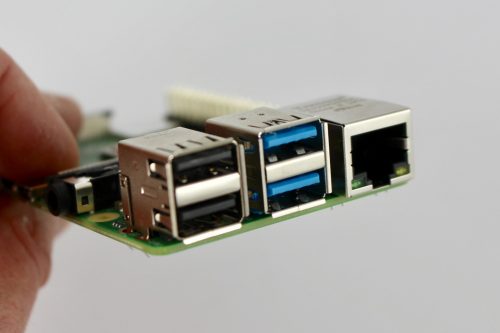
    Connecting a keyboard and a mouse to your Raspberry Pi just involves plugging them in, although you should probably make sure you plug them into the USB 2 rather than the USB 3 sockets. You can tell these apart by their colour: USB 3 sockets have blue ‘tongues’, while USB 2 sockets have black ones.

    USB 2 sockets (left), with USB 3 sockets (middle), and Ethernet (right)

    USB 2 sockets (left), USB 3 sockets (middle), and Ethernet socket (right)

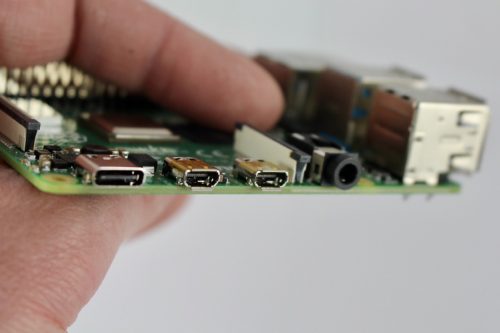
    Raspberry Pi 4 has two micro HDMI sockets, allowing you to use it with dual monitors if you wish: it supports one 4K screen at 60fps, or two 4K screens at 30fps.

    Power (USB-C) socket (left), with two micro-HDMI sockets (middle) and the headphone jack (right)

    Power (USB-C) socket (left),  two micro-HDMI sockets (middle), and the headphone jack (right)

    You can connect Raspberry Pi to any HDMI monitor (or two) you have in the house — you’ll only need a micro-HDMI to HDMI cable (or two) to do it. There are two of these included in the Desktop Kit.

    While the official Raspberry Pi keyboard and mouse are great, I’ve picked up a smaller wireless keyboard and mouse for added convenience and fewer wires.

    Setting up wireless networking

    Setting up wireless networking on Raspberry Pi can be done from your desktop. Alternatively, you can also set up networking before you boot your Raspberry Pi for the first time by editing a file on the boot partition of your SD card after you burn the operating system onto it.

    $ cd /Volumes/boot $ nano wpa_supplicant.conf

    Then add the following lines to the wpa_supplicant.conf file:

    country=COUNTRY ctrl_interface=DIR=/var/run/wpa_supplicant GROUP=netdev update_config=1 network={ ssid="SSID" psk="PASSWORD" key_mgmt=WPA-PSK }

    COUNTRY should be set the two-letter ISO/IEC alpha2 code for the country in which you are using your Raspberry Pi, e.g.:

    • GB (United Kingdom)
    • FR (France)
    • DE (Germany)
    • US (United States)
    • SE (Sweden)

    SSID is the ESSID of your home network, with PASSWORD being the WPA2 password for that network.

    It’s important to enter the correct country code in the file, as this will determine which regulatory domain your Raspberry Pi thinks it’s operating in, and therefore which wireless channels it enables on your adaptor.

    Setting up email

    For many of us, our email lives in our browsers these days, so just navigate to your normal email provider in Chromium and you will be able to use it as normal.

    However, you can get your email directly to your Raspberry Pi desktop if you want to do that. Raspbian ships with the Claws Mail client, which supports both POP3 and IMAP standards. Although some ISPs still use the POP3 protocol, IMAP access is the more commonly used, especially when it comes to most of the web-based services like Google’s Gmail.

    Using Microsoft Office

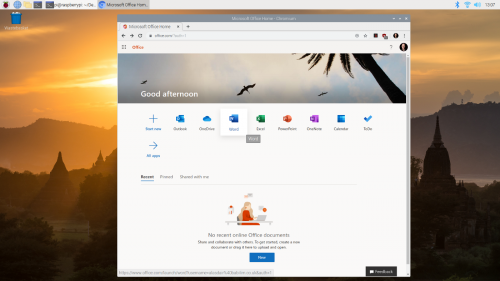
    Some workplaces will prefer that you use MS Office. Raspbian ships with Libre Office, and there is no native version of Microsoft Office applications that run on Raspberry Pi. However, you can use Office directly in your browser.

    Using Microsoft Office in the browser

    Using Microsoft Office in the browser

    Navigate to office.com and log in with your Microsoft Live account to access the free version; if your company subscribes to Office 365, you should be able to log in with your work username and password.

    Using Google Docs and Drive

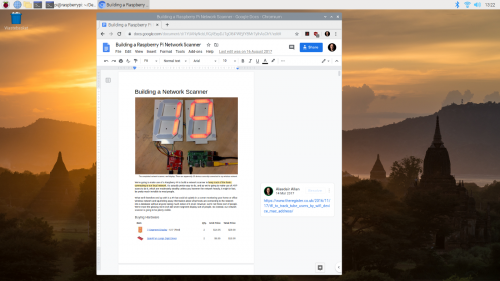
    Designed to be used in web browsers, Google Docs, Sheets, Slides, and Forms work out of the box on Raspberry Pi.

    Using Google Docs on the Raspberry Pi

    Using Google Docs on the Raspberry Pi

    Like all the other Google applications you can access Google Drive directly in your browser from your Raspberry Pi. However if needed you can mount Google Drive using FUSE as part of the file system.

    Setting up a VPN client

    It’s really easy to find advice and tutorials on how to set up a VPN server for Raspberry Pi. Finding information on how to set up your Raspberry Pi as a VPN client, to allow it to connect to your existing work VPN back in the office, is much harder.

    How you get your Raspberry Pi to talk to your office VPN is going to depend on exactly which type of VPN your company uses. So reach out to your company’s IT team to ask them for advice.

    Using OpenVPN

    The OpenVPN protocol is one of the youngest VPN protocols; it is open-source and generally considered one of the more secure protocols.

    To get OpenVPN working on Raspberry Pi, first you’ll need to install the OpenVPN package:

    $ sudo apt-get install openvpn

    Then you’ll need to create a client.conf configuration file in /etc/openvpn.

    client dev tun proto udp remote HOSTNAME PORT resolv-retry infinite nobind user nobody group nogroup persist-key persist-tun # Path to your certificates (ca.crt, client.crt, and client.key) ca FILEPATH_CA cert FILEPATH_CRT key FILEPATH_KEY ns-cert-type server comp-lzo verb 3

    Replace HOSTNAME and PORT with the name and port number of your company’s VPN server, and FILEPATH_CAFILEPATH_CRT, and FILEPATH_KEY with the fully resolved path to your ca.rt, client.crt, and client.key certificate files; you can obtain this information from your company’s IT people. While these files normally live alongside your configuration file in /etc/openvpn, it isn’t necessary to have them saved there if you really want them to live somewhere else.

    Then in a terminal window, type:

    $ sudo openvpn /etc/openvpn/client.conf

    You should then be connected to your company’s VPN via OpenVPN.

    Using PPTP

    The Point Tunneling Protocol (PPTP) is an older VPN protocols, and despite known vulnerabilities, it is still one of the more widely used ones because it’s integrated into Windows, macOS, and Linux. If your workplace offers other protocols, such as OpenVPN, I suggest that you choose one of these instead, since they are more secure. However, if you do need to use PPTP, you can do so on Raspberry Pi.

    First you’ll need to install the PPTP package:

    $ sudo apt-get install pptp-linux

    Then go ahead and create a /etc/ppp/peers/pptp-config file to hold your PPTP configuration, and copy and paste the following into the file:

    pty "pptp HOSTNAME --nolaunchpppd --debug" name USERNAME password PASSWORD remotename PPTP require-mppe-128 require-mschap-v2 refuse-eap refuse-pap refuse-chap refuse-mschap noauth debug persist maxfail 0 defaultroute replacedefaultroute usepeerdns

    Replace HOSTNAME, USERNAME, and PASSWORD with the name of your company’s VPN server, your own username, and your password.

    Then in a terminal window, type:

    $ sudo pon /etc/ppp/peers/pptp-config

    You should then be connected to your company’s VPN via PPTP.

    Using L2TP/IPSec

    Because of the lack of confidentiality inherent in the Layer 2 Tunneling Protocol (L2TP), it is normally used in conjunction with another protocol called IPSec. Unfortunately setting up an L2TP/IPSec client on Raspberry Pi is somewhat more involved than using either OpenVPN or PPTP.

    If your company supports it, I’d opt to use OpenVPN rather than trying to get L2TP/IPsec up and working on Raspberry Pi.

    One alternative approach is to swap out Raspberry Pi’s default wireless management for Network Manager and use the Network Manager widget to setup L2TP/IPSec instead of the default tools. It’s probably easier than trying to set things up via the command line, but if you run into problems, it’s going to be somewhat harder to figure out what is going wrong.

    Setting up video conferencing

    To get video conferencing working with Raspberry Pi, you’ll need three things: a way to get audio out of Raspberry Pi, a way to get audio in, and a camera so that people can see you.

    Adding audio

    Setting up audio out for your Raspberry Pi is normally fairly easy. You can just plug a set of headphones into the audio jack, or use the speakers in your computer monitor connected via HDMI, and Raspberry Pi should just figure things out for you.

    If you’re not getting sound out of your Raspberry Pi, either via the audio jack or the built-in speakers in your monitor, you might need to set audio output manually using the raspi-config tool.

    Unfortunately, Raspberry Pi doesn’t have any native audio input capability. The simplest way to to add audio input is to use a USB microphone. These range from a cheap and cheerful mini USB microphone, designed for basic sound capture, to much more impressive ones designed for podcasting.

    Alternatively, you can get a compatible USB sound card, which means that you may be able to use a wired headset and microphone with a standard audio jack. But be warned, most USB sound cards don’t provide any gain for passive mics, so you’ll need to provide a good signal.

    Adding a camera

    The absolutely easiest way to add a camera to your Raspberry Pi for video conferencing is just to plug in a USB webcam. If your camera offers a built-in microphone, like the Razor Kiyo, and your monitor has built-in speakers, then your camera can provide your audio as well as video.

    You can test your USB web camera using the fswebcam package.

    If you’ve got a Raspberry Pi Camera Module, it’s possible to use that as well — just make sure you configure the Camera Module using raspi-config. You will however need to have a separate microphone, as the Raspberry Pi Camera Module doesn’t have one built in.

    Using Google Hangouts

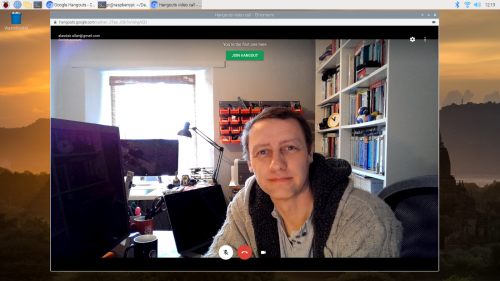
    Google Hangouts works in your browser and doesn’t require a client. You should be able to navigate to hangouts.google.com or click directly on the meeting link in your calendar or email.

    Google Hangouts on the Raspberry Pi desktop

    Google Hangouts on the Raspberry Pi desktop

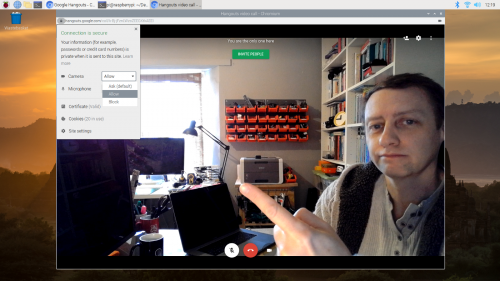
    However, the first time you open Hangouts, despite giving permission for the app to access your camera and microphone, you might find that it thinks that access has been denied.

    To fix this problem, navigate to the padlock🔒icon in your browser’s address bar and click on it. This will open a drop-down menue letting you mark both the Camera and Microphone as ‘Allow’. Select ‘Allow’ for both the camera and microphone, even if they are set to ‘Allow’ already.

    The permissions drop down in Google Hangouts

    The permissions drop-down menu in Google Hangouts

    Close the drop-down menu by clicking on the cross in the top right-hand corner of the dialog window. Doing so add a bar at the top of your window prompting you to ‘Reload’. Click on ‘Reload’. This time, Google Hangouts should be able to access your camera and microphone.

    This trick may also be handy for some other video conferencing applications.

    Using Zoom

    While there isn’t a Zoom desktop client for Raspberry Pi, you can run the Zoom client application, or even host a meeting, directly in the browser.

    Open your browser, navigate to join.zoom.us, and enter the meeting ID and password; if you have received an email invitation, you can click directly on the meeting request URL in the email.

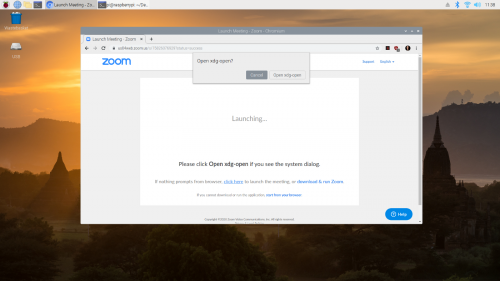
    Click on the cancel button when prompted to “Open xdg-open” by Zoom

    Click on the ‘Cancel’ button when prompted to ‘Open xdg-open’ by Zoom

    Then, when you get asked to ‘Open xdg-open?’ in the system dialog that opens, click on ‘Cancel’.

    Next click on the ‘click here’ link near the bottom of the page where it says “If nothing prompts from browser, click here to launch the meeting…”. Another ‘Open xdg-open?’ system dialog will open, and you need to click on ‘Cancel’ again.

    Then you should see a new “start from your browser” link in really small font at the bottom of the page. Go ahead and click on the this link.

    Your Zoom meeting should now start normally in your browser.

    Using Skype

    There is a Skype web client, which works out of the box on Raspberry Pi. Just navigate to web.skype.com and log in as normal.

    Setting up Citrix Workspace (Citrix Receiver)

    It’s possible to use Citrix Receiver on your Raspberry Pi, because Citrix offers a prepackaged Linux binary for the ARM architecture that will run without problems on Raspberry Pi.

    Download the ‘Full Package (Self-Service Support)’ for Debian Linux, picking the ‘Citrix Workspace app for Linux (ARM HF)’ package.

    Then install it by typing into a terminal window:

    $ sudo dpkg -I iaclient_19.12.0.19_armhf.deb

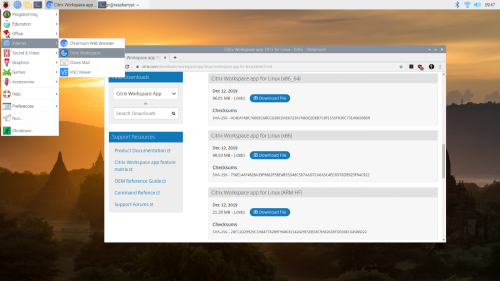
    You can then find the newly installed client in main desktop menu.

    The newly installed Citrix Workspace client

    The newly installed Citrix Workspace client

    Clicking on the Citrix icon will open a pop-up menu asking you to accept the EULA and then prompting you to add an account. Here you need to enter your work email or the server address provided by your company’s IT people.

    Setting up a VNC client

    Raspbian includes the VNC Connect client from RealVNC. To open it, navigate to the start menu, click on ‘Internet’, and then on ‘VNC Viewer’.

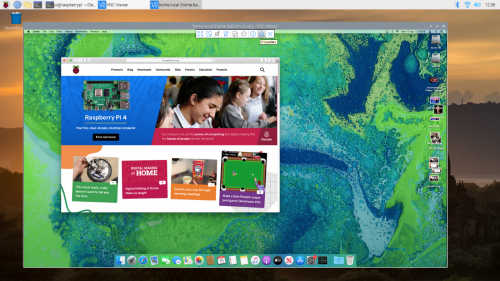
    VNC viewer connected to my Mac mini

    VNC Viewer connected to my Mac mini

    Type the host name of the computer you’re trying to reach into the address bar of the VNC Viewer. You’ll be prompted for a username and password to authenticate to your remote computer. Your remote desktop should appear in a window. You can access the window setting by mousing over near the middle top of the window where a small drop-down panel will appear.

    Wrapping things up

    I’d been a freelance journalist for years before joining Raspberry Pi, so I perfected my home-working setup a long time ago; but I’m still finding it incredibly useful having a Raspberry Pi set up at the corner of my desk.

    A number of our colleagues here at Pi Towers are are using a Raspberry Pi as their main work-from-home computer, or as a supplementary device for conferencing and file-sharing. We’re also seeing a very large number of people, both in our team and out in the community, using Raspberry Pi as a computer for kids to do homework on (an absolute necessity in so many households where parents are using all the available computers to do their own work on!).

    If you’ve found any clever work-from-home workarounds that you’d like to share, please let us know about them below.

    Website: LINK

  • PlayStation Blogcast 360: Finally

    PlayStation Blogcast 360: Finally

    Reading Time: < 1 minute

    Email us at blogcast@sony.com!

    Subscribe via Apple Podcasts, Spotify, Google or RSS, or download here


    This week, Marvel’s Iron Man VR director Ryan Payton checks in for a development update. Then, we gush about how much we love Final Fantasy VII Remake… it’s really good. Listen in!

    Stuff We Talked About

    • Final Fantasy VII Remake
    • Marvel’s Iron Man VR
    • Our “comfort games”
    • Persona 5 Royal
    • No Man’s Sky

    The Cast

    Tim Turi – Senior Content Communications Specialist, SIE


    Thanks to Cory Schmitz for our beautiful logo and Dormilón for our rad theme song and show music.

    [Editor’s note: PSN game release dates are subject to change without notice. Game details are gathered from press releases from their individual publishers and/or ESRB rating descriptions.]

    Website: LINK

  • Make a Side Pocket-esque pool game | Wireframe #36

    Make a Side Pocket-esque pool game | Wireframe #36

    Reading Time: 7 minutes

    Recreate the arcade pool action of Data East’s Side Pocket. Raspberry Pi’s own Mac Bowley has the code.

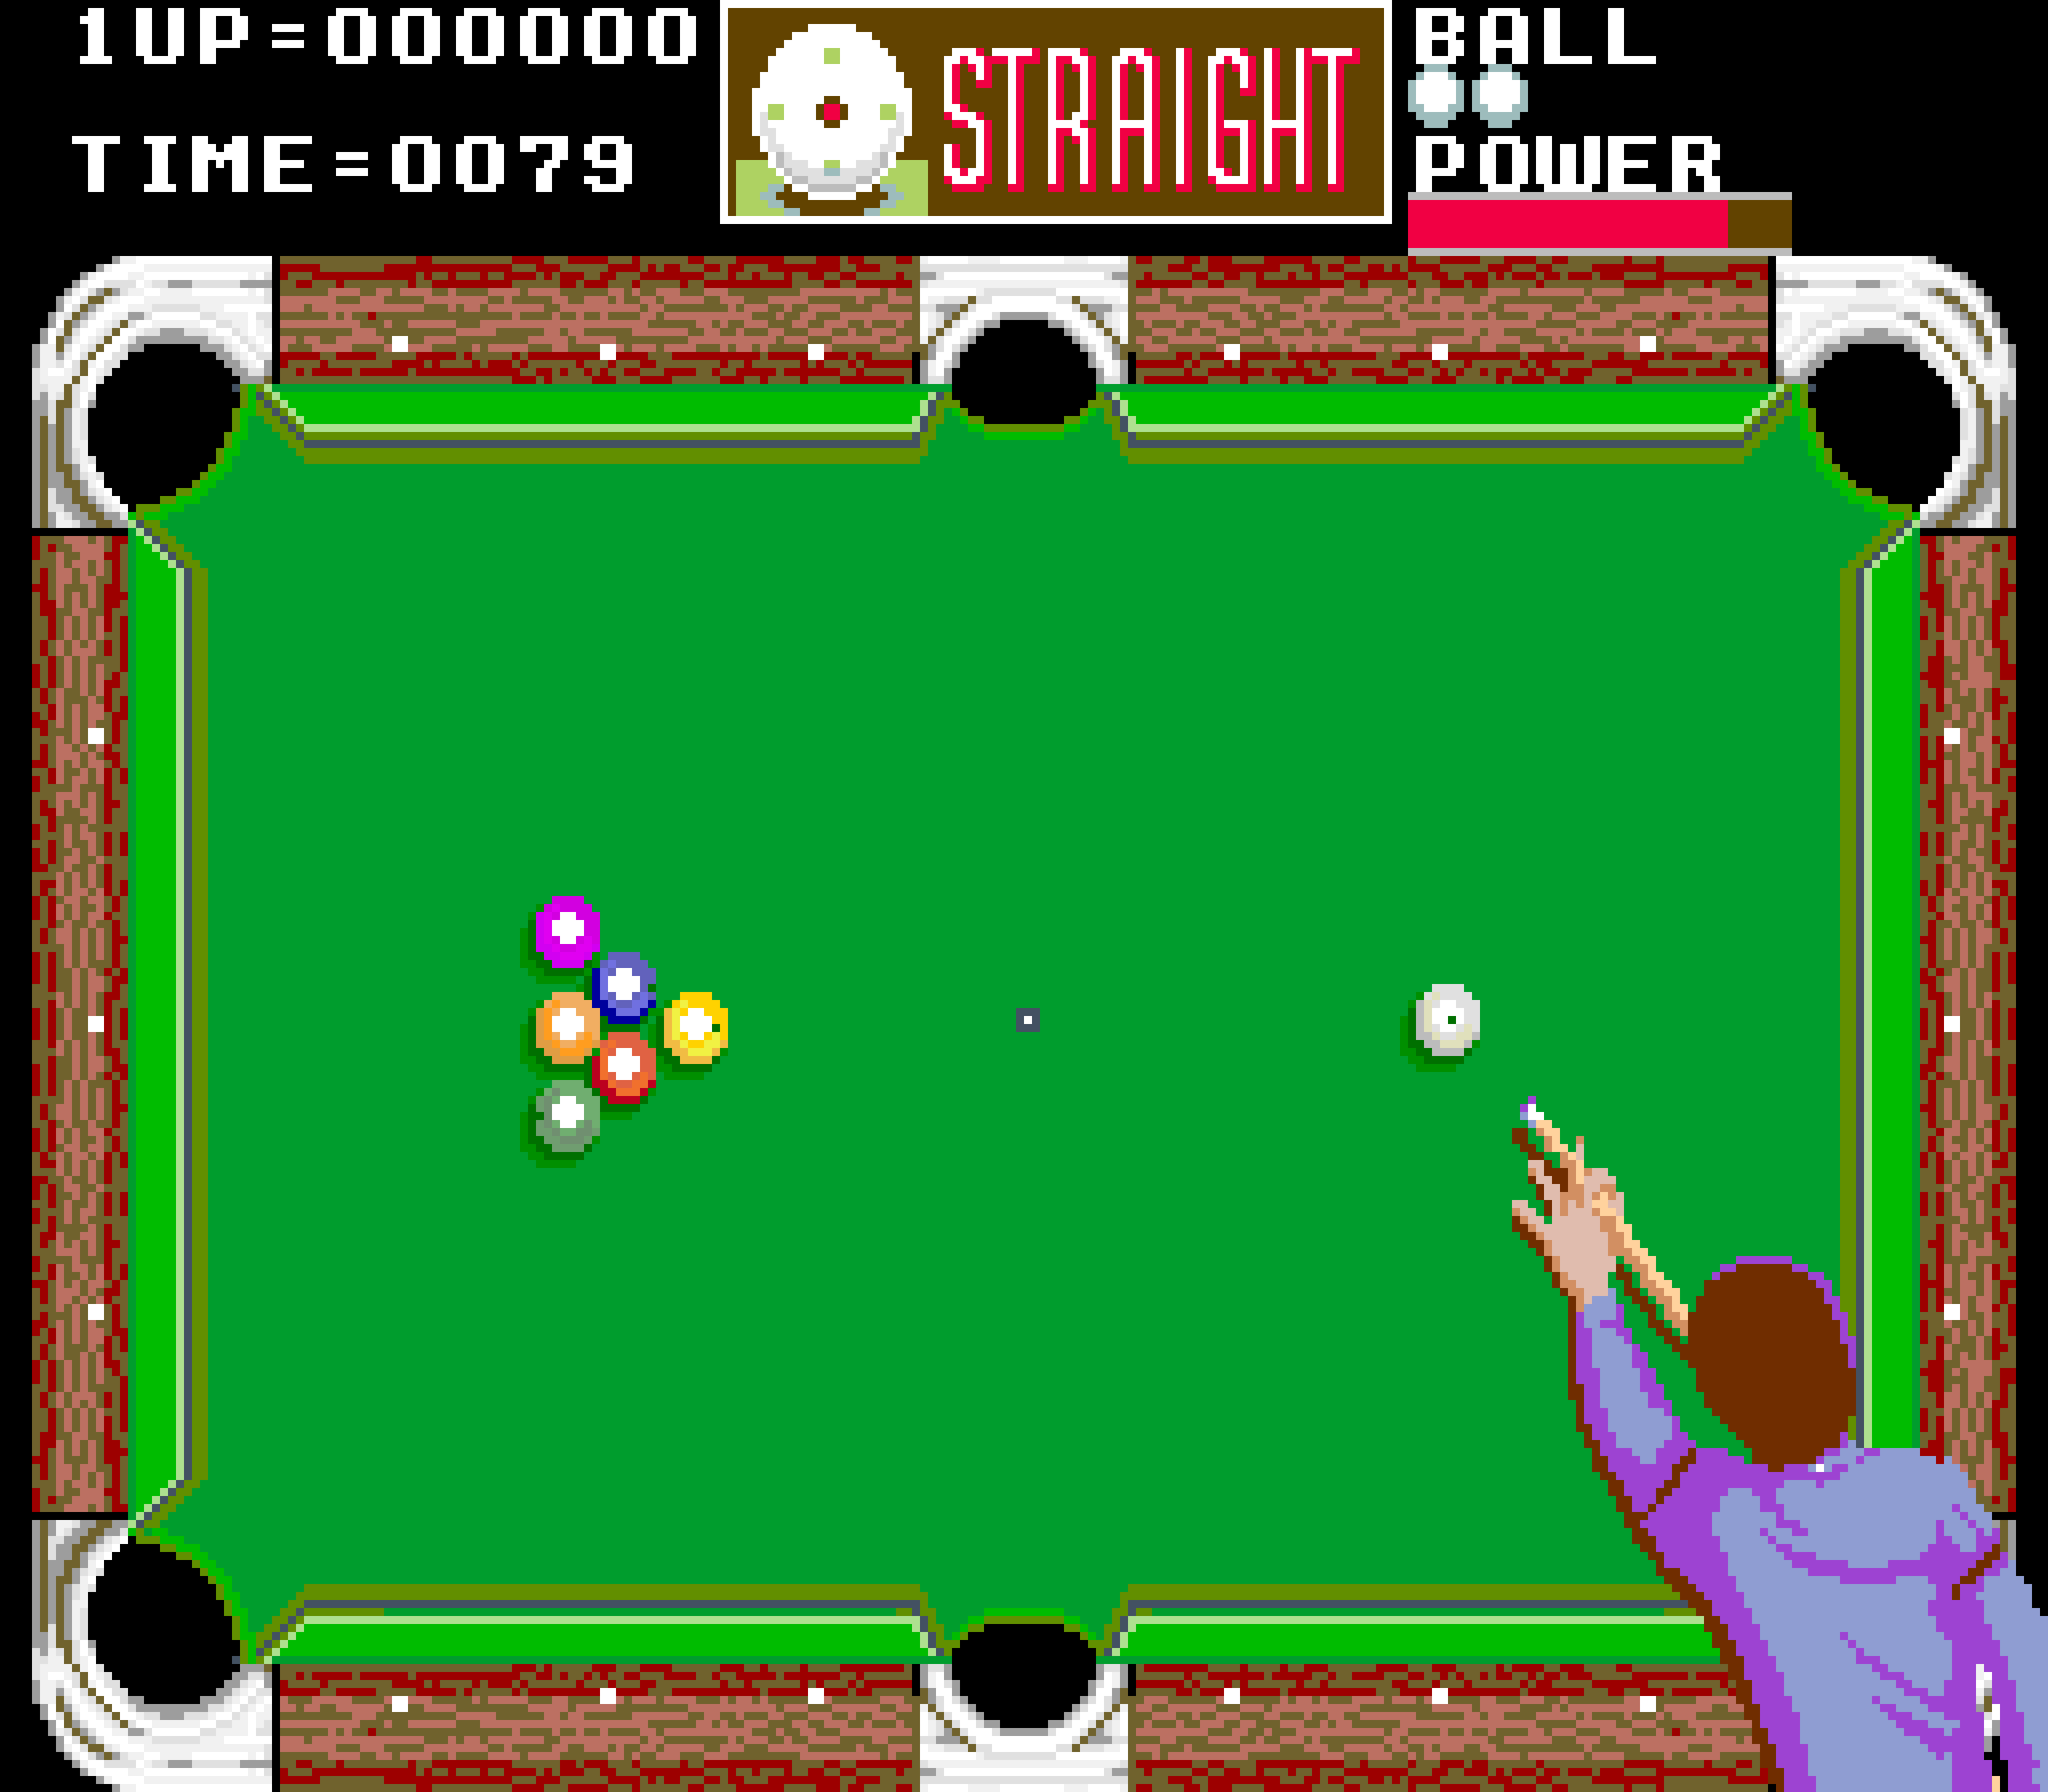
    In the original Side Pocket, the dotted line helped the player line up shots, while additional functions on the UI showed where and how hard you were striking the cue ball.

    Created by Data East in 1986, Side Pocket was an arcade pool game that challenged players to sink all the balls on the table and achieve a minimum score to progress. As the levels went on, players faced more balls in increasingly difficult locations on the table.

    Here, I’ll focus on three key aspects from Side Pocket: aiming a shot, moving the balls, and handling collisions for balls and pockets. This project is great for anyone who wants to dip their toe into 2D game physics. I’m going to use the Pygame’s built-in collision system as much as possible, to keep the code readable and short wherever I can.

    Making a pool game

    Before thinking about aiming and moving balls, I need a table to play on. I created both a border and a play area sprite using piskelapp.com; originally, this was one sprite, and I used a rect to represent the play area (see Figure 1). Changing to two sprites and making the play area an actor made all the collisions easier to handle and made everything much easier to place.

    Figure 1: Our table with separate border. You could add some detail to your own table, or even adapt a photograph to make it look even more realistic.

    For the balls, I made simple 32×32 sprites in varying colours. I need to be able to keep track of some information about each ball on the table, such as its position, a sprite, movement, and whether it’s been pocketed or not – once a ball’s pocketed, it’s removed from play. Each ball will have similar functionality as well – moving and colliding with each other. The best way to do this is with a class: a blueprint for each ball that I will make copies of when I need a new ball on the table.

    class Ball:
    def __init__(self, image, pos):
    self.actor = Actor(image, center=pos, anchor=(“center”, “center”))
    self.movement = [0, 0]
    self.pocketed = False

    def move(self):
    self.actor.x += self.movement[0]
    self.actor.y += self.movement[1]
    if self.pocketed == False:
    if self.actor.y < playArea.top + 16 or self.actor.y > playArea.bottom-16:
    self.movement[1] = -self.movement[1]
    self.actor.y = clamp(self.actor.y, playArea.top+16, playArea.bottom-16)
    if self.actor.x < playArea.left+16 or self.actor.x > playArea.right-16:
    self.movement[0] = -self.movement[0]
    self.actor.x = clamp(self.actor.x, playArea.left+16, playArea.right-16)
    else:
    self.actor.x += self.movement[0]
    self.actor.y += self.movement[1]
    self.resistance()

    def resistance(self):
    # Slow the ball down
    self.movement[0] *= 0.95
    self.movement[1] *= 0.95

    if abs(self.movement[0]) + abs(self.movement[1]) < 0.4:
    self.movement = [0, 0]

    The best part about using a class is that I only need to make one piece of code to move a ball, and I can reuse it for every ball on the table. I’m using an array to keep track of the ball’s movement – how much it will move each frame. I also need to make sure it bounces off the sides of the play area if it hits them. I’ll use an array to hold all the balls on the table.

    To start with, I need a cue ball:

    balls = []
    cue_ball = Ball(“cue_ball.png”, (WIDTH//2, HEIGHT//2))
    balls.append(cue_ball)

    Aiming the shot

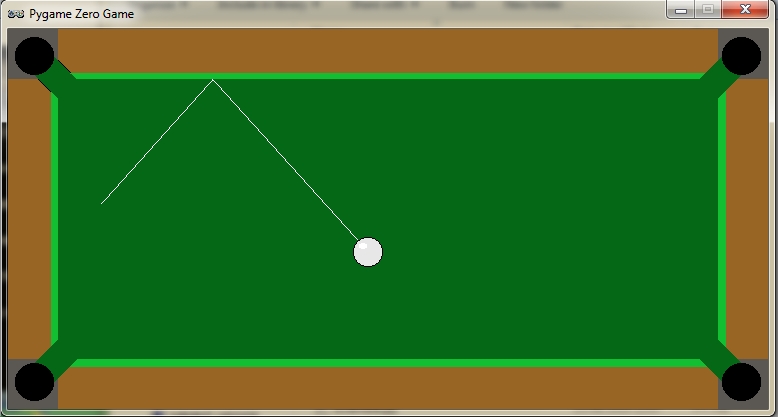
    In Side Pocket, players control a dotted line that shows where the cue ball will go when they take a shot. Using the joystick or arrow buttons rotated the shot and moved the line, so players could aim to get the balls in the pockets (see Figure 2). To achieve this, we have to dive into our first bit of maths, converting a rotation in degrees to a pair of x and y movements. I decided my rotation would be at 0 degrees when pointing straight up; the player can then press the right and left arrow to increase or decrease this value.

    Figure 2: The dotted line shows the trajectory of the ball. Pressing the left or right arrows rotates the aim.

    Pygame Zero has some built-in attributes for checking the keyboard, which I’m taking full advantage of.

    shot_rotation = 270.0 # Start pointing up table
    turn_speed = 1
    line = [] # To hold the points on my line
    line_gap = 1/12
    max_line_length = 400
    def update():
    global shot_rotation

    ## Rotate your aim
    if keyboard[keys.LEFT]:
    shot_rotation -= 1 * turn_speed
    if keyboard[keys.RIGHT]:
    shot_rotation += 1 * turn_speed

    # Make the rotation wrap around
    if shot_rotation > 360:
    shot_rotation -= 360
    if shot_rotation < 0:
    shot_rotation += 360

    At 0 degrees, my cue ball’s movement should be 0 in the x direction and -1 in y. When the rotation is 90 degrees, my x movement would be 1 and y would be zero; anything in between should be a fraction between the two numbers. I could use a lot of ‘if-elses’ to set this, but an easier way is to use sin and cos on my angle – I sin the rotation to get my x value and cos the rotation to get the y movement.

    # The in-built functions need radian
    rot_radians = shot_rotation * (math.pi/180)

    x = math.sin(rot_rads)
    y = -math.cos(rot_rads)
    if not shot:
    current_x = cue_ball.actor.x
    current_y = cue_ball.actor.y
    length = 0
    line = []
    while length < max_line_length:
    hit = False
    if current_y < playArea.top or current_y > playArea.bottom:
    y = -y
    hit = True
    if current_x < playArea.left or current_x > playArea.right:
    x = -x
    hit = True
    if hit == True:
    line.append((current_x-(x*line_gap), current_y-(y*line_gap)))
    length += math.sqrt(((x*line_gap)**2)+((y*line_gap)**2) )
    current_x += x*line_gap
    current_y += y*line_gap
    line.append((current_x-(x*line_gap), current_y-(y*line_gap)))

    I can then use those x and y co-ordinates to create a series of points for my aiming line.

    Shooting the ball

    To keep things simple, I’m only going to have a single shot speed – you could improve this design by allowing players to load up a more powerful shot over time, but I won’t do that here.

    shot = False
    ball_speed = 30


    ## Inside update
    ## Shoot the ball with the space bar
    if keyboard[keys.SPACE] and not shot:
    shot = True
    cue_ball.momentum = [x*ball_speed, y*ball_speed]

    When the shot variable is True, I’m going to move all the balls on my table – at the beginning, this is just the cue ball – but this code will also move the other balls as well when I add them.

    # Shoot the ball and move all the balls on the table
    else:
    shot = False
    balls_pocketed = []
    collisions = []
    for b in range(len(balls)):
    # Move each ball
    balls[b].move()
    if abs(balls[b].momentum[0]) + abs(balls[b].momentum[1]) > 0:
    shot = True

    Each time I move the balls, I check whether they still have some movement left. I made a resistance function inside the ball class that will slow them down.

    Collisions

    Now for the final problem: getting the balls to collide with each other and the pockets. I need to add more balls and some pocket actors to my game in order to test the collisions.

    balls.append(Ball(“ball_1.png”, (WIDTH//2 - 75, HEIGHT//2)))
    balls.append(Ball(“ball_2.png”, (WIDTH//2 - 150, HEIGHT//2)))

    pockets = []
    pockets.append(Actor(“pocket.png”, topleft=(playArea.left, playArea.top), anchor=(“left”, “top”)))
    # I create one of these actors for each pocket, they are not drawn

    Each ball needs to be able to collide with the others, and when that happens, the direction and speed of the balls will change. Each ball will be responsible for changing the direction of the ball it has collided with, and I add a new function to my ball class:

    def collide(self, ball):
    collision_normal = [ball.actor.x - self.actor.x, ball.actor.y - self.actor.y]
    ball_speed = math.sqrt(collision_normal[0]**2 + collision_normal[1]**2)
    self_speed = math.sqrt(self.momentum[0]**2 + self.momentum[1]**2)
    if self.momentum[0] == 0 and self.momentum[1] == 0:
    ball.momentum[0] = -ball.momentum[0]
    ball.momentum[1] = -ball.momentum[1]
    elif ball_speed > 0:
    collision_normal[0] *= 1/ball_speed
    collision_normal[1] *= 1/ball_speed
    ball.momentum[0] = collision_normal[0] * self_speed
    ball.momentum[1] = collision_normal[1] * self_speed

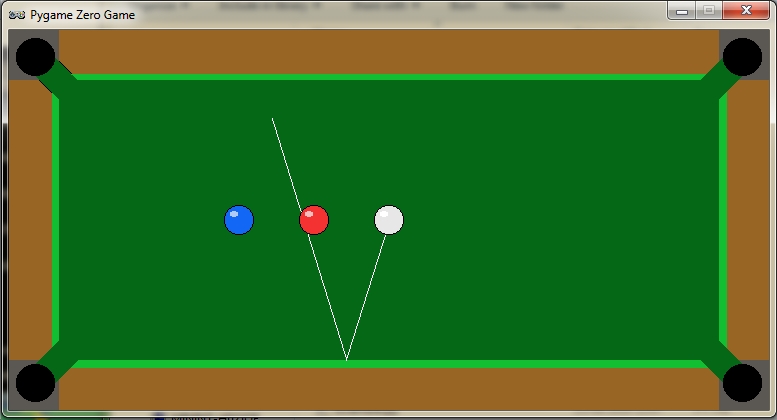
    When a collision happens, the other ball should move in the opposite direction to the collision. This is what allows you to line-up slices and knock balls diagonally into the pockets. Unlike the collisions with the edges, I can’t just reverse the x and y movement. I need to change its direction, and then give it a part of the current ball’s speed. Above, I’m using a normal to find the direction of the collision. You can think of this as the direction to the other ball as they collide.

    Our finished pool game. See if you can expand it with extra balls and maybe a scoring system.

    Handling collisions

    I need to add to my update loop to detect and store the collisions to be handled after each set of movement.

    # Check for collisions
    for other in balls:
    if other != b and b.actor.colliderect(other.actor):
    collisions.append((b, other))
    # Did it sink in the hole?
    in_pocket = b.actor.collidelistall(pockets)
    if len(in_pocket) > 0 and b.pocketed == False:
    if b != cue_ball:
    b.movement[0] = (pockets[in_pocket[0]].x - b.actor.x) / 20
    b.movement[1] = (pockets[in_pocket[0]].y - b.actor.y) / 20
    b.pocket = pockets[in_pocket[0]]
    balls_pocketed.append(b)
    else:
    b.x = WIDTH//2
    b.y = HEIGHT//2

    First, I use the colliderect() function to check if any of the balls collide this frame – if they do, I add them to a list. This is so I handle all the movement first and then the collisions. Otherwise, I’m changing the momentum of balls that haven’t moved yet. I detect whether a pocket was hit as well; if so, I change the momentum so that the ball heads towards the pocket and doesn’t bounce off the walls anymore.

    When all my balls have been moved, I can handle the collisions with both the other balls and the pockets:

    for col in collisions:
    col[0].collide(col[1])
    if shot == False:
    for b in balls_pocketed:
    balls.remove(b)

    And there you have it: the beginnings of an arcade pool game in the Side Pocket tradition. You can get the full code and assets right here.

    Get your copy of Wireframe issue 36

    You can read more features like this one in Wireframe issue 36, available directly from Raspberry Pi Press — we deliver worldwide. And if you’d like a handy digital version of the magazine, you can also download issue 36 for free in PDF format.

    Make sure to follow Wireframe on Twitter and Facebook for updates and exclusive offers and giveaways. Subscribe on the Wireframe website to save up to 49% compared to newsstand pricing!

    Website: LINK

  • SD Card Speed Test

    SD Card Speed Test

    Reading Time: 6 minutes

    Since we first launched Raspberry Pi, an SD card (or microSD card) has always been a vital component. Without an SD card to store the operating system, Raspberry Pi is pretty useless*! Over the ensuing eight years, SD cards have become the default removable storage technology, used in cameras, smartphones, games consoles and all sorts of other devices. Prices have plummeted to the point where smaller size cards are practically given away for free, and at the same time storage capacity has increased to the point where you can store a terabyte on your thumbnail.

    SD card speed ratings, and why they matter

    However, the fact that SD cards are now so commonplace sometimes conceals the fact that not all SD cards are created equal. SD cards have a speed rating – how fast you can read or write data to the card – and as card sizes have increased, so have speed ratings. If you want to store 4K video from your digital camera, it is important not just that the card is big enough to hold it, but also that you can write it to the card fast enough to keep up with the huge amount of data coming out of the camera.

    The speed of an SD card will also directly affect how fast your Raspberry Pi runs, in just the same way as the speed of a hard drive affects how fast a conventional desktop computer runs. The faster you can read data from the card, the faster your Raspberry Pi will boot, and the faster programs will load. Equally, write speed will also affect how well any programs which save large quantities of data run – so it’s important to use a good-quality card.

    What speed can I expect from my SD card?

    The speed rating of an SD card should be printed either on the card itself or on the packaging.

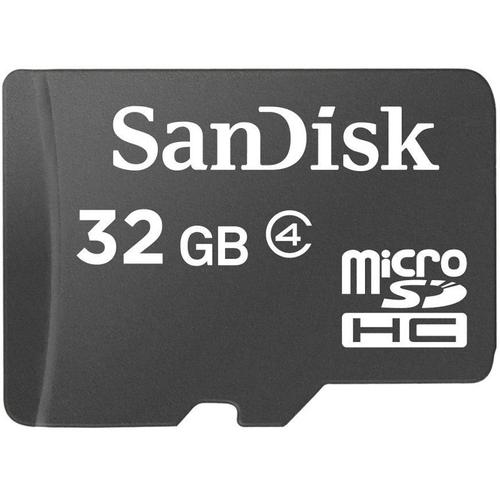
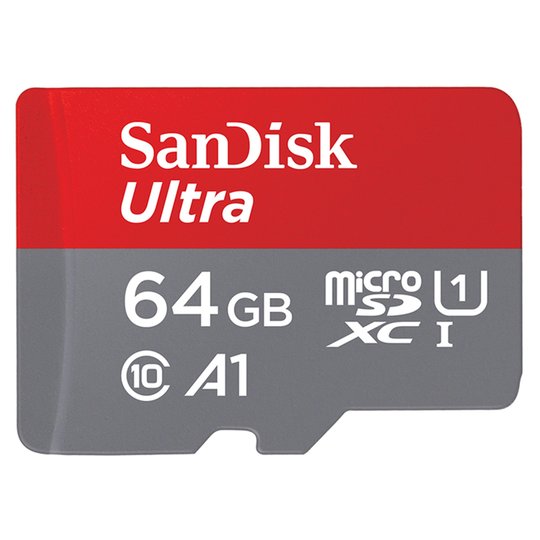
    The 32GB card shown below is Class 4, denoted by the 4 inside the letter C – this indicates that it can write at 4MB/s.

    The 64GB card shown below is Class 10, and so can write at 10MB/s. It also shows the logo of UHS (“ultra high speed”) Class 1, the 1 inside the letter U, which corresponds to the same speed.

    More recently, speeds have started to be quoted in terms of the intended use of the card, with Class V10 denoting a card intended for video at 10MB/s, for example. But the most recent speed categorisation – and the one most relevant to use in a Raspberry Pi – is the new A (for “application”) speed class. We recommend the use of Class A1 cards (as the one above – see the A1 logo to the right of the Class 10 symbol) in Raspberry Pi – in addition to a write speed of 10MB/s, these support at least 1500 read operations and 500 write operations per second. All the official Raspberry Pi microSD cards we sell meet this specification.

    A new tool for testing your SD card speed

    We’ve all heard the stories of people who have bought a large capacity SD card at a too-good-to-be-true price from a dodgy eBay seller, and found that their card labelled as 64GB can only actually hold 2GB of data. But that is at least fairly easy to spot – it’s much harder to work out whether your supposedly fast SD card is actually meeting its specified speed, and unscrupulous manufacturers and sellers often mislabel low quality cards as having unachievable speeds.

    Today, as the first part of a new suite of tests which will enable you to perform various diagnostics on your Raspberry Pi hardware, we are releasing a tool which allows you to test your SD card to check that it performs as it should.

    To install the new tool, from a terminal do

    sudo apt update sudo apt install agnostics

    (“agnostics”? In this case it’s nothing to do with religion! I’ll leave you to work out the pun…)

    Once installed, you will find the new application “Raspberry Pi Diagnostics” in the main menu under “Accessories”, and if you launch it, you’ll see a screen like this:

    In future, this screen will show a list of the diagnostic tests, and you will be able to select which you want to run using the checkboxes in the right-hand column. But for now, the only test available is SD Card Speed Test; just press “Run Tests” to start it.

    Understanding your speed test results

    One thing to note is that the write performance of SD cards declines over time. A new card is blank and data can be written to what is effectively “empty” memory, which is fast; but as a card fills up, memory needs to be erased before it can be overwritten, and so writes will become slower the more a card is used. The pass / fail criteria in this test assume a new (or at least freshly formatted) card; don’t be alarmed if the write speed test fails when run on the SD card you’ve been using for six months! If you do notice your Raspberry Pi slowing down over time, it may be worth backing up your SD card using the SD Card Copier tool and reformatting it.

    The test takes a minute or so to run on a Raspberry Pi 4 (it’ll take longer on older models), and at the end you’ll see a results screen with either (hopefully) PASS or (if you are less fortunate) FAIL. To see the detailed results of the speed test, press “Show Log”, which will open the test log file in a text editor. (The log file is also written to your home directory as rpdiags.txt.)

    We are testing against the A1 specification, which requires a sequential write speed of 10MB/s, 500 random write operations per second, and 1500 random read operations per second; we run the test up to three times. (Tests of this nature are liable to errors due to other background operations accessing the SD card while the test is running, which can affect the result – by running the test multiple times we try to reduce the likelihood of a single bad run resulting in a fail.)

    If the test result was a pass, great! Your SD card is good enough to provide optimum performance in your Raspberry Pi. If it failed, have a look in the log file – you’ll see something like:

    Raspberry Pi Diagnostics - version 0.1 Mon Feb 24 09:44:16 2020 Test : SD Card Speed Test Run 1 prepare-file;0;0;12161;23 seq-write;0;0;4151;8 rand-4k-write;0;0;3046;761 rand-4k-read;9242;2310;0;0 Sequential write speed 4151 kb/s (target 10000) - FAIL Note that sequential write speed declines over time as a card is used - your card may require reformatting Random write speed 761 IOPS (target 500) - PASS Random read speed 2310 IOPS (target 1500) - PASS Run 2 prepare-file;0;0;8526;16 ... 

    You can see just how your card compares to the stated targets; if it is pretty close to them, then your card is only just below specification and is probably fine to use. But if you are seeing significantly lower scores than the targets, you might want to consider getting another card.

    br>
    br>
    [*] unless you’re using PXE network or USB mass storage boot modes of course.

    Website: LINK

  • The History of Pong | Code the Classics

    The History of Pong | Code the Classics

    Reading Time: 7 minutes

    One topic explored in Code the Classics from Raspberry Pi Press is the origin story and success of Pong, one of the most prominent games in early video game history.

    ‘The success of Pong led to the creation of Pong home consoles (and numerous unofficial clones) that could be connected to a television. Versions have also appeared on many home computers.’

    Ask anyone to describe a game of table tennis and they’ll invariably tell you the same thing: the sport involves a table split into quarters, a net dividing the two halves, a couple of paddles, and a nice round ping-pong ball to bat back and forth between two players. Take a look at the 1972 video game Pong, however, and you’ll notice some differences. The table, for instance, is simply split in half and it’s viewed side-on, the paddles look like simple lines, and the ball is square. Yet no one – not even now – would have much trouble equating the two.

    Back in the early 1970s, this was literally as good as it got. The smattering of low-powered arcade machines of the time were incapable of realistic-looking graphics, so developers had to be creative, hoping imaginative gamers would fill the gaps and buy into whatever they were trying to achieve. It helped enormously that there was a huge appetite for the new, emerging video game industry at that time. Nolan Bushnell was certainly hungry for more – and had he turned his nose up at Spacewar!, a space combat game created by Steve Russell in 1962, then Pong would never even have come about.

    “The most important game I played was Spacewar! on a PDP-1 when I was in college,” he says, of the two-player space shooter that was popular among computer scientists and required a $120,000 machine to run. Although the visuals were nothing to write home about, the game was one of the first graphical video games ever made. It pitted two spaceships against each other and its popularity spread, in part, because the makers decided the code could be distributed freely to anyone who wanted it. “It was a great game, fun, challenging, but only playable on a very expensive computer late at night and the wee hours of the morning,” Nolan says. “In my opinion, it was a very important step.”

    Nolan was so taken by Spacewar! that he made a version of the game with a colleague, Ted Dabney. Released in 1971, Computer Space allowed gamers to control a rocket in a battle against flying saucers, with the aim being to get more hits than the enemy in a set period of time. To make it attractive to players, it was placed in a series of colourful, space-age, moulded arcade cabinets. Nolan and Ted sold 1500 of them; even though they made just $500 from the venture, it was enough to spur them into continuing. They came up with the idea for Pong and created a company called Atari.

    One of their best moves was employing engineer Al Alcorn, who had worked with Nolan at the American electronics company Ampex. Al was asked to create a table tennis game based on a similar title that had been released on the Magnavox Odyssey console, on the pretence that the game would be released by General Electric. In truth, Nolan simply wanted to work out Al’s potential, but he was blown away by what his employee came up with. Addictive and instantly recognisable, Atari realised Pong could be a major hit. The game’s familiarity with players meant it could be picked up and played by just about anyone.

    Even so, Nolan had a hard time convincing others. Manufacturers turned the company down, so he visited the manager of a bar called Andy Capp’s in Sunnyvale, California and asked them to take Pong for a week. The manager soon had to call Nolan to tell him the machine had broken: it had become stuffed full of quarters from gamers who loved the game. By 1973, production of the cabinet was in overdrive and 8000 were sold. It led to the creation of a Pong home console which sold more than 150,000 machines. People queued to get their hands on one and Atari was on its way to become a legendary games company.

    For Nolan, it was justification for his perseverance and belief. Suddenly, the man who had become interested in electronics at school, where he would spend time creating devices and connecting bulbs and batteries, was being talked of as a key player in the fledgling video game industry. But what did Nolan, Ted, Al, and the rest of the Atari team do to make the game so special? “We made it a good, solid, fun game to play,” says Nolan. “And we made it simple, easy, and quickly understood. Keeping things simple is more difficult to do than building something complex. You can’t dress up bad gameplay with good graphics.”

    Making Pong

    On the face of it, Pong didn’t look like much. Each side had a paddle that could be moved directly up and down using the controller, and the ball would be hit from one side to the other. The score was kept at the top of the screen and the idea was to force the opposing player to miss. It meant the game program needed to determine how the ball was hit and where the ball would go from that point. And that’s the crux of Pong’s success: the game encouraged people to keep playing and learning in the hope of attaining the skills to become a master.

    When creating Pong, then, the designers had a few things in mind. One of the most important parts of the game was the movement of the paddles. This involved a simple, vertical rectangle that went up and down. One of the benefits Atari had when it created Pong was that it controlled not just the software but the hardware too. By building the cabinet, it was able to determine how those paddles should be moved. “The most important thing if you want to get the gameplay right is to use a knob to move the paddle,” advises Nolan. “No one has done a good Pong using touchscreens or a joystick.”

    Look at a Pong cabinet close up – there are plenty of YouTube videos which show the game in action on the original machine – and you will see what Nolan means. You’ll notice that players turned a knob anticlockwise to move the paddle down, and clockwise to move it up. Far from being confusing, it felt intuitive.

    Movement of the ball

    With the paddles moving, Atari’s developers were able to look at the movement of the ball. At its most basic, if the ball continued to make contact with the paddles, it would constantly move back and forth. If it did not make contact, then it would continue moving in the direction it had embarked upon and leave the screen. At this stage, a new ball was introduced in the centre of the screen and the advantage was given to the player who had just chalked up a point. If you watch footage of the original Pong, you will see that the new ball was aimed at the player who had just let the ball go past. There was a chance he or she would miss again.

    To avoid defeat, players had to be quite nifty on the controls and stay alert. Watching the ball go back and forth at great speed could be quite mesmerising as it left a blurred trail across the cathode ray tube display. There was no need to waste computing power by animating the ball because the main attention was focused on what would happen when it collided with the paddle. It had to behave as you’d expect. “The game did not exist without collisions of the ball to the paddle,” says Nolan.

    Al realised that the ball needed to behave differently depending on where it hit the paddle. When playing a real game of tennis, if the ball hits the centre of the racket, it will behave differently from a ball that hits the edge. Certainly, the ball is not going to be travelling in a simple, straight path back and forth as you hit it; it is always likely to go off at an angle. This, though, is the trickiest part of making Pong “The ball should bounce up from an upper collision with more obtuse angles as the edge of the paddle is approached,” Nolan says. “This balances the risk of missing with the fact that an obtuse angle is harder to return.” This is what Pong is all about: making sure you hit the ball with the paddle, but in a manner that makes it difficult for the opposing player to return it. “A player wants the ball to be just out of reach for the opponent or be hard for him or her to predict.”

    Read on…

    This post is part of a much longer deep dive into the history of Pong in Code the Classics, our 224-page hardback book that not only tells the stories of some of the seminal video games of the 1970s and 1980s, but also shows you how to use Python and Pygame Zero to create your own games inspired by them, following examples programmed by Raspberry Pi founder Eben Upton.

    In conjunction with today’s blog post, we’re offering £1 off Code the Classics when you order your copy between now and midnight Wednesday 26 Feb 2020 from the Raspberry Pi Press online store. Simply follow this link or enter the discount code PONG at checkout to get your copy for only £11, with free shipping in the UK.

    Code the Classics is also available as a free download, although the physical book is rather delightful, so we really do recommend purchasing it.

    Website: LINK
  • Make a Spy Hunter-style scrolling road | Wireframe #31

    Make a Spy Hunter-style scrolling road | Wireframe #31

    Reading Time: 4 minutes

    Raspberry Pi’s own Mac Bowley shows you how to make the beginnings of a top-down driving game inspired by 1983’s Spy Hunter.

    Spy Hunter, an arcade game from 1983

    Spy Hunter was one of the very first games with both driving and shooting.

    Spy Hunter

    The 1983 arcade classic Spy Hunter put players at the wheel of a fictitious Interceptor vehicle and challenged them to navigate a vertically scrolling road, destroying enemy vehicles.

    Here, I’ll show you how you can recreate the game’s scrolling road to use in your own driving games. The road will be created using the Rect class from Pygame, with the road built from stacked rectangles that are each two pixels high.

    Making the scrolling road in Python

    First, I create two lists; one to hold the pieces of road currently being drawn on screen, and another to hold a queue of pieces that will be added as the road scrolls. To create the scrolling road effect, each of the current pieces of road will need to move down the screen, while a new piece is added to the end of the list at position y = 0.

    Pygame can schedule functions, which can then be called at set intervals – meaning I can scroll my road at a set frame rate. The scroll_road function will achieve this. First, I loop over each road piece, and move it down by two pixels. I then remove the first item in the queue list and append it to the end of the road. The Pygame clock is then set to call the function at intervals set by a frame_rate variable: mine is set to 1/60, meaning 60 frames per second.

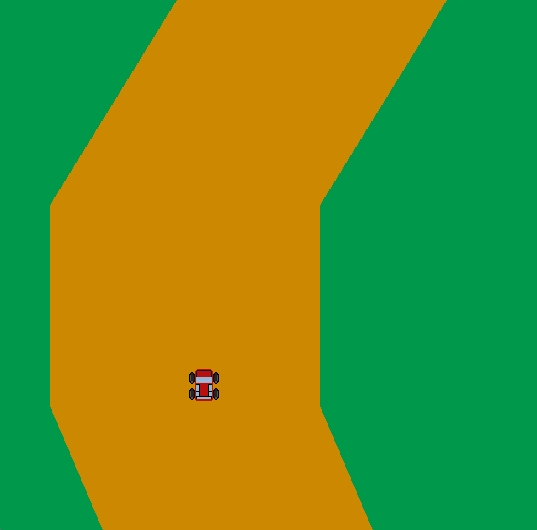
    Our top-down rolling road in Python

    Our code snippet provides a solid basis for your own top-down driving game. All you need now are weapons. And a few other cars.

    My road can either turn left or right, a random choice made whenever the queue is populated. Whichever way the road turns, it has to start from the same spot as the last piece in my queue. I can grab the last item in a list using -1 as an index and then store the x position; building from here will make sure my road is continuous. I use a buffer of 50 pixels to keep the road from moving off the edge of my screen – each time a turn is made, I check that the road doesn’t go beyond this point.

    I want the turn amount to be random, so I’m also setting a minimum turn of 200 pixels. If this amount takes my car closer than the buffer, I’ll instead set the turn amount so that it takes it up to the buffer but no further. I do this for both directions, as well as setting a modifier to apply to my turn amount (-1 to turn left and 1 to turn right), which will save me duplicating my code. I also want to randomly choose how many pieces will be involved in my turn. Each piece is a step in the scroll, so the more pieces, the longer my turn will take. This will make sure I have a good mix of sharp and elongated turns in my road, keeping the player engaged.

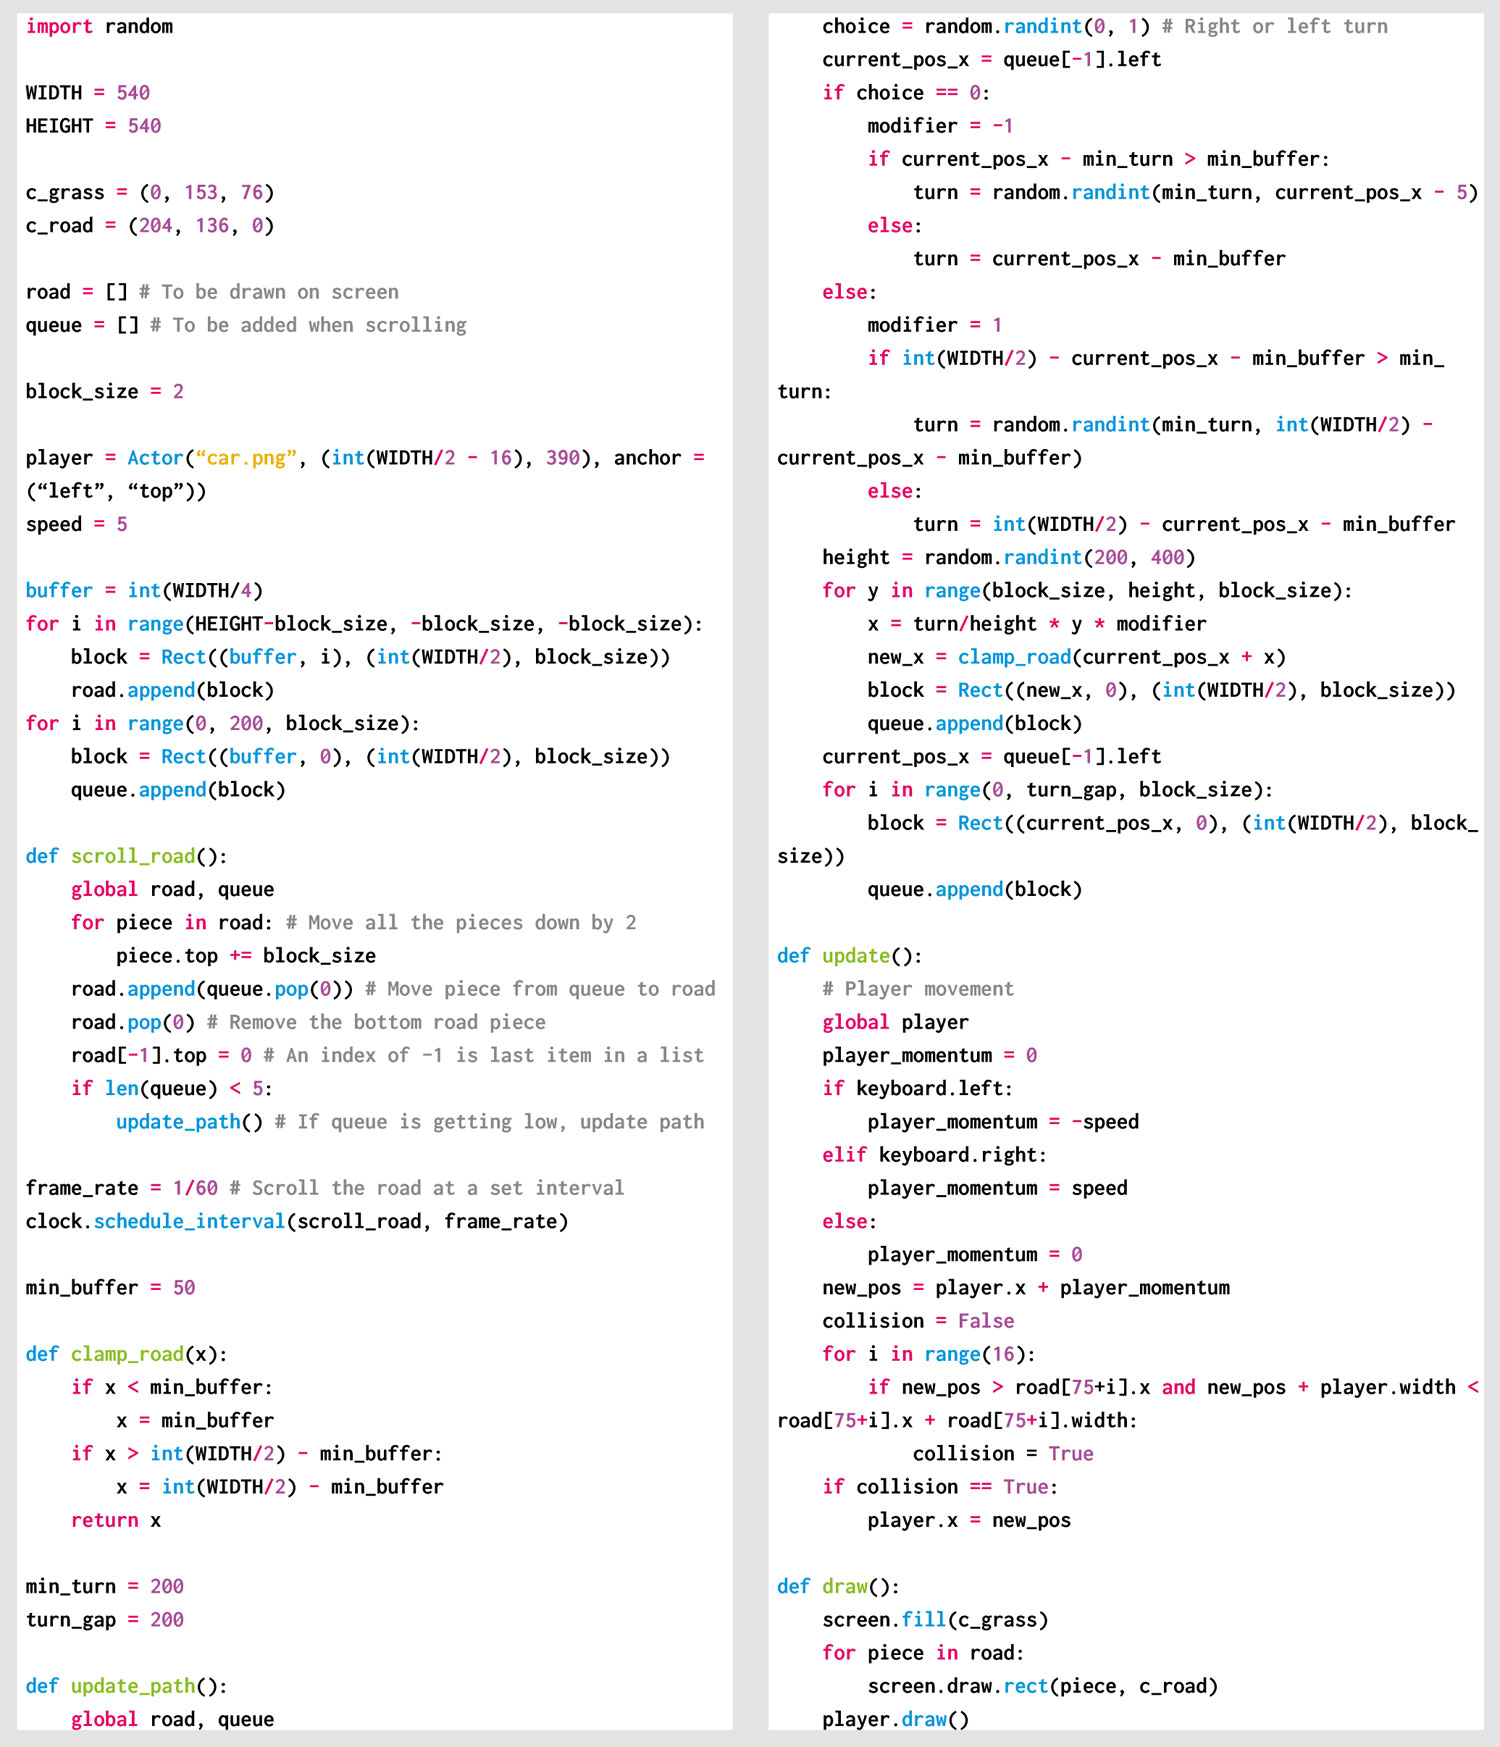
    Our rolling road Python code

    Here’s Mac’s code snippet, which creates a winding road worthy of Spy Hunter in Python. To get it working on your system, you’ll need to install Pygame Zero. And to download the full code, go here.

    Speeding up the game

    To make things more exciting, the game can also be speeded up by decreasing the frame_rate variable. You could even gradually increase this over time, making the game feel more frantic the further you get.
    Another improvement would be to make the turns more curvy, but make sure you’re comfortable with algebra before you do this!

    Get your copy of Wireframe issue 31

    You can read more features like this one in Wireframe issue 31, available now at Tesco, WHSmith, all good independent UK newsagents, and the Raspberry Pi Store, Cambridge.

    Or you can buy Wireframe directly from Raspberry Pi Press — delivery is available worldwide. And if you’d like a handy digital version of the magazine, you can also download issue 31 for free in PDF format.

    Make sure to follow Wireframe on Twitter and Facebook for updates and exclusive offers and giveaways. Subscribe on the Wireframe website to save up to 49% compared to newsstand pricing!

    Website: LINK

  • Vulkan is coming to Raspberry Pi: first triangle

    Vulkan is coming to Raspberry Pi: first triangle

    Reading Time: 2 minutes

    Following on from our recent announcement that Raspberry Pi 4 is OpenGL ES 3.1 conformant, we have some more news to share on the graphics front. We have started work on a much requested feature: an open-source Vulkan driver!

    Vulkan

    Standards body Khronos describes Vulkan as “a new generation graphics and compute API that provides high-efficiency, cross-platform access to modern GPUs”. The Vulkan API has been designed to better accommodate modern GPUs and address common performance bottlenecks in OpenGL, providing graphics developers with new means to squeeze the best performance out of the hardware.

    First triangle

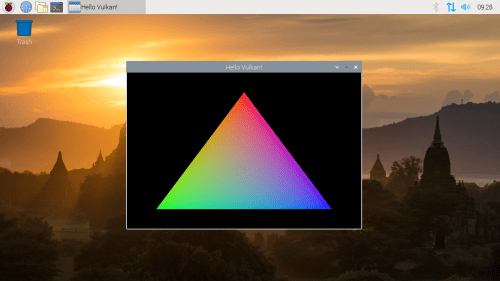
    The “first triangle” image is something of a VideoCore graphics tradition: while I arrived at Broadcom too late to witness the VideoCore III version, I still remember the first time James and Gary were able to get a flawless, single-tile, RGB triangle out of VideoCore IV in simulation. So, without further ado, here’s the VideoCore VI Vulkan version.

    First triangle out of Vulkan

    Before you get too excited, remember that this is just the start of the development process for Vulkan on Raspberry Pi. While there have been community efforts in the direction of Vulkan support (originally on VideoCore IV) as far back as 2018, Igalia has only been working on this new driver for a few weeks, and we still have a very long development roadmap ahead of us before we can put an actual driver in the hands of our users. So don’t hold your breath, and instead look forward to more news from us and Igalia as they make further development progress.

    Website: LINK

  • Build your own first-person shooter in Unity

    Build your own first-person shooter in Unity

    Reading Time: 3 minutes

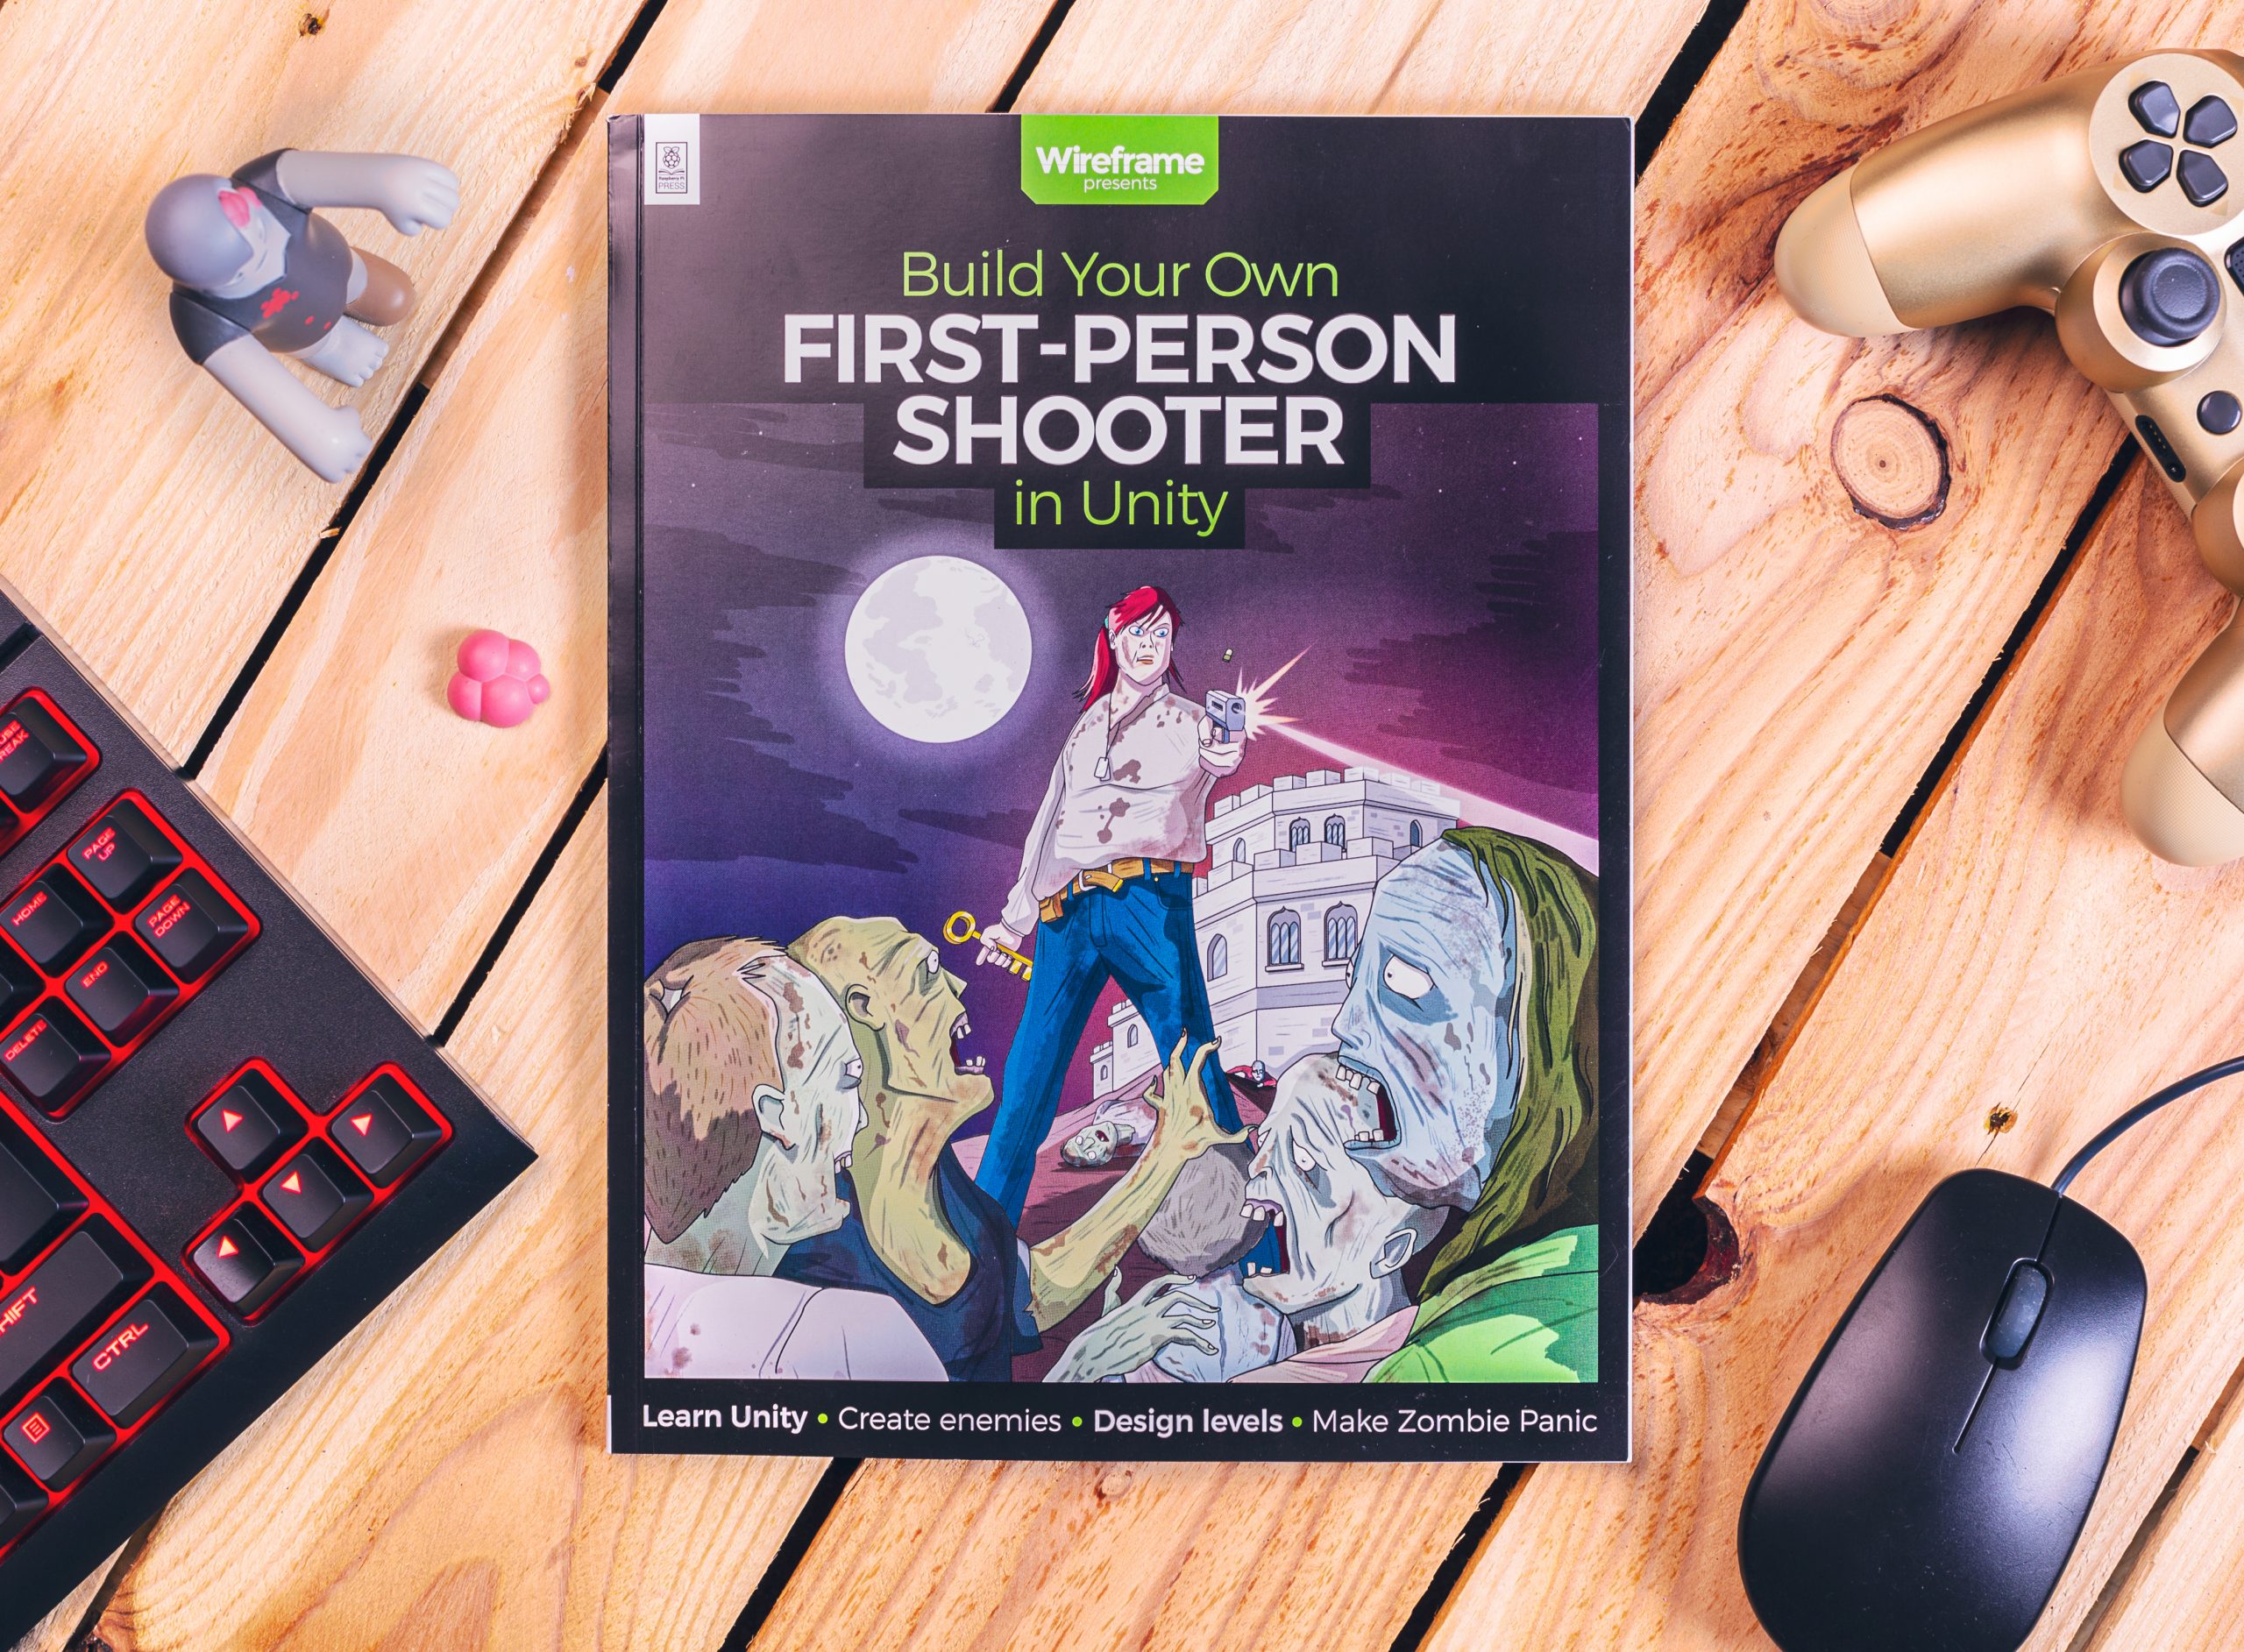
    Raspberry Pi Press is back with a new publication: this time, it’s Wireframe’s time to shine, with Build Your Own First-Person Shooter in Unity.

    BUILD YOUR OWN first-person shooter game in Unity || Wireframe magazine

    Ever fancied creating your own first-person shooter game? Now you can with Wireframe’s brand new, 140-page bookazine, which positively heaves with tutorials and advice from expert video game developers!

    Could you build a video game?

    We’ve all had that moment of asking ourselves, “I wonder if I could do this?” when playing a video game. Whether as a child racing friends in Mario Kart, or in more recent years with vast open-world masterpieces, if you like games, you’ve probably thought about designing and building your own.

    So, why don’t you?

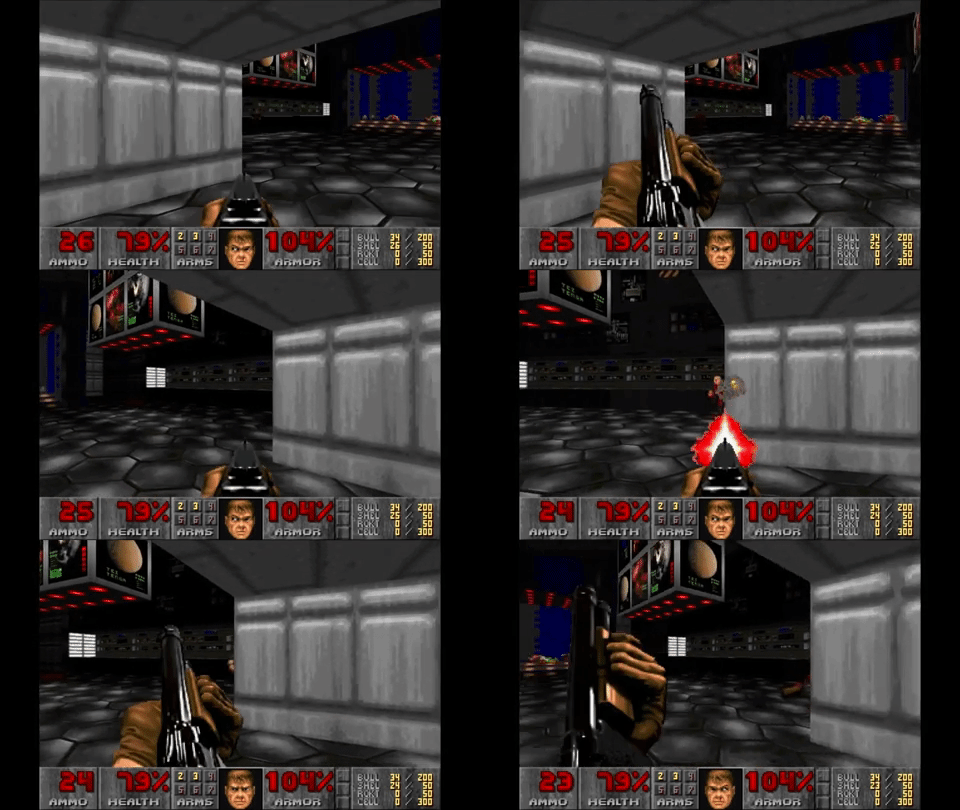
    With the latest publication from Wireframe and Raspberry Pi Press, you can learn how to use Unity, free software available to download online, to create your very own first-person shooter. You could build something reminiscent of DOOM, Wolfenstein, and all the other games you tried to convince your parents you were old enough to play when you really weren’t (who knew blurry, pixelated blood could be so terrifying?).

    Build Your Own First-Person Shooter in Unity

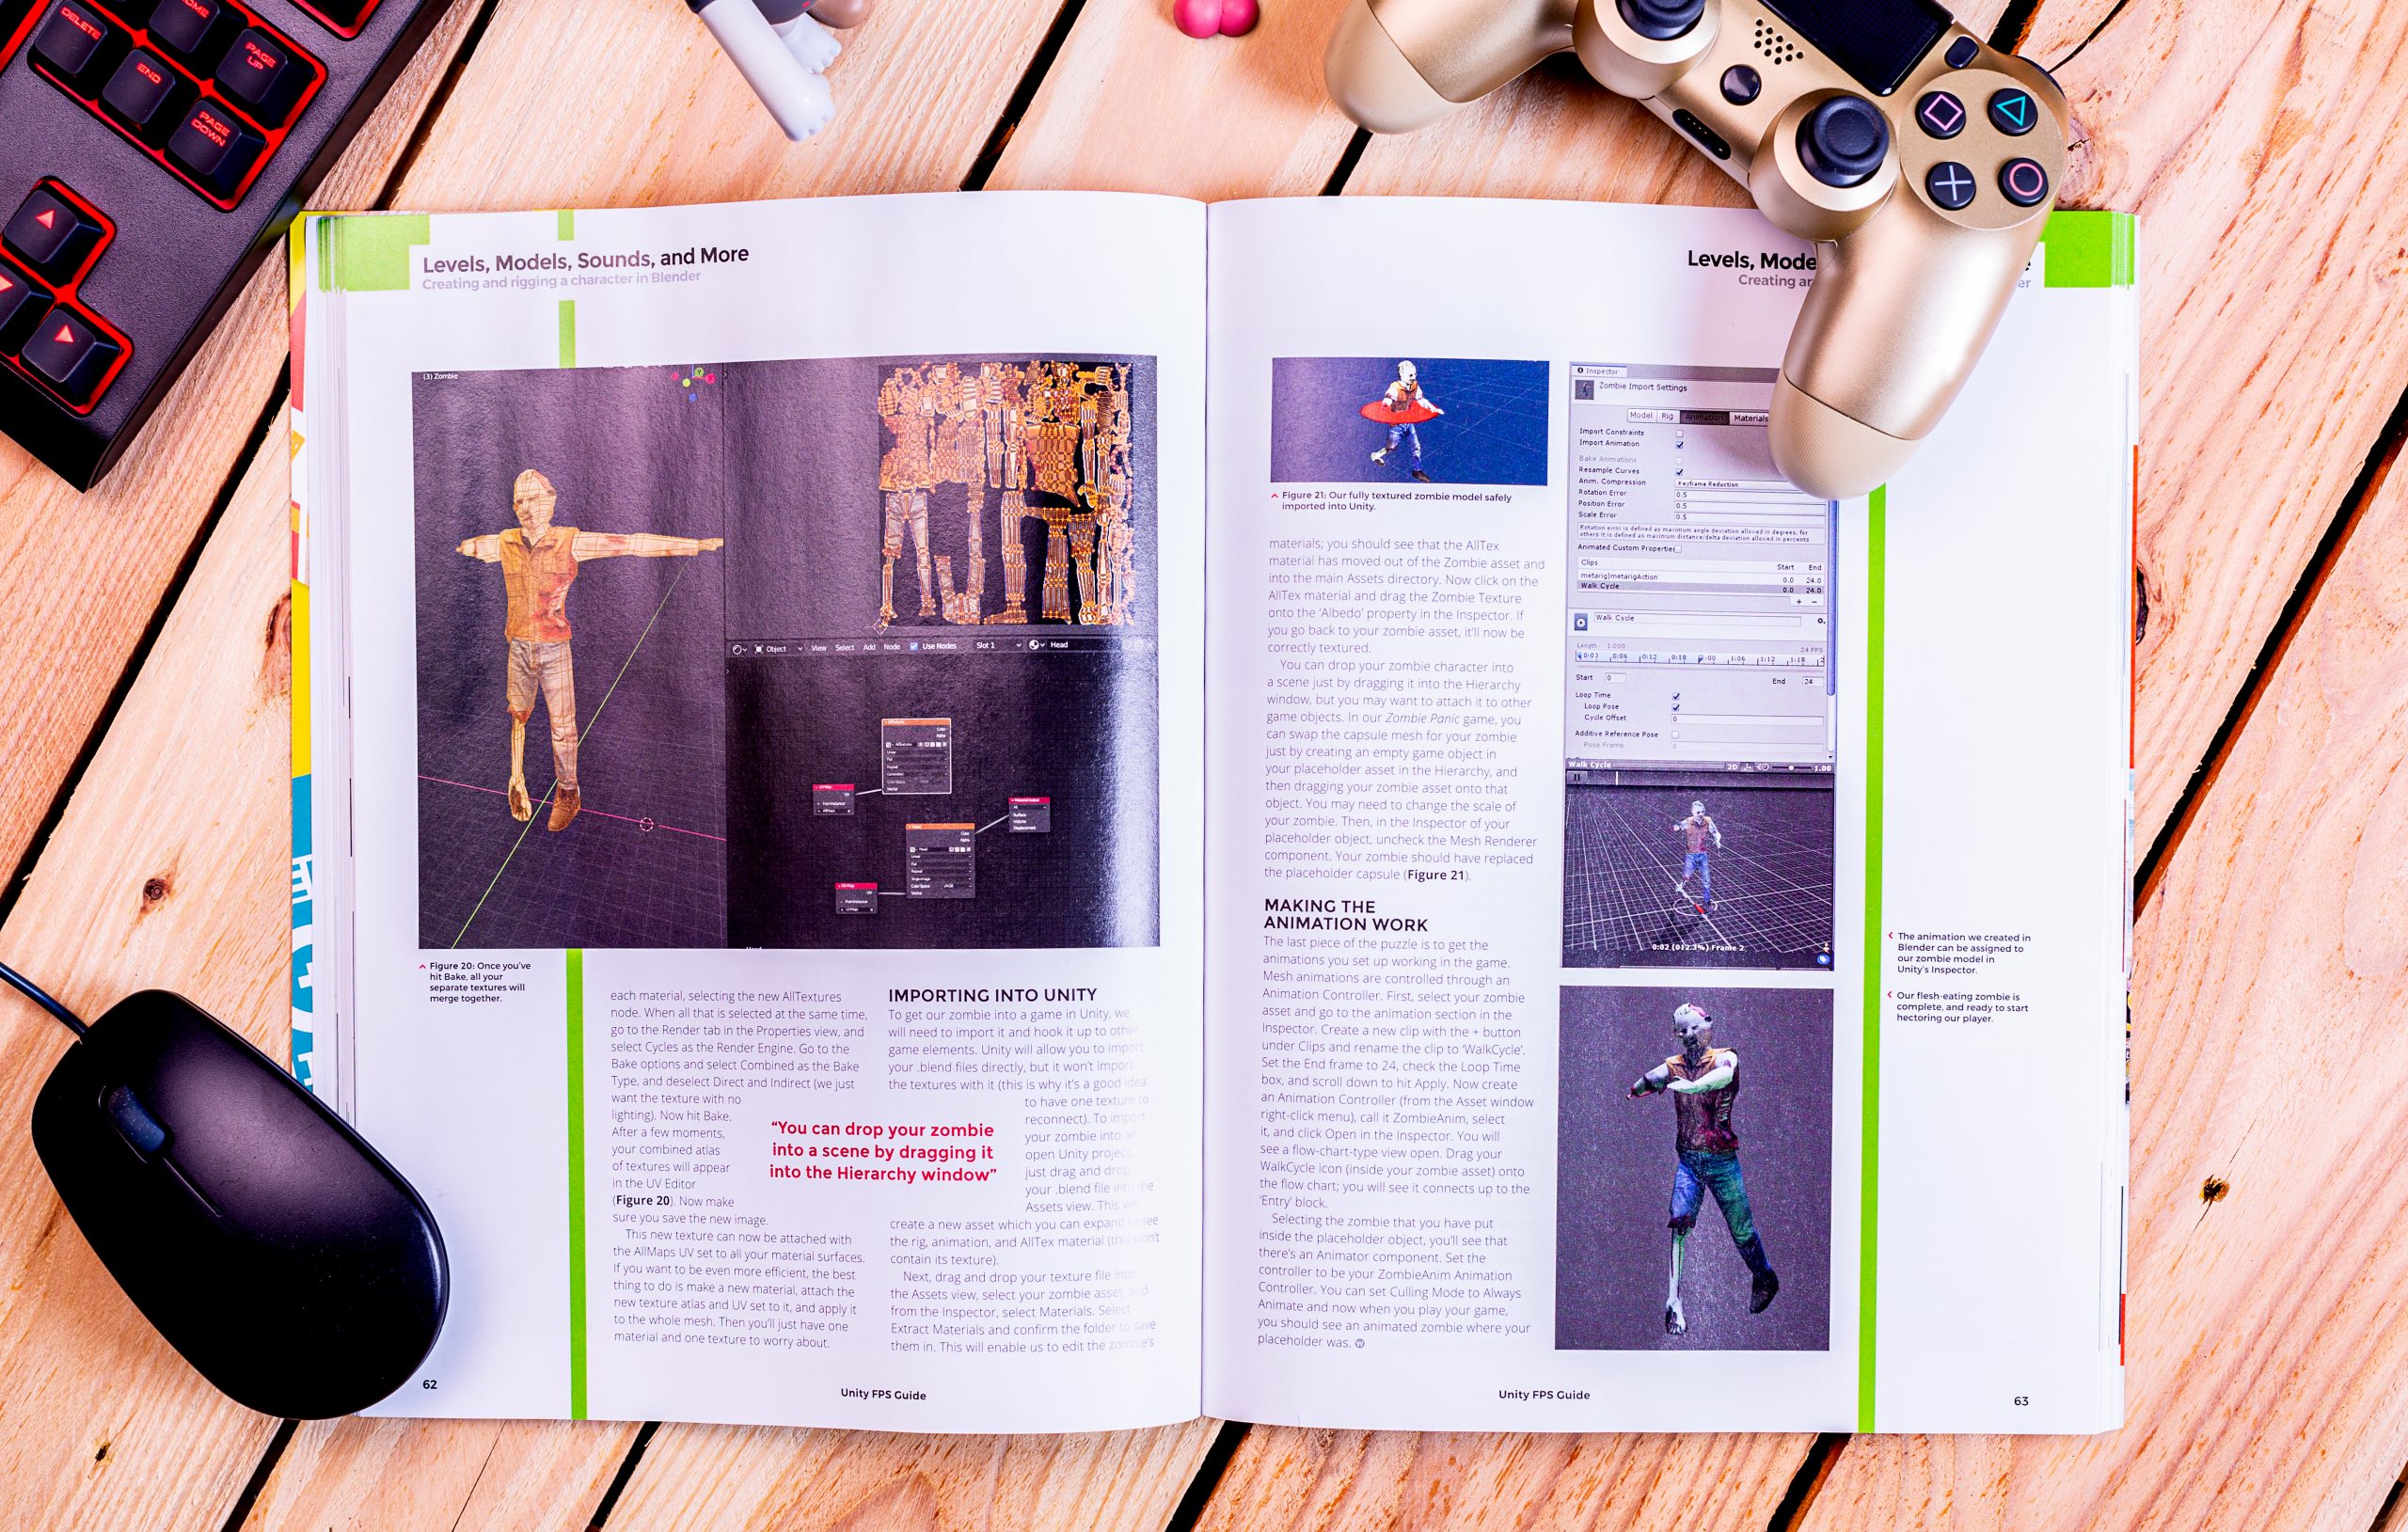
    Build Your Own First-Person Shooter in Unity leads you step-by-step through the process of making the game Zombie Panic – a frenetic battle for survival inside a castle heaving with the undead.

    You’ll learn how to set up and use all the free software you’ll need, make enemies that follow and attack the player, create and texture 3D character models, and design levels with locked doors and keys.

    You’ll also get tips and advice from experts, allowing you to progress your game making beyond the tutorials in the book.

    Get your copy now!

    Build Your Own First-Person Shooter in Unity is available now from the Raspberry Pi Press online store with free worldwide shipping, from the Raspberry Pi Store in Cambridge, and as a free download from the Wireframe website.

    Wait, a free download?

    Yup, you read correctly. Build Your Own First-Person Shooter in Unity can be downloaded for free as a PDF from the Wireframe website. We release free PDF versions of our books and magazines on the day they’re published; it means as many people as possible can get their hands on high-quality, up-to-date information about computing, programming and making.

    However, when you buy our publications, you help us produce more great content, and you support the work of the Raspberry Pi Foundation to bring computing and digital making to people all over the world. We offer a variety of subscription options, including some terrific free gifts. And we make sure our publications are printed to feel good in your hands and look good on your bookshelf.

    So, buy Build Your Own First-Person Shooter in Unity if you can – thank you, you’re amazing! And if not, grab the free PDF. Whichever you choose, we hope you make an awesome game. Don’t forget to share it with us on our social media channels.

    Website: LINK
  • Can you connect a Raspberry Pi to a GoPro Hero 6?

    Can you connect a Raspberry Pi to a GoPro Hero 6?

    Reading Time: < 1 minute

    A contractor is drilling in the office space above ours, and it sounds like we’re under attack by a swarm of very angry, Transformeresque bees. We can’t hear ourselves think. Although we can hear the drills.

    Because of this disruption, I (Alex) am unable to focus on words. [Ed’s note: me too. We apologies for any typos.] So here you go. Have an interesting video from YouTuber Blitz City DIY.

    Can you help Liz create a wireless monitor for her GoPro Hero 6 using VLC on a Raspberry Pi despite the latest changes to GoPro software?

    DIY FYI: GoPro and Wi-Fi

    I wanted to create a wireless monitor for my GoPro Hero 6 using VLC on a Raspberry Pi but immediately ran into issues concerning Wi-Fi on the newer GoPro models (basically the GoPro Hero 4 and up).

    Reply in the comments of the video, or here if you don’t have a YouTube account. Meanwhile, I will slowly be losing my mind, cowering under my desk with my fingers in my ears.

    Website: LINK
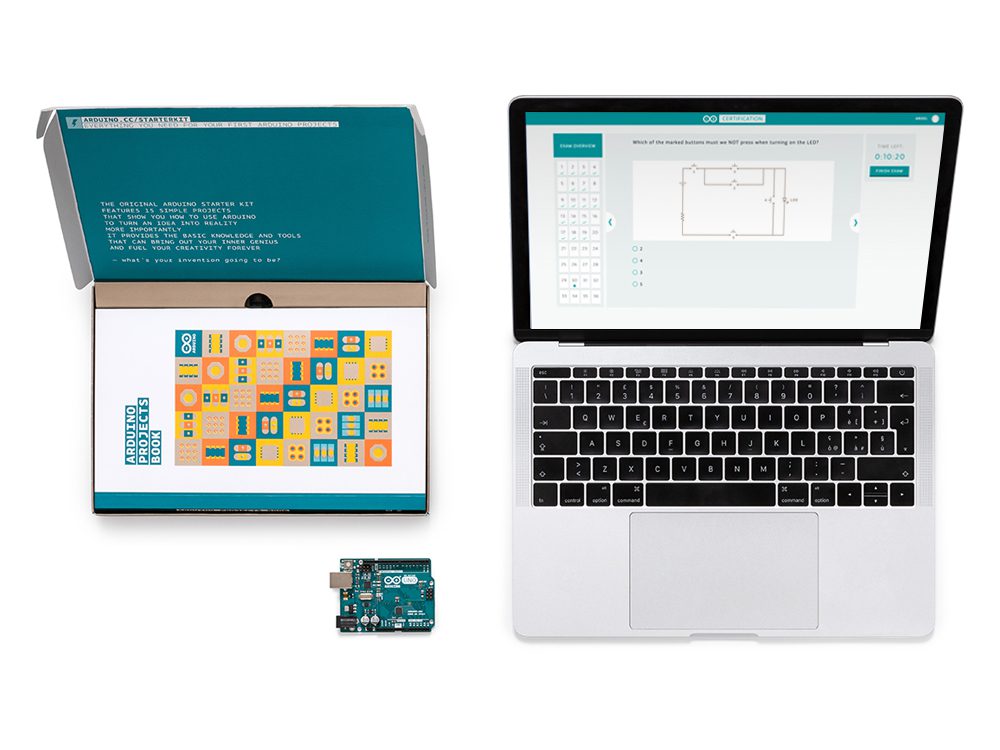
  • The Arduino Fundamentals Certification Exam is now available in Spanish and Italian!

    The Arduino Fundamentals Certification Exam is now available in Spanish and Italian!

    Reading Time: 3 minutes

    For enthusiasts, the Fundamentals Exam is the first tier in the Arduino Certification Program (ACP), designed to test entrants knowledge in Arduino-related electronics, programming, and physical computing.

    The exam is available for everyone interested in officially certifying their skills and knowledge on Arduino, that could, for example, be referred to in a resume for academic or professional purposes.

    Get your students, colleagues and friends certified!

    The Fundamentals Exam is now also open to schools, academic institutions, universities, and companies that are interested in getting their students and employees officially certified!

    The Fundamentals Certification offers the right balance of academic excellence and real world skills to give students the confidence and motivation they need to succeed both in educational and professional environments.

    It is a great opportunity for companies who are interested in certifying their employees to refresh and add new skills to their repertoire.

    Want to learn more? Additional information can be found here.

    El examen de Certificación Fundamentals, está ahora disponible en Español e Italiano

    Para entusiastas, el examen de Certificación Fundamentals, es el primer nivel del Programa de certificación Arduino (ACP), diseñado para evaluar el conocimiento de los participantes en electrónica, programación y computación física relacionadas con Arduino.

    El examen está disponible para todos los interesados ??en certificar oficialmente sus habilidades y conocimientos en Arduino, que podrían, por ejemplo, mencionarse en un currículum con fines académicos o profesionales.

    ¡Certifica a tus estudiantes, colegas y equipo de trabajo!

    La certificación también está disponible para escuelas, instituciones académicas, universidades y empresas que estén interesadas en certificar oficialmente a sus estudiantes y equipo de trabajo.

    La Certificación Fundamentals ofrece el equilibrio adecuado entre excelencia académica y habilidades del mundo real, para brindar a los estudiantes la confianza y la motivación que necesitan para tener éxito tanto en entornos académicos como profesionales.

    También es una gran posibilidad para compañías que están interesadas en certificar a su equipo de trabajo para actualizar y agregar nuevas habilidades a su repertorio.

    Para saber más visita: https://store.arduino.cc/digital/cert_fundamentals.

    Siamo lieti di annunciare che l’esame per la certificazione Arduino Fundamentals è da adesso disponibile anche in spagnolo e italiano! 

    Desideriamo rendere accessibile la Certificazione alle scuole, alle istitutuzioni, università e aziende che siano interessate a certificare ufficialmente i propri studenti e dipendenti! La certificazione Arduino Fundamentals offre il giusto equilibrio fra l’acquisizione di abilità accademiche e lavorative, fornendo agli studenti la sicurezza e la motivazione necessarie per riuscire nel mondo accademico e professionale. E’ inoltre un increndibile possibilità per le aziende interessate ad aggionarne, migliorare e/o accrescere le capacità dei propri dipendenti.

    Per saperne di più, visitate: https://store.arduino.cc/digital/cert_fundamentals.

    Website: LINK

  • The Arduino Fundamentals Certification Exam is now available in Spanish and Italian!

    The Arduino Fundamentals Certification Exam is now available in Spanish and Italian!

    Reading Time: 3 minutes

    For enthusiasts, the Fundamentals Exam is the first tier in the Arduino Certification Program (ACP), designed to test entrants knowledge in Arduino-related electronics, programming, and physical computing.

    The exam is available for everyone interested in officially certifying their skills and knowledge on Arduino, that could, for example, be referred to in a resume for academic or professional purposes.

    Get your students, colleagues and friends certified!

    The Fundamentals Exam is now also open to schools, academic institutions, universities, and companies that are interested in getting their students and employees officially certified!

    The Fundamentals Certification offers the right balance of academic excellence and real world skills to give students the confidence and motivation they need to succeed both in educational and professional environments.

    It is a great opportunity for companies who are interested in certifying their employees to refresh and add new skills to their repertoire.

    Want to learn more? Additional information can be found here.

    El examen de Certificación Fundamentals, está ahora disponible en Español e Italiano

    Para entusiastas, el examen de Certificación Fundamentals, es el primer nivel del Programa de certificación Arduino (ACP), diseñado para evaluar el conocimiento de los participantes en electrónica, programación y computación física relacionadas con Arduino.

    El examen está disponible para todos los interesados ??en certificar oficialmente sus habilidades y conocimientos en Arduino, que podrían, por ejemplo, mencionarse en un currículum con fines académicos o profesionales.

    ¡Certifica a tus estudiantes, colegas y equipo de trabajo!

    La certificación también está disponible para escuelas, instituciones académicas, universidades y empresas que estén interesadas en certificar oficialmente a sus estudiantes y equipo de trabajo.

    La Certificación Fundamentals ofrece el equilibrio adecuado entre excelencia académica y habilidades del mundo real, para brindar a los estudiantes la confianza y la motivación que necesitan para tener éxito tanto en entornos académicos como profesionales.

    También es una gran posibilidad para compañías que están interesadas en certificar a su equipo de trabajo para actualizar y agregar nuevas habilidades a su repertorio.

    Para saber más visita: https://store.arduino.cc/digital/cert_fundamentals.

    Siamo lieti di annunciare che l’esame per la certificazione Arduino Fundamentals è da adesso disponibile anche in spagnolo e italiano! 

    Desideriamo rendere accessibile la Certificazione alle scuole, alle istitutuzioni, università e aziende che siano interessate a certificare ufficialmente i propri studenti e dipendenti! La certificazione Arduino Fundamentals offre il giusto equilibrio fra l’acquisizione di abilità accademiche e lavorative, fornendo agli studenti la sicurezza e la motivazione necessarie per riuscire nel mondo accademico e professionale. E’ inoltre un increndibile possibilità per le aziende interessate ad aggionarne, migliorare e/o accrescere le capacità dei propri dipendenti.

    Per saperne di più, visitate: https://store.arduino.cc/digital/cert_fundamentals.

    Website: LINK
  • Join Disintegration’s Technical Beta and Test its Multiplayer Starting January 28

    Join Disintegration’s Technical Beta and Test its Multiplayer Starting January 28

    Reading Time: 3 minutes

    Hey! We are V1 Interactive, a small studio that is currently developing Disintegration. We’ve been working nonstop for the last few months for this moment to finally arrive: we are super excited to announce Disintegration’s Technical Beta.

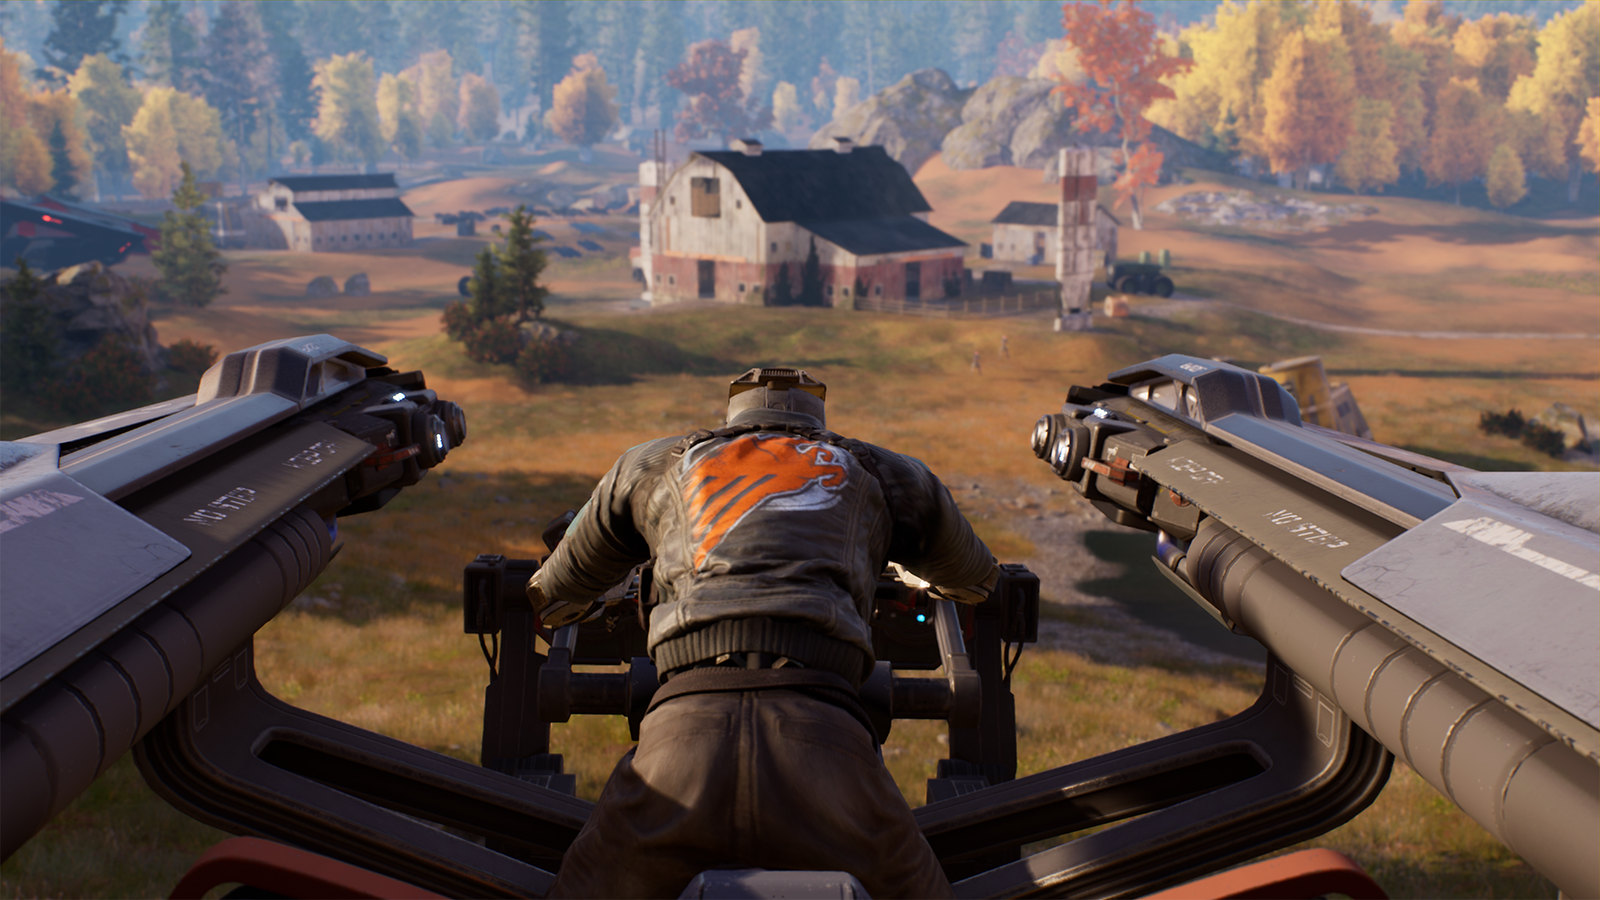
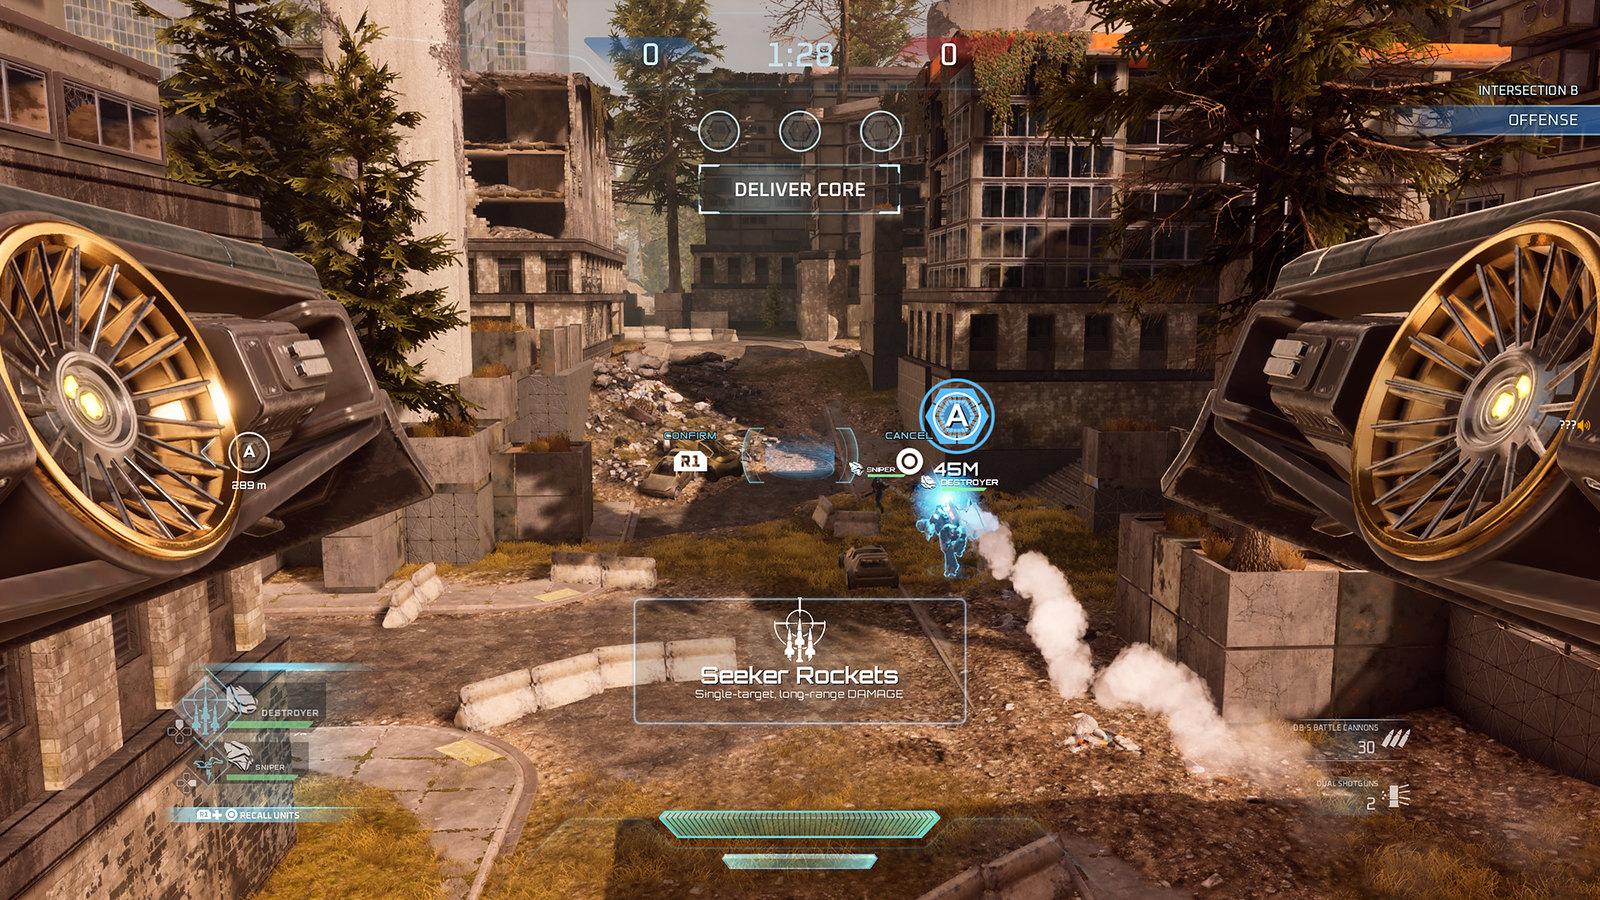
    For those who aren’t familiar with it, Disintegration is a sci-fi FPS in which you pilot a hovering, weaponized vehicle called a gravcycle, while you tactically command your squad around the battlefield.

    Set on Earth in a not-so-distant future where humanity’s last chance of survival is to replace their bodies with robotic armatures, the single player campaign focuses on Romer Shoal’s story and his fight against the Rayonne to regain his humanity.

    Although we have been putting a lot of work into the campaign, we’ve also been working hard to ensure Disintegration’s multiplayer is fast, frenetic, and a lot of fun.

    The multiplayer game pits you against other players in up to 5v5 matches with you and your individual squads on the ground. The unique game modes, blending aerial combat and squad commands across several different modes and maps, are sure to test not only your shooter skills, but also your tactical approach on the battlefield.

    We let players at Pax West get hands on with the game, but the time has come to put Disintegration’s multiplayer into a real stress test — that’s why we are running our Technical Beta at the end of January.

    Disintegration’s Technical Beta will include two maps and two different modes. You can also choose between seven different crews each with their own weapons, abilities, and role in combat.

    We are overwhelmed with all the support and encouraging words we have received so far from the community, but now we need to ask a favor to all of you: join the Technical Beta, coordinate with your team, command your units, and most importantly, have fun!

    You may see bugs, frame rate issues, or other odd behavior. That’s what we’re looking to resolve. Play it, test it out in every way possible, then give us your honest feedback. Your feedback is key for us to try and make Disintegration the best that it can be.

    So sign up now to have a chance to participate in the Closed Technical Beta January 28-30.

    However, don’t worry if you don’t get the chance to join the closed session! You can always play the Open Technical Beta at PlayStation Store, that will run from January 31 to February 1.

    You can find all the information on Disintegration and details about the Technical Beta at www.disintegrationgame.com. Time to jump onto your gravcycles and reboot humanity!

    Website: LINK
  • Code a Boulder Dash mining game | Wireframe #30

    Code a Boulder Dash mining game | Wireframe #30

    Reading Time: 4 minutes

    Learn how to code a simple Boulder Dash homage in Python and Pygame. Mark Vanstone shows you how. 

    The original Boulder Dash was marked out by some devious level design, which threatened to squash the player at every turn.

    Boulder Dash

    Boulder Dash first appeared in 1984 for the Commodore 64, Apple II, and the Atari 400/800. It featured an energetic gem collector called Rockford who, thanks to some rather low-resolution graphics, looked a bit like an alien. His mission was to tunnel his way through a series of caves to find gems while avoiding falling rocks dislodged by his digging. Deadly creatures also inhabited the caves which, if destroyed by dropping rocks on them, turned into gems for Rockford to collect.

    The ingenious level designs were what made Boulder Dash so addictive. Gems had to be collected within a time limit to unlock the exit, but some were positioned in places that would need planning to get to, often using the physics of falling boulders to block or clear areas. Of course, the puzzles got increasingly tough as the levels progressed.

    Written by Peter Liepa and Chris Gray, Boulder Dash was published by First Star Software, which still puts out new versions of the game to this day. Due to its original success, Boulder Dash was ported to all kinds of platforms, and the years since have seen no fewer than 20 new iterations of Boulder Dash, and a fair few clones, too.

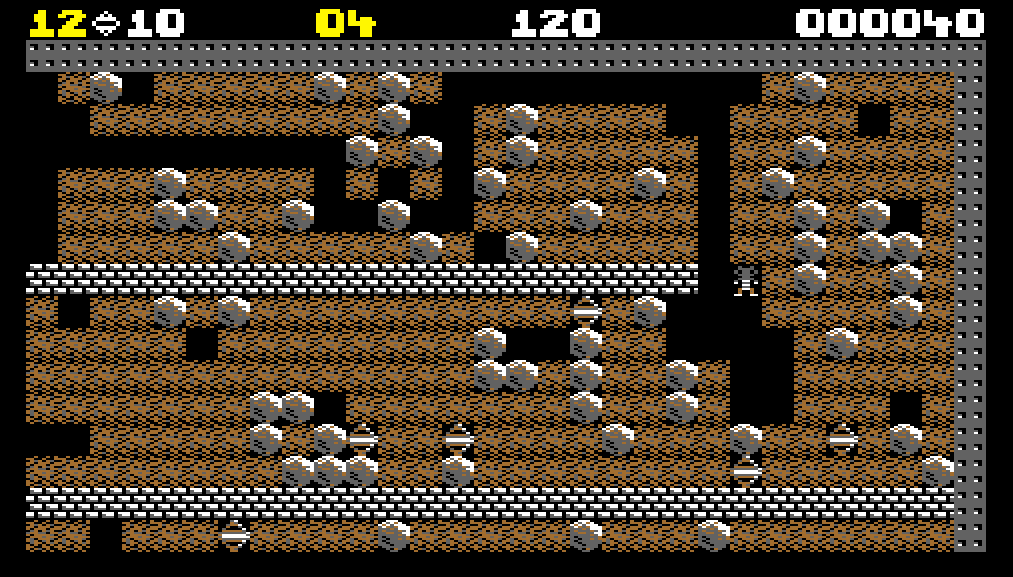
    Our homage to Boulder Dash running in Pygame Zero. Dig through the caves to find gems – while avoiding death from above.

    Making Boulder Dash in Python

    We’re going to have a look at the boulder physics aspect of the game, and make a simple level where Rockford can dig out some gems and hopefully not get flattened under an avalanche of rocks. Writing our code in Pygame Zero, we’ll automatically create an 800 by 600-size window to work with. We can make our game screen by defining a two-dimensional list, which, in this case, we will fill with soil squares and randomly position the rocks and gems.

    Each location in the list matrix will have a name: either wall for the outside boundary, soil for the diggable stuff, rock for a round, moveable boulder, gem for a collectable item, and finally, rockford to symbolise our hero. We can also define an Actor for Rockford, as this will make things like switching images and tracking other properties easier.

    Here’s Mark’s code, which gets an homage to Boulder Dash running in Python. To get it working on your system, you’ll first need to install Pygame Zero. And to download the full code, go here.

    Our draw() function is just a nested loop to iterate through the list matrix and blit to the screen whatever is indicated in each square. The Rockford Actor is then drawn over the top. We can also keep a count of how many gems have been collected and provide a congratulatory message if all of them are found. In the update() function, there are only two things we really need to worry about: the first being to check for keypresses from the player and move Rockford accordingly, and the second to check rocks to see if they need to move.

    Rockford is quite easy to test for movement, as he can only move onto an empty square – a soil square or a gem square. It’s also possible for him to push a boulder if there’s an empty space on the other side. For the boulders, we need to first test if there’s an empty space below it, and if so, the boulder must move downwards. We also test to see if a boulder is on top of another boulder – if it is, the top boulder can roll off and down onto a space either to the left or the right of the one beneath.
    There’s not much to add to this snippet of code to turn it into a playable game of Boulder Dash. See if you can add a timer, some monsters, and, of course, some puzzles for players to solve on each level.

    Testing for movement

    An important thing to notice about the process of scanning through the list matrix to test for boulder movement is that we need to read the list from the bottom upwards; otherwise, because the boulders move downwards, we may end up testing a boulder multiple times if we test from the beginning to the end of the list. Similarly, if we read the list matrix from the top down, we may end up moving a boulder down and then when reading the next row, coming across the same one again, and moving it a second time.

    Get your copy of Wireframe issue 30

    You can read more features like this one in Wireframe issue 30, available now at Tesco, WHSmith, all good independent UK newsagents, and the Raspberry Pi Store, Cambridge.

    Or you can buy Wireframe directly from Raspberry Pi Press — delivery is available worldwide. And if you’d like a handy digital version of the magazine, you can also download issue 30 for free in PDF format.

    Make sure to follow Wireframe on Twitter and Facebook for updates and exclusive offers and giveaways. Subscribe on the Wireframe website to save up to 49% compared to newsstand pricing!

    Website: LINK
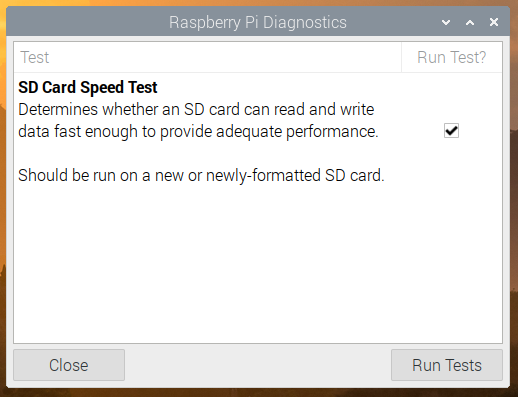
  • Code the Classics on sale now

    Code the Classics on sale now

    Reading Time: 4 minutes

    TL;DR: we made a fully automated luxury gay space communist type-in-listing book. Buy it now and get it in time for Christmas.

    Code the Classics cover

    Back in the dawn of time, in the late 1980s, I grew up on a diet of type-in computer game listings. From the BBC Micro User Guide, to The Micro User magazine, to the ubiquitous Usborne books: an hour or two of painstaking copying and a little imagination would provide you with an experience which wasn’t a million miles away from what you could buy on the shelves of your local computer store.

    Can you believe they did “Machine Code for Beginners”?

    The simple act of typing in a game helped to familiarise you with a programming language (usually a dialect of BASIC), and by making mistakes you could start to understand what other, more intentional changes might accomplish. Some of the earliest games I wrote started off as heavily modified versions of type-in listings; in fact, one of these made a sneaky reappearance on this blog last year.

    Fast forward to the present day, and aside from regular appearances in our own MagPi and Wireframe magazines, type-in listings have faded from view. Commercial games, even casual ones, have become much more sophisticated, beyond what you might expect to be able to enter into a computer in a reasonable amount of time. At the same time, tools like Unity remove the need to develop every title from the ground up.

    But there’s still a lot to be said for the immediacy of the type-in experience. Three years ago, we asked ourselves whether we could make a type-in game listing book for the modern era. The end result, of which we’re launching the first volume today, is Code the Classics. David Crookes and Liz Upton will take you behind the scenes of the creation of five classic arcade games, and then I’ll show you how to implement a simple Python game inspired by each one.

    Cavern

    Substitute Soccer

    Developing retro arcade games has been a hobby of mine since those early BBC Micro days, and I spent many happy evenings developing these titles, ably assisted by Andrew Gillett and Sean Tracey. It was important to us that these games be as close as possible to the standard of modern commercial casual games. With this in mind, we invited Dan Malone, famous among many other things for his work with The Bitmap Brothers, to provide graphics, and long-time game audio pro Allister Brimble to provide music and sound effects. I’ve known Dan for nearly twenty years, and have admired Allister’s work since childhood; it was an enormous pleasure to work with them, and we took the opportunity to snag interviews with them both, which you’ll also find in the book. Here’s Dan to offer you a taster.

    Meet the artist behind Code the Classics

    Subscribe to our YouTube channel: http://rpf.io/ytsub Help us reach a wider audience by translating our video content: http://rpf.io/yttranslate Buy a Raspberry Pi from one of our Approved Resellers: http://rpf.io/ytproducts Find out more about the #RaspberryPi Foundation: Raspberry Pi http://rpf.io/ytrpi Code Club UK http://rpf.io/ytccuk Code Club International http://rpf.io/ytcci CoderDojo http://rpf.io/ytcd Check out our free online training courses: http://rpf.io/ytfl Find your local Raspberry Jam event: http://rpf.io/ytjam Work through our free online projects: http://rpf.io/ytprojects Do you have a question about your Raspberry Pi?

    We’ve pushed the boat out on the production values for the book itself too: think of it as an object from a parallel universe where Usborne made luxury hardbound coffee-table type-in listing books rather than paperbacks.

    So although, like all our books, you can download this one for free, you’ll really want a physical copy of Code the Classics to have, and to hold, and to leave on your bedside table to club intruders with.

    And while the listings are rather long, and fully-commented versions are available on GitHub, perhaps you should think about spending a rainy afternoon actually typing one in.

    Website: LINK
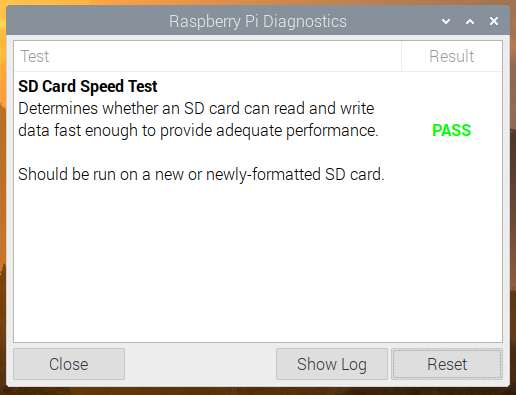
  • More new books from The MagPi and HackSpace magazines

    More new books from The MagPi and HackSpace magazines

    Reading Time: 2 minutes

    If our recent release of Retro Gaming with Raspberry Pi, Getting Started with Arduino, and Coding the Classics isn’t enough for you, today sees the release of TWO MORE publications from Raspberry Pi Press!

    The Official Raspberry Pi Projects Book Volume 5

    If you’re looking for Raspberry Pi inspiration, volume 5 of the ever popular Raspberry Pi Projects Book is for you. Packed full of ideas, projects, and incredible builds, The Official Raspberry Pi Projects Book Volume 5 is the perfect read for any budding coder, maker, or fan of cool stuff.

    Get your copy now

    Buy The Official Raspberry Pi Projects Book Volume 5 directly from the Raspberry Pi Press online store today with FREE WORLDWIDE SHIPPING, or pick up your copy from the Raspberry Pi Store, Cambridge; local UK newsagents and supermarkets such as WHSmith and Sainsbury’s; or from Barnes & Noble in the US in the next few weeks.

    If you’d like to sample The Official Raspberry Pi Projects Book Volume 5, you can download the PDF from The MagPi website.

    Book of Making Volume 2

    Much like The Official Raspberry Pi Projects Book Volume 5, Book of Making Volume 2 collects together some of the very best projects and tutorials from the makersphere, whether they involve wood- and metalwork or fine electronics and 3D printing. If you’re a maker hobbyist, or simply a fan of awesome projects and unusual builds, Book of Making Volume 2 is the publication for you.

    Get your copy today

    You can buy Book of Making Volume 2 directly from the Raspberry Pi Press online store today, again with FREE WORLDWIDE SHIPPING. It’ll also be available from the Raspberry Pi Store, Cambridge; local UK newsagents and supermarkets such as WHSmith and Sainsbury’s; or Barnes & Noble in the US in the next few weeks.

    You can also download the free PDF from HackSpace magazine’s website.

    Website: LINK

  • Researchers have developed self-healing soft electronics

    Researchers have developed self-healing soft electronics

    Reading Time: 2 minutes

    Researchers have developed self-healing soft electronics

    Arduino TeamNovember 9th, 2019

    While flexible electronics can pose certain advantages, they are often subject to a rather short life, and can be difficult if not impossible to repair. As a solution to this conundrum, researchers from Carnegie Mellon University and the University of Tokyo have been exploring a novel material that can fuse itself together automatically, and conduct electricity.

    The composite material is called MWCNTs-PBS, or multi-walled carbon nanotubes surrounded by a flexible polymer polyborosiloxane outer region. When two sections need to be attached, they’re simply pressed together and like magic it forms an electrical and mechanical bond. 

    Tests performed with the help of an Arduino Mega include pressure and touch sensing, as well as cut detection. It will be interesting to see how this technology advances in the future, perhaps leading to a day when devices just ‘heal’ themselves!

    [youtube https://www.youtube.com/watch?v=Q1zfu5GYW8A?feature=oembed&w=500&h=281]

    Living things in nature have long been utilizing the ability to “heal” their wounds on the soft bodies to survive in the outer environment. In order to impart this self-healing property to our daily life interface, we propose Self-healing UI, a soft-bodied interface that can intrinsically self-heal damages without external stimuli or glue. The key material to achieving Self-healing UI is MWCNTs-PBS, a composite material of a self-healing polymer polyborosiloxane (PBS) and a filler material multi-walled carbon nanotubes (MWCNTs), which retains mechanical and electrical self-healability. We developed a hybrid model that combines PBS, MWCNTs-PBS, and other common soft materials including fabric and silicone to build interface devices with self-healing, sensing, and actuation capability. These devices were implemented by layer-by-layer stacking fabrication without glue or any post-processing, by leveraging the materials’ inherent self-healing property between two layers. We then demonstrated sensing primitives and interactive applications that extend the design space of shape-changing interfaces with their ability to transform, con- form, reconfigure, heal, and fuse, which we believe can enrich the toolbox of human-computer interaction (HCI). 

    Website: LINK