Raspberry Pi 4 is more than powerful enough to serve as replacement desktop computer while you’re working from home. Or as a secondary desktop to help you out while you’re doing other things, such video conferencing, on your main computer.

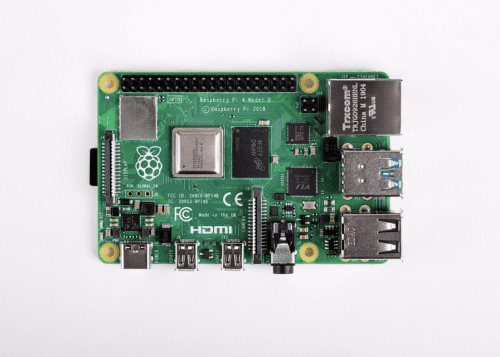
Raspberry Pi 4 Model B
If you’re pulling your Raspberry Pi out of a drawer right now, you should make sure you update it with the latest version of Raspbian; if it’s been a while since you used this Raspberry Pi, you might even want to install a new copy of Raspbian so you know you’re working from a good base image. Fortunately, you can use our new imaging utility, which makes installing a fresh copy of the operating system much easier.
Connecting a monitor, keyboard, and Mouse
I normally use my Raspberry Pis headless as a server. But working from home, and using Raspberry Pi as your primary computer, you’re going to need a monitor, keyboard, and mouse.

My Raspberry Pi 4, which I use for video calls, perched on the edge of my desk at home
Except for the monitor, the Raspberry Pi Desktop Kit has everything you need to get you going, including a USB-C power supply and all the necessary cables.
Connecting a keyboard and a mouse to your Raspberry Pi just involves plugging them in, although you should probably make sure you plug them into the USB 2 rather than the USB 3 sockets. You can tell these apart by their colour: USB 3 sockets have blue ‘tongues’, while USB 2 sockets have black ones.
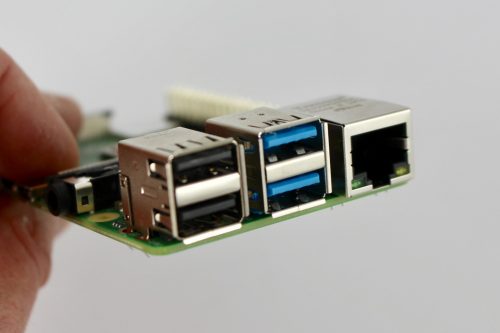
USB 2 sockets (left), USB 3 sockets (middle), and Ethernet socket (right)
Raspberry Pi 4 has two micro HDMI sockets, allowing you to use it with dual monitors if you wish: it supports one 4K screen at 60fps, or two 4K screens at 30fps.
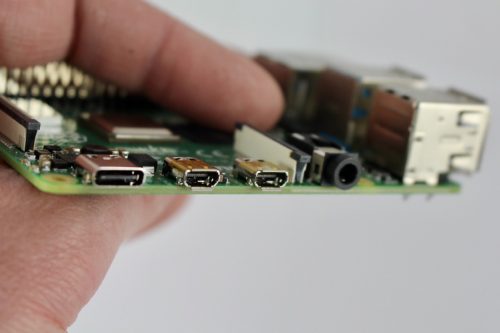
Power (USB-C) socket (left), two micro-HDMI sockets (middle), and the headphone jack (right)
You can connect Raspberry Pi to any HDMI monitor (or two) you have in the house — you’ll only need a micro-HDMI to HDMI cable (or two) to do it. There are two of these included in the Desktop Kit.
While the official Raspberry Pi keyboard and mouse are great, I’ve picked up a smaller wireless keyboard and mouse for added convenience and fewer wires.
Setting up wireless networking
Setting up wireless networking on Raspberry Pi can be done from your desktop. Alternatively, you can also set up networking before you boot your Raspberry Pi for the first time by editing a file on the boot partition of your SD card after you burn the operating system onto it.
$ cd /Volumes/boot $ nano wpa_supplicant.conf
Then add the following lines to the wpa_supplicant.conf file:
country=COUNTRY ctrl_interface=DIR=/var/run/wpa_supplicant GROUP=netdev update_config=1 network={ ssid="SSID" psk="PASSWORD" key_mgmt=WPA-PSK }
COUNTRY should be set the two-letter ISO/IEC alpha2 code for the country in which you are using your Raspberry Pi, e.g.:
- GB (United Kingdom)
- FR (France)
- DE (Germany)
- US (United States)
- SE (Sweden)
SSID is the ESSID of your home network, with PASSWORD being the WPA2 password for that network.
It’s important to enter the correct country code in the file, as this will determine which regulatory domain your Raspberry Pi thinks it’s operating in, and therefore which wireless channels it enables on your adaptor.
Setting up email
For many of us, our email lives in our browsers these days, so just navigate to your normal email provider in Chromium and you will be able to use it as normal.
However, you can get your email directly to your Raspberry Pi desktop if you want to do that. Raspbian ships with the Claws Mail client, which supports both POP3 and IMAP standards. Although some ISPs still use the POP3 protocol, IMAP access is the more commonly used, especially when it comes to most of the web-based services like Google’s Gmail.
Using Microsoft Office
Some workplaces will prefer that you use MS Office. Raspbian ships with Libre Office, and there is no native version of Microsoft Office applications that run on Raspberry Pi. However, you can use Office directly in your browser.
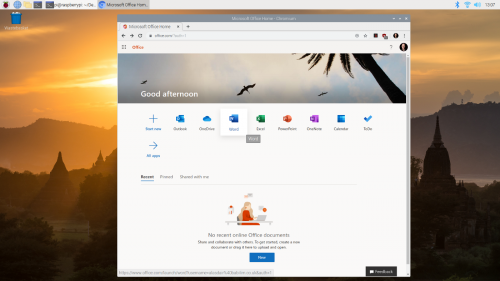
Using Microsoft Office in the browser
Navigate to office.com and log in with your Microsoft Live account to access the free version; if your company subscribes to Office 365, you should be able to log in with your work username and password.
Using Google Docs and Drive
Designed to be used in web browsers, Google Docs, Sheets, Slides, and Forms work out of the box on Raspberry Pi.
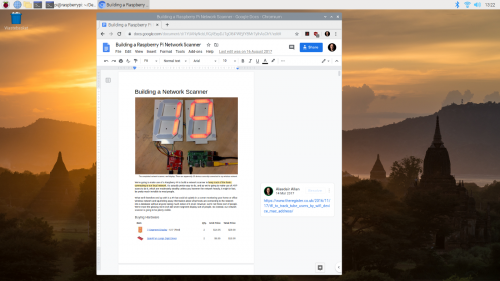
Using Google Docs on the Raspberry Pi
Like all the other Google applications you can access Google Drive directly in your browser from your Raspberry Pi. However if needed you can mount Google Drive using FUSE as part of the file system.
Setting up a VPN client
It’s really easy to find advice and tutorials on how to set up a VPN server for Raspberry Pi. Finding information on how to set up your Raspberry Pi as a VPN client, to allow it to connect to your existing work VPN back in the office, is much harder.
How you get your Raspberry Pi to talk to your office VPN is going to depend on exactly which type of VPN your company uses. So reach out to your company’s IT team to ask them for advice.
Using OpenVPN
The OpenVPN protocol is one of the youngest VPN protocols; it is open-source and generally considered one of the more secure protocols.
To get OpenVPN working on Raspberry Pi, first you’ll need to install the OpenVPN package:
$ sudo apt-get install openvpn
Then you’ll need to create a client.conf configuration file in /etc/openvpn.
client dev tun proto udp remote HOSTNAME PORT resolv-retry infinite nobind user nobody group nogroup persist-key persist-tun # Path to your certificates (ca.crt, client.crt, and client.key) ca FILEPATH_CA cert FILEPATH_CRT key FILEPATH_KEY ns-cert-type server comp-lzo verb 3
Replace HOSTNAME and PORT with the name and port number of your company’s VPN server, and FILEPATH_CA, FILEPATH_CRT, and FILEPATH_KEY with the fully resolved path to your ca.rt, client.crt, and client.key certificate files; you can obtain this information from your company’s IT people. While these files normally live alongside your configuration file in /etc/openvpn, it isn’t necessary to have them saved there if you really want them to live somewhere else.
Then in a terminal window, type:
$ sudo openvpn /etc/openvpn/client.conf
You should then be connected to your company’s VPN via OpenVPN.
Using PPTP
The Point Tunneling Protocol (PPTP) is an older VPN protocols, and despite known vulnerabilities, it is still one of the more widely used ones because it’s integrated into Windows, macOS, and Linux. If your workplace offers other protocols, such as OpenVPN, I suggest that you choose one of these instead, since they are more secure. However, if you do need to use PPTP, you can do so on Raspberry Pi.
First you’ll need to install the PPTP package:
$ sudo apt-get install pptp-linux
Then go ahead and create a /etc/ppp/peers/pptp-config file to hold your PPTP configuration, and copy and paste the following into the file:
pty "pptp HOSTNAME --nolaunchpppd --debug" name USERNAME password PASSWORD remotename PPTP require-mppe-128 require-mschap-v2 refuse-eap refuse-pap refuse-chap refuse-mschap noauth debug persist maxfail 0 defaultroute replacedefaultroute usepeerdns
Replace HOSTNAME, USERNAME, and PASSWORD with the name of your company’s VPN server, your own username, and your password.
Then in a terminal window, type:
$ sudo pon /etc/ppp/peers/pptp-config
You should then be connected to your company’s VPN via PPTP.
Using L2TP/IPSec
Because of the lack of confidentiality inherent in the Layer 2 Tunneling Protocol (L2TP), it is normally used in conjunction with another protocol called IPSec. Unfortunately setting up an L2TP/IPSec client on Raspberry Pi is somewhat more involved than using either OpenVPN or PPTP.
If your company supports it, I’d opt to use OpenVPN rather than trying to get L2TP/IPsec up and working on Raspberry Pi.
One alternative approach is to swap out Raspberry Pi’s default wireless management for Network Manager and use the Network Manager widget to setup L2TP/IPSec instead of the default tools. It’s probably easier than trying to set things up via the command line, but if you run into problems, it’s going to be somewhat harder to figure out what is going wrong.
Setting up video conferencing
To get video conferencing working with Raspberry Pi, you’ll need three things: a way to get audio out of Raspberry Pi, a way to get audio in, and a camera so that people can see you.
Adding audio
Setting up audio out for your Raspberry Pi is normally fairly easy. You can just plug a set of headphones into the audio jack, or use the speakers in your computer monitor connected via HDMI, and Raspberry Pi should just figure things out for you.
If you’re not getting sound out of your Raspberry Pi, either via the audio jack or the built-in speakers in your monitor, you might need to set audio output manually using the raspi-config tool.
Unfortunately, Raspberry Pi doesn’t have any native audio input capability. The simplest way to to add audio input is to use a USB microphone. These range from a cheap and cheerful mini USB microphone, designed for basic sound capture, to much more impressive ones designed for podcasting.
Alternatively, you can get a compatible USB sound card, which means that you may be able to use a wired headset and microphone with a standard audio jack. But be warned, most USB sound cards don’t provide any gain for passive mics, so you’ll need to provide a good signal.
Adding a camera
The absolutely easiest way to add a camera to your Raspberry Pi for video conferencing is just to plug in a USB webcam. If your camera offers a built-in microphone, like the Razor Kiyo, and your monitor has built-in speakers, then your camera can provide your audio as well as video.
You can test your USB web camera using the fswebcam package.
If you’ve got a Raspberry Pi Camera Module, it’s possible to use that as well — just make sure you configure the Camera Module using raspi-config. You will however need to have a separate microphone, as the Raspberry Pi Camera Module doesn’t have one built in.
Using Google Hangouts
Google Hangouts works in your browser and doesn’t require a client. You should be able to navigate to hangouts.google.com or click directly on the meeting link in your calendar or email.
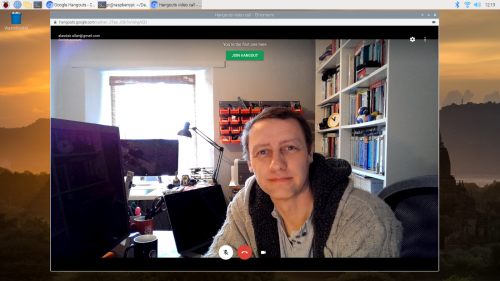
Google Hangouts on the Raspberry Pi desktop
However, the first time you open Hangouts, despite giving permission for the app to access your camera and microphone, you might find that it thinks that access has been denied.
To fix this problem, navigate to the padlock🔒icon in your browser’s address bar and click on it. This will open a drop-down menue letting you mark both the Camera and Microphone as ‘Allow’. Select ‘Allow’ for both the camera and microphone, even if they are set to ‘Allow’ already.
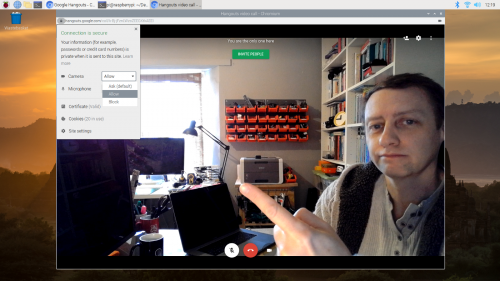
The permissions drop-down menu in Google Hangouts
Close the drop-down menu by clicking on the cross in the top right-hand corner of the dialog window. Doing so add a bar at the top of your window prompting you to ‘Reload’. Click on ‘Reload’. This time, Google Hangouts should be able to access your camera and microphone.
This trick may also be handy for some other video conferencing applications.
Using Zoom
While there isn’t a Zoom desktop client for Raspberry Pi, you can run the Zoom client application, or even host a meeting, directly in the browser.
Open your browser, navigate to join.zoom.us, and enter the meeting ID and password; if you have received an email invitation, you can click directly on the meeting request URL in the email.
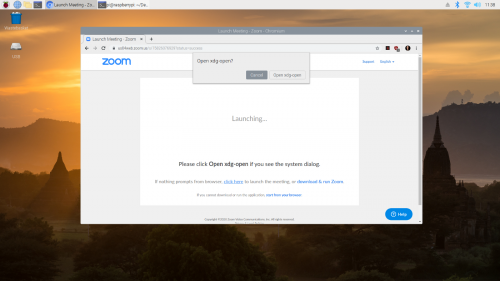
Click on the ‘Cancel’ button when prompted to ‘Open xdg-open’ by Zoom
Then, when you get asked to ‘Open xdg-open?’ in the system dialog that opens, click on ‘Cancel’.
Next click on the ‘click here’ link near the bottom of the page where it says “If nothing prompts from browser, click here to launch the meeting…”. Another ‘Open xdg-open?’ system dialog will open, and you need to click on ‘Cancel’ again.
Then you should see a new “start from your browser” link in really small font at the bottom of the page. Go ahead and click on the this link.
Your Zoom meeting should now start normally in your browser.
Using Skype
There is a Skype web client, which works out of the box on Raspberry Pi. Just navigate to web.skype.com and log in as normal.
Setting up Citrix Workspace (Citrix Receiver)
It’s possible to use Citrix Receiver on your Raspberry Pi, because Citrix offers a prepackaged Linux binary for the ARM architecture that will run without problems on Raspberry Pi.
Download the ‘Full Package (Self-Service Support)’ for Debian Linux, picking the ‘Citrix Workspace app for Linux (ARM HF)’ package.
Then install it by typing into a terminal window:
$ sudo dpkg -I iaclient_19.12.0.19_armhf.deb
You can then find the newly installed client in main desktop menu.
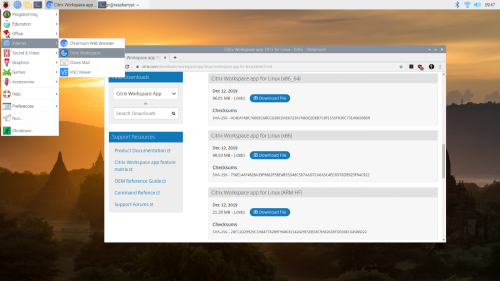
The newly installed Citrix Workspace client
Clicking on the Citrix icon will open a pop-up menu asking you to accept the EULA and then prompting you to add an account. Here you need to enter your work email or the server address provided by your company’s IT people.
Setting up a VNC client
Raspbian includes the VNC Connect client from RealVNC. To open it, navigate to the start menu, click on ‘Internet’, and then on ‘VNC Viewer’.
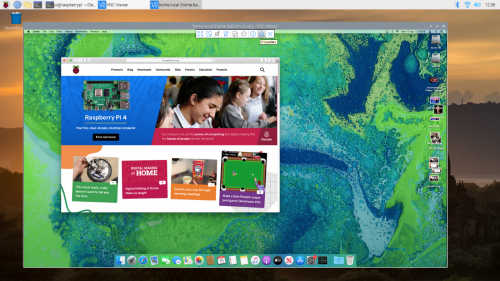
VNC Viewer connected to my Mac mini
Type the host name of the computer you’re trying to reach into the address bar of the VNC Viewer. You’ll be prompted for a username and password to authenticate to your remote computer. Your remote desktop should appear in a window. You can access the window setting by mousing over near the middle top of the window where a small drop-down panel will appear.
Wrapping things up
I’d been a freelance journalist for years before joining Raspberry Pi, so I perfected my home-working setup a long time ago; but I’m still finding it incredibly useful having a Raspberry Pi set up at the corner of my desk.
A number of our colleagues here at Pi Towers are are using a Raspberry Pi as their main work-from-home computer, or as a supplementary device for conferencing and file-sharing. We’re also seeing a very large number of people, both in our team and out in the community, using Raspberry Pi as a computer for kids to do homework on (an absolute necessity in so many households where parents are using all the available computers to do their own work on!).
If you’ve found any clever work-from-home workarounds that you’d like to share, please let us know about them below.
Website: LINK
Schreibe einen Kommentar
Du musst angemeldet sein, um einen Kommentar abzugeben.