Schlagwort: Uncategorized

  • Raspberry Pi + Furby = ‘Furlexa’ voice assistant

    Raspberry Pi + Furby = ‘Furlexa’ voice assistant

    Reading Time: 3 minutes

    How can you turn a redundant, furry, slightly annoying tech pet into a useful home assistant? Zach took to howchoo to show you how to combine a Raspberry Pi Zero W with Amazon’s Alexa Voice Service software and a Furby to create Furlexa.

    [youtube https://www.youtube.com/watch?v=aCOsM-4NEKs?feature=oembed&w=500&h=281]

    Furby was pretty impressive technology, considering that it’s over 20 years old. It could learn to speak English, sort of, by listening to humans. It communicated with other Furbies via infrared sensor. It even slept when its light sensor registered that it was dark.

    Furby innards, exploded

    Zach explains why Furby is so easy to hack:

    Furby is comprised of a few primary components — a microprocessor, infrared and light sensors, microphone, speaker, and — most impressively — a single motor that uses an elaborate system of gears and cams to drive Furby’s ears, eyes, mouth and rocker. A cam position sensor (switch) tells the microprocessor what position the cam system is in. By driving the motor at varying speeds and directions and by tracking the cam position, the microprocessor can tell Furby to dance, sing, sleep, or whatever.

    The original CPU and related circuitry were replaced with a Raspberry Pi Zero W

    Zach continues: “Though the microprocessor isn’t worth messing around with (it’s buried inside a blob of resin to protect the IP), it would be easy to install a small Raspberry Pi computer inside of Furby, use it to run Alexa, and then track Alexa’s output to make Furby move.”

    What you’ll need:

    Harrowing

    Running Alexa

    The Raspberry Pi is running Alexa Voice Service (AVS) to provide full Amazon Echo functionality. Amazon AVS doesn’t officially support the tiny Raspberry Pi Zero, so lots of hacking was required. Point 10 on Zach’s original project walkthrough explains how to get AVS working with the Pimoroni Speaker pHAT.

    Animating Furby

    A small motor driver board is connected to the Raspberry Pi’s GPIO pins, and controls Furby’s original DC motor and gearbox: when Alexa speaks, so does Furby. The Raspberry Pi Zero can’t supply enough juice to power the motor, so instead, it’s powered by Furby’s original battery pack.

    Software

    There are three key pieces of software that make Furlexa possible:

    1. Amazon Alexa on Raspberry Pi – there are tonnes of tutorials showing you how to get Amazon Alexa up and running on your Raspberry Pi. Try this one on instructables.
    2. A script to control Furby’s motor howchooer Tyler wrote the Python script that Zach is using to drive the motor, and you can copy and paste it from Zach’s howchoo walkthrough.
    3. A script that detects when Alexa is speaking and calls the motor program – Furby detects when Alexa is speaking by monitoring the contents of a file whose contents change when audio is being output. Zach has written a separate guide for driving a DC motor based on Linux sound output.
    Teeny tiny living space

    The real challenge was cramming the Raspberry Pi Zero plus the Speaker pHAT, the motor controller board, and all the wiring back inside Furby, where space is at a premium. Soldering wires directly to the GPIO saved a bit of room, and foam tape holds everything above together nice and tightly. It’s a squeeze!

    Zach is a maker extraordinaire, so check out his projects page on howchoo.

    Website: LINK

  • How IoT device provisioning to the Arduino IoT Cloud works

    How IoT device provisioning to the Arduino IoT Cloud works

    Reading Time: 5 minutes

    This article was written by Luigi Gubello, Arduino Security Team.

    Be kind to the end user. At Arduino, we like to develop powerful ideas into simple tools. This is the spirit behind our team’s efforts in launching our IoT Cloud platform: making the Internet of Things accessible and easy for everyone. We can now offer a complete low-code IoT application development platform that seamlessly integrates with our hardware products: Arduino IoT Cloud.

    Behind such simplicity, you’ll always find a thorough design study carried out by our team in order to offer a user-friendly IoT cloud solution, which is suitable for everything from your first IoT project to state-of-the-art professional use — what the user needs to do is connect their compatible Arduino board to a computer and follow the steps displayed in the browser window. The process will configure the device to securely connect to the Arduino IoT Cloud, thus creating an  Internet-connected device in minutes.

    So how does Arduino IoT Cloud provisioning work?

    In a previous blog post titled “Arduino Security Primer,” we began to introduce how the device provisioning works, showing how security is a fundamental requirement for us. The Arduino IoT Cloud security model is based on three key elements: an open-source library named ArduinoBearSSL, a Hardware Secure Element, and a device certificate provisioning for TLS Client Authentication. 

    The TLS Client Authentication (or TLS Mutual Authentication) is an authentication method in which the server verifies the client’s identity through a certificate to grant or deny access to the device. In the standard TLS handshake, only a client authenticating a server is required, while in TLS Client Authentication, the server also needs to authenticate the client by verifying its identity. If the server cannot trust the client’s identity, it does not authorize a connection.

    In the TLS Client Authentication system, the device’s credentials are replaced by a signed certificate that guarantees the device identity, thereby eliminating some security risks such as credentials stealing, weak passwords, or brute-force attacks. During the device provisioning process, a certificate — signed by our certificate authority — is stored inside the hardware secure element of supported Arduino boards to be used when identity verification is required.

    In order to communicate with the Microchip secure element (ATECC508A or ATECC608A) mounted on some Arduino boards, our engineering team developed an open-source library (ArduinoECCX8) which is used for device provisioning by the Arduino IoT Cloud. This library is responsible for writing and reading data from the secure element. In particular — during the provisioning stage — it manages the generation of private keys, certificate signing requests, and certificate storage. This library can also be used to generate self-signed certificates and to sign JWT, using the public key generated by the crypto chip.

    IoT device provisioning for the Arduino IoT Cloud is performed by an open-source Arduino sketch, Provisioning.ino, contained in our ArduinoIoTCloud library. 

    The entire device provisioning process is hidden behind a browser based user-friendly interface, so that users can quickly and easily connect their Arduino boards to the Arduino IoT Cloud by following a step-by-step procedure from the Getting Started page. During this process, the provisioning sketch is uploaded to the Arduino board and the open-source Arduino Create agent interacts with the browser content to help complete the device registration procedure. Taking a look at the provisioning source code to better understand what happens “behind the scenes,” it is possible to see how we use the hardware secure element.

    The secure element’s slot 0 is used for storing the device private key, only the secure element can access its content. Slots 10, 11, and 12 are used for storing the compressed certificate, signed by Arduino’s certificate authority.

    const int keySlot = 0;
    const int compressedCertSlot = 10;
    const int serialNumberAndAuthorityKeyIdentifierSlot = 11;
    const int deviceIdSlot = 12;

    At first, the sketch configures and locks the hardware secure element. This process is required to begin using the device.

    #include "ECCX08TLSConfig.h" [...] if (!ECCX08.writeConfiguration(DEFAULT_ECCX08_TLS_CONFIG)) { Serial.println("Writing ECCX08 configuration failed!"); while (1); }

    After the hardware secure element has been configured, a private key and a certificate signing request (CSR) are generated.

     if (!ECCX08Cert.beginCSR(keySlot, true)) { Serial.println("Error starting CSR generation!"); while (1); } String deviceId = promptAndReadLine("Please enter the device id: "); ECCX08Cert.setSubjectCommonName(deviceId); String csr = ECCX08Cert.endCSR();

    The Create Agent takes the generated CSR and sends it to the server via the Arduino IoT Cloud API in order to receive a signed certificate. At this point the signed certificate is sent to the Arduino board and stored in the secure element.

     if (!ECCX08Cert.beginStorage(compressedCertSlot, serialNumberAndAuthorityKeyIdentifierSlot)) { Serial.println("Error starting ECCX08 storage!"); while (1); } [...] if (!ECCX08Cert.endStorage()) { Serial.println("Error storing ECCX08 compressed cert!"); while (1); }

    Once the signed certificate is successfully stored, the device provisioning is complete and the Arduino board is ready to connect to the Arduino IoT Cloud.

    The Arduino IoT Cloud facilitates the first approach to the Internet of Things, providing a simple user experience, but beneath its simplicity lies a powerful tool to develop professional projects. Our platform offers access to the Arduino IoT Cloud API, which is ideal for automation workflows.

    In this use case, we will demonstrate how a user in need of provisioning a device fleet can automate and improve the process through the use of the Arduino IoT Cloud’s API and our open-source Arduino_JSON library. The following code is a self-provisioning sketch optimized for the Arduino Nano 33 IoT, which automatically takes care of registering the board to the Arduino IoT Cloud once uploaded to the board and executed.

    Self-provisioning for MKR WiFi 1010 and Nano 33 IoT in prod:

    To further enhance this process, we use our open-source Arduino CLI to quickly upload the code to the board. All that’s needed is a simple command:

    arduino-cli compile -b arduino:samd:nano_33_iot -u -p /dev/ttyACM0 SelfProvisioning

    These are only a few of the features that show how the Arduino hardware products and cloud service can automate processes and create an interconnected system to improve users’ projects and businesses. There will be an increasing number of connected and communicating devices added in the near future, and we are working to make this IoT revolution user-friendly, accessible, and open-source.

    Website: LINK

  • Top 5 tips for Madden 21, out now on PS4

    Top 5 tips for Madden 21, out now on PS4

    Reading Time: 4 minutes

    The wait is finally over … that’s right, Madden season is upon us, and Madden NFL 21 is officially available everywhere. Another season of bragging rights, Ultimate Team upgrades, and total domination over your friends is just a click away.

    A lot has changed this year in Madden 21, so we’re bringing you some tips to get the most out of your Madden experience. So start taking notes, here are the top five tips for Madden 21.

    Have more fun in Madden’s newest mode

    The Yard is a backyard-inspired 6v6 football experience, a brand-new mode in Madden that’s all about trick plays, the freshest gear you’ve ever seen, and a bold attitude. Create wild gameplay moments and swag out your custom Avatar while earning rewards along the way. The rising generation of NFL stars has been dropping dimes and creating in space way before they got to the league. Now, it’s your turn.

    Get more wins with these teams

    In Madden 21, the Kansas City Chiefs, Baltimore Ravens, San Francisco 49ers, and Tampa Bay Buccaneers boast advantages that other teams likely can’t beat. Patrick Mahomes of the Chiefs has speed and mobility in the pocket and some elite downfield weapons to throw to. Lamar Jackson (ahem, the Madden 21 cover athlete) leads a dominant ground game (yes, we know he’s the QB). The 49ers have a great defense and an elite play action-based offense. The Buccaneers have Tom Brady (GOAT) under center, and a slew of big, talented wideout options to throw to. 

    Learn how to use Superstar and X-Factor abilities

    There are over 50 new Superstar and X-Factor abilities in Madden NFL 21 fresh out of the lab designed to elevate the stars of a new generation. This game-changing ability system is key to winning, as you can gain, (or take away) huge advantages in clutch moments. If you know what the trigger and knockout conditions are for the Superstar and X-Factor players on your team, and on your opponent’s team, you’ll have what could be a momentum-shifting edge during clutch moments.

    Master new gameplay enhancements

    Developed to inspire creativity on and off the field, innovative new gameplay enhancements in Madden NFL 21 offer new levels of ingenuity and control on both sides of the ball. On offense, the Skill Stick ball carrier system allows the user to chain together elusive skill moves that combine for amazing gameplay moments that could result in a game-winning touchdown. On defense, strategy is more crucial than ever as offensive linemen now build resistance to repeated pass-rush moves. Diversify your play calling to outsmart Adaptive AI adjustments that counter your tendencies in new ways.

    Be aware of Madden ratings

    Every single week, Madden Ratings are adjusted based on the performance of NFL players in stadiums around the country. And being aware of the ratings of players on your team, and your opponent’s team, can give you that slight advantage you might need to earn a win. For example, if we’re talking about pass-rush moves, knowing which types of moves to try and which lineman to try them against is very important to success. For example, faster speed rushers won’t excel with “power” moves.

    So what are you waiting for? Go all out in Madden NFL 21 today!

    Website: LINK

  • The Official PlayStation Podcast Episode 375: Drop Back In

    The Official PlayStation Podcast Episode 375: Drop Back In

    Reading Time: < 1 minute

    Email us at PSPodcast@sony.com!

    Subscribe via Apple Podcasts, Spotify, Google or RSS, or download here


    This week, Justin’s back! He and Kristen talk about hopping back on the skateboard and dropping in to Tony Hawk’s Pro Skater 1 + 2’s Warehouse Demo. 

    Stuff We Talked About

    • Fall Guys: Ultimate Knockout
    • Marvel’s Avengers
    • Manifold Garden
    • Final Fantasy XIV (now you REALLY know Justin’s back)

    The Cast


    Thanks to Cory Schmitz for our beautiful logo and Dormilón for our rad theme song and show music.

    [Editor’s note: PSN game release dates are subject to change without notice. Game details are gathered from press releases from their individual publishers and/or ESRB rating descriptions.]

    Website: LINK

  • Self-driving trash can controlled by Raspberry Pi

    Self-driving trash can controlled by Raspberry Pi

    Reading Time: 3 minutes

    YouTuber extraordinaire Ahad Cove HATES taking out the rubbish, so he decided to hack a rubbish bin/trash can – let’s go with trash can from now on – to take itself out to be picked up.

    [youtube https://www.youtube.com/watch?v=7fdM2hHW8yA?feature=oembed&w=500&h=281]

    Sounds simple enough? The catch is that Ahad wanted to create an AI that can see when the garbage truck is approaching his house and trigger the garage door to open, then tell the trash can to drive itself out and stop in the right place. This way, Ahad doesn’t need to wake up early enough to spot the truck and manually trigger the trash can to drive itself.

    Hardware

    The trash can’s original wheels weren’t enough on their own, so Ahad brought in an electronic scooter wheel with a hub motor, powered by a 36V lithium ion battery, to guide and pull them. Check out this part of the video to hear how tricky it was for Ahad to install a braking system using a very strong servo motor.

    The new wheel sits at the front of the trash can and drags the original wheels at the back along with

    An affordable driver board controls the speed, power, and braking system of the garbage can.

    The driver board

    Tying everything together is a Raspberry Pi 3B+. Ahad uses one of the GPIO pins on the Raspberry Pi to send the signal to the driver board. He started off the project with a Raspberry Pi Zero W, but found that it was too fiddly to get it to handle the crazy braking power needed to stop the garbage can on his sloped driveway.

    The Raspberry Pi Zero W, which ended up getting replaced in an upgrade

    Everything is kept together and dry with a plastic snap-close food container Ahad lifted from his wife’s kitchen collection. Ssh, don’t tell.

    Software

    Ahad uses an object detection machine learning model to spot when the garbage truck passes his house. He handles this part of the project with an Nvidia Jetson Xavier NX board, connected to a webcam positioned to look out of the window watching for garbage trucks.

    Object detected!

    Opening the garage door

    Ahad’s garage door has a wireless internet connection, so he connected the door to an app that communicates with his home assistant device. The app opens the garage door when the webcam and object detection software see the garbage truck turning into his street. All this works with the kit inside the trash can to get it to drive itself out to the end of Ahad’s driveway.

    There she goes! (With her homemade paparazzi setup behind her)

    Check out the end of Ahad’s YouTube video to see how human error managed to put a comical damper on the maiden voyage of this epic build.

    Website: LINK

  • Atomic TV | The MagPi 97

    Atomic TV | The MagPi 97

    Reading Time: 4 minutes

    Nothing on television worth watching? Ryan Cochran’s TV set is just as visually arresting when it’s turned off, as David Crookes reports in the latest issue of the MagPi magazine, out now.

    Flat-screen televisions, with their increasingly thin bezels, are designed to put the picture front and centre. Go back a few decades, however, and a number of TVs were made to look futuristic – some even sported space age designs resembling astronaut helmets or flying saucers sat upon elaborate stands. They were quirky and hugely fun.

    Maker Ryan Cochran’s project evokes such memories of the past. “I have a passion for vintage modern design and early NASA aesthetics, and I wanted to make something which would merge the two into an art piece that could fit on my shelf,” he recalls. “The first thing I could think of was a small television.” And so the idea for the Atomic TV came into being.

    Made of wood and using spare tech parts left over from a couple of past projects, it’s a television that’s as compelling to look at when it’s turned off as when it’s playing videos on a loop. “My main concern was fit and finish,” he says. “I didn’t want this thing to look amateurish at all. I wanted it to look like a professionally built prototype from 1968.”

    Turn on

    Before he began planning the look of the project, Ryan wanted to make sure everything would connect. “The parts sort of drove the direction of the project, so the first thing I did was mock everything up without a cabinet to make sure everything worked together,” he says.

    This posed some problems. “The display is 12 volts, and I would have preferred to simplify things by using one of the 5-volt displays on the market, but I had what I had, so I figured a way to make it work,” Ryan explains, discovering the existence of a dual 5 V-12 V power supply.

    With a Raspberry Pi 4 computer, the LCD display, a driver board, and a pair of USB speakers borrowed from his son all firmly in hand, he worked on a way of controlling the volume and connected everything up.

    “Power comes in and goes to an on/off switch,” he begins. “From there, it goes to the dual voltage power supply with the 12 V running the display and the 5 V running Raspberry Pi 4 and the small amp for the speakers. Raspberry Pi runs Adafruit’s Video Looper script and pulls videos from a USB thumb drive. It’s really simple, and there are no physical controls other than on/off switch and volume.”

    Tune in

    The bulk of the work came with the making of the project’s housing. “I wanted to nod the cap to Tom Sachs, an artist who does a lot of work I admire and my main concern was fit and finish,” Ryan reveals.

    He filmed the process from start to end, showing the intricate work involved, including a base created from a cake-stand and a red-and-white panel for the controls. To ensure the components wouldn’t overheat, a fan was also included.

    “The television runs 24/7 and it spends 99 percent of its time on mute,” says Ryan. “It’s literally just moving art that sits on my shelf playing my favourite films and video clips and, every now and then, I’ll look over, notice a scene I love, and turn up the volume to watch for a few minutes. It’s a great way to relax your brain and escape reality every now and then.”

    Get The MagPi magazine issue 97 — out today

    The MagPi magazine is out now, available in print from the Raspberry Pi Press onlinestore, your local newsagents, and the Raspberry Pi Store, Cambridge.

    You can also download the PDF directly from the MagPi magazine website.

    Subscribers to the MagPi for 12 months get a free Adafruit Circuit Playground, or can choose from one of our other subscription offers, including this amazing limited-time offer of three issues and a book for only £10!

    Website: LINK

  • 3D-printable cases for the Raspberry Pi High Quality Camera

    3D-printable cases for the Raspberry Pi High Quality Camera

    Reading Time: 4 minutes

    Earlier this year, we released the Raspberry Pi High Quality Camera, a brand-new 12.3 megapixel camera that allows you to use C- and CS-mount lenses with Raspberry Pi boards.

    We love it. You love it.

    How do we know you love it? Because the internet is now full of really awesome 3D-printable cases and add-ons our community has created in order to use their High Quality Camera out and about…or for Octoprint…or home security…or SPACE PHOTOGRAPHY, WHAT?!

    The moon, captured by a Raspberry Pi High Quality Camera. Credit: Greg Annandale

    We thought it would be fun to show you some of 3D designs we’ve seen pop up on sites like Thingiverse and MyMiniFactory, so that anyone with access to a 3D printer can build their own camera too!

    Adafruit did a thing, obvs

    [youtube https://www.youtube.com/watch?v=g107_ErFv9k?feature=oembed&w=500&h=281]

    Shout out to our friends at Adafruit for this really neat, retro-looking camera case designed by the Ruiz Brothers. The brown filament used for the casing is so reminiscent of the leather bodies of SLRs from my beloved 1980s childhood that I can’t help but be drawn to it. And, with snap-fit parts throughout, you can modify this case model as you see fit. Not bad. Not bad at all.

    Nikon to Raspberry Pi

    While the Raspberry Pi High Quality Camera is suitable for C- and CS-mount lenses out of the box, this doesn’t mean you’re limited to only these sizes! There’s a plethora of C- and CS-mount adapters available on the market, and you can also 3D print your own adapter.

    Thingiverse user UltiArjan has done exactly that and designed this adapter for using Nikon lenses with the High Quality Camera. Precision is key here to get a snug thread, so you may have to fiddle with your printer settings to get the right fit.

    And, for the Canon users out there, here’s Zimbo1’s adapter for Canon EF lenses!

    Raspberry Pi Zero minimal adapter

    If you’re not interested in a full-body camera case and just need something to attach A to B, this minimal adapter for the Raspberry Pi Zero will be right up your street.

    Designer ed7coyne put this model together in order to use Raspberry Pi Zero as a webcam, and according to Cura on my laptop, should only take about 2 hours to print at 0.1 with supports. In fact, since I’ve got Cura open already…

    3D print a Raspberry Pi High Quality Camera?!

    Not a working one, of course, but if you’re building something around the High Quality Camera and want to make sure everything fits without putting the device in jeopardy, you could always print a replica for prototyping!

    Thingiverse user tmomas produced this scale replica of the Raspberry Pi High Quality Camera with the help of reference photos and technical drawings, and a quick search online will uncover similar designs for replicas of other Raspberry Pi products you might want to use while building a prototype

    Bonus content alert

    We made this video for HackSpace magazine earlier this year, and it’s a really hand resource if you’re new to the 3D printing game.

    [youtube https://www.youtube.com/watch?v=MR01KZM-dk4?feature=oembed&w=500&h=281]

    Also…

    …I wasn’t lying when I said I was going to print ed7coyne’s minimal adapter.

    Website: LINK

  • Boston Dynamics’ Handle robot recreated with Raspberry Pi

    Boston Dynamics’ Handle robot recreated with Raspberry Pi

    Reading Time: 3 minutes

    You in the community seemed so impressed with this recent Boston Dynamics–inspired build that we decided to feature another. This time, maker Harry was inspired by Boston Dynamics’ research robot Handle, which stands 6.5 ft tall, travels at 9 mph and jumps 4​ ​feet vertically. Here’s how Harry made his miniature version, MABEL (Multi Axis Balancer Electronically Levelled).

    MABEL has individually articulated legs to enhance off-road stability, prevent it from tipping, and even make it jump (if you use some really fast servos). Harry is certain that anyone with a 3D printer and a “few bits” can build one.

    MABEL builds on the open-source YABR project for its PID controller, and it’s got added servos and a Raspberry Pi that helps interface them and control everything.

    [youtube https://www.youtube.com/watch?v=DS-QJv-ae3s?feature=oembed&w=500&h=281]

    Installing MABEL’s Raspberry Pi brain and wiring the servos

    Thanks to a program based on the open-source YABR firmware, an Arduino handles all of the PID calculations using data from an MPU-6050 accelerometer/gyro. Raspberry Pi, using Python code, manages Bluetooth and servo control, running an inverse kinematics algorithm to translate the robot legs perfectly in two axes.

    Kit list

    If you want to attempt this project yourself, the files for all the hard 3D-printed bits are on Thingiverse, and all the soft insides are on GitHub.

    IKSolve is the class that handles the inverse kinematics functionality for MABEL (IKSolve.py) and allows for the legs to be translated using (x, y) coordinates. It’s really simple to use: all that you need to specify are the home values of each servo (these are the angles that, when passed over to your servos, make the legs point directly and straight downwards at 90 degrees).

    When MABEL was just a twinkle in Harry’s eye

    MABEL is designed to work by listening to commands on the Arduino (PID contoller) end that are sent to it by Raspberry Pi over serial using pySerial. Joystick data is sent to Raspberry Pi using the Input Python library. Harry first tried to get the joystick data from an old PlayStation 3 controller, but went with the PiHut’s Raspberry Pi Compatible Wireless Gamepad in the end for ease.

    Keep up with Harry’s blog or give Raspibotics a follow on Twitter, as part 3 of his build write-up should be dropping imminently, featuring updates that will hopefully get MABEL jumping!

    Website: LINK

  • Raspberry Pi listening posts ‘hear’ the Borneo rainforest

    Raspberry Pi listening posts ‘hear’ the Borneo rainforest

    Reading Time: 2 minutes

    These award-winning, solar-powered audio recorders, built on Raspberry Pi, have been installed in the Borneo rainforest so researchers can listen to the local ecosystem 24/7. The health of a forest ecosystem can often be gaged according to how much noise it creates, as this signals how many species are around.

    And you can listen to the rainforest too! The SAFE Acoustics website, funded by the World Wide Fund for Nature (WWF), streams audio from recorders placed around a region of the Bornean rainforest in Southeast Asia. Visitors can listen to live audio or skip back through the day’s recording, for example to listen to the dawn chorus.

    Listen in on the Imperial College podcast

    What’s inside?

    The device records data in the field and uploads it to a central server continuously and robustly over long time-periods. And it was built for around $305.

    Here’s all the code for the platform, on GitHub.

    The 12V-to-5V micro USB converter to the power socket of the Anker USB hub, which is connected to Raspberry Pi.

    The Imperial College London team behind the project has provided really good step-by-step photo instructions for anyone interested in the fine details.

    Here’s the full set up in the field. The Raspberry Pi-powered brains of the kit are safely inside the green box

    The recorders have been installed by Imperial College London researchers as part of the SAFE Project – one of the largest ecological experiments in the world.

    Dr Sarab Sethi designed the audio recorders with Dr Lorenzo Picinali. They wanted to quantify the changes in rainforest soundscape as land use changes, for example when forests are logged. Sarab is currently working on algorithms to analyse the gathered data with Dr Nick Jones from the Department of Mathematics.

    The lovely cross-disciplinary research team based at Imperial College London

    Let the creators of the project tell you more on the Imperial College London website.

    Website: LINK

  • The Official PlayStation Podcast Episode 374: Music To Our Ears

    The Official PlayStation Podcast Episode 374: Music To Our Ears

    Reading Time: 2 minutes

    Email us at PSPodcast@sony.com!

    Subscribe via Apple Podcasts, Spotify, Google or RSS, or download here


    Welcome back y’all! This week Kristen, Sid, and Tim share some of their favorite gaming soundtracks, and sing the praises of battle royale platformer Fall Guys: Ultimate Knockout.

    Stuff We Talked About

    • Ghost of Tsushima
    • Crash Bandicoot 4: It’s About Time
    • The Last of Us Part II
    • Manifold Garden
    • Weird (and immature) ways we name characters when given the chance

    The Cast

    Sid Shuman – Senior Director of Content Communications, SIE

    Tim Turi –  Senior Content Communications Specialist, SIE


    Thanks to Cory Schmitz for our beautiful logo and Dormilón for our rad theme song and show music.

    [Editor’s note: PSN game release dates are subject to change without notice. Game details are gathered from press releases from their individual publishers and/or ESRB rating descriptions.]

    Website: LINK

  • Train Sim World 2 erreicht PlayStation

    Train Sim World 2 erreicht PlayStation

    Reading Time: 5 minutes

    Hallo, liebe Eisenbahnfreunde. Ich bin Matt Peddlesden, der Senior Producer von Train Sim World 2 bei Dovetail Games. Passend zur Veröffentlichung unserer neuen Simulation für PlayStation haben wir für euch die zehn besten Tipps für den perfekten Spielstart gesammelt. Damit steht eurem Aufstieg zum erfahrenen Lokführer nichts mehr im Weg.

    Geht auf Reisen

    Train Sim World 2 beinhaltet 3 Strecken: die Londoner U-Bahn-Linie Bakerloo Line, die Schnellfahrstrecke Köln-Aachen und die Sand Patch Grade. Egal mit welcher Strecke ihr loslegt, ihr habt die Wahl, eine neue „Reise“ zu beginnen. Das ist eine der besten Wege, ins Spielgeschehen einzusteigen. Jede Reise besteht aus Tutorials, Szenarien und Dienstleistungen, die sorgfältig ausgewählt wurden, um euch das Gameplay behutsam näherzubringen. Hier erledigt ihr zunächst einfache Aufgaben, bevor ihr später komplexere Dienstleistungen erfüllen müsst.

    Spielt die Tutorials

    Wer neu in den Führerstand steigt, fühlt sich angesichts der zahlreichen Steuerungseinheiten nicht selten überfordert. Aber keine Sorge, in Train Sim World 2 gibt es für jede der sechs Lokomotiven lustige und leicht verständliche Tutorials. Ein brandneues immersives Controller-Schema sorgt für ein vereinfachtes Lernen der Befehle. Und vergesst nicht: Auch für einen kurzen Auffrischungskurs stehen euch die Tutorials jederzeit erneut zur Verfügung.

    Schaut auf die HUD-Anzeigen

    Auf jeder Fahrt werden euch zahlreiche nützliche Infos angezeigt. Der Pause-Bildschirm zeigt nicht nur Zuginformationen an, sondern auch Details zum Fahrplan, während euch eine überarbeite HUD-Anzeige stets wichtige Informationen zur Verfügung stellt. Darunter befinden sich Anzeigen zur Geschwindigkeit, den Sicherheitssystemen, zur Bremssteuerung, dem Zustand der Türen und mehr. Wer bei einer Geschwindigkeit von 250 km/h durch Deutschland rast, ist auf diese Informationen mehr als angewiesen. Für einen besseren Überblick kann die HUD-Anzeige außerdem in der Größe angepasst oder – für ein authentisches Erlebnis – sogar ganz ausgeschaltet werden.

    Lernt eure Lok kennen

    Ihr habt euer erstes Tutorial und eure erste Herausforderung mit Bravour bestanden? Dann wird es Zeit, im weiteren Verlauf des Spiels mehr über jede der Lokomotiven zu erfahren. Jede Lok besitzt einzigartige Steuerungs- und Sicherheitssysteme, die perfekt auf ihre jeweilige Funktion angepasst sind und sich auf den Gleisen unterschiedlich verhalten. Alles – angefangen vom Antrieb über das Gewicht bis hin zur Bremssteuerung – wird eure Spielweise beeinflussen. Außerdem müsst ihr euch den wechselnden Wetterbedingungen anpassen und die neue Haftungsphysik miteinplanen. Lernt die feinen, aber kleinen Unterschiede jeder Lokomotive gut kennen, damit sie reibungslos über die Schienen gleiten.

    Kennt die Strecke

    Ihr müsst nicht nur die Lok in- und auswendig kennen. Jede Strecke in Train Sim World 2 ist ihrem echten Vorbild akribisch genau nachempfunden. Das schließt auch die Streckenabschnitte mit ein, die schwieriger zu navigieren sind. Wer zum perfekten Lokführer werden will, muss wissen, wann Haltesignale kommen und Geschwindigkeitsbegrenzungen greifen. Oder sich Bremspunkte einprägen, um die Gleise der Haltestellen perfekt zu treffen. Nur wer die Geschwindigkeiten und die Bremsen richtig setzt, wird das Fahrtziel pünktlich erreichen.

    Seht euch eure Berichte an

    Nach Abschluss eines Szenarios erhaltet ihr einen detaillierten Bericht über euren Streckenverlauf und erfahrt, wie pünktlich ihr wart und wo ihr die Geschwindigkeitsbegrenzung der Strecke eingehalten habt (und wo nicht). Am Ende werden euch je nach Leistung Medaillen verliehen. Lernt aus euren Fehlern, ändert euren Fahrstil und versucht, das nächste Mal, wenn ihr das Szenario spielt, alles richtig zu machen.

    Vertretet euch die Füße

    Train Sim World 2 bietet euch die Freiheit, euren Führerstand zu verlassen, um euch all das anzusehen, was eine Eisenbahn zu Fuß zu bieten hat. Dabei warten ebenfalls vielfältige Aufgaben auf diejenigen, die diesen Teil des Spiels ebenfalls erkunden möchten. Rund um die Bakerloo Line müsst ihr beispielsweise Fahrpläne verteilen, kaputte Stationsmonitore reparieren, Plakate aufhängen und leere Zeitungsstände auffüllen. Schließt Strecken-Aufgaben ab, um PlayStation-Trophäen zu erhalten!

    Werdet kreativ

    Sobald ihr eure Lieblingslokomotive auserkoren habt, möchtet ihr sie vielleicht nach eurem Geschmack gestalten. Das könnt ihr ganz leicht mit dem neuen Anstrich-Designer. Gestaltet einzigartige Designs für eure Lokomotiven und Wagen. Dabei steht euch eine große Auswahl an Dekoren und Farben zur Verfügung, mit denen ihr Schicht für Schicht eure individuellen Anstriche zusammenstellt. Führt die Lok danach unbedingt auf eine Testfahrt aus und überzeugt euch davon, wie sie auf euren liebsten Streckenabschnitten zur Geltung kommt.

    Fotos für Eisenbahnfreunde

    Sanfte Hügel, atemberaubende Architektur und urbane Stadtlandschaften bringen Train Sim World 2 zum Leben und lassen euch tief in die Welt der fahrenden Züge eintauchen. Diese unglaublichen Hintergründe bilden nicht selten einen perfekten Rahmen für eine Lokomotive. Warum hüpft ihr nicht mal aus dem Führerstand und sucht nach der perfekten Stelle, um die vorbeifahrenden Lokomotiven bildlich einzufangen. Mit „Railfan Shot“ (der Schnappschuss-Funktion) lassen sich eure Fotos in einer Online-Galerie speichern.

    Erstellt ein Szenario

    Ihr habt eine Reise auf eurer Lieblingsstrecke komplett durchgespielt, wollt aber noch mehr? Verwendet den Szenario-Planer, um das zu fahren, was ihr wollt, wohin ihr es wollt. Erschafft ein individuelles Szenario mit eurer eigenen Auswahl an Lokomotiven. Dabei lassen sich sogar die Gesetze der Physik per Option außer Kraft setzen. Wer also schon immer mal eine deutsche elektrische Eisenbahn durch eine amerikanische Berglandschaft jagen wollte … Alles ist möglich!

    Wir wünschen euch viel Spaß mit Train Sim World 2, das am 20. August für PlayStation 4 erscheint! Für alle Besitzer von Train Sim World 2020 gibt es einen Treue-Rabatt von 15 %. Geht einfach in den Shop im Spiel von Train Sim World, um es dort zu kaufen.

    Website: LINK

  • Rotary encoders: Raise a Glitch Storm | Hackspace 34

    Rotary encoders: Raise a Glitch Storm | Hackspace 34

    Reading Time: 7 minutes

    A Glitch Storm is an explosive torrent of musical rhythms and sound, all generated from a single line of code. In theory, you can’t do this with a Raspberry Pi running Python – in this month’s new issue, out now, the HackSpace magazine team lovingly acquired a tutorial from The Mag Pi team to throw theory out the window and show you how.

    What is a Glitch Storm

    A Glitch Storm is a user-influenceable version of bytebeat music. We love definitions like that here at the Bakery: something you have never heard of is simple a development of something else you have never heard of. Bytebeat music was at the heart of the old Commodore 64 demo scene, a competition to see who could produce the most impressive graphs and music in a very limited number of bytes. This was revived/rediscovered and christened by Viznut, aka Ville-Matias Heikkilä, in 2011. And then JC Ureña of the ‘spherical sound society’ converted the concept into the interactive Glitch Storm.

    Figure 1: Schematic for the sound-generating circuit

    So what is it?

    Most random music generators work on the level of notes; that is, notes are chosen one at a time and then played, like our Fractal Music project in The MagPi #66. However, with bytebeat music, an algorithm generates the actual samples levels that make up the sound. This algorithm performs bitwise operations on a tick variable that increments with each sample. Depending on the algorithm used, this may or may not produce something musically interesting. Often, the samples produced exhibit a fractal structure, which is itself similar on many levels, thus providing both the notes and structure.

    Enter the ‘Glitch Storm’

    With a Glitch Storm, three user-controlled variables – a, b, and c – can be added to this algorithm, allowing the results to be fine-tuned. In the ‘Algorithms’ box, you can see that the bytebeat algorithms simply run; they all repeat after a certain time, but this time can be long, in the order of hours for some. A Glitch Storm algorithm, on the other hand, contains variables that a user can change in real-time while the sample is playing. This exactly what we can do with rotary encoders, without having the algorithm interrupted by checking the state of them all the time.

    Figure 2: Schematic for the control box

    What hardware?

    In order to produce music like this on the Raspberry Pi, we need some extra hardware to generate the sound samples, and also a bunch of rotary encoders to control things. The samples are produced by using a 12-bit A/D converter connected to one of the SPI ports. The schematic of this is shown in Figure 1. The clock rate for the transfer of data to this can be controlled and provides a simple way of controlling, to some extent, the sample rate of the sound. Figure 2 shows the wiring diagram of the five rotary encoders we used.

    Making the hardware

    The hardware comes as two parts: the D/A converter and associated audio components. These are built on a board that hangs off Raspberry Pi’s GPIO pins. Also on this board is a socket that carries the wires to the control box. We used an IDC (insulation displacement connector) to connect between the board and the box, as we wanted the D/A connection wires to be as short as possible because they carry a high frequency signal. We used a pentagonal box just for fun, with a control in each corner, but the box shape is not important here.

    Figure 3: Front physical layout of the interface board

    Construction

    The board is built on a 20-row by 24-hole piece of stripboard. Figure 3 and Figure 4 show the physical layout for the front and back of the board. The hole number 5 on row 4 is enlarged to 2.5mm and a new hole is drilled between rows 1 and 2 to accommodate the audio jack socket. A 40-way surface-mount socket connector is soldered to the back of the board, and a 20-way socket is soldered to the front. You could miss this out and wire the 20-way ribbon cable direct to the holes in these positions if you want to economise.

    Figure 4: Rear physical layout of the interface board

    Further construction notes

    Note: as always, the physical layout diagram shows where the wires go, not necessarily the route they will take. Here, we don’t want wires crossing the 20-way connector, so the upper four wires use 30AWG Kynar wire to pop under the connector and out through a track hole, without soldering, on the other side. When putting the 20-way IDC pin connector on the ribbon cable, make sure the red end connector wire is connected to the pin next to the downward-pointing triangle on the pin connector. Figure 5 shows a photograph of the control box wiring

    Figure 5: Wiring of the control board

    Testing the D/A

    The live_byte_beat.py listing on GitHub is a minimal program for trying out a bytebeat algorithm. It will play until stopped by pressing CTRL+C. The variable v holds the value of the sample, which is then transferred to the D/A over SPI in two bytes. The format of these two bytes is shown in Figure 6, along with how we have to manipulate v to achieve an 8-bit or 12-bit sample output. Note that all algorithms were designed for an 8-bit sample size, and using 12 bits is a free bonus here: it does sound radically different, and not always in a good way.

    The main software

    The main software for this project is on our GitHub page, and contains 24 Pythonised algorithms. The knobs control the user variables as well as the sample rate and what algorithm to use. You can add extra algorithms, but if you are searching online for them, you will find they are written in C. There are two major differences you need to note when converting from C to Python. The first is the ternary operation which in C is a question mark, and the second is the modulus operator with a percent sign. See the notes that accompany the main code about these.

    Figure 6: How to program the registers in the D/A converter

    Why does this work?

    There are a few reasons why you would not expect this to work on a Raspberry Pi in Python. The most obvious being that of the interruptions made by the operating system, regularly interrupting the flow of output samples. Well, it turns out that this is not as bad as you might fear, and the extra ‘noise’ this causes is at a low level and is masked by the glitchy nature of the sound. As Python is an interpreted language, it is just about fast enough to give an adequate sample rate on a Raspberry Pi 4.

    Make some noise

    You can now explore the wide range of algorithms for generating a Glitch Storm and interact with the sound. On our GitHub page there’s a list of useful links allowing you to explore what others have done so far. For a sneak preview of the bytebeat type of sound, visit magpi.cc/bytebeatdemo; you can even add your own algorithms here. For interaction, however, there’s no substitute for having your own hardware. The best settings are often found by making small adjustments and listening to the long-term effects – some algorithms surprise you about a minute or two into a sequence by changing dramatically.

    Get HackSpace magazine issue 34 — out today

    HackSpace magazine issue 34: on sale now!

    HackSpace magazine is out now, available in print from the Raspberry Pi Press online store, your local newsagents, and the Raspberry Pi Store, Cambridge.

    You can also download the directly from PDF from the HackSpace magazine website.

    Subscribers to HackSpace for 12 months to get a free Adafruit Circuit Playground, or choose from one of our other subscription offers, including this amazing limited-time offer of three issues and a book for only £10!

    If you liked this project, it was first featured in The MagPi Magazine. Download the latest issue for free or subscribe here.

    Website: LINK

  • Spiritfarer, the cozy management game about dying, sets sail today

    Spiritfarer, the cozy management game about dying, sets sail today

    Reading Time: 4 minutes

    Hey everyone! I’m Nick, Spiritfarer’s Creative director. I’m very happy to be announcing the game’s release today. To those of you just joining us, we call Spiritfarer a “cozy management game about dying.” We designed it to be a wholesome, soothing, and welcoming game — something that we believe a lot of us need in what’s been a pretty challenging year! So I’d like to go into a few details about how we accomplished that goal.

    Spiritfarer is inspired by the ancient Greek myth of Charon, who ferried the souls of the dead across the River Styx. You play as Stella, the newly-appointed ferry master to the deceased. With your trusty feline companion Daffodil, you build a boat to explore the world, then befriend and care for spirits before finally releasing them into the afterlife. 

    Many of the core mechanics of the game will be familiar to anyone who has ever played a farm sim or other management games, such as Stardew Valley. So too in Spiritfarer do you inherit a ramshackle boat, which as a matter of course needs fixing and improving to get it up to speed; this will continue and progress organically throughout the game. But the crucial element that we were determined to infuse into Spiritfarer is motivation: why you do what you do. 

    In short, Stella has inherited from Charon not just a floating fixer-upper, but also great responsibility towards her passengers, the spirits on their final voyage. Kindness and care are the main motivations behind the game’s actions, around which all gameplay mechanics revolve. 

    As you sail across mystical seas, many spirits join your journey and request that Stella accomplish a wide variety of unexpected and surprising tasks. You do not fulfill these requests incidentally, or simply in order to optimize your boat, amass resources, or progress your own main quest. Rather, we designed the game to flip that motivation on its head: the spirits, at a fundamental level, are Stella’s mission. Boat optimization, resource gathering, crafting, farming, fishing — all these things are solely motivated by kindness towards the spirits, to help get them to their final destination.

    We wanted coziness to permeate all aspects of the game, from the world visuals to the boat stations minigames which allow Stella to create and transform resources. Kindness is both a feeling and an action, performed for example through the hugs Stella can give to her passengers, as well as discovering and preparing each spirit’s favorite dish. In return, happy Spirits will reward Stella with gifts and advice, but also teach her how to use stations, interact with sea events, and be a better Spiritfarer.

    To be as realistic as possible, we wanted Spirits to have moods that could be affected by many different elements, some of them independent of the player’s actions. Keeping their moods high can sometimes be challenging, but we see this as not only thematically important as the characters live through their final days, but mechanically engaging as well. 

    The final key to motivating the player to act kindly and caring towards the spirit passengers was to truly build these characters’ stories with heart. Many of Spiritfarer’s characters are inspired in part by persons that deeply touched members of the development team before passing on. They will continue to live on in our game, through spirit personalities, anecdotes, preferences — our tribute to those we have lost, but are still very much with us. Our hope is that this will be subtly felt in the writing and the game, that this will help these characters be compelling, and that your motivation to be kind to them should come naturally. 

    On behalf of the entire team, thank you so much for checking Spiritfarer out — we hope you enjoy the experience.

    Thanks for reading!

    Website: LINK

  • Teaching pigeons with Raspberry Pi

    Teaching pigeons with Raspberry Pi

    Reading Time: 4 minutes

    It’s been a long lockdown for one of our favourite makers, Pi & Chips. Like most of us (probably), they have turned their hand to training small animals that wander into their garden to pass the time — in this case, pigeons. I myself enjoy raising my glass to the squirrel that runs along my back fence every evening at 7pm.

    Of course, Pi & Chips has taken this one step further and created a food dispenser including motion-activated camera with a Raspberry Pi 3B+ to test the intelligence of these garden critters and capture their efforts live.

    Bird behaviour

    Looking into the cognitive behaviour of birds (and finding the brilliantly titled paper Maladaptive gambling by pigeons), Pi & Chips discovered that pigeons can, with practice, recognise objects including buttons and then make the mental leap to realise that touching these buttons actually results in something happening. So they set about building a project to see this in action.

    Enter the ‘SmartFrank 3000’, named after the bossiest bird to grace Pi & Chips’s shed roof over the summer.

    Steppers and servos

    The build itself is a simple combo of a switch and dispenser. But it quickly became apparent that any old servo wasn’t going to be up to the job — it couldn’t move fast enough to open and close a hatch quickly or strongly enough.

    The motor setup

    Running a few tests with a stepper motor confirmed that this was the perfect choice, as it could move quickly enough, and was strong enough to hold back a fair weight of seed when not in operation.

    It took a while to get the timing on the stepper just right to give a pretty consistent delivery of the seed…

    A 3D-printed flap for the stepper was also fashioned, plus a nozzle that fits over the neck of a two-litre drinks bottle, and some laser-cut pieces to make a frame to hold it all together.

    The switch

    Now for the switch that Frank the pigeon was going to have to touch if it wanted any bird seed. Pi & Chips came up with this design made from 3mm ply and some sponge as the spring.

    They soldered some wires to a spring clip from an old photo frame and added a bolt and two nuts. The second nut allowed very fine adjustment of the distance to make sure the switch could be triggered by as light a touch as possible.

    Behind the scenes

    Behind the scenes setup

    Behind the scenes there’s a Raspberry Pi 3B+ running the show, together with a motor controller board for the stepper motor. This board runs from its own battery pack, as it needs 12V power and is therefore too heavy for Raspberry Pi to handle directly. A Raspberry Pi Camera Module has also been added and runs this motion detection script to start recording whenever a likely bird candidate steps up to the plate for dinner. Hopefully, we can soon get some footage of Frank the pigeon learning and earning!

    Website: LINK

  • Empfehlung der Redaktion: Ghost of Tsushima

    Empfehlung der Redaktion: Ghost of Tsushima

    Reading Time: 4 minutes

    Meine Samurai-Brüder sind gefallen. Mein Adoptivonkel, Fürst Shimura, kann jeden Moment hingerichtet werden. Alles auf der Insel Tsushima steht entweder in Flammen oder wird von angreifenden Mongolen überrannt. Als einsamer Samurai Jin Sakai ist es meine unbeirrbare Mission, die Insel zurückzuerobern und diese Feinde aus meiner Heimat zu verjagen. Nichts hat größeren Vorrang.

    Mit schwerem Seufzen steige ich auf mein treues Ross, zucke beim qualvollen Anblick der Flammen am Horizont zusammen und galoppiere meinem Schicksal entgegen. Nur Sekunden später starre ich auf Mongolen herab, die auf einer staubigen Straße einen braven Bürger drangsalieren, mein unerbittlicher Blick fest auf ihre blutigen Klingen geheftet. Wir kreuzen die Schwerter. Die Mongolen fallen. Ein Leben ist gerettet, und ich breche zu einer Festung auf, in der es nur so wimmelt vor … Moment. Hüpft da etwa ein Fuchs um einen goldenen Baum herum? Ich muss einfach sehen, was es damit auf sich hat.

    Die nächsten Stunden verbringe ich damit, Füchse zu streicheln, Blumen zu pflücken und mit offenem Mund die überwältigende Schönheit zu bestaunen, die Ghost of Tsushima aus allen Poren dringt. Ich vergesse jeglichen Sinn für die Dringlichkeit meiner Mission und nehme die Welt um mich herum ganz und gar in mich auf.

    Es zeugt von den Naturwundern des Spiels, dass ich Jins lebensverändernden Feldzug der Gerechtigkeit einfach so beiseitezuschieben vermag. Trotz der eingangs erwähnten aufwühlenden ersten Momente und ein paar wirklich entsetzlichen Toden, die meinen unerbittlichen Rachedurst bloß noch weiter anheizten, hat mich die weitläufige Landschaft der Insel stets in ihren Bann gezogen – aber nie nach Art einer typischen Null-acht-fünfzehn-Ablenkung mit abzuhakenden Aufgaben. Das verführerische Arrangement aus gischtgepeitschten Klippen, besinnlichen heißen Quellen, faszinierenden Inari-Schreinen und anderen Weltwundern weckte meine fortwährende Faszination und Neugier bis weit über den Nachspann hinaus … und bis hin zur Platin-Trophäe.

    Es wurde schon viel gesagt über die Insel, den beeindruckenden Foto-Modus des Spiels und die farbenfroh schillernden Blätter, die durch die Luft fliegen. Doch man kann gar nicht oft genug betonen, wie sehr einen diese offene Welt in ihren Bann schlägt und wie unglaublich reizvoll es ist, sie einfach nur zu erkunden. Wenn man eine gewaltige Felsformation erklimmt, wird man vielleicht nur mit einer überwältigenden Aussicht belohnt. Doch wieder und wieder hat diese Aussicht (und ein schnelles Foto fürs Erinnerungsalbum) die Reise mehr als wettgemacht.

    Für jeden besinnlichen Augenblick, den ich mit der Betrachtung eines Wasserfalls oder der Komposition eines Haikus verbracht habe, gab es auch eine nervenzerreißende Begegnung mit Banditen, Ronins und Mongolen. Jin ist ein fähiger Schwertkämpfer, und so ist man von Anfang an in der Lage, es mit mehreren Gegnern gleichzeitig aufzunehmen. Im Verlauf seiner Reise erlernt Jin neue Kampfhaltungen und erweitert sein Arsenal um heimliches Schleichen und Werkzeuge und kann so mit nur wenigen Attacken fünf, sechs … sogar zehn Gegner ausschalten. Am Ende der Reise war ich ausgesprochen überzeugt von meiner Fähigkeit, geradewegs in ein Lager hineinzumarschieren, jeden in Sichtweite als meiner Aufmerksamkeit unwürdigen Feigling zu betiteln und sie allesamt gnadenlos niederzumähen.

    Diese Art der Frontalkonfrontation ist eine ehrenvolle Taktik, die mit Jins Samurai-Hintergrund einhergeht, doch man kann sich auch jederzeit wieder in den Schatten zurückziehen und mithilfe von listigen Geist-Techniken einen Gegner nach dem anderen ausschalten. Ob man nun seinen Widersachern Auge in Auge gegenübertritt oder als der mysteriöse Geist über die Dächer springt – der Kampf fühlt sich in jedem Fall flüssig und intensiv an.

    Jins persönliche Reise ist perfekt mit dieser Dualität aus Samurai und Geist verwoben. Nach der Vernichtung seines Klans liegen seiner anfänglichen Rachestrategie eher traditionelle Motive zugrunde, die höchstwahrscheinlich noch mehr Verderben nach sich ziehen würden. Aber Yuna, eine Diebin, die Jin im frühen Spielverlauf rettet, lotst ihn von diesen Frontalangriffen weg. Sie schließen Freundschaft, weil beide für Gerechtigkeit sorgen wollen und aufgrund ihres hybriden Schlachtplans große Verluste hinnehmen müssen. Im Laufe der Zeit trifft Jin auf bedeutende Personen aus seiner Vergangenheit und begegnet neuen Verbündeten, die allesamt daran mitwirken, ihn zu einem neuen Menschen heranreifen zu lassen. Die Nebenrollen – und ihre jeweils eigenen Questreihen – sind eine wahre Freude und eine enorme Bereicherung für das Gefüge und die Emotionen dieser Welt. Was als „Wow, ganz schön viele Nebenquests“ begann, wird schnell zu „Schade, damit ist diese Geschichte wohl zu Ende …“.

    Die Kombination aus unvergesslichen Charakteren, erbitterten Kämpfen und einer beschaulichen Weltkarte mit dramatischer Musikuntermalung ergibt ein außergewöhnliches Abenteuer, das zweifellos zu meinen Lieblingsspielen des Jahres zählt.

    Website: LINK

  • Remote teams ring office bell with Raspberry Pi and Slack

    Remote teams ring office bell with Raspberry Pi and Slack

    Reading Time: 3 minutes

    Bustling offices… remember those? It feels like we’ve all been working from home forever, and it’s going to be a while yet before everyone is back at their desks in the same place. And when that does happen, if your workplace is anything like Raspberry Pi Towers, there will still be lots of people in your team who are based in different countries or have always worked from home.

    This office bell, built by a person called Alex, is powered by a Raspberry Pi 3B+ and is linked to Slack, so when a milestone or achievement is announced on the chat platform by a remote team member, they get to experience ringing the office bell for themselves, no matter where in the world they are working from.

    Kit list:

    Close-up of the servo wired to the Raspberry Pi pins

    Integrating with Slack

    To get the Raspberry Pi talking to Slack, Alex used the slackclient module (Python 3.6+ only), which makes use of the Slack Real Time Messaging (RTM) API. This is a websocket-based API that allows you to receive events from Slack in real time and send messages as users.

    With the Slack RTM API, you create an RTM client and register a callback function that the client executes every time a specific Slack event occurs. When staff tell the @pibot on Slack it’s ‘belltime’, the Raspberry Pi tells the servo to ring the bell in the office.

    Alex also configured it to always respond with an emoji reaction when someone successfully rings the bell, so remote employees get some actual feedback that it worked. Here’s the script for that bit.

    Alex also figured out how to get around WiFi connectivity drops: they created a cronjob that runs a bash script every 15 minutes to check if the bell ringer is running. If it isn’t running, the bash script starts it.

    At the end of Alex’s original post, they’ve concluded that using a HAT would allow for more control of the servo and avoid frying the Raspberry Pi. They also cleaned up their set-up recently and switched the Raspberry Pi 3B+ out for a Raspberry Pi Zero, which is perfectly capable of this simple job.

    Website: LINK

  • 5 Verbesserungen des Karrieremodus in FIFA 21

    5 Verbesserungen des Karrieremodus in FIFA 21

    Reading Time: 5 minutes

    Hallo PlayStation-Fans! Vor ein paar Wochen hatten wir die Gelegenheit, FIFA 21 und den neuen Karrieremodus näher kennenzulernen. Ionel Stanescu, Senior Game Designer, hat uns die umfassenden Verbesserungen in diesem Modus und im Volta-Modus – der ebenfalls seine Rückkehr feiert – erläutert. Lest weiter, um alle neuen Informationen zu erhalten. 

    1. Interaktive Spielsimulation

    FIFA 21FIFA 21

    Zuerst wird euch der neue Startbildschirm vor dem Spiel auffallen. Hier findet ihr viele nützliche Informationen, die euch helfen, die besten strategischen Entscheidungen für das bevorstehende Spiel zu treffen. Sobald ihr eure Entscheidungen getroffen habt, ist es an der Zeit, auf dem Platz loszulegen. 

    Die Simulationen sind umfassender als je zuvor, um euch mehr Einflussnahme und Kontrolle zu gewähren. Die Ausdauer, Werte, Spielstatistiken und Spielplanoptionen der Spieler sind zu jeder Zeit verfügbar, sodass ihr über die Management-Registerkarte schnell vom Spielfeldrand aus taktische Änderungen vornehmen könnt. Alternativ dürft ihr während eines Spiels jederzeit und so oft ihr möchtet selber die Kontrolle übernehmen und die Action direkt auf dem Spielfeld steuern. Das Spiel schlägt euch in wichtigen Momenten vor, direkt einzugreifen – z. B. wenn ein Tor erzielt wird. 

    Wir haben hart daran gearbeitet, den Übergang von der Simulation zum tatsächlichen Spiel möglichst fließend zu gestalten. Darüber hinaus wird euch vor Beginn der Simulation die wahrscheinliche Aufstellung des gegnerischen Teams vorgeschlagen. So steht euch eine unglaubliche Auswahl an Tools zur Verfügung, mit denen ihr die Zusammensetzung und die Aufstellung eures Teams planen und für jede gegnerische Taktik den richtigen Konter auf dem Platz finden könnt. Wenn ihr möchtet, könnt ihr auch einfach die Zeit vorspulen (oder das Match) und den Endstand und die Statistiken abrufen. 

    2. Spielerentwicklung

    Letztes Jahr wurden dynamische Spielerpotenziale zum Karrieremodus hinzugefügt, mit denen ihr das Wachstum und die Entwicklung eurer Spieler genau verfolgen könnt. Das Studio hat darauf aufgebaut und bietet euch in diesem Jahr einen noch vielschichtigeren und flexibleren Ansatz der Spielerentwicklung. 

    Im Karrieremodus von FIFA 21 könnt ihr planen, wie eure Spieler ihre Fähigkeiten entwickeln und entscheiden, in welchen Bereichen die Entwicklung eines Spielers stattfinden soll. 

    Beispiel: Wählt einen jungen, unerfahrenen Spieler aus und bringt ihn dazu, sich beim Training auf das Dribbeln und Torschießen zu konzentrieren. Oder schnappt euch einen Veteranen und entscheidet, welche seiner bereits entwickelten Fähigkeiten auf höchstem Niveau bleiben sollen, damit sein Platz in der Mannschaft gesichert ist. 

    Ihr könnt jedoch nicht einfach so die Fähigkeiten auswählen, die verbessert werden sollen. Sie werden mit anderen Parametern wie der Spielzeit eines Spielers, den Spielstatistiken und dem Schwierigkeitsgrad des Gegners abgeglichen. Das alles beeinflusst die Entwicklung eurer Spieler und wie schnell sie ihr maximales Potenzial erreichen können.     

    Als Antwort auf die am häufigsten gewünschten Änderungen von FIFA-Fans habt ihr in diesem Jahr die Möglichkeit, die Feldposition eines Spielers zu ändern. Es gibt jedoch einen Vorbehalt: Je nach Entwicklung des jeweiligen Spielers können einige Positionsänderungen schwieriger sein als andere. Einen Innenverteidiger zu einen Stürmer zu machen ist kein leichtes Unterfangen, aber möglich. 

    3. Aktives Trainingssystem und Bissigkeit

    fiofa 21fiofa 21

    Eine weitere neue Funktion ist das aktive Trainingssystem. Dies verleiht dem Leistungsmanagement eine zusätzliche Tiefe. Während sich das Spielerpotenzial auf die langfristige Entwicklung konzentriert, geht es bei dem aktiven Training um die unmittelbare Spielvorbereitung der Spieler. Dadurch habt ihr noch mehr Kontrolle über die Vorbereitung eurer Mannschaft auf das Match.  

    Bissigkeit ist der neue Indikator der Spielerfähigkeit. Je größer der Bissigkeits-Wert, desto besser wird der Spieler im nächsten Spiel sein. Zusammen mit der Moral der Spieler wirkt sich dieser auf die Leistung aus. 

    Eine Möglichkeit, die Bissigkeit eines Spielers zu erhöhen, sind Trainingseinheiten. Bedenkt jedoch, dass sich das Training auf das Fitnesslevel des ausgewählten Fußballers auswirkt. Es liegt an euch, das richtige Gleichgewicht zwischen Bissigkeit und Fitness zu finden, die beide wesentliche Eigenschaften für einen Sieg sind. 

    Das Training bietet verschiedene Übungsszenarien. Bedingungen wie Schwierigkeitsgrad, Intensität und Anzahl der Spieler variieren je nach gewähltem Training. Die Spieler werden automatisch ausgewählt, je nachdem, wer sich in eurer Hauptaufstellung befindet und wer auf der Bank sitzt, aber ihr könnt die Auswahl auch nach euren Wünschen anpassen. 

    Um den maximalen Nutzen für euer Team zu erzielen, müsst ihr alle Übungen mindestens einmal absolvieren.

    4. Spieler-Feedbacksystem

    FIFA 21FIFA 21

    Das Studio hat sich bemüht, die Ergebnisse auf Grundlage eurer Entscheidungen beim Mannschaftsmanagement so realistisch wie möglich zu machen. 

    Eure Herangehensweise an Bissigkeit, Fitness und Moral wirkt sich auf jeden Spieler aus und verändert seine Eigenschaften entsprechend. Wenn ihr einen Spieler auf eine unliebsame Position versetzt, werden seine Moral und Bissigkeit garantiert sinken. Ihr werdet darüber jedoch nicht im Unklaren gelassen: umfassende Statistiken sind immer verfügbar, sodass ihr die Gefühle jedes einzelnen Spielers bezüglich eurer Entscheidungen kennt. Wählt eure Entscheidungen also mit Bedacht. 

    5. Zeitplan

    Neben der Spielerentwicklung könnt ihr auch den Zeitplan eures Teams anpassen. Ihr müsst selber entscheiden, wann eure Spieler am besten trainieren oder sich ausruhen sollen. 

    Es gibt zwei Möglichkeiten: ihr könnt globale Parameter festlegen, die für die ganze Saison gelten, oder wöchentliche Feinanpassungen vornehmen, indem ihr Trainings- oder Erholungstage nach Bedarf verschiebt. So könnt ihr einen unglaublich detaillierten und personalisierten Zeitplan erstellen, der auf die spezifischen Bedürfnisse eurer Mannschaft zugeschnitten ist. 

    Dies ist nur eine kleine Auswahl der Verbesserungen, die in FIFA 21 enthalten sind. Zu den weiteren Änderungen im Karrieremodus gehören ein verbessertes Einstiegserlebnis für neue Spieler, realistischere Transfer- und Einstellungsmöglichkeiten sowie eine verbesserte Gegner-KI. Wenn FIFA 21 am 9. Oktober für PS4 veröffentlicht wird, könnt ihr euch selbst    ein Bild davon machen. 

    Website: LINK

  • Warehouse-Demo zu Tony Hawk’s Pro Skater 1 + 2: Alles, was ihr wissen müsst

    Warehouse-Demo zu Tony Hawk’s Pro Skater 1 + 2: Alles, was ihr wissen müsst

    Reading Time: 5 minutes

    Ab Freitag, 14. August, um 17 Uhr (MESZ) öffnen die Tore zur Warehouse-Demo für alle Skater rund um den Globus, die Tony Hawk’s Pro Skater 1 + 2 digital vorbestellt haben und jetzt vor der Veröffentlichung der Vollversion am 4. September losskaten können.

    Es wird Zeit, Tony wieder ins Warehouse zu bringen – hier ist alles, was ihr über diese Demo wissen müsst:

    Was enthält die Demo?

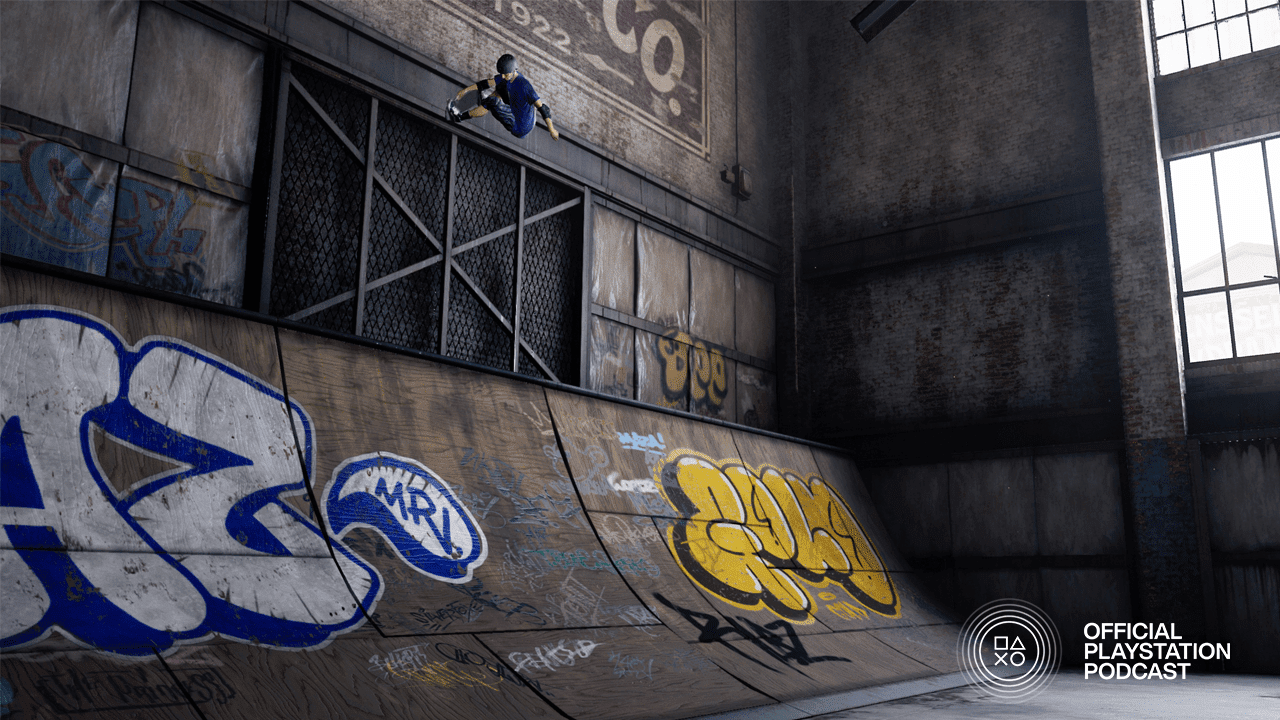
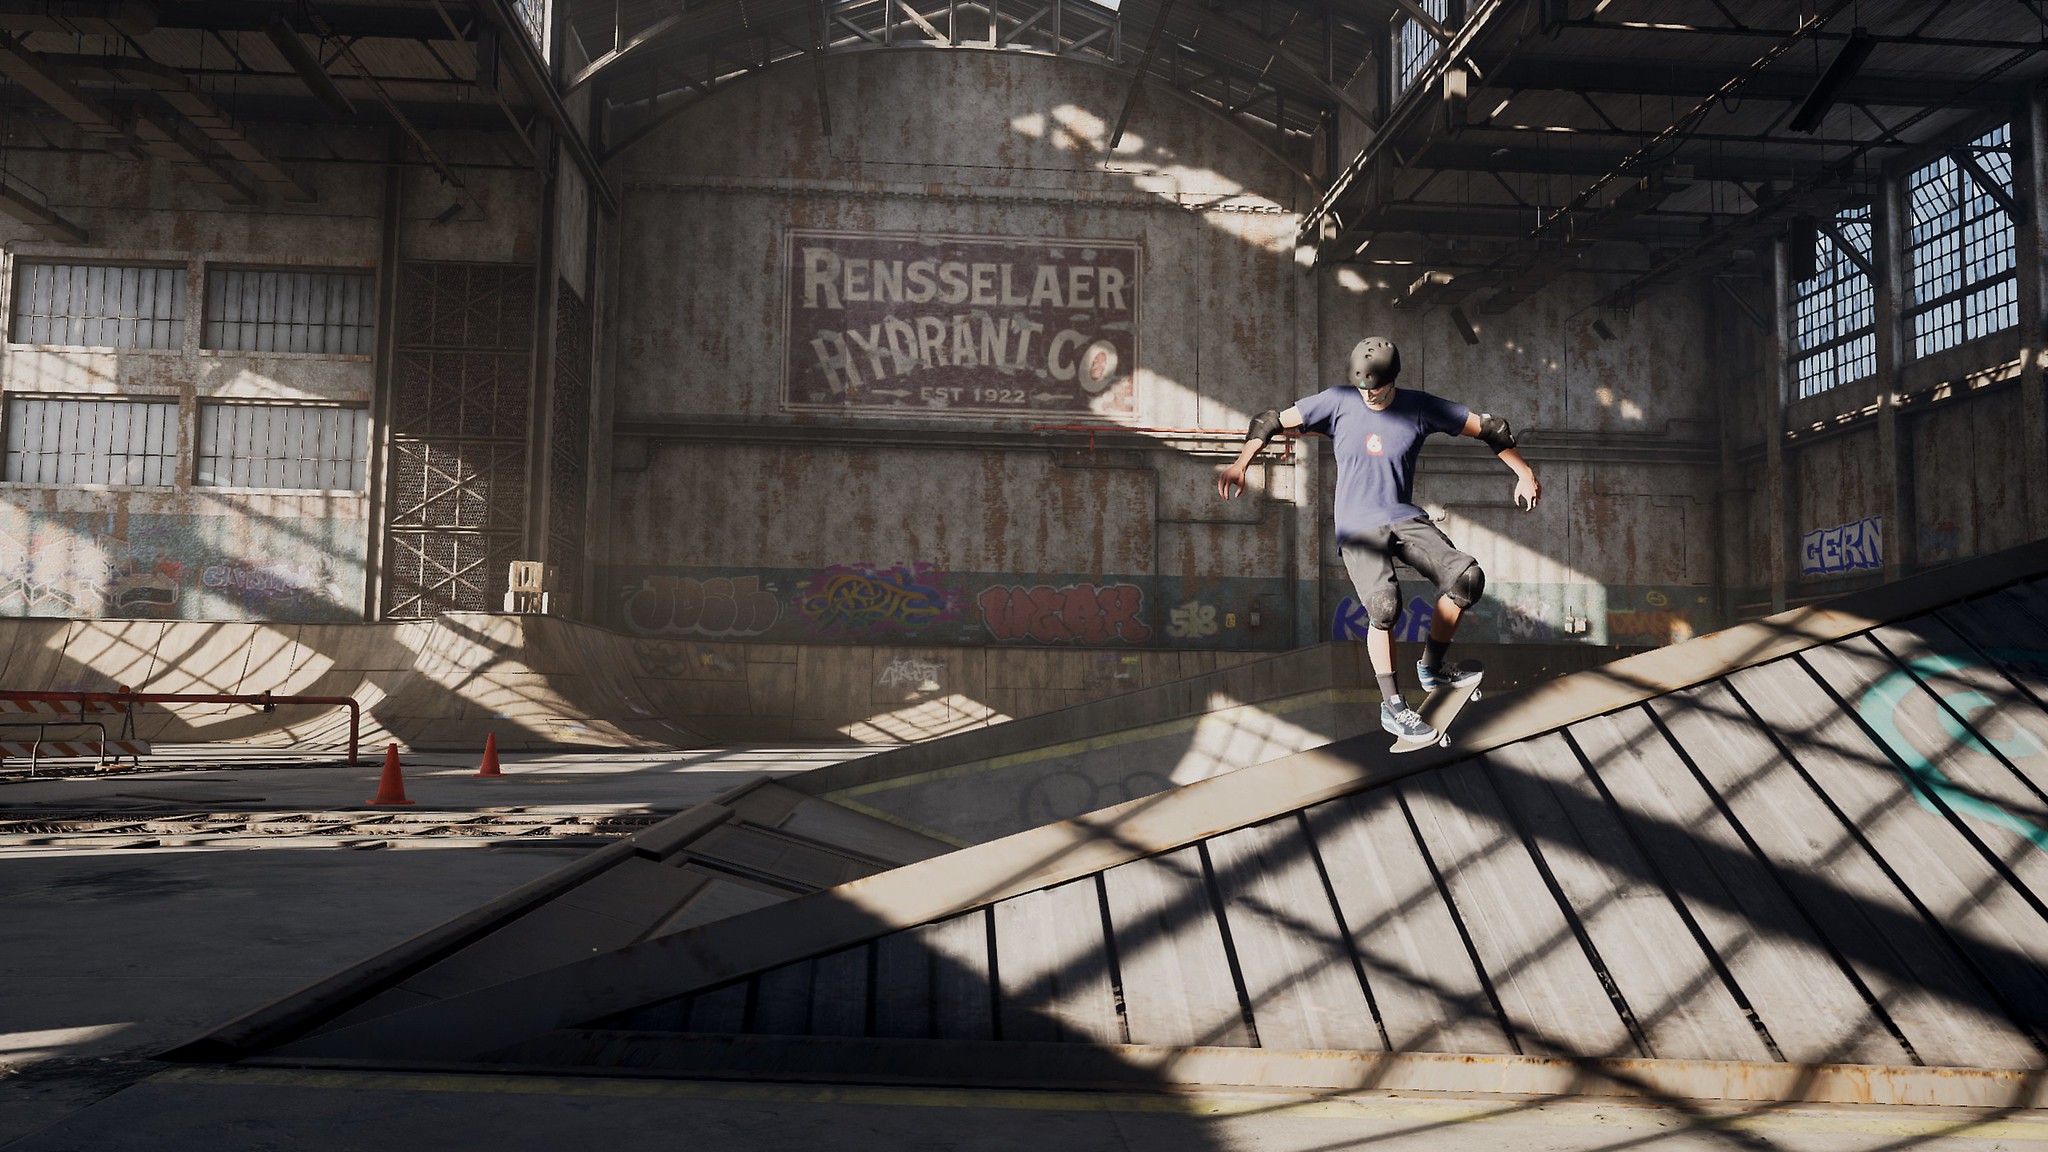
    In diesem Vorgeschmack vor der Veröffentlichung der Vollversion skatet ihr als Tony Hawk in dem Level, in dem die Reihe ihren Anfang nahm – das Warehouse aus dem Originalspiel Tony Hawk’s Pro Skater.

    Für diese Demo nehmt ihr an einer klassischen, schlichten Single Session teil. Ihr habt zwei Minuten – es sei denn, ihr geht mit einer Combo, die über das Zeitlimit hinaus andauert, in Overtime – um beim Erkunden des Warehouse so viele Punkte wie möglich zu sammeln.

    Möchtet ihr einen weiteren Versuch wagen? Einfach die entsprechende Schaltfläche auswählen! Der Anzahl der Sessions ist keine Grenze gesetzt.

    Nach jeder Single Session seht ihr eine Zusammenfassung eurer Endpunktzahl, der längsten Combo und weitere individuelle Statistiken zu eurem Skaten in dieser Session.

    Zieht alle Tricks

    Tony Hawk Pro Skater 1 + 2 (und diese Demo) beinhalten nicht nur Tricks aus den beiden Originalspielen – Vicarious Visions präsentiert weitere Moves aus den Sequels dieser Reihe, die ihr einsetzen könnt.

    Dies sind die erwähnenswerten Tricks, die ihr in Tony Hawk’s Pro Skater 1 + 2 verwenden könnt:

    Manual – Während der Skater samt Skateboard noch auf festem Boden steht, bewirkt ein schnelles Drücken der Tastenkombination oben, dann nach unten (vor und zurück), dass sich der Skater auf die Hinterseite des Boards lehnt und es nur noch mit zwei Rollen den Boden berührt. Diese Haltung muss weiterhin durch die gleiche Tastenkombination gehalten werden, ansonsten schlagen die zwei vorderen Rollen wieder auf dem Boden auf und beenden den Manual, oder der Skater fällt nach hinten und springt ab.

    Nose Manual – Ähnlich zum Manual, nur lautet hier die Tastenkombination: erst unten, dann oben, damit nur noch die beiden vorderen Rollen des Boards den Boden berühren.

    Flatland Tricks – Drückt ihr während eines Manuals oder Nose Manuals die Tasten für einen Grind, Flip oder Grab, führt der Skater Tricks wie Casper und Pogo aus.

    Revert – „Der Revert wurde zu einem der wichtigsten Grundpfeiler der Reihe, den wir von Anfang an unbedingt dabeihaben wollten“, sagt Leo Zuniga, leitender Designer bei Vicarious Visions. Und ihr könnt euch sicher sein, dass wir den Revert in Tony Hawk’s Pro Skater 1 + 2 und in diese Demo gepackt haben. Führt ein Skater einen Trick auf einer grünen Oberfläche wie z. B. einer Halfpipe oder Bowl aus, könnt ihr durch Drücken einer (oder beider) Tasten für den Haltungswechsel das Board um 180° drehen und so eine aktuelle Combo hinzufügen und diese möglicherweise noch mit einem Manual oder Nose Manual erweitern.

    Spine Transfer – Ist gegenüber einer grünen Oberfläche, auf der sich der Skater gerade befindet, eine weitere, z. B. zwei Bowls oder Halfpipes nebeneinander, könnt ihr in der Luft mit der gleichen Tastenkombination wie beim Revert nahtlos von der einen Oberfläche zur anderen springen. Das wird direkt zu eurer aktuellen Combo hinzugefügt und ist vielleicht der Schlüssel für Extrapunkte durch Abstände.

    Acid Drop – Führt ein Skater Ollies, No Complies, Boneless, Nollies, oder Fake Ollies über einer grünen Oberfläche aus und drückt dabei die Tastenkombination für ein Revert, landet er in einem Übergang. So lässt sich noch mal richtig Schwung holen, um nach dem Revert eine Combo zu starten oder in einen Manual oder Nase Manual überzugehen.

    Wall Ride – Erfahrene Skater wissen es bereits, aber es ist eine Wiederholung wert: Springt ein Skater neben einer vertikalen Oberfläche – z. B. einer Wand – und drückt währenddessen die Grind-Taste, gleitet er mit seinem Board beim Fahren an der Wand entlang, was viele Punkte einfährt und ein guter Start oder eine gute Weiterführung für eine Combo ist.

    Wall Plant – Springt ein Skater direkt auf eine vertikale Oberfläche zu und drückt die Tastenkombination für einen Boneless-Move, kann er sich mit einem Fuß in die entgegengesetzte Richtung von der Oberfläche abstoßen und noch mehr Schwung holen, anstatt direkt in die Oberfläche hinein zu brettern.

    Trick Transitions – Ein Skater kann durch doppeltes Drücken der Grind-, Grab- oder Flip-Taste von einem Trick in einen anderen übergehen und dabei so ziemlich jeden Trick anwenden, vor allem Grinds.

    Alte und neue Tricks

    Neben anderen anpassbaren Funktionen innerhalb dieser Demo, zum Beispiel in den Einstellungen, könnt ihr hier Tony Hawks Trickliste komplett eigenständig anpassen und neuzuweisen.

    In anderen Worten: Tony ist bereit für den 900, den Kickflip McTwist und den 5-0 Overturn Grind. Es sind allerdings noch zwei weitere Stellen für Spezialtricks offen.

    Wollt ihr Tony einen Rowley Darkslide, den berühmten Move der Streetskating-Ikone Geoff Rowley, machen lassen? Oder wie wär‘s, wenn ihr Tony ein paar verrückte Tricks von neuen Skatern ausprobieren lasst, wie den „Hardflip Backside Nose Pick“ von Aori Nishimura? All diese und viele, VIELE weitere sind zum Auswählen verfügbar, um die offenen Stellen zu füllen, oder als Ersatz für Tonys Original-Spezialtricks.

    Nicht nur Spezialtricks sind komplett frei anpassbar – ihr könnt auch Grab-, Flip- und Lip-Tricks nach Belieben individualisieren und neuzuweisen. Wenn ihr also Tonys Grab-Tricks austauschen wollt, damit er einen Cannonball macht und keinen Indy, ist das möglich.

    Informationen zum Runterladen

    Bereit, es selbst zu erleben?

    Stellt zuerst sicher, dass ihr das Spiel digital im PlayStation Store vorbestellt habt. Für diejenigen, die es bereits vorbestellt haben: Ihr könnt die Warehouse-Demo ab dem 12. August um 17 Uhr (MESZ) herunterladen. Geht in eure Bibliothek, dort werdet ihr die Demo bereit zum Herunterladen vorfinden. Nach dem Herunterladen wird eure Demo am 14. August um 17 Uhr (MESZ) zum Spielen freigeschaltet.

    Wenn ihr das Spiel nach der Veröffentlichung der Demo vorbestellt, werdet ihr beim Bezahlvorgang darauf hingewiesen, die Demo herunterzuladen.

    Haltet nach weiteren Informationen zu Tony Hawk’s Pro Skater 1 + 2 Ausschau, während die Veröffentlichung am 4. September immer näher rückt.

    Verfügbarkeit und Starttermin(e) der Warehouse-Demo können sich ändern. Internet erforderlich.

    Website: LINK

  • New twist on Raspberry Pi experimental resin 3D printer

    New twist on Raspberry Pi experimental resin 3D printer

    Reading Time: 3 minutes

    Element14’s Clem previously built a giant Raspberry Pi-powered resin-based 3D printer and here, he’s flipped the concept upside down.

    The new Raspberry Pi 4 8GB reduces slicing times and makes for a more responsive GUI on this experimental 3D printer. Let’s take a look at what Clem changed and how…

    [youtube https://www.youtube.com/watch?v=3rttZ-59ZAo?feature=oembed&w=500&h=281]

    The previous iteration of his build was “huge”, mainly because the only suitable screen Clem had to hand was a big 4K monitor. This new build flips the previous concept upside down by reducing the base size and the amount of resin needed.

    Breaking out of the axis

    To resize the project effectively, Clem came out of an X,Y axis and into Z, reducing the surface area but still allowing for scaling up, well, upwards! The resized, flipped version of this project also reduces the cost (resin is expensive stuff) and makes the whole thing more portable than a traditional, clunky 3D printer.

    Look how slim and portable it is!

    How it works

    Now for the brains of the thing: nanodlp is free (but not open source) software which Clem ran on a Raspberry Pi 4. Using an 8GB Raspberry Pi will get you faster slicing times, so go big if you can.

    A 5V and 12V switch volt power supply sorts out the Nanotec stepper motor. To get the signal from the Raspberry Pi GPIO pins to the stepper driver and to the motor, the pins are configured in nanodlp; Clem has shared his settings if you’d like to copy them (scroll down on this page to find a ‘Resources’ zip file just under the ‘Bill of Materials’ list).

    Raspberry Pi working together with the display

    For the display, there’s a Midas screen and an official Raspberry Pi 7″ Touchscreen Display, both of which work perfectly with nanodlip.

    At 9:15 minutes in to the project video, Clem shows you around Fusion 360 and how he designed, printed, assembled, and tested the build’s engineering.

    A bit of Fusion 360

    Experimental resin

    Now for the fancy, groundbreaking bit: Clem chose very specialised photocentric, high-tensile daylight resin so he can use LEDs with a daylight spectrum. This type of resin also has a lower density, so the liquid does not need to be suspended by surface tension (as in traditional 3D printers), rather it floats because of its own buoyancy. This way, you’ll need less resin to start with, and you’ll waste less too whenever you make a mistake. At 13:30 minutes into the project video, Clem shares the secret of how you achieve an ‘Oversaturated Solution’ in order to get your resin to float.

    Now for the science bit…

    Materials

    It’s not perfect but, if Clem’s happy, we’re happy.

    Join the conversation on YouTube if you’ve got an idea that could improve this unique approach to building 3D printers.

    Website: LINK

  • Raspberry Pi calls out your custom workout routine

    Raspberry Pi calls out your custom workout routine

    Reading Time: 3 minutes

    If you don’t want to be tied to a video screen during home workouts, Llum AcostaSamreen Islam, and Alfred Gonzalez shared this great Raspberry Pi–powered alternative on hackster.io: their voice-activated project announces each move of your workout routine and how long you need to do it for.

    [youtube https://www.youtube.com/watch?v=YxixpvTRhwk?feature=oembed&w=500&h=281]

    This LED-lit, compact solution means you don’t need to squeeze yourself in front of a TV or crane to see what your video instructor is doing next. Instead you can be out in the garden or at a local park and complete your own, personalised workout on your own terms.

    Kit list:

    Raspberry Pi and MATRIX Device

    The makers shared these setup guides to get MATRIX working with your Raspberry Pi. Our tiny computer doesn’t have a built-in microphone, so here’s where the two need to work together.

    MATRIX, meet Raspberry Pi

    Once that’s set up, ensure you enable SSH on your Raspberry Pi.

    Click, click. Simple

    The three sweet Hackster angels shared a four-step guide to running the software of your own customisable workout routine buddy in their original post. Happy hacking!

    1. Install MATRIX Libraries and Rhasspy

    Follow the steps below in order for Rhasspy to work on your Raspberry Pi.

    2. Creating an intent

    Access Rhasspy’s web interface by opening a browser and navigating to http://YOUR_PI_IP_HERE:12101. Then click on the Sentences tab. All intents and sentences are defined here.

    By default, there are a few example sentences in the text box. Remove the default intents and add the following:

    [Workout]start [my] workout

    Once created, click on Save Sentences and wait for Rhasspy to finish training.

    Here, Workout is an intent. You can change the wording to anything that works for you as long as you keep [Workout] the same, because this intent name will be used in the code.

    3. Catching the intent

    Install git on your Raspberry Pi.

    sudo apt install git

    Download the repository.

    git clone https://github.com/matrix-io/rhasspy-workout-timer

    Navigate to the folder and install the project dependencies.

    cd rhasspy-workout-timernpm install

    Run the program.

    node index.js

    4. Using and customizing the project

    To change the workout to your desired routine, head into the project folder and open workout.txt. There, you’ll see:

    jumping jacks 12,plank 15, test 14

    To make your own workout routine, type an exercise name followed by the number of seconds to do it for. Repeat that for each exercise you want to do, separating each combo using a comma.

    Whenever you want to use the Rhasspy Assistant, run the file and say “Start my workout” (or whatever it is you have it set to).

    And now you’re all done — happy working out. Make sure to visit the makers’ original post on hackster.io and give it a like.

    Website: LINK

  • Horizon Zero Dawn Complete Edition sees PC release today

    Horizon Zero Dawn Complete Edition sees PC release today

    Reading Time: < 1 minute

    Horizon Zero Dawn Complete Edition launches today for PC. Horizon Zero Dawn is set in a stunning post-post-apocalyptic world you can lose yourself in, led by a courageous hero who inspires the best in us, and full of captivating action against larger-than-life machines.

    Over three years after its debut, and with its highly anticipated sequel Horizon Forbidden West confirmed to be coming to PlayStation 5, it’s a great time to introduce a new audience to this fan-favorite epic. For anyone who’s never owned a PS4, or those who’ve skipped on a generation or more, it’s a great example of the kinds of games we consistently aim to deliver.

    Of course, the studio has taken steps to add options and features PC gamers expect: support for mouse and keyboard (or DualShock 4), ultrawide monitor support, higher frame rates and resolutions on sufficiently powerful systems, and more.

    We’re confident PC players will fall in love with Aloy and her world. Then, when Horizon Forbidden West arrives for PlayStation 5 and it’s time to find out where Aloy’s journey takes her next, we invite them to join along!

    Website: LINK

  • Processing raw image files from a Raspberry Pi High Quality Camera

    Processing raw image files from a Raspberry Pi High Quality Camera

    Reading Time: 6 minutes

    When taking photos, most of us simply like to press the shutter button on our cameras and phones so that viewable image is produced almost instantaneously, usually encoded in the well-known JPEG format. However, there are some applications where a little more control over the production of that JPEG is desirable. For instance, you may want more or less de-noising, or you may feel that the colours are not being rendered quite right.

    This is where raw (sometimes RAW) files come in. A raw image in this context is a direct capture of the pixels output from the image sensor, with no additional processing. Normally this is in a relatively standard format known as a Bayer image, named after Bryce Bayer who pioneered the technique back in 1974 while working for Kodak. The idea is not to let the on-board hardware ISP (Image Signal Processor) turn the raw Bayer image into a viewable picture, but instead to do it offline with an additional piece of software, often referred to as a raw converter.

    A Bayer image records only one colour at each pixel location, in the pattern shown

    The raw image is sometimes likened to the old photographic negative, and whilst many camera vendors use their own proprietary formats, the most portable form of raw file is the Digital Negative (or DNG) format, defined by Adobe in 2004. The question at hand is how to obtain DNG files from Raspberry Pi, in such a way that we can process them using our favourite raw converters.

    Obtaining a raw image from Raspberry Pi

    Many readers will be familiar with the raspistill application, which captures JPEG images from the attached camera. raspistill includes the -r option, which appends all the raw image data to the end of the JPEG file. JPEG viewers will still display the file as normal but ignore the (many megabytes of) raw data tacked on the end. Such a “JPEG+RAW” file can be captured using the terminal command:

    raspistill -r -o image.jpg

    Unfortunately this JPEG+RAW format is merely what comes out of the camera stack and is not supported by any raw converters. So to make use of it we will have to convert it into a DNG file.

    PyDNG

    This Python utility converts the Raspberry Pi’s native JPEG+RAW files into DNGs. PyDNG can be installed from github.com/schoolpost/PyDNG, where more complete instructions are available. In brief, we need to perform the following steps:

    git clone https://github.com/schoolpost/PyDNG
    cd PyDNG
    pip3 install src/. # note that PyDNG requires Python3

    PyDNG can be used as part of larger Python scripts, or it can be run stand-alone. Continuing the raspistill example from before, we can enter in a terminal window:

    python3 examples/utility.py image.jpg

    The resulting DNG file can be processed by a variety of raw converters. Some are free (such as RawTherapee or dcraw, though the latter is no longer officially developed or supported), and there are many well-known proprietary options (Adobe Camera Raw or Lightroom, for instance). Perhaps users will post in the comments any that they feel have given them good results.

    White balancing and colour matrices

    Now, one of the bugbears of processing Raspberry Pi raw files up to this point has been the problem of getting sensible colours. Previously, the images have been rendered with a sickly green cast, simply because no colour balancing is being done and green is normally the most sensitive colour channel. In fact it’s even worse than this, as the RGB values in the raw image merely reflect the sensitivity of the sensor’s photo-sites to different wavelengths, and do not a priori have more than a general correlation with the colours as perceived by our own eyes. This is where we need white balancing and colour matrices.

    Correct white balance multipliers are required if neutral parts of the scene are to look, well, neutral.  We can use raspistills guesstimate of them, found in the JPEG+RAW file (or you can measure your own on a neutral part of the scene, like a grey card). Matrices and look-up tables are then required to convert colour from ‘camera’ space to the final colour space of choice, mostly sRGB or Adobe RGB.

    My thanks go to forum contributors Jack Hogan for measuring these colour matrices, and to Csaba Nagy for implementing them in the PyDNG tool. The results speak for themselves.

    Results

    Previous attempts at raw conversion are on the left; the results using the updated PyDNG are on the right.

    DCP files

    For those familiar with DNG files, we include links to DCP (DNG Camera Profile) files (warning: binary format). You can try different ones out in raw converters, and we would encourage users to experiment, to perhaps create their own, and to share their results!

    1. This is a basic colour profile baked into PyDNG, and is the one shown in the results above. It’s sufficiently small that we can view it as a JSON file.
    2. This is an improved (and larger) profile involving look-up tables, and aiming for an overall balanced colour rendition.
    3. This is similar to the previous one, but with some adjustments for skin tones and sky colours.

    Note, however, that these files come with a few caveats. Specifically:

    • The calibration is only for a single Raspberry Pi High Quality Camera rather than a known average or “typical” module.
    • The illuminants used for the calibration are merely the ones that we had to hand — the D65 lamp in particular appears to be some way off.
    • The calibration only really works when the colour temperature lies between, or not too far from, the two calibration illuminants, approximately 2900K to 6000K in our case.

    So there remains room for improvement. Nevertheless, results across a number of modules have shown these parameters to be a significant step forward.

    Acknowledgements

    My thanks again to Jack Hogan for performing the colour matrix calibration with DCamProf, and to Csaba Nagy for adding these new features to PyDNG.

    Further reading

    1. There are many resources explaining how a raw (Bayer) image is converted into a viewable RGB or YUV image, among them Jack’s blog post.
    2. To understand the role of the colour matrices in a DNG file, please refer to the DNG specification. Chapter 6 in particular describes how they are used.

    Website: LINK