Schlagwort: MKR Zero
-

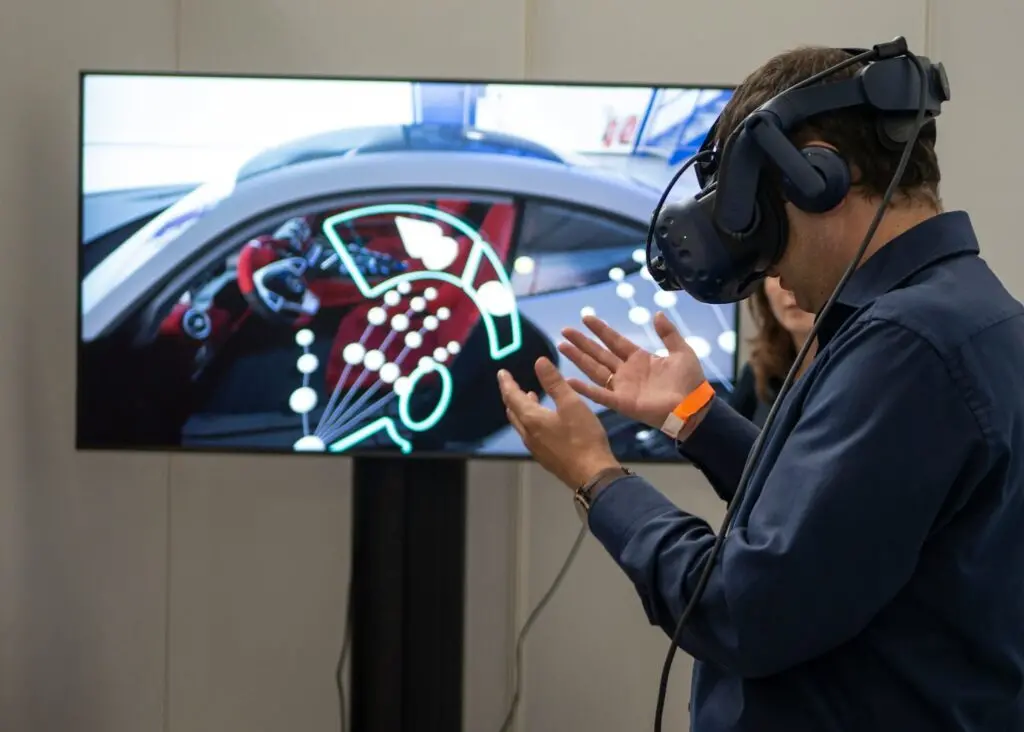
How makers can use AR and VR
Reading Time: 4 minutesAugmented reality (AR) and virtual reality (VR) are both currently experiencing a meteoric rise in popularity, with the combined market expected to reach $77 billion by 2025, from just $15.3 billion in 2020. For makers, AR and VR represent exciting opportunities to build new types of projects, tapping into entirely new possibilities…
-

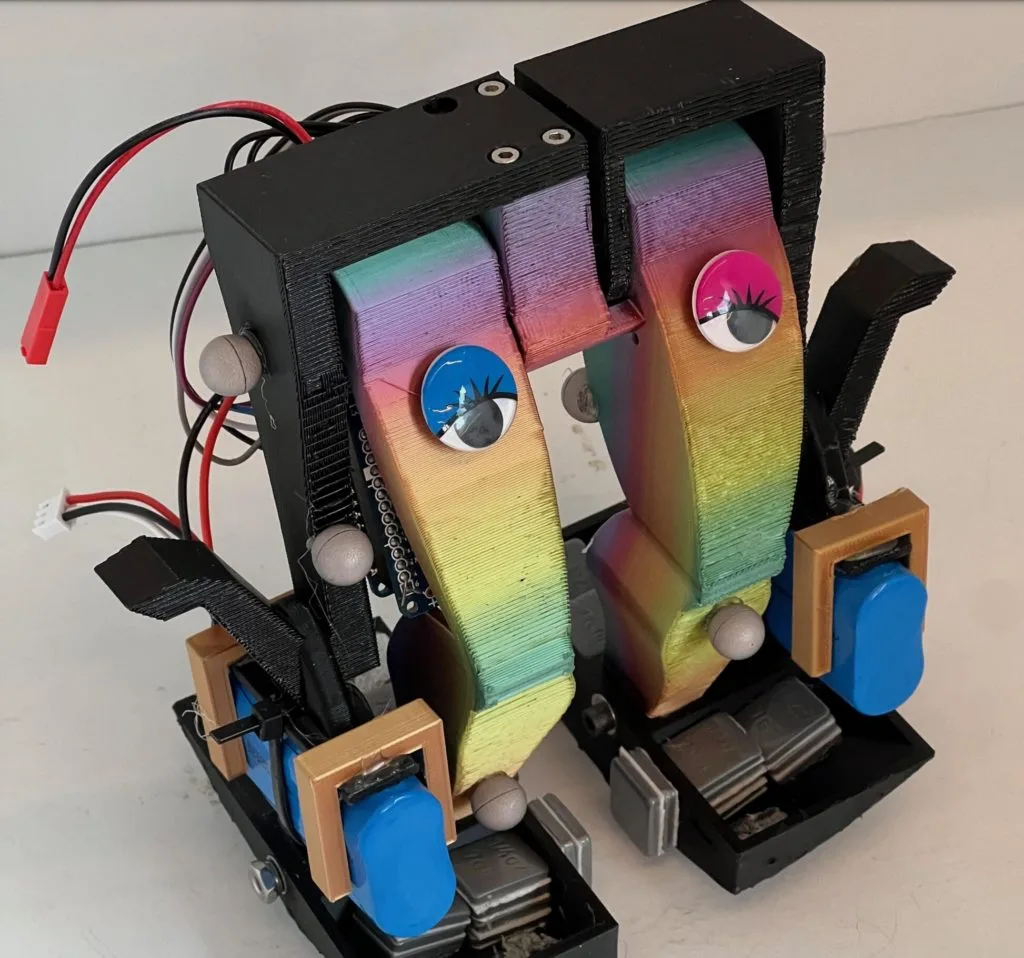
Bipedal robot walks with a single motor
Reading Time: 2 minutesA popular goal among roboticists is animal-like locomotion. Animals move with a fluidity and grace that is very hard to replicate artificially. That goal has led to extremely complex robots that require a multitude of motors and sensors, along with heavy processing, to walk. But even those don’t quite match biological movement.…
-

Celebrate good grades with this Arduino-powered robot
Reading Time: 2 minutesFor some students, getting decent grades or even finding the motivation to attempt to do schoolwork is a challenge, and this is often met with incentives such as money, praise, or simply avoiding embarrassment. Adam Soileau of element14 Presents had the idea to build a robot, which is an incentive unto itself by…
-

This project facilitates augmented reality Minecraft gaming
Reading Time: 2 minutesAugmented reality (AR) is distinct from virtual reality (VR) in that it brings the real world into virtual gameplay. The most famous example of AR is Pokémon Go, which lets players find the pocket monsters throughout their own physical region. Minecraft is the best-selling video game of all time, but lacks any official AR gameplay.…
-

The Baldcorder is James Lewis’ tricorder-like device for measuring light levels and temperature
Reading Time: 2 minutesThe Baldcorder is James Lewis’ tricorder-like device for measuring light levels and temperature Arduino Team — July 11th, 2021 As part of element14’s Build Inside the Box Challenge, James Lewis (AKA Bald Engineer) decided to make his own DIY tricoder from Star Trek. In the series, a tricoder is a ubiquitous scanning tool that can perform…
-
This MKR Zero system gives early warning of potential sump pump problems
Reading Time: 2 minutesArduino Team — June 29th, 2021 As most homeowners with a basement will tell you, keeping track of the sump pump is an important part of maintenance, as neglecting it can lead to the basement turning into a swimming pool. This is the exact predicament that a recent element14 Build Inside the Box winner, Mike…
-
Turn your bicycle into a Pokebike with DJ Harrigan’s MKR Zero device
Reading Time: 2 minutesTurn your bicycle into a Pokebike with DJ Harrigan’s MKR Zero device Arduino Team — June 16th, 2021 Within the Pokemon series there exists a special bicycle that plays a little tune when ridden, and this is what element14 Presents’ DJ Harrigan was trying to recreate with his DIY Pokebike project. It has…
-

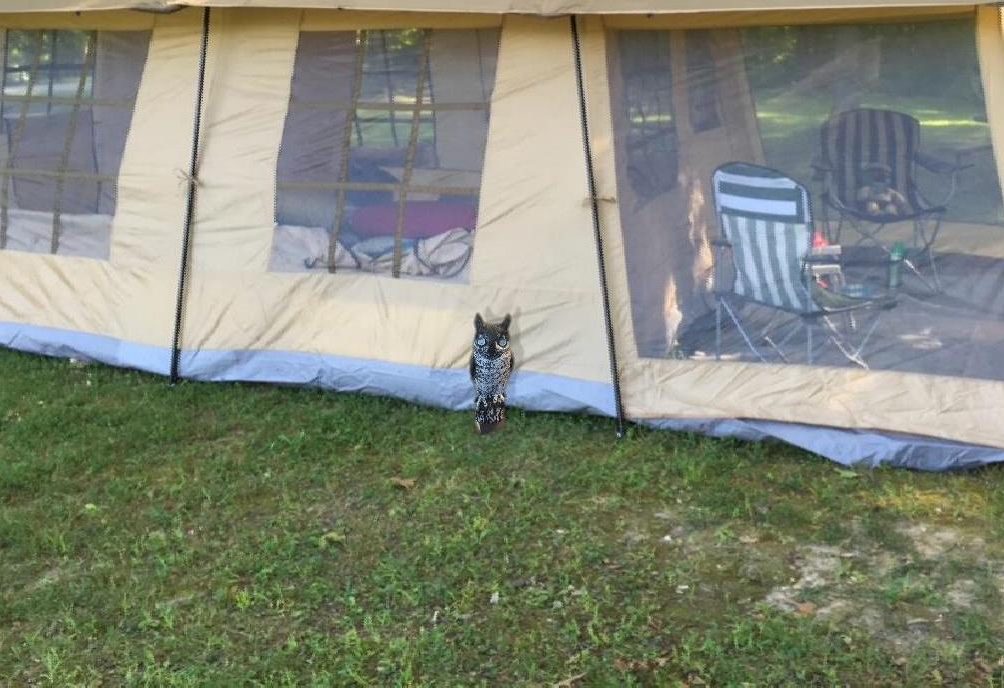
This disguised campsite security system lets you know ‘hoos’ there
Reading Time: 2 minutesThis disguised campsite security system lets you know ‘hoos’ there Arduino Team — June 10th, 2021 Motion sensors for home security stick out like a sore thumb, as their shiny white exteriors can be easily seen from a distance. This is made worse when camping, as small, discrete security devices that blend…
-

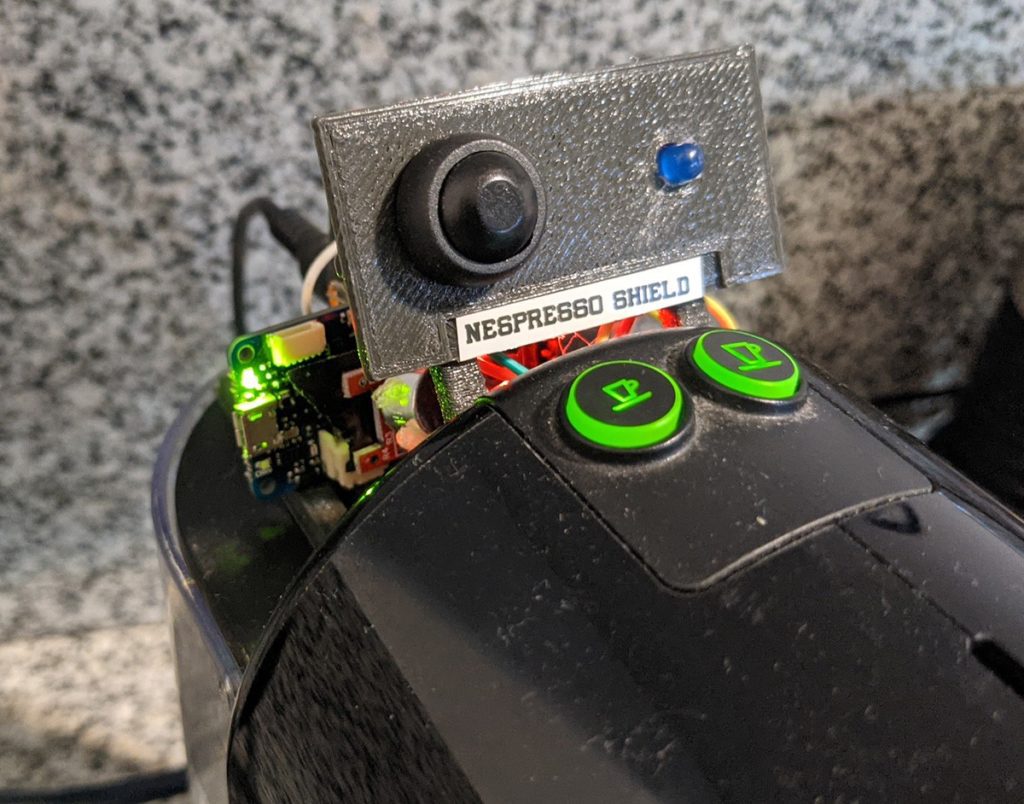
The Nespresso Shield logs your coffee consumption using a MKR Zero
Reading Time: < 1 minuteArduino Team — April 26th, 2021 How much coffee do you consume in a day? No idea? Then the Nespresso Shield by Steadman Thompson may be just what you need! The device employs an Arduino MKR Zero, and a microphone unit to sense when a Nespresso machine gets louder than a certain…
-

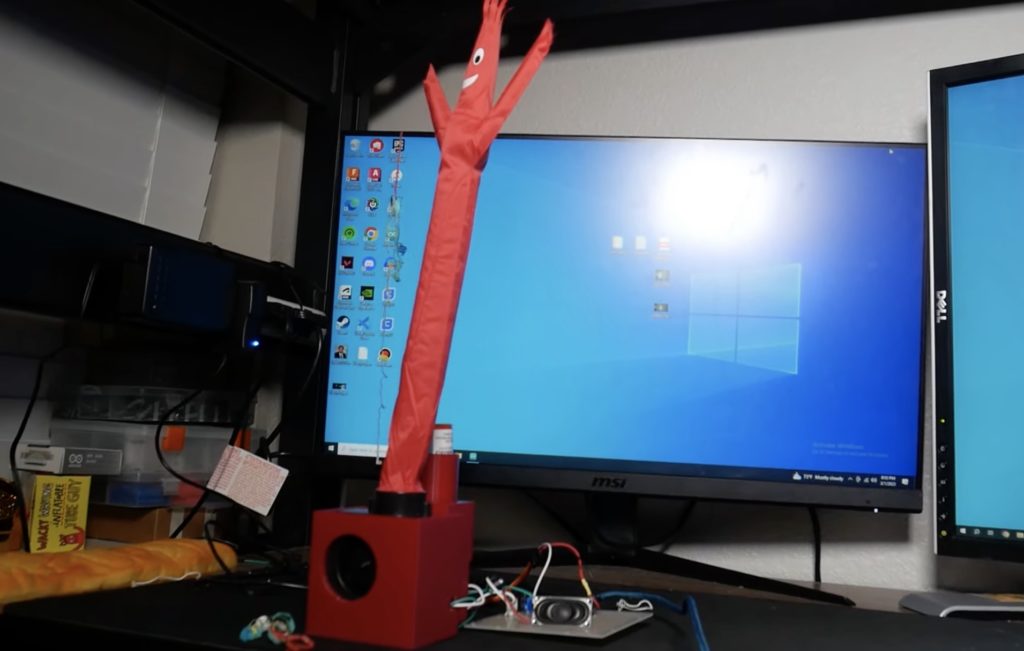
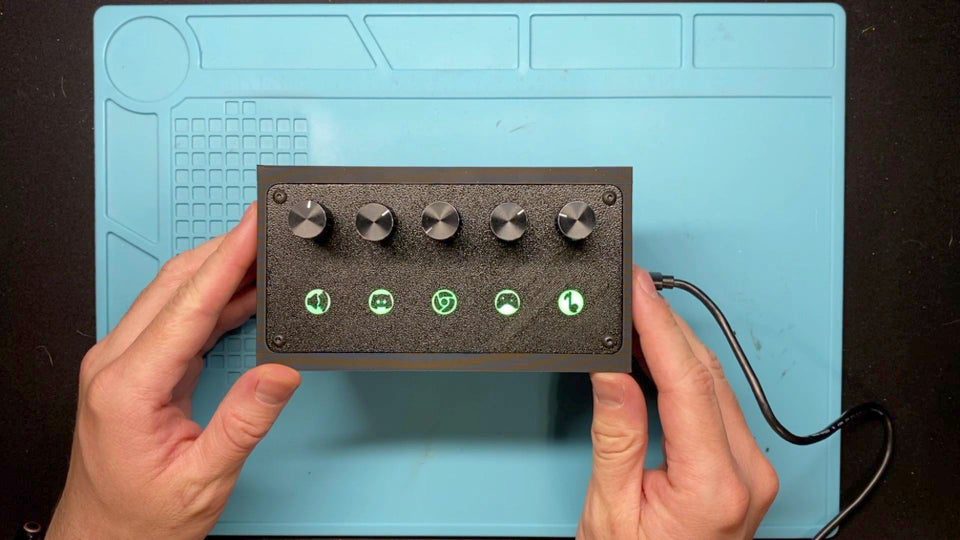
A MKR ZERO-based volume controller for your PC
Reading Time: < 1 minuteA MKR ZERO-based volume controller for your PC Arduino Team — September 18th, 2020 While some keyboards provide media keys or even knobs to adjust your overall computer sound up and down, often what you really want is the ability to tune program volumes separately. To make this extremely easy, SNR…
-

Recreating Rosie the Robot with a MKR ZERO
Reading Time: < 1 minuteRecreating Rosie the Robot with a MKR ZERO Arduino Team — August 3rd, 2020 While 2020 may seem like a very futuristic year, we still don’t have robotic maids like the Jetsons’ Rosie the Robot. For his latest element14 Presents project, DJ Harrigan decided to create such a bot as a sort of…
-

Build a comment-critiquing keyboard adapter using TensorFlow Lite and Arduino
Reading Time: 2 minutesBuild a comment-critiquing keyboard adapter using TensorFlow Lite and Arduino Arduino Team — July 7th, 2020 If you’ve ever left an online comment that you later regretted, this anti-troll bot will keep that from happening again by letting you know when you’re being a bit too harsh. The device — which was…
-

Meet Tomo, a DIY virtual pet that’ll spark ’90s nostalgia
Reading Time: 2 minutesMeet Tomo, a DIY virtual pet that’ll spark ’90s nostalgia Arduino Team — June 19th, 2020 If you miss your Tamagotchi virtual pet from the ’90s, Element14 Presents’ DJ has come up with the next best thing — or perhaps something even better! His DIY device named “Tomo,” for friend, displays a digital…
-

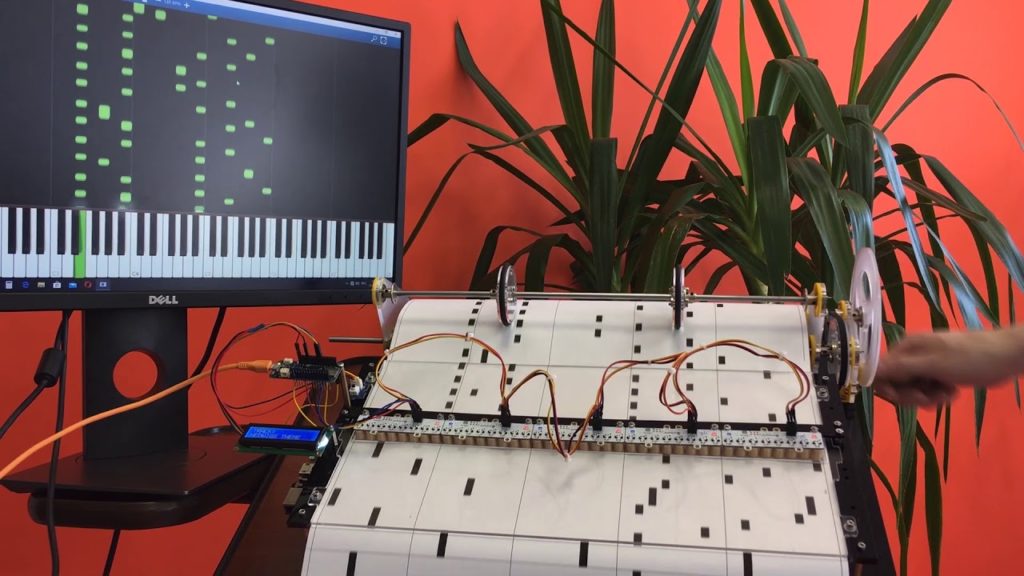
Arduino barrel piano plays encoded sheet music
Reading Time: < 1 minuteArduino barrel piano plays encoded sheet music Arduino Team — June 17th, 2020 Max Danilin created an automatic barrel piano that outputs MIDI signals, not through an SD card or internal memory, but by reading sheet music encoded on paper as black dots and dashes. The sheet is pulled under an array of…
-

Developing a photovoltaic solar tracker controller with a MKR Zero
Reading Time: 2 minutesDeveloping a photovoltaic solar tracker controller with a MKR Zero Arduino Team — August 7th, 2019 While energy consumption is an important concern in our modern world, you might have noticed that energy in the form of light shines down on us every day from the sun. Solar panels can be utilized…