Before succumbing to the Whos’ Christmas cheer, the Grinch’s heart was two sizes too small (or three in the text) and that sounds like a medical condition that warrants immediate surgery. What better way to celebrate Christmas this year than by performing that surgery yourself after building this Grinch-themed Operation game.
This project from Hanzlica puts a grumpy green spin on the classic Operation game. The gameplay is the same and there are six maladies to remedy, including a broken heart, butterflies in the stomach, and the ol’ nail in the arm. As in the standard Hasbro game, the goal is to pull those pieces from the patient’s body without touching the sides of the cavities. But this version is enlarged to the point where players don’t need to use special tweezers and can instead pull the pieces using their hands. The cavities have aluminum foil lining and act as capacitive touch sensors to detect contact.
The Instructables tutorial provides detailed instructions on how to build the board using plywood and glue. The removable pieces are 3D-printable and a laser cutter is ideal for the complex board outlines. An Arduino Nano RP2040 Connect board handles logic. It detects contact through an Adafruit 12-key capacitive touch sensor breakout board. That knows which cavity the player touches, which allows for the use of different sound effects that play through a small speaker connected directly to the Arduino.
Both kids and adults should get a kick out of this game, which will make it perfect for holiday family gatherings.
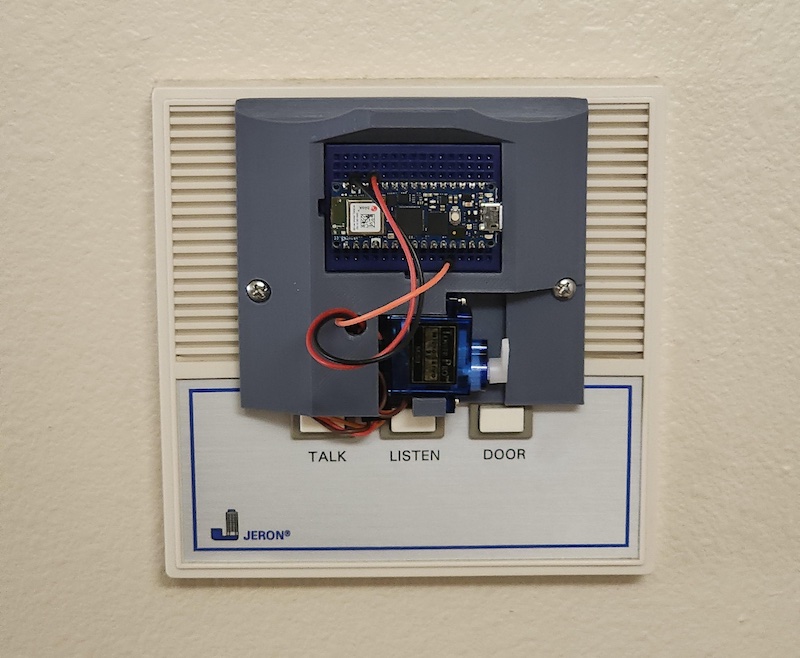
Many apartment buildings in urban areas have intercom systems that give residents the ability to unlock the building’s front door when a visitor calls. The visitor selects the resident from a list and the system connects them to that resident’s intercom. The idea is that the resident will recognize their visitor and push a button on the intercom to allow them entry. herzogshandicraft’s handy device utilizes the intercom system to automatically unlock the door when it detects a specific audio pattern.
This device serves two purposes: it lets the resident gain entry to the building without needing a key and it lets the resident give access to visitors when they aren’t home. It listens for a pattern of noise created by the visitor pressing and releasing the “talk” button on the intercom. When they press that button, audible noise comes through—even when nobody is speaking. In this case, it listens for noise above a threshold (the button pressed) for one second, no noise (button released) for one second, and then noise again for another second. If it hears that pattern, it uses a servo to press the door unlock button on the intercom.
An Arduino Nano RP2040 Connect controls the device and was chosen because it has a built-in microphone. It would also be possible to utilize the Arduino’s onboard wireless adapter to log events if the user wants to track them. The only other components are the small hobby servo motor, a mini breadboard, and a USB power supply. Those fit on a custom 3D-printed frame that attaches to the intercom panel. It’s an affordable and simple way to add some intelligence to an apartment intercom and users can always reconfigure the unlock pattern to suit their own security requirements.
Celebrating the very unique Elektor Magazine guest-edited by Arduino
You can rely on Elektor for solutions and insights to all your electronics challenges. Elektor breaks the constraints of a magazine. It’s a community of active e-engineers — from novices to professionals — eager to learn, make, design and earn surprising electronics. Every edition of Elektor Magazine is loaded with up-to-date news and views, real-world lab tests and high-quality DIY construction projects.
For serious Arduino Lovers and those who are eager to learn more about it
“In this issue you will find interviews with members of the Arduino community, special projects we — at Arduino — do in our spare time, and real-life examples of how the Arduino community is helping make the connected world a better place. This is just a tiny portion of everything that has happened since Arduino started in Ivrea in 2005. We hope you will like the stories and projects we hand-picked for you. And remember: sharing is caring!” — David Cuartielles
What can you expect from this super-thick, special edition of Elektor Magazine?
Features:
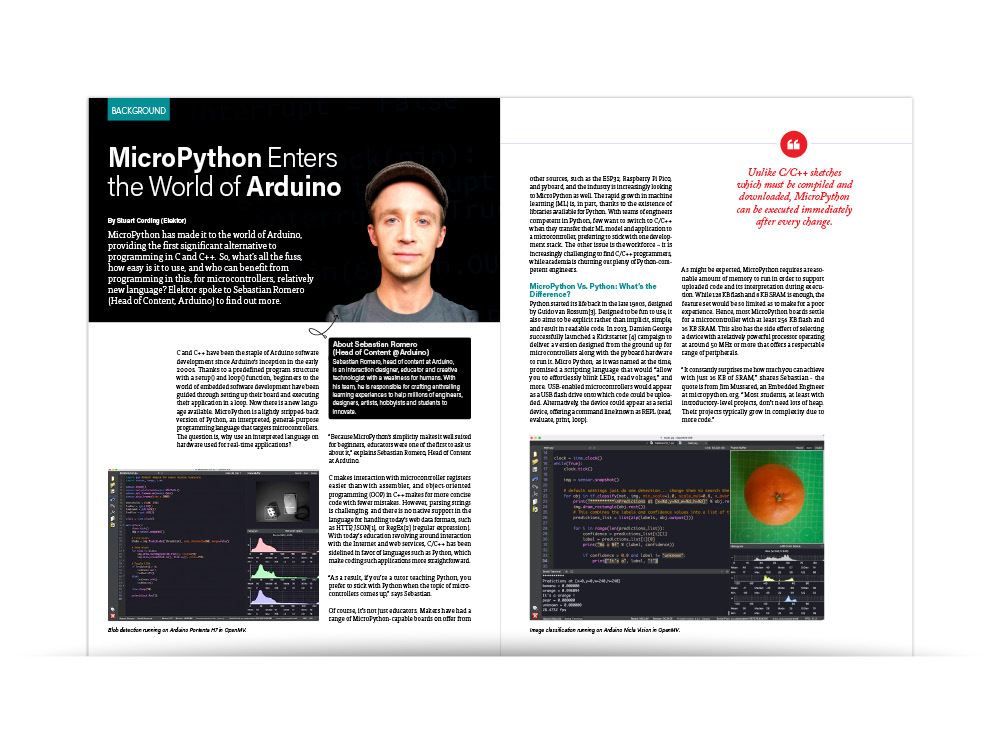
MicroPython Enters the World of Arduino
Connected Projects, Simplified: Dive Into the Arduino Cloud
Introduction to TinyML: Big Is Not Always Better
Writing Arduino Sketches Just Got Better: The Arduino IDE 2.0
Getting Started with the Portenta X8: Manage Software Securely with Containers
Build, Deploy, and Maintain Scalable, Secure Applications: With Arduino Portenta X8 Featuring NXP’s i.MX 8M Mini Applications Processor and EdgeLock SE050 Secure Element
Go Professional with Arduino Pro
Smart Ovens Take a Leap Into the Future
Tagvance Builds Safer Construction Sites with Arduino
Santagostino Breathes Easy: With Remote Monitoring That Leverages AI for Predictive Maintenance
Security Flies High with RIoT Secure’s MKR-Based Solution
Open-Source Brings a New Generation of Water: Management to the World
The Mozzi Arduino Library for Sound Synthesis: Insights from Tim Barrass
The New Portenta X8 (with Linux!) and Max Carrier Redefine What’s Possible
How Using Arduino Helps Students Build Future Skills
Must-Haves for Your Electronics Workspace
The Importance of Robotics in Education
Dependable IoT Based Upon LoRa
Art with Arduino: Inspiring Insights from Artists and Designers
Projects:
Arduino Portenta Machine Control and Arduino Portenta H7: A CAN-to-MQTT Gateway Demo Project
How I Automated My Home: Arduino CEO Fabio Violante Shares Solutions
Altair 8800 Simulator: Hardware Simulation of a Vintage Computer
MS-DOS on the Portenta H7: Run Old-School Software on Contemporary Hardware
Grow It Yourself: A Digitally Controlled, Single-Box Solution for Indoor Farming
Save the Planet With Home Automation? MQTT on the Arduino Nano RP2040 Connect
Senso: Detect Deforestation with Sound Analysis
8-Bit Gaming with Arduboy
Reducing Water Usage at Horseback Riding Tracks: An IoT Solution to Constantly Monitor Soil Humidity and Temperature Levels
The Panettone Project: A Sourdough Starter Management and Maintenance System
Space Invaders with Arduino
The 140-page magazine is available to download from Elektor — simply click here and add the code ARDUINOGIFT to get your copy at the special price of €1.
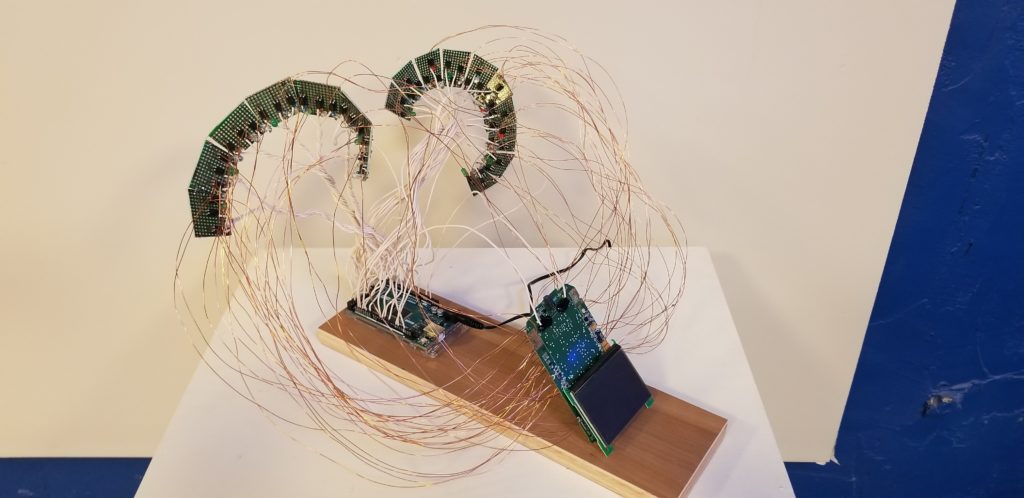
Moore’s Law and the rapid progression of technological development have one very serious downside: e-waste. Because so many electronic devices become obsolete within just a few years, the world ends up with literal mountains of discarded devices that no longer serve any practical purpose. Fortunately, humans value more than practicality. Eddie Farr proved that when he turned an old and broken TI-83 calculator into this interesting Tee Eye sculpture that tells a story.
If you were in school any time in the last 25 years, then you probably used a TI-83 calculator. For a while, it was the graphing calculator and updated versions are still sold today. A friend of Farr’s found this particular TI-83 while out on a run. It was covered in mud and completely non-functional. Most people would have ignored it or thrown it away, but Farr has vision and wanted to revive the calculator. After days of cleaning, he was able to make it turn on. But it still wasn’t completely functional, as only have the screen worked and several of the input keys were dead.
Farr’s solution was to repurpose the TI-83 as sculpture that displays poetry. He used an Arduino Mega 2560 and an absurd number of optocouplers to press the TI-83’s buttons. The Arduino sketch takes an input string (like a poem) and pushes the corresponding TI-83 button for each character in sequence. A slight delay between each button press makes the text input slow enough to read. In this way, viewers can watch as poems and stories appear on the TI-83’s screen.
The rest of Eddie’s work went into the chaotic —yet beautiful — sculpture. The TI-83’s PCB and the Arduino mount to a nice wood plank, with the wires and optocouplers suspended in the air between. It looks almost disorderly, but that fits well with the project.
The scourge of air pollution claims several million lives globally each year, with industrial processes and energy production accounting for much of it. Because of its harmful nature, governments often set up air quality monitoring stations, although they have to cover large areas and yield low resolution data. To monitor the air quality of a neighboring ecological reserve, Guillermo Perez Guillen created a small, portable toolkit that can record data from almost anywhere and send it to the cloud.
Guillen’s system relies on two Arduino MKR WAN 1300 boards, which communicate with each other over the LoRaWAN long-range network, along with a Nano 33 IoT for sending the received data to a web API endpoint over WiFi. The transmitting MKR WAN 1300 is connected to a suite of sensors that measure temperature, humidity, carbon dioxide, carbon monoxide, and volatile organic compounds (VOCs) in the air. Then, at preset intervals, each sensor is read and the resulting measurements are sent to an awaiting receiver MKR WAN 1300 board.
Once the data packets have arrived, they are decoded and displayed on an attached 20×4 character LCD, as well as being sent over UART to a Nano 33 IoT. From here, values are written to a Thingspeak channel so they can be tracked over time. More information about this project can be found on Instructables.
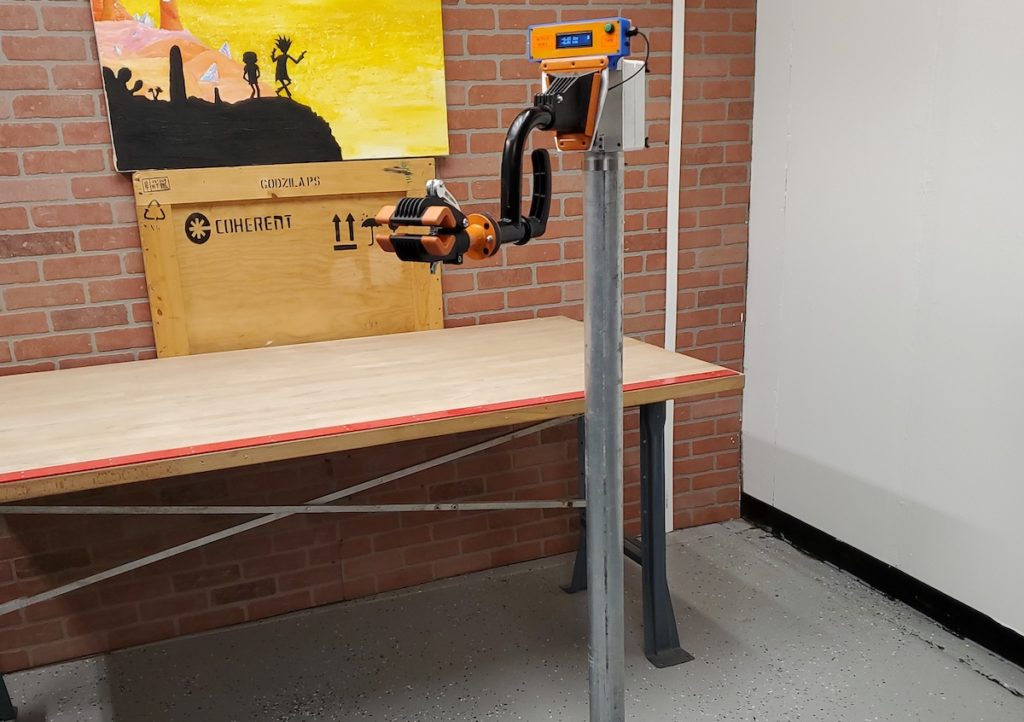
If you do a lot of work on bicycles then a decent repair is very valuable. They can clamp onto various parts of the frame, like the top tube or seat tube, and support the bike while you work on it. Truing a wheel, for example, is much easier with a bike stand. And if your bike’s weight is an important factor, then Dane Kouttron’s Bike Repair Stand with Built-in Scale should be right up your alley.
The project’s title explains everything: this is a bike stand with an integrated digital scale. With a quick glance at the readout, a builder can see how much the bike weighs at any point during assembly (and deduce the weight of individual parts). It is meant to work with a wall-mounted bike repair stand. Kouttron built a base for the stand and the scale sits between the two, but it would be possible to adapt the design to keep it wall-mounted.
An Arduino Nano measures the weight of everything from the repair stand and out with a DYMH-103 strain gauge through an SEN-13879 amplifier. It receives power from an 18650 lithium battery cell via a battery charger/booster module. It then displays the weight on a small 16×2 character LCD connected through I2C. Tare is simple, since the weight of the bike repair stand doesn’t change and the Arduino can subtract that from the total weight to calculate the weight of the bike. The user can also push the “tare” button if they want to subtract the weight of a bike frame or other components.
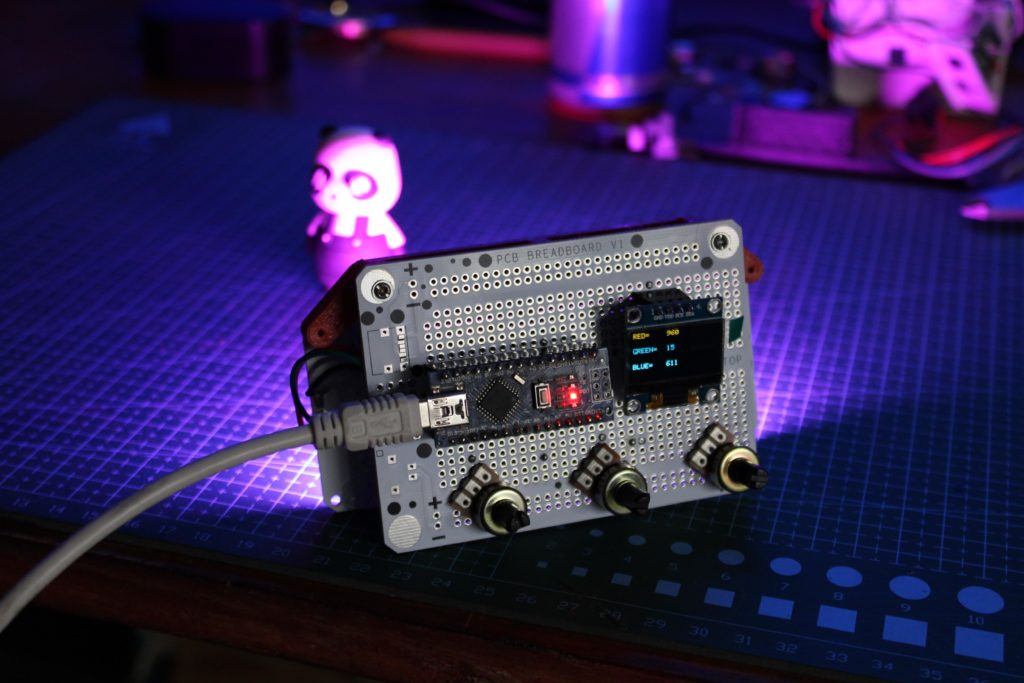
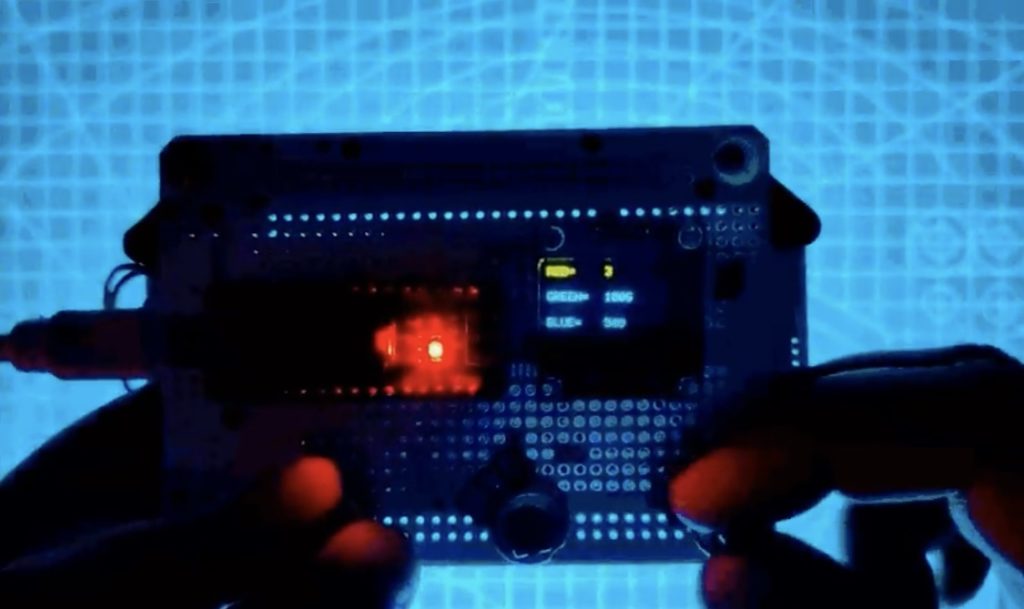
Lighting is the single most important factor when it comes to capturing good photos. For a conventional setup, you probably want diffuse, indirect light in a natural color. But you can get more creative with the use of colored light. RGB box lights let you set whatever hue you want, but they aren’t cheap. Arnov Sharma’s color mixer box is both affordable and versatile.
This is a relatively small light box and so it alone isn’t suitable for lighting an entire scene, unless you want a dark and moody feel. But it is perfect for adding colored highlights or illuminating small objects in close-up photos. Three knobs let you adjust the color channels, so you can dial in the exact hue you want. An OLED display shows each channel’s set brightness and that makes it easy to reproduce colors that you set in the past. Power can come from either a USB cable or a battery pack.
To build this color mixer box, you’ll first need Sharma’s DIY WS2812 individually addressable RGB LED matrix. That puts 128 LEDs on a single PCB in a 16×8 grid. An Arduino Nano board controls the LEDs according to the brightness values set by the three potentiometers. The settings readout is an SSD1306-based OLED screen. A PCB breadboard will make it easy to assemble the components and a simple 3D-printed frame piece holds everything together. The Arduino sketch utilizes Adafruit’s SSD1306 and NeoPixel libraries, and simply sets every LED to the same color chosen with the potentiometers.
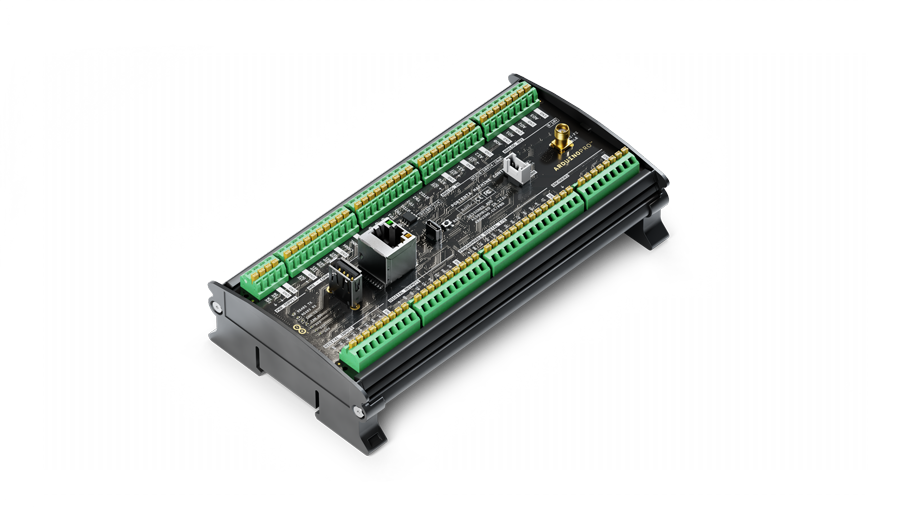
With the demand for PLC programming rising due to the spread of automation in a wide range of industrial fields, we felt we had to step up for our community of budding and experienced engineers!
That’s why we have just launched a dedicated ArduinoPLC IDE, which supports the five languages defined by the IEC 61131-3 standard: Ladder Diagram, Functional Block Diagram, Structured Text, Sequential Function Chart and Instruction List.
Download the PLC IDE and use it to combine PLC programming with Arduino sketchprogramming – even leveraging pre-installed libraries – to get your Portenta Machine Control up and running in no time, bringing deterministic cyclic tasks and multitasking to your software applications with integrated no-code Fieldbus configurators that allow you to manage CanOpen, Modbus RTU, and Modbus TCP communication. Spoiler alert: In the near future, the Arduino Opta will also be available!
With the Arduino PLC IDE, automation is easier to achieve even for mission-critical tasks, and promises the best improvements in efficiency and productivity thanks to advanced monitoring and debugging tools, as well as zero-downtime program changes thanks to its hot swap functionality.
Interested in making your life as a PLC engineer easier? Starting a career in PLC programming? Find all the details about the Arduino PLC IDE on our dedicated page.
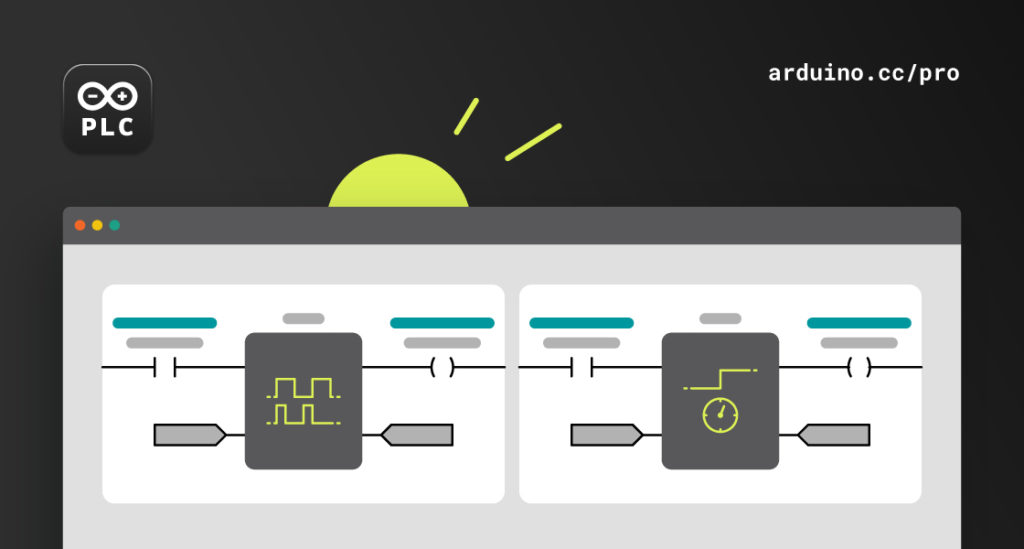
We’ve all been there: you’re about to start a new print job and the filament on the spool is looking pretty sparse. You start the print hoping that there is enough filament for the job, but it runs out 90% of the way through and your part is ruined. A filament runout sensor will help you address this problem when it occurs, but this DIY digital spool scale will prevent the problem altogether.
Every popular slicer on the market will provide a fairly accurate estimate of the amount of filament (in mass and length) that a job will require. To determine if you have enough filament, you just need to know the length of the filament left on the spool or its weight. Figuring out the length is almost impossible unless you track the feed over time, but it is easy to weigh the filament. As long as you can subtract the weight of the spool (set the tare), you can determine if you have enough filament. This device both weighs the current spool and subtracts the tare.
This device contains an Arduino Nano, a load cell, buttons, and an OLED screen on a custom PCB. It fits into a custom spool holder and weighs whatever spool is in place. The cool thing is that it stores profiles in EEPROM, so it can remember the weight of empty spools from different manufacturers. You can either weigh an empty spool to get the tare value (the most accurate) or weigh a new spool and subtract the specified weight of the filament (such as 1kg). The latter is less accurate, since manufacturers tend to add a little extra filament to be safe. But you’d be erring on the side of caution, so that method shouldn’t cause any print failures.
If you do a lot of 3D printing and end up with a pile of partial spools, this scale device would make a perfect weekend project to improve your life.
Having something broken into and/or destroyed is an act that most people hope to avoid altogether or at least catch the perpetrator in the act when it does occur. And as Nekhil R. notes in his project write-up, traditional deterrence/detection methods often fail, meaning that a newer type of solution was necessary.
Unlike other glass breaking sensors, Nekhil’s project relies on a single, inexpensive Arduino Nano 33 BLE Sense and its onboard digital microphone to record audio, classify it, and then alert a property owner over WiFi via an ESP8266-01 board. The dataset used to train the machine learning model came from two sources: the Microsoft Scalable Noisy Speech Dataset for background noise, and breaking glass recorded on the device itself. Both of these were added to an Edge Impulse project via the Studio and split into two-second samples before being processed by a Mel-filterbank Energy (MFE) algorithm.
The resulting model, trained using 200 training cycles and slight noise additions, resulted in an impressive 92% accuracy, with some glass breaking samples being misclassified as mere noise. This was then exported to the Nano 33 BLE Sense as a library for use in a sketch that continually classifies incoming sounds and sends an email with the help of IFTTT if breaking glass is detected.
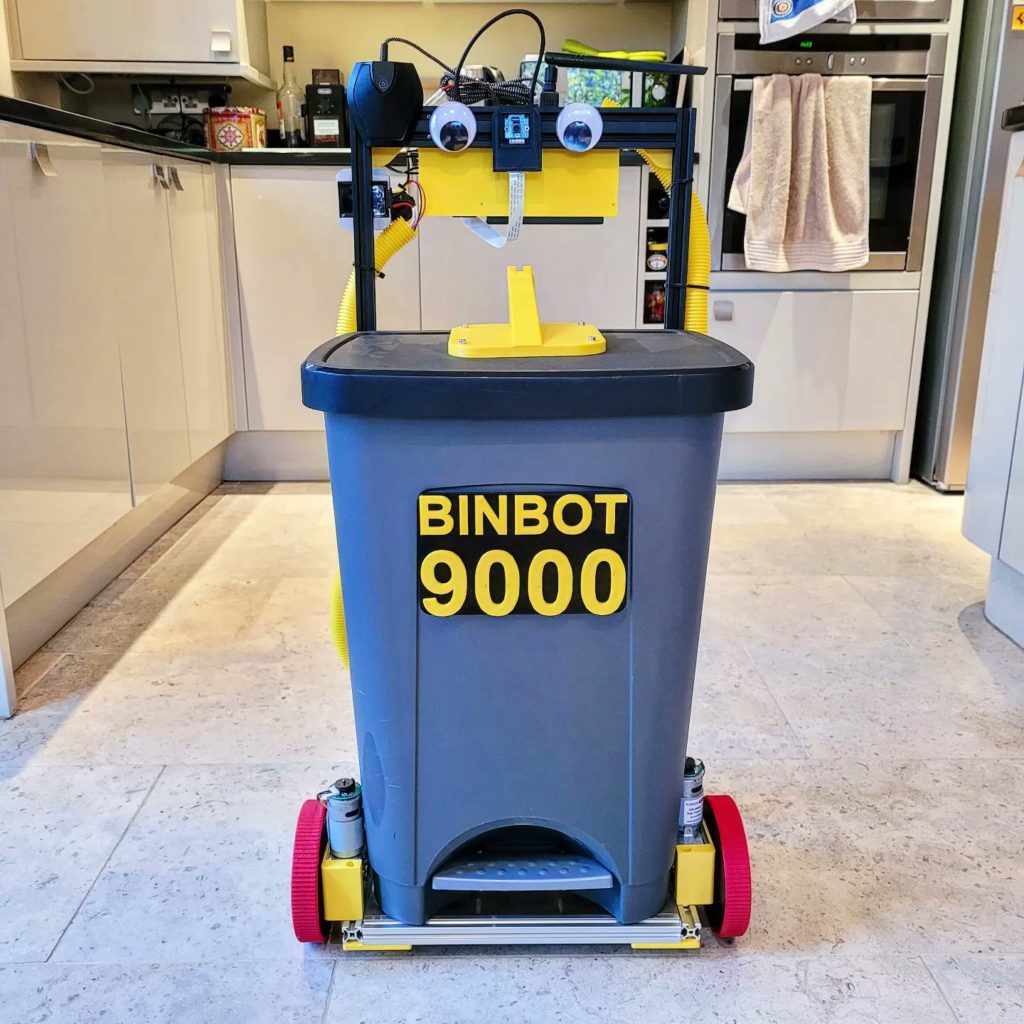
Our modern societies create a lot of garbage, which we can fortunately remove from our homes thanks to local waste management services. But the garbage people won’t come sift through your house for refuse, which forces you to utilize trash bins. Those bins never seem to be nearby when you need them, which is why James Bruton built the Binbot 9000.
The Binbot 9000 is exactly what it sounds like: a robotic trash can. No longer must the bin remain stationed in some out-of-the-way location. Instead, Binbot 9000 can drive around a home in search of people who need to throw things away.
Bruton started by placing a standard trash can on a robotic frame built using aluminum extrusion and 3D-printed parts. It has two drive wheels with encoders, which an Arduino Mega 2560 controls. To navigate through the home while avoiding collisions, Bruton added an NVIDIA Jetson Nano single-board computer and a Raspberry Pi Camera. The Jetson runs computer vision software and feeds commands to the Arduino via serial.
The computer vision software looks for simple targets printed on sheets of paper. The robot rotates until it sees and centers a target in the video frame. It will then drive forward until it reaches the target, rotates 90 degrees, and repeats the process. If it collides with something (ideally someone’s foot), the wheel encodes will detect the stall and the robot will open its lid with a servo. After someone deposits trash and closes the lid, the robot will go back into its target-seeking cycle.
By placing targets in strategic locations around his home, Bruton gave Binbot 9000 the ability to drive around his home in efficient paths. Whenever he needs to throw something away, he can nudge the robot to stop it and deposit his garbage. It also responds to voice commands, so Bruton can summon it or send it home as needed.
Heart disease is the most common cause of death — not just in industrialized countries, but for the world as a whole. Many deaths caused by heart failure could be prevented if the patient received medical care sooner, but people are often unaware of impending heart failure until it actually occurs. However, there are physiological indicators that become detectable in advance of heart failure. This wearable “health belt” contains sensors that monitor for those indicators to give warning of imminent heart failure so patients can seek lifesaving medical attention.
This health belt has a variety of sensors to monitor key physiological indicators, including thoracic impedance, heart rate, electrocardiogram activity, and motion activity. None of those alone would reliably correspond to upcoming heart failure without many false positives and negatives, but together they provide a clear picture. The sensor array, which is wearable and resembles a cumberbund, communicates via Bluetooth with the user’s phone. When the signs of heart failure appear, their phone can either notify them to seek medical attention or notify a third party, like a family member or doctor.
The team used an Arduino Uno board to construct their prototype health belt. It connects to several sensors: a peripheral module interface (PMOD) Impedance Analyzer (IA), an AD8232 ECG (electrocardiogram) sensor, a MAX30105 heart rate sensor, and an ADXL362 accelerometer. Power comes from a 9V battery and an HC06 module handles the Bluetooth communication.
More testing is needed to determine the health belt’s efficacy, as the research team wasn’t able to gather data from people actually experiencing heart failure. But early testing with a subject mimicking similar body movement and breathing was promising.
Image credit: Iqbal, S.M.A., Mahgoub, I., Du, E. et al. Development of a wearable belt with integrated sensors for measuring multiple physiological parameters related to heart failure. Sci Rep12, 20264 (2022). https://doi.org/10.1038/s41598-022-23680-1
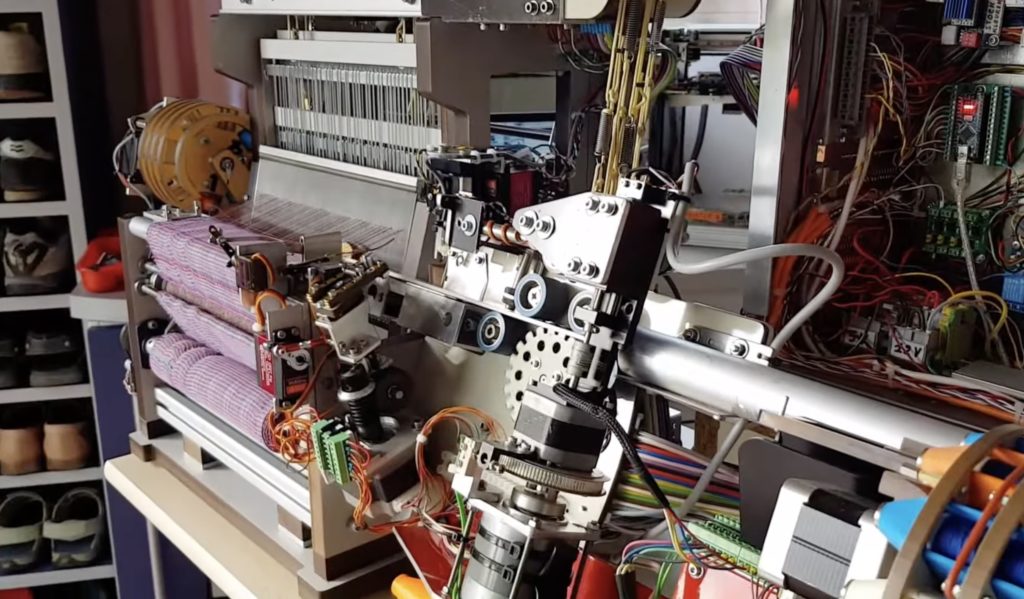
Automated weaving machines are one of the most important (and underappreciated) advancements to come from the industrial revolution. Prior to their invention, most people only owned a few garments that were woven and maintained by the family. With the introduction of machines able to churn out textiles, affordable clothing suddenly became available. As an expert in the industry, Roger de Meester was able to construct a fully automated weaving machine controlled by Arduino boards.
Unlike the early weaving machines of the industrial revolution that could only produce patterns inherent to their construction, de Meester’s desktop weaving machine utilizes sophisticated computer control to produce a huge range of patterns on demand. A new pattern can be completely different from the preceding pattern and the machine can even adjust the pattern on-the-fly during the weaving process, meaning it can create rich tapestries.
This machine is incredibly complex, as it doesn’t rely on any mechanical coupling. That means that every facet of the machine’s operation is adjustable via a stepper motor, DC motor, or servo motor. There are a lot of motors to drive, so de Meester needed multiple Arduino boards: an Arduino Mega 2560 and two Arduino Nanos. The mechanical components are 3D-printed (like the shuttles) or made from aluminum extrusion and wood (like the frame).
None of our descriptions can give this project justice, so be sure to watch the video to see de Meester’s machine in action.
While our philosophy is all about the democratization of technology, we are well aware that businesses and professional users have specific needs: that’s why our Pro business unit is entirely focused on catering to them, with dedicated solutions that meet the strictest requirements for performance and security.
And after growing our Arduino Pro hardware portfolio with over a dozen new components in the past few months, we are happy to announce a major software advancement in our ecosystem: the Arduino Cloud for Business offers unique benefits for companies and industrial clients wanting enhanced features in terms of device management, RBAC, fleet management, and safe remote access.
The Arduino Cloud for Business is based on a powerful and flexible data plane where you can gather real-time and historical data in one place, sending information securely over-the-air. Display everything you need on dashboards built simply by choosing from dozens of configurable widgets: easily connect your devices – as many as you want! – to the Cloud and build your own control center.
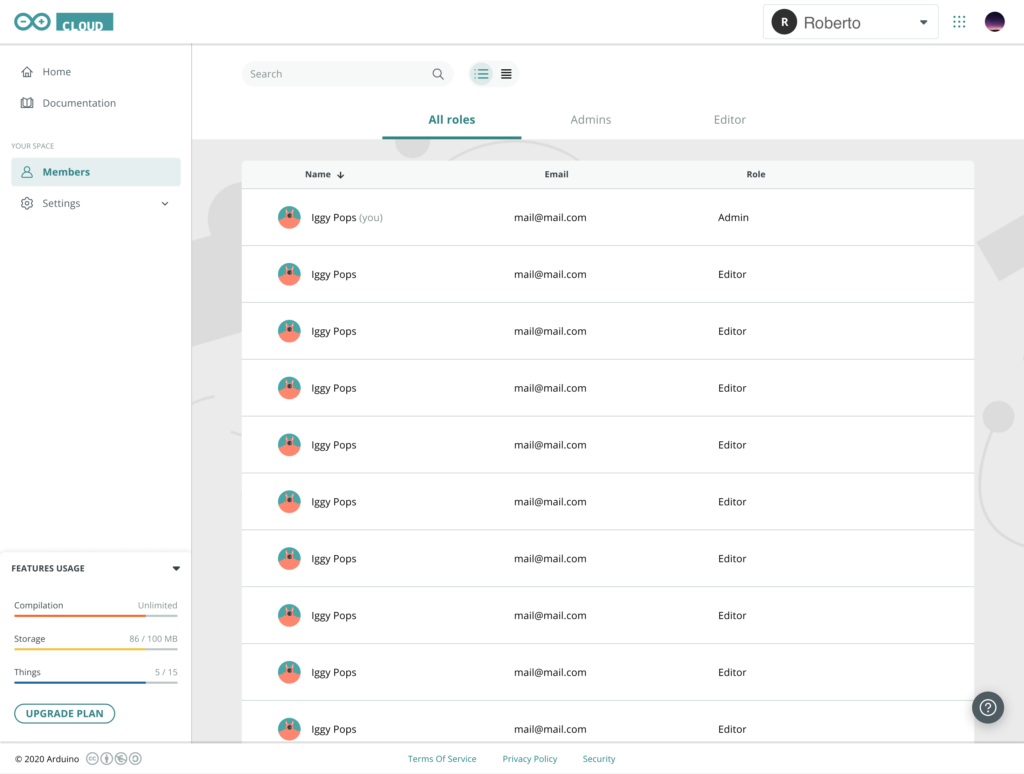
Join an Organization Space. Define and manage multiple Organization spaces in Arduino Cloud for Business. Set up role-based access control (RBAC) by assigning profiles and sharing with any number of users, and access all cloud projects and sketches – always in sync thanks to the Web Editor – at any time and from any device, thanks to wide cross compatibility (Windows, Mac, Linux or Chromebook) and the free IoT Remote app.
The Arduino Cloud for Business allows for device management with instant or programmed OTA updates, secure provisioning to connect boards leveraging their secure element, and easy verification of their status (connected, not connected) and maintenance.
And there’s more: its specific fleet management features enable you to filter your devices by status, create groups and tags to more efficiently manage campaigns, search between boards, and list and order them.
Multiple of 50 devices can be connected under the Enterprise Base Plan – and you can always contact our team for a tailored plan to accelerate your IoT solutions.
Sketching and coding run through the integrated Arduino Web Editor, allowing you to program your boards from any browser, update devices over-the-air, move all sketches and libraries to the Cloud, use the latest IDE features without having to install any software locally, share projects across your team, and customize your libraries online.
With Arduino Cloud for Business, you can create an unlimited number of dashboards. Push button, Switch, Scheduler, Map, Chart… These are just a few of the many widgets you can customize to visualize all your data or to remotely control your devices. Click here to learn more.
Allow your team to view/edit your dashboards or share them with your customers in just a couple of clicks. Everyone you want can have the permission to access them, not only in the browser, but also on-the-go using the free IoT Remote app (available from Google Play and the App Store).
Whether your data is needed every day or every minute, Arduino Cloud infrastructure is optimized to receive, elaborate, and return tons of data each second across the globe.
And, with one year data retention by default, Arduino Cloud for Business provides companies a place to store and mine data for additional insights and analysis, like condition monitoring or predictive maintenance. If you need to store the data somewhere else, export your entire set of data locally for further evaluation or manipulation.
Use Arduino IoT Cloud back-end to control Things and devices via Arduino rest APIs in Javascript, Python, or Go. With Arduino rest APIs, you will be able to manage up to 50 requests per second, guaranteeing stable data sharing. Leveraging the APIs, you can interact with any element of the Cloud: data, devices, dashboards, and web properties. Add the power to script, to create complex scenarios, or to send and receive data from your custom service or mobile application.
Generate your secure API key in just one click and start interacting with third-party apps and services without friction. Do you want to learn more? Check our API documentation.
The Arduino Cloud for Business is compatible with the widest range of Arduino PRO devices in the Portenta and Nicla families, as well as with MKR and Nano components.
To address additional needs, Arduino Cloud for Business can be customized with optional add-ons:
Portenta X8 Manager: Securely maintain Portenta X8 Linux distribution with this dedicated add-on. Deploy and update all your applications packaged into containers and perform secure over the air differential updates to target Portenta X8 devices/fleets. Check Portenta X8 documentation to find out more.
LoRaWAN Device Manager: Easily connect your LoRa devices to Arduino Cloud for Business with this integrated add-on. Build your own enterprise grade LoRaWAN network server without location constraints and directly visualize and manage data exchanged through LoRa protocol into your Cloud projects. Get started now.
Machine Learning Tools Enterprise: Build and train professional grade predictive models with just few lines of code through this dedicated add-on. Deploy premade models out of the box to quickly develop your machine learning projects, starting from object detection, machine vision to audio segmentation. Click here to learn more.
So, why choose Arduino Cloud for Business for your next IIoT challenge?
Here are a few reasons:
Remotely access all your data and dashboards from any device.
Securely update your applications over-the-air.
Use multiple connectivity options (e.g. WiFi, LoRa, Ethernet, cellular etc.).
Your data is always fully encrypted.
Securely provision your devices leveraging their secure elements.
Share and grant access to your projects to colleagues and customers in one click.
Export your Cloud data locally when needed.
Optional add-on covering all your needs.
Develop your projects including all your MKR, Nano, and Portenta devices.
Last but not least, the Arduino Cloud for Business offers the frictionless experience and extensive documentation and tutorials Arduino is known for: check out available plans and start building your Cloud workspace today!
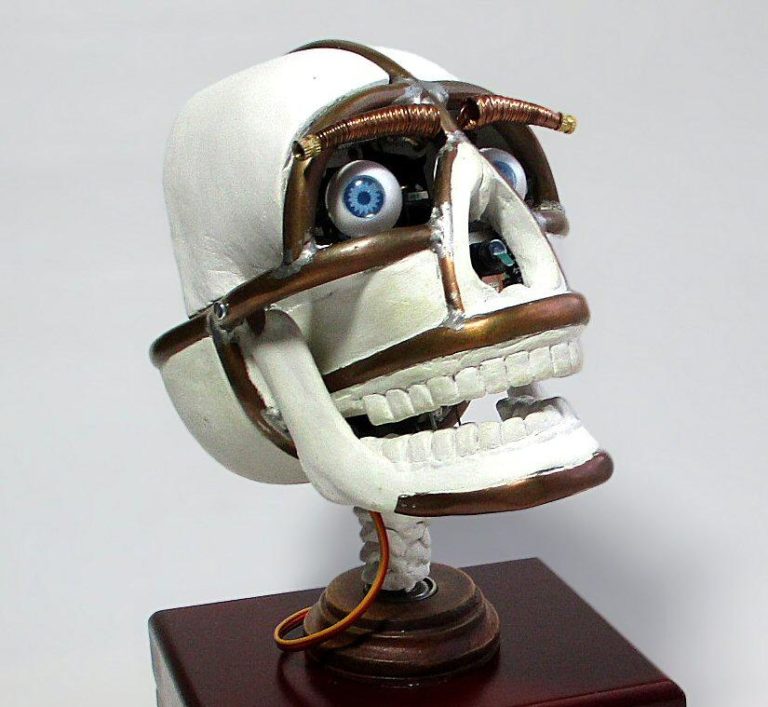
Peter Balch visited a robot exhibit at his local museum and noticed that one of the most popular pieces was a robot head that would track and mimic visitors’ faces. That was so interesting that Balch decided to replicate the project in order to learn how it was done. To do that, he first needed a robot head to work with. This Instructables tutorial explains how he built a skull-like android head that will eventually mimic human expressions.
Balch hasn’t yet tackled the facial detection and expression recognition portions of the project, which will require significant processing power. But he has built the android head that will receive the expression commands. It resembles a human skull with a copper tube framework that acts as both a support structure and a design accent. The head also has copper wire eyebrows (with heat-set insert ends) and plastic eyeballs from a cheap toy.
The robot can tilt its head up and down, rotate left and right, point its eyes in any direction, open and close its jaw, and pivot its eyebrows. That doesn’t cover the full range of human facial expression, but it does provide enough actuation for the robot to emote in a recognizable way. An Arduino Nano board drives the servos that handle the actuation. At this time, the Arduino controls the servos according to explicit commands. But once Balch finishes the facial recognition software, the device it runs on will send control commands to the Arduino to replicate the functionality that Balch saw in the museum.
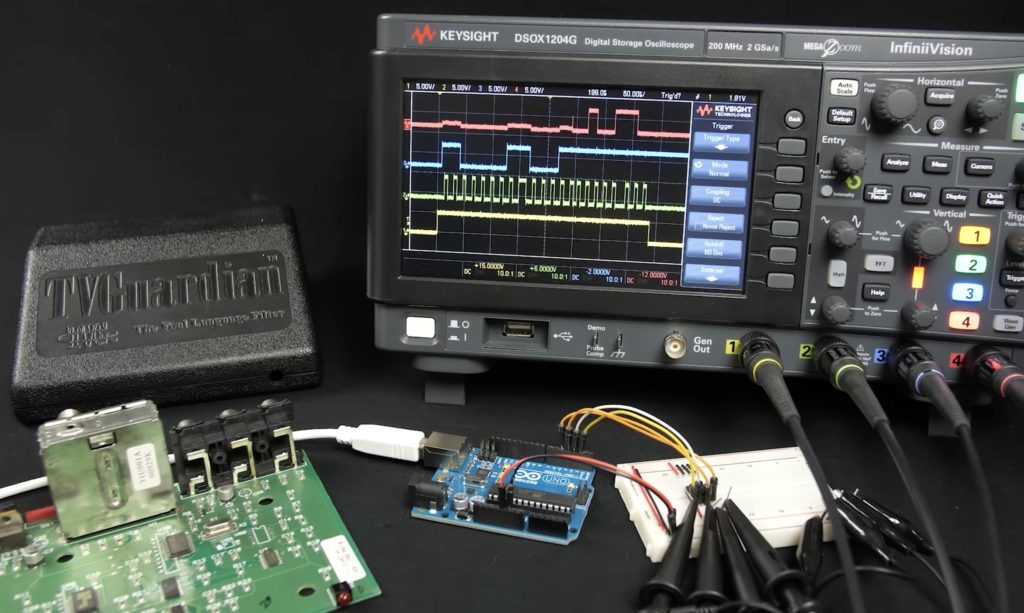
Back in the 1980s, there existed a piece of hardware called the “TVGuardian,” which would attempt to censor incoming video in real-time. As recently covered by the wonderful YouTube channel Technology Connections, the TVGuardian reads captioning data as it’s sent and then replaces the bad word(s) with an alternative phrase and also mutes the audio.
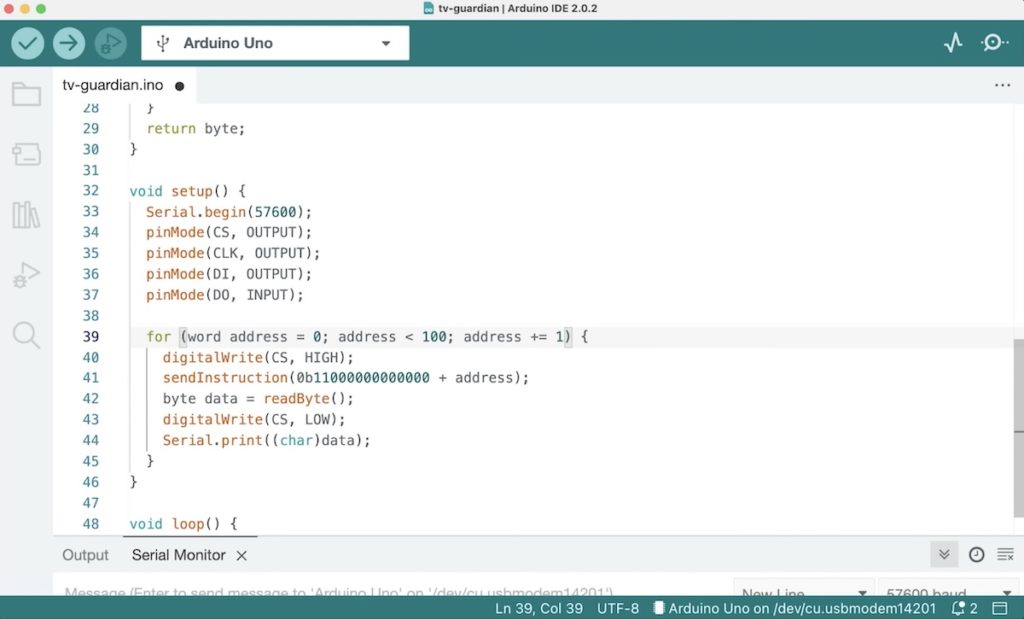
Upon learning that the internal dictionary of offensive words is not listed anywhere in the manual, Ben Eater had the idea to extract it himself. After a quick teardown, he discovered a single 93LC86 EEPROM chip functioning in 8-bit mode for a total of 2,048 8-bit words. He then connected an Arduino Uno to the EEPROM’s SPI bus and read 16-byte chunks before dumping the contents to the serial monitor for further investigation.
One of the most interesting findings that Eater discovered was how the words were encoded in blocks of 256 bytes separated by a long string of null characters. Every bad word is an array of bytes for the ASCII characters themselves along with a terminating character and an extra byte at the end, whereas the replacement words are listed as simple character arrays indexed elsewhere. The final byte of each censored word contains flag bits that denote if the word is whitelisted, allowed in non-strict mode, and which G-rated word should replace it. To see this analysis in more detail, check out Eater’s video below!
Going for a hike outdoors is a great way to relieve stress, do some exercise, and get closer to nature, but tracking them can be a challenge. Our recent collaboration with K-Way led Zalmotek to develop a small wearable device that can be paired to a jacket to track walking speed, steps taken, and even the current atmospheric conditions.
At its core, the tracker can be split into having three main functions: weather prediction, step/climbing activity, and a way to gather and send raw data over Bluetooth® Low Energy to the Arduino IoT Cloud for additional processing and training machine learning models. Performing these tasks is a Nicla Sense ME board, which contains an advanced six-axis BHI260AP IMU, a three-axis magnetometer, a pressure sensor, and a BME688 four-in-one gas sensor with temperature and humidity capabilities.
Zalmotek first collected data samples using the Edge Impulse Studio from the barometer ranging from rising to falling air pressure, as they predict clear or stormy conditions, respectively. Once finished, a classification model was trained and deployed to the Nicla Sense, where the LEDs could indicate which weather pattern is more likely. The activity tracking model, however, was trained using data collected from the IMU and labeled with either walking, climbing, or staying. After integrating them both into a single sketch, Zalmotek created an Arduino IoT Cloud dashboard for displaying these values in real-time.
As part of his ongoing PorscheKart project, YouTuber Wesley Kagan wanted a better way to steer his V12 custom-built race car, as the previous wheel was simply a mechanical linkage to the front steering. Instead, this new version would closely mimic the layout and functionality of an actual Formula 1 wheel, complete with all of the buttons, dials, switches, and the central screen.
The base of the wheel was formed from a laser-cut sheet of aluminum while the surrounding grips were painstakingly 3D-printed out of TPU filament. For the electronics, Kagan decided to use a pair of Arduino Micros, which were split between handling button inputs and driving the display, while an Arduino Mega 2560 gathers sensor data and sends it as a string to the two boards. Because of the limited number of pins, he wired each of the three rotary switches’ output pins to a differently valued resistor, thereby letting the analog input on the Micro know which position is selected by the incoming voltage.
The final steps of building this upgraded steering included connecting the 3.5” LCD screen to one of the Arduino Micro boards and wiring everything together with the help of a couple harnesses to minimize the mess. However, creating the graphics program proved to be a challenge due to the limited space in ROM for storing all of the draw function calls, which is why Kagan plans on eventually swapping it out for a static image that has the values filled-in. To see more about the project, you can watch his build log video below and read this blog post.
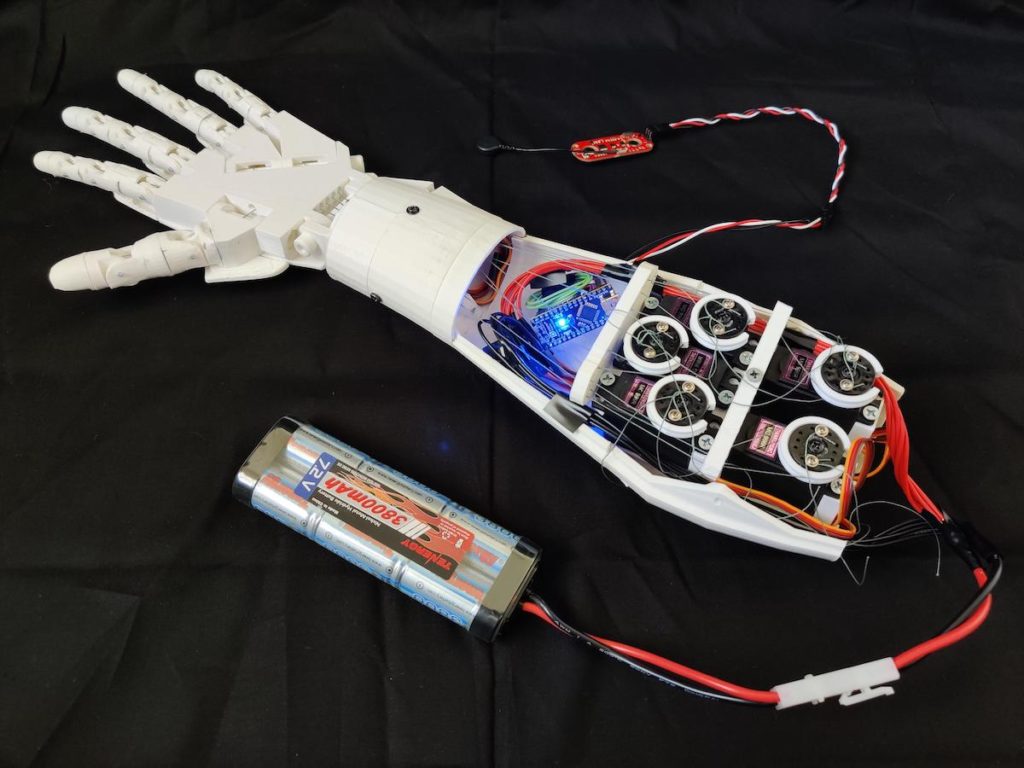
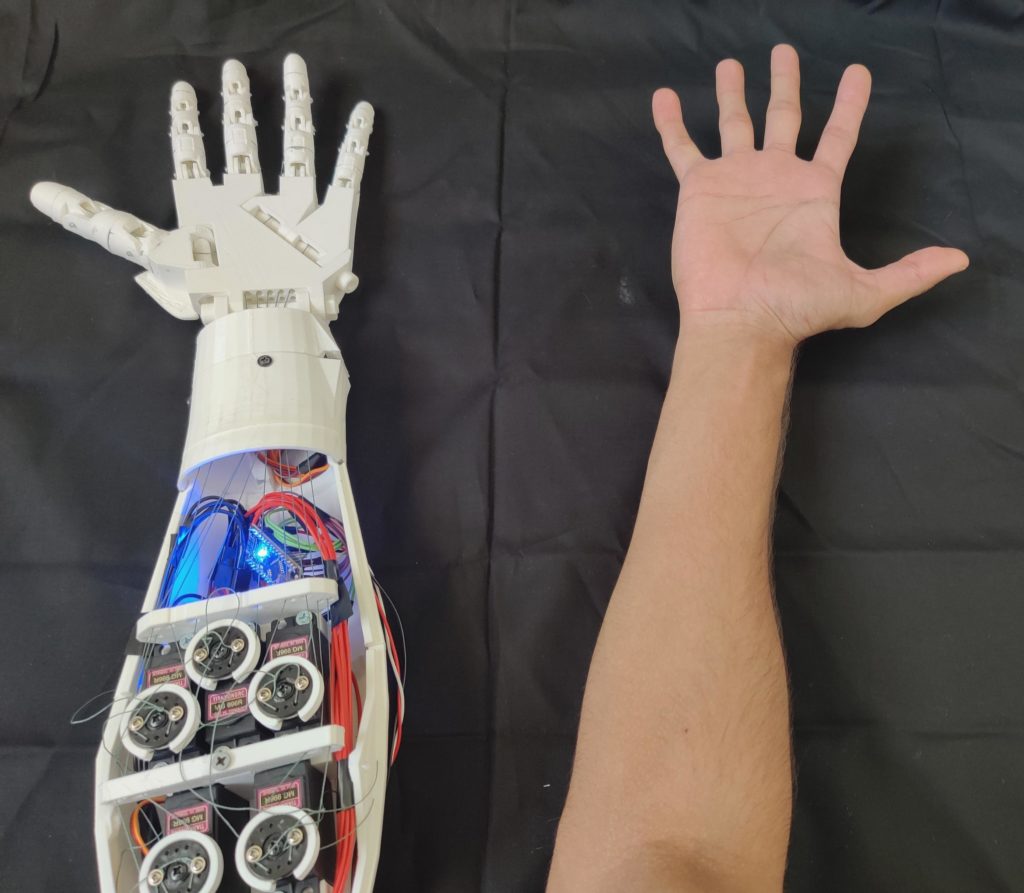
The cost of a new prosthetic arm can range from several thousand dollars to tens of thousands, putting them out of reach for many people. Ahmad Ikram recognized this need and decided to design and build a far cheaper, open source version that has myoelectric capabilities.
To begin this project, Ikram decided upon using the InMoov 3D-printed arm design from French sculptor Gael Langevin due to it being easy to construct. The hand itself contains a single wire connected to each finger, while the other end gets wrapped around a servo motor horn so that the finger can bend whenever the serv moves. A Myoware muscle sensor is responsible for reading the electrical signals generated by muscle contractions and converting them into a readable analog voltage, which is read by an Arduino Nano’s analog pin.
The program Ikram created for the Arduino simply takes continuous readings from the myoelectric sensor and checks if it above a certain threshold. Once it is, the servos are set to a position for contracting the finger, otherwise it releases tension from the wire and makes the fingers return to their original position.
To see more about this project, you can read Ikram’s post here on Instructables and watch its demo video below.
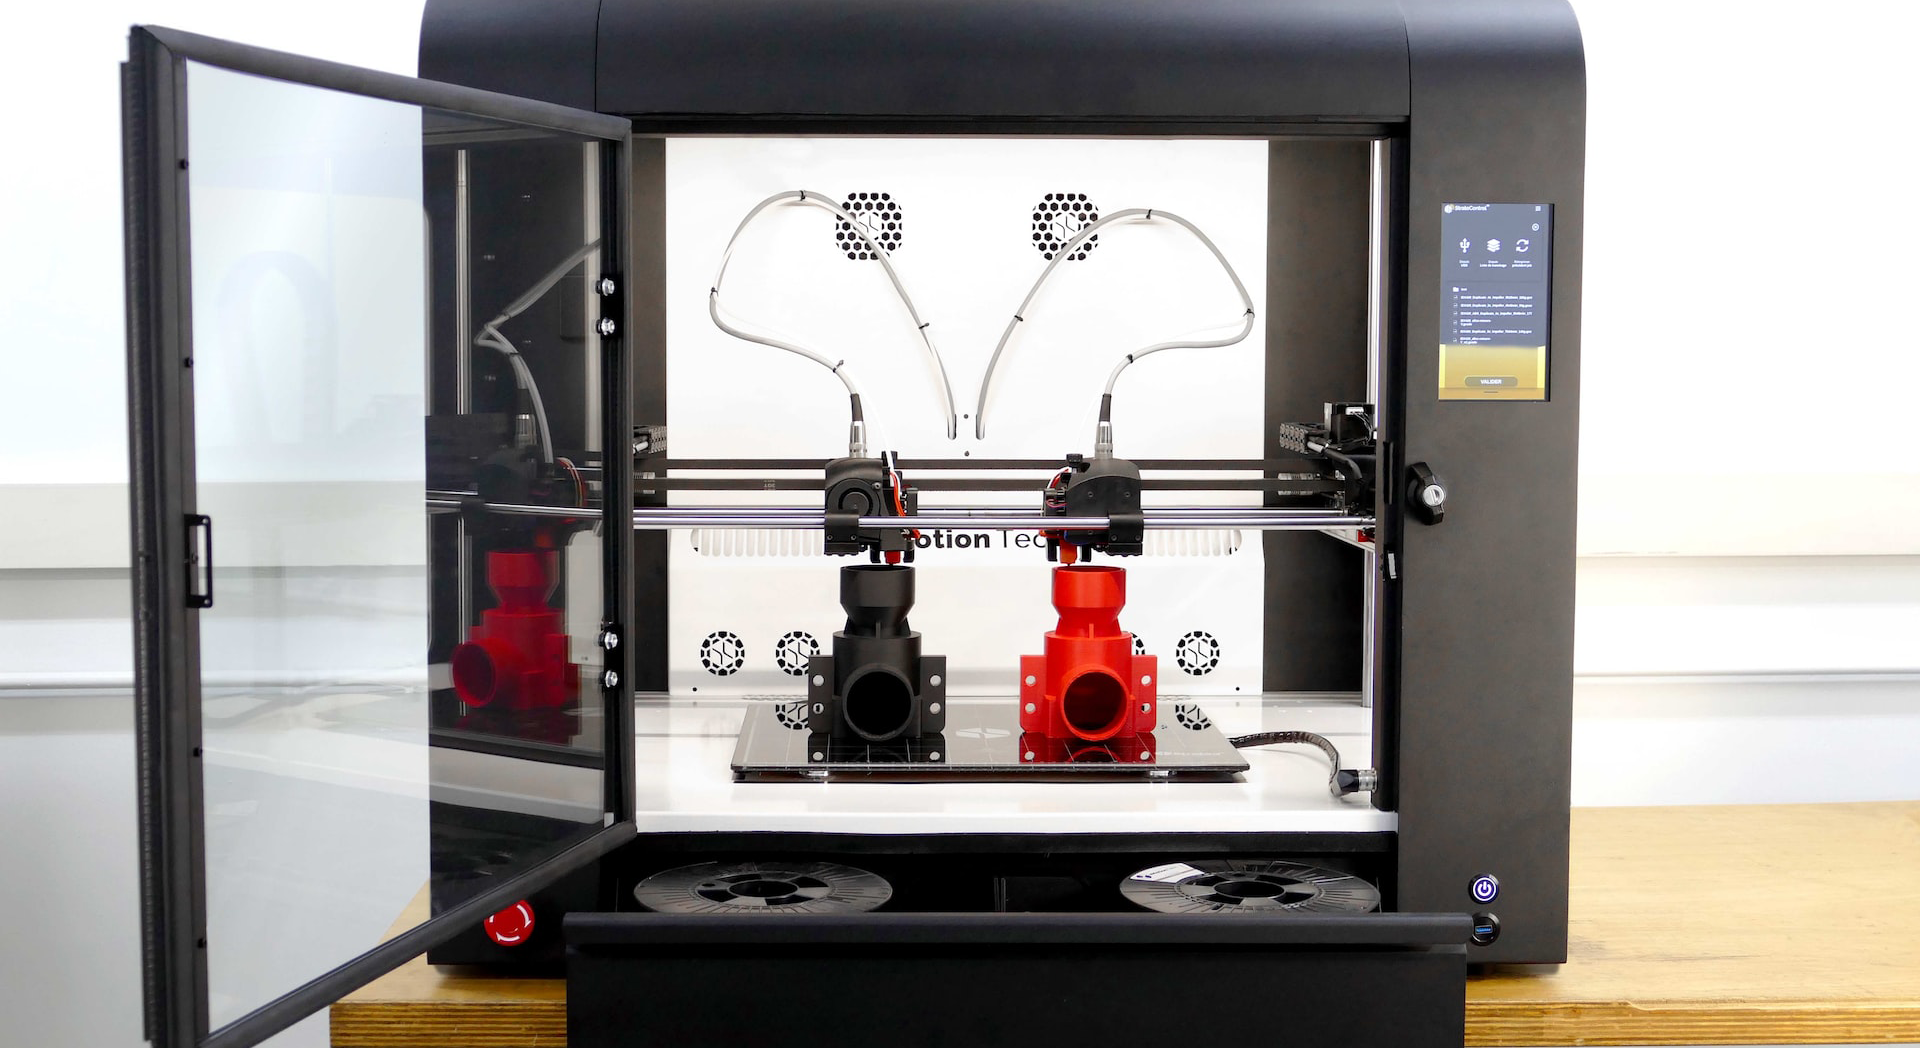
3D printing, the stuff of science fiction only a few short years ago, is becoming more widely available all the time. Buying your own 3D printer to keep in your home is now fairly accessible, with entry-level printers available for just a few hundred dollars.
But why would you buy one? It’s easy to think 3D printers are still a niche toy, exciting for a few enthusiasts but largely useless for the general population. But this couldn’t be more wrong — 3D printers have a wide range of very practical uses for everyday households.
In this article, we’ll take a look at why 3D printing is so useful and some of the many reasons to consider adding a 3D printer to your own smart home.
Why 3D printing is so useful
It’s fast and convenient. With a 3D printer, you can produce simple objects, creations, and components for existing items in a fairly short amount of time — much quicker than ordering the same things online or heading to a local store.
You get a ton of control over what you print. Need a very specific shaped object to repair a broken item in your home? It may be impossible to buy what you need anywhere, but a 3D printer allows you to create exactly the right size and shape you need.
It’s relatively affordable. As mentioned, basic 3D printers can be had for fairly cheap nowadays, and printing — for smaller objects, at least — costs very little.
It’s sustainable. It’s much more sustainable to print your own things than order them across large distances, and this is especially true for niche items that might need to be shipped across the globe to reach you.
Using 3D printing in your smart home
So what can you use a 3D printer for? There are many potential uses for a 3D printer in your smart home, and they range from practical tasks like repairing broken furniture to more creative hobbies. Let’s take a look at some of the main reasons to own a 3D printer.
Create useful items for your home
3D printers are perfect for creating small, useful items to use around the home. Some examples are coasters, decorations, lampshades, stationery, and small kitchen tools. This is a great way to combine practical use with a fun creative hobby, putting your own personal spin on the little items you use every day.
Repair items
You know that table you have that just never sits right? The door handle that doesn’t quite match the others in the house? The light switch that doesn’t fit exactly flush with the wall?
3D printing is the perfect solution to many of these small defects and faults. Because you have so much control over what you print — 3D printers can print according to virtually any instructions — it’s easy to create components to fix and spruce up the objects and appliances around your smart home.
Education
3D printers aren’t a regular fixture in classrooms around the world just yet, but it’s only a matter of time. These machines allow students to take a more hands-on and creative approach to their learning. Some examples could be:
Science projects like creating models of the solar system of the structure of an atom
Geography work like printing detailed models of mountains or volcanoes
All kinds of product design work
Creative work like art
Arts and creative projects
Creative projects aren’t just for the classroom — many people own 3D printers purely for their own artistic work. There’s almost no limit to what a 3D printer can do in this area, and with a little experience, it’s possible to create truly beautiful and incredibly detailed works of art at home.
Build your own smart home with Arduino
3D printing is just one aspect of a smart home. There’s an almost endless list of things you can do with the right home automation tools — from growing a smart garden to keeping your pets entertained and fed.
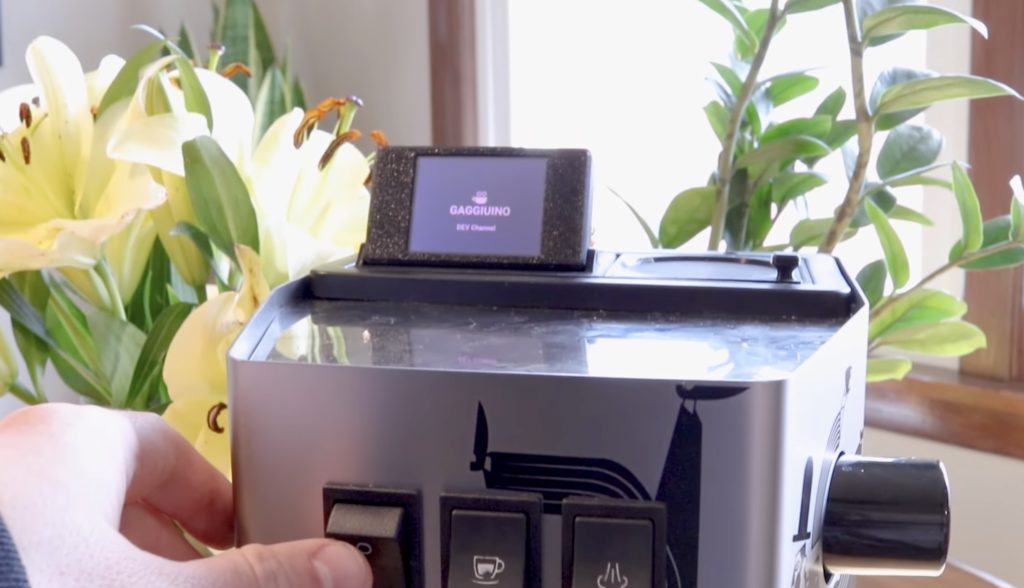
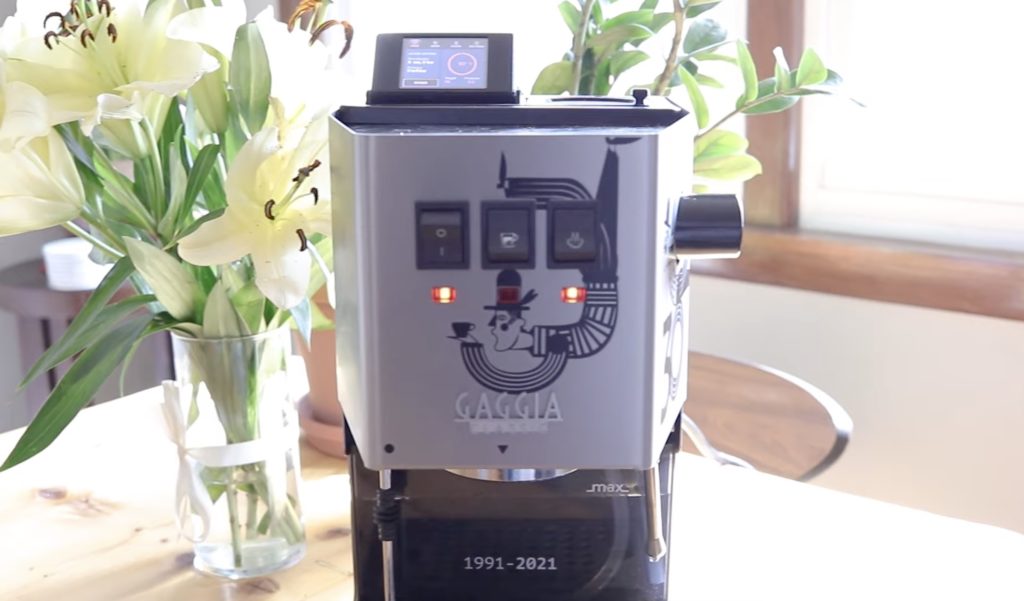
There are few beverages on this planet that enthusiasts take more seriously than espresso. Aficionados care about and tune everything from steam pressure to bean roasting temperature. But espresso machines that provide both accurate and precise adjustments are very expensive — easily several thousand dollars. Fortunately, you can tackle the Gaggiuino project to upgrade an affordable Gaggia espresso machine to something comparable to a high-end machine.
Gaggia espresso machines cost less than $500 and they’re quite good for that price point, but they aren’t a match for something like a $6,000 La Marzocco Linea Mini. However, the building blocks are there; Gaggia espresso machines have high-quality parts, they simply lack precision electronic control. Gaggiuino addresses that shortcoming with a handful of affordable components. For around $100 worth of hardware, you can dramatically upgrade your Gaggia Classic or Gaggia Classic Pro to create an exceptional machine.
The hardware required for the Gaggiuino upgrade includes an Arduino Nano board, a 2.4” Nextion touchscreen LCD, a thermocouple, a solid-state relay (SSR), a pressure sensor, and a dimmer module. A few 3D-printed enclosures and mounts help to secure those components. After performing this upgrade, you’ll get a ton of great features. Those include: steam control, sensor graphs, manual flow control, a descale cycle, an auto shot timer, user profiles, and a nice UI to access and configure everything. Thanks to the new hardware, those functions all operate with great accuracy and precision, so you can dial in your perfect brew and get the same results every morning.
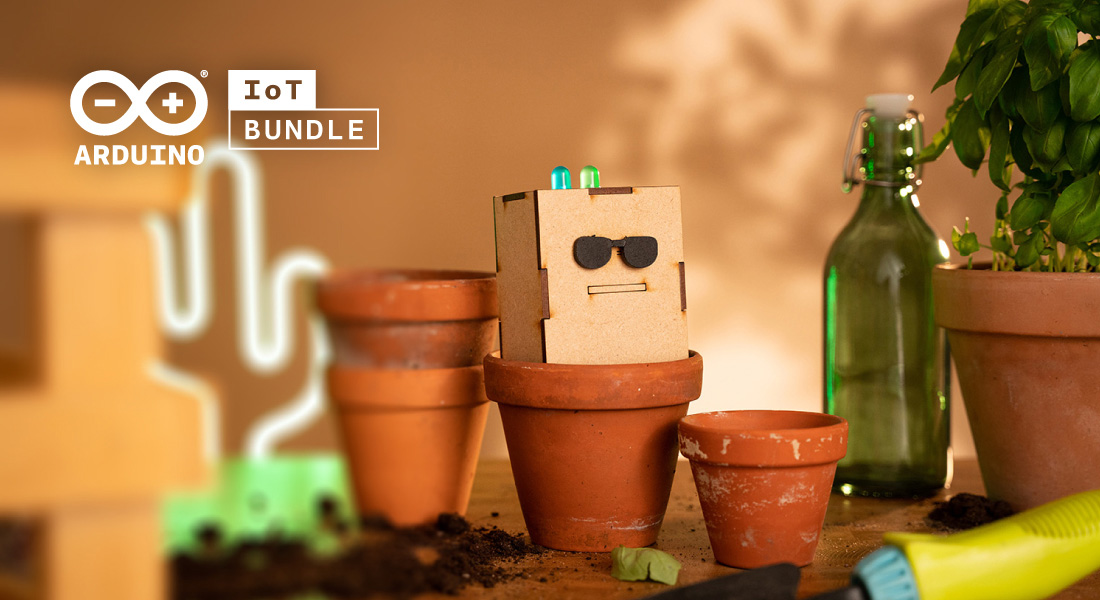
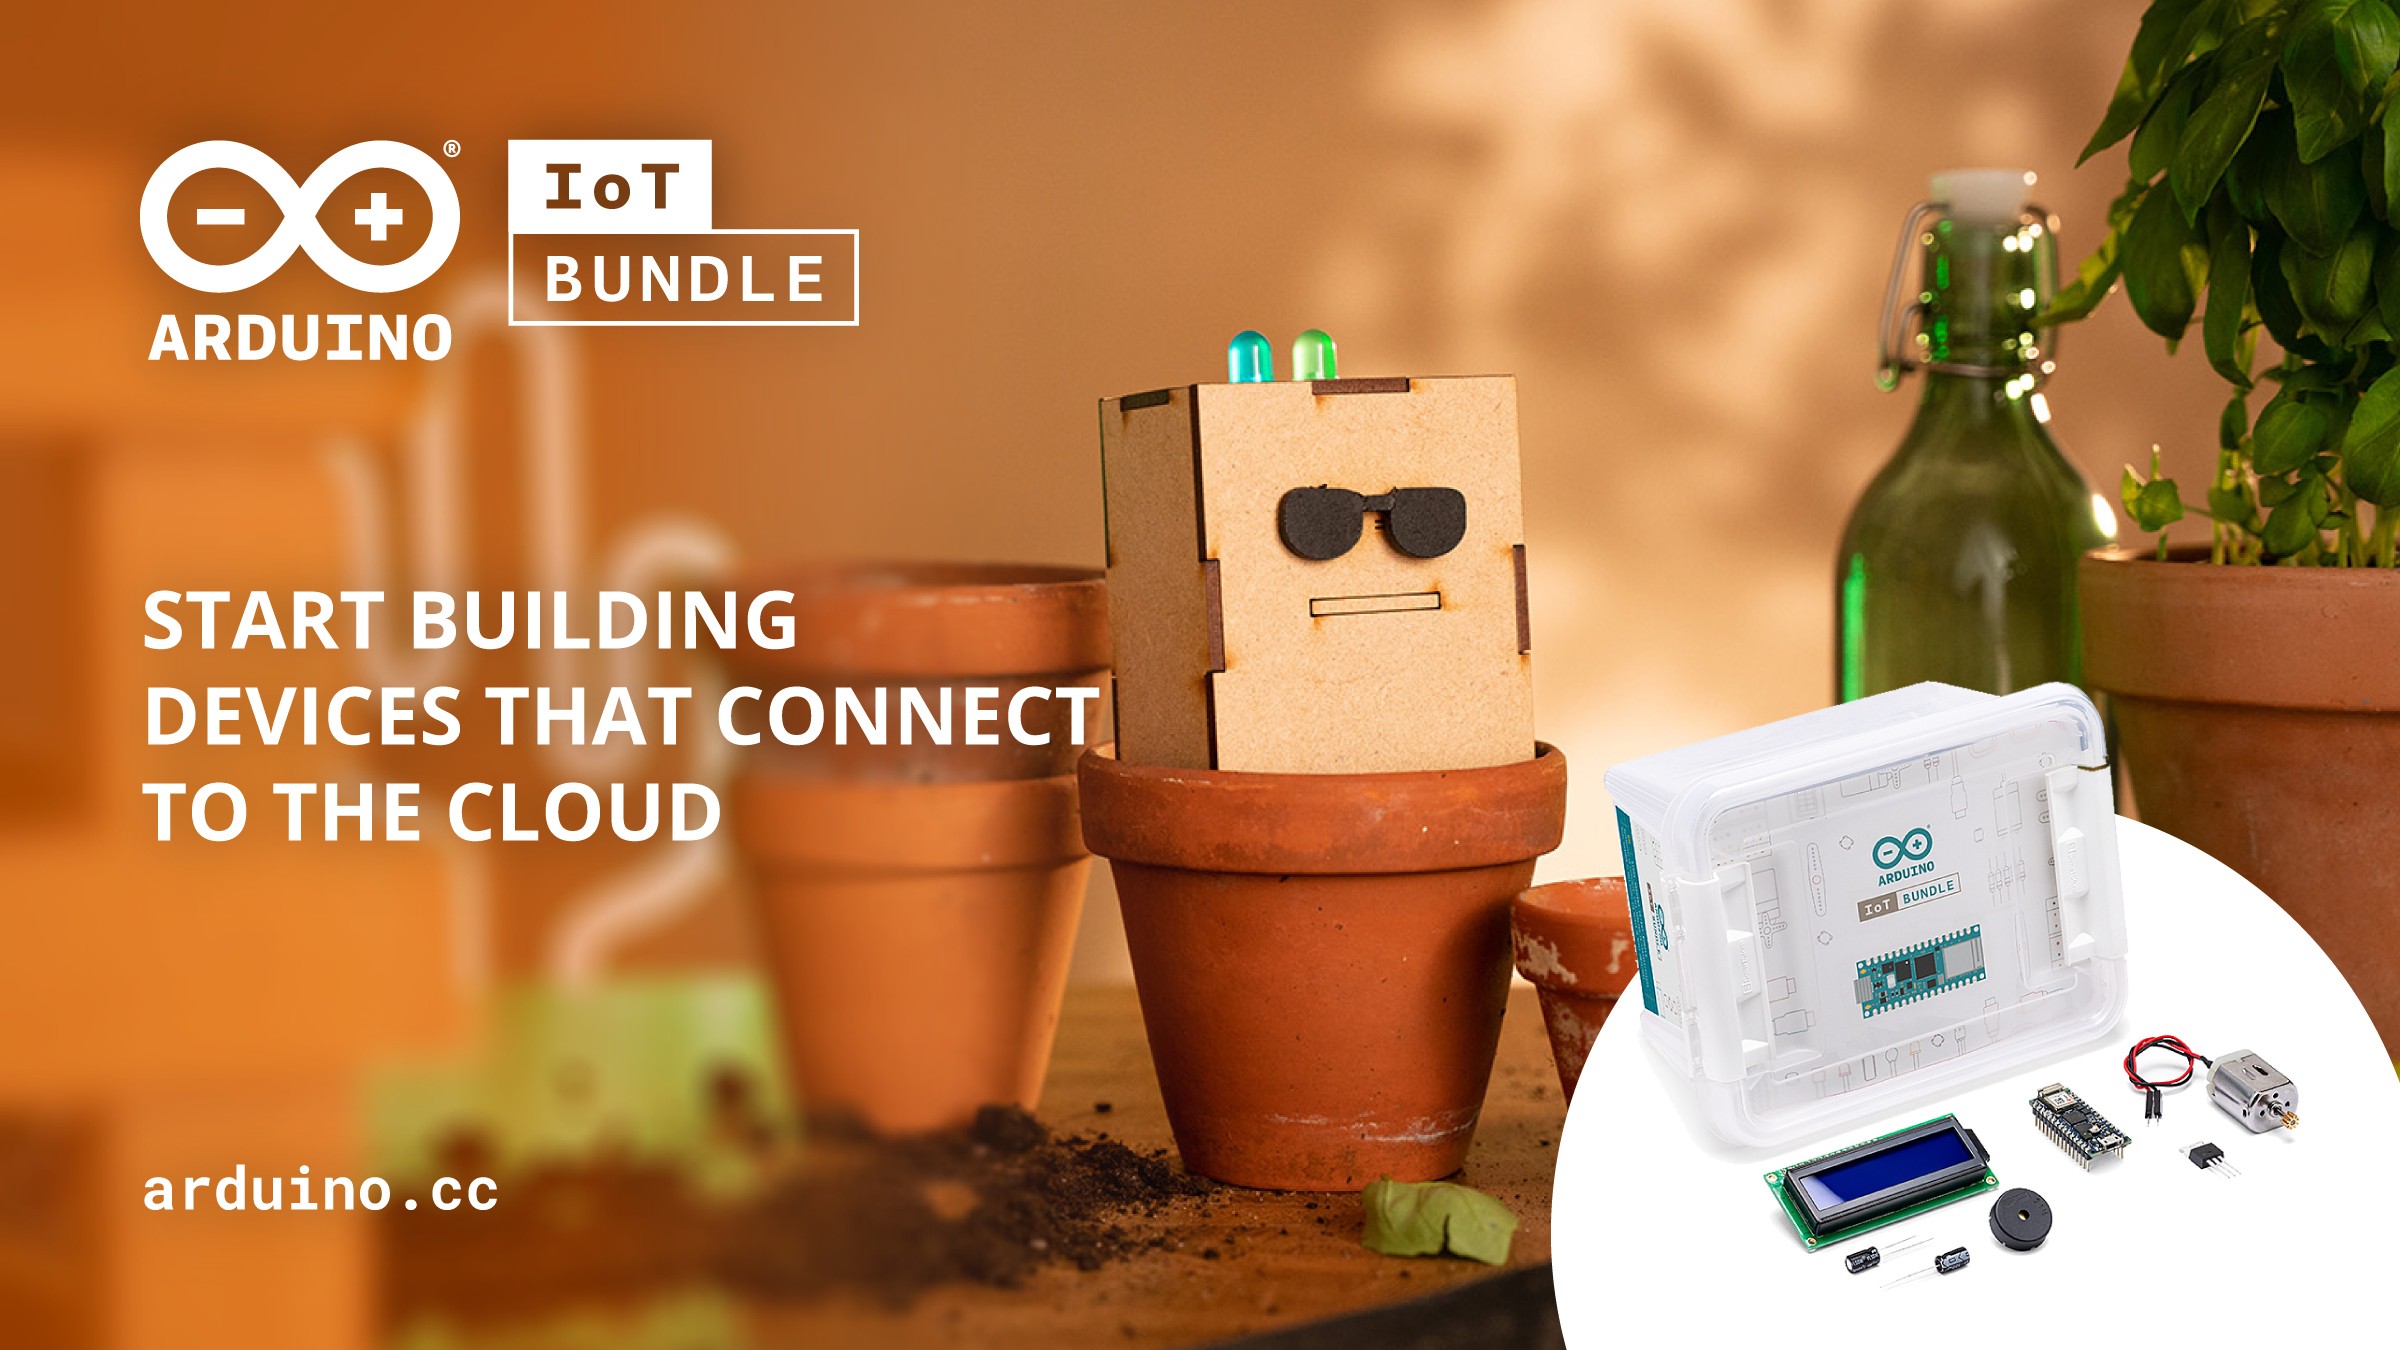
We’re excited to announce the launch of the new Arduino IoT Bundle. This is built to help you dive into the complex and fascinating world of the Internet of Things with even more confidence and possibility — giving you the hardware, software, and components you need to create your own connected IoT projects.
So how does it all work? Let’s find out more.
What is the Arduino IoT Bundle?
Getting started with the IoT can be a daunting process. It requires a certain set of tools and a level of knowledge to take those first steps, but building your own connected IoT devices can be an incredibly rewarding process once you figure out the basics.
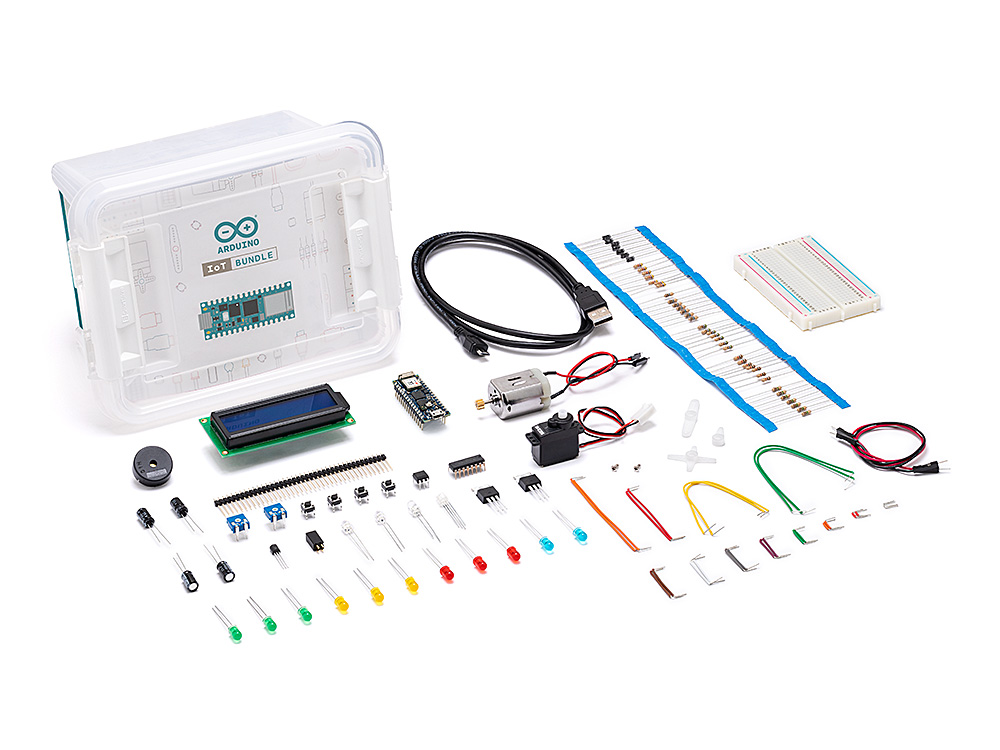
The Arduino IoT Bundle is designed to bring together all the tools and knowledge you’ll need to get started with your first connected IoT devices. It’s built around the Arduino Nano RP2040 Connect, and the bundle also contains electronic components and a series of step-by-step tutorials to help you get started quickly and confidently.
How it works — some examples
The IoT is an incredibly rich area when it comes to building your own connected projects. There are a ton of exciting opportunities here that don’t require an enormous amount of knowledge or resources to get started with.
Training a cat is a tricky business, as any feline owner will know all too well. However, you can now use technology to make this task easier, using an IoT-enabled device you build at home to keep your cats in line.
This project — using only components found in the Arduino IoT Bundle and some cardboard — allows you to build a device that plays a certain melody whenever it dispenses food for your cat. At other times, it will play a different tune and your furry friend gets nothing.
Just like Pavlov and his famous dogs, you’ll be able to train your cat to associate certain sounds with a reward — teaching your cat when it’s time for dinner.
Remember the days of the Tamagotchi? Caring for a digital pet was something millions of people devoted large chunks of their day to (or not, in the case of the many deceased Tamagotchis).
Now, with Arduino’s IoT Bundle, you can make your own digital pet. The Nerd lives on your desktop and survives by eating food and absorbing sunlight. Your task is easy: just make sure it’s adequately fed and has enough light to bask in. The Nerd will even help you by sending you an SOS in Morse code through a built-in speaker when it’s getting hungry.
You can feed The Nerd by pressing a button which is connected to the Arduino Cloud. Just don’t forget to keep on top of things — these creatures don’t die quietly.
This puzzle box is designed to keep your belongings safe(ish) in a cardboard container which is controlled by a fun combination lock. All you need is a few pieces of cardboard and the components from the Arduino IoT Bundle.
The box is kept closed with a servo motor, and will only open up if you turn all the potentiometers to get the right combination for access. You can set the combination in the Arduino IoT Cloud dashboard. To make things more fun, an LED on the box gives you feedback in the form of different coloured lights, letting you know how close you are to guessing the correct combination and gaining access to the box.
The puzzle box works best as a fun game to entertain others, rather than an actual security feature — but it’s still well worth giving a try.
Tap into the IoT with Arduino
Arduino’s IoT Bundle is the perfect introduction to tinkering around with your very own IoT devices at home. It gives you everything you need to get started with some simple projects, and requires very few pre-existing components and not much prior experience at all.
Um dir ein optimales Erlebnis zu bieten, verwenden wir Technologien wie Cookies, um Geräteinformationen zu speichern und/oder darauf zuzugreifen. Wenn du diesen Technologien zustimmst, können wir Daten wie das Surfverhalten oder eindeutige IDs auf dieser Website verarbeiten. Wenn du deine Einwillligung nicht erteilst oder zurückziehst, können bestimmte Merkmale und Funktionen beeinträchtigt werden.
Funktional
Immer aktiv
Die technische Speicherung oder der Zugang ist unbedingt erforderlich für den rechtmäßigen Zweck, die Nutzung eines bestimmten Dienstes zu ermöglichen, der vom Teilnehmer oder Nutzer ausdrücklich gewünscht wird, oder für den alleinigen Zweck, die Übertragung einer Nachricht über ein elektronisches Kommunikationsnetz durchzuführen.
Vorlieben
Die technische Speicherung oder der Zugriff ist für den rechtmäßigen Zweck der Speicherung von Präferenzen erforderlich, die nicht vom Abonnenten oder Benutzer angefordert wurden.
Statistiken
Die technische Speicherung oder der Zugriff, der ausschließlich zu statistischen Zwecken erfolgt.Die technische Speicherung oder der Zugriff, der ausschließlich zu anonymen statistischen Zwecken verwendet wird. Ohne eine Vorladung, die freiwillige Zustimmung deines Internetdienstanbieters oder zusätzliche Aufzeichnungen von Dritten können die zu diesem Zweck gespeicherten oder abgerufenen Informationen allein in der Regel nicht dazu verwendet werden, dich zu identifizieren.
Marketing
Die technische Speicherung oder der Zugriff ist erforderlich, um Nutzerprofile zu erstellen, um Werbung zu versenden oder um den Nutzer auf einer Website oder über mehrere Websites hinweg zu ähnlichen Marketingzwecken zu verfolgen.