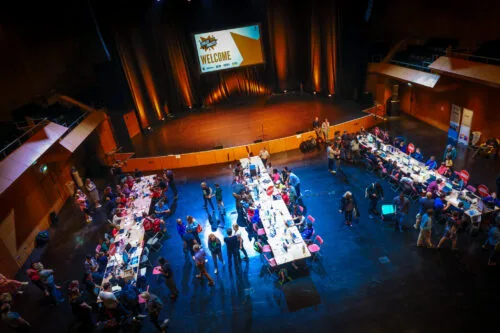
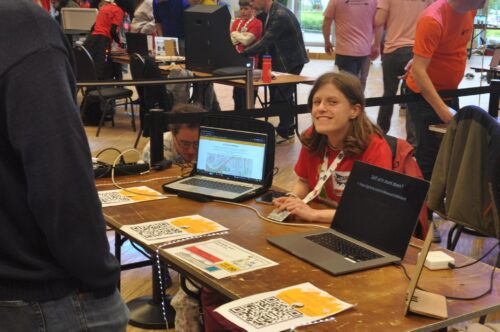
In the 2023 Coolest Projects online showcase, 5801 young people from all over the world shared the wonderful, fun, and creative things they had made with technology. But that’s not all we’ve seen of Coolest Projects this year. As well as our worldwide annual online showcase, a number of in-person Coolest Projects events are taking place in countries across the globe in 2023.
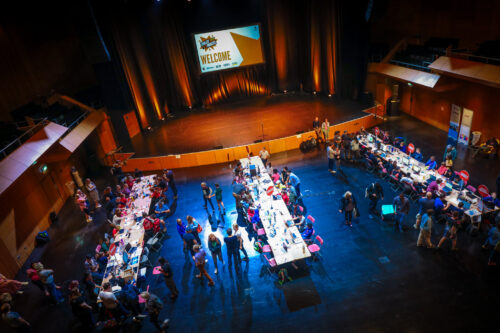
The exhibition hall at Coolest Projects Ireland 2023.
Run by us or partner organisations, these exciting events create a space for young people to meet other young tech creators, connect to their community, and celebrate each others’ creations. In-person Coolest Projects events around the world had to pause over the coronavirus pandemic, and we’re delighted to see them return to engage and inspire young people once again.
Coolest Projects Ireland in Dublin
On 1 July, we were super excited to host Coolest Projects Ireland, our first in-person Coolest Projects event since 2020. 63 young tech creators from Northern Ireland and the Republic of Ireland came together in Dublin for an exciting one-day event where they shared 43 incredible creations, with engineer and STEM communicator Dr Niamh Shaw leading everyone through the day’s celebrations.
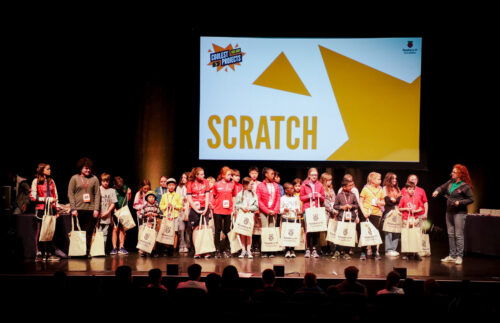
The creators with projects in the Scratch category on stage with Dr Niamh Shaw.
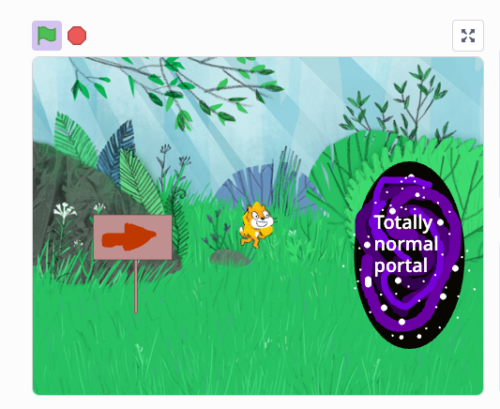
One young maker showcasing her project was Charlotte from Kinsale CoderDojo in the Republic of Ireland. Her creative storytelling project ‘Goldicat and the Three Angry Property Owners’ was chosen as a judges’ favourite in the Scratch category.
Charlotte’s story includes different games and three secret endings for the user to discover. She told us: “I know someone who made an animation based off the fairy tale Hansel and Gretel in Scratch. This inspired me to make a game based off a different fairy tale, Goldilocks and the Three Bears.”
Charlotte’s project ‘Goldicat and the Three Angry Property Owners’.
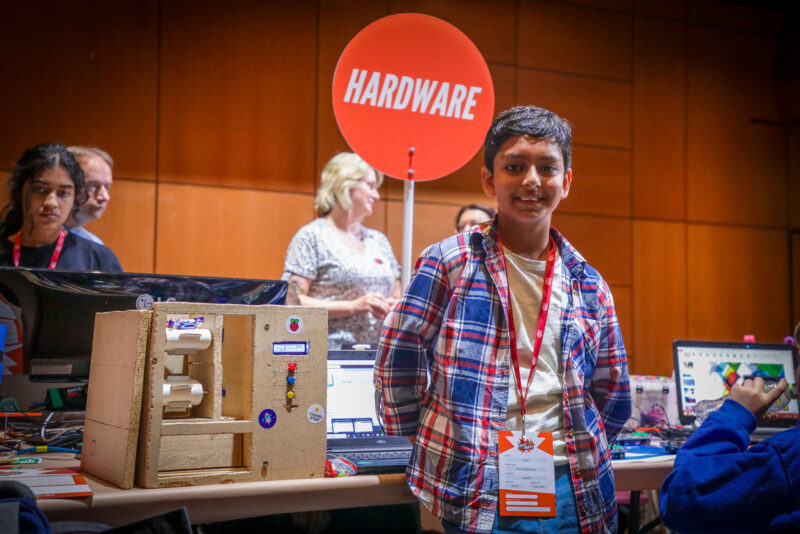
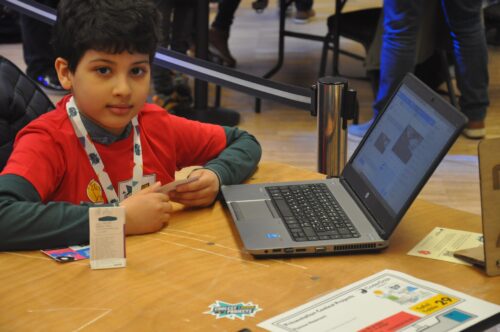
Harshit entered the Hardware category with his amazing mini vending machine. Describing his project, he explained, “This is a recreation of a vending machine, but I have added my own twists to it to make it simple to build. You still get the full experience of an actual vending machine, but what makes it special is that it is made fully out of recycled materials.”
Harshit with his mini vending machine project.
Young people at Coolest Projects Ireland were joined and supported by family, friends, and mentors from Code Clubs and CoderDojos. Mentors told us their favourite things about attending a Coolest Projects event in person were “the joy and excitement the participants got from taking part and discussing their project with the judges”, and “the way it was very inclusive to all children and all [were] included on stage for some swag!”
Coolest Projects events by partners around the world
In 2023 we’re partnering with six organisations that are bringing Coolest Projects events for their communities. We’re still looking forward to the exciting Coolest Projects events planned in Sri Lanka, Malaysia, Iraq, and South Africa during the rest of the year.
Back in June, more than 30 young creators participated in Coolest Projects Hungary, which was organised in Budapest by the team at EPAM. And April saw our partner CoderDojo Belgium organise Coolest Projects Belgium for 40 young people, who shared 25 projects across different categories from Scratch to Hardware and Advanced Programming.
A young tech creator at Coolest Projects Belgium.A young tech creator at Coolest Projects Belgium.
The CoderDojo Belgium team shared how important the Coolest Projects event is to their community:
“Just like every year, we’ve unlocked the doors to welcome the next generation of tech enthusiasts. And this year, once again, we were absolutely amazed by the projects they brought to the spotlight. From an app predicting stock market evolution, to creatively designed games with unexpected twists, not to mention the incredible robots, and more, their ingenuity knows no bounds.”
CoderDojo Belgium
How you can get involved in Coolest Projects
We’re excited that the Coolest Projects online showcase — open to any young creator anywhere in the world — will return in 2024. And if there isn’t a Coolest Projects in-person event in your country yet, don’t worry. We’re working with more and more partners every year to bring Coolest Projects events to more young people.
And you can celebrate young tech creators with us year round wherever you are by following Coolest Projects on X, Instagram, LinkedIn, or Facebook, where we share inspiring projects from the Coolest Projects online gallery and photos from the in-person events.
We’d like to thank Meta, GoTo, and Pimoroni for supporting the Coolest Projects Ireland event. If you’re interested in partnering with us for Coolest Projects, please reach out to us via email.
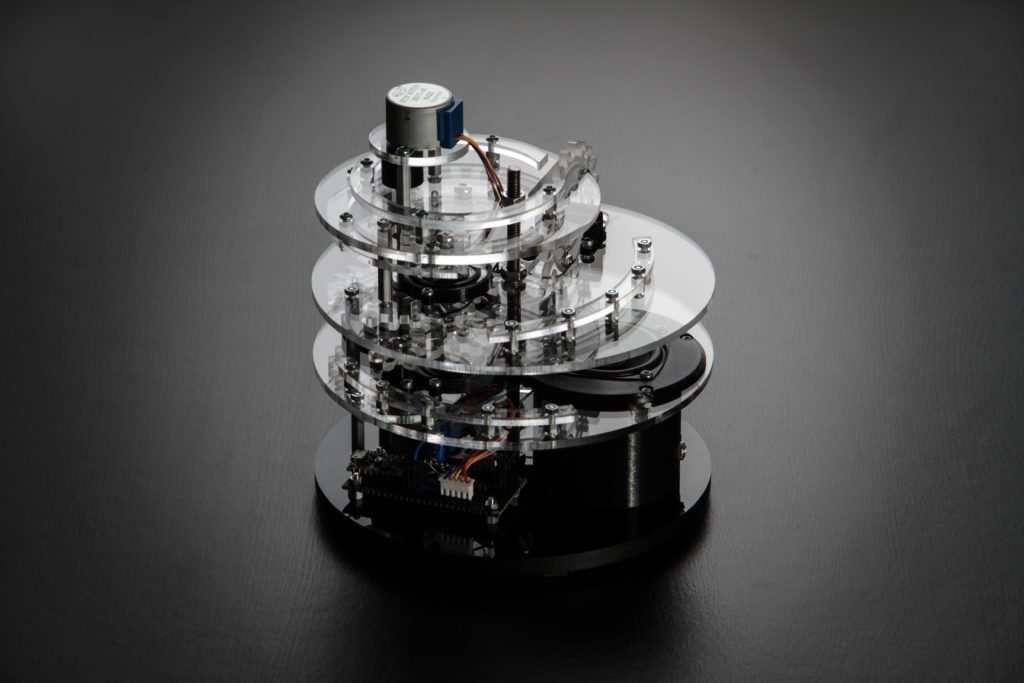
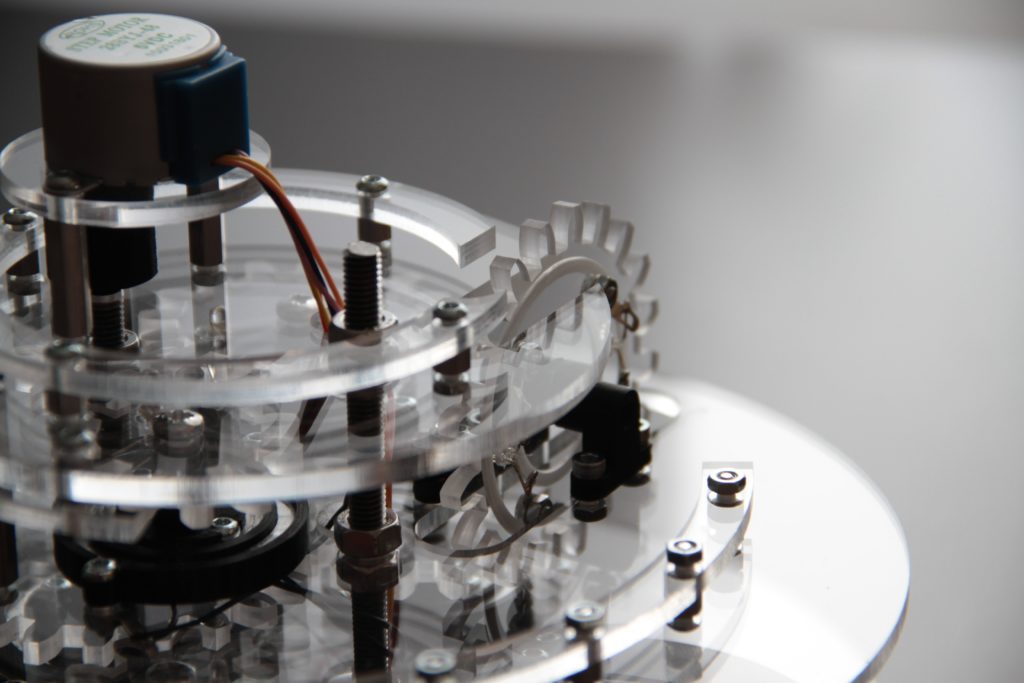
The great thing about art is that it doesn’t have to serve a purpose. When utility is irrelevant, the artist is free to express their creativity in whatever way they like. A painting doesn’t have to inspire introspection or revolution — it can just be something pretty to look at. In the same vein, Eirik Brandal’s Intermittent Luminal Phase kinetic sculpture is both gorgeous and useless.
Brandal started this project as an excuse to experiment with his new CNC router. Cutting gears seemed like a good way to do so, but he didn’t have a need for any mechanism that utilized them. That led him to the concept of a kinetic sculpture and Intermittent Luminal Phase is the result. It spins endlessly, making noise and blinking lights. But it is almost hypnotizing to see in action.
An Arduino Nano Every board controls two motors that spin a central input shaft, which turns all of the other gears. The gears aren’t perfect and produce a fair amount of vibration, but Brandal converted that bug into a feature. He added a piezo element that picks up the vibrations. Those are then amplified and pumped out through a speaker on the sculpture. The gears also have LEDs that make contact through DIY slip rings, so they light up at certain points in the rotation.
We’re also expanding your parked entertainment options beyond video. Already available in some cars as a standalone app, Vivaldi, a Chromium-based internet browser, is rolling out starting today on Google Play in the car. With Vivaldi’s powerful functionality, you’re able to browse the web safely while parked so you can make the most of your time.
More peace of mind while on your drive
In addition to being productive and entertained, we’re also investing in more ways to help you stay up to speed while on the open road. For example, if an unexpected rainstorm interrupts your trip, you will soon be able to download The Weather Channel app from Google Play on cars with Google built-in. The Weather Channel, the world’s most accurate weather forecaster, allows drivers to always stay up-to-date on changing weather conditions with hourly forecasts, follow-me alerting and “Trip View” radar, helping keep drivers aware of the conditions ahead.
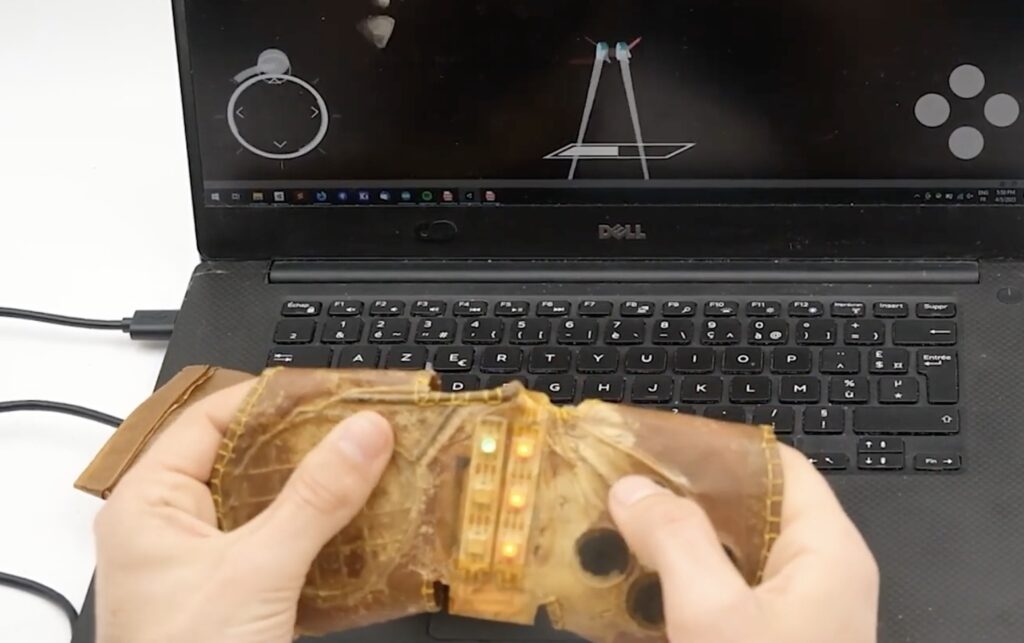
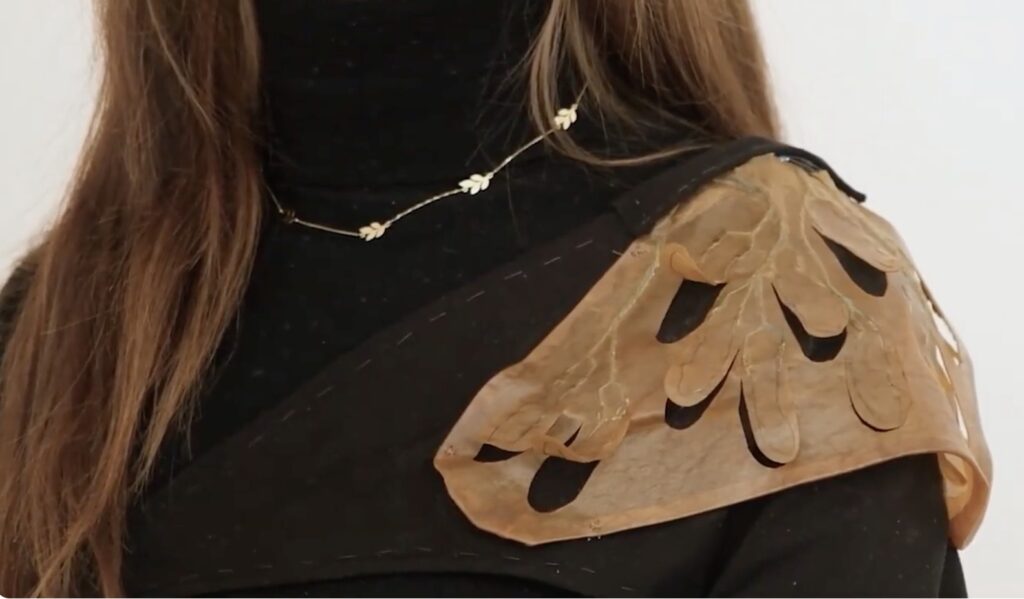
Cyborgs have long been a staple of sci-fi, but we see few real-world examples of this concept outside of a handful of biomedical devices and prostheses. But bionics — engineered systems that integrate biological structures — is an adjacent field with interesting possibilities. A bionic device would include some biological material (often tissue) with artificial components (often electronics). In the burgeoning field of bionics, Saarland University Human-Computer Interaction Lab’s Biohybrid Interactive Devices look promising.
The goal of this research was to a develop viable and practical HCI devices. The approach taken by the researchers was to embed traditional electronics in bacterial cellulose. Comparable to animal tissue, bacterial cellulose is a growable biomaterial. It is flexible and retains structural integrity, which makes it suitable for many applications. To embed electronics in the bacterial cellulose, the team had to create growth and stabilization techniques that enable the biomaterial to remain stable for a useful amount of time.
A couple of different prototype devices demonstrate this. One is a shoulder-worn accessory that conveys the user’s emotions visually. An embedded galvanic skin response (GSR) sensor lets an Arduino Leonardo detect user anxiety or stress. When it does, it passes current through shape memory alloy that causes bacterial cellulose flaps to rise noticeably. Another is a gamepad with an embedded multi-touch matrix and capacitive touch buttons, which connect to a computer through an Arduino Nano.
Both of these prototypes were successful, but the bacterial cellulose did still experience degradation caused by the presence of the electronic components and the heat they generate. Further research may allow for more stability. You can read more about Biohybrid Interactive Devices in the team’s paper here.
It’s time to catch up on all things LoRaWAN® and low-power IoT! Our team is looking forward to returning to The Things Conference this year, joining all LoRa® key players in Amsterdam on September 21st-22nd. Our experts will be showcasing new products and applications relevant to the technology that is putting the “smart” in smart cities, smart agriculture, smart logistics, and more.
Indeed, with IoT’s huge growth potential in both B2B and B2C applications, LoRaWAN® is stepping up as one of the technologies of the future. Already established as the low-power connectivity choice, according to The Things Network it is reaping the benefits of innovations that increase efficiency even further – and is poised to support ESG (environmental, social and governance) goals with reduced energy consumption and secure data transmission.
LoRaWAN® novice, or expert? We’ve got you covered
Whether you are just realizing the potential of LoRaWAN® or have been a fan of it since day one (like us!), we’ll have something for you to discover at our booth at The Things Conference:
Looking for an entry-level option? The Arduino MKR WAN 1310 offers you the renowned versatility of the practical and cost-effective MKR family and adds LoRa® connectivity to projects requiring low power.
Ready to take it up a notch? The solution for advanced applications requiring sturdy computational power is to boost Arduino Pro’s Portenta H7 module (in any of its three variants) with the capability to run embedded computer vision applications, connect wirelessly via LoRa® to the Arduino Cloud (or third-party infrastructure), and activate systems upon the detection of sound events. How? With thePortenta Vision Shield LoRa®, of course!
Feel the need for high performance? Pair the Portenta Max Carrier with aPortenta X8module to add LoRa® connectivity to your project, transforming your robust SOM into a single-board computer or reference design enabling edge AI for industrial, building automation and robotics applications.
Need deep indoor coverage or want to add reliable connectivity to your outdoor system? TheWisGate Edge Lite 2 andWisGate Edge Pro are your ready-to-use, industrial-grade gateways for LoRaWAN® connectivity powered by RAKwireless.
The Arduino ecosystem has something for everyone, and might just have everything you need for your next LoRaWAN® idea. Contact us or come by the booth to find out more.
Don’t miss the demos!
The Things Conference will also be a great opportunity to see some of our products in action. You’ll have the chance to explore our solution to control pests in vineyards with the most effectiveness and the least use of chemicals or labor, for example. Computer vision and LoRa® connectivity combine in a smart trap based on a MKR WAN 1310, which attracts bugs and records their number and type in real-time, allowing for remote monitoring and therefore more cost-effective interventions.
Our experts at The Things Conference will also be happy to show you how Portenta X8 and Portenta Max Carrier can join forces to deploy a secure, industrial-grade Linux computer capable of interacting with equipment/machinery or integrating within an existing smart kiosk: a system ready to collect data from onsite controllers, process them thanks to supported industrial protocols, and finally send useful information to your Cloud or ERP system, acting as a multi-protocol gateway via Wi-Fi, NB/IoT, LTE Cat.M1 or – you guessed it – LoRa®.
People make The Things Conference special
We are proud to have two special events included in the program this year.
On Friday, September 22nd, our Application Engineering Lead, Sebastian Romero, will return to Amsterdam with a keynote showing how IoT-capable hardware can be retrofitted to integrate smart remote management, using Arduino components and LoRaWAN®. Interested in present opportunities, but also curious about the future of IoT from Arduino’s perspective? Then make sure to attend the fireside chat with our CEO Fabio Violante on Thursday, September 21st at 10:30am CEST, to find out how the company’s philosophy will continue to leverage the latest technological evolutions to best serve innovators like you.
Let’s get social!
We’ll be happy to see you at the booth: come say hi, ask questions and get to know Arduino better. While approaching the venue, keep an eye on the ground and look for our street graffiti – be sure to take photos and tag us on social media: we’ll repost to share highlights with the millions in our community!
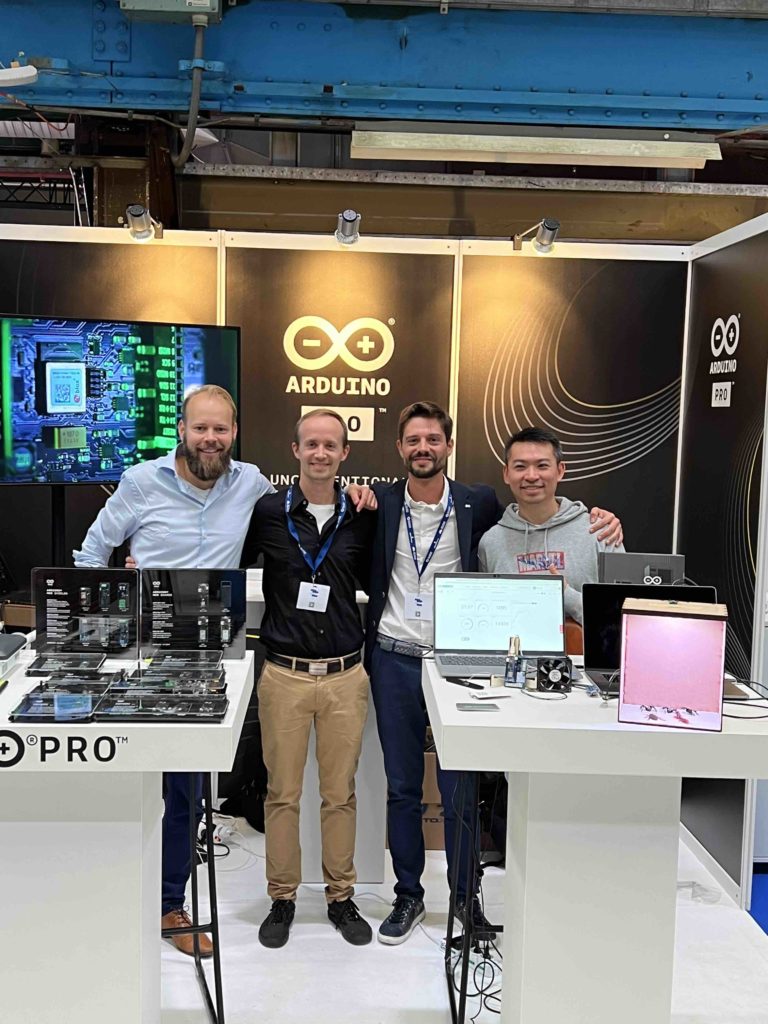
“But can it run Doom?” is more than just a joke in the tech world. It is also a decent litmus test for the computing power of hardware. That test isn’t very relevant for modern computers, but it is still worth asking when discussing microcontrollers. Microcontrollers vary in dramatically in processing power and memory, with models to suit every application. But if you have an Arduino Nano ESP32 board, you can run Doomas Naveen Kumar has proven.
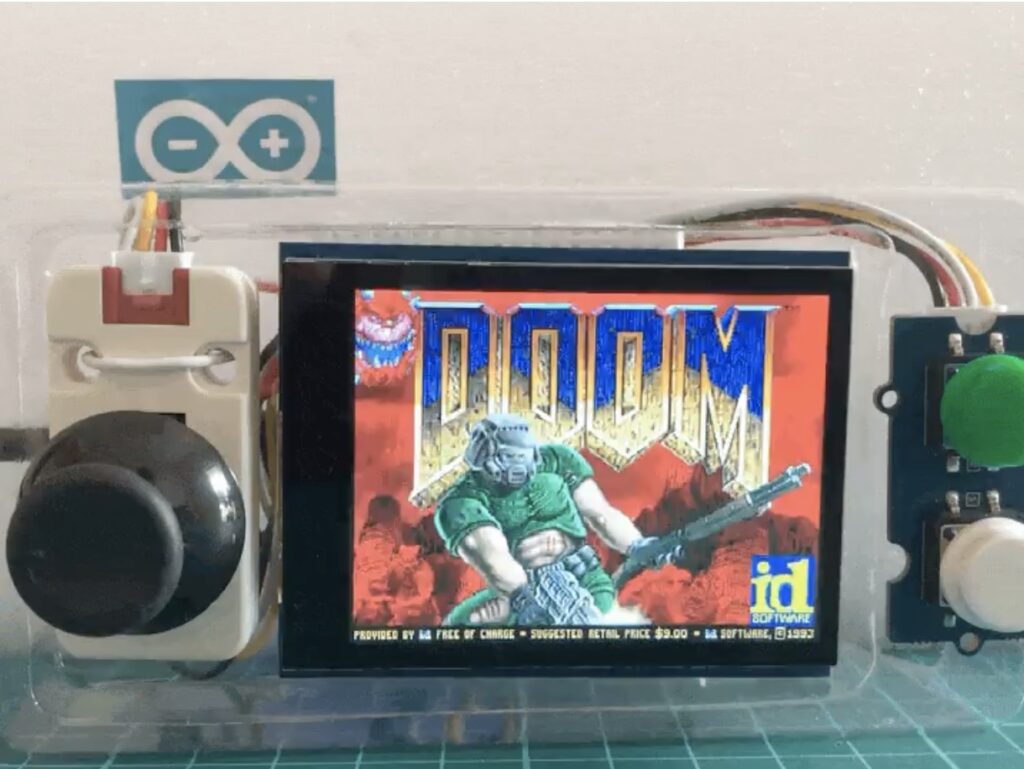
The Nano ESP32 is a small development board for the ESP32-S3 microcontroller. Espressif developed the ESP32 for IoT applications, so it has onboard Wi-Fi® and Bluetooth® adapters. It also has a relatively high clock speed and quite a lot of memory: 240MHz and 512kB SRAM, respectively. That still isn’t enough to meet the requirements of the original Doom release, which needed a lot more RAM. But Kumar demonstrates the use of a microcontroller-friendly port that runs well on this more limited hardware.
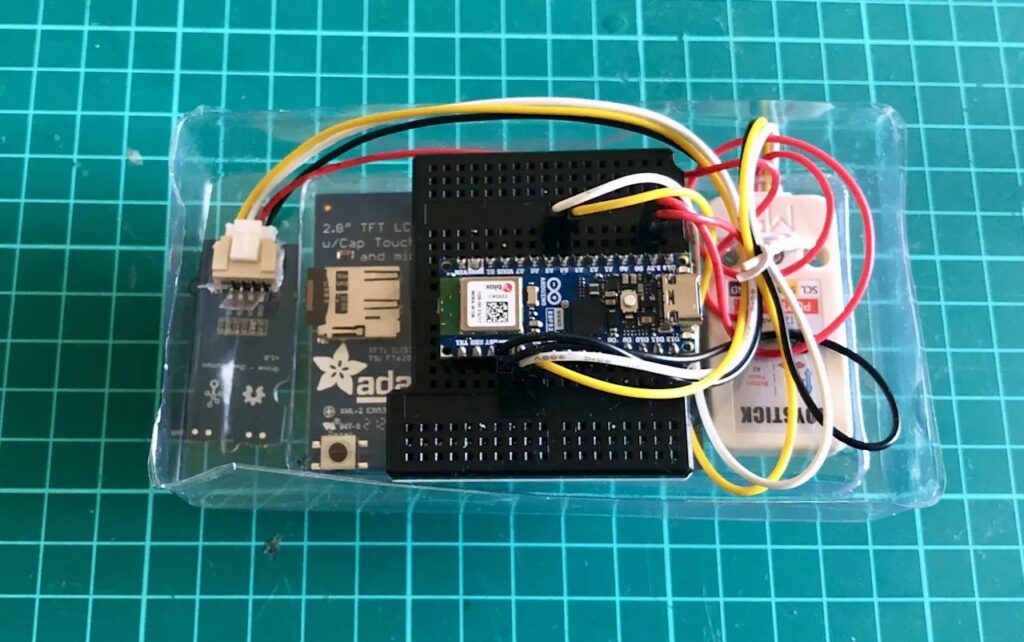
To try this yourself, you’ll need the Nano ESP32, an Adafruit 2.8″ TFT LCD shield, an M5Stack joystick, a Seeed Studio Grove dual button module, a breadboard, and some jumper wires. You’ll then need to compile and flash the Retro-Go firmware, which was designed specifically for running games like Doom on ESP32-based devices. You can then load the specialized WAD (Where’s All the Data) files.
Kumar reports an average frame rate at a 320×240 resolution, which is very playable.
It’s back to school! Whether you are a student or not, Arduino’s Project Hub is a great place to never stop learning, thanks to the wealth of knowledge, experiments, and plain cool ideas our community so generously shares. The three highlights we’ve selected among the projects uploaded in June indeed all have something to teach us… with one valuable lesson in common: the past has a lot to offer, if we take the time to recharge, rediscover or revamp it just a little!
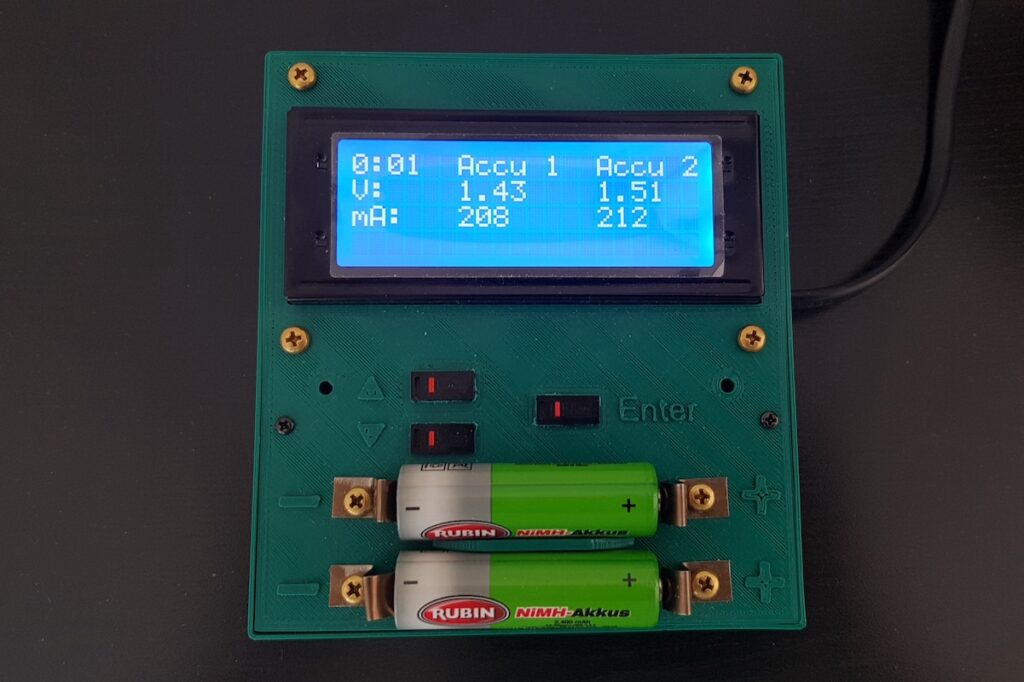
This tutorial is so clear it can make anyone feel capable of building their own charger – with additional functionalities such as determining battery wear. Batteries always have to be handled with care, but if you have the skills to customize code and solder a circuit according to the schematic provided, more power to you! All you need are an Arduino Nano and a few other common components.
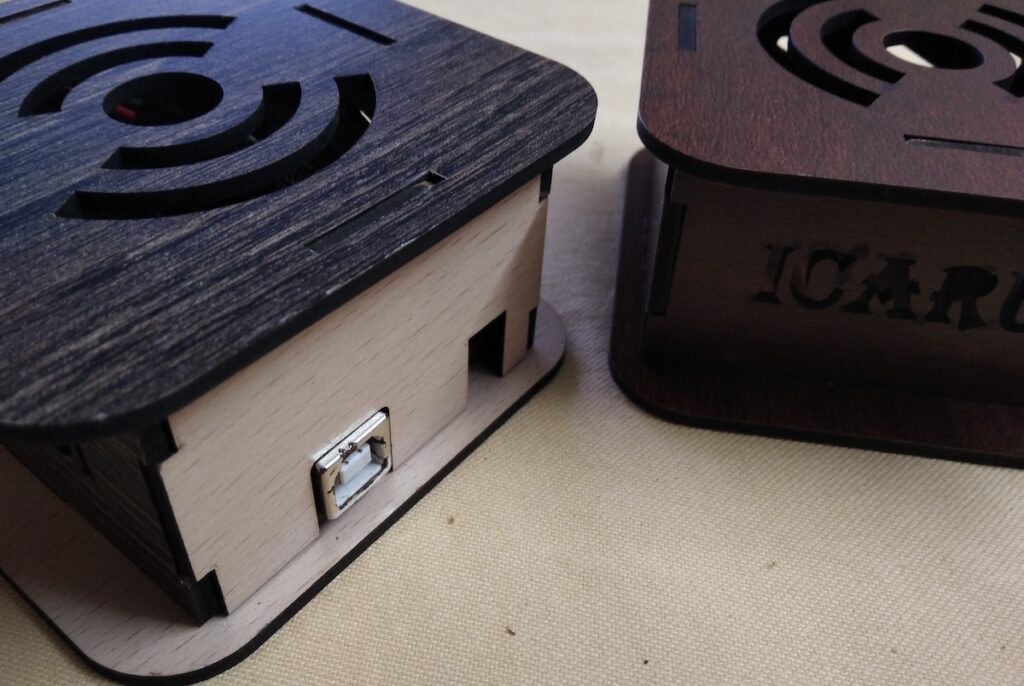
This is not just a project, but a wonderful deep-dive on wireless communication where you’ll learn about the ISM band, ASK modulation, and synchronous and asynchronous demodulation. More importantly, you might rediscover the “simpler and older radio frequency devices and schemes” that are perfect to save resources on smaller projects. In this case, they will be all you need to implement wireless communication interfacing a Nano with a 433 MHz RF module.
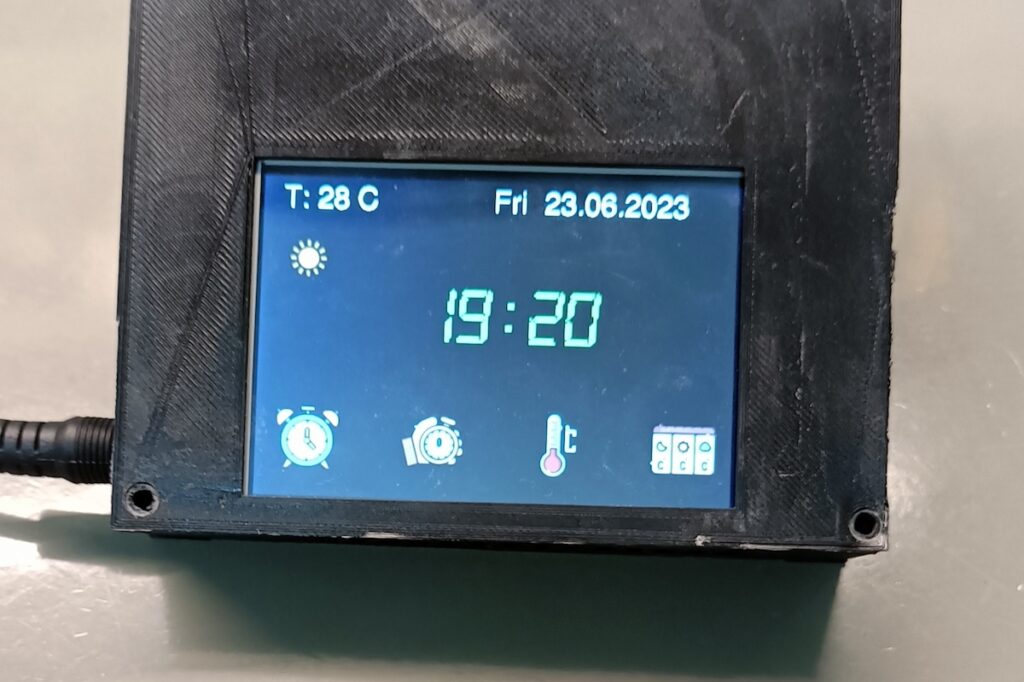
Time and date, timer and alarm, but also detailed temperature data and even the weather forecast: you can have it all in one clock! With this project, Project Hub user dzh121 improved upon a previous version of theirs by adding a touchscreen and displaying more information. An impressive device that makes great use of Arduino IoT Cloud-based dashboards.
For your chance to be selected for a $100, $300 or even $500 gift card to spend on the Arduino Store, submit your best project on the Project Hub! We will be awarding three new entries every month, as detailed in the complete terms and conditions. Good luck!
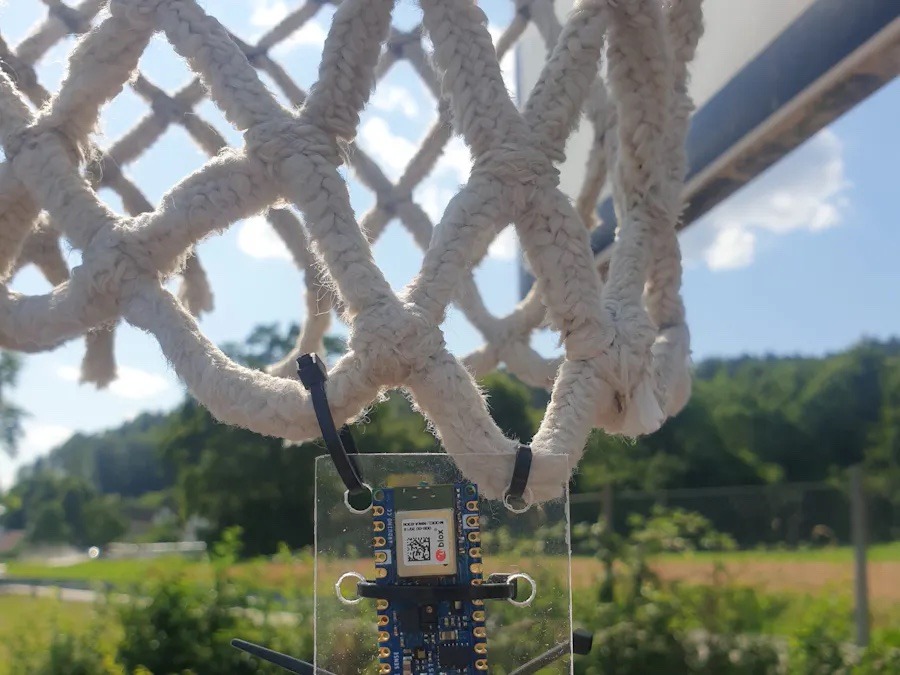
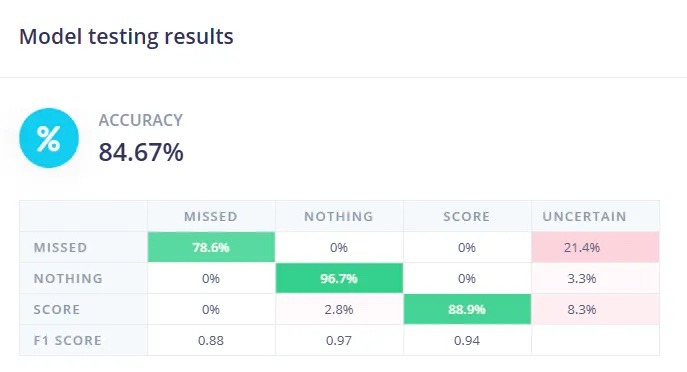
When playing a short game of basketball, few people enjoy having to consciously track their number of successful throws. Yet when it comes to automation, nearly all systems rely on infrared or visual proximity detection as a way to determine when a shot has gone through the basket versus missed. This is what inspired one team from the University of Ljubljan to create a small edge ML-powered device that can be suspended from the net with a pair of zip ties for real-time scorekeeping.
After collecting a total of 137 accelerometer samples via an Arduino Nano 33 BLE Sense and labeling them as either a miss, a score, or nothing within the Edge Impulse Studio, the team trained a classification model and reached an accuracy of 84.6% on real-world test data. Getting the classification results from the device to somewhere readable is handled by the Nano’s onboard BLE server. It provides two services, with the first for reporting the current battery level and the second for sending score data.
Once the firmware had been deployed, the last step involved building a mobile application to view the relevant information. The app allows users to connect to the basketball scoring device, check if any new data has been received, and then parse/display the new values onscreen.
A well-maintained garden is a beautiful thing. The envy of your friends and neighbors, and a lifelong project you can truly take pride in, especially in the summer months.
Gardening itself, though, can be a chore. The really fun parts often feel like a small fraction of the overall work, with a ton of time spent on tedious, boring, and even physically uncomfortable tasks.
The good news is that automation can help. In fact, garden automation is its own entire topic — one that’s growing in popularity all the time.
By tapping into this rapidly growing pool of garden automation tools and technologies, you can take your garden to the next level. Save time on the dull work so you can focus more on the rewarding stuff, and use tech to enhance your garden and make it better than ever before.
In this article, we’ll look at some of the key ways tech and automation help with gardening, and how you can start harnessing it at home.
How can tech benefit gardeners?
Let’s dive into a few of the ways tech can help gardeners:
Save time by making tasks more efficient and automated.
Take care of boring tasks, leaving you free to focus on the more interesting and enjoyable elements of gardening (which may be simply chilling out in your garden).
Assist with planning and design, helping you build the most attractive and convenient garden possible.
Make things more fun with creative and collaborative projects
Garden automation trends to pay attention
We’re currently living through an incredibly exciting time when it comes to technology. New, fascinating trends are emerging all the time, and existing technologies are growing at breakneck speed.
When it comes to garden automation, let’s check out some of the most interesting tech trends and solutions you can tap into this summer.
Soil monitoring and management
Soil is the lifeblood of your garden.
Without healthy soil, imbued with just the right balance of nutrients, minerals, pH levels, and moisture, your dreams of a thriving and beautiful garden are over before they’ve even begun.
However, it’s hard to find out this information ourselves. There are techniques and tricks you can use, but they rely on guesswork more than actual measurement.
This is where technology comes in. Smart garden tech makes it possible to accurately monitor all kinds of different aspects of your soil health. Thanks to the Internet of Things, even amateur gardeners can now access a ton of powerful sensors that keep track of various key metrics and alert you when something needs to change.
You can even install automatic tools to fix any issues your sensors detect. Let’s find out more about that.
Automated irrigation systems
Watering your plants by hand isn’t just tedious, it can also be wasteful.
The downsides to underwatering your plants are obvious, but overwatering can be bad for the plants and soil, as well as wasting precious water, especially in the hotter months.
On top of that, relying on manual watering can mean forgetting key times, and of course the stress of leaving home for a few days and worrying about your garden becoming dry and wilted.
Once again, though, tech can help out. Smart irrigation systems combine sensors with up-to-date weather data, planning and executing watering schedules that work perfectly for your garden with minimal wastage.
Better gardening through AI
Whatever you think about it, there’s no denying that artificial intelligence is the flavor of the month right now, and with good reason.
We’re currently experiencing a renaissance of AI, with new tools exploding onto the scene every day and regular massive leaps forward in sophistication and power.
Gardening might not be the first use case that springs to mind for AI, but there is actually lots of potential here for tech-savvy gardeners. Here are a few examples:
Robots: Just like the Roomba revolutionized the way we clean our carpets, automated lawnmowers and other tools are transforming the way we care for our gardens.
Designing your garden: AI can now suggest ideas for how to design your garden, like providing plans for different layouts and structures, suggestions for plants and colors that work well together, and recommendations based on your previous designs, preferences, and your location.
Reminders and updates: The right apps can help you stay on top of various aspects of running your garden by using AI to notify you when you need to do tasks like watering your plants, trimming the lawn, planting seeds, and more.
Smart pest control
Hungry pests are the bane of any gardener’s existence, and depending on where you’re located they can be an enormous problem.
Gardeners have battled against pests for millennia, trying just about every strategy under the sun to finally defeat them, with varying degrees of success.
Now, technology may provide yet another powerful weapon in this fight. In fact, it can offer several.
Here are just a few quick examples:
Automated traps that quickly and efficiently remove pests from the danger zone.
Pheromone-based systems attract pests by simulating the chemicals that lure them in, drawing them away from your precious plant life.
AI-driven pest detection tools can be used to accurately monitor your plants for the presence of unwanted visitors, and then guide your pest control systems to efficiently deal with them.
On top of helping you reduce pest damage, these technologies also remove the need for harmful pest control methods like toxic pesticides and help you move towards a safer, cleaner, and more environmentally-friendly approach to gardening.
Vertical and space-efficient gardens
If you live in an urban environment, the chances are that one of the biggest challenges for you when it comes to gardening is a lack of space.
It can be tough to grow a varied, beautiful garden when you have serious constraints on space, but the good news is that smart gardening methods can help you stretch every square meter further and build a much more space-efficient garden — even if you live in an apartment.
One example here is stackable planters — essentially multiple plant containers stacked on top of each other that allow you to grow several different types of plants in the same space. These can range from simple, basic designs to much more complex constructions.
Another way technology can help make the most of small spaces is by giving you the insights and tools to optimize things like light exposure, water distribution, and plant health. This lets you make the most of limited resources to grow the best garden possible in the conditions available to you.
Integration with smart home systems
A well-equipped smart home is a hive of powerful features and tools.
Voice assistants and mobile apps bring everything together, enabling you to control your lighting, sound systems, heating, A/C, and much more at the touch of a button or a single spoken command.
The same process can be extended to your smart garden.
By integrating your smart garden tools like automated sprinklers, sensors, traps, and gardening robots with your existing smart home ecosystem, you can even more easily control your garden and stay on top of key data insights.
This can save a ton of time and bring your home and garden into the same, easily controlled system.
Data-driven plant selection
Not all plants are suitable for all gardens.
Various factors like your soil type, climate, water levels, humidity, and a ton of others will determine which plant species thrive in your garden, and which ones wilt away.
Finding out which plants fall into each category can be an incredibly time-consuming task, one that takes many gardeners years to work out through trial and error. Fortunately, with the right smart garden tools, you can shave a ton of time off that process.
Apps like Iris allow you to share information about the conditions in your garden — like climate and soil data — and it will recommend the best plants for you.
Data is an incredibly powerful, yet underused, tool for gardeners. It can help you grow a garden the smart way, by making informed and intelligent decisions to save huge amounts of time and disappointment.
Make it a family activity
One of the great things about gardening is that it’s an activity that really can be fun for the whole family.
With the right tech gadgets and tools, you can make gardening much more engaging and rewarding for kids, sparking what could be a lifelong interest in the hobby.
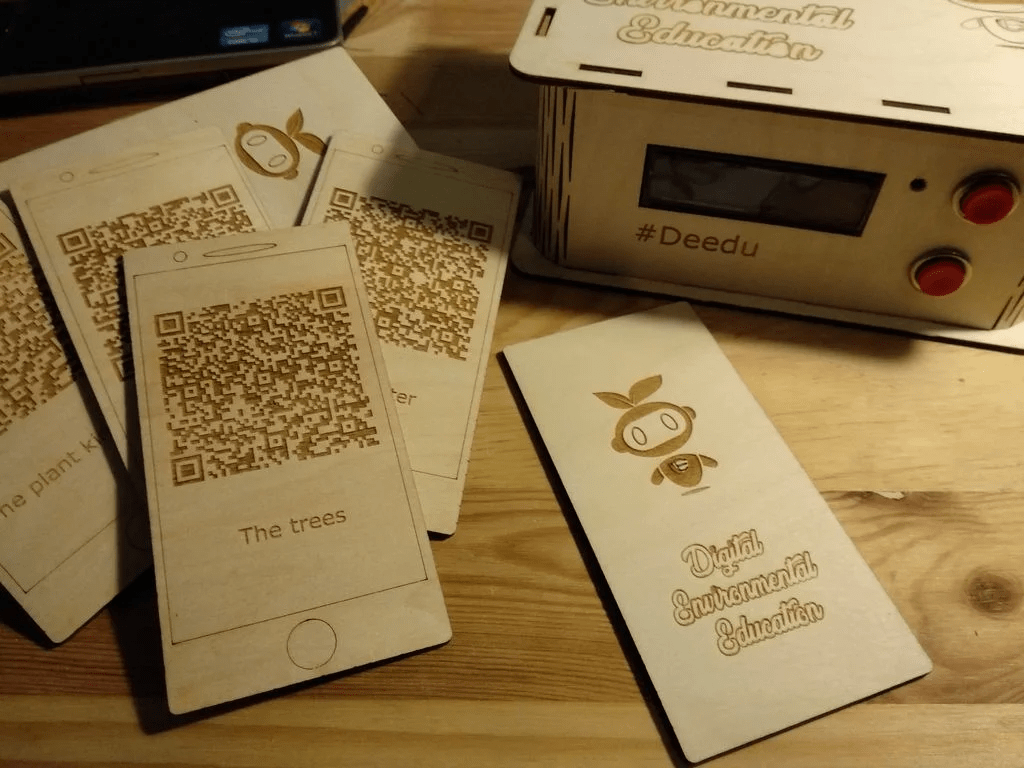
There are many resources to help with this. For example, this project from EDUcentrum uses Arduino tools combined with other components to help children build their very own automated gardening kit.
The project is designed to help kids get some hands-on experience with automation while learning about plants, gardening, and the environment — all while cooperating with other young learners from different countries.
The power of a smarter garden
Smart garden automation can completely transform the way you care for your garden and approach your future gardening plans.
By helping you make data-driven decisions, monitor the right vital signs more easily, keep pests at bay, and automate tedious tasks, technology can bring joy back into gardening while at the same time giving you a healthier, better-looking, and more durable outdoor space.
Everyone’s garden is different, of course, so ultimately this is all about experimentation and finding out the right tools and technologies that work best for you.
At Arduino, we have many different solutions to help you build and refine your own smart garden, along with just about every other aspect of your home. Check out a few examples from our users:
A smart soil moisture sensor
Check out this project by Arduino user Fouad_Roboticist. It’s a soil moisture sensor, made using just a handful of fairly simple components.
The sensor works by sending the data from the sensor to an Arduino microcontroller, giving you the ability to stay on top of your soil moisture more easily and efficiently.
Automated plant watering
Arduino user Saikan45 decided to build their very own automated plant watering system. The goal was to automate plant watering while ensuring there was enough moisture for healthy growth.
The project was also designed to cool the soil and soften the tillage pan, reducing the need for human work and creating a more suitable environment for plants to thrive. Built using just a few simple components, Saikan45’s project has the potential to save gardeners a ton of time and stress.
Crop monitoring and controlling
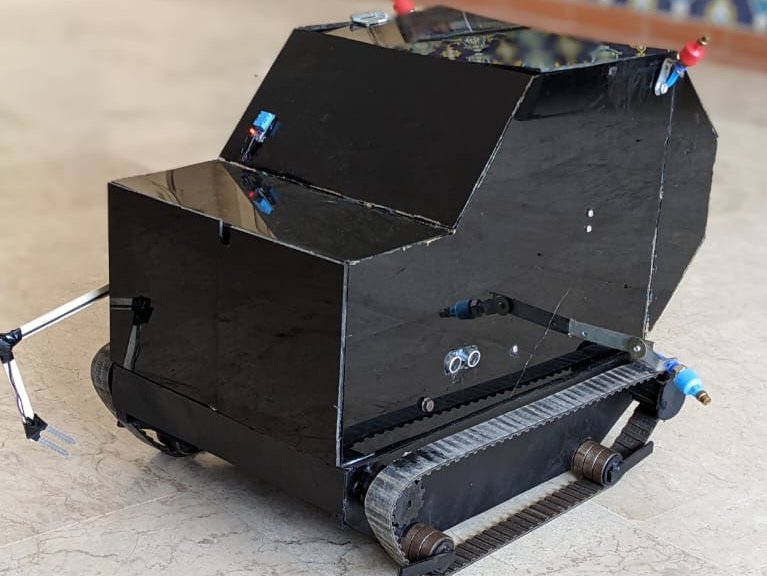
Arduino user beena_2000 created a robot that saves a huge amount of human time by giving real-time readings of temperature, humidity, and soil moisture, combined with live camera recordings from the robot.
Everything is controlled through a mobile application, and the robot can move through the environment and deploy pest spray and fertilizer to specific plants, avoiding wastage.
With an Arduino, some basic components, and a curious mind, there’s no limit to what’s possible. Get in touch with us to find out more and get started!
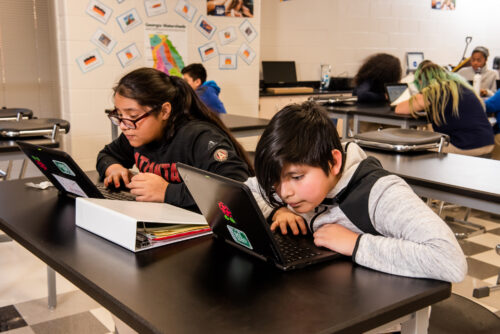
New artificial intelligence (AI) tools have had a profound impact on many areas of our lives in the past twelve months, including on education. Teachers and schools have been exploring how AI tools can transform their work, and how they can teach their learners about this rapidly developing technology. As enabling all schools and teachers to help their learners understand computing and digital technologies is part of our mission, we’ve been working hard to support educators with high-quality, free teaching resources about AI through Experience AI, our learning programme in partnership with Google DeepMind.
In this article, we take you through the updates we’ve made to the Experience AI Lessons based on teachers’ feedback, reveal two new lessons on large language models (LLMs) and biology, and give you the chance to shape the future of the Experience AI programme.
Updated lessons based on your feedback
In April we launched the first Experience AI Lessons as a unit of six lessons for secondary school students (ages 11 to 14, Key Stage 3) that gives you everything you need to teach AI, including lesson plans, slide decks, worksheets, and videos. Since the launch, we’ve worked closely with teachers and learners to make improvements to the lesson materials.
The first big update you’ll see now is an additional project for students to do across Lesson 5 and Lesson 6. Before, students could choose between two projects to create their own machine learning model, either to classify data from the world’s oceans or to identify fake news. The new project we’ve added gives students the chance to use images to train a machine learning model to identify whether or not an item is biodegradable and therefore suitable to be put in a food waste bin.
Our second big update is a new set of teacher-focused videos that summarise each lesson and highlight possible talking points. We hope these videos will help you feel confident and ready to deliver the Experience AI Lessons to your learners.
A new lesson on large language models
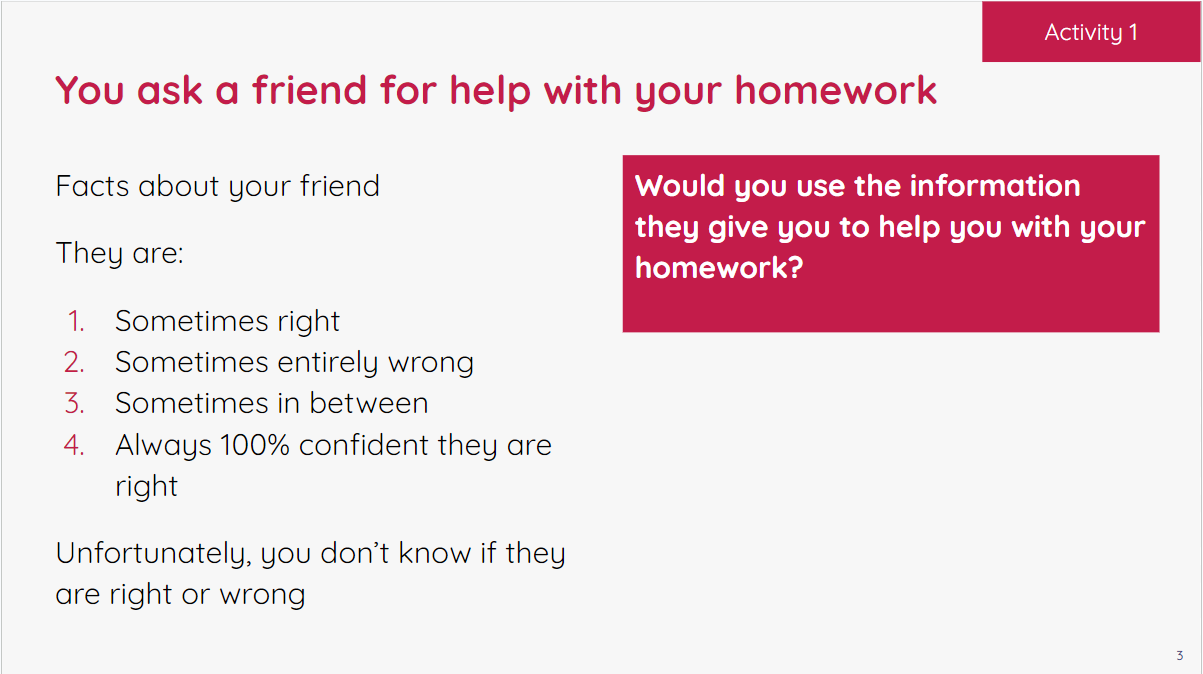
As well as updating the six existing lessons, we’ve just released a new seventh lesson consisting of a set of activities to help students learn about the capabilities, opportunities, and downsides of LLMs, the models that AI chatbots are based on.
With the LLM lesson’s activities you can help your learners to:
Explore the purpose and functionality of LLMs and examine the critical aspect of trustworthiness of these models’ outputs
Examine the reasons why the output of LLMs may not always be reliable and understand that LLMs are machines that make predictions
Compare LLMs to other technologies to assess their suitability for different purposes
Evaluate the appropriateness of using LLMs in a variety of authentic scenarios
An example activity in our new LLM unit.
All Experience AI Lessons are designed to be cross-curricular, and for England-based teachers, the LLM lesson is particularly useful for teaching PSHE (Personal, Social, Health and Economic education).
The LLM lesson is designed as a set of five 10-minute activities, so you have the flexibility to teach the material as a single lesson or over a number of sessions. While we recommend that you teach the activities in the order they come, you can easily adapt them for your learners’ interests and needs. Feel free to take longer than our recommended time and have fun with them.
A new lesson on biology: AI for the Serengeti
We have also been working on an exciting new lesson to introduce AI to secondary school students (ages 11 to 14, Key Stage 3) in the biology classroom. This stand-alone lesson focuses on how AI can help conservationists with monitoring an ecosystem in the Serengeti.
We worked alongside members of the Biology Education Research Group (BERG) at the UK’s Royal Society of Biology to make sure the lesson is relevant and accessible for Key Stage 3 teachers and their learners.
Register your interest if you would like to be one of the first teachers to try out this thought-provoking lesson.
Webinars to support your teaching
If you want to use the Experience AI materials but would like more support, our new webinar series will help you. You will get your questions answered by the people who created the lessons. Our first webinar covered the six-lesson unit and you can watch the recording now:
September’s webinar: How to use Machine Learning for Kids
Join us to learn how to use Machine Learning for Kids (ML4K), a child-friendly tool for training AI models that is used for project work throughout the Experience AI Lessons. The September webinar will be with Dale Lane, who has spent his career developing AI technology and is the creator of ML4K.
Help shape the future of AI education
We need your feedback like a machine learning model needs data. Here are two ways you can share your thoughts:
Become part of our teacher feedback panel. We meet every half term, and our first session will be held mid-October. Email us to register your interest and we’ll be in touch.
To find out more about how you can use Experience AI to teach AI and machine learning to your learners this school year, visit the Experience AI website.
The launch of the Arduino UNO R4 marks a huge leap forward for our community. For us, it’s also the chance to celebrate the people who bring our ecosystem to life with their bright ideas, radiant enthusiasm, and shining insight.
That is how the UNO R4 Stars blog post series began: to highlight makers who have not only created amazing projects with Arduino, but who are giving back to the community by sharing as they go and helping others make anything they wish.
We invite you to discover each profile, hoping you might find a North Star to navigate around an expanding galaxy or venture into completely new universes.
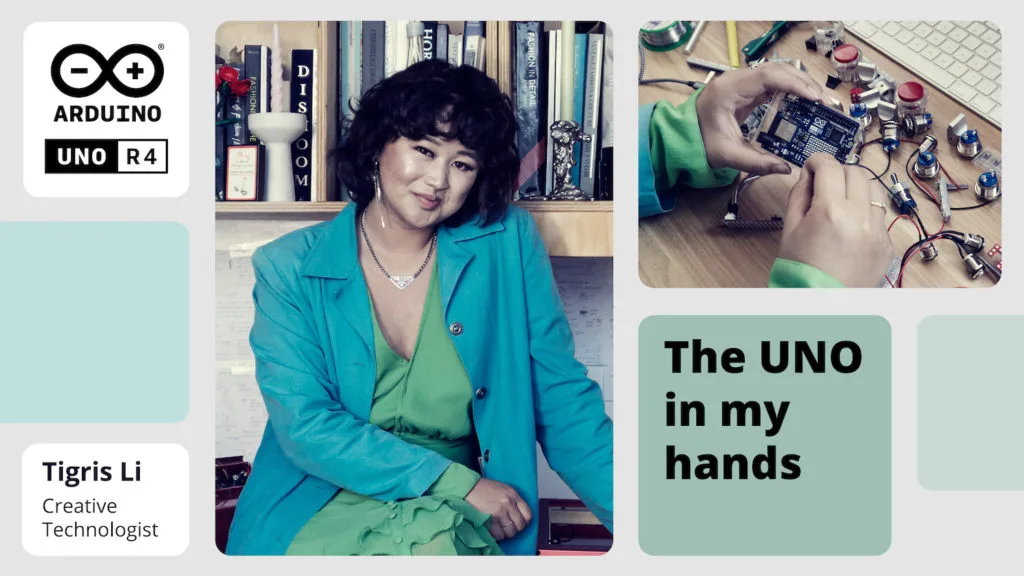
After competing as a national figure skater in her native Canada and attracting over 1 million views as a Minecraft YouTuber – all by the age of 12! – the good-vibes powerhouse that is Tigris Li now invites us all to explore our most human inner workings. Her goals? To help everyone develop heightened emotional intelligence, and to educate and empower a new generation of innovators. She does so through her eclectic practice as an artist and creative technologist – leveraging 3D design and every tool making has to offer, to create experiences that spark conversations about our relationships with technology, each other, and ourselves.
Indeed, she says the project that best represents her is a “playfully absurd” installation she built in 2021, focusing on the very concept of love: the Incu-dater touches on the speculative future by welcoming couples in a futuristic pod, where they can assess the emotional status of their relationship and, based on the results, are prescribed a recommended dose of oxytocin to compensate any imbalances.
More in general, Li was always excited about turning imagination into reality by building physical objects: “Being a maker today is a very radical thing. It’s very radical to be independent against consumer and commercial objects, to be able to create something on your own that stems from you and your individuality.”
And today, she is able to inspire millions of followers to do the same, by sharing her projects online. Check out her latest one: a custom DJ controller based on the UNO R4 Minima and loads of fun retro style.
We asked Li, “What’s your favorite part of the UNO R4?”
The 12×8 LED matrix in the UNO R4 Wifi, because it allows her to build “hardware as an intimate art experience which you can hold in the palm of your hand.”
The ESP32 module (also featured in the WiFi variant), great for wireless connectivity.
How the entire Arduino ecosystem is able to transcend borders and accessibility limitations, to offer new opportunities for exploration and connection to everyone.
Li is currently based in London but of course you can catch up – and keep up – with her many projects anywhere in the world: just check out her portfolio on her website, or join the thousands already following her on Instagram and X!
Still, that just means I need to dig down into the documentation, and read the manual. I tried using Bard and ChatGPT to create working code, but it was all out-of-date or simply incorrect. I’m enjoying hacking through it all.
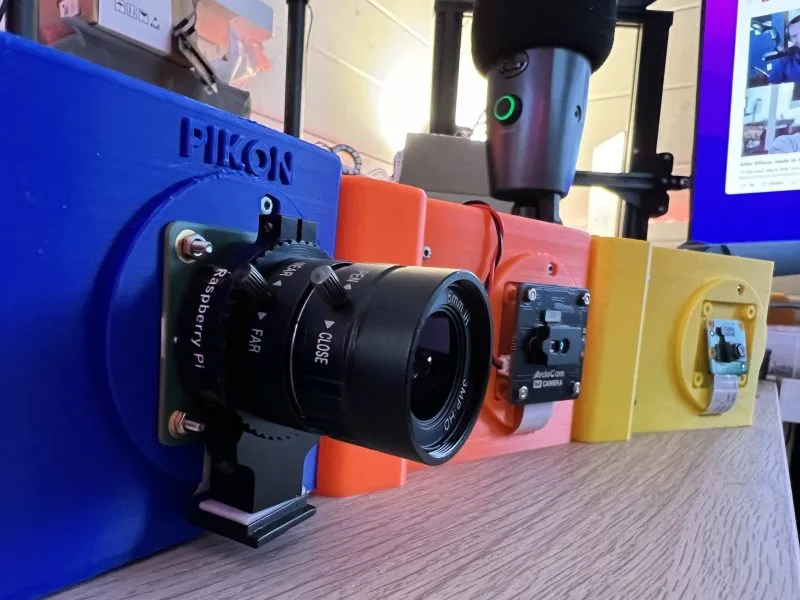
In the meantime, I’ve got it up and running with a direct Ethernet connection. This is handy, as I helped take some photos of Babbage (the Raspberry Pi mascot) for Part 5 of our Camera Module tutorial (issue 133, page 54).
On the whole, I’m pretty happy with how my little camera is coming along. Even if it looks a bit shonky and doesn’t fully work yet. That’s not always the point. Making my own camera is a fun project, but it’s also an important learning experience. You never quite learn as much as when making. I’ve learned more about the Raspberry Pi Camera Module and integration with Python and the picamera2 library, Raspberry Pi power requirements, and the windowing system over the last few weeks than I ever would just reading the documentation. Making remains quite humbling.
Live and learn
Another feature that really interested me this month is Work & Learn with Raspberry Pi (page 64). Raspberry Pi is increasingly becoming my go-to work computer, and I bought a 60% mechanical keyboard to keep my desk tidy and type better with Raspberry Pi.
It’s always interesting to me that Raspberry Pi was designed as a computer for making and hacking, but is increasingly useful for everyday computing tasks. It’s a perfect little Linux machine for doing the regular task of writing, editing, and commissioning all the other great people who work on this magazine. Of course, it helps that a lot of my work involves writing about Raspberry Pi, so doing that with Raspberry Pi feels nicely circular.
Learning has always been a fairly central part of my life. It’s always felt important to me to be developing myself. Sometimes it’s just personal development; sometimes on a professional front. But, as long as I end the day having a little more nounce than before, I can go to sleep happy.
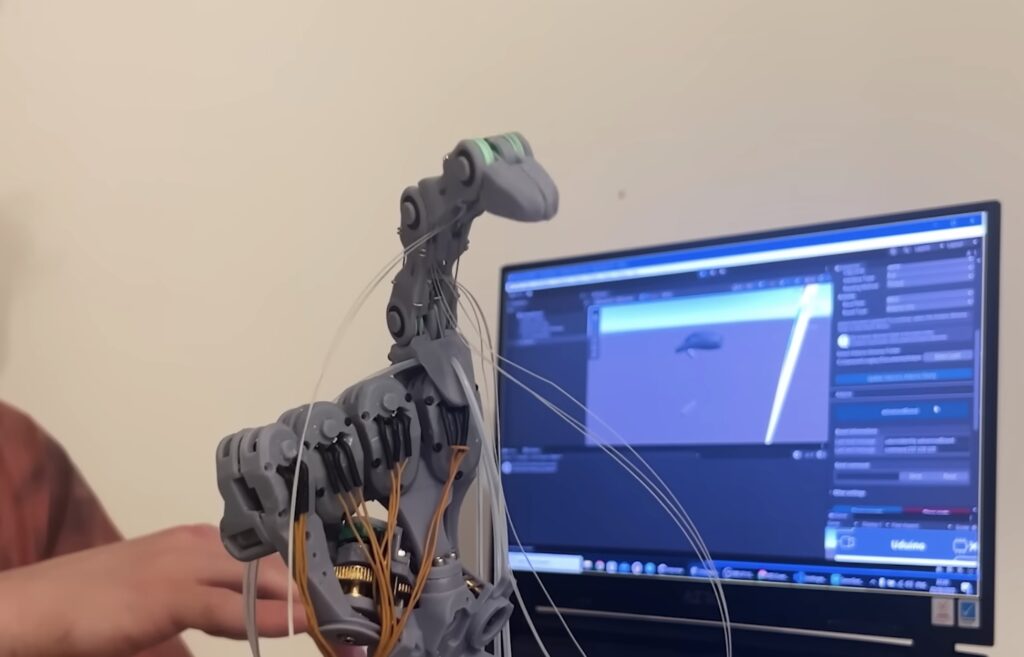
Building a robot is only half the battle, because you also need a way to control it. Something like a rover may work with a simple joystick or even typed commands. But complex robots often have many motors and controlling those all directly becomes a challenge. That’s why Will Cogley chose motion control for his bionic hand.
This is the newest iteration of a project that Cogley first started a few years ago. It is robotic hand meant to mimic a human hand as much as possible. Human fingers do not contain muscles. Instead, muscles in the forearms and palms pull on tendons to move the fingers. Cogley’s bionic hand works in a similar manner by using servo motors in the forearm to pull on cables that actuate the fingers. An Arduino UNO Rev3 moves the servos according to commands from a PC, but Cogley needed a way to streamline those commands.
Cogley chose a Leap Motion Controller for this job. It can track the motion of the user’s hand in near real-time and update a 3D model on the computer to reflect that. It displays that model in Unity, which is a 3D game engine that has the flexibility to perform in applications like this. Unity can determine the angle of each joint and Cogley was able to take advantage of the Uduino plugin to send servo commands to the Arduino based on those angles.
The Arduino PRO team will be exhibiting in Las Vegas next week at PACK EXPO 2023, the largest event for the packaging industry. From Monday, September 11th through to the 13th, meet our team at the Arduino PRO booth #7592 in the upper south hall.
This is the first year for Arduino PRO at PACK EXPO. The event is expected to bring over 26,000 attendees and 2,300 exhibitors from the packaging industry. Our industrial automation controllers, the Portenta Machine Controller (PMC) and Opta PLC have been particularly popular in the packaging industry. Ever since the launch of PMC, customers have recommended the expo, and we are excited to have this opportunity to exhibit.
The complete Arduino PRO product line will be featured on display, including the certified PMC and Opta PLC industrial controllers, the Portenta family of System-on-Modules, and the Nicla family of sensor boards. In addition, APS Engineering will be at the booth displaying their commercial inkjet fluid controller powered by the Portent Machine Controller.
The Arduino team will be joined by our newest system integrator partner, Dojo Five, who specializes in industrial firmware development. Throughout the event, our team of sales and solution architects are available live at the booth to walk through our solutions and discuss specific application architecture. Combined with the embedded software expertise of Dojo Five, attendees have the unique opportunity of a full end-to-end project consulting session live on the event floor.
The Arduino PRO team looks forward to meeting existing and potential new customers in Las Vegas – championing open source, accessibility, and flexibility in industrial-grade solutions at PACK EXPO.
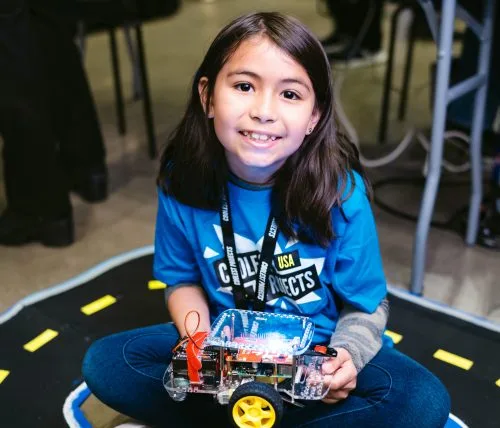
Lots of kids are excited about robotics, and we have the free resources you need to help your children start making robots.
What’s a robot anyway?
Did you know that the concept of robotics dates back to ancient Greece, where a mathematician built a self-propelled flying pigeon to understand bird flight? Today, we have robots assisting people in everything from manufacturing to medicine. But what exactly is a robot? Ask two people, and you might get two different answers. Some may tell you about Star Wars’ C3PO and R2D2, while others may tell you about self-driving cars or even toys.
In my view, a robot is a machine that can carry out a series of physical tasks, programmed via a computer. These tasks could range from picking up an object and placing it elsewhere, to navigating a maze, to even assembling a car without human interaction.
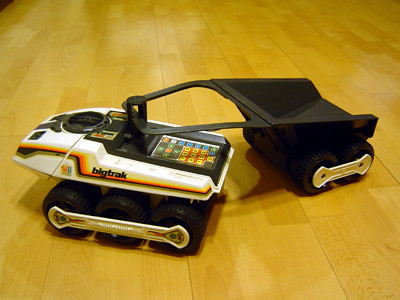
Why robotics?
My first encounter with robotics was the Big Trak, a programmable toy vehicle created in 1979. You could program up to 16 commands into Big Trak, which it then executed in sequence. My family and I used the toy to transport items to each other around our house. It was a fun and engaging way to explore the basics of robotics and programming.
Understanding something about robotics is not just for scientists and engineers. It involves learning a range of skills that empower your kids to be creators of our digital world, instead of just consumers.
Robotics combines various aspects of science, technology, engineering, and mathematics (STEM) in a fun and engaging way. It also encourages young people’s problem-solving abilities, creativity, and critical thinking — skills that are key for the innovators of tomorrow.
Machine learning and robotics: A powerful duo
What happens when we add machine learning to robotics? Machine learning is an area of artificial intelligence where people design computer systems so they “learn” from data. This is not unlike how people learn from experience. Machine learning can enable robots to adapt to new situations and perform tasks that only people used to do.
We’ve already built robots that can play chess with you, or clean your house, or deliver your food. As people develop machine learning for robotics further, the possibilities are vast. By the time our children start their careers, it might be normal to have robots as software-driven “coworkers”. It’s important that we prepare children for the possible future that robotics and machine learning could open up. We need to empower them to contribute to creating robots with capabilities that complement and benefit all people.
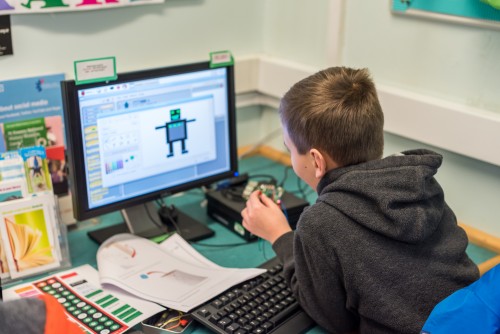
Kids will learn to create interactive stories, games, and animations, all while getting a taste of physical computing. They’ll explore how to use sound and light, and even learn how to create improvised buttons.
It’s a great way to delve deeper into the world of electronics and programming. The path includes a variety of fun and engaging projects that incorporate crafting and allow children to see the tangible results of their coding efforts.
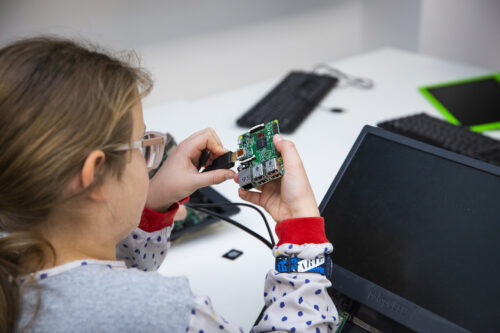
Build a robot
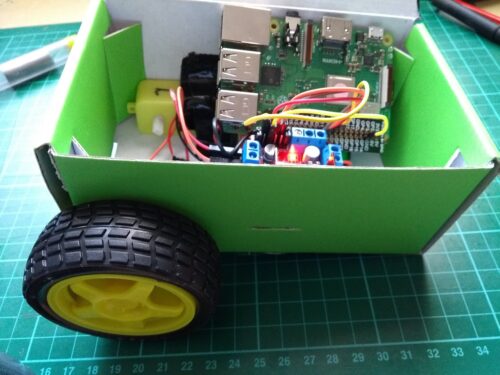
‘Build a robot’ is a project path that allows young people to create a simple programmable buggy. They can then make it remote-controlled and even transform it so it can follow a line by itself.
This hands-on project path not only teaches the basics of robotics but also encourages problem-solving as kids iteratively improve their robot buggy’s design.
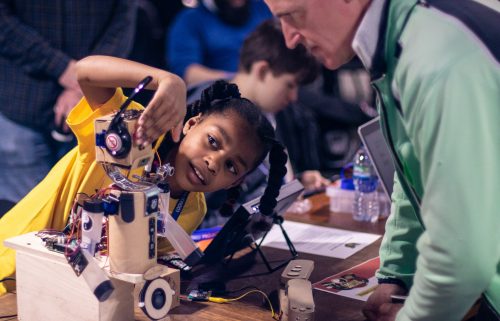
The robot building community
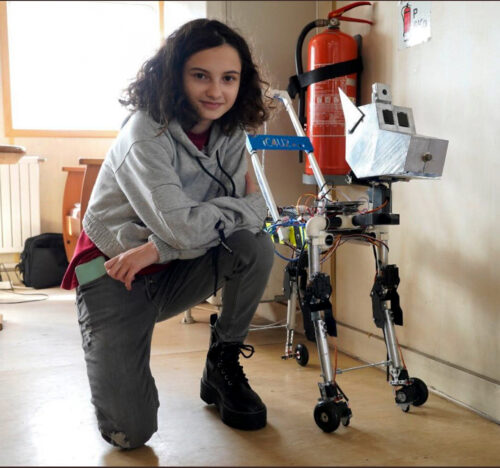
Let’s take a moment to celebrate two young tech creators who love building robots. Selin is a digital maker from Istanbul, Turkey, who is passionate about robotics and AI. Selin’s journey into the world of digital making began with a wish: after her family’s beloved dog Korsan passed away, she wanted to bring him back to life. This led her to design a robotic dog on paper, and to learn coding and digital making to build that robot.
Selin has since built seven different robotics projects. One of them is IC4U, a robotic guide dog designed to help people with impaired sight. Selin’s commitment to making projects that help make the world a better place was recognised when she was awarded the Aspiring Teen Award by Women in Tech.
Jay, a young digital maker from Preston, UK, started experimenting with code at a young age to make his own games. He attended free local coding groups, such as CoderDojo, and was introduced to the block-based programming language Scratch. Soon, Jay was combining his interests in programming with robotics to make his own inventions.
Jay’s dad, Biren, comments: “With robotics and coding, what Jay has learned is to think outside of the box and without any limits. This has helped him achieve amazing things.”
Robotics and machine learning are not just science fiction — they shape our lives today in ways kids might not even realise. Whether your child is just interested in playing with robots, wants to learn more about them, or is considering a career in robotics, our free resources are a great place to start.
If a Greek mathematician was able to build a flying pigeon millennia ago, imagine what children could create today!
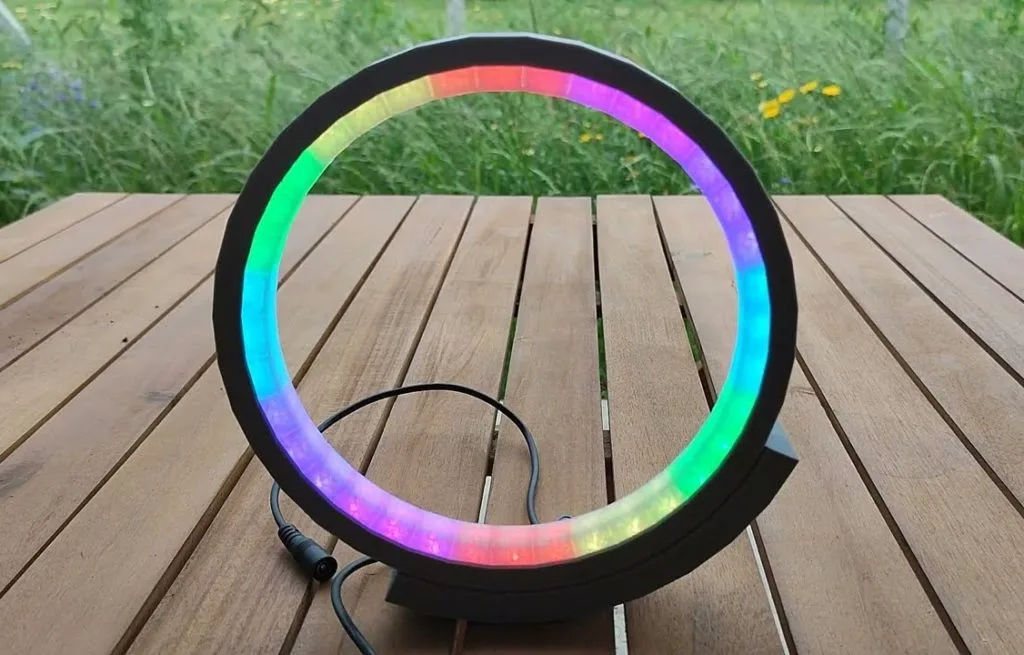
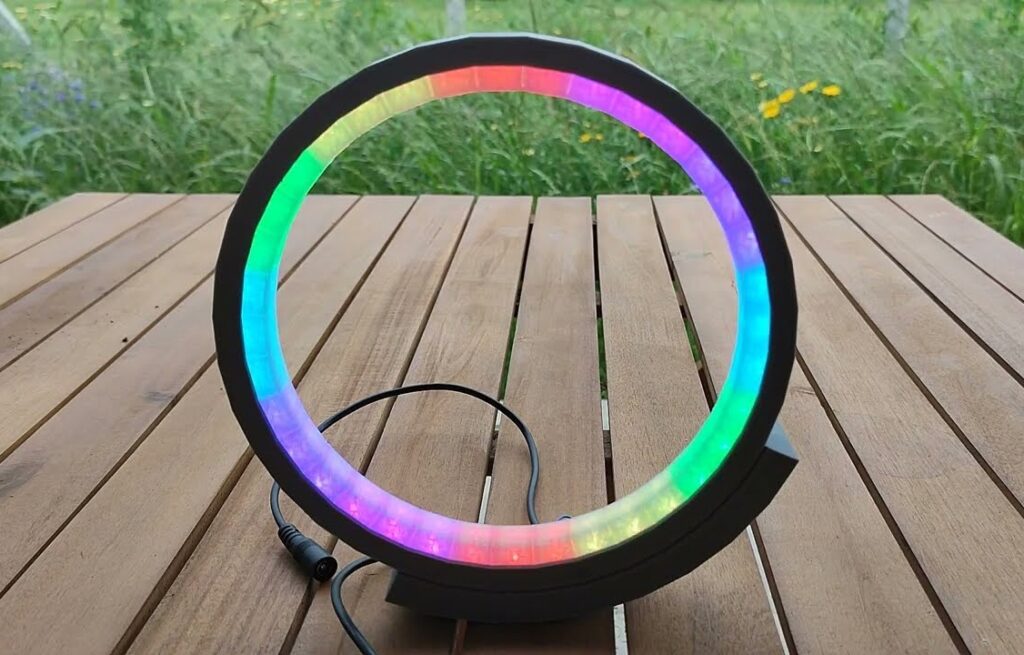
Individually addressable RGB LEDs like the WS2812B models are popular because they’re so easy to drive and don’t require any complex wiring. Each LED in the chain passes a signal on to its neighbor and you only need to know the position of an LED in the chain to control its brightness and color. This project from Andrei Erdei shows how to use that to great effect in a minimalist lamp.
This lamp is charming in its simplicity. It has an opaque outer ring with a slightly thicker base and a translucent inner ring to diffuse the LEDs. When all of the LEDs are a single color, it is a unique lamp. But because they’re WS2812B LEDs, you can take advantage of the available Arduino libraries to produce all kinds of interesting lighting effects.
The frame is entirely 3D-printable. The only required components are an Arduino Nano board, a strip of 36 WS2812B LEDs (the 60 LEDs per meter density), and a power supply. The tutorial provides a sketch with lighting effects and also explains how to work with the FastLED Arduino library. That library is fantastic for easily controlling dozens or even hundreds of LEDs, so you can create whatever effects you can imagine.
In today’s modern world, smart technology is revolutionizing the way we interact with our surroundings. From managing our home’s energy consumption to controlling appliances remotely — such as washing machines, fans, coffee makers, and even air conditioners. Smart devices offer us a level of convenience and control that was once unimaginable. However, dealing with multiple apps for various systems can be cumbersome and inefficient. This is where an integrated platform like the Arduino Cloud comes into play, offering a unified dashboard to control all your smart devices. Moreover, if you’re an Arduino enthusiast, you’ll be excited to learn how Node-RED can bridge the gap between commercial products and the Arduino Cloud. Last, but not least, you can integrate this project with the rest of your Arduino Cloud projects automating your appliance control using other devices’ data.
In this blog post, we’ll delve into a fascinating project that demonstrates how you can harness the power of the Arduino Cloud and Node-RED to control TP-Link smart plugs, giving you the ability to manage and monitor your appliances from a centralized hub.
TP-Link smart plugs and Kasa
TP-Link smart Wi-Fi plugs are intelligent devices that transform everyday appliances into smart ones, enabling remote control via your Wi-Fi network. These plugs are part of TP-Link’s smart home ecosystem, designed to offer enhanced convenience and control over your home appliances. To manage and control these smart devices, TP-Link has developed the Kasa Smart platform. Through the Kasa Smart app, you can easily schedule, automate, and control your connected devices, making your home even smarter. Importantly, Kasa Smart provides an API that facilitates seamless integration with other platforms.
Arduino Cloud: Simplifying IoT development
The Arduino Cloud is a versatile platform that simplifies the creation, deployment, and management of IoT devices. It supports a range of hardware, including Arduino boards, ESP32/ESP8266-based boards and devices programmed with Python, JavaScript or Node-RED. This platform is a boon for makers, IoT enthusiasts, and professionals, as it enables them to build connected projects without needing extensive coding skills. Arduino Cloud lets you manage and monitor connected devices through customizable dashboards, offering real-time visualizations of device data. These dashboards can be accessed remotely using your favourite browser or via the Arduino IoT Cloud Remote mobile app, available for both Android and iOS devices, ensuring that you’re in control no matter where you are.
Node-RED: Bridging the gap
Node-RED is an open-source visual programming tool designed to facilitate the connection and automation of devices, services, and APIs. Its browser-based flow editor enables users to effortlessly create workflows by dragging and dropping nodes onto a canvas and connecting them. Each node represents a specific functionality or service, such as data input/output, data transformation, or communication with external systems. Popular in the Internet of Things (IoT) realm, Node-RED simplifies the integration of sensors, devices, and cloud services, empowering users to craft sophisticated IoT applications and automation systems without traditional coding. In this blog post we will see how Node-RED can act as a middleware between TP-Link smart plugs and the Arduino Cloud.
Project setup: Getting started
To embark on this exciting journey of controlling TP-Link smart plugs with the Arduino Cloud and Node-RED, you’ll need a few prerequisites:
An instance of Node-RED (running locally or in the cloud)
No Arduino, ESP32, or ESP8266 devices are required for this project.
Step-by-step implementation
Here’s a concise overview of the steps you’ll undertake to bring your project to life:
Configure your TP-Link smart plug: Begin by adding your TP-Link smart plug to the Kasa app on your mobile device. This process connects your plug to both your Wi-Fi network and the internet, enabling remote control.
Create the device in the Arduino Cloud: In the Devices section of Arduino IoT Cloud, create a new device. This process involves selecting “Any Device” and following the instructions in the wizard. Don’t forget to save your Device ID and Secret Key.
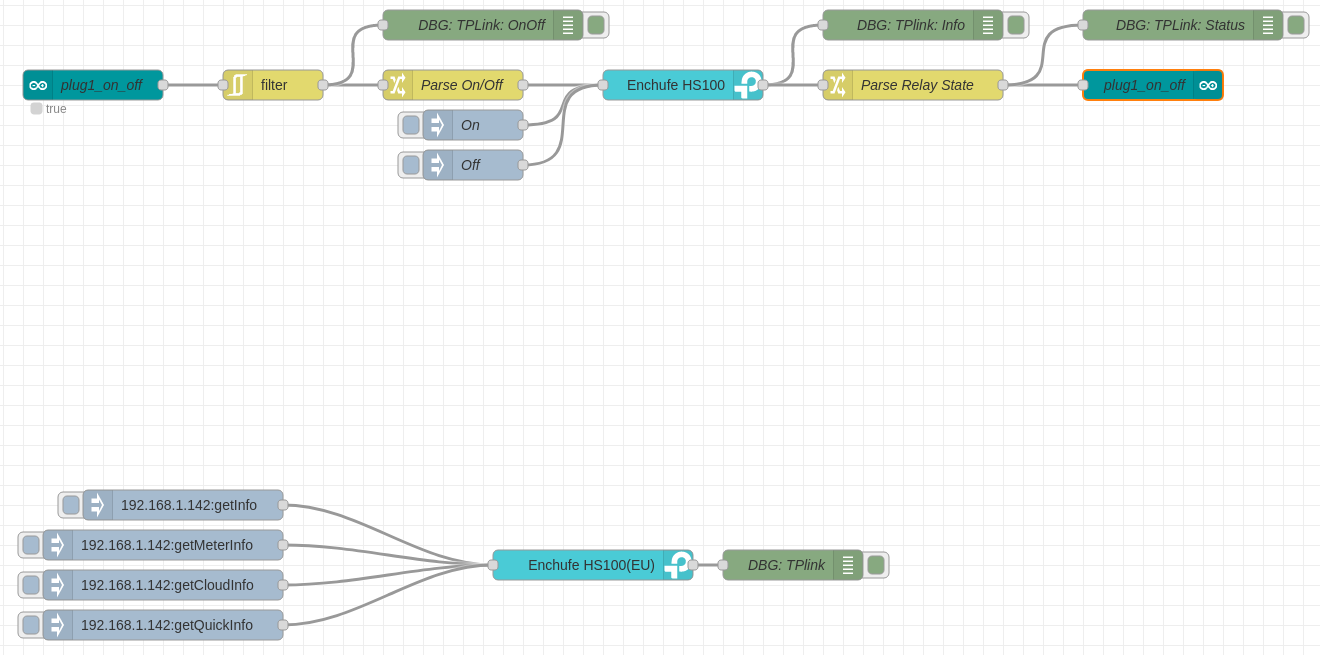
Create the Node-RED flow: Access your Node-RED instance and import the provided code. This code configures the integration between the TP-Link smart plug, Arduino Cloud, and Node-RED.
Configure the Kasa and Arduino Cloud nodes: Within Node-RED, you’ll need to input the IP address of your TP-Link smart switch and configure the connection to Arduino Cloud using the API key you generated.
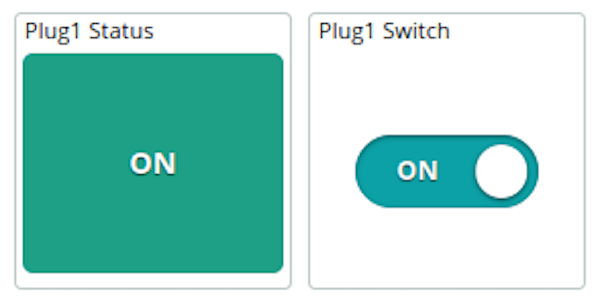
Create the Arduino Cloud dashboard: Navigate to the Dashboards section of the Arduino Cloud and create your dashboard. Customize it to your liking for easy monitoring and control.
Test the System: With everything set up, it’s time to test your creation. Access your Arduino Cloud dashboard to observe the status of your smart plug and control it using the provided button.
Try it now!
Experience the future of home control now. Discover how the Arduino Cloud and Node-RED combine to command TP-Link smart plugs. Create your Arduino Cloud account and dive in at the Project Hub project page and transform your home today!
We are happy to announce that Arduino raised an additional $22 million round, taking our Series B funding to $54 million, thanks to an expansion co-led by CDP Venture Capital and Anzu Partners. Joining them is semiconductor leader Arm, following up on earlier investments.
CDP Venture Capital, Italy’s largest VC firm, invested through Large Ventures, launched in 2023 to support the scaling up of Italian global category leaders. “We are proud to support the dimensional leap of Arduino, a unique global excellence in the democratization of open-source hardware and software,” said Mario Branciforti, Head of CDP Venture Capital SGR’s Large Ventures fund.
After the first $32 million Series B financing received in 2022, “This investment will allow us to further fuel our transformational platform initiative for professional customers, lowering the barriers to entry in IoT and AI by providing a continuum from hardware to Cloud,” says Arduino’s CEO Fabio Violante.
Want to know more about how the funds will be put to good use? A major chunk will be invested to further strengthen the R&D team based in Turin, Italy, with the goal to grow enterprise application libraries and the Arduino Cloud for Business with more integrations and embedded AI features. Another consistent part is earmarked to help Arduino grow even more in the US, where we recently opened an office in Austin, TX and bolstered our presence in Chicago, IL. Finally, we will use the additional funds to accelerate go-to-market initiatives and customer support in selected areas.
“Arduino came a long way from its humble beginning, becoming a powerful industrial tool used by cutting-edge organizations all over the world. I’m honored by this investment which is a further confirmation that our original formula keeps applying to new domains.”
Massimo Banzi, Arduino’s co-founder, chairman and CMO
This continued and expanding confidence from investors reflects the quality of the work we’ve been able to do, building a global company based on the strong values we share with every user in our amazing community.
According to Jimmy Kan, Partner at Anzu Partners, “The enterprise ecosystem is on the cusp of a seismic transformation, driven by the convergence of efficient AI and IoT at the edge. Arduino stands at the heart of this revolution, and their commitment to innovation promises to redefine the industry norms.” Making technology accessible remains our mission, because the key to our success is empowering users: “Arduino supports an extensive community of developers who play a crucial role in accelerating the deployment of new computing solutions for IoT applications,” says Paul Williamson, senior vice president and general manager, IoT Line of Business at Arm.
Amidst great change, we take our role as enablers of innovation seriously, and strive to leverage every resource we can access to expand our platform, keep up our forward momentum, and always enhance our service to you – so you can create the world we will live in.
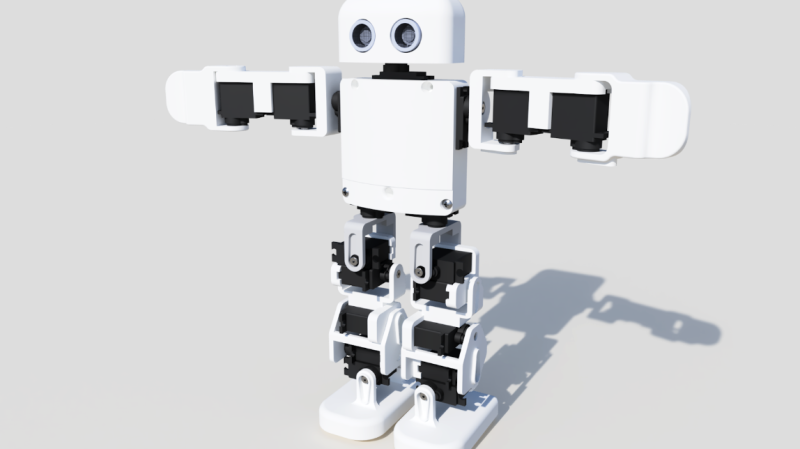
Kevin wanted to create a small bipedal robot so he could develop his expertise with walking and gestures. He relished the idea of designing something that would quite literally stand or fall depending on whether he was able to get the balance right, but also the instability needed to allow his electronic biped to walk. He envisaged a robot similar in looks to Plen (the first open-source, 3D-printable robot), with nods to Robosen (which makes the likes of Optimus Prime and Buzz Lightyear robots) and EZ-Robot, a self-assembly robot for educational use. Walking and smoothly extending the limbs were key, and meant Kevin would need to consider the robot’s aesthetic design and be vigilant about 3D-printing tolerances.
The ambitious robot design will provide “18 degrees of freedom” proclaimed Kevin part-way through the build, “and move in 18 different ways.” The hands, arms and shoulders, hips, upper leg, knee, lower leg, shin, and foot will all articulate, while the neck will be able to rotate. All of this necessitates a board with 18 servo sockets, hence Kevin’s choice of Pimoroni’s Servo 2040 board based on the RP2040 chip. A clear advantage for Kevin was being able to program everything in MicroPython, his first choice of programming language due to its simplicity. The straightforward code is pretty important as Kevin aims to put together a tutorial for Chip which all ages will be able to follow. He also rates Pimoroni’s documentation and support, and says “Pimoroni includes some great servo classes that have servo easing to make motion really buttery smooth.” Even so, he needed to adjust the tolerance (distance between the two arms between each servo) so the servos would move freely.
Rock solid foundations
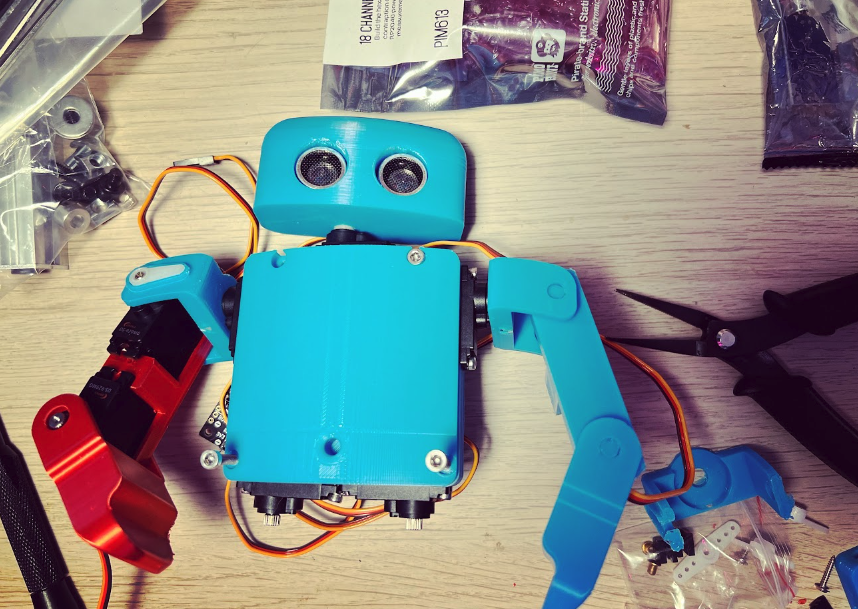
Kevin says using the RP2040-powered Pimoroni Servo 2040 board meant he could get straight to the interesting part of this project, designing the parts and constructing them. The Raspberry Pi RP2040 chip at its heart “has plenty of power and flexibility to enable me to add extra sensors, such as an IMU (inertia measurement unit), so the robot can balance and keep itself upright.” However, it didn’t all go quite to plan: “I burned out a couple of servos making this project; the joints were too stiff, and I cranked up the amperage to see if they could move it better, and magic smoke appeared.”
Despite his experience in 3D printing and robot design, Kevin found he had to print several versions of each part to get the fit just right. “Designing the model in 3D doesn’t always highlight the issues you find after 3D-printing the model,” he explains. He was able to reduce the printing time as he has two 3D printers, but one uses red filament, so the pieces then didn’t match, necessitating a complete body spray to give Chip the intended look.
We think Chip looks great and will be keeping an eye on Kevin’s blog to see how the self-balancing feature based on the PID algorithm comes along. Having splurged on 19 servos costing £9 each, Kevin admits Chip is an expensive build, but loved bringing him to life: “Seeing a little human-like robot walking around is too much fun!”
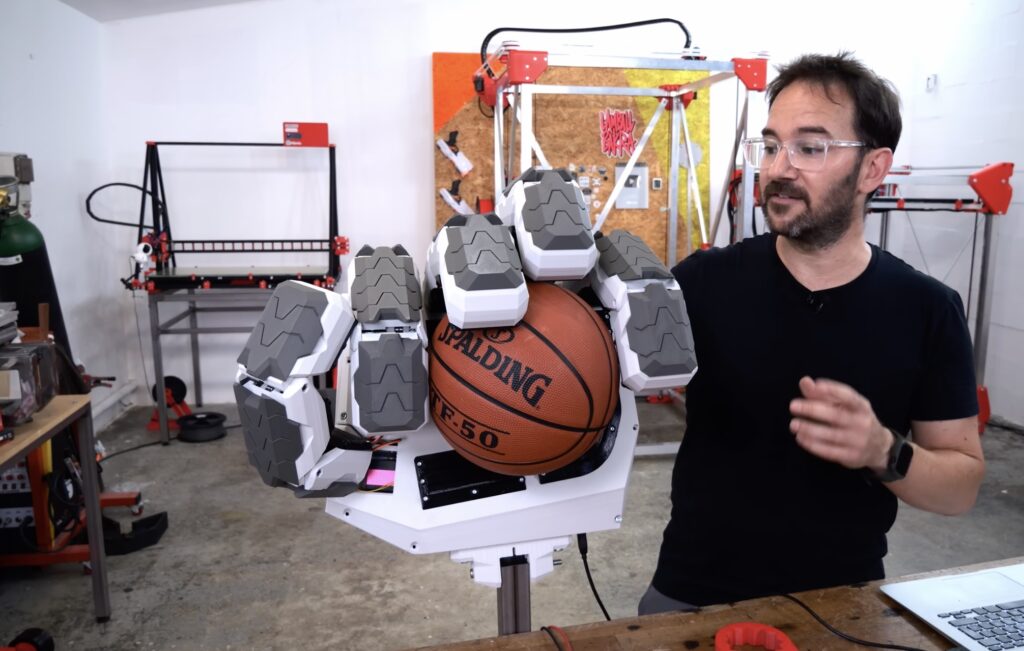
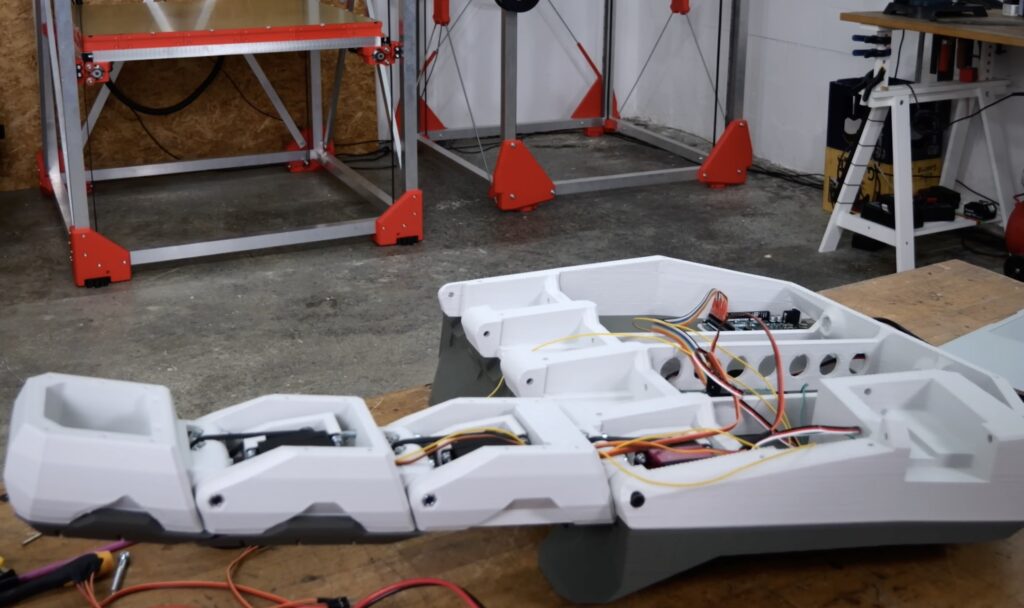
Ivan Miranda has a humble dream: he wants to build a massive 3D-printed robot that he can ride upon. In other words, he wants a mech. But that is obviously a very challenging project that will take an incredible amount of time and money. So he decided to test the waters with one piece of the mech: a huge 3D-printed robotic hand.
Miranda designed this robotic hand at the scale necessary for an enormous rideable mech, but he has only built the one hand at this point. This let him test the idea before jumping into the deep end with the full project. The structure and most of the mechanical components were 3D-printed. It has four fingers and a thumb, each with three joints (like a real human hand). It is mostly rigid PLA, but there are some flexible TPU parts that add grip.
Servos actuate all 15 of those joints. Most of them have 11kg-cm of torque, but the base of each finger has a more powerful servo with 25kg-cm of torque. An Arduino Mega 2560 controls all of the servo motors with pulse-width modulation (PWM) signals. Power, of course, comes directly from the power supply and not the Arduino.
In testing, the hand seems to work quite well. It can move and grip large objects, though the belts do slip and need to be replaced with a type that can’t stretch. We’re not sure if Miranda will complete the entire mech, but we sure hope that he does!
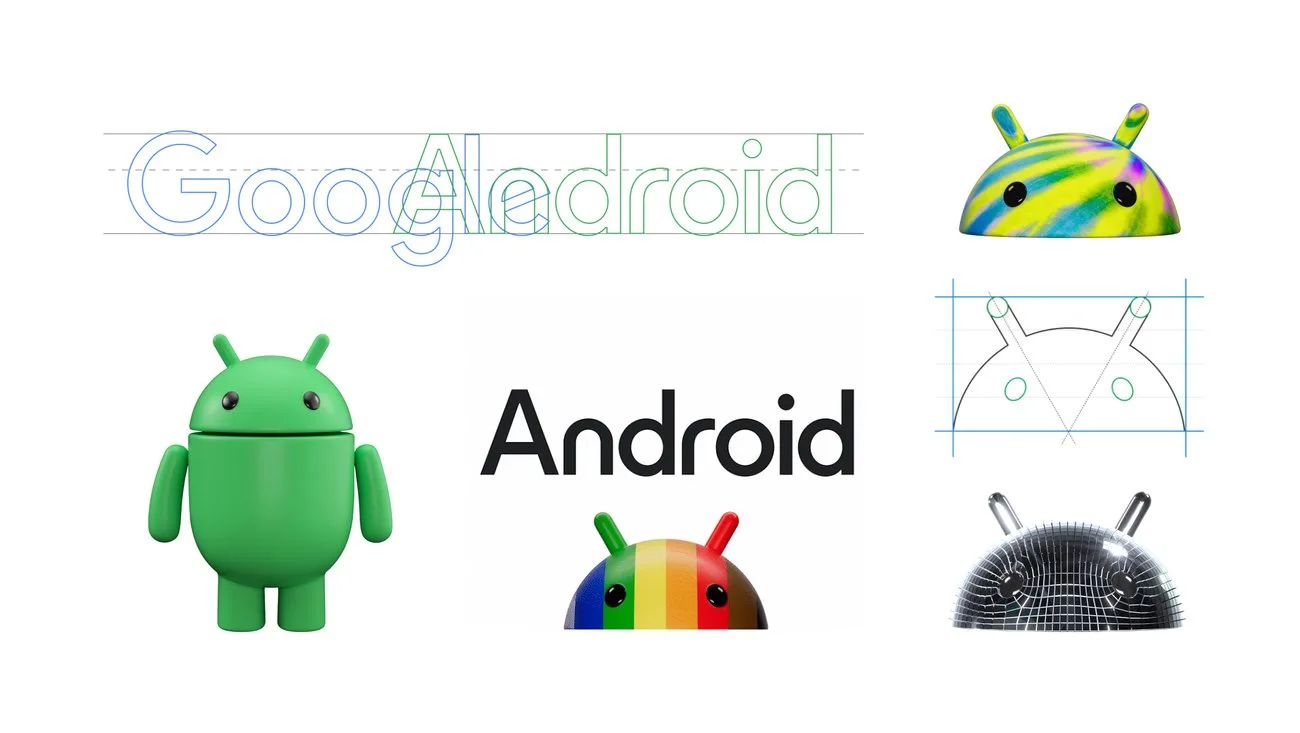
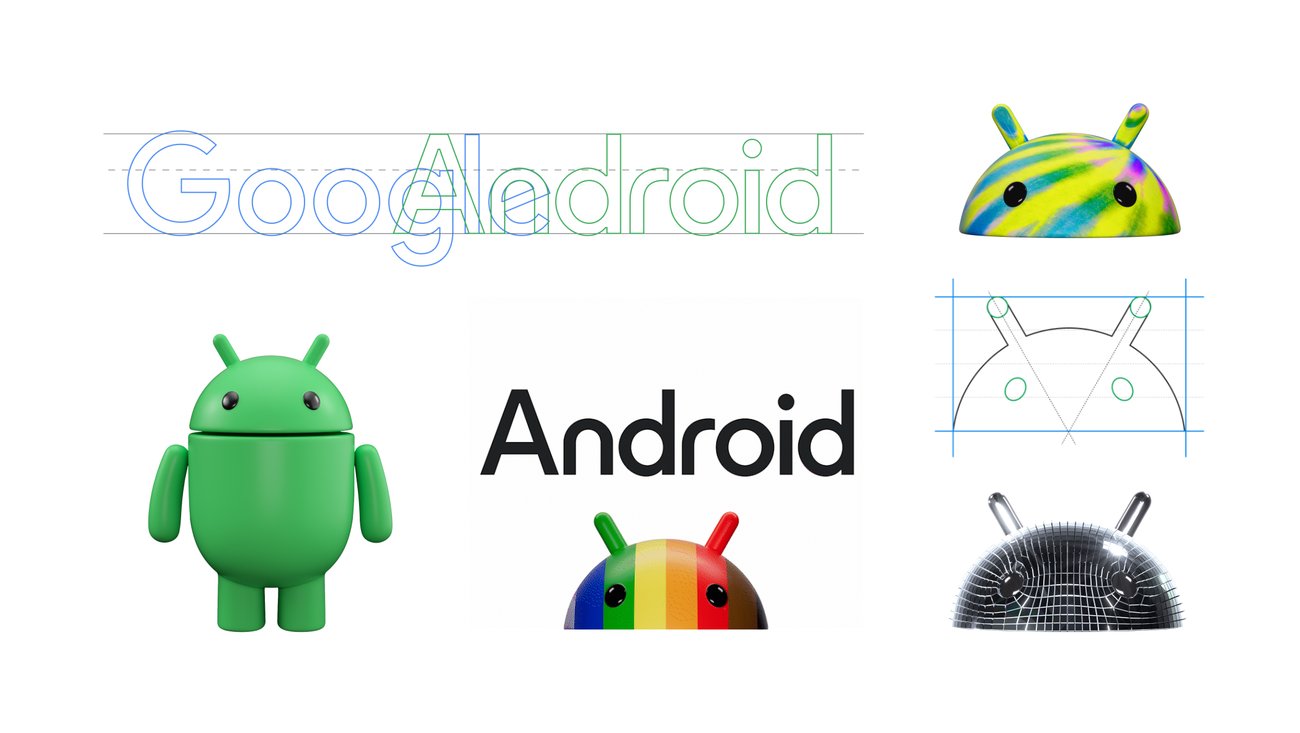
As the world’s largest operating system, Android’s open platform serves a diverse community of developers, device makers and users. And as we’ve grown — with over 3 billion Android devices worldwide — so has our vision. We believe our brand system and how we show up visually to the world as Android should reflect Android’s core ethos of being open, iterative and inclusive. That’s why we’re sharing an update to our visual identity that better represents our Android community — and it’s also a lot of fun, too.
Behind our new logo makeover
Over the past decade, the Android brand has undergone several updates to modernize its look and feel and evolve with the needs of our community. In 2019, for instance, we changed our logo to be more accessible and easier to read. We also updated the naming convention for Android releases from fanciful (e.g., Android Lollipop) to simple (e.g., Android 14), making subsequent releases clearer and easier to understand globally.
Each time we overhaul our branding, we evaluate not only changing needs, but also future goals. We know people today want more choice and autonomy, and we want our brand to be reflective of Android: something that gives people the freedom to create on their terms. As an open platform, it’s important that both our technology and brand are an invitation for people to create, connect and do more with Google on Android devices.
Our new visuals draw inspiration from Material design to complement the Google brand palette, as well as be adaptable. The refreshed and dynamic robot shows up where Android connects with people, community and cultural moments. It can reflect individual passions, personality and context.
With this update, you’ll notice some subtle changes that help connect Android to Google. In addition to moving away from our longstanding lowercase stylization of “android,” we’re elevating the Android logo by capitalizing the “A,” adding more weight to its appearance when placed next to Google’s logo. While we’ve added more curves and personality unique to Android, the new Android stylization more closely mirrors Google’s logo and creates balance between the two. We hope these small but significant updates to the Android typeface will better communicate the relationship between Android devices and the Google apps and services people already know.
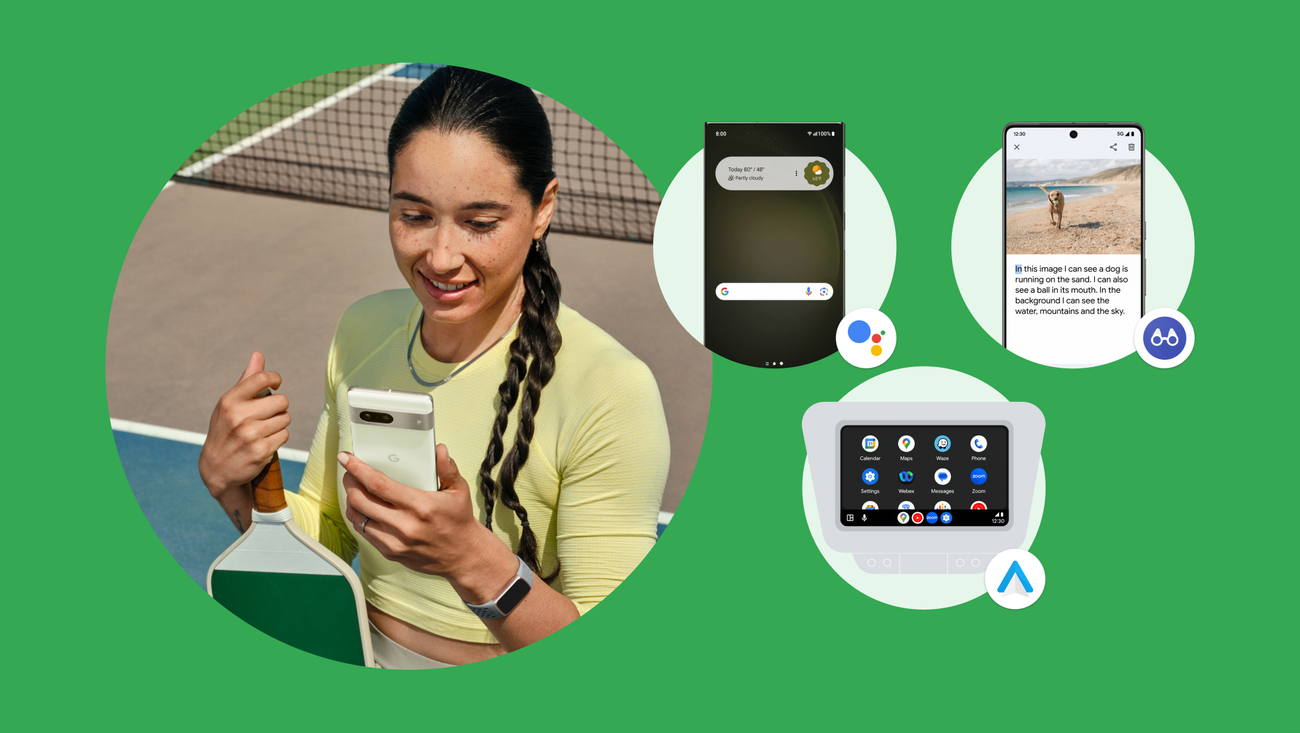
Scrolling through images in a group chat, photos on your camera app or even on social media can often be inaccessible for people who are blind or low-vision. Image Q&A on Lookout makes visual content more accessible by using AI to generate more detailed descriptions. After opening an image, you can type or use your voice to ask follow-up questions to learn more about what is in the image. Lookout is also making 11 new languages available on its app, including Japanese, Korean and Chinese, bringing the total number of supported languages to 34.
Um dir ein optimales Erlebnis zu bieten, verwenden wir Technologien wie Cookies, um Geräteinformationen zu speichern und/oder darauf zuzugreifen. Wenn du diesen Technologien zustimmst, können wir Daten wie das Surfverhalten oder eindeutige IDs auf dieser Website verarbeiten. Wenn du deine Einwillligung nicht erteilst oder zurückziehst, können bestimmte Merkmale und Funktionen beeinträchtigt werden.
Funktional
Immer aktiv
Die technische Speicherung oder der Zugang ist unbedingt erforderlich für den rechtmäßigen Zweck, die Nutzung eines bestimmten Dienstes zu ermöglichen, der vom Teilnehmer oder Nutzer ausdrücklich gewünscht wird, oder für den alleinigen Zweck, die Übertragung einer Nachricht über ein elektronisches Kommunikationsnetz durchzuführen.
Vorlieben
Die technische Speicherung oder der Zugriff ist für den rechtmäßigen Zweck der Speicherung von Präferenzen erforderlich, die nicht vom Abonnenten oder Benutzer angefordert wurden.
Statistiken
Die technische Speicherung oder der Zugriff, der ausschließlich zu statistischen Zwecken erfolgt.Die technische Speicherung oder der Zugriff, der ausschließlich zu anonymen statistischen Zwecken verwendet wird. Ohne eine Vorladung, die freiwillige Zustimmung deines Internetdienstanbieters oder zusätzliche Aufzeichnungen von Dritten können die zu diesem Zweck gespeicherten oder abgerufenen Informationen allein in der Regel nicht dazu verwendet werden, dich zu identifizieren.
Marketing
Die technische Speicherung oder der Zugriff ist erforderlich, um Nutzerprofile zu erstellen, um Werbung zu versenden oder um den Nutzer auf einer Website oder über mehrere Websites hinweg zu ähnlichen Marketingzwecken zu verfolgen.


 .
.