Kategorie: Linux
-

Arduino Pro IDE v0.0.4-alpha is here!
Reading Time: < 1 minuteArduino Pro IDE v0.0.4-alpha is here! Arduino Team — January 30th, 2020 Our dev team has some more exciting news to share: Arduino Pro IDE v0.0.4-alpha has been released. Highlights include: Automatic Arduino language server (LS) recovery. From now on, if the LS process terminates, it restarts automatically. Updated the bundled Clang version…
-

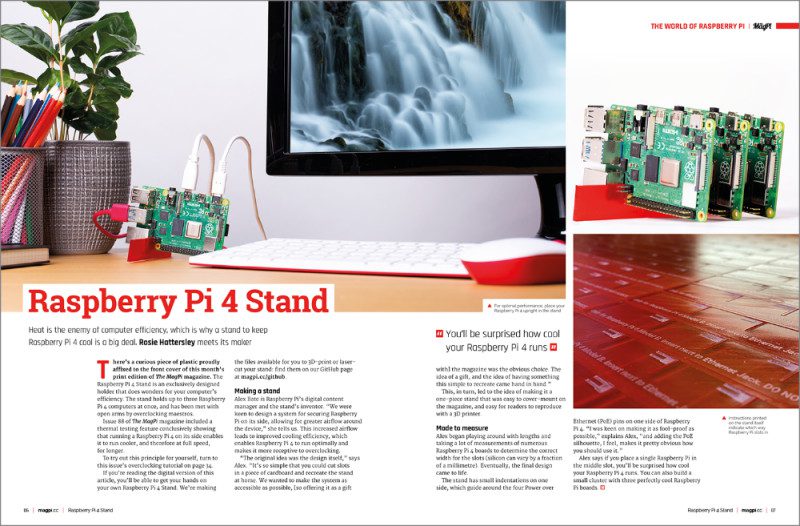
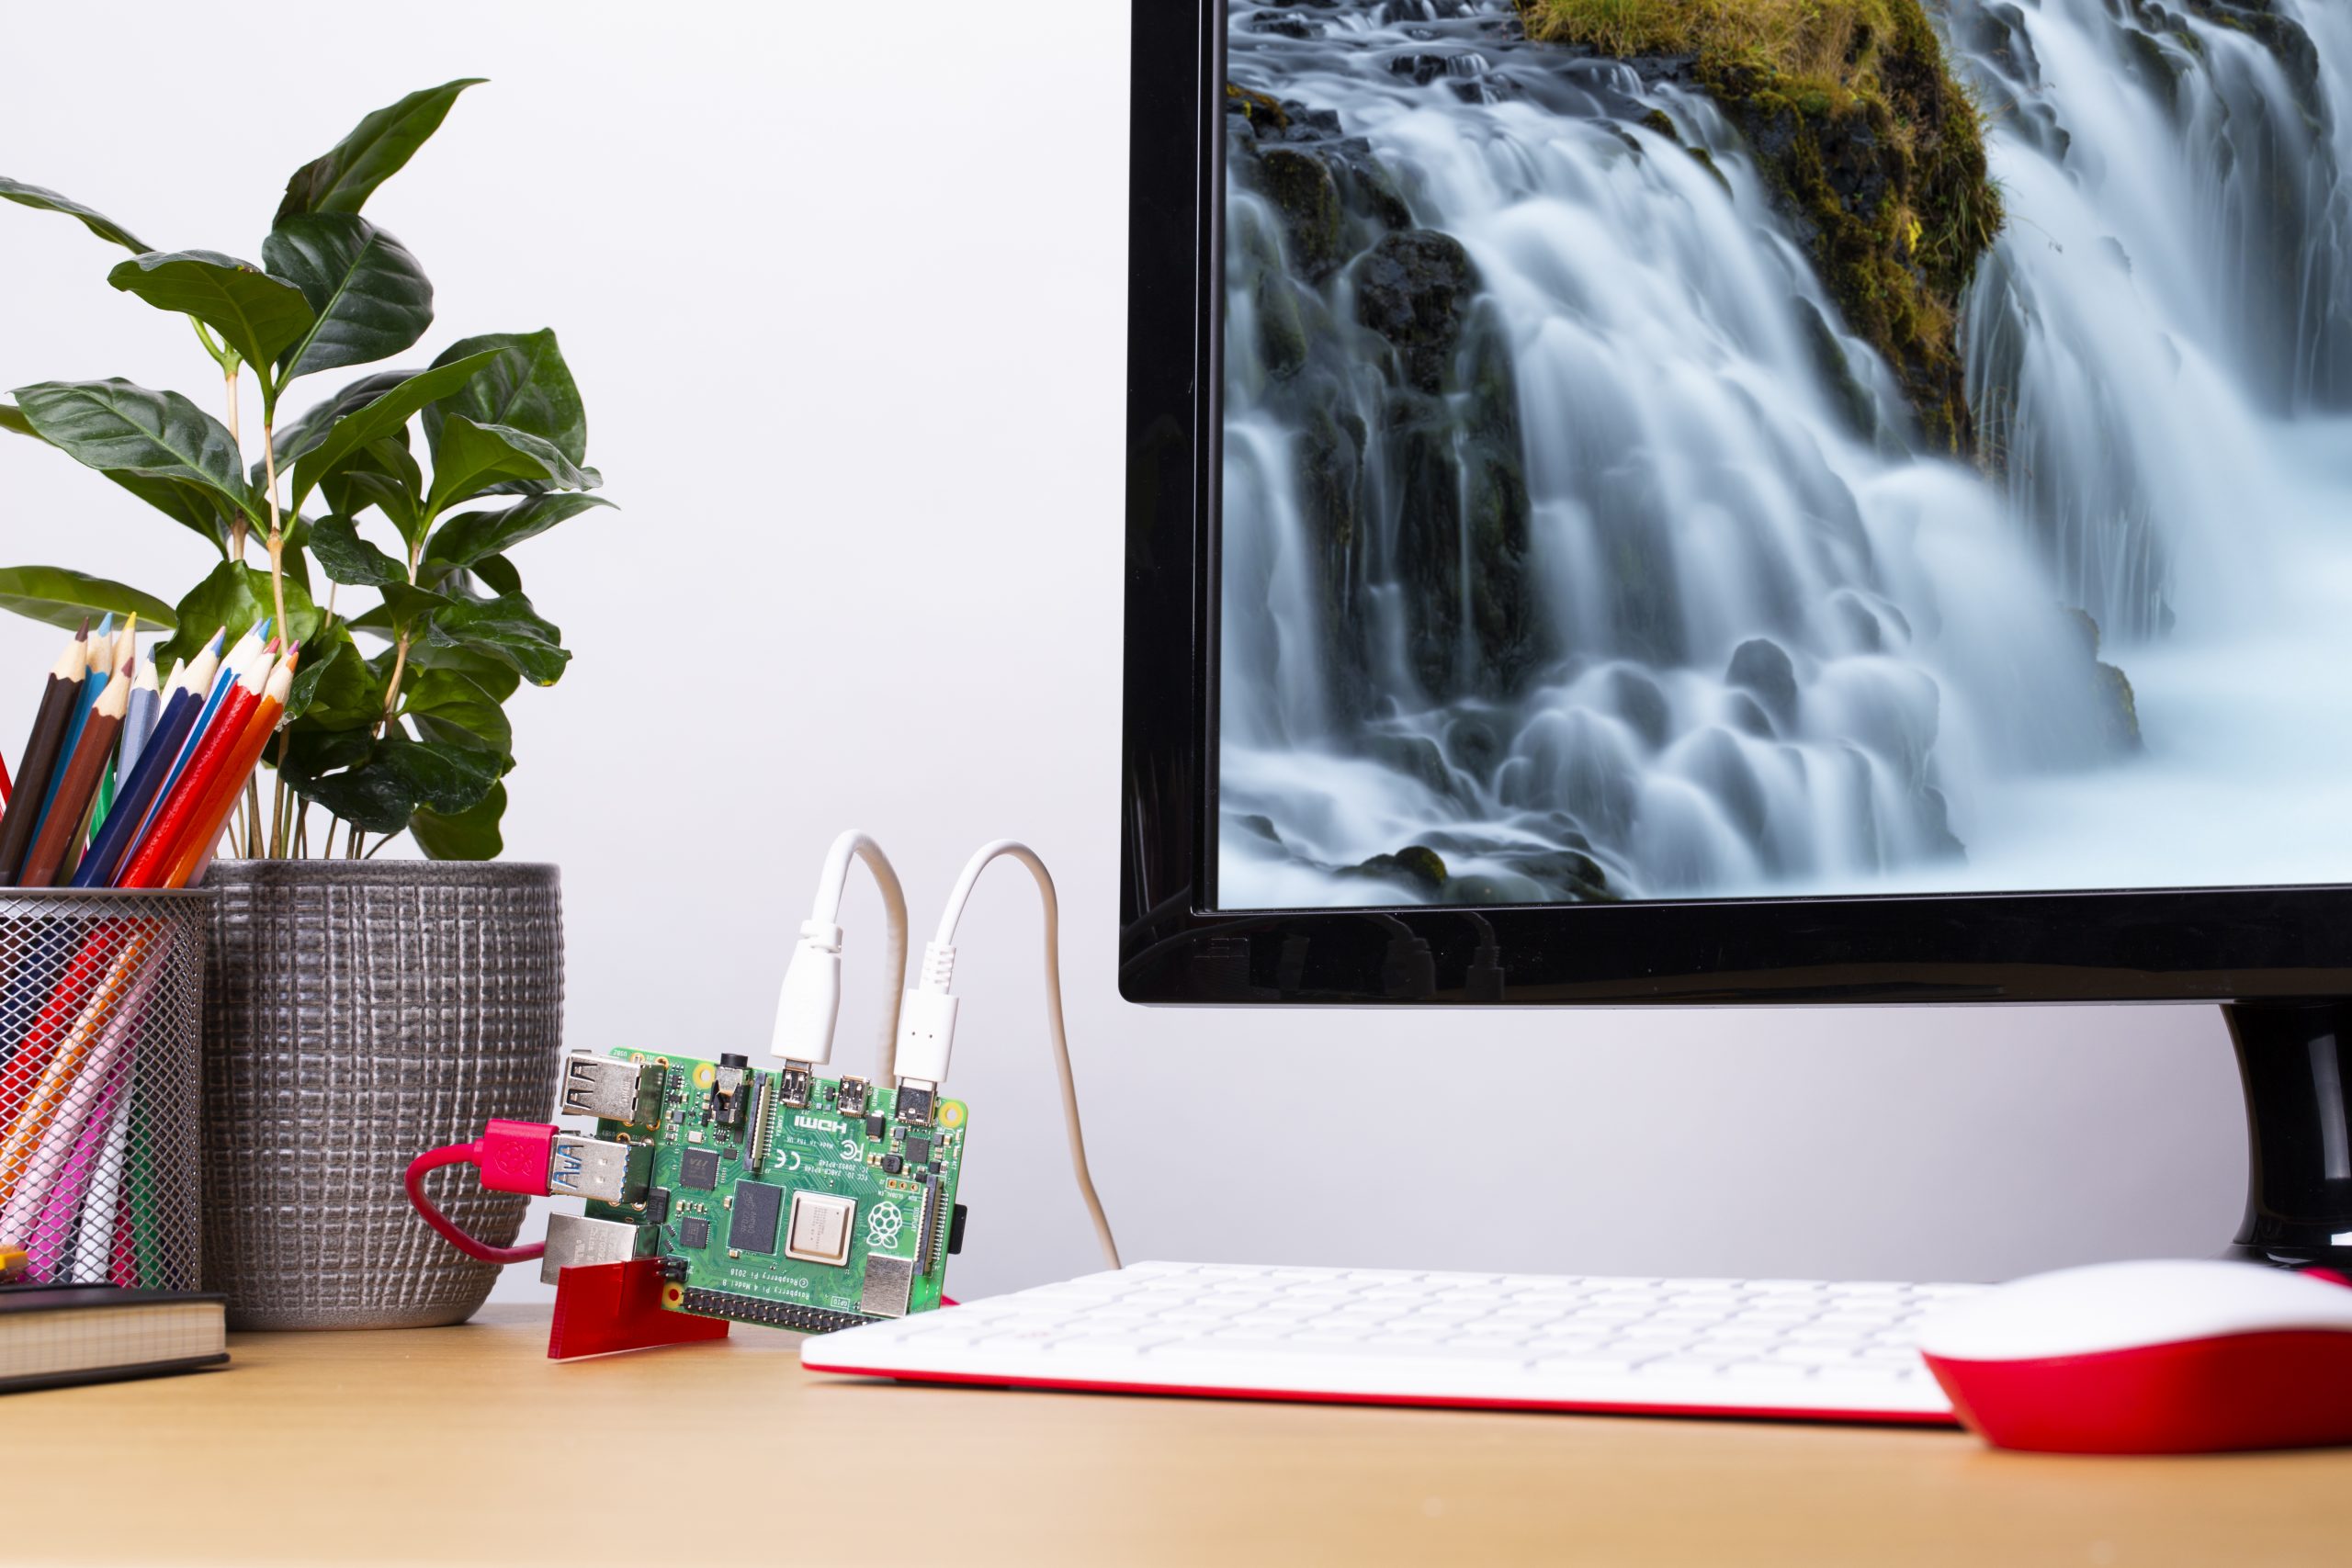
Free Raspberry Pi 4 Stand, overclocking guide, and cooling case testing in The MagPi 90
Reading Time: 3 minutesBuild the ultimate Magic Mirror When it comes to relatively easy Raspberry Pi projects, that produce impressive results, few are better than making a Magic Mirror. Combine a stock Raspberry Pi touchscreen display with observation glass and a wooden frame, and you get an incredibly impressive mirror that displays information in white…
-

Free Raspberry Pi 4 cooling stand with The MagPi 90!
Reading Time: 3 minutesIn issue 88 of The MagPi, we discovered that Raspberry Pi 4 can be kept cooler than usual if placed on its side. This gave us an idea, and thanks to many Top People, it resulted in the small, simple, and very practical Raspberry Pi 4 stand that you will find on…
-

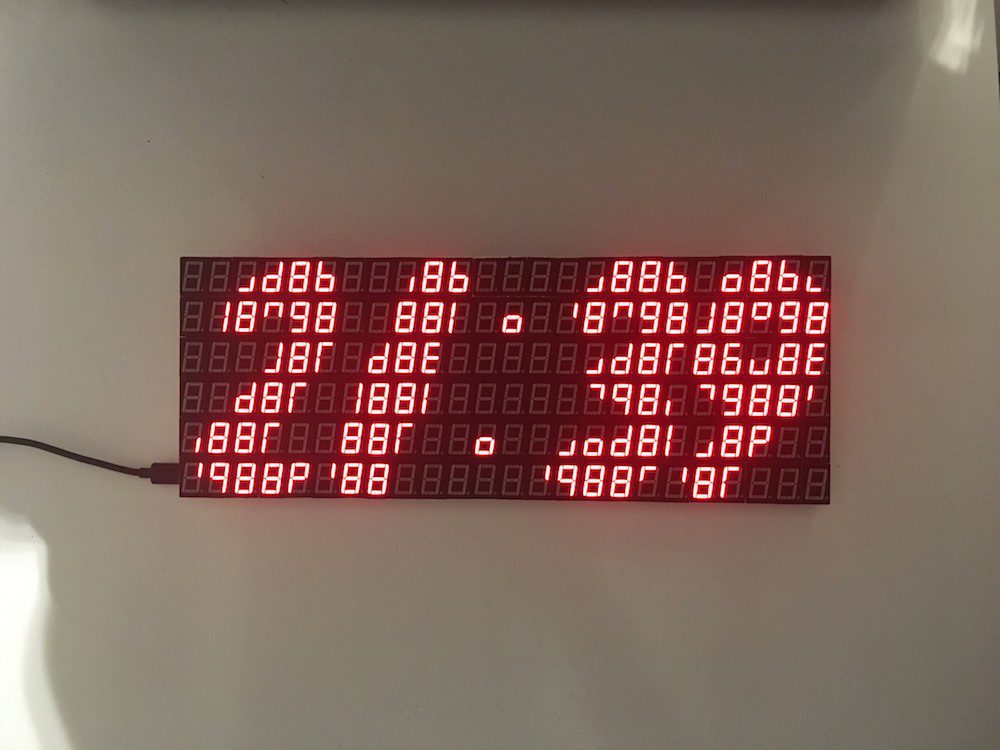
144 7-segment displays make up this delightful digital clock
Reading Time: 2 minutes144 7-segment displays make up this delightful digital clock Arduino Team — January 29th, 2020 Using 7-segment displays to make a clock is nothing new, but what if you combined 144 of them together to create an epic LED timepiece? That’s exactly how this project was made, allowing it to show surprisingly…
-

Build your own first-person shooter in Unity
Reading Time: 3 minutesRaspberry Pi Press is back with a new publication: this time, it’s Wireframe’s time to shine, with Build Your Own First-Person Shooter in Unity. BUILD YOUR OWN first-person shooter game in Unity || Wireframe magazine Ever fancied creating your own first-person shooter game? Now you can with Wireframe’s brand new, 140-page bookazine,…
-

Win one of five ProtoDock add-ons!
Reading Time: < 1 minuteSave 37% off the cover price with a subscription to The MagPi magazine. Try three issues for just £5, then pay £25 every six issues. You’ll save money and get a regular supply of in-depth reviews, features, guides and other PC enthusiast goodness delivered directly to your door every month. Subscribe
-

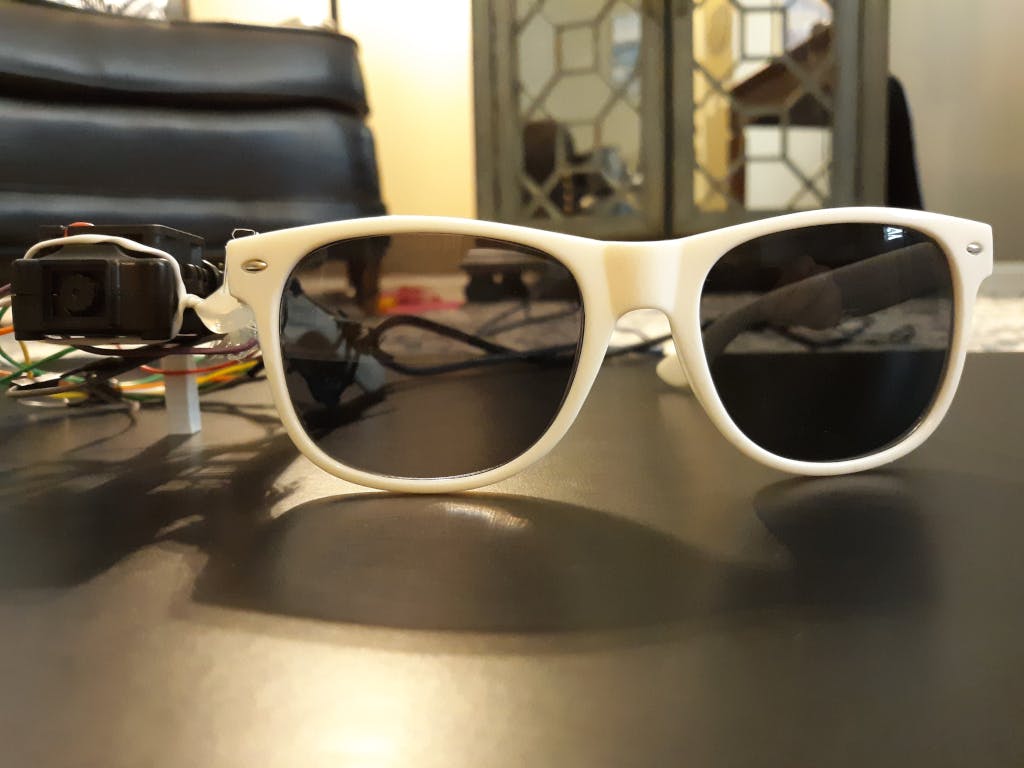
Give your memory a boost with Newrons
Reading Time: 2 minutesGive your memory a boost with Newrons Arduino Team — January 28th, 2020 When you get a notification on your smartphone, more often than not, you’re doing something more pressing. You then silence the alarm, and perhaps forget about it. Nick Bild, however, has created a pair of smart glasses that take…
-

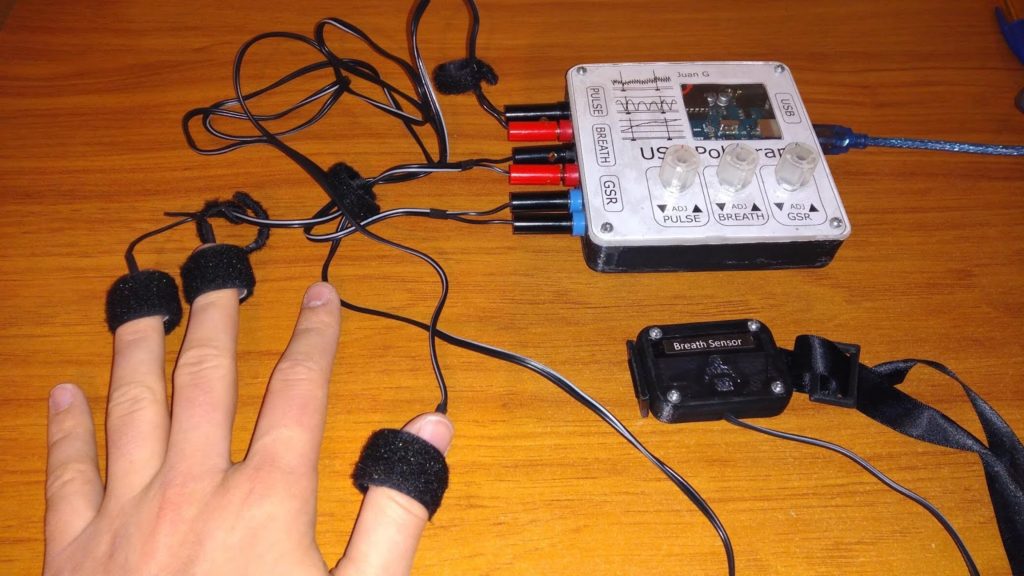
“The Arduino lie detector determined that was a lie”
Reading Time: 2 minutes“The Arduino lie detector determined that was a lie” Arduino Team — January 28th, 2020 Want to know if someone is telling you the truth? Well, unfortunately Juan Gg’s “USB Polygraph” isn’t a professional product and won’t actually give you an answer. However, it is a neat exploration into biometrics that incorporates…
-

50 Raspberry Pi 4 Tips and Tools: pt 1
Reading Time: 5 minutesWhether you are new to making with Raspberry Pi or have been at it for years, there are always new tools and techniques to be learned. For the new arrival to the making community, this list will be a great resource to introduce you to tools that you may not have heard…
-

Our brand-new HackSpace magazine trailer
Reading Time: < 1 minuteOur brand-new trailer for HackSpace magazine is very pretty. Here, have a look for yourself. THIS IS MAKING || Hackspace magazine HackSpace magazine is the new monthly magazine for people who love to make things and those who want to learn. Grab some duct tape, fire up a microcontroller, ready a…
-
Arduino 1.8.11 has been released
Reading Time: < 1 minuteArduino 1.8.11 has been released Arduino Team — January 27th, 2020 We’re excited to announce that Arduino IDE 1.8.11 is here! In addition to the usual load of bugfixes and small improvements under the hood, the latest version includes: Improved support for Mac OS X (the app is now notarized and strictly follows…
-

Prototype room-scale, shape-changing interfaces with LiftTiles
Reading Time: 2 minutesPrototype room-scale, shape-changing interfaces with LiftTiles Arduino Team — January 27th, 2020 Shape-shifting interfaces, which could be deployed to create dynamic furniture, structures or VR environments, have great potential; however, creating them is often quite difficult. To simplify things, researchers from the University of Colorado Boulder have developed “LiftTiles,” modular blocks that…
-
Can you connect a Raspberry Pi to a GoPro Hero 6?
Reading Time: < 1 minuteA contractor is drilling in the office space above ours, and it sounds like we’re under attack by a swarm of very angry, Transformeresque bees. We can’t hear ourselves think. Although we can hear the drills. Because of this disruption, I (Alex) am unable to focus on words. [Ed’s note: me…
-

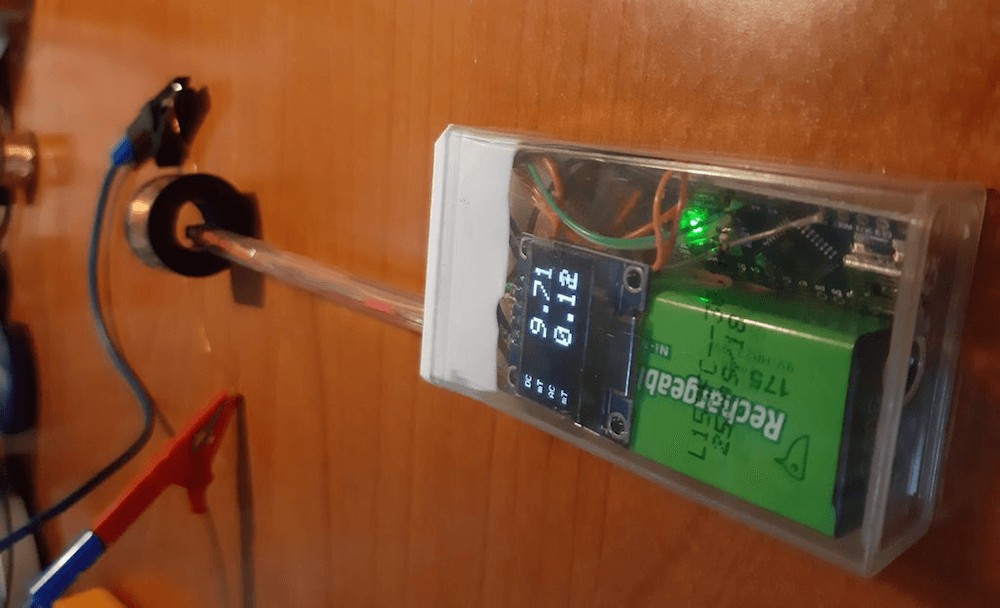
Turning a Tic Tac box into a portable magnetometer
Reading Time: 2 minutesTurning a Tic Tac box into a portable magnetometer Arduino Team — January 24th, 2020 If you want a way to measure magnetic fields on the go, then look no further than this tiny device from Instructables user “rgco.” The portable magnetometer was made using just a couple of common parts, including…
-

What was your first Raspberry Pi project?
Reading Time: < 1 minuteQuick and simple blog post today: what was your first Raspberry Pi project? Or, if you’ve yet to enter the world of Raspberry Pi ownership, what would you like to do with your Raspberry Pi once you get one? Answer in the comments below, or on Twitter using #MyFirstRaspberryPi. Photos aren’t…
-

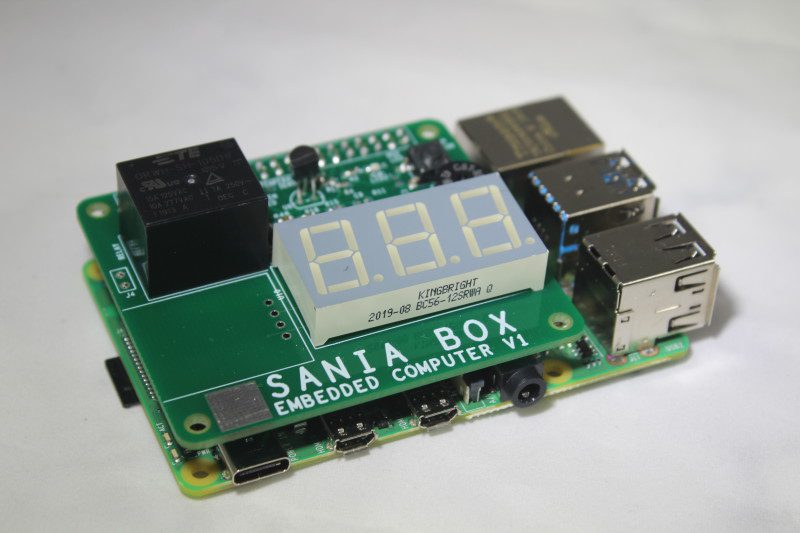
Sania Box encourages kids to build a PC – no adult required
Reading Time: 2 minutesSania Jain is one of a growing band of teenage entrepreneurs keen to share their ideas with peers. In her case, her idea is to spread a love of coding and STEAM skills with children who may not have had a chance to explore it before. Sania’s eponymously-named DIY computer box is powered…