Kategorie: Reviews

  • Win a Monk Makes Air Quality Kit

    Win a Monk Makes Air Quality Kit

    Reading Time: < 1 minute

    Subscribe

  • Automated standing desk

    Automated standing desk

    Reading Time: 3 minutes

    His solution? A desk that would rise automatically every hour or so, encouraging him to spend more time standing. “One of the most valuable takeaways from behavioural economics is the insight that you’re far, far more likely to do the ‘right’ thing when it’s also the easiest thing, or the default thing,” he explains.

    Making the connection

    After opening up his desk’s control box to investigate its workings, he discovered a set of test pins that, when connected correctly, replicated the actions of the programmable buttons. 

    By connecting two particular pins together, he found he could cause the desk to rise to a preset height. Now all he needed was a way of connecting them in an automated way to raise it at regular intervals. The obvious choice was a relay which could be triggered with a small current. After thinking about designing a circuit with a 555 timer chip, he settled on a Raspberry Pi Zero to control the relay.

    “You could argue that a Raspberry Pi was hugely overkill for this project,” he says. However, he had been wanting an excuse to play around with one for ages, and found it easy to work with. “The ability to SSH right in and to write the program in Python, which I’m much more comfortable with than C++, made it very attractive.”

    The project took David a few hours to complete, altogether, over the course of a few days. “Honestly, nothing was particularly hard,” he tells us. “I had to do a bit of research to find the right type of relay, since I’m not very familiar with all of the technical specifications for those kinds of electrical components.”

    He found setting up Raspberry Pi and writing the relay control code easy. Soldering the wires – from the desk’s pins to the relay, and the latter’s control pins to Raspberry Pi’s GPIO – was also simple. “I had to shave a little bit of plastic off of the control box to allow it to close fully with my wire coming out, but that was pretty easy.”

    Don’t sit down

    With the desk now rising at regular intervals, David found it helped him avoid sitting for too long. “When I had to make a conscious decision to stand, I did it far less often. The ‘default’ was to sit all the time. When the desk rose automatically every hour, the ‘default’ was to stand, and I almost always ended up standing for a good chunk of the hour.”

    He ended up tweaking the code to make it operate a little more randomly. “I originally had it going up at exactly the same time every hour, but then I found myself anticipating it, and I found it just more pleasant to have it happen more organically.”

    While he has noticed less pain in his back as a result, the desk has occasionally taken him by surprise. “It definitely has caused some funny moments! Sometimes, I would be on a video call, in the middle of a sentence, and the desk would start to rise. I would just keep on talking and stand up with it. It never caused any problems, though, and it would sometimes be a nice way to lighten the mood.“

  • The Official Raspberry Pi Handbook 2022 is out now!

    The Official Raspberry Pi Handbook 2022 is out now!

    Reading Time: 3 minutes

    Pick up your copy of The Official Raspberry Pi Handbook

    The Official Raspberry Pi Handbook is available as a free digital download, or you can purchase a print edition from the Raspberry Pi Press store. Print copies can also be bought from The Raspberry Pi Store in the Grand Arcade, Shopping Centre, Cambridge; plus WH Smith retail outlets and good newsagents.

    50 Hacks & Hints

    Raspberry Pi Hacks & Hints

    Beginners and seasoned experts can get more from Raspberry Pi computers with QuickStart Guides and a definitive collection of tips and tricks. 

    Lunchbox Arcade Game

    Lunchbox Arcade game

    The Official Raspberry Pi Handbook 2022 is packed with 76 pages of incredible projects. Discover awesome builds like this Lunchbox Arcade Game. In this project, maker Rich Jones has used an arcade stick, buttons and LCD screen to transform a colourful lunchbox into a portable video games system.

    Introducing Raspberry Pi Pico

    Introducing Raspberry Pi Pico

    This year, Raspberry Pi launched its first Microcontroller board, Raspberry Pi Pico alongside Raspberry Pi’s first silicon microcontroller: RP2040. It’s an exciting development that brings a whole new level of making to the maker community. Our in-depth Raspberry Pi Pico feature has detailed specifications, in-depth use cases, and interviews with the engineers, 

    iPod Classic Spotify player

    Upcycle old products with Raspberry Pi: iPod Classic Spotify Player

    This amazing iPod Classic upgraded with Raspberry Pi demonstrates how small computers can bring classic gadgets back to life. This iPod Classic now streams Spotify tracks.

    Build the ultimate media centre

    Build the Ultimate Media Centre

    Your official Raspberry Pi Handbook 2022 is packed with features and tutorials for incredible home builds. Putting together a media centre is a great way to make use of Raspberry Pi. With your own media centre you can stream and play all your favourite movies, music, and TV shows. Plus show off your photo collection and understand how it all works. 

    Play classic console games legally on Raspberry Pi

    Play classic console games legally on Raspberry PI

    Retro game emulation is another amazing use for the ultra-modern Raspberry Pi. Getting hold of games and running them legally is an incredible way to build a working arcade machine. Our series of arcade tutorials 

    Inky Impression

    Definitive reviews of the best Raspberry Pi kit

    Inside the Handbook 2022, you will discover all the greatest Raspberry Pi gadgets, accessories and add-ons! Take Raspberry Pi to whole new levels with our guide to products you can quickly attach to Raspberry Pi. Like this full-colour e-reader display, perfect for creating colourful interfaces. 

  • Synth6581

    Synth6581

    Reading Time: 3 minutes

    The C64 was limited to a single SID sound chip and Simon could only program in BASIC at the time, but he thought that one day it would be great to make a MIDI-controlled synthesizer out of it. “Delving deeper, I found that the designer of the SID chip, Bob Yannes, also had ideas of making a polyphonic synthesizer out of it but it never happened. I thought I would make it happen after all.”

    Authentic audio

    Simon realised his polyphonic synth would have a rich, fat sound if he dedicated one SID chip per channel, and so six chips would make it possible to play six notes at once. “I wanted to make it sound like an original C64 computer and so using eighties silicon was going to be the way [rather than emulating sounds].”

    Sourcing six original MOS6581 SID chips on eBay, he designed a PCB to accommodate each chip. After hand-assembling the six board units, he stacked them on top of a Raspberry Pi 4 which ‘pokes’ their registers to control them.

    From a PC-based software synthesizer he’d written in Python some years ago, Simon ported the MIDI control part of the code to Raspberry Pi and modified it to control external circuit boards. 

    The biggest challenge was getting the SID chips to make any sound at all. “I wrote a C-driver that manages the I/O to control the SID chips because Python was slow at dealing with I/O,” he says. “Since the filter of each SID chip has different characteristics, I had to plot the cut-off frequency vs filter setting of each channel and make a look-up table so that the chips behaved the same way.”

    One downside of using multiple SID chips is how much background hiss they make. “When you have six chips mixed to one output and you are not playing anything, the chips all make low volume whirring noises out the audio output. The board design can go up to eight SID chips, but that is even more background noise.”

    Depeche modes

    The Synth6581 offers two main modes. In the standard synthesizer mode, audio from the SIDs is played using a standard MIDI keyboard connected to Raspberry Pi via USB. As shown in Simon’s YouTube demo, the keyboard’s sliders and knobs are used to tweak various parameters of the SIDs’ voices. Filters can also be added so sounds evolve over time, while arpeggiator settings include the ability to modulate one oscillator to recreate that familiar ultra-fast arpeggio sound used in so many C64 tunes.

    The second main mode for Synth6581 is music playback. This enables the playing of distinctive sounds reverse-engineered from music files of C64 games. A single key press can trigger playback of elements such as percussion loops and basslines.

    The public response to Synth6581 has been very positive. “People have thanked me for reminding them of games played 30 years ago and enjoyed the reboot of those sounds,” says Simon. While he plans to make further improvements to it, he also has an eye on other musical projects. “One really big challenge would be to open up an old Roland synthesizer and use the Raspberry Pi to control its sound registers directly. It’s a great hobby, but very time-consuming.”

  • HIIT Workout Trainer

    HIIT Workout Trainer

    Reading Time: 3 minutes

    With that in mind, James married his regular HIIT (high-intensity interval training) workout with Raspberry Pi, and the HIIT Raspberry Pi web app was born. It’s a clever idea that uses machine learning on Raspberry Pi to keep tabs on your workout in real time and make sure you are getting optimum results.

    No pain, no gain

    James first had the idea in January 2020, and had a prototype ready around three weeks later, with improvements and tweaks then made based on feedback from family, friends, and internet reaction. He’s taken the HIIT concept, where you have short bursts of very high-intensity activity alternated with rest or much lower intensity exercise, and arguably improved it. 

    “It gamifies workouts with the leaderboard dashboard, and makes doing exercise fun with your partner and friends,” he says. What’s more, the app is simplicity itself in that it basically does just two things. Firstly, it uses computer vision, and a Raspberry Pi Camera Module, to track movements and poses, and then it scores them based on a set of predefined standards. 

    To speed up the machine learning algorithms, James plugged a USB Coral Accelerator Edge TPU into his Raspberry Pi. This, he highlights, was an important addition: “An Edge TPU is required for it to work roughly at 30 fps. Without the accelerator, frame rates drop significantly and the user experience deteriorates.”

    Of course, as with all builds, some fine-tuning was required, as James shares. “Every single workout consists of many moves or a sequence of poses. HIIT Workout Trainer needs to make sure to track them at a fraction of a second under various external conditions. Also, the web app interface has gone through many evolutions to have an intuitive and simplistic version of high-performance.” 

    James has made various improvements to the project, with most coming from faster and more efficient video processing by the ML model under the hood, as well as user interface redesigns on the front. “I’m definitely going to test more workouts if I have enough time on hand. It would be great if more people joined in,” he says.

    Unbiased adjudicator

    This idea has obvious potential. James has described the app as akin to an “electronic referee”, and it could easily be adapted for other forms of sport or exercise: “I’ve already seen people do similar awesome projects, but for weight training.” 

    So, if you’d like to try your hand at this project, James very much encourages it. “The project is open-sourced on GitHub, where you can find more to set it up and get started. If anyone has any questions, please find me via email or Twitter, I’m more than happy to help.”

    What more motivation do you need? As James reminds us on his web page, “Just imagining a workout is never the same as actually doing it. With everything put into place, let’s slip on sweatpants and get it rolling!”

  • RACOON waste sorter

    RACOON waste sorter

    Reading Time: 3 minutes

    One of the problems faced by individuals is uncertainty over what can and cannot be recycled. While recycling bins are commonplace in most countries, they can become contaminated with the wrong material and that’s why, in the UK alone, some 525,000 tonnes of household waste ends up being rejected at the point of sorting.

    This can prove expensive to rectify, but a team of students at Rice University in Houston, Texas, have been working on a low-cost solution. They’ve created a prototype waste bin that keeps a close eye on what is thrown away. “We wanted to provide a safety net for users so they can recycle without fear of contaminating recycling loads,” says one of the students, Rene Carballo.

    Trash training

    In designing their project, they opted to use a Raspberry Pi computer as the main control system. “We chose it because of its small but powerful form-factor,” Rene says. They supplemented it with an Arduino to control some sensors and motors. “The use of these two platforms allowed us to make a device that would accurately classify and sort recyclables, while being easy to use and maintain,” he explains.

    The system uses a camera to take an image of any trash placed within an intake section that sits between two compartments. This is sent to Raspberry Pi which then seeks to classify the object that has been thrown away, allowing a decision to be made as to whether the item is non‑recyclable or not.

    If so, it is sorted into the correct bin, ensuring the one for recycling isn’t contaminated. “The main decision-making mechanism is a neural network that takes an image of the recycled item in order to classify it,” Rene reveals. Gathering the data took three months.

    “To train the network, we had to source our own data, taking more than 1500 images by hand,” he continues. “As this is a relatively small dataset for deep learning, we mitigated the issue by using transfer learning and data augmentation.”

    Cleaning up

    As well as sorting rubbish, the device doubles as an educational tool, the idea being that users end up learning what should and shouldn’t be recycled without needing assistance from the smart bin.

    “The device is coupled with a companion web app which provides resources on the best recycling practices so people can better understand how to recycle,” says Rene. “It also allows users to check in to the device with a personalised QR code, giving them rewards points when they recycle correctly.”

    The students are now looking to refine their project, with the immediate aim of making their own university more sustainable by placing these bins around the campus. “We want to improve on the algorithm to increase the accuracy of the device, and spend more time on the web app to allow for more personalised feedback to the user,” Rene says. “It’s more important than ever to take care of our planet.”

  • OPINION: Making it together

    OPINION: Making it together

    Reading Time: 2 minutes

    I have always supported those magazines I love. I currently subscribe to Simon Brew’s excellent Film Stories magazine, BBC Good Food, National Geographic, and I get RSPB Nature’s Home and Tate Etc. delivered as a member of both fine organisations. I also have a Readly account for picking up digital magazines that I wouldn’t admit to reading in public, and PressReader for picking up digital newspapers (incidentally, did you know you can read these online for free with a library card, at pressreader.com?)

    You can get The MagPi magazine, and all of our stable of tech titles for free: HackSpace magazine, Wireframe, and Custom PC are all available as PDF downloads. This is because we want to reach as many people as possible, and make computing as accessible as it can be to a wide range of folk. Raspberry Pi is all about lowering the barrier to entry for computing. And our magazines are a proud part of that.

    Each magazine we make offers a different window into the tech and maker scene, whether it’s Wireframe’s developer interviews, or HackSpace’s practical tutorials on wood and metal-working. I even enjoy Custom PC’s deep dive into obscure PC components like cooling widgets. It keeps people off the streets, probably literally as they can’t afford shoes, having spent all their money on motherboards.

    Keeping it real

    One thing I’m especially looking forward to is meeting The MagPi magazine readers again. Whether it’s at Pi Wars, the Scratch party, or the Raspberry Pi Birthday Bash. It’s at these kinds of events that the community comes together. This is where we really find out if it’s all working. Fingers crossed we will be back attending these events soon. 

    In the meantime, you can really help us out by filling out our reader survey. We’re not sure how it works at other magazines, but we set up these surveys ourselves, and the editorial team sends them to our email list. 

    It’s not just some marketing gumpf. We read every response and take all the thoughts on board. And of course, you can always email the team directly (magpi@raspberrypi.com) or get in touch on Twitter or Facebook.

    Magazines are all about people. The people featured, making the projects, and those behind the scenes beavering away to put the images and words together. Ultimately, it’s all about coming together once a month to hang out and chat about our hobby, making and building with Raspberry Pi.

    I hope you enjoy the time you spend inside these pages. I hope The MagPi, in its own small way, makes the world a better place. Even if it’s just for a few people for a couple of hours every month.

  • FINAL WORD: Making it together

    FINAL WORD: Making it together

    Reading Time: 2 minutes

    I have always supported those magazines I love. I currently subscribe to Simon Brew’s excellent Film Stories magazine, BBC Good Food, National Geographic, and I get RSPB Nature’s Home and Tate Etc. delivered as a member of both fine organisations. I also have a Readly account for picking up digital magazines that I wouldn’t admit to reading in public, and PressReader for picking up digital newspapers (incidentally, did you know you can read these online for free with a library card, at pressreader.com?)

    You can get The MagPi magazine, and all of our stable of tech titles for free: HackSpace magazine, Wireframe, and Custom PC are all available as PDF downloads. This is because we want to reach as many people as possible, and make computing as accessible as it can be to a wide range of folk. Raspberry Pi is all about lowering the barrier to entry for computing. And our magazines are a proud part of that.

    Each magazine we make offers a different window into the tech and maker scene, whether it’s Wireframe’s developer interviews, or HackSpace’s practical tutorials on wood and metal-working. I even enjoy Custom PC’s deep dive into obscure PC components like cooling widgets. It keeps people off the streets, probably literally as they can’t afford shoes, having spent all their money on motherboards.

    Keeping it real

    One thing I’m especially looking forward to is meeting The MagPi magazine readers again. Whether it’s at Pi Wars, the Scratch party, or the Raspberry Pi Birthday Bash. It’s at these kinds of events that the community comes together. This is where we really find out if it’s all working. Fingers crossed we will be back attending these events soon. 

    In the meantime, you can really help us out by filling out our reader survey. We’re not sure how it works at other magazines, but we set up these surveys ourselves, and the editorial team sends them to our email list. 

    It’s not just some marketing gumpf. We read every response and take all the thoughts on board. And of course, you can always email the team directly (magpi@raspberrypi.com) or get in touch on Twitter or Facebook.

    Magazines are all about people. The people featured, making the projects, and those behind the scenes beavering away to put the images and words together. Ultimately, it’s all about coming together once a month to hang out and chat about our hobby, making and building with Raspberry Pi.

    I hope you enjoy the time you spend inside these pages. I hope The MagPi, in its own small way, makes the world a better place. Even if it’s just for a few people for a couple of hours every month.

  • Remote agricultural monitoring

    Remote agricultural monitoring

    Reading Time: 2 minutes

    The system was designed and programmed by Shinobu Sukenari, a MAFF senior inspector, using the following requirements: they should take a photo of the trap at least once a day and report them over the internet. Secondly, the systems should run for a month without external power. Finally, the system should be protected from the sun, wind, and rain.

    Fly trapped

    “We use a [trap] to capture and kill the target,” Soichi Nagasato, CEO of Mechatrax who helped develop the monitoring station, tells us. “Then we photograph the inside of the trap. The camera uses a Raspberry Pi Camera Module V2 and is connected to a Raspberry Pi 3. Other components include a power management board for intermittent operation, an LTE [4G wireless network] board, and dry batteries. The complete set of equipment is housed in a waterproof box and attached to the pest trap. The inside of the trap is photographed through a window in the waterproof box and the images are emailed to the administrator via [the internet].”

    The batteries are nothing special – just eight AAs, enough to power a Sega Game Gear – and even the special case is made from an off-the-shelf, waterproof carrying case: “We use the Pelican 1060 Micro Case,” Soichi explains. “It is a transparent case that allows photography from the inside and has no openings. As a result, Pelican’s high water and weather resistance can be used as is.”

    Analysis on the fly

    As you may be aware, flies are pretty small. This could make it tricky for the system; however, the results were adequate.

    “Although fruit flies are roughly 1 cm in size, we were able to obtain enough clear images by email to distinguish between native and target species,” Shinobu says. “This may reduce the time and effort required for field patrols and improve the frequency of checks in areas/seasons with a high risk of infestation.”

    How to drive off the unwanted flies is not part of the system. It’s still a prototype, albeit one that is undergoing positive trials. However, as they are able to identify when and where they’re present more quickly and efficiently than with patrols, these methods can be more effective.

  • Raspberry Pi 4 refurbishment programme launched

    Raspberry Pi 4 refurbishment programme launched

    Reading Time: 2 minutes

     These pre-loved boards will be tested, reconditioned, and renewed. OKdo plans to put the restored boards back on sale at a lower price, and will donate to the Raspberry Pi Foundation for each board sold.

    OKdo’s SVP of Technology Richard Curtin comments: “With the global population predicted to approach nine billion people by 2030, we are using more resources than the planet can provide; our future depends on reusing what we have in a sustainable way.”

    Raspberry Pi planet

    “Raspberry Pi has a long-standing commitment to sustainability,” says Eben Upton, Founder & CEO at Raspberry Pi. “Our computers consume less power than the legacy PCs they replace, and of course consume less energy, material, and labour during the manufacturing process. Over 40 million Raspberry Pi computers have been sold since 2012, and the vast majority of these remain in working order, even after their owners have upgraded to more recent versions. Managed reuse of these surplus units provides an avenue to further reduce our environmental footprint, and we welcome this exciting new initiative from OKdo and Sony.”

    “The scheme will aim to begin the recycling of a proportion of the 40 million Raspberry Pi [boards] in circulation today that are pre-loved, but no longer used,” explains Richard Curtin. Initially, this service is being rolled out across the UK, but we have plans to expand it globally by the end of 2021.” More information on the scheme and how to take part can be found at: okdo.com/raspberry-pi-renew.

  • Pico Wireless Pack review

    Pico Wireless Pack review

    Reading Time: 2 minutes

    In addition, the board features a bright on-board RGB LED, tiny tactile switch, and a microSD slot for storing extra data, expanding greatly on Pico’s 2MB of flash storage.

    To connect your Pico, you’ll need to have male headers soldered on, then you can just plug it into the female headers of the Wireless Pack, so it and Pico are back to back.

    The obvious downside is that it blocks access to Pico’s GPIO pins. So, to connect sensors or other components, you’ll need a stacking header on Pico or a breakout board such as Pimoroni’s Pico Omnibus. Still, 14 GPIO pins are left unused; plenty for most projects.

    Software libraries

    Libraries for C++ and MicroPython can be downloaded from Pimoroni’s GitHub repo. The latest version of Pimoroni’s MicroPython UF2 firmware contains the necessary drivers, so you’ll need to flash Pico with it.

    To help you get to grips with the picowireless library, a couple of MicroPython examples are provided. One creates a simple web server enabling you set the red, green, and blue values of the on-board LED. The other demonstrates connecting to an API, and lets you control the LED’s colour using #cheerlights tweets.

    Both examples are pretty verbose, with some complex HTTP request details, so are hard to follow unless you know your networking, but you could easily adapt them for your own projects.

    Alternatively, you can code with CircuitPython, using Adafruit’s CircuitPython and ESP32 libraries, by adjusting a few pin numbers in their code examples.

    Verdict

    8/10

    A simple way to add wireless connectivity to Pico, although you’ll need to break out the GPIO pins for IoT projects.

  • RFID Floppy Disk Reader

    RFID Floppy Disk Reader

    Reading Time: 3 minutes

    “My project was taking an old 1988 word processor and repurposing it into a gaming emulator with a Raspberry Pi,” creator Dylan Blake tells us. “I wanted to utilise the floppy disk drive with RFID tags to initiate the software and have a working power button for added effect.”

    We’ve covered an RFID-based record player that did something similar with vinyls, but it wasn’t built into an old piece of tech like this. “I came up with the idea by realising I didn’t have a cool case to put my emulator in, and I really dig all things retro,” Dylan explains. “I found this device for $20 on a marketplace app and thought it would be awesome to work with.”

    Breathing new life

    The way the system works makes it feel almost like a classic computer, albeit a bit faster.

    “When you click the tactile power button, you are briefly greeted with a retro splash screen and then cute computer ASCII art prompting to insert a floppy disk,” Dylan says. “You fumble around for your favourite game handwritten on a 3.5-inch floppy, insert it into the floppy disk bay, and your game immediately starts up. If you don’t know what game you want to play, you can insert the ‘All’ floppy to access the RetroPie game menu (of course, using the 8-bit theme).”

    Dylan chose Raspberry Pi to power this for all the familiar reasons – a good size, easy access to GPIO pins, and it also allowed him to get more comfortable with Linux. “Raspberry Pi has fascinated me for years, and I probably have five of them at this point for various projects.”

    Old-school cool

    We’re big proponents of learning things when building projects, and as well as getting more experience with Linux, Dylan learnt how to use RFID tags and readers in the process, which we think is a cool skill. It wasn’t his first choice, though.

    “I have a USB floppy reader that I would like to utilise instead of the RFID tag reader for look and feel,” he admits. “But right now I like the ease of use of the RFID reader.”

    He says the reactions he’s received from it completely validate why he did it: “It was very popular on Reddit where I originally shared it, and my family loves how niche and fun it is! I especially like that my two-year-old son enjoys playing with it, albeit poorly. The only negative feedback I’ve received is that I repurposed a device that was already working. My counter to that is the word processor was only good for typing documents and saving them to floppies. Repurposing it has given life to this old tech, even if it’s just the aesthetics of the original device.

  • Pico-Controlled Automated Model Railroad

    Pico-Controlled Automated Model Railroad

    Reading Time: 3 minutes

    The Pico-Controlled Automated Model Railroad builds on his ‘sensored’ track concept that detects a train passing and instructs it to speed up, slow down, or come to a halt. “Electric motors are among my most favourite devices because they connect the fields of electronics and mechanics,” he reveals. “I try to add motors wherever possible.” 

    As someone with experience of Arduino, Kushagra believes Pico has great crossover appeal, lauding its ease of use and functionality: “One of the best reasons to [use Pico] is the availability of libraries to allow the integration of modules, sensors, and other complex stuff without having to write the entire code from scratch,” he explains in his guide to programming Raspberry Pi Pico with the Arduino IDE.

    The project joins Kushagra’s sizable collection of Instructables focused on using microcontrollers and stepper motors to augment a model railway layout. His projects work well together, with this first foray into Pico territory building on Kushagra’s existing ideas for using Arduino to add smart features to his train tracks. “Raspberry Pi Pico helped make it more budget-friendly and enabled several options for expansion in the future,” he says. 

    Connect the wires of the track power block to the outputs of the motor driver, then connect the female DC jack positive wire to the +12 V terminal. Connect a male jumper and the DC jack’s negative wire to the GND (centre) terminal, and a jumper wire to the +5 V (right) terminal of the motor driver.

    Automating a model railroad with Raspberry Pi

    Kushagra’s approach to automating a model railway starts with a basic oval track layout, Raspberry Pi Pico, and an L298N motor driver, which he favours because of its +/- 5 V on-board voltage regulator, which can be used to supply power to any attached microcontroller and other modules. “The voltage level is quite important as a lot of sensors and modules use 3.3 volts for communication, and having a 3.3-volt microcontroller eliminates the need of using voltage level shifters and optocouplers in the circuit,” he explains. 

    Raspberry Pi Pico is programmed using the Arduino IDE and becomes the brains of the model railway, using sensors to instruct each locomotive that passes over the smart track what to do next. As the layout grows, additional sensors can be added and used to alter the locomotive’s speed or get it to stop for a preset time, as if it were at a red signal or at a station. Kushagra says, “I am planning to add yard shunting operation which will allow the locomotive to couple, and decouple, with the rolling stock to allow it to pick them up from one point and drop them off at another.”

    Each time the train passes the sensor on the track, its speed is adjusted by the Pico program

    Setup Pico to control a model railroad

    The setup instructions given on his Instructable are admirably clear, but Kushagra also provides troubleshooting tips for this and his other projects, such as what to do if the train unexpectedly starts moving in the wrong direction (switch the polarity of the track’s power). For example, the sensor’s LED should only light up when a train passes over the sensor-enabled track. If, however, the LED on the sensor is always on, you should adjust the sensitivity of the potentiometer.

    Although there are lots of other Raspberry Pi- and Arduino-controlled layouts out there, we really like Kushagra’s low-cost approach to automating his model railway. His modular approach makes it clear enough for newbie makers to take on, while also being ideal for established railway modellers to use as a template to retrofit their layout. “Given enough time and effort, you could automate switching operations, automate the operation of multiple trains at the same time, control the lighting, or use WiFi or Bluetooth to control your trains and turnouts and a lot more,” Kushagra enthuses. 

    There’s plenty of potential in the ‘sensored’ track approach, too: anyone up for combining the track sensor with a station announcement board to indicate an approaching service (or delay)?  

  • HyperPixel 2.1 Round review

    HyperPixel 2.1 Round review

    Reading Time: 2 minutes

    A Raspberry Pi Zero fits neatly onto the rear, although you’ll need to be careful when mounting it not to crack the screen – it’s best to put it face down on a soft surface. Short standoffs (not supplied) can be use to secure it. If using a full-size Raspberry Pi, you’ll need a GPIO booster header.

    While the HyperPixel 2.1 Round uses all the GPIO pins, five breakout pins on the rear provide the option of connecting sensors via an alternate I2C interface.

    Software libraries

    Libraries for C++ and MicroPython can be downloaded from Pimoroni’s GitHub repo. The latest version of Pimoroni’s MicroPython UF2 firmware contains the necessary drivers, so you’ll need to flash Pico with it.

    To help you get to grips with the picowireless library, a couple of MicroPython examples are provided. One creates a simple web server enabling you set the red, green, and blue values of the on‑board LED. The other demonstrates connecting to an API and lets you control the LED’s colour using #cheerlights tweets.

    Both examples are pretty verbose, with some complex HTTP request details, so are hard to follow unless you know your networking, but you could easily adapt them for your own projects.

    Alternatively, you can code with CircuitPython, using Adafruit’s CircuitPython and ESP32 libraries, by adjusting a few pin numbers in their code examples.

    Verdict

    8/10

    If you really want a round display, maybe for a Halloween animated eyeball, this is an excellent option.

  • The best Raspberry Pi Pico projects in The MagPi magazine issue 109

    The best Raspberry Pi Pico projects in The MagPi magazine issue 109

    Reading Time: 2 minutes

    20 Raspberry Pi Pico projects

    20 Raspberry Pi Pico projects

    The community has taken Raspberry Pi Pico to its heart, and started building wonderful things with it. From video game controllers, to smart keyboards, animated signs, and even musical instruments.  

    Pico has been around for a few months now, and the community has managed to create some fantastic projects. Take inspiration from these creations and get ready to make your own amazing build.

    Synth6581 SID synthesizer

    Play a SID synthesizer

    Simon Martin is an engineer at Raspberry Pi and his Synth6581 pet project is making a lot of noise. Simon is using multiple recycled SID chips (the sound chips inside Commodore 64 computers) to transform a keyboard into one that makes incredible retro synth sounds.

    Pico-Controlled Automated Model Railroad

    Automating Model Rail

    Mechatronics student Kusagra Keshari is a big fan of model trains, and has combined a love of electronics with his train set. The result is a sensor-enabled track that uses Raspberry Pi Pico and motors to automate the track control.

    Isomorphic Keyboard: Hex keys

    Add hex keys to a isomorphic keyboard

    Mike Cook’s incredible Isomorphic Keyboard project uses a switch matrix to add a hex keyboard layout. This month Mike also adds control switches, an OLED display and rotary encoders.

    Geeky Faye interview

    Interview with Geeky Faye

    We interview the biggest names in the maker community, and this month we chat to Allie, also known as Geeky Faye. They tell us about being a maker, artist, designer and filmmaker that makes interesting things with Raspberry Pi.

    Pick up your copy of The MagPi magazine #109

    The MagPi magazine is available as a free digital download, or you can purchase a print edition from the Raspberry Pi Press store.

  • Win a Raspberry Pi 4 Case Fan

    Win a Raspberry Pi 4 Case Fan

    Reading Time: < 1 minute

    Subscribe

  • Kenbak – 2/5

    Kenbak – 2/5

    Reading Time: 3 minutes

    The Kenbak-1 was created by John Blankenbaker, a computer engineer and inventor, and Michael was drawn to the idea of reproducing it in the form of the Kenbak-2/5 (a 2:5 scale model of the original) for a key reason. “For me, the thing that attracted me to this project, aside from the historical significance, was the sophisticated instruction set that the Kenbak-1 supported,” he explains. “This was surprising because the computer was implemented with discrete logic chips and did not contain a microprocessor. The instructions were on a par with those used in microprocessors that were to follow years later, like the Motorola 6800 (1974) and the MOS Technology 6502 (1975).”

    A contemporary take

    Michael has a YouTube video that explains in detail how the original computer worked, as he enters a program through the model’s front panel buttons. He then details how the Kenbak-2/5 supplements the original by allowing the user to enter a program by typing in assembly language instructions. In Michael’s words, his version of this computer “allows one to have a ‘classic’ Kenbak-1 experience, then enhances that experience by allowing the user to use more modern tools like an assembler and a debugger.” He also has a detailed Hackaday page, if you feel like having a go yourself.

    A close-up of the wiring from the HAT; most of the channels were used

    Using photographs of the original machine as a guide, because finding an original Kenbak-1 would have been difficult and hugely expensive, Michael 3D-printed the frame of the project. “One of the reasons that I chose to make this reproduction at 2/5 (40%) scale was so that all the 3D-printed parts (of which there were only five) would fit onto my printer. So, this simplified the assembly,” he says. “Aside from the screws used to mount the Raspberry Pi to the frame, everything just snaps together.”

    A built-in Raspberry Pi 4 is connected to the front panel via a 32-channel expansion HAT. It also runs an IDE that can be accessed on a remote machine via SSH or VNC; the source code is on GitHub (along with the STL files for 3D printing the case).

    Michael created the Kenbak-1 Assembler and Emulator using Python and it’s all based on John Blankenbaker’s Programming Reference Manual. Any qualms he had about his understanding of the documentation were laid to rest by fellow enthusiasts who helped him out with potential glitches. “Fortunately, there is a pretty active Kenbak-1 community out there and some people actually tried out my software and found a few bugs and misunderstandings.

    Raspberry Pi 4 is connected to the lights and LEDs on the front panel via a 32-channel I/O expansion HAT

    Architect’s approval

    The icing on the cake is that Michael’s make has received praise from the original inventor. “I sent John Blankenbaker (91 years young) an email with pictures of my reproduction and a few questions, and he was gracious enough to answer. The first thing he said in his reply was ‘Your email was the most interesting thing I have received today. I was very impressed!’. That sure made my day too!”

    Praise indeed, and this underlines one of the reasons why Michael undertook the challenge: “I think that the devices themselves, and their designers, deserve to be remembered and honoured.” Many enthusiasts would certainly agree with that sentiment.

  • Air Quality Traffic Light

    Air Quality Traffic Light

    Reading Time: 3 minutes

    For that reason, he decided to take a break from a project he was working on – a device which monitors currency prices using Raspberry Pi Zero W – to create an air quality reporting system. Having found a battery-operated toy traffic light, he came up with a plan that was both practical and fun.

    “If the wind blows in the direction of the city, you can smell the smoke, which some say resembles whiskey, and it means you don’t want to have the windows open for too long,” Dmytro says. “So, I came up with the idea of having the red light of a traffic light illuminate if this was to happen.“

    The traffic light is only used during the day. It’s been coded to turn itself off at night, but can be activated for a minute by pressing the button on top

    Capturing air quality

    Dmytro chose a traffic light made by German toy manufacturer Dickie. “It’s compact, has a button on top, and two additional LEDs accompanying the standard three,” he explains. But before he could connect it to a Raspberry Pi 3B+ computer, he needed to open the toy.

    “I had to get rid of the traffic light’s internal components without damaging the LEDs or the internal structure of the toy,” he continues. “I also had to change the resistors so that it would work with Raspberry Pi’s GPIO pins, which produce 3.3 V.”

    From there, it was a matter of working out the best way of capturing air quality, starting by experimenting with the MQ-135 gas sensor which monitors benzene, alcohol, and smoke. “I got it working after a few hours by connecting an additional analogue-to-digital chip to the serial port of Raspberry Pi,” he says. “But the measurements were not that precise and I had to write quite a bit of code to account for inaccuracies which varied drastically based on the environment temperature.”

    Data from IQAir is used to help determine which LED should illuminate on the traffic light

    Good to go

    Instead, he turned to an MH-Z19B carbon dioxide sensor. “It was way more accurate and it worked, but only temporarily, as the elements in my area can be on the extreme side,” Dmytro says.

    The solution, therefore, was to write a short program using the open-source programming language Go. It fetches Air Quality Index data from the website IQAir, which uses information from consumer devices located across Kyiv. It also grabs current data from OpenWeather in parallel.

    By storing the data on Raspberry Pi, Dmytro’s script – written in Python – can determine which light to illuminate, controlling the LEDs using the Python library GPIO Zero. Red obviously shows that the air quality is poor, prompting Dmytro to close the windows and take precautions when venturing outside.

    Even so, there is room for improvement. “The aggregated data is quite accurate but it covers the entire city,” he laments. “Sometimes it would make more sense for measurements to be more local. Collecting data myself and combining it with the information I get from the API should be the next step.”

  • Maple Syrup Pi

    Maple Syrup Pi

    Reading Time: 2 minutes

    “Maple Syrup Pi Camera is part of my research project,” Ricardo tells us. “I’m one of the 25 TRAIN@Ed Research Fellows at University of Edinburgh. I am working on a project focused on helping local tourist attractions to better manage tourist flow, still GDPR compliant by design. My solution is to process information in the camera without ever saving or transmitting personal data. In addition to that, I wanted something open-source that could be customised, and as low-power as possible, allowing it to run a full day on an off-the-shelf power bank. Raspberry Pi Zero W is my go-to IoT device and, together with the Google Coral USB Accelerator, it has become my powerhouse for machine learning inference.”

    The case holds a Raspberry Pi Zero W and a Camera Module

    The Coral USB Accelerator attached to Raspberry Pi contains an Edge TPU processor which allows for offline TensorFlow models to run. It has some similar tech to the AIY Vision Kit that Google released a little while back.

    If you’re interested in reading about how it works in more detail, you can head to Ricardo’s project page.

    The finished device is fairly small

  • Campervan LAN

    Campervan LAN

    Reading Time: 3 minutes

    Although most campsites and caravan parks offer WiFi to guests, such connections are often unsecured, limited to only a couple of hours’ free use, and require each device to log in separately. Enrico needed a setup that was far more robust. His vehicle, Jan The Van, sports a secure mobile LAN, is powered by three Raspberry Pi computers, and allows Enrico to use a single login to provide internet access to any devices on his network. The whole setup cost less than 500 euros, meaning he could also afford to add a solar panel.

    Jan The Van’s third passenger reportedly enjoys the ride

    Hack The Van

    Enrico bought his van specifically for use as a mobile office. “The project aims to create a modular set of technological improvements in a standard vehicle to convert it to a secured and efficient mobile unit for living, working, and travelling,” he explains.

    It’s named after Enrico’s friend Jan Cumps who helped him work out the electronics that would be needed to successfully hack the van. The pair spent many evenings working together studying how to develop projects, debug hardware circuits, and teaching workshops at the Ingegno Makerspace in Ghent in Belgium.

    A quick glance inside and Jan seems like a relatively normal luxurious campervan

    The duo took a modular approach to the build, starting with an 8GB Raspberry Pi 4B mounted in a case with a 7-inch touchscreen. Developed with Node-RED, the display shows the state of the network, firewall status, and the local weather. It also has screens monitoring any physical intrusions around Jan The Van.

    DHCP features and the wireless LAN to Ethernet router make it safe for Enrico to connect his shielded network to insecure public WiFi networks. He’s currently adding sensors to monitor gas and smoke levels from the van’s kitchen, and to show how much water he’s storing on board, providing reassurance there are plenty of provisions on lengthier, more remote journeys.

    Enrico found lots of ideas online for how to create his vision, building and testing each element before installing it. “I tried to design it to be as modular as possible so it’s easy to replicate it and adapt the modules to similar but not identical environments,” he says.

    More Raspberry Pi

    Jan The Van – a mobile office with a constantly changing landscape

    Internal devices on Jan The Van’s network could only be connected to the Ethernet port, which wouldn’t work for iPads, iPhones, and other mobile devices that lack the necessary port. To overcome this, Enrico added an Ethernet switch and a second Raspberry Pi 4B configured as a bridge to which these mobile devices can connect wirelessly. A third Raspberry Pi connected to a full HD webcam provides live visuals of the rear of the vehicle while he’s driving, and acts as a motion sensor security camera when the campervan is parked. It “detects motion around the camera field of view and records video just in case,” Enrico says.

    Jan The Van’s first big trip was a ten-day journey from Belgium to a “nice campsite” in Spain – some 2800 km – where Enrico easily hooked up his campervan LAN and was able to work as a consultant each morning and tinker with his mobile office setup each evening. Planned improvements include adding a third Raspberry Pi 4 with a display to stream images from the van’s rear camera and other information to the dashboard or cockpit. Most important, says Enrico, “is travelling to nice places to test the prototype in the real world.” 

  • Opinion: Our place in history

    Opinion: Our place in history

    Reading Time: 3 minutes

    My father-in-law also used to run simulations back in the 1970s on what turned out (after a long chat and some online digging) to be an IBM System/360 (magpi.cc/ibm360). He didn’t personally program the machine; he wrote down instructions for the simulation on a form, another person punched the hole cards, and then the programmer ran them through the computer. The results typically came back a week or so later.

    There followed a surprisingly informative chat about the history of computing covering all the usual bases: Charles Babbage, Ada Lovelace, Alan Turing, John von Neumann, and early proto-computers like the Difference and Analytic Engines, and orrery devices like the Antikythera Mechanism.

    They talked with pride about Lyons LEO (Lyons Electronic Office), a computer I hadn’t heard of but intend to learn more about. It was the first computer used in a commercial business setting. LEO was modelled closely on Cambridge’s EDSAC, which I do know about – that was designed by Sir Maurice Wilkes, the person whose name adorns the office building I often work in.

    „Rather oddly, we need to take the magic out of computing“

    They have parts and articles on LEO at The Centre for Computing History in Cambridge, which has now reopened and I can’t recommend it highly enough. I’ll be heading down there to take a look.

    We tend to think of computing as ultra-modern and, obviously, forward-thinking. Yet there is the weight of history behind our technological toys. We had just visited Enderby’s Wharf and, following a drink in Enderby House, there followed a chat about the history of underwater cabling. The first telegraph cable across the Atlantic was produced there, and much of the world’s subsea communication cables were made in the area. Alcatel Submarine Networks is still based around the corner.

    It often comes as a surprise to folks that most of the internet traffic isn’t whizzing around in space, but bouncing along vast undersea cables. You can take a look at all the wires in this interactive map.

    Learning how the mystical world of technology works helps us to ground (or even submerge, in this case) folks to reality. Rather oddly, we need to take the magic out of computing. To bring it away from the realm of “any sufficiently advanced technology is indistinguishable from magic”, and into the practical world where computing becomes a tool we can control.

    Raspberry Pi

    It gave me great pride to show my in-laws Raspberry Pi and explain what each constituent part was. They were amazed by how small it was, especially Raspberry Pi Zero. Having this historical perspective helped me explain to them why Raspberry Pi was so important. It continues the UK’s long tradition of designing, and building, its own computers. Raspberry Pi is vital to ensure the existence of a future generation of programmers, by putting the power of physical computing into the hands of young learners (of all ages).

    Image credit: Photo of a LEO III computer circuit board, Wikipedia, geni

  • PrivacyMic

    PrivacyMic

    Reading Time: 3 minutes

    “It’s hard to tell what an IoT device is doing with its microphone beyond an LED signifying its microphone is in a muted or unmuted state,” says Yasha Iravantchi, a graduate student at the University of Michigan. “In the future, these devices are going to perform more tasks than just listening for speech commands and there is the possibility that a lot of audio will be captured, recorded, and stored.”

    For this reason, Yasha has been leading a team developing PrivacyMic, a research project ensuring private conversations cannot be recorded and stored. By only gathering sound at frequencies above the range of human hearing, the system filters out speech and audible sound, yet can still understand what’s happening in our environment.

    This laptop is running the team’s own open-source app T4Train which can connect to PrivacyMic and train a model on the spot using incoming data, or load a pre-trained model

    Sound of silence

    PrivacyMic is built around Raspberry Pi and it works with ultrasonic sounds – that is, those with a frequency of 20 kilohertz or higher. Many objects and actions emit ultrasound waves, including compact fluorescent bulbs, dishwashers, computer monitors, flushing toilets, and electric toothbrushes. “It’s a frequency that’s inoffensive to humans, but can be annoying to dogs,” says Yasha.

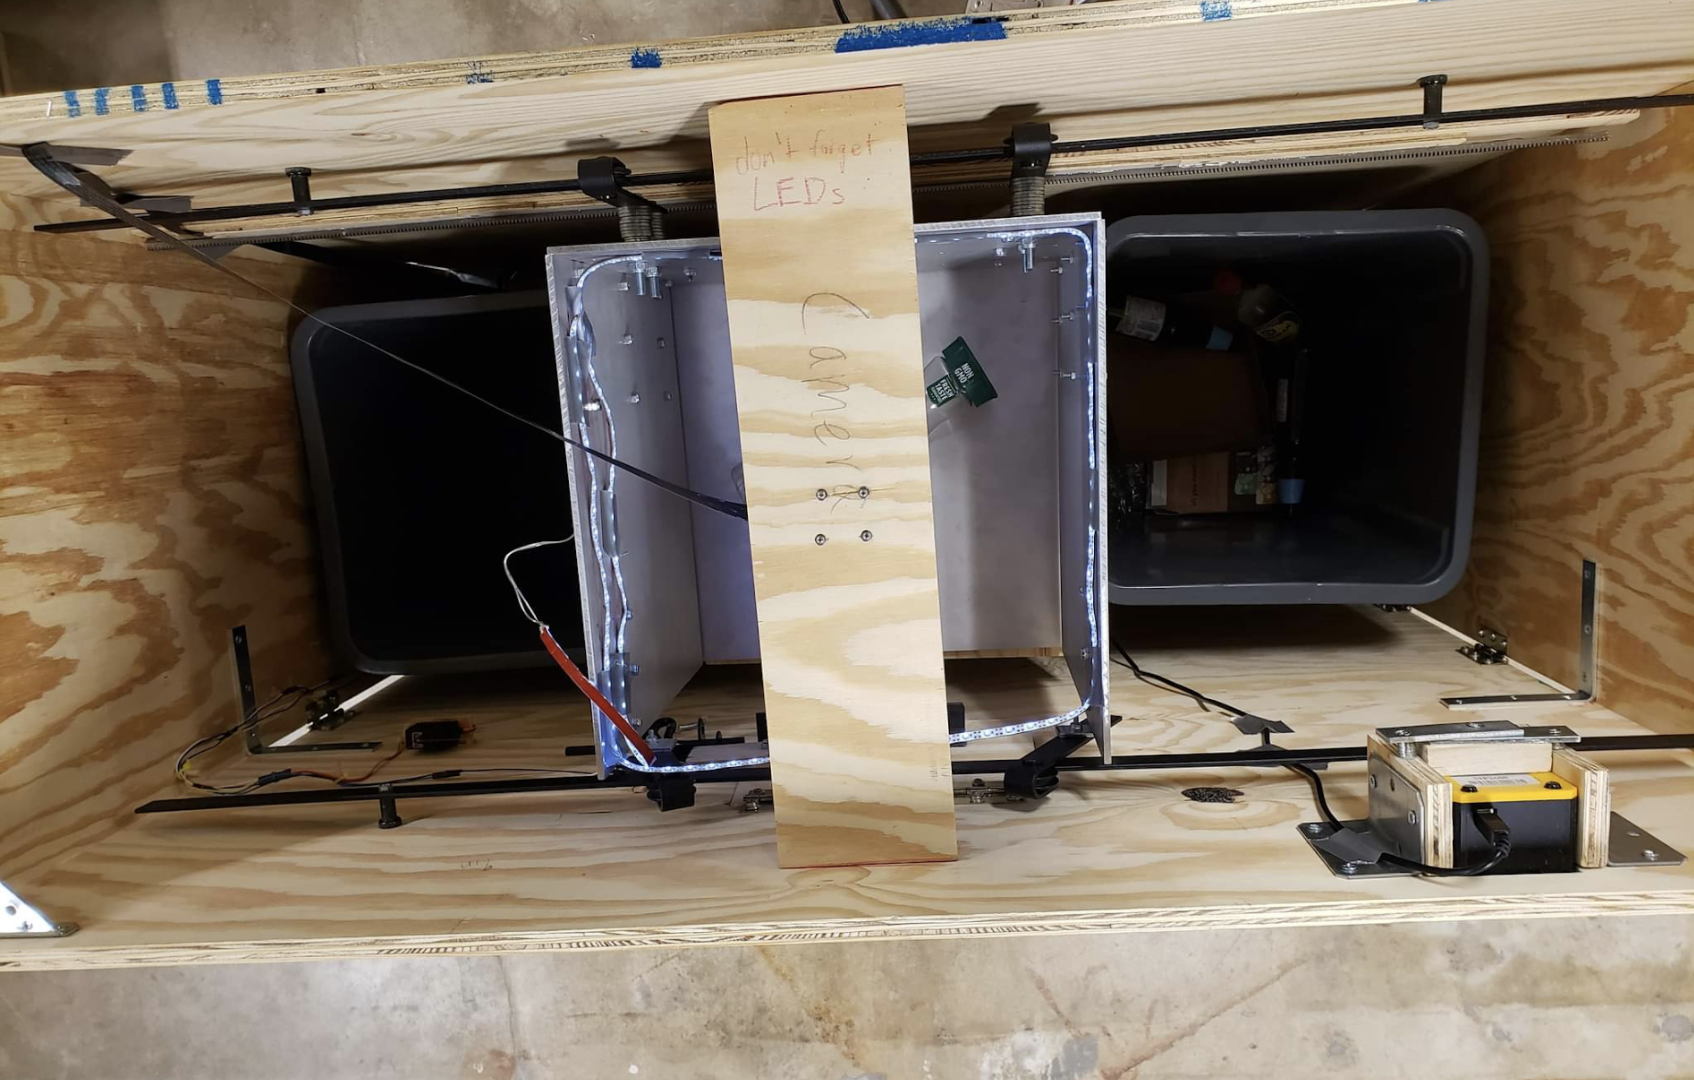
    Most traditional audio equipment won’t capture ultrasonic sounds. “Devices are tuned to focus on the range of human speech or hearing and they often actively remove the sounds outside of these ranges as ‘noise’ from the environment,” Yasha explains. By creating a HAT for Raspberry Pi Zero W using an analogue ultrasonic microphone and a filter to remove speech and audible frequencies, however, PrivacyMic can do the opposite.

    “The ‘noise’ that these systems throw away is a valuable signal we can use to recognise and classify daily-use objects,” Yasha says. It means PrivacyMic can hear when a light bulb or microwave is turned on, determine when a toothbrush is being used, or when a toilet is flushed, without capturing any conversations. “We’ve also been using Raspberry Pi 3 to explore ways of performing all tasks – from capture to classification – on the computer itself to ensure no data ever leaves Raspberry Pi.”

    Listen up

    So how does it work? “Analogue filters remove the audible frequencies and only allow ultrasonic frequencies to pass through to the analogue-to-digital converter (ADC),” Yasha explains. “These signals are passed to a machine learning model to recognise these daily-use objects in ultrasound only, and the model then records an entry, including a time stamp and the name of the thing that turned on.”

    The PrivacyMic HAT connected to Raspberry Pi Zero. A 250kHz low-pass filter is needed by the 500kHz ADC to remove high-frequency interference

    In doing so, the filtered ultrasound is not kept. “The idea is that there are multiple layers of safeguards in place that allow us to minimise the privacy exposure to users while keeping the artefacts that matter. In the case of activities of daily living tracking, it’s the activity log, not the sounds themselves that are of value,” Yasha says.

    Accomplishing this has entailed a lot of coding. C is used to efficiently send samples from the ADC to a laptop via TCP, and a new framework for interactive machine learning has been developed in Python. “It’s called T4Train and it’s a work-in-progress, but it’s already compatible with Raspberry Pi,” Yasha says.

    Even so, work is far from complete. “One of the hardest challenges is trying to train PrivacyMic to learn to recognise sounds that you yourself cannot hear,” Yasha laments. It means the device won’t likely be out of the proof-of-concept stage for a few years yet, but we’ll keep our ears to the ground for more news as the project progresses.