Kategorie: Reviews

  • M4All microscope

    M4All microscope

    Reading Time: 3 minutes

    The team, the NanoBioPhotonics group at the University of Strathclyde, have been using their imaging expertise to “investigate the mechanisms that macrophages (a type of immune cell in the body) employ to remove respiratory pathogens”, pathogens that, among other things, can lead to pneumonia or meningitis.

    “From my experience using research microscope facilities to image macrophage samples, I realised there can be limitations with accessing commercial microscope systems, not only with costs but also time limits and flexibility,” Gemma explains. “A high-end research microscope can cost over £250,000 and so access to it can be limited and charged per-hour! In the past few years there has been a growing community of research groups working on open-source microscopy hardware and software solutions. Seeing their work inspired us to create M4All, which directly addresses our imaging requirements for macrophage research, but also contributes to the community where the system can be adapted for many other applications.”

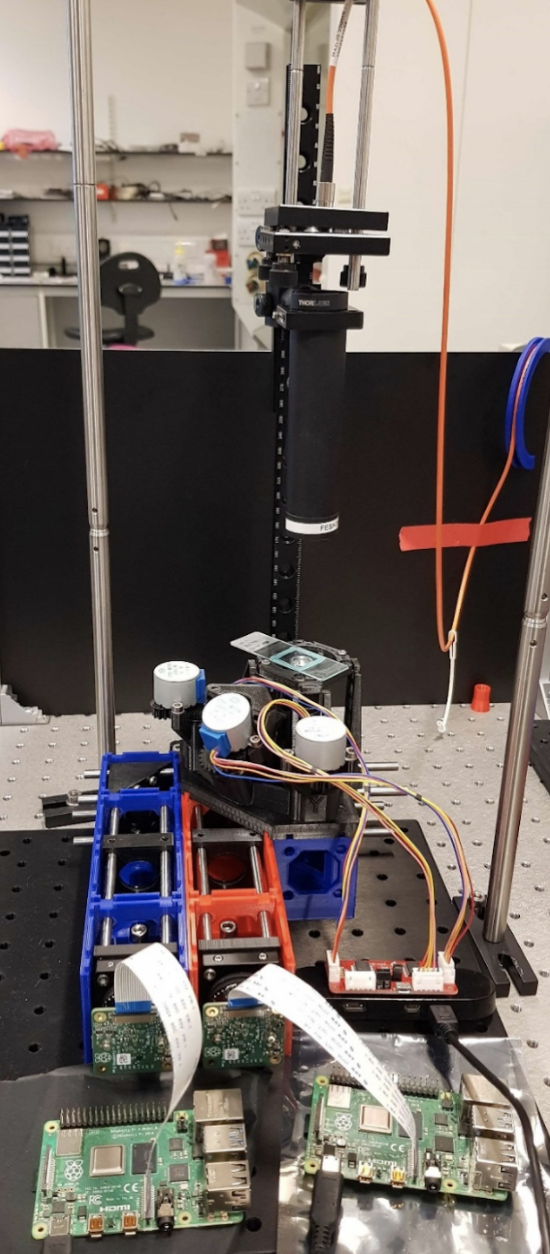
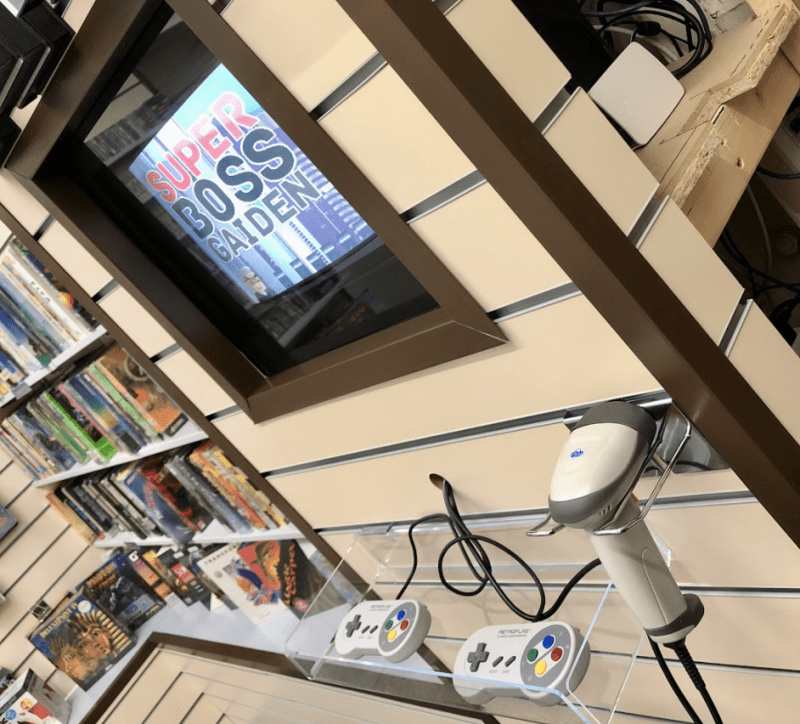
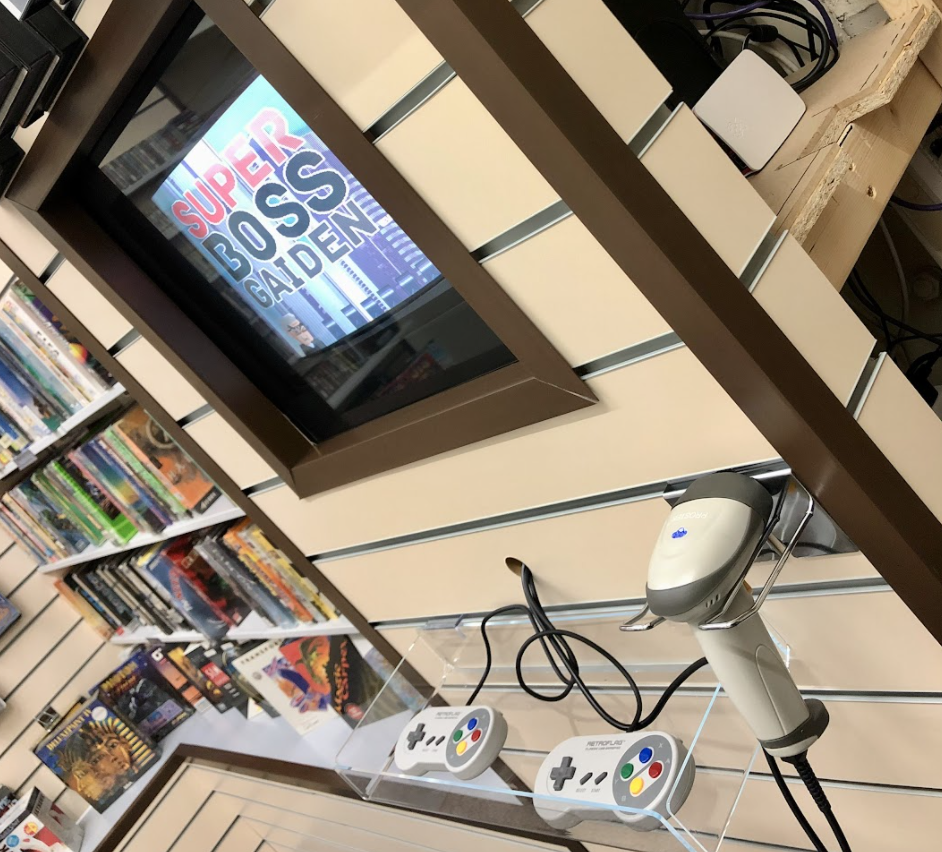
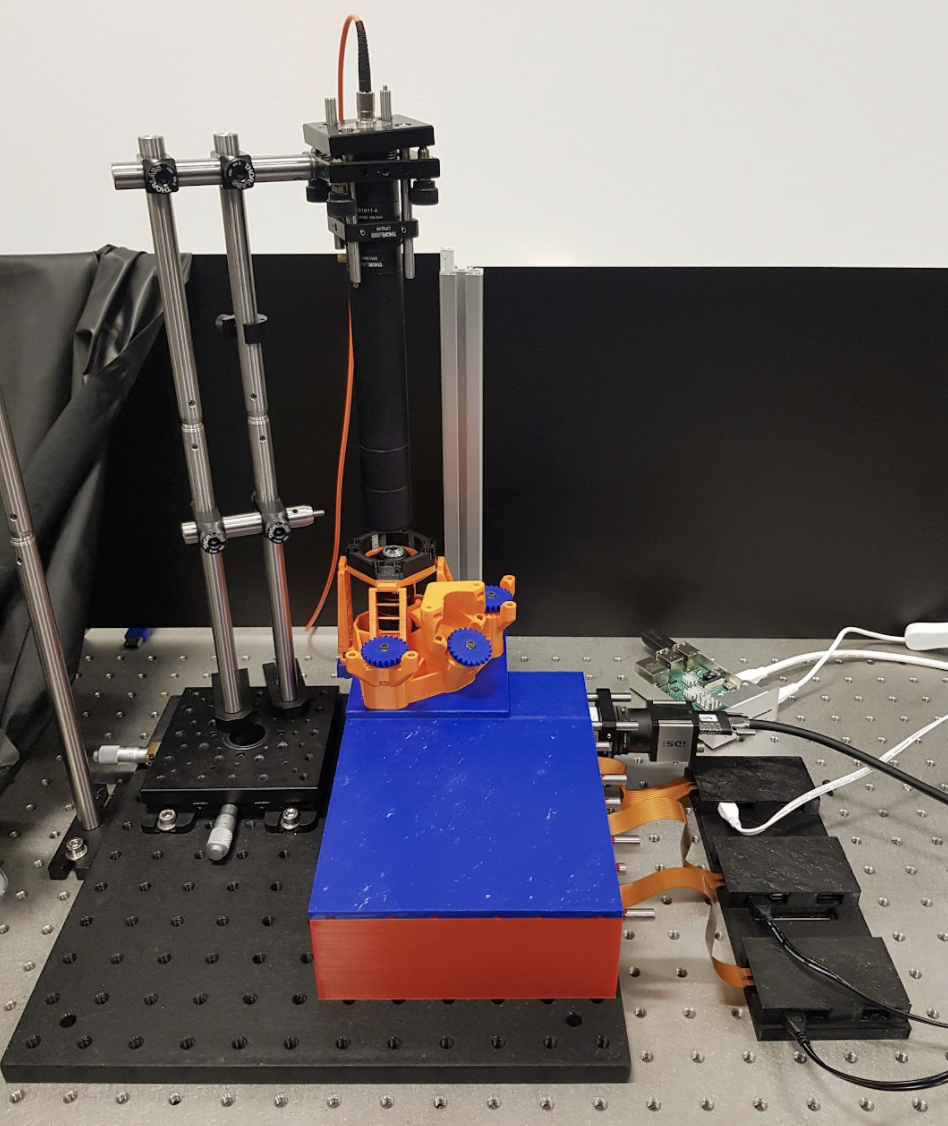
    Raspberry Pi microscope

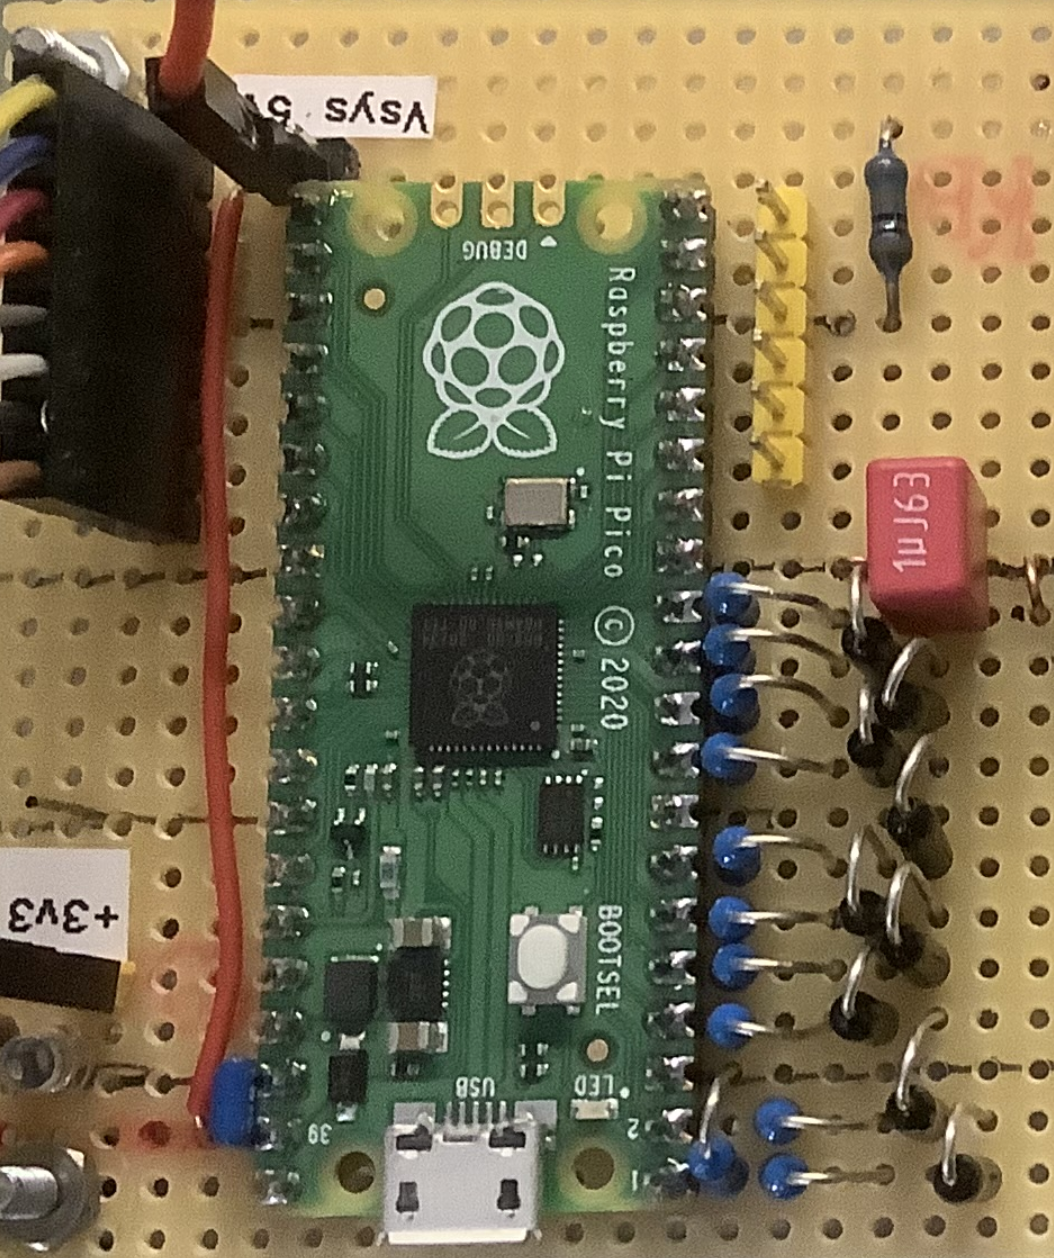
    The team opted for Raspberry Pi because they wanted something low-cost and small, and Raspberry Pi’s Camera Modules and HQ Cameras, along with its GPIO pins for controlling motors and LEDs, made it perfect as the heart of M4All. The next step was just making it all fit together.

    “Developing the designs for the 3D-printed parts has been a very iterative process to achieve their final form,” Gemma says. “We wanted to create a system that can be used by a wide level of expertise, but also has the stability and capability for quantitative biological imaging (that is, images where the brightness of each pixel can be trusted and compared with nearby pixels or other regions of the image to perform numerical analysis). The modular cubes are printed as monolithic parts to form the optical path, and the inserts are designed to minimise the number of degrees of freedom for alignment. The only optical alignment that needs to be carried out is setting up and focusing the lenses for imaging.”

    As an open-source project, it also integrates other open-source bits into it, like OpenFlexure. OpenFlexure allows the image to be separated in a specific way and focused on the camera installed in Raspberry Pi.

    Small goals

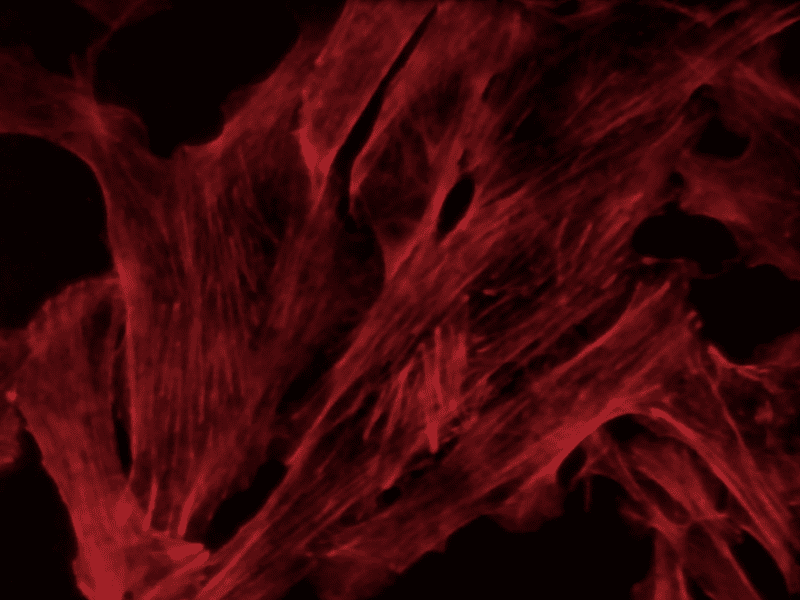
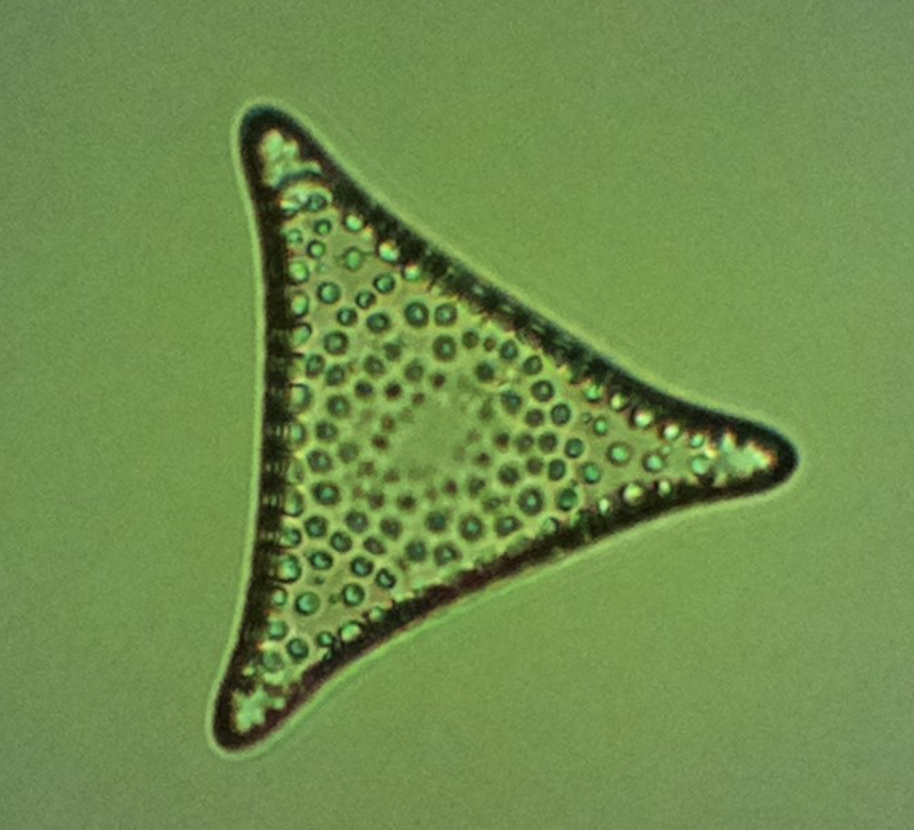
    “We have been able to image various structures inside of cells using fluorescence microscopy, such as mitochondria, bacteria, and actin, with good resolution and with a signal-to-noise ratio which allows us to obtain quantitative information on what’s happening in the cell,” Gemma reveals. “This will allow us to study interactions with bacteria inside of macrophages at a much lower cost than commercial systems. Then, if interesting data arises, more specialised microscopy systems can be used for further analysis based on what the M4All microscopes have found. We have also imaged diatoms in bright-field which are single cells of algae. Their cell walls are made of silica, which forms very intricate and cool patterns.”

    You can head to here for instructions on how to build your own system, and start doing your own microbiology.

    “Having a flexible platform also means that we can test out new designs and applications in collaboration with a huge range of researchers – from biochemists or marine environmental scientists!”

  • Raspberry Pi hardware hacks

    Raspberry Pi hardware hacks

    Reading Time: 3 minutes

    Portable power

    One of the easiest ways to take Raspberry Pi portable is to use a mobile phone charging bank. These sticks typically use a USB connection to hold power, and you can plug them into Raspberry Pi just like your phone charger.

    It’s a hack though – if you want a more secure solution, it’s possible to power Raspberry Pi computers using batteries (both alkaline and lithium). Devices such as this LiPo Battery HAT for Raspberry Pi combine a power bank management chip with a Li-polymer battery. Be careful when using lithium-ion batteries to enclose Raspberry Pi and the battery inside a case.

    Network install (beta)

    Until recently you’ve needed to use another computer to set up Raspberry Pi. Typically using Raspberry Pi Imager.

    A recent development at Raspberry Pi is looking to fix this with a Raspberry Pi bootloader that implements network installation. If Raspberry Pi is connected to the internet with an Ethernet cable, it will download Imager from the internet and enable you to flash a microSD card or USB drive.

    You’ll need to update the bootloader on Raspberry Pi and the service is currently in Beta. But it’s well worth investigating to see the future of Raspberry Pi OS installation.

    Switch to an M.2 drive

    The traditional storage for Raspberry Pi is a microSD card, and you can get a huge performance boost by swapping over to an M.2 SATA drive. This can provide ten times the storage transfer speed.

    If you have a Raspberry Pi 4, consider getting an Argon M.2 case. This neat case houses an M.2 SATA blade in the bottom part of the case, and Raspberry Pi 4 in the top (repositioning and expanding the ports). 

    If you have a Raspberry Pi 400, it’s possible to gain an equivalent speed boost with an M.2 SATA drive inside a USB enclosure.

    Pico pinout

    Look closely at the GPIO pins on Raspberry Pi Pico and you’ll detect that some of the pads are round, while other are square. The square solder pads are ground, making it easy to identify them. Take a look at the Raspberry Pi Pico pinout document.

    Add a reset button

    It’s possible to add a reset button to Raspberry Pi Zero 2 W. It has a test pad on the back marked RUN. Connect this to ground and you will reset Raspberry Pi, and this can be used with a push button to create a reset button.  

    You can discover the location of the RUN (and other test pins) here

    It is also possible to connect a similar reset button to Raspberry Pi Pico. This makes it a lot easier to test out prototypes with the microcontroller.

    Overclock Raspberry Pi

    Recent updates have enabled Raspberry Pi 4 and Raspberry Pi 400 to run at a clock speed of 1.8GHz. Combined with the impressive 4GB RAM (and 8GB on some Raspberry Pi 4 models), this enables Raspberry Pi to act as an effective desktop computer.

    It’s possible to take these Raspberry Pi models further, though, especially if you combine them with effective cooling. We’ve had a Raspberry Pi 4 with a cooling solution running at 2.147GHz.

    Take a look at our ‘How to overclock Raspberry Pi’ tutorial.

  • REVIEW: Tiny 2040

    REVIEW: Tiny 2040

    Reading Time: 2 minutes

    You can flash it with the Pico firmware and program it with MicroPython, C/C++, or CircuitPython. So it’s very versatile and easy to get started with.

    To achieve a smaller footprint, a few compromises have been made. Most notably, the Tiny 2040 only has a total of 16 pins versus Pico’s 40, plus a debug header. Of these, there are 12 GPIO pins, compared to 26 on Pico. So it won’t be compatible with most Pico add-on modules. As with Pico, there’s no wireless connectivity.

    On the plus side, the Tiny 2040 does break out a fourth ADC input – which is connected to an on-board temperature sensor on Pico.

    Tiny choices

    You can buy the Tiny 2040 with or without (2.54 mm pitch) header pins attached. There’s also a choice between 2MB of on-board QSPI flash storage (as on Pico) or 8MB. The Tiny 2040 is a fair bit pricier than Pico itself, which is only £3.60 / $4.

    On the plus side, the Tiny 2040 adds a very welcome on-board reset button, which saves repeatedly unplugging and reconnecting the board. There’s also a programmable RGB LED (linked to three internal GPIO channels), rather than the single-colour green one on Pico.

    Other than that, its advantages are mainly down to its diminutive size, making it suitable for wearable projects or even a tiny robot. While not quite as minuscule as a Nionics Atto or Seeeduino XIAO, its RP2040 chip is a lot more powerful.

    Verdict

    8/10

    Perfect for wearables and other portable projects, it packs the same RP2040 SoC as Pico but on a much smaller board, plus a few bonus features.

    SPECS

    Connectors:
    16 × pins including 12 × GPIO, 3-pin debug header, USB-C port

    RAM / Storage:
    264kB SRAM, 2MB or 8MB QSPI flash

    Features:
    Reset and boot select buttons, RGB LED, 4 × 12-bit ADC channels, PIO, I2C, SPI, UART

    Dimensions:
    22.9 × 18.2 × 6 mm

  • Penkesu Computer

    Penkesu Computer

    Reading Time: 3 minutes

    Penk was looking to build upon his work with mechanical keyboards. “I’d learned not only how to build them from scratch, or mould and cast my own key caps, but also how to use a laser engraver to melt pigment onto key caps to print my own legends,” he says. “I recall staring at those low-profile key switches and thinking to myself, this could make a great retro-style computer”. 

    There were two things he wanted above all: compact physical dimensions and a nostalgic theme. “Back in the 1990s, gadget pencil cases were extremely popular among kids in Asia,” he says. “I figured if I were to pay homage to the past, what could be better than recreating the magical moment of opening a pencil case?” This thinking led to the project’s name: Penkesu is the Japanese word for ‘pencil case’, while happening to reference the maker himself.

    Key to success

    Identifying the appropriate components proved relatively easy. “Since this project started with the keyboard, finding the other parts was fairly straightforward,” Penk affirms. At first, this meant looking for a screen to match the size of his 48-key mechanical keyboard, and it led him to choosing a 7.9-inch touchscreen display.

    He then opted for a Raspberry Pi Zero 2 W computer. “It was a natural fit,” he says. “Looking back at its predecessors, you will find that there’s virtually nothing to complain about except to marvel at the wonders of modern technology.” The rest of the components included a LiPo battery, some diodes, and a keyboard-controlling Arduino Pro Micro, but designing a 3D-printable case was the greatest challenge.

    Making a good case

    “The weight distribution was not an easy task,” Penk explains. “The screen is mounted in a rather top-heavy fashion, so it took me some time to properly design the chassis and place counterweights so that it would not tip over when opened at its maximum angle.” This was achieved by gluing a thin metal sheet to the base. “The end result is a low-centre-of-gravity, stable, and satisfyingly clicky device,” he adds.

    Interestingly, the project also uses a set of replacement hinges designed for a Game Boy Advance SP console, making the device easy to open and close while adding extra retro goodness. “What could be more nostalgic than using genuine console parts from the 1990s?” he asks. It was then a matter of connecting everything up – in this case, largely plugging the components together – and getting Raspberry Pi to run Raspberry Pi OS for an instant mini-machine.

    “Everyone knows that when it comes to presenting your build to the interweb community, cable management is the most important thing, and I’m terrible at soldering,” he laughs, before adding that in a world of supply chain disruption, it also made the project more viable. “I’m now experimenting with the mouse keys feature of QMK firmware to see if I can rely on the keyboard more when using Raspberry Pi OS,” he says, explaining that he’s not finished with this project just yet.

  • OPINION: Rubber Soul

    OPINION: Rubber Soul

    Reading Time: 2 minutes

    This makes sense. Raspberry Pi is ideal for rediscovering retro classics; its modern processor is capable of faithfully emulating just about every beloved computer of our generation. And like many computer geeks of our generation, we loved many different 8- and 16-bit computers.

    My beloved computer of this month is the ZX Spectrum. Which is – and I can barely believe I’m saying this – 40 years old this April.

    I mean, I know this must be true. It had ‘© 1982 Sinclair Research’ on the screen every time I looked at it. But it can’t be 40 years, can it!?

    I first got a ZX Spectrum around 1984. A wonderful year (despite its infamous book namesake). I fell in love with prodding the rubber buttons and making things move around my small black and white TV screen. The BASIC programming language was – in retrospect – absolutely basic. And the gulf between BASIC and Z80 machine code was depressingly huge.

    And there’s no getting away from the fact that computers were sold as toys, which meant they became heavily gendered. The Spectrum was pitched at boys and let’s not forget the cliquey club with “no smelly girls in our treehouse.” Thank goodness those days are over.

    Still, I stuck with my beloved ZX Spectrum. Even though its keys were squidgy and each button had four or five confusing commands printed on it. And the Spectrum broke so often that the factory, at one point, was rumoured to have stopped taking returns (because there physically wasn’t enough space to store them). Mine broke five times before my Dad bought me a Commodore 64 out of frustration.

    Honour the past

    We’ve honoured the ZX Spectrum many, many times in The MagPi (and will continue to do so in the future). Two years ago, the ZX Spectrum Next project produced a modern version of the classic computer. I bought one and I love it. It uses a Raspberry Pi Zero inside to provide sound support, enabling users to load tapes with sound, screeches, and all. Meanwhile, a modern FPGA (field-programmable gate array) reproduces the Z80 chip exactly.

    If you’ve ever loved the ZX Spectrum, I wholeheartedly recommend you read (Wireframe editor) Ryan Lambie’s wonderful homage to Sinclair computing and the ZX Spectrum. 

    Nostalgia has its place, and I defy any Spectrum fan to hear the loading screech and not have their heart melt. But Raspberry Pi and Raspberry Pi Pico are ultra-modern computer platforms remaking the modern computing landscape. As Eben says, “the future of computers is only $4 away”. That’s the important thing!

  • REVIEW: Badger 2040

    REVIEW: Badger 2040

    Reading Time: 2 minutes

    The device comes fully assembled, so all you need to do is turn it on and load up the latest version of the software from Pimoroni’s GitHub page. Installation is a case of holding down the BOOT button to mount RP2040 onto the destkop, and copying the UF2 file to the mounted storage.

    There’s an app

    There is a clock app, ebook app (pre-loaded with Wind in the Willows), an image app, interactive list app, badge app, along with a QR code, info, and help information displays. 

    As with many projects, the fun begins when you start exploring what you can do with Badger 2040 in a coding environment. Pimoroni’s documentation is, as typical, excellent, including a Getting Started with Badger 2040 guide. The tutorials take you through writing ‘Hello Badger’ to the screen and customising the default apps. This is done by exploring a range of text files in Thonny (using View > Files). Images can be converted using Pillow and the convert.py file

    An optional accessory kit includes a AAA battery holder and batteries, Velcro square, lanyard, and cable. You can also power Badger 2040 by connecting a lithium battery to the JST-PH connector.

    Moving on from the default Badger OS and test projects, Badger 2040 has a Qwiic/STEMMA QT port for connecting breakouts with a JST‑SH cable and STEMMA QT adapter. With this, you can explore integration with a variety of sensors, breakout boards, and accessories.

    Verdict

    8/10

    Badger 2040 is a fun accessory that integrates nicely with Raspberry Pi thanks to its RP2040 base. Simple to set up, but a lot of potential for integration with your projects.

    SPECS

    Screen:
    2.9-inch black and white e-ink display (296 × 128 pixels)

    Processor:
    RP2040 (dual Arm Cortex-M0+ running at up to 133MHz with 264kB of SRAM); 2MB of QSPI flash supporting XiP

    I/O:
    Five front user buttons; Reset and boot buttons; White LED USB-C connector for power and programming; JST-PH connector for attaching a battery (input range 2.7 V – 6 V)

  • Retro barcode scanner

    Retro barcode scanner

    Reading Time: 3 minutes

    “It felt a shame to go to so much effort in restoring and repairing these classic machines only to hide them away in a cupboard,” he says. “A pipe dream began to form that I might one day be able to open an exhibition space for retro fans to come and enjoy them and, through hard work and incredible generosity from viewers, here we are, on the cusp of opening up to the public.”

    Hey MiSTer

    Located on the top floor of an 18th century mill in Chalford in Gloucestershire, The Cave, as the space is called, includes lots of games consoles and computers from the past 40 years, as well as classic arcade machines. But one of the stand-out sections is a replica retro video game store where visitors can pick a game off a shelf, scan its barcode at a kiosk, and quickly start playing – a system that has a Raspberry Pi 3 computer at its heart.

    “We’d just created new hardware called the MiSTer Multisystem which was powering the kiosk in the shop, but choosing a game to play on it required me to open the kiosk and manually select one, and that meant there would really only be one playable game all day,” Neil recalls. “I wanted to make it more fun with a front-end menu that wouldn’t confuse visitors, and then realised the room itself would make the perfect physical front-end. It didn’t need to be a menu on the screen!”

    At first, Neil and his friend Chris Harris considered using a Raspberry Pi Camera Module to scan the barcodes. “But we found that environmental changes in light and mounting it behind the smoked perspex of the kiosk made it less than 100% reliable,” Neil says. “We then switched to a handheld barcode scanner which not only works great but also fits the theme of a retro shop very well.”

    Space invader

    Raspberry Pi runs a program called Barcode Rattler, created by Chris. It processes information from the scanner connected to Raspberry Pi via the USB port, and the information is sent via a secure network connection to the MiSTer gaming device – a highly accurate system well-loved by retro fans that emulates machines using an FPGA chip rather than software. 

    “Python waits for a keyboard event which it then reads and looks up a barcode in a CSV file,” Neil explains. “The barcode scanner behaves as a keyboard device so, when it scans a code, it sends the string to Raspberry Pi as if you’d typed out the numbers on the keyboard. If it finds a matching barcode in the CSV, it will send SSH commands to the MiSTer to start the correct system core and load the game via a utility called MiSTer Batch Control.”

    The result is a fun physical user interface that has gone down well with those who have tested it. “People seem to enjoy zapping the games and they love the ‘beep’ of the barcode gun,” Neil says. It’s also become his favourite room. “It’s a time-warp where you can forget the real world for a day and be swept away in a wave of carefree nostalgia,” he adds. “What could be more nostalgic than revisiting the video game shop from your childhood?”

  • INTERVIEW: Mike Cook

    INTERVIEW: Mike Cook

    Reading Time: 3 minutes

    “I am addicted to making stuff,” Mike tells us. “Now retired, but I was a university lecturer for 21 years and an electronic engineer in a mass-production consumer electronics company for the rest of my career.”

    What is your history with electronics and programming?

    My first electronic kit was called Trans Tronic. I got it when I was nine, and was making and selling crystal sets to my classmates when I was 13. Left my secondary modern school at 16, although 14 was the minimum school leaving age then. I went to work for a local industrial electronics company. There I did day release and night school for an ONC qualification. This allowed me to attend Newcastle Polytechnic, where I took a joint degree in Physics/Electronics. This is where I had my only formal education about computers. I had three one-hour lectures on programming with Fortran IV, but that was enough to get me hooked.

    When did you start writing about it? 

    After I made my own computer in 1976, from just a datasheet of the processor, and no idea what software did in them. My first published article on computing was in 73 Magazine, a ham radio magazine from the USA. It was about making music with a microcomputer. Later, I went on to write about the BBC computer in The Micro User, and after that in Acorn User. My first publication was in The MagPi #5, but I didn’t start writing my Pi Bakery series until The MagPi #33.

    When did you learn about Raspberry Pi?

    From a blog post online about six months before it first came out. I wasn’t quick enough to get one of the first batch, although I did apply for, and got, a second-batch machine.

    What was the first thing you made with a Raspberry Pi?

    I adapted a project I had done in The Micro User for a computer-controlled glockenspiel.

    What is your favourite thing you’ve made?

    What, just one? Too hard, you get eight on Desert Island Discs. Well, I will give you my top three. Dancing Skeletons – The MagPi #50, Tap-n-LED, – The MagPi #97, and Pico Voice – The MagPi #106.

    What other hobbies have inspired you?

    Astronomy. I have a 10˝ Cassegrain telescope. I even lectured in it as part of the physics courses at the university. Speleology, although it is some years since my wetsuit actually fitted me. Photography, analogue stuff with trays of chemicals. I was a professional wedding photographer for three years in the late 1960s. Also, amateur radio, live music gigs, stained glass work, and hill walking.

    Mike Cook

    Anything else you’d like to add?

    I just love helping people with their projects. There was no ‘online’ when I started, and so I had to work it all out myself. It is good to give people a helping hand.

  • ZX Spectrum Raspberry Pi Cassette

    ZX Spectrum Raspberry Pi Cassette

    Reading Time: 3 minutes

    Stuart’s first computer, a ZX Spectrum, has a special place in his heart, so a Raspberry Pi project based around one seemed ideal. “They’re still great machines!” he says of the beloved computer which celebrates its 40th birthday this April. 

    Stuart loves repairing and running real hardware as well as emulations and thought “it would be nifty to see if I could fit an entire ZX Spectrum emulator into a cassette tape shell.” He now uses his ZX Spectrum Pi Cassette as a ‘pick up and play’ device whenever he fancies “a quick bash at some old school gaming.”

    Learn as you go

    Prior to this project, Stuart had several retro makes under his belt and had made a tape emulator for an Arduino-based ZX Spectrum +2 that acts like a multi-cart tape. “Putting a whole Spectrum in a tape shell was the next logical step and an interesting challenge,” he says. Being tight for space, he chose Raspberry Pi Zero W. He loves the fact both ZX Spectrum and Raspberry Pi’s ARM processor were developed in Cambridge. 

    Despite this, he describes himself as a haphazard tinkerer with little electronics experience, who plans everything in his head. “I don’t have any schematics to share,” he apologises, “and never measure anything.” However, he makes paper mock-ups of everything he’s planning, largely to ensure it all fits. A veteran of small case builds, Stuart cautions other wannabe makers to leave far more room for cables than you think you’ll need. He also admits to treating his Raspberry Pi collection rather roughly: “even though they have been abused and tortured, they still keep running.”

    Stuart assembled the ZX Spectrum Raspberry Pi build from what he had to hand. He took a sheet of scrap metal and used a bandsaw to fashion a crude shape for what would act as Raspberry Pi Zero W’s heatsink. A Dremel, needle files, and fine-grit sandpaper were used to finesse the shape.

    Getting it taped

    Stuart bought a job lot of cassette tape seconds: “Boots C15 were the cassettes I used for storing my programs back in the ’80s; it was an obvious choice” – for which he designed and printed new labels.

    “Cassette shells make for a great form factor,” says Stuart, “I started with a plain black spare cassette shell and used a small hand file and side cutters to remove the plastic supports in preparation for fitting the heatsink.” 

    The 5 mm interior of the C15 cassette tape meant something would have to give: fitting a Zero W inside involved cutting out a section to nestle under the reels and “preserve the illusion” – not something inexperienced makers are advised to tackle. Stuart has eight similar builds under his belt, hence his confidence. He wrapped Raspberry Pi in foil and “went at it with a Dremel.” Surprisingly, it survived. “I lost some GPIO ports, but it was well worth it to get the tape looking right.”

    Configuring the DietPi and Fuze ZX Spectrum emulator took lots of tweaks before Stuart was able to get them to boot in an acceptable time frame. “I eventually got it to boot in 16 seconds. The full-width heatsink meant I could safely overclock Zero W and saved another couple of seconds,” he says.

    His next challenge: a 1980s boom box with drop-in cassettes that boot up and play games from different iconic home computers. We like his thinking!

  • Hidden Hacks for Raspberry Pi in The MagPi magazine issue #116

    Hidden Hacks for Raspberry Pi in The MagPi magazine issue #116

    Reading Time: 3 minutes

    Hidden Hacks for Raspberry Pi

    Hidden Hacks for Raspberry Pi

    Get even more from your computer with our Hidden Hacks feature. We’ve got tips for the terminal, hacks for headless and hostnames, physical hints for the hardware, and Raspberry Pi OS software secrets. In short: there is a massive collection of tips & tricks that every Raspberry Pi owner should know. 

    Shoot for the stars: Raspberry Pi Astrophotography

    Shoot for the stars

    Astrophotography is a fantastic hobby and Raspberry Pi is the ideal star capturing device. In this feature, you will discover how to go about exploring the night sky with Raspberry Pi and a few (low-cost) additions. It’s an educational tour, and a wonderful demonstration of what you can achieve with a single-board computer. 

    ZX Spectrum Raspberry Pi Cassette

    ZX Spectrum Raspberry Pi Cassette project

    Would you believe that the Sinclair Spectrum is 40-years-old this April? We found it hard as well. This wonderful project cuts down a Raspberry Pi Zero and fits it inside a Boots C90 cassette tape.

    Penkesu Computer

    Penkesu Computer

    Pop Raspberry Pi in your pocket with this stunning retro computer. Penk Check decided to build a small computer with a mechanical keyboard and a 7.9-inch touchscreen display.  The result is a delightful computer that’s both ultra-modern and classic at the same time.

    Kimberlina Droid

    Kimberlina Droid

    This droid, which takes inspiration from Star Wars: Attack Of The Clones, packs quite the punch. Selin Ornek’s battlebot won her first prize at Coolest Projects. 

    Set up a digital audio workstation

    Set up a digital audio workstation

    KG continues an exploration of MIDI and mt-32 digital audio solutions for Raspberry Pi. This month they build a  digital audio workstation that runs Reaper software.

    8BitDo Arcade Stick review

    8BitDo Arcade Stick tested

    Another excellent option for Raspberry Pi realtor gaming is this arcade stick. It packs weight and heft, plus enough inputs to accommodate even the busiest button basher.

    10 Amazing Robot Projects

    10 Amazing Robot projects

    The best-wheeled buddies a person can build; and one that crawls along on cardboard legs. This month we look at the very best robots built by The MagPi readers. 

    Pick up your copy of The MagPi issue #116

    The MagPi magazine issue 116 is available as a free digital download, or you can purchase a print edition from the Raspberry Pi Press store. Subscribe to The MagPi in print for 12-months and get a free Raspberry Pi Zero 2 computer.

  • Win! One of five 8BitDo Pro 2 controllers

    Win! One of five 8BitDo Pro 2 controllers

    Reading Time: < 1 minute

    Subscribe

  • Case study: XOGO digital signage

    Case study: XOGO digital signage

    Reading Time: 2 minutes

    XOGO successfully launched its first bespoke media hardware – the XOGO Mini – in 2019. For its follow-up, XOGO founder and CMO Justin Miller knew price would be critical, especially as the company was aiming for growth along with the thriving digital signage market. He says that the choice of Raspberry Pi 4 for the company’s own media player device was clear.

    The challenge

    XOGO needed to offer their customers a 4K-capable turnkey hardware platform for its digital media player, at a very low price point: its solution must retail for under $100 (US).

    The solution

    The XOGO Mini 2 is based on a Raspberry Pi 4 running a custom XOGO Player/Linux image. XOGO’s custom software turns it into a media player that pushes content to a display. The Mini 2 is wireless-enabled, so the user can control and play content stored on its SD card using XOGO’s Player app on any smartphone. Access is restricted by a security code; entering this lets the user send playlists securely from their app to the Mini 2.

    The XOGO Mini 2 is presented in XOGO’s custom silent, fanless enclosure, and ships with an HDMI cable and an international power adapter to give customers a plug-and-play setup experience.

    Why Raspberry Pi?

    XOGO’s CMO, Justin Miller, puts it succinctly: “No other hardware platform in this price range is as powerful or flexible.

    “Raspberry Pi 4 was the perfect media player platform for us because it’s 4K-capable, it allowed us to build a customised disk image running XOGO Player/Linux, and we can even offer disk images to our customers around the world so they can build their own DIY Raspberry Pi media players,” he adds. “Competing solutions are more expensive, do not offer customisations such as international power supplies and custom cases, and are not as widely available worldwide.”

    XOGO was understandably cautious about moving away from the hardware that had proven successful with its first XOGO Mini. Raspberry Pi proved convincing: XOGO’s experts were persuaded by its superior power and video/URL playback capabilities and its lower cost, together with what they describe as the “ultimate flexibility” it offers them to design their own player device around it, right down to the case and power supply. “We absolutely love Raspberry Pi 4.”

    The results

    Sales of the Raspberry Pi 4-based XOGO Mini 2 are strong in both the US and the UK, and the device is proving extremely reliable in the hands of customers. XOGO believes that “Raspberry Pi is the platform for digital signage,” and its software is now integrated with Sharp-NEC’s Raspberry Pi Compute Module-driven displays. The two organisations are working together on sensor integration plans using Raspberry Pi hardware at the cutting edge of digital signage technology.

  • REVIEW: Argon EON

    REVIEW: Argon EON

    Reading Time: 3 minutes

    The EON is a full network-attached storage (NAS) enclosure for your Raspberry Pi 4. Whereas previous NAS projects often involve a USB hub and cables to external drives, the EON fits up to four drives in an enclosure with a single power source. This allows you to build your own multi-drive storage solution for a fraction of the price of a PC-based equivalent.

    The first thing that strikes you about the EON is the enclosure itself. No boring black box here – instead we appear to have a pyramidical version of the monolith from 2001: A Space Odyssey. The frame is built from “space-grade” aluminium, and feels reassuringly heavy. If dropped, we suspect it’s the floor that’s getting damaged, not the internals. Two magnetically-held opaque plates give a sleek black finish. The rear is solid with plenty of mounting holes for your drives. Raspberry Pi 4 sits at the base of the unit.

    Inside is a layered affair with Raspberry Pi 4 at the bottom, then two further PCBs, the top exposing four SATA ports for your drives. These connect via USB 3.0 directly to your Raspberry Pi 4 using a supplied external connector. The SATA ports support four drives, mounted vertically. The unusual shape of the EON means that the two outermost connectors only support 2.5˝ drives, but the inner two can be full-size 3.5˝ HDD or SSD.

    Versatile

    Argon has also baked versatility into the design with a built-IR port that works with the firm’s remote control (reviewed last month), perfect for a home theatre setup. A fan provides cooling for the entire unit, and the top-mounted power switch is a small OLED screen that can be customised to display anything, such as IP address or CPU temperature.

    Installing drives was straightforward and the supplied screws and tools were a welcome bonus. Our Raspberry Pi 4 immediately recognised the new devices, and soon we had a RAID system up and running. Argon plans to add an internal USB port to support an M.2 SSD, so you can separate the operating system and RAID drives.

    We found it hard to come up with anything negative about this case. The positioning of the power switch makes it very easy to hit it when handling the device, which can punish the impatient when moving things around. Also, despite the rock star looks, the shape of the device does cheat you out of 4 × 3.5˝ drives, which could be seen as form over function.

    These minor nitpicks aside, this is one of the most impressive home NAS setups we’ve seen. If you want your home server not only capable of huge storage and Raspberry Pi performance, but also as something great to look at, this is for you.

    Verdict

    9/10

    This is simply a stunning piece of engineering. You can build a NAS that competes with much more expensive options, and it looks like something from a sci-fi movie.

  • Speech-to-text badge

    Speech-to-text badge

    Reading Time: 3 minutes

    Kevin’s idea was to transcribe everything he said in real-time and display it on a screen that could be worn as a badge. Since he works at Deepgram – which offers a deep learning speech recognition system – he already knew what software he was going to use. One of Kevin’s friends, Bevis, then suggested he pick up a Raspberry Pi Zero computer for the project. “I wanted to create a wearable and I needed the smallest and lightest option,” he explains.

    Listening intently

    In essence, the project is a full-screen browser application. It runs on Raspberry Pi Zero which is connected to a hi-res HyperPixel 4.0 display and the setup is powered via a battery pack. A generic USB lapel microphone is also plugged in, and this is intended to sit on the wearer’s shoulder so that it picks up the person’s speech.

    From there, it was a case of incorporating the Deepgram API into a program. “At its core, the whole Deepgram feature is just twelve lines of code. It asks for the microphone, accesses raw data, opens a persistent WebSocket connection with Deepgram, and sends mic data every 250 milliseconds,” Kevin says. “It then logs the results when they come back. Every spoken word is transcribed onto the screen.”

    As a coder, Kevin had few problems. “The software development side of the project was perfectly within my wheelhouse,” he says. “But as the project grew in complexity, so did the software, from plain HTML and JavaScript to Vue.js, and finally implementing a back-end with Node.js to handle translation.”

    Look who’s talking

    Initially, the intention was to only transcribe his own voice, but the project soon evolved. Since Deepgram works by detecting everyone who is speaking (and can transcribe many languages), Kevin initially ensured that only the first voice would be displayed on the screen – this meant he could talk and know that only his words were being transcribed.

    “But because the data was there, it was extremely simple to include a mode that would also show all of the user voices,” Kevin says. The spoken words of each person in range of the microphone are shown on the screen in a different colour. “A feature called ‘diarisation’ detects different speakers and returns data about who is speaking.”

    After showcasing the project on Twitter, one of the most common requests was for a translation option so that words could appear in a different language. “Deepgram doesn’t do this,” Kevin says. “So I found a lovely, simple translation API called iTranslate and, with very minimal extra work, I could take Deepgram transcripts and pass them on for translation.”

    Finally, he included a mode which would turn the display into a simple conference badge. “It’s just a static screen containing personal information and this was also a community suggestion. It only needed a few lines of code and it didn’t need to interact with an API.” Even so, this project could well be an essential conference accessory.

  • Pica and Dot

    Pica and Dot

    Reading Time: 3 minutes

    This effort used two motors, a DRV8833 motor driver, and a 70 mAh lithium-polymer battery. It moved along on three 8 mm wooden beads acting as wheels. To make it as small as possible, Kaisar decided to saw away Raspberry Pi Pico’s lower section.

    “I had a number of these boards, so I took the risk to trim one, up to the crystal,” he explains. “Trimming a Raspberry Pi Pico board is not something I recommend, and it’s also not required for the functional operation of this robot.”

    Joining the dots

    Having taken to Twitter to showcase Pica, he wanted to go even smaller. This time he turned his attention to Pimoroni’s Tiny 2040 – a development board that, as with Raspberry Pi Pico, includes the RP2040 microcontroller chip. 

    “I just wanted to make a smaller version of Pica utilising the Tiny 2040 board,” he says. Given the Tiny 2040 is roughly the size of a postage stamp, he could confidently claim on social media to have made the smallest Raspberry Pi robot in the world. This was Dot.

    “The initial plan was to have the same DRV8833 motor driver and 6 mm motors,” he reveals. “But because of the much smaller size of the Tiny 2040, it was a little tricky to find room for the motor driver and still maintain the low profile and cuteness of the robot. Then I had the idea of measuring the motor current to see if they can be used without a motor driver.”

    He found that they could, so the two 3 V geared DC motors were connected directly to the Tiny 2040 board’s GPIO pins. Kaisar admits there is a risk of damage – “running even these small motors off the GPIO should be avoided because of the potential spikes and high stall currents,” he says – but it allowed the robot to be as small and cute as possible.

    Wooden wheels

    This time, Kaisar used just two wooden bead wheels, with Dot having a zero-degree turning circle. “I think they look awesome,” Kaisar says. “They also get their uniqueness from the fact that the wheels are not on the same axle, so I learned that reinventing the wheel can actually be a satisfactory experiment.”

    Dot is powered by a 70 mAh LiPo battery and, as with Pica, it has been programmed using CircuitPython. But there are limitations. “The robots have very minimal functionality so far – the moves are hard-coded,” Kaisar continues. “They don’t have remote controlling over wireless LAN, Bluetooth, or Zigbee either because that doesn’t excite me too much. 

    Even so, Kaisar is looking to improve both robots. He wants Dot to benefit from voice control and Pica to be able to draw. “Work is also in progress for machine-learning-based autonomous controls developed with the C++ SDK which will be made open-source,” Kaisar says, thinking big.

  • REVIEW: Trilobot

    REVIEW: Trilobot

    Reading Time: 3 minutes

    The standard Base Kit includes everything you need, apart from a Raspberry Pi 4, microSD card, USB-C power bank, and optional Raspberry Pi Camera Module v2. Note, however, that you could use any full-size Raspberry Pi model and/or power bank by substituting the supplied USB-C cable with one for the connections you need.

    Easy assembly

    We found the kit very straightforward to assemble, aided by the well-illustrated step-by-step online guide. The only real difficulty we encountered was getting the tiny nuts into the plastic brackets for the motors – the fit is tight, so we needed to use the blade of a flat-headed screwdriver to push them into place.

    The robot’s chassis comprises two FR-4 PCBs. Rather neatly, a DRV8833PWP dual H-bridge motor controller is integrated seamlessly into the main PCB, with two mini JST sockets to connect the supplied short cables to the pre-soldered shims of the metal-gear motors – no soldering or screwing required. Two moon buggy wheels are supplied, along with a standard metal ball castor to be attached to the rear of the board (with an acrylic spacer).

    At this point, you can add an optional Raspberry Pi Camera Module v2 using the kit’s camera mount before adding the supplied HC-SR04 ultrasonic distance sensor in its own mount in front, with a hole for the camera lens to poke through as the two are sandwiched together. The distance sensor’s pins fit into a port on the PCB.

    Your Raspberry Pi is then mounted upside down on the main PCB’s female GPIO header (via a booster). Once attached using the standoffs, the top PCB serves as a platform for the power bank – ours was a fair bit wider than the one featured in Pimoroni’s assembly guide, but the Velcro straps secured it well enough.

    Robot running

    With the robot assembled, you just need to install the software in Raspberry Pi OS using three Terminal commands. A comprehensive Python library offers a large range of useful functions and comes with several code examples to help you get started. These include some impressive underlighting effects using the six RGB LEDs located on the bottom of the main PCB, reading the four push-buttons located near the rear, and avoiding walls using the distance sensor.

    Another code example enables you to remote-control the Trilobot wirelessly using a Bluetooth Xbox, PlayStation, or 8BitDo gamepad. There aren’t yet any examples for using the camera, although it should be fairly straightforward to use it to take photos and stream video; you could even use OpenCV to add object or face detection.

    While it’s not the speediest robot we’ve ever seen, the 110:1 metal-gear motors provide a good level of torque while the moon buggy wheels offer plenty of grip, even on a hard surface.

    There are plentiful possibilities for expanding the robot. As well as two Qwiic / STEMMA QT ports, the main PCB has several unpopulated headers: one for a 5 V servo (or NeoPixel strips if you prefer), another for I2C, along with five more for adding Pimoroni’s Breakout Garden sockets to use the wide range of sensors available. So, for instance, you could add a motion sensor or mini LCD.

    Verdict

    9/10

    With a solid chassis, detailed software library, and abundant options for expansion, it all adds up to an excellent robotics platform for beginners and more experienced enthusiasts alike.

  • Arbitrary waveform generator

    Arbitrary waveform generator

    Reading Time: 3 minutes

    Wolfgang had made a hardware-based arbitrary waveform generator before, but having researched the capabilities of the RP2040 microcontroller and its support for DMA and PIO, he realised Raspberry Pi Pico would be ideal for amplifying waveform signals. MicroPython, which Pico natively supports, also happens to be Wolfgang’s preferred programming language. He decided to add an output stage “to amplify the signal of the RP2040 and make it short circuit-proof,” plus a display to make the results clearer. The amplifier was needed because the RP2040 can only drive small loads, he explains. Initial tests using a breadboard proved the concept worked well, while online research suggested other users were also searching for a device of this kind, and may well appreciate having a design they could use too.

    In praise of Pico

    “Pico is the perfect microcontroller board for this project. It has plenty of  RAM and flash memory. The RP2040’s CPU clock is specified for 125MHz, but runs reliably at 250MHz, which for my project enables output frequencies well above 20MHz, while the SPI interface can drive a TFT display for the user interface,” Wolfgang says of the Pico’s impressive specifications. 

    It wasn’t all plain sailing, though. “Ideally a function generator should have a clean output signal with no distortions or noise.” However, using Pico to both generate the wave and power the TFT display via the SPI interface resulted in a noisy output signal because of cross-talk from the SPI interface to the PIO output pins, Wolfgang reports. Making some changes to his breadboard layout improved things, but didn’t get rid of all the signal noise. Instead, he took charge of how the TFT updated. “Once the user has entered or adjusted the wave and started the generator output, the display refresh is turned off. This turns off the SPI, which reduces most of the noise,” he explains.

    Community input

    A fan of rapid prototyping, he split the development into three phases beginning with the generator engine. Here, he added some control code that fellow maker Rcgo had written up as an Instructable that enabled Raspberry Pi Pico to calculate a wave and program the DMAs and PIO. Wolfgang was able to modify this for the AWG core, adding a list of data elements the generator module would use to create the desired wave based on the user’s input. Another community-contributed project, Peter Hinch’s micro-gui, proved “the perfect base to build a user interface for small embedded systems.” Peter helped Wolfgang put together a knob widget to go with the two push-buttons and rotary encoder he’d set up to work alongside micro-gui and the TFT controls. These dials were critical, since they govern changes to the waveform created. 

    The class AB output stage consists of discrete components including “a nice video driver IC that provides low output impedance,” while compromising with an 8-bit DAC (rather than a better resolution 10-bit one) avoided timing problems at higher frequencies. “Four wave data samples are loaded every other clock cycle, so there is time for the DMAs to reconfigure, while the PIO still has data to shift out. Running the CPU at 250MHz, waves can be generated well above 20MHz,” Wolfgang reports. Just a few days after he started designing it, the so-called poor man’s AWG was used to diagnose and fix his friend’s tube amplifier. “One more happy friend,” says Wolfgang.

  • Fancy Octopus Arcades

    Fancy Octopus Arcades

    Reading Time: 3 minutes

    When Shonee documented their work on Instagram, people began to take notice. Their bespoke gaming arcade business, Fancy Octopus Arcades, “just sort of took off from there.”

    Bijou is beautiful

    Brooklyn resident Shonee started following a few Reddit and Facebook pages where he “saw folks making huge gaming rooms, loading them up with arcade cabinets, and realised that for some of us in smaller apartments, that wasn’t a possibility.” Shonee was also frustrated that people were capitalising on the scarcity of arcade cabinets, “snagging all the 1up machines they could find and price gouging them to death.” He decided to address pent-up demand for games arcades, focusing on designs that would fit a New York-sized apartment.

    The idea was to make small, mini cabinets, packed to the gills with games, easily plugged via standard HDMI for video audio output. Shonee also wanted them to be highly personalised art pieces “that a person could be proud to put on a display shelf or coffee table.” Raspberry Pi’s small profile and extremely robust performance helped him “pack a lot of oomph into a very small package,” he confirms. He also loves being able to easily flash images directly onto the SD card with little or no manual coding changes. As a result, he can focus on each cabinet’s artistry.

    Daring designs

    Although homemade retro games cabinets are a popular build, Shonee’s stand out because he designs and creates all the parts himself. The 3D printing, silkscreen, vinyl wrap, and decoupage work is all done in-house, depending on the build. Shonee works closely with clients, creating a design around their vision. “No two builds are ever alike, and no two designs are ever repeated,” he says of what is now a two-year-old business. “I’ve had so many folks ask me ‘can you build me a copy of that Donkey Kong deck?’ My bank account absolutely hates that I have to say no.” The unique elements that bring his designs to life include gear sticks masquerading as swords for his Samurai Jack build, the handle from a Panasonic boom box found at a Chinatown flea market and used in his Basquiat/Keith Haring build, and a Donkey Kong barrel refashioned from a garden centre planter. “Basically, I use whatever I can.” More often than not, he uses software from Arcadepunks.com. Their front ends are “stable, responsive, and rarely cause problems down the line,” Shonee says.

    “Some folks really want to focus on retro arcade gaming; some folks are more focused on having a game preservation library of console games from their past. There are always some adjustments that need to be made. Luckily, with the versatility of Raspberry Pi, it’s pretty easy.” Each Fancy Octopus Arcade typically takes about a month to complete, with costs varying depending on the brief. 

    “Without Raspberry Pi, this would just be a box with buttons on it,” Shonee concludes. “The size, power, versatility, and ease of use have given me the ability to help the dream of making my hobby a career come to fruition.

  • REVIEW: 8BitDo Pro 2 Controller

    REVIEW: 8BitDo Pro 2 Controller

    Reading Time: 3 minutes

    Reminiscent of a PlayStation DualShock, the Pro 2 controller has two analogue sticks, a D-pad, four buttons, four triggers, two Pro-level back buttons, Select, Start, Star, Heart, and Profile button. It’s certainly not short of a button or two.

    If all that wasn’t enough, there is an ‘SADX’ Mode switch underneath that swaps between four different modes: Switch, Apple, Android, and Windows. 

    It comes with a long USB-C cable and 1000 mAh lithium-ion battery with “20 hours of battery life.”

    In terms of value, £40 is not particularly low-cost in the world of Raspberry Pi, but it is good value when stacked up against its immediate rivals: a Sony DualShock will cost you £50 and an Xbox One Controller starts at £55 (without a rechargeable battery). So, this is cheaper than either. But is it better? 

    Setup was a breeze. We used the Windows (X) setting on the back and started with a direct USB-C connection.  We then held down the Pair button and synced it up with ‘Add Device’ in the Bluetooth settings in Raspberry Pi OS. 

    Support in Raspberry Pi OS is game-dependent, although we had a blast in Super Tux Kart and Doom.

    We moved onto classic games with Batocera.linux which is a new retro gaming distribution that we’ll be talking more about in future. Setup was even easier there, requiring us only to plug in via the USB-C and hold the Pair button. RetroPie was equally easy to set up, mapping the buttons on the controller during the setup process.

    For a more modern experience, we tested it out with Xbox Cloud gaming. This enabled us to use all the analogue sticks and triggers with some of the latest 3D masterpieces. Again, we had no problems. 

    Button combinations can be mapped to the two Pro buttons on the rear; sadly, the software to control them is only available for Windows, macOS, Android, and iOS. It’s a shame you can’t do the setup via a web or Linux app. 

    There are a few quirks. You switch off the controller by holding down the Start button for three seconds, and you might find using Windows (X) not immediately obvious over the other settings. But really there’s nothing here that a read of the supplied instruction manual won’t clear up.

    Holding its own

    Build quality of the Pro 2 controller is superb. It’s easy to grip and buttons have a nice responsive click with no sponginess. The analogue sticks are weighted well and spring cleanly back to the centre. It’s certainly a step above the usual fare for a third-party controller. 

    The Pro 2 integrates neatly with Raspberry Pi, and the Mode Switch means you can quickly transfer it to any other consoles or computers that you might be using. 

    We really have no hesitation in recommending this one.

    Verdict

    9/10

    A fantastic controller for a good price that works across a range of Raspberry Pi games, apps, and distributions. Easy to set up and use. Shame the Ultimate Software isn’t available in Linux, though.

  • PiGlass V2

    PiGlass V2

    Reading Time: 3 minutes

    One maker, Matt Desmaris, recently revisited the idea. “I made PiGlass V1 in 2018,” he explains. “I wanted to try to make a heads-up display wearable and see how far I could take it. I kept running into performance issues with Raspberry Pi Zero when I was trying to add more features, and I made a note to revisit the project when Raspberry Pi Zero 2 came out.”

    PiGlass V2 has some extra features, like bone conduction earphones. It also makes use of a wearer’s hat.

    Virtual vision

    Matt was in contact with us throughout the process of making this and the build, actually,  was quite quick, as he elaborates: “Construction was straightforward – a soldering iron, heat gun, and small flat-head [screwdriver] are all that’s required. Construction took place over a couple weeks as I progressively got more and more parts in. Everything is secured with zip ties or heat shrink.”

    The whole system is controlled with a gamepad, which makes for an interesting sight. 

    “There is a button on the audio hat on the back of my head,” Matt reveals. “It is the start/stop button. Start the menu program or kill every program that could be running. The menu program uses the [picamera] API which allows it to be recorded, including the text overlays. The menu program has a few options: camera (from PiGlass V1) at 1080p, record video with audio at 1080 p, stream YouTube at 720p, Emulation Station, Kodi at 720p, and Steam Link [with controller issues].”

    While Matt developed it hooked up to a monitor, he’s tested it thoroughly by watching streaming video and playing some retro games – something we heartily approve of.

    Seeing cyber

    “Within the menu/related programs it works very well; some things take a few seconds to load,” Matt tells us. “The 720p display looks really good; all the text in menus and captions are easily readable. The camera program allows you to take 1080p images/silent videos, and video with audio records at 1080p, 25 fps, with 44kB audio. YouTube stream will livestream to YouTube in 720p, 25 fps, with 44kB audio.”

    With the project now at an advanced stage, Matt has been thinking of future improvements as well: “I want to add voice commands and I have a few ideas. The microphones are located on the back of my head and they can pick up my voice at normal speaking levels. I want to add real-time object detection. I have tested demo code and it looks like [Raspberry Pi] Zero 2 W can do it. I want to make a program that uses the gamepad to be able to select which type of object is being detected.”

    We very much look forward to the cyberpunk cyberglass future.