REVIEW: Trilobot
The standard Base Kit includes everything you need, apart from a Raspberry Pi 4, microSD card, USB-C power bank, and optional Raspberry Pi Camera Module v2. Note, however, that you could use any full-size Raspberry Pi model and/or power bank by substituting the supplied USB-C cable with one for the connections you need.
Easy assembly
We found the kit very straightforward to assemble, aided by the well-illustrated step-by-step online guide. The only real difficulty we encountered was getting the tiny nuts into the plastic brackets for the motors – the fit is tight, so we needed to use the blade of a flat-headed screwdriver to push them into place.

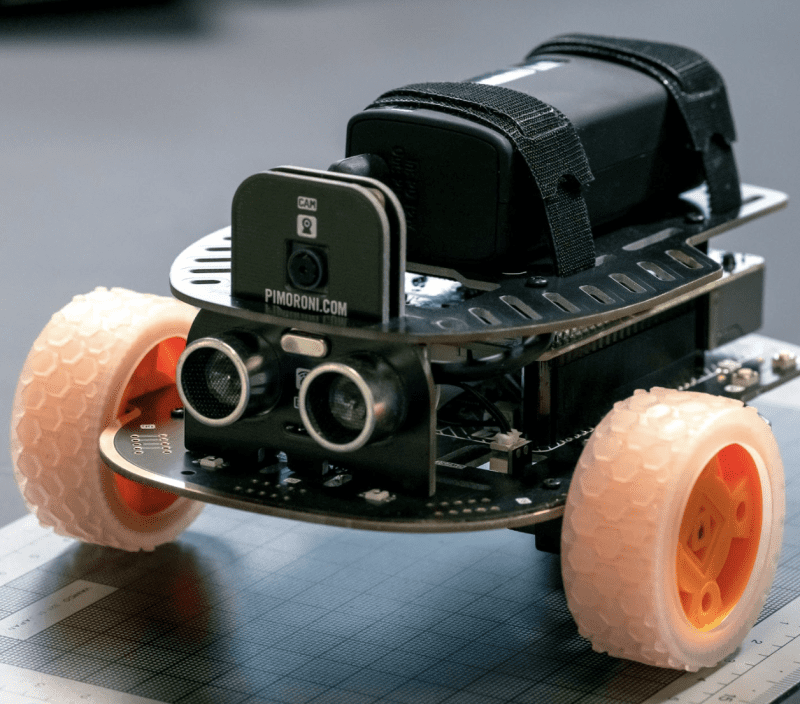
The robot’s chassis comprises two FR-4 PCBs. Rather neatly, a DRV8833PWP dual H-bridge motor controller is integrated seamlessly into the main PCB, with two mini JST sockets to connect the supplied short cables to the pre-soldered shims of the metal-gear motors – no soldering or screwing required. Two moon buggy wheels are supplied, along with a standard metal ball castor to be attached to the rear of the board (with an acrylic spacer).
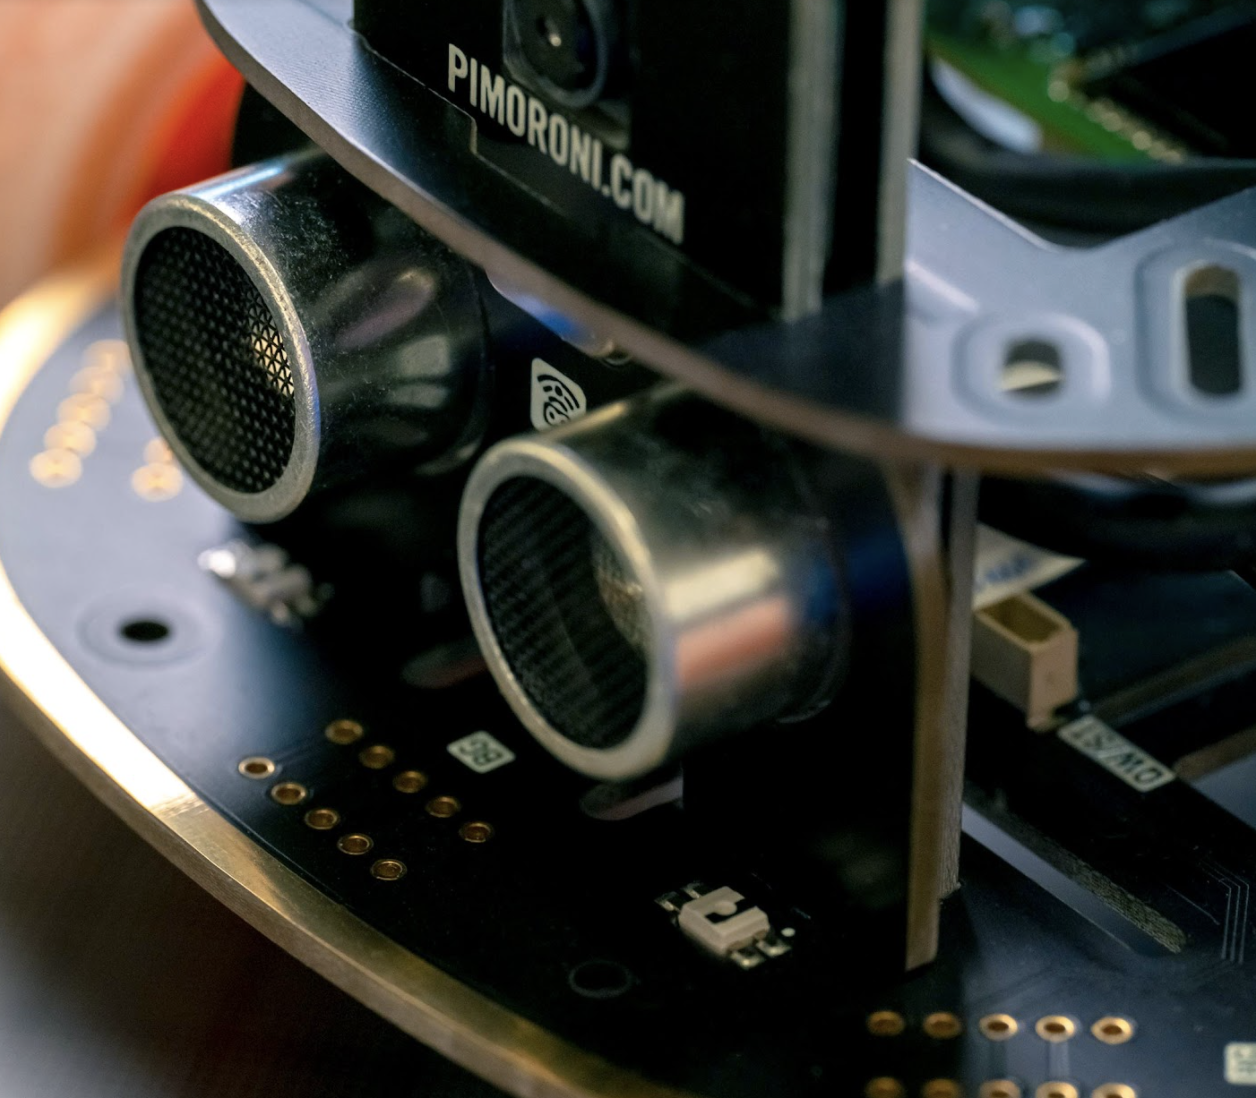
At this point, you can add an optional Raspberry Pi Camera Module v2 using the kit’s camera mount before adding the supplied HC-SR04 ultrasonic distance sensor in its own mount in front, with a hole for the camera lens to poke through as the two are sandwiched together. The distance sensor’s pins fit into a port on the PCB.

Your Raspberry Pi is then mounted upside down on the main PCB’s female GPIO header (via a booster). Once attached using the standoffs, the top PCB serves as a platform for the power bank – ours was a fair bit wider than the one featured in Pimoroni’s assembly guide, but the Velcro straps secured it well enough.
Robot running
With the robot assembled, you just need to install the software in Raspberry Pi OS using three Terminal commands. A comprehensive Python library offers a large range of useful functions and comes with several code examples to help you get started. These include some impressive underlighting effects using the six RGB LEDs located on the bottom of the main PCB, reading the four push-buttons located near the rear, and avoiding walls using the distance sensor.
Another code example enables you to remote-control the Trilobot wirelessly using a Bluetooth Xbox, PlayStation, or 8BitDo gamepad. There aren’t yet any examples for using the camera, although it should be fairly straightforward to use it to take photos and stream video; you could even use OpenCV to add object or face detection.
While it’s not the speediest robot we’ve ever seen, the 110:1 metal-gear motors provide a good level of torque while the moon buggy wheels offer plenty of grip, even on a hard surface.
There are plentiful possibilities for expanding the robot. As well as two Qwiic / STEMMA QT ports, the main PCB has several unpopulated headers: one for a 5 V servo (or NeoPixel strips if you prefer), another for I2C, along with five more for adding Pimoroni’s Breakout Garden sockets to use the wide range of sensors available. So, for instance, you could add a motion sensor or mini LCD.
Verdict
9/10
With a solid chassis, detailed software library, and abundant options for expansion, it all adds up to an excellent robotics platform for beginners and more experienced enthusiasts alike.