Attach Inky wHAT to Raspberry Pi
Carefully line up your Inky wHAT over the GPIO header pins on Raspberry Pi (use the header booster that sits between the wHAT and the board if yours is a full-sized Raspberry Pi model) and press it into place. Connect Raspberry Pi’s mouse, keyboard, screen, and power on. As with using any new hardware, start by updating your Raspberry Pi. We advise using a fresh installation of Raspberry OS, which will suggest updating itself when it first boots up. Follow the prompts to check for and download any updates.
Turn on SPI and I2C
Inky wHAT needs both SPI (Serial Peripheral Interface) and I2C (Inter-Integrated Circuit) enabled to work. Both can be found in Raspberry Pi Configuration. Click on the menu icon and choose Preferences > Raspberry Pi Configuration. Click on the Interfaces tab and set both SPI and I2C to Enabled. Click OK.
Install Inky wHAT software
With the Inky wHAT hardware attached, we’ll install the software. Open a Terminal (click the black rectangle icon in the top bar) and enter:
curl https://get.pimoroni.com/inky | bashPress Y in response to ‘Do you wish to do a full install?’, then press ENTER.
Clean and reset
During the wHAT installation, some example programs will have been copied to Raspberry OS. Open a new Terminal window and type:
cd /home/pi/Pimoroni/inky/examples
ls
…to locate them. Let’s start by ‘cleaning’ your Inky wHAT’s screen (it ships with the logo displayed.) While in the examples directory, enter:
python clean.py --type what --colour yellow(If you have the red wHAT, then enter –colour red instead, and for all following examples.)
The Inky wHAT screen flashes as it refreshes and then cycles through yellow, black, and white. In the end you will have a clear screen. To bring back the fantastic Inky wHAT logo screen, type :
python logo.py --type what --colour yellowQuotes
Inside the examples directory is another folder marked what. There are more examples in here, including a selection of quotes. Enter:
cd what…to change directory. Then run the example:
quotes-what.py –colour yellowFor these programs, you don’t need to specify the type (because you’re in the what folder). The quotes are pulled from an editable selection at Wikiquote.
Change quote
You can edit the quotes-what.py code to pick quotes from any of your favourite people. Enter:
mousepad quotes-what.py…to open the file in Text Editor. And replace the list of names with your favoured person:
people = [ "Douglas Adams"
]
Use File > Save As and save the file as quotes‑adams.py. Now, in the Terminal, enter:
python quotes-adams.py --type yellow…and you’ll see a quote from the celebrated author.
Make a name badge
Now we’ve explored the options Pimoroni provides, let’s tell Inky wHAT to display something we specify. Head back to the examples directory, using cd .. or cd /home/pi/Pimoroni/examples, and type:
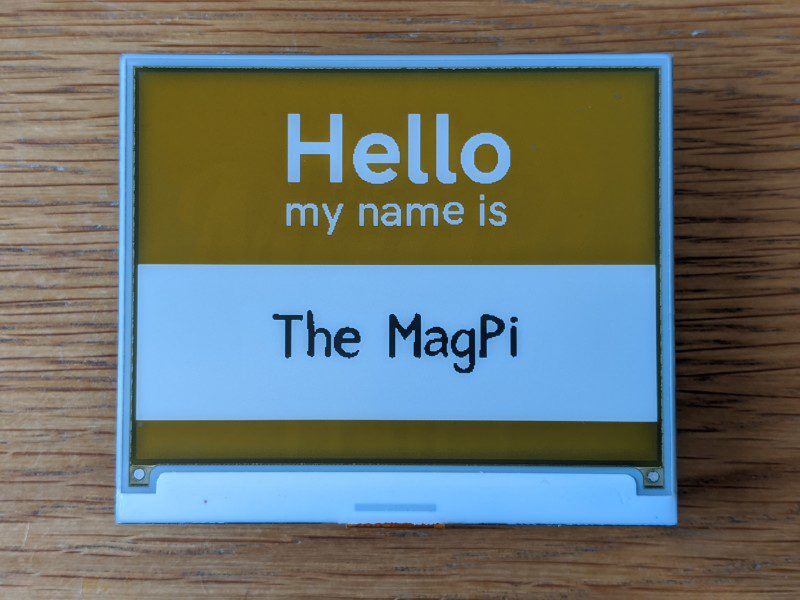
python name-badge.py --type what --colour yellow --name "The MagPi"Replace ‘The MagPi’ with your own name (or any name you like). After a few seconds, Inky wHAT’s display will mimic a conference delegate’s name badge, complete with the name you provided.
![]()
Hello Python
What about coding your own text and images from scratch? Fortunately, it’s possible to code your own messages using Python. Let’s start with the traditional Hello World program. Open the Thonny IDE (Menu > Programming > Thonny Python IDE) and save the file as hello_inky.py (we saved ours in the Pimoroni/inky directory).
Now enter the code from hello_inky.py. Click Run to display Hello World on the screen.
Show off your own images
You can tell Inky wHAT to display any image you wish, but it can only handle 400×300-pixel PNG files that use three-channel indexed colour.
Although specific, it doesn’t mean you can’t display most images, just that you will need to convert them first. The GIMP image editor is ideal for this. To install GIMP, type:
sudo apt update
sudo apt install gimp
You will also need the three-channel indexed palette. Either use Text Editor to create the inky‑palette.gpl file and save it with your code files (we’ve put ours in /home/pi/Pimoroni/inky), or download it from Pimoroni’s Inky GitHub repo – in a Terminal, enter:
git clone https://github.com/pimoroni/inkyYou’ll find the colour palette at inky/tools/
inky–palette.gpl. It’s configured for the Inky wHAT red version, so change the third line from 255, 0, 0 to 255, 255, 0 if you have a yellow Inky wHAT.
Import the palette
Once installed, type gimp in the Terminal to run GIMP, or open it from Menu > Graphics > GNU Image Manipulation program. Choose Windows > Dockable Dialogs > Palettes. The Palettes dialog appears in the top-right of the screen. Right-click it and choose Import Palette. Choose Palette File and click the Select Palette File icon next to it. Use the window to select the inky-palette.gpl file. Click Import.
Convert an image
You can use inky-palette.gpl to convert an RGB image to the three channels. For best results you can create your own image using GIMP (Choose File > New and set the width to 400 and the height to 300). And then draw an image using the tools and stick to the three colours that match your Inky wHAT model (white, black, and yellow/red). If your artistic skills aren’t feeling up to much, we’ve included a MagPi-Logo.png file along with the code files on our GitHub. It’s already sized at 400×300 and features the three colours.
Open the image (File > Open) and click Convert to the colour profile (this isn’t related to our three channels). Now choose Image > Mode > Indexed and select Use Custom Palette. Click the palette graphic (typically it will be marked Web) and choose inky-palette from the list.
Click Convert.
Now choose File > Export As and save the file to the same directory as your code (we saved it to /home/pi/Pimoroni/inky).
Image code
The code to display an image on the Inky wHAT is much shorter, and easier to understand, than the code for text.
Enter the code from magpi_inky.py and make sure that the file name and path on line 7 (magpi_logo.png) match the file you saved in the previous step. Run the program to view the image on your Inky wHAT:
python magpi_inky.py
Schreibe einen Kommentar
Du musst angemeldet sein, um einen Kommentar abzugeben.