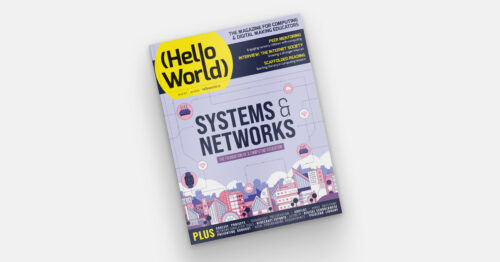
Kategorie: PC

  • Team Pinball

    Team Pinball

    Reading Time: 3 minutes

    “Raspberry Pi is a powerful tool that has already found its place in the video game community with RetroPie. We wanted to do the same and create new, fun games with the Raspberry Pi,” explains Romain Fontaine. When the team sat down to decide on the theme and title for their pinball machine, it became clear they were all fond of games from the 1980s era. Their retro game, The Mafia, “brings the player back to Chicago and the 1930s Prohibition Era with gangsters, casinos, and of course, a bank to rob!”

    Pi-eyed

    Team Pinball originally designed their game for Raspberry Pi 2, noting its compact size and price and that it had “everything we needed”, including being able to output audio, drive the screen, and control the machine through its GPIO,” says Romain. Having been updated and upgraded in the five years since Mafia Pinball launched to some acclaim in the pinball enthusiast arena, The Mafia is now based on a Raspberry Pi 3 that runs game code on top of a modified Linux image optimised for fast boot and low latency. There are two separate sets of software. One runs the game logic that reads the switches located in the machine and drives the solenoids and light show; the other plays music and audio effects, and also renders the score and animations on the LCD screen.

    Starting from scratch

    Team Pinball designed the game and cabinet themselves, basing it on their own sketches, cutting playfields, wiring harnesses, and the electronic controller. The game’s pinball layout is their own design too, while most of the pinball-specific parts, such as mechanisms, are standard and can be bought on pinball websites. As far as possible, parts were locally sourced: the wooden cabinet was made by a Welsh company, with printing and glass panels also done in Wales. “Our office is only 30 minutes away from Raspberry Pi’s factory,” says Romain, so they can also count that as a locally sourced part.

    Team Pinball designed their own controller board, called Rboard, specifically for Raspberry Pi that is compatible with direct switches, as well as a switch matrix with up to 100 switch inputs. “It can drive more than 200 LEDs and 48 solenoids. This is more than previous pinball controllers such as the WPC, while using one tenth of the board space thanks to Raspberry Pi,” says Romain. “Several revisions” to the Rboard added a watchdog circuit to protect the hardware, capacitors, “and a regulator to maintain a perfect 5 V for Raspberry Pi.” The latest version includes a DAC for improved audio quality. Video needed to be in H.264 format, so they had to find alternative rendering techniques.

    Manufacturing was measured in a combination of metric for bespoke parts and imperial for standard pinball parts, which added to the challenge – not least because some of the manufacturers had never worked on a pinball machine before. When the 32-tonne lorry delivering everything to Team Pinball’s HQ arrived, turning down the narrow Welsh lane was a feat too far, so Romain and his colleagues had to carry the cabinets for the last part of their journey in the pouring rain. Nonetheless, everything was assembled and comprehensively checked before Mafia Pinball eventually made its much-anticipated debut.

    The game has been a big hit in the pinball community, gaining numerous plaudits and orders. Their machines have shipped globally, to USA, Canada, Sweden, France, Austria, and even Australia. A Canadian company also uses the Team Pinball system for their game design. Better yet, Romain says Team Pinball “absolutely!” has more pinball machines in the pipeline. “More pinball projects, all powered with Raspberry Pi, CM4, and Raspberry Pi Pico!”

  • Register your project for Coolest Projects 2023 now

    Register your project for Coolest Projects 2023 now

    Reading Time: 3 minutes

    Young creators, it’s time to share your ideas with the world! Registration for Coolest Projects is now open.

    Coolest Projects logo.

    Coolest Projects is an online showcase celebrating all young people who create with digital technology. From today, Monday 6 February, young people can register their projects on the Coolest Projects website. Registered projects will be part of the online showcase gallery, for people all over the world to see.

    By entering your digital tech creations into Coolest Projects, you’ll have the chance to get personalised feedback about your project, represent your country in the online showcase, and get fun, limited-edition swag. Your project could even be selected as a favourite by our very special VIP judges.

    What you need to know about Coolest Projects

    Coolest Projects is an online celebration of young digital tech creators worldwide, their skills, and their wonderful creative ideas. We welcome all kinds of projects, from big to small, beginner to advanced, and work in progress to completed creation.

    A young person creating a project at a laptop. An adult is sat next to them.

    Here’s what you need to know:

    • Coolest Projects is all online and completely free
    • All digital technology projects are welcome, from very first projects to advanced builds, and they don’t have to be complete
    • Young creators up to age 18 from anywhere in the world can take part individually or in teams of up to five friends
    • Projects can be registered in one of six categories: Scratch, games, web, mobile apps, hardware, and advanced programming
    • Registration is now open and closes on 26 April 2023
    • All creators, mentors, volunteers, teachers, parents, and supporters are invited to the special celebration livestream on 6 June 2023

    Five steps to taking part in Coolest Projects

    1. Imagine your idea for a project
    2. Choose your project category
    3. Gather a group of friends or work by yourself to make your project
    4. Register the project in a few clicks to share it in the showcase gallery
    5. Explore the other projects from around the world in the showcase gallery, and join the community at the special celebration livestream
    A group of young people plan their projects on laptops.

    If you’d like help with your idea or project, take a look at our free, step-by-step Coolest Projects workbook and coding project guides. You can also get inspired by all the creations in the 2022 showcase gallery.

    You are also very welcome to register a tech project you’ve already made and want to share with the world this year.

    We offer free resources to help mentors and parents support young people through the process of taking part in Coolest Projects, from imagining ideas, to creating projects, to registration.

    A parent and young person work on a digital making project at home.

    There are loads more announcements to come, so make sure to subscribe to the Coolest Projects newsletter to be the first to find out about this year’s VIP judges, limited-edition digital swag, and much more.

    Website: LINK

  • Photon: A DIY incident light meter

    Photon: A DIY incident light meter

    Reading Time: 3 minutes

    Pico power

    While most modern digital cameras have light meters built-in, many older cameras don’t have this luxury, and the price of some light meters can be prohibitive. Enter Martin Spendiff and Vanessa Bradley, two familiar makers who present their latest Pico-based project: Photon, a very budget-friendly take on this handy tool. Always keen to use old tech whenever possible, and aware of a revival using analogue film, the pair show off their make in this slick YouTube video.

    The duo felt that “the big brand light meters seemed too expensive for what they actually are.” Also, this is a potential money-saver if you use film in your camera, as “film is still pretty expensive, so something that means more consistent images is really useful.” Furthermore, Martin is now very conscious that, “after using Picos for a while, you look at things and think ‘I could build that’!”

    Photon contains a light sensor which reads the light level and then “does a little bit of calculation to make it able to turn that into the required camera settings. Pico is doing all the hard work with a bit of MicroPython that we put on GitHub,” explains Martin. The code was “borrowed from some other projects (coffee grinder augmentation and the burger cooker); it isn’t very complicated code, so it was pretty easy to cobble together.”

    Proof of the pudding

    To make sure that Photon was performing as it should, a consistency check was done against much more expensive counterparts, and the results were hugely encouraging. So much so that Martin admits being surprised: “When I saw that people were saying they were building them, I nervously went back and rechecked against a couple of expensive meters and a grey card and a camera… it was accurate over a wide range of light levels. It was a relief!

    “The feedback has largely been from the analogue film community, and positive,” he continues. “I think the overlap between makers and keen photographers is bigger than we anticipated.” Martin alludes to a famous photography expression, attributed to the New York photographer Weegee, which is ‘f/8 and be there’, the underlying gist of which is: take the opportunity for a great picture, but don’t worry too much about technique, using a basic aperture setting. “The incident meter is a good way to simplify the process of getting a good exposure. My photos aren’t better, but they are definitely more consistent,” affirms Martin.

    Regular readers of The MagPi will remember other Veeb projects we’ve featured, and Martin thinks he may now want to go back and “refactor” some of those soon. “There have been lots of times where we learned things and thought… we should have done X like that,” and Photon might be a project that gets some future refactoring once more GitHub feedback is received. You can find their collection of superbly put together and illuminative videos on Veeb’s YouTube page.

  • Galactic Unicorn (Pico W Aboard) review

    Galactic Unicorn (Pico W Aboard) review

    Reading Time: 3 minutes

    When you first power on the Galactic Unicorn, via the supplied short micro-USB cable, it immediately springs into life with Pimoroni’s MicroPython firmware and code examples pre-installed, so there’s no need to flash it. Text on the display invites you to press the A, B, C, or D button to launch a different graphical demo.

    Whichever button you select, you’re sure to be impressed. There’s a cool (or rather warm) burning flames effect, an eighties supercomputer (random pixels), a cycling rainbow, and a nostalgia computer prompt. What you notice straight away is how these pixels are large and bright (dazzling at the maximum level) – and there’s no sign of flicker, even if you film the display running. The Pico W RP2040’s PIO state machines are used to drive the LEDs at around 300 fps at 14-bit resolution, while gamma correction is applied to image data.

    Button controls

    Those four tiny tactile buttons are situated on the rear, along with five others on the opposite side to sleep the display, adjust the brightness, and alter the volume from the mini 1 W speaker on the rear. They’re also labelled on the front of the board for easy reference so you can reach behind to press them. In addition, there’s a handy reset button on the rear to reboot the device.

    Also on the back, along with some nifty silkscreen artwork, you’ll find an optional battery connector (for up to 5.5 V) and a couple of Qwiic/STEMMA ports (JST-SH) for connecting breakouts such as sensors. The Galactic Unicorn even has one sensor built-in: a phototransistor at the right-hand edge of the front panel to detect light levels – which could be useful for adjusting the display brightness automatically.

    While the LEDs have some built-in diffusion, you may want to add your own diffuser panel, in which case the mounting holes should come in useful. Example DXF files are supplied on the product page. To stand the board vertically, at a slight angle, two metal legs are supplied and screw into any of four slightly larger holes in the board edge.

    Pixel programming

    Programming the Galactic Unicorn should prove relatively easy in MicroPython. Several further code examples are supplied on the GitHub repo. These include a fairly convincing, procedurally generated lava lamp and an easily adaptable scrolling text demo. Graphics and text are generated using the PicoGraphics library – used for several of Pimoroni’s displays, it offers rich functionality including shapes, sprites, and a selection of fonts. Other functions are explained in the Galactic Unicorn reference guide.

    There are a few examples that make use of Pico W’s wireless connectivity too. Just pop your Wi-Fi network details into the WIFI_CONFIG.py file to get connected. A digital clock demo fetches the live time from an NTP server; a Cheerlights history slowly builds up coloured pixels, one every five minutes; while a Galactic paint program enables you to draw on the display in real-time from another device via a web server hosted by Pico W – very cool indeed!

    With a little creativity, there’s the potential to use the Galactic Unicorn for a wide range of projects, including wireless ones such as a live weather dashboard or scrolling RSS feed.

    Verdict

    9/10

    Its elongated shape may not suit all projects, but this is one dazzling display that makes uses of Pico W’s power to create impressive animated effects at a super high frame rate.

    Specs
    Display: 53×11 matrix of RGB LEDs (583 in total)
    Features:
    Pico W on board, 10 × push-buttons, mono I2S amp and 1W speaker, 2 × Qwiic/STEMMA ports, battery connector, 2 × metal legs
    Dimensions:
    331 × 79 mm

  • Code to the beat of your own drum during Black History Month 2023

    Code to the beat of your own drum during Black History Month 2023

    Reading Time: 5 minutes

    When we think about a celebration, we also think about how important it is to be intentional about sound. And with this month of February being a celebration of Black history in the USA, we want to help you make some noise to amplify the voices, experiences, and achievements of the Black community.

    Two young people using laptops at a Code Club session.

    From the past and present, to those still to come in the future, countless remarkable achievements have been made by Black individuals who have chosen to move to the beat of their own drum. Music and sound can be tools to tell stories, to express ourselves, to promote change, to celebrate, and so much more. So take some time this month to make your own music with your young coders and start dancing.                

    Of course, choosing to dance is not the same as choosing to devote your life to the equality and freedom of all people. But it reminds us that you can incite change by choosing to do what is right, even when you feel like you’re the only one moving to the music. It won’t be long before you see change and meet people you resonate with, and a new sound will develop in which everyone can find their rhythm.

    So join us this month as we explore the power of code and music to celebrate Black History Month.

    Projects to help you find your rhythm

    We’ve selected three of our favourite music-related projects to help you bring a joyful atmosphere to your coding sessions this month. All of the projects are in Scratch, a programming language that uses blocks to help young people develop their confidence in computer programming while they experiment with colours and sounds to make their own projects.  

    Drum star | Scratch

    Find your rhythm with this clicker game where you earn points by playing the drums in different venues. The project is one of our Explore projects and it includes step-by-step instructions to help young creators develop their skills, confidence, and interest in programming. This makes it a great option for beginners who want to get started with Scratch and programming.

    alt=""

    Music maker | Scratch

    Code to the beat of your own drum — or any instrument you like. Use this project to create your own virtual musical instrument and celebrate a Black musician you admire. For young people who have some experience with Scratch, they may enjoy expressing themselves with this Design project. Our Design projects give young people support to build on their experience to gain more independence coding their own ideas.

    alt=""

    Binary hero | Scratch

    Can you keep up with the beat? Prove it in this game where you play the notes of a song while they scroll down the screen. You could choose to include a song associated with a moment in Black history that is meaningful to you. This project is a great opportunity for young people to expand their programming knowledge to create lists, while they also test their reaction skills with a fun game.

    alt=""

    For young creators who want to create projects that don’t involve music or sound, check out these projects which can help you to:

    Let us know how you’re celebrating Black History Month in your community on Twitter, LinkedIn, Facebook, or Instagram all month long!

    Black stories to inspire you to move

    Learn about our partnership with Team4Tech and Kenya Connect, with whom we are empowering educators and students in rural Kenya to use the power of coding and computing to benefit their communities.

    A young person uses a computer.
    • I Belong in Computer Science: Salome Tirado Okeze

    Meet Salome, a computer science student from the UK who shares her experiences and advice for young people interested in finding out where computer science can lead them. Salome was one of the first people we interviewed for our ‘I belong’ campaign to celebrate young role models in computer science.

    alt=""

    Research to help set the tone  

    We believe that creating inclusive and equitable learning environments is essential to supporting all young people to see computer science as an opportunity for them. To help engage young people, especially those who are underrepresented in computer science classrooms, we are carrying out research with teachers to make computing culturally relevant. Our work promoting culturally relevant pedagogy in educational settings in England has been impacted by projects of many US researchers who have already contributed heavily to this area. You can learn about two of these projects in this blog post.

    Educators who want to find out how they can use culturally relevant pedagogy with their learners can download our free guidelines today.

    An educator explains a computing concept to a learner.

    We would also like to invite you to our monthly research seminar on 7 February 2023, when we will be joined by Dr Jean Salac who will be sharing their research on Moving from equity to justice in computing instruction for youth. Dr Salac’s session is part of our current series of seminars that centres on primary school (K–5) teaching and learning of computing. The seminars are free and open to everyone interested in computing education. We hope to see you there! 

    Website: LINK

  • Smart camera

    Smart camera

    Reading Time: 2 minutes

    Similar things can be said about text generators like ChatGPT. We’ve seen people use it to create a jumping on point for simple Python code, which is an interesting use of open-source scripts. However, for actual text… well, the best way I’ve seen it described is ‘confidently wrong’. For very basic stuff, you might get something competent, but anything else and it’s better to get a person involved.

    Computer vision

    Over the years, we’ve made great use of OpenCV in many Raspberry Pi projects – it’s a machine learning tool that processes image data to help make decisions. It’s used in robotics a lot with a Raspberry Pi Camera Module, with the late, great Formula Pi robots doing stellar work with it as they zipped around.

    This use of AI is great. It’s doing something people can sort of do, but if you were doing these tasks it would be a bit menial. And the AI can do it a lot faster.

    I’ve also seen people use image recognition technology with Raspberry Pi to create a Pokédex from the Pokémon anime – a device that recognises the eponymous monsters – and simply a ‘magic wand’ that identifies what it’s being pointed at. Both work to varying degrees of success. However, humans only know a limited amount of knowledge too.

    Ethical future

    We’re currently at a tipping point with a lot of AI tech. It’s getting very interesting and very powerful, but the technology should not be replacing human expression – especially when it’s copying other humans’ expressions without any context. The way it’s been used in computer vision is a good template for the future – as an aid and not a pseudo-replacement. Art is important expression after all.

    With the new Camera Module 3 and its laundry list of new features, I can only imagine what we’ll be able to do with it that a person cannot.

  • Computing curriculum fundamentals | Hello World #20

    Computing curriculum fundamentals | Hello World #20

    Reading Time: 5 minutes

    Why are computing systems at the heart of our computing curriculum design? Senior Learning Manager Sway Grantham from the Foundation team explains in her article from the brand-new issue of Hello World, our free magazine for computing educators, out today.

    Cover of Hello World issue 20.

    Whether you plan lessons on a Computing topic, develop curriculum content, or even write curriculum policy, you have to make choices. What are you going to include and what is less of a priority? You have to consider time constraints and access to resources, prior learning and maybe even pupil interests. You probably also have to consider the wider curriculum context. Well, here is my first principle to help you: computing systems should be the foundation of your Computing curriculum.

    A computing systems epiphany

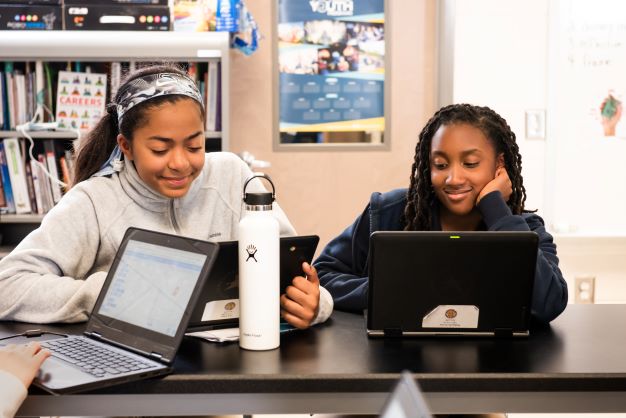
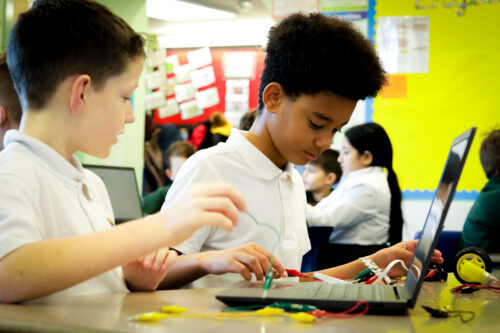
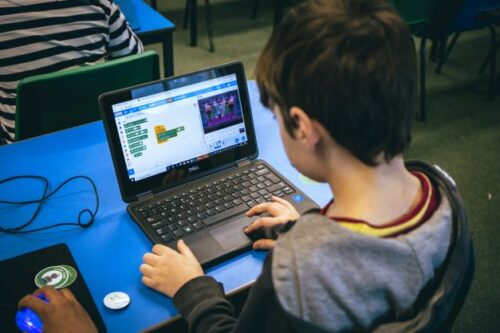
    As a primary teacher, when I first began writing Computing lesson plans for children aged 9 to 10, I started with programming. This was a very visual entry into Computing, and children were excited to create projects that were familiar to them, such as games and animations. However, as my understanding of Computing grew, I realised that something was missing.

    Two learners do physical computing in the primary school classroom.

    My learners could explain what an algorithm is, as well as explaining that a program is ‘a set of instructions that runs on a computer to tell it what to do’. Both of these met the curriculum needs, but I wasn’t convinced that they could link these two concepts together. Could they connect what they were doing on a floor robot to the computing systems around them? Did they understand what a computer was? Well… I asked them to see what they’d say!

    According to my class, a computer was:

    • A piece of technology
    • A keyboard and a screen
    • A search engine
    • A machine used for work
    • A metal brain
    • A machine with a keyboard
    • An information device
    • Electric

    This very simple question highlighted a wealth of alternate conceptions about programming and computing systems. The other commonality of my learners’ definitions was that they described the computer’s function, as if, in order to define what a computer is, we just need to know what it does. This view of a definition greatly limits learners’ ability to understand what potential computers have beyond personal use.

    My learners had two discrete chunks of knowledge: how to program a floor robot, and that laptops were computers. However, without a bridge to connect them, this learning was disjointed. Learners needed to have a concrete, conceptual understanding of ‘what a computer is’ before they could start to comprehend the more abstract role of a program in that system.

    Knowledge of computing systems empowers people to take control of technology and not just consume it.

    Beyond the experiences of my young learners, we see examples of a lack of understanding about computing systems all the time in society. Many competent users of software are able to regularly complete the tasks that they need, but if one day something doesn’t work, they do not know how to find a solution. Equally, many people enjoy exploring digital making projects, yet if they want to personalise the project, they don’t know what they can or can’t change to do this. Knowledge of computing systems empowers people to take control of technology and not just consume it.

    Planning computing content today

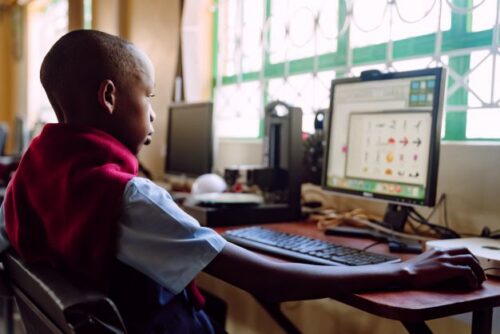
    Both of these examples highlight the importance of introducing computing systems as both life skills and as support for developing other areas of computing. More recently, the Raspberry Pi Foundation has been creating 100 hours of curriculum content in partnership with non-profit organisation Amala Education. Through this content we aim to give refugee learners who may never have used technology enough understanding to build a website that encourages social change.

    Whilst we know that the material needs to include some foundational knowledge of computing systems, we must first consider the core content that learners must understand to achieve the end goal, such as:

    • Webpage creation 
    • HTML/CSS/JavaScript
    • Project management 
    • Project development

    These areas of learning are a great place to start as, undeniably, learners aren’t going to be able to build a website without knowing the process of creating a website, the languages used to create web pages, or the project management skills to see a project from start to finish.

    This could be the entirety of the content, but instead, I encourage you to think back to those children who could program but didn’t know on what devices programs could run. We need to connect the core content to that foundational content: how is building a website related to computing systems?

    Prior knowledge

    All learning is built on prior knowledge, even if that prior knowledge has been gained through life experience and not formal education. To build a website, we need to know how to type and use a mouse. We need to know what a website is, why people use websites, and what sort of media is found on them. Beyond that, we need to know how the files that we are creating are being shared with other people. We need to understand that a computer can communicate with another computer and what the process is to make that happen. None of this learning is the core content of building a website, but if you tried to build a website without understanding these things, it would be difficult to do.

    All learning is built on prior knowledge, even if that prior knowledge has been gained through life experience and not formal education.

    As the learners we support together with Amala Education might have no prior experience of using technology, we needed to ensure that enough foundational computing systems content was built into the learning sequence — things such as:

    • Recognising digital devices
    • Decomposing computing systems
    • Digital painting (mouse skills)
    • Combining text and images (desktop publishing)
    • Networks and the internet
    • Internet searching

    By incorporating this content into the learning sequence, we ensure that learners do not just learn a process for creating a website. They understand the impact of the choices they make when building a website, they have the skills to implement their ideas, and they can connect their understanding to solve any unexpected challenges they find along the way. This more holistic approach should support learners’ knowledge transfer and offer them a much broader range of opportunities. 

    This more holistic approach should support learners’ knowledge transfer and offer them a much broader range of opportunities.

    Whatever your curriculum requires, you will have the core content you need to teach. This could be the requirements of your standardised curriculum, it could be the specific project you’re trying to build, or it could be the aspirations that you have for your students. However, rather than stopping at that part of your learning sequence, take a step back and consider the prior knowledge you’re connecting to. I expect you will find that computing systems is what you need to ensure learners’ new knowledge has a solid foundation.

    Read the new Hello World issue today

    Computing systems and networks is one of those computer science topics in which misconceptions abound. Hello World issue 20 focuses on how you can support your learners to grasp even the tricky ideas within this topic, giving you practical ideas, activities, and insights from practicing educators. Download your free PDF copy now, and subscribe to never miss an issue.

    Website: LINK

  • PiRitos Star Trek interface

    PiRitos Star Trek interface

    Reading Time: 2 minutes

    This means if you really want to do some light Star Trek roleplay, you can have several screens in one room which have some degree of connectivity – such as displaying a red alert.

    “After that, I connected LEDs to the back of my monitor and they would pulse red if the status was ‘red alert’,” James continues. “I connected a Raspberry Pi Sense HAT to the Flask server, so room weather data would be sent to the PiRitos system. Finally, for a bit of fun, I connected a Pico to the server and it transmitted its own internal temp sensor reading to the Flask server. This was also sent to all the connected clients.”

    Isolinear processing

    The project itself started solely as Ritos in the browser but, after seeing it in action, James asked meWho Rob if he could have the source code to make PiRitos. He used it as an excuse to learn Flask and Socket.IO, as he reckons he learns best via a project.

    “meWho Rob decided to help me for a few weeks, and we managed to work together to open some of the JS functions and attached the Socket.IO code,” James explains. “After that, it was a simple case of having Flask and Socket.IO communicate to the connected clients. Once communication between server and client was working, it was super-easy to extend to physical hardware like LEDs and sensors.”

    Second contact

    The result is fantastic – we mentioned it in our previous issue after it got shared far and wide on social media, with many Raspberry Pi and Star Trek fans getting excited by the project.

    “At the moment, I don’t think I have any plans to do anything more with the PiRitos system,” James admits. “It’s been a bit of fun and a great learning experience, but it would take a lot of work to get this into something more useful. Personally, I want to tinker more with connecting Raspberry Pi with other smart services like turning on/off smart plugs and lights. This could go into PiRitos at some point. Or the reverse, getting a voice assistant, like Alexa, to set the red alert status would be awesome, but [we] don’t have any road map for that… I know [meWho Rob is] moving on to make a LCARS site based off the Picard series, and maybe we can work on getting that to also work with Raspberry Pi!”

  • Deep focus on the Camera Module 3 in The MagPi magazine issue #126

    Deep focus on the Camera Module 3 in The MagPi magazine issue #126

    Reading Time: 2 minutes

    Introducing Camera Module 3 for Raspberry Pi

    Everything you need to know about the new 12-megapixel camera module with HDR and lightning-fast autofocus. Our feature is packed with starter advice, engineering insights and project ideas.

    Create Smart Lights with Raspberry Pi

    Create smart lights

    Use Raspberry Pi and Pico to light up your home. This feature covers NeoPixels, motion-sensing lights, and how to control HUE lights with Raspberry Pi. Get inspired by some of the best light show projects around.

    PiRitos: Star Trek computer interface on Raspberry Pi

    Build a Star Trek-style computer

    Discover how PiRitos has been used by one maker to lovingly recreate the LCARS computer from Star Trek. The computer is run from a Raspberry Pi server and displays on multiple screens around one maker’s home.

    Raspberry Pi Exoskeleton

    A Raspberry Pi Exoskeleton

    Learn about a Standford University program using Raspberry Pi to build a groundbreaking walking aid. This exoskeleton is made from carbon fibre and aluminium and uses machine learning to adapt to its user.

    Create a toy Chatter Box with Raspberry Pi Codec Zero

    Create a toy Chatter Box

    Make use of the new Raspberry Pi Audio boards to build a device that records short audio clips and plays them back.

  • Combining computing and maths to teach primary learners about variables

    Combining computing and maths to teach primary learners about variables

    Reading Time: 5 minutes

    In our first seminar of 2023, we were delighted to welcome Dr Katie Rich and Carla Strickland. They spoke to us about teaching the programming construct of variables in Grade 3 and 4 (age 8 to 10).

    We are hearing from a diverse range of speakers in our current series of monthly online research seminars focused on primary (K-5) computing education. Many of them work closely with educators to translate research findings into classroom practice to make sure that all our younger learners have positive first experiences of learning computing. An important goal of their research is to impact the development of pedagogy, resources, and professional development to support educators to deliver computing concepts with confidence.

    Variables in computing and mathematics

    Dr Katie Rich (American Institutes of Research) and Carla Strickland (UChicago STEM Education) are both part of a team that worked on a research project called Everyday Computing, which aims to integrate computational thinking into primary mathematics lessons. A key part of the Everyday Computing project was to develop coherent learning resources across a number of school years. During the seminar, Katie and Carla presented on a study in the project that revolved around teaching variables in Grade 3 and 4 (age 8 to 10) by linking this computing concept to mathematical concepts such as area, perimeter, and fractions.

    Young person using Scratch.

    Variables are used in both mathematics and computing, but in significantly different ways. In mathematics, a variable, often represented by a single letter such as x or y, corresponds to a quantity that stays the same for a given problem. However, in computing, a variable is an identifier used to label data that may change as a computer program is executed. A variable is one of the programming constructs that can be used to generalise programs to make them work for a range of inputs. Katie highlighted that the research team was keen to explore the synergies and tensions that arise when curriculum subjects share terms, as is the case for ‘variable’. 

    Defining a learning trajectory

    At the start of the project, in order to be able to develop coherent learning resources across school years, the team reviewed research papers related to teaching the programming construct of variables. In the papers, they found a variety of learning goals that related to facts (what learners need to know) and skills (what learners need to be able to do). They grouped these learning goals and arranged the groups into ‘levels of thinking’, which were then mapped onto a learning trajectory to show progression pathways for learning.

    Four of the five levels of thinking identified in the study: Data storer, data user, variable user, variable creator.
    Four of the five levels of thinking identified in the study: Data Storer, Data User, Variable User, Variable Creator. Click to enlarge.

    Learning materials about variables

    Carla then shared three practical examples of learning resources their research team created that integrated the programming construct of variables into a maths curriculum. The three activities, described below, form part of a series of lessons called Action Fractions. You can read more about the series of lessons in this research paper.

    Robot Boxes is an unplugged activity that is positioned at the Data User level of thinking. It relates to creating instructions for a fictional robot. Learners have to pay attention to different data the robot needs in order to draw a box, such as the length and width, and also to the value that the robot calculates as area of the box. The lesson uses boxes on paper as concrete representations of variables to which learners can physically add values.

    ""

    Ambling Animals is set at the ‘Data Storer’ and ‘Variable Interpreter’ levels of thinking. It includes a Scratch project to help students to locate and compare fractions on number lines. During this lesson, find a variable that holds the value of the animal that represents the larger of two fractions.

    ""

    Adding Fractions draws on facts and skills from the ‘Variable Interpreter’ and ‘Variable Implementer’ levels of thinking and also includes a Scratch project. The Scratch project visualises adding fractions with the same denominator on a number line. The lesson starts to explain why variables are so important in computer programs by demonstrating how using a variable can make code more efficient. 

    Takeaways: Cross-curricular teaching, collaborative research

    Teaching about the programming construct of variables can be challenging, as it requires young learners to understand abstract ideas. The research Katie and Carla presented shows how integrating these concepts into a mathematics curriculum is one way to highlight tangible uses of variables in everyday problems. The levels of thinking in the learning trajectory provide a structure helping teachers to support learners to develop their understanding and skills; the same levels of thinking could be used to introduce variables in other contexts and curricula.

    A learner does physical computing in the primary school classroom.

    Many primary teachers use cross-curricular learning to increase children’s engagement and highlight real-world examples. The seminar showed how important it is for teachers to pay attention to terms used across subjects, such as the word ‘variable’, and to explicitly explain a term’s different meanings. Katie and Carla shared a practical example of this when they suggested that computing teachers need to do more to stress the difference between equations such as xy = 45 in maths and assignment statements such as length = 45 in computing.

    The Everyday Computing project resources were created by a team of researchers and educators who worked together to translate research findings into curriculum materials. This type of collaboration can be really valuable in driving a research agenda to directly improve learning outcomes for young people in classrooms. 

    How can this research influence your classroom practice or other activities as an educator? Let us know your thoughts in the comments. We’ll be continuing to reflect on this question throughout the seminar series.

    You can watch Katie’s and Carla’s full presentation here:

    Join our seminar series on primary computing education

    Our monthly seminar series on primary (K–5) teaching and learning is of interest to a global audience of educators, including those who want to understand the prior learning experiences of older learners.

    We continue on Tuesday 7 February at 17.00 UK time, when we will hear from Dr Jean Salac, University of Washington. Jean will present her work in identifying inequities in elementary computing instruction and in developing a learning strategy, TIPP&SEE, to address these inequities. Sign up now, and we will send you a joining link for the session.

    Website: LINK

  • Win one of ten Raspberry Pi Camera Module 3

    Win one of ten Raspberry Pi Camera Module 3

    Reading Time: < 1 minute

    Subscribe

  • Get creative with Raspberry Pi Pico

    Get creative with Raspberry Pi Pico

    Reading Time: 2 minutes

    Fiber OpticMatrix Display

    Using LEDs such as NeoPixels is a pretty easy thing to do – we’ve covered them extensively in issues 122 and 123 with light-up vacuum cleaners and Christmas tree lights. This project (which we covered in issue 118) goes further, using optic fibres connected to an LED board to create beautiful glowing effects, as text and images are pushed through them to a ‘screen’. It’s mesmerising in motion, and is truly a conversation starter. It’s a little time-consuming though – there are about 250 optic fibres hooked between the LEDs, and the display and programming them is a little different than a standard uniform display. At least you’ll have a head start on the code from maker elliotmade.

    magpi.cc/fomatrix

    Light painting

    Light painting is a bit of a trick – you’re not actually painting with light, you’re just using maths and a long exposure time to create something that only exists in camera. However, it is an exceptionally cool existence. You can do it with bikes with lit-up spokes, special LED strips, and much more to make incredible stuff.

    magpi.cc/lightpainting

  • Make sound with Pico

    Make sound with Pico

    Reading Time: 3 minutes

    Pico Portal Music Box

    Even after 15 years, Portal’s Still Alive song is still well remembered and this project will make sure you never forget it. Pico can actually play MP3 files, and maker thisoldgeek wanted to give it a more antique music box vibe, so he created one in the style of a music box MIDI sound. It’s still an MP3 though!

    He reckons it takes a couple of hours to put together, with a simple 3D-printed box and minimal amount of soldering and wiring required. It even includes lights, which fade in and out for a great effect.

    Pico Audio Pack

    Instead of soldering a speaker to your Pico, this add-on allows you to have high-quality audio output from Pico through 3.5 mm jacks. It connects to Pico like a HAT on Raspberry Pi. You can even choose to manually amplify each output. Grab one here.

    Pico Piano

    This clever project uses a copper-plated board with piano keys etched into them and a series of resistors to create variable currents at each key. The piano player then uses a jumper cable hooked up to a Pico which senses the different current values and plays a note based on it.

    This use of resistors would be very difficult to do on Raspberry Pi without other components. If you don’t have access to copper boards and etching solutions, you can use a perf board as well to create a piano.

    MIDI controller

    There are a couple of great DIY MIDI controller projects for Pico – we quite like the MIDI Fighter that uses arcade buttons – however, if you just want to experiment with code and don’t want to do too much physical building, Keybow 2040 from Pimoroni is a great customisable keyboard that can be used as a MIDI controller with some coding. Get it here.

    Lo-Fi Orchestra

    This massive orchestra is made up of various microcontrollers and microcomputers, and nearly every week we get to hear something new from it. We quite like the version of Gustav Holst’s The Planets suite composed on it. You can find out how it works with the very thorough blog.

  • RelayFi smart relay board review

    RelayFi smart relay board review

    Reading Time: 2 minutes

    The four relays take up most of the board and handle conversion and control for four mains-powered devices. We highly suggest getting some kind of case for the board as there are solder points on the underside of the PCB. These relays are controlled via an optoisolator which does improve the safety of the relays and, despite there being four squeezed onto the board, the screw terminals have a decent amount of space between them. Still – caution is recommended with this, like any other relay.

    Connecting to things

    With a series of I2c and standard component pins, you can add a little extra control to the board that is all programmed using the classic Arduino IDE. As it’s all Wi-Fi connected, having it talk to a Raspberry Pi or Pico W is a matter of making sure it’s looking for the right thing. Like an Arduino board, a micro USB port is used to power and connect to it for programming, which also supports various smart home systems for voice control via RelayFi.

    It’s a fairly solid build for such a relatively cheap board, and the ease of coding helps with its appeal as well.

    Verdict

    7/10 A solid IoT board with easy programming functions that can interact with Raspberry Pi just fine.

    Specs

    Microcontroller: ESP32
    Connectors:
    Relays × 4, 5 × 3 component pins, I2c breakout, USB micro data port
    Radio:
    Wi-Fi, Bluetooth 4.2, BLE

  • What we achieved in 2022

    What we achieved in 2022

    Reading Time: 2 minutes

    For 2022, I decided to make some goals and rough plans instead of stumbling into projects like I have in the past – and also promising to go a bit easier on myself if I didn’t achieve them all.

    Still stumbling

    One thing I’m always proud of is the work we do on The MagPi. I’m especially happy when I get to make something cool and talk about what I’ve learnt in the pages of the mag – this year, in particular, three projects stand out to me.

    Firstly, there were the quiz button boxes. After years of saying I’d make it, I finally created custom buzzers with programmable sounds and the ability to find out who pressed buttons in what order. I’ve made some modifications since I put the tutorial in the mag and, at some point, I’ll update the code on the GitHub as well.

    Otherwise, this year I got back to making cosplay props with the Poltergust G-00 I made with help from, 3D printing wizard and Raspberry Pi Maker in Residence, Toby Roberts. It was a bit easier than last time when I had to gut a real vacuum cleaner, and I learned a lot about using NeoPixels with Pico, which I then applied to some excellent Christmas lights that are shortly going up on my tree.

    Satisfaction guaranteed

    Other things I planned for the year – mostly personal stuff like make silly videos and write more fiction – I wasn’t always able to get to, but thankfully I did enough to be proud of. Maybe I also was able to be kinder to myself in the process as well!

    Anyway, I hope you all have a fantastic 2023. I’ll see you there.

  • Celebrating the community: Adarsh

    Celebrating the community: Adarsh

    Reading Time: 4 minutes

    In our work, we get to meet so many super inspiring young people who make things with technology. Our series of community stories is one way we share their journeys and enthusiasm for digital making with you.

    Today we’re introducing you to Adarsh from California, USA.

    Young tech creator Adarsh with his Raspberry Pi projects.

    Meet Adarsh

    Help us celebrate Adarsh and inspire other young people by sharing his story on Twitter, LinkedIn, Facebook, or Instagram.

    We first met Adarsh at the Coolest Projects USA showcase in 2019, when he was 15 years old. Adarsh was chosen as the Coolest Projects judges’ favourite in the showcase’s Hardware category for making a Smart Sprinkler System, which can serve an entire community. He was inspired to create this project by the need he saw in California to manage water during a drought. Using a Raspberry Pi computer, he built a moisture sensor–based sprinkler system that integrates real-time weather forecast data and Twitter feeds to dispense only optimum amounts of water, in compliance with city water regulations. Adarsh says:

    “The world around us right now has a lot of different problems that need to be solved and so the way that I get inspired is by looking outwards.”

    In 2020, Coolest Projects Global went online with young people across the world sharing their tech projects, and Adarsh created a project for the showcase to solve another real-life problem he had witnessed. When Adarsh had been in middle school, his mother had to be rushed to hospital with a sudden heart problem. The experience of seeing her hooked up to lots of vital sign monitors, with the wires hindering her movement, stayed in his memory. It led Adarsh to create another tech project: the Contactless Vital Signs Monitor. This low-cost device can be used to monitor a person’s skin temperature, heart rate, respiratory rate, blood pressure, and oxygen saturation without needing to be in direct contact with them. Adarsh’s contactless monitor lets patients rest more comfortably and also keeps healthcare staff safer from infections.

    Tech creator Adarsh and his mother on a walk in their California neighbourhood.
    Adarsh and his mother on a walk in their California neighbourhood.

    Adarsh entered his Contactless Vital Signs Monitor in the Davidson Fellows Scholarship programme, which recognises students who have completed significant projects that have the potential to benefit society.

    Adarsh has this message for other young people who think they might like to try creating things with tech:

    “None of these projects, to get to the stage where they are today, were without frustration or difficulties. That’s part of the process. You should expect that. Because of all the struggles I had, the fact that I was able to build all of this is so much more rewarding to me.”

    Helping each other solve problems

    A big part of coding and digital making is problem-solving and collaboration. Adarsh told us that he had a really great mentor, Johan, who introduced him to coding and Raspberry Pi hardware, and showed him where Adarsh could ask for help online.

    “[The Raspberry Pi community] is such a large and inclusive community. It welcomes young students — even older adults who are first starting to develop their interest in computer science — and we all are developing our own skills, our own projects, and our own passions together, and while doing so, we’re helping each other out.”

    Tech creator Adarsh and his mentor Johan.
    Adarsh with his mentor Johan.

    The future for Adarsh

    Now a freshman at Stanford University, Adarsh is currently doing an epidemiology-related research project about the relationship between COVID-19 mutations and environmental, health, and demographic statistics. He wants to focus either on biomedical engineering or environmental engineering in his studies.

    “Really [what I’m studying at university] is going to involve engineering or computer science largely due to the Raspberry Pi and the early influence it has had on my life.”

    Thanks for inspiring us, Adarsh, and for letting us share your story with the community!

    Help us celebrate Adarsh and inspire other young people to discover coding and digital making as a passion, by sharing his story on Twitter, LinkedIn, Facebook, or Instagram.

    Website: LINK

  • Code Pico with Thonny

    Code Pico with Thonny

    Reading Time: 2 minutes

    2. Choose interpreter

    Thonny is normally used to write programs that run on the same computer you’re using Thonny on; to switch to writing programs on your Raspberry Pi Pico, you’ll need to choose a new Python interpreter. Look at the bottom-right of the Thonny window for the word ‘Python’ followed by a version number: that’s your current interpreter.

    Click ‘Python’ and look through the list that appears for ‘MicroPython (Raspberry Pi Pico)’ – or, if you’re running an older version of Thonny, ‘MicroPython (generic)’.

    3. Hello World

    Writing a program for your Raspberry Pi Pico is a lot like writing a program for your Raspberry Pi. You can type commands in the Shell area at the bottom of the window to have them immediately executed, or you can write a program in the main part of the window to run on-demand.

    Click in the Shell area, next to the >>>> symbols, and type:

    print("Hello, World!")

    When you press ENTER at the end of the line, you’ll see your Raspberry Pi Pico respond.

    You are now ready to start writing your MicroPython code in the main window. Click Run to start the program on Raspberry Pi Pico. Take a read of our book, Get Started with MicroPython on Raspberry Pi Pico if you want to learn more about Pico programming.

    Top tip: Update Thonny

    If you don’t see ‘MicroPython (Raspberry Pi Pico)’ in the interpreter list, you’ll need to update Thonny. Open a Terminal window and type:

    sudo apt update && sudo apt full-upgrade -y
  • Set up Raspberry Pi Pico

    Set up Raspberry Pi Pico

    Reading Time: < 1 minute

    2. Switch to MicroPython

    Raspberry Pi Pico is set up, by default, for use with the C/C++ Software Development Kit (SDK). The C/C++ SDK is an extremely flexible and powerful way to interact with your Raspberry Pi Pico. However, there’s a more beginner-friendly method: MicroPython.

    Hold down the small button on your Raspberry Pi Pico marked ‘BOOTSEL’ and connect Pico to your computer using the USB cable. (We are using a Raspberry Pi). Wait a few seconds, then let go of the BOOTSEL button. You will see your computer mount a removable drive. Click OK in the ‘Removable medium is inserted’ window to open Raspberry Pi Pico’s on-board storage.

    3. Install the UF2 firmware

    Double-click the INDEX.HTM file shown in Pico’s mounted storage. Your browser will open and display the Raspberry Pi Documentation web page. Select ‘MicroPython’, then click the option to download the correct MicroPython firmware for your board (Pico or Pico W). It’s a small file, so it’ll only take a few seconds.

    Open File Manager and locate the.uf2 file in the Downloads folder. Drag-and-drop the UF2 file to the Raspberry Pi Pico’s removable drive (named ‘RPI-RP2’). After a few seconds, the drive will disappear as the new MicroPython firmware is recognised and installed.

    You’ll need:

  • PiCar entertainment system

    PiCar entertainment system

    Reading Time: 3 minutes

    “I have made extensive modification to my Jeep, including replacing the motor with a Chevy LS 6.0 V8,” Vincent tells us. “This required some hacking into the Jeep’s CAN bus to fool the Jeep into thinking it still has a motor. There is so much useful information present on the network that is not presented to the driver, and it frustrated me that one of the main user interfaces on the vehicle, the car radio, does not present or allow the driver to access it.”

    Vincent looked at various solutions, but they didn’t quite fit the Jeep’s aesthetic. He decided to make something a bit more custom using a VFD (vacuum fluorescent display) to fit the original look, and even fool folks into thinking it was the stock radio.

    Farm to auto

    After using Raspberry Pi to fix an automated chicken coop, Vincent started using it more in projects.

    “I found that it was fairly easy to use Raspberry Pi to interface to the CAN bus as well as I2C,” Vincent explains. “Since it was a Linux-based platform, it was also easy to talk to the various software-defined radio (RTL-SDR) devices out there.”

    Even with a familiarity with Raspberry Pi, and ease of access to the interfaces, the project hasn’t been without issues.

    “It has been a learning experience,” Vincent says. “While there are a lot of folks building things for Raspberry Pi, not a lot of the software or hardware is rugged enough to put in an automotive application. A lot of tools, while pretty cool, were written at the hobbyist level. For instance, most of the software-defined radio (SDR) tools require a desktop display, and can’t be used in a car radio app.

    “The other problem was that the automotive manufacturers are really proprietary and secretive about how their systems work. I had to mostly adjust the Jeep CAN network packet information by trial and error, such as monitor the packets, open a car door, and see what changes, etc.”

    In the end, Vincent wrote a custom application in C++ that talks to the VFD over the serial port. It monitors the states of the knobs and the CAN bus, talks to a GPS board via serial, and the SDR via USB.

    Finishing touches

    “[It’s] just about ready to replace the existing radio,” Vincent tells us. “I am currently alternating between it sitting on my shop desk and my dashboard. I have a temporary harness cabled that allows me to plug it [in] and move it back and forth. I need to paint and engrave the faceplate.”

    Apparently reactions have been varied – folks who know what he’s made are blown away while others are at least appreciative of the display. Count us in as one of the blown-away parties.

  • Gender Balance in Computing — the big picture

    Gender Balance in Computing — the big picture

    Reading Time: 7 minutes

    Improving gender balance in computing is part of our work to ensure equitable learning opportunities for all young people. Our Gender Balance in Computing (GBIC) research programme has been the largest effort to date to explore ways to encourage more girls and young women to engage with Computing.

    A girl in a university computing classroom.

    Commissioned by the Department for Education in England and led by the Raspberry Pi Foundation as part of our National Centre for Computing Education work, the GBIC programme was a collaborative effort involving the Behavioural Insights Team, Apps for Good, and the WISE Campaign.

    Gender Balance in Computing ran from 2019 to 2022 and comprised seven studies relating to five different research areas:

    • Teaching Approach:
    • Belonging: Supporting learners to feel that they “belong” in computer science
    • Non-formal Learning: Establishing the connections between in-school and out-of-school computing
    • Relevance: Making computing relatable to everyday life
    • Subject Choice: How computer science is presented to young people as a subject choice 

    In December we published the last of seven reports describing the results of the programme. In this blog post I summarise our overall findings and reflect on what we’ve learned through doing this research.

    Gender balance in computing is not a new problem

    I was fascinated to read a paper by Deborah Butler from 2000 which starts by summarising themes from research into gender balance in computing from the 1980s and 1990s, for example that boys may have access to more role models in computing and may receive more encouragement to pursue the subject, and that software may be developed with a bias towards interests traditionally considered to be male. Butler’s paper summarises research from at least two decades ago — have we really made progress?

    A computing classroom filled with learners.

    In England, it’s true that making Computing a mandatory subject from age 5 means we have taken great strides forward; the need for young people to make a choice about studying the subject only arises at age 14. However, statistics for England’s externally assessed high-stakes Computer Science courses taken at ages 14–16 (GCSE) and 16–18 (A level) clearly show that, although there is a small upwards trend in the proportion of female students, particularly for A level, gender balance among the students achieving GCSE/A level qualifications remains an issue:

    Computer Science qualification (England): In 2018: In 2021: In 2022:
    GCSE (age 16) 20.41% 20.77% 21.37%
    A level (age 18) 11.74% 14.71% 15.17%
    Percentage of girls among the students achieving Computer Science qualifications in England’s secondary schools

    What did we do in the Gender Balance in Computing programme?

    In GBIC, we carried out a range of research studies involving more than 14,500 pupils and 725 teachers in England. Implementation teams came from the Foundation, Apps For Good, the WISE Campaign, and the Behavioural Insights Team (BIT). A separate team at BIT acted as the independent evaluators of all the studies.

    In total we conducted the following studies:

    • Two feasibility studies: Storytelling; Relevance, which led to a full randomised controlled trial (RCT)
    • Five RCTs: Belonging; Peer Instruction; Pair Programming; Relevance, which was preceded by a feasibility study; Non-formal Learning (primary)
    • One quasi-experimental study: Non-formal Learning (secondary)
    • One exploratory research study: Subject Choice (Subject choice evenings and option booklets)

    Each study (apart from the exploratory research study) involved a 12-week intervention in schools. Bespoke materials were developed for all the studies, and teachers received training on how to deliver the intervention they were a part of. For the RCTs, randomisation was done at school level: schools were randomly divided into treatment and control groups. The independent evaluators collected both quantitative and qualitative data to ensure that we gained comprehensive insights from the schools’ experiences of the interventions. The evaluators’ reports and our associated blog posts give full details of each study.

    The impact of the pandemic

    The research programme ran from 2019 to 2022, and as it was based in schools, we faced a lot of challenges due to the coronavirus pandemic. Many research programmes meant to take place in school were cancelled as soon as schools shut during the pandemic.

    A learner and a teacher in a computing classroom.

    Although we were fortunate that GBIC was allowed to continue, we were not allowed to extend the end date of the programme. Thus our studies were compressed into the period after schools reopened and primarily delivered in the academic year 2021/2022. When schools were open again, the implementation of the studies was affected by teacher and pupil absences, and by schools necessarily focusing on making up some of the lost time for learning.

    The overall results of Gender Balance in Computing

    Quantitatively, none of the RCTs showed a statistically significant impact on the primary outcome measured, which was different in different trials but related to either learners’ attitudes to computer science or their intention to study computer science. Most of the RCTs showed a positive impact that fell just short of statistical significance. The evaluators went to great lengths to control for pandemic-related attrition, and the implementation teams worked hard to support teachers in still delivering the interventions as designed, but attrition and disruptions due to the pandemic may have played a part in the results.

    Woman teacher and female students at a computer

    The qualitative research results were more encouraging. Teachers were enthusiastic about the approaches we had chosen in order to address known barriers to gender balance, and the qualitative data indicated that pupils reacted positively to the interventions. One key theme across the Teaching Approach (and other) studies was that girls valued collaboration and teamwork. The data also offered insights that enable us to improve on the interventions.

    We designed the studies so they could act as pilots that may be rolled out at a national scale. While we have gained sufficient understanding of what works to be able to run the interventions at a larger scale, two particular learnings shape our view of what a large-scale study should look like:

    1. A single intervention may not be enough to have an impact

    The GBIC results highlight that there is no quick fix and suggest that we should combine some of the approaches we’ve been trialling to provide a more holistic approach to teaching Computing in an equitable way. We would recommend that schools adopt several of the approaches we’ve tested; the materials associated with each intervention are freely available (see our blog posts for links).

    2. Age matters

    One of the very interesting overall findings from this research programme was the difference in intent to study Computing between primary school and secondary school learners; fewer secondary school learners reported intent to study the subject further. This difference was observed for both girls and boys, but was more marked for girls, as shown in the graph below. This suggests that we need to double down on supporting children, especially girls, to maintain their interest in Computing as they enter secondary school at age 11. It also points to a need for more longitudinal research to understand more about the transition period from primary to secondary school and how it impacts children’s engagement with computer science and technology in general.

    Bar graph showing that in the Gender Balance in Computing research programme, learners intent to continue studying computing was lower in secondary school than primary school, and that this difference is more pronounced for girls.
    Compared to primary school age girls, girls aged 12 to 13 show dramatically reduced intent to continue studying computing.

    What’s next?

    We think that more time (in excess of 12 weeks) is needed to both deliver the interventions and measure their outcome, as the change in learners’ attitudes may be slow to appear, and we’re hoping to engage in more longitudinal research moving forward.

    In a computing classroom, a girl looks at a computer screen.

    We know that an understanding of computer science can improve young people’s access to highly skilled jobs involving technology and their understanding of societal issues, and we need that to be available to all. However, gender balance relating to computing and technology is a deeply structural issue that has existed for decades throughout the computing education and workplace ecosystem. That’s why we intend to pursue more work around a holistic approach to improving gender balance, aligning with our ongoing research into making computing education culturally relevant.

    Stay in touch

    We are very keen to continue to build on our research on gender balance in computing. If you’d like to support us in any way, we’d love to hear from you. To explore the research projects we’re currently involved in, check out our research pages and visit the website of the Raspberry Pi Computing Education Research Centre at the University of Cambridge.

    Website: LINK

  • reTerminal E10-1 industrial expansion board review

    reTerminal E10-1 industrial expansion board review

    Reading Time: 2 minutes

    We do mean beefy too – it’s larger than the original reTerminal, and attaching it does increase the footprint (and weight). However, for that sacrifice you do get a barrel DC jack, a battery compartment, PoE, improved wireless LAN, mobile network support, serial ports, microphones, and speakers for any machine learning application, and the ability to add much more storage via SATA 2.0 and M.2 drives.

    Safely secured

    Adding storage isn’t just a case of slotting in an SD card – the whole expansion kit comes apart so that you can install any drives into the very sturdy case so you’re not losing any protection. The battery compartment is attached by screws as well, so any portable power you put in won’t accidentally fall out.

    Attaching the expansion to reTerminal is very easy – it slots into a port covered by a rubber foot on the rear end, and is then secured with a couple of provided screws. No friction or plastic clasps are used so there’s no danger of the connector wearing out, so to speak.

    With that connection, you just need to install a driver and a Python library to the main reTerminal and you’re ready to go and incorporate the expansion into the system. It’s very easy and will definitely help with connecting to older hardware.

    Verdict

    9/10

    A great, if bulky, expansion for reTerminal that seems to address any prior connectivity issues.

    Specs
    Connectivity:
    RS-485, RS-232, CAN, RJ45 Gigabit Ethernet, M.2, Mini-PCIe, mobile network, wireless LAN
    Dimensions: 140 mm × 95 mm × 30 mm

  • Mini Mars Rover

    Mini Mars Rover

    Reading Time: 3 minutes

    Nikodem had to fit the building of his own remote-controlled Mini Mars Rover around his other university work, and there was plenty to do, including designing it from scratch in CAD and undertaking a lot of 3D printing and CNC machining.

    “All parts were designed in such a way that you can print them on the most popular FDM 3D printers and you don’t need a huge build plate,” he says. “The bottom plate was machined on my DIY CNC machine – IndyMill… The principle of how it works is very simple; designing and 3D printing it is not.”

    He also kept adding more features while working on the project. In particular, the robotic arm was an especially time-consuming part, with Nikodem designing and then redesigning it multiple times until it worked. The 3D printing aspect took around 24 hours in total but, in the end, all parts worked beautifully.

    Core components

    Raspberry Pico W is integral to the Rover: “Thanks to Pico W, it is possible to control it through Wi-Fi and [a] simple Python script on a computer,” explains Nikodem. The script is created with Pygame and a simple custom class he developed for the simple user interface elements he needed.

    “For controlling the micro servo motors, I am simply using 50Hz PWM signal. For DC motors I am using popular and cheap drivers, L298N, and control them through PWM and digital pins,” he explains. He also added an FPV camera system to the build, which turned out to be far simpler than he’d imagined. “I had no experience with FPV systems before; it was completely new to me, but it turned out to be super-straightforward and it works great.”

    Small and sharable

    Nikodem was determined to make his project as clean and small as possible “for aesthetics reasons, but also for its safety and functionality,” he underlines. He also wanted to be able to share his work with others and make it easy to replicate, so he chose to make his own custom PCB, using a cheap CNC machine he’d modified. “The best part about this setup is: in the morning I design a PCB and, by the afternoon, I have it ready for soldering.”

    Nikodem’s Rover has received plenty of positive comments and he admits “that was a big relief after working on it for so long.” There were a few people who suggested that the Rover’s wheels wouldn’t survive the Mars environment, but Nikodem is pragmatic as “it was quite obvious for me from the beginning that the purpose of the project is to educate and inspire. Building it in the way real Mars rovers are built is completely unrealistic and unnecessary.”

    Excitingly, Nikodem is now concentrating on his bachelor thesis project which will use Pico’s RP2040 chip. “I am currently testing the PCB for the project… The end goal is to be able to take long exposures of deep sky objects with a camera by compensating the movement of Earth and also create a go-to system with Stellarium.”

    If you take a look at Nikodem’s YouTube channel, you’ll see a huge and interesting array of projects he’s worked on so far, and it seems there will be plenty more to come from this very talented maker.