Desk chairs are essential tools for the office environment, so why not turn them into a computer input and feedback device? Aarnio, by researchers from several universities, adds this functionality via an Arduino board. It’s able to detect rotation and tilt via an MPU-6050 IMU, and how far it travels along the floor with an optical sensor from a computer mouse.
User feedback is provided by servo motors that can lock individual casters down. A brake setup is also implemented to inhibit rotation of the central axis and a spring is tightened as needed to modify tilt force.
Testing showed about a 90% feedback recognition in users, and applications could include use as a gaming controller or as an assistive device for those with limited mobility of their hands.
Will Cogley’s tester controls 16 servos simultaneously
Arduino Team — January 5th, 2020
When you need to test a single servo, it’s a fairly straightforward task. Just hook it up to an Arduino to generate the proper PWM signal, along with an appropriate power supply, and you’re in business. If, however, you need to test a bunch of them at the same time, things get a bit more complicated.
To solve this challenge for another project he’s working on, Will Cogley built a 3D-printed tester capable of experimenting with 16 servos at the same time.
The device runs on an Uno, and uses four potentiometers and two buttons for controlling the motors in sets of four. Settings from all 16 outputs are displayed on a 1.8” TFT screen and an Adafruit 16-channel driver is implemented to interface with the servos directly.
This 3D-printed infinity cube is easy to make, hard to resist
Arduino Team — December 31st, 2019
Infinity cubes use six mirrors arranged in such a way that they bounce light inside back and forth, making them appear to stretch on to infinity. While not the first to make such a device, Thomas Jensma created the frame for his as a single 3D-printed piece.
This method meant that the plexiglass mirrors surrounding the build are automatically quite flat, allowing the 144 LEDs inside to reflect beautifully with no adjustment. An external Arduino board controls the lights, producing an infinite number of patterns. A 5V supply is also used in order to power the assembly.
Instructions for the project can be found here, and with this simplified design, Jensma was able to construct his in a day for just $25 in parts.
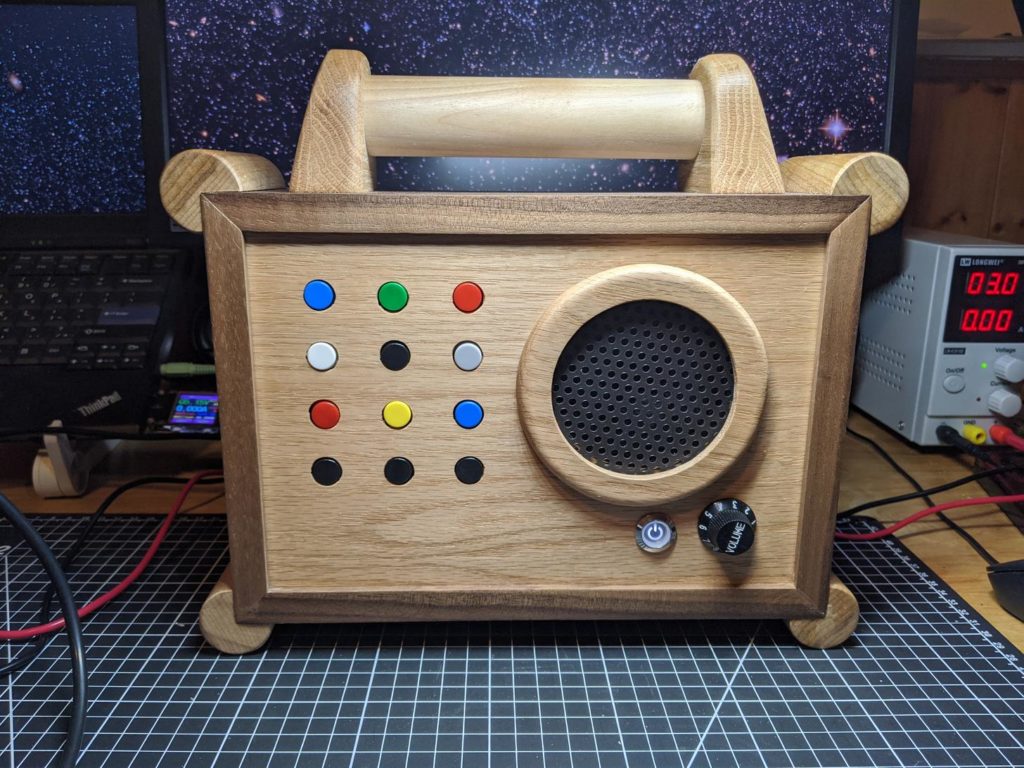
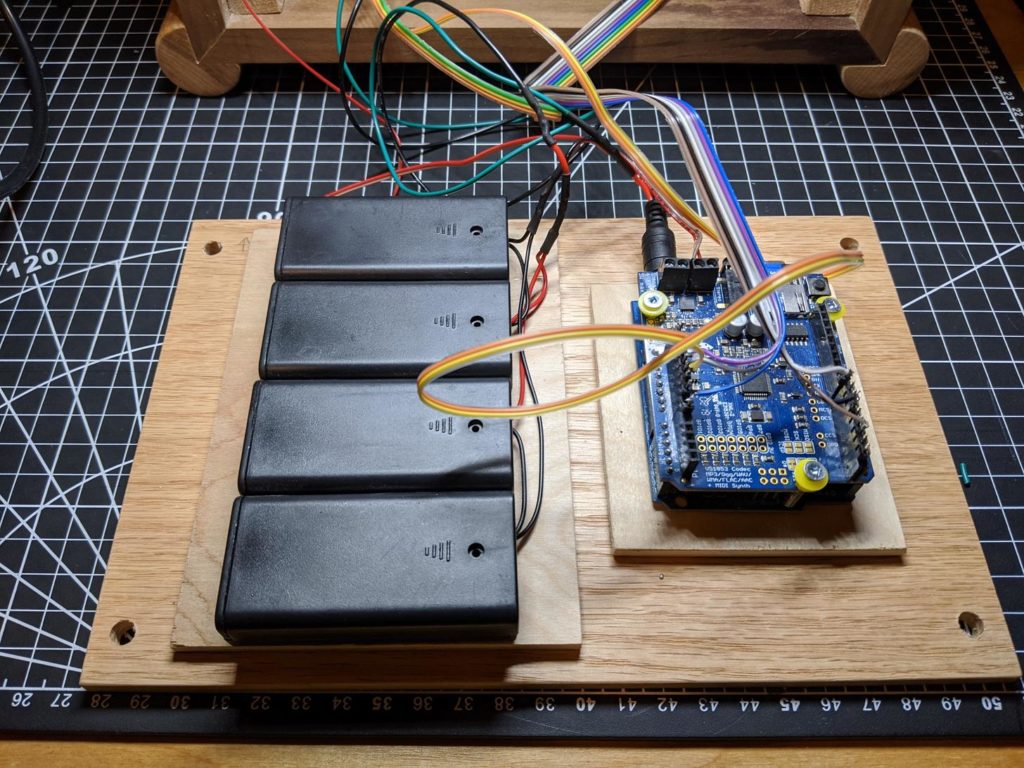
If your young child wants to listen to music, what better way than a beautiful wooden MP3 “radio,” with an array of buttons that select the album? After being inspired by a similar commercial product, Redditor “DerThes” decided to make such a device for a fraction of the cost using an Arduino Uno for control, along with a Music Maker Shield to play tunes off an SD card.
The toddler can select songs from a grid of 16 input buttons, which are sent to the Uno via a pair of shift registers. There’s also a “parent’s mode” with the ability to choose from up to 99 albums, and a volume knob for… adjusting the volume.
Finally, the unt features a beautiful enclosure made out of oak and black walnut, with corners softened by dowels to reduce collateral damage “after the player has gone airborne.” More details can be seen on Imgur here and on GitHub.
This is an easy to use MP3 player for small children. I made this for my 2 year old for Christmas. Each of the top 9 buttons will play an album. The black buttons on the bottom are prev – play/pause – next. The player also supports an alternative playback mode that can be activated using a special key combination. That combination will turn the buttons into a 10 digit input matrix allowing playback of up to 99 albums. That way the player can be used by parents as well. 😉
When I first saw the Hoerbert at a friends place I wanted it for my child. After I heard of the $400 price tag I knew that I needed to spend 50 hrs and $100 to build my own.
Programming an Arduino to do simple things like turn on an LED or read a sensor is easy enough via the official IDE. However, think back to your first experiences with this type of hardware. While rewarding, getting everything set up correctly was certainly more of a challenge, requiring research that you now likely take for granted.
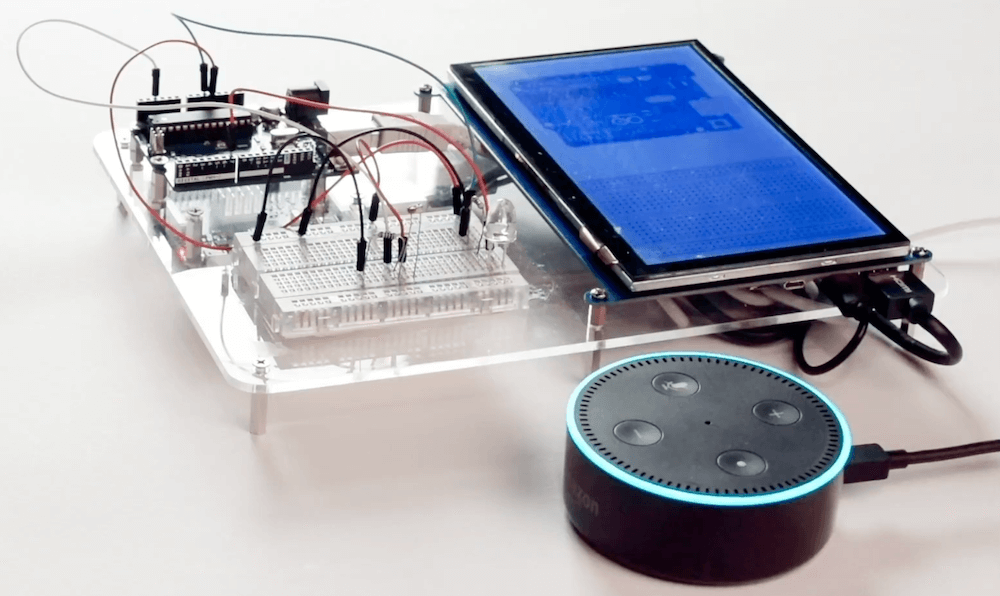
To assist with these first steps of a beginner’s hardware journey, researchers at KAIST in South Korea have come up with HeyTeddy, a “conversational test-driven development [tool] for physical computing.”
As seen in the video below, HeyTeddy’s voice input is handled by an Amazon Echo Dot, which passes these commands through the cloud to a Raspberry Pi. The system then interacts with the physical hardware on a breadboard using an Arduino Uno running Firmata firmware, along with a 7” 1024 x 600 LCD touchscreen for the GUI. Once programmed, code can be exported and used on the board by itself.
HeyTeddy is a conversational agent that allows users to program and execute code in real-time on an Arduino device without writing actual code but instead operating it through dialogue. This conversation can either be based on voice or text (through a Web chat). Commands spoken to HeyTeddy are parsed, interpreted, and executed in real-time, resulting in physical changes to the hardware. For example, the “write high” command configures an I/O pin to behave as a digital output with its internal state set to high (e.g., a 5V logic level), making driving an LED possible. Hence, the user does not need to write any code, compile it, deal with errors, and manually upload it on the hardware.
Furthermore, HeyTeddy supervises the user’s choices, preventing incorrect logic (e.g., writing an analog value to a digital pin), guiding the user through each step needed to assemble the circuit, and providing an opportunity to test individual components through separate unit tests without interrupting the workflow (i.e., TDD functionalities). Finally, the user has the option of exporting the issued commands as a written code for Arduino (i.e., an Arduino sketch in C++, ready for upload).
Build your own tracking and GoTo mount for DSLR astrophotography
Arduino Team — December 18th, 2019
Astrophotography can be challenging, in a large part because your subject matter — or your base, the Earth rather — is constantly moving. In order to take excellent long exposures of far-off objects, Redditor intercipere came up with a beautiful 3D-printable, star-following mount that holds and rotates a DSLR camera.
Now intercipere can simply input the RA/DEC coordinates and the device will automatically move to a desired target in the sky.
Motion is handled by an Arduino Uno and two small stepper motors, with a 16×2 LCD shield user interface. The rig is capable of tracking for at least four minutes, producing this photo of the Andromeda galaxy with a cheapo lens from a heavy light polluted area.
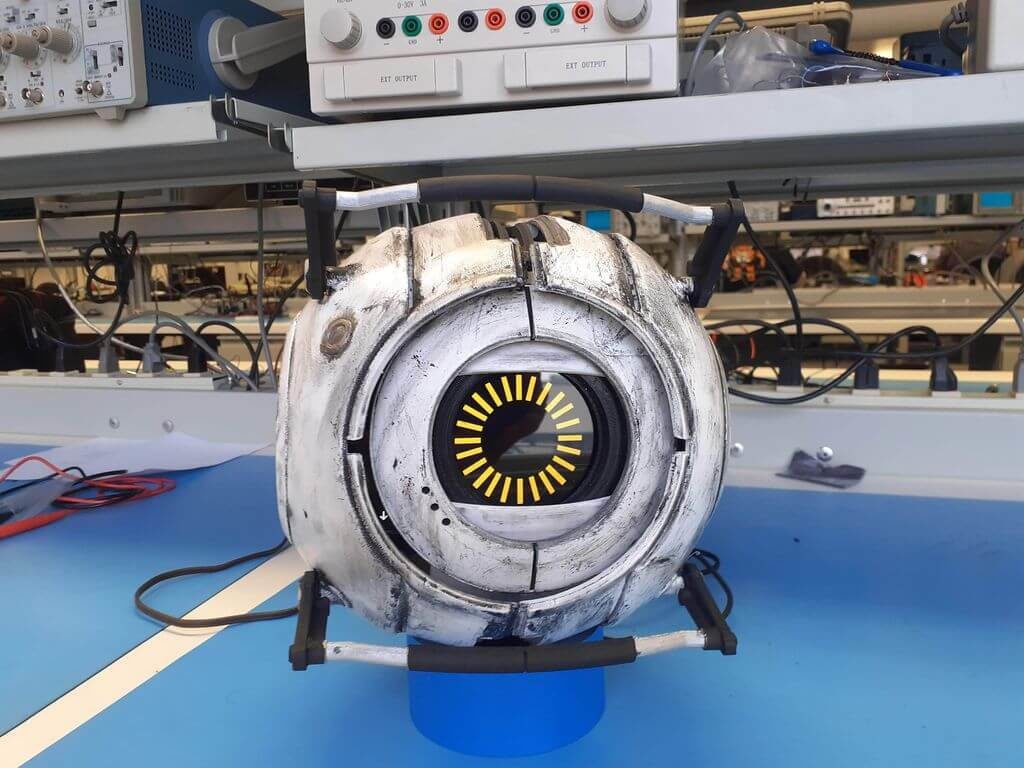
His Space Core is 3D-printed from a model that he found online, scaled up by 300% to fit the electronics inside, including an Arduino Uno and eight servo actuators. As with many projects, there was barely enough room to fit the electrical components, but as seen in the video below, it looks delightfully glitchy.
The Arduino controls the servo-driven eye movement and is linked to a smartphone over Bluetooth for remote operation. A second phone is integrated into the moving eye section, which displays an image of the personality core’s iris, and plays game quotes through its music app.
ClearCrawler Strandbeeest walks under Arduino control
Arduino Team — December 3rd, 2019
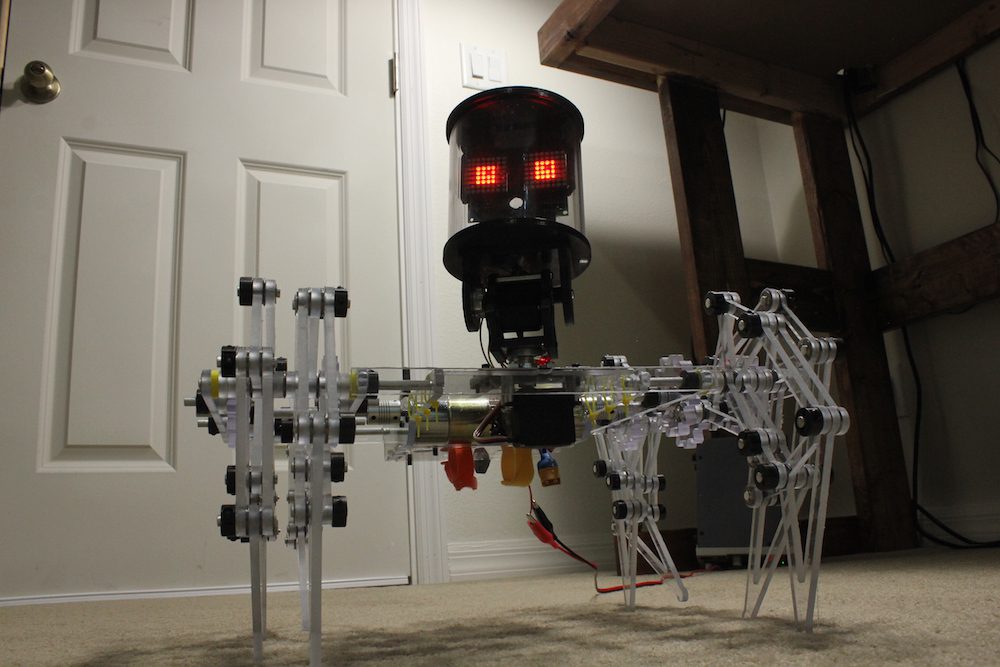
Maker Jeremy S. Cook has been building Theo Jansen-style walkers for literally years, and after several iterations has come up with what he calls the “ClearCrawler.”
This little guy stands at just over 15 inches tall — including its comparatively large clear cylindrical head — and travels around via a pair of motors that move four legs on either side like tank treads.
For control, Cook is using an Arduino Nano onboard, along with a motor driver, plus an Uno and joystick shield as the remote unit. Communication between the two is accomplished by a pair of nRF24L01+ radio modules.
Code for the project is available on GitHub, and the build is split up into an electronics and mechanical section in the videos below.
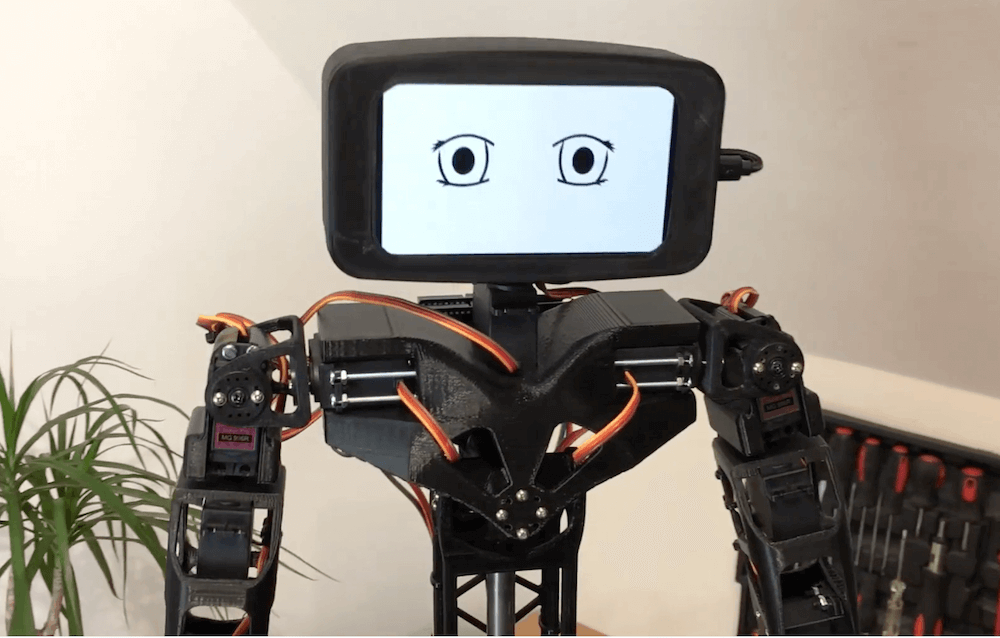
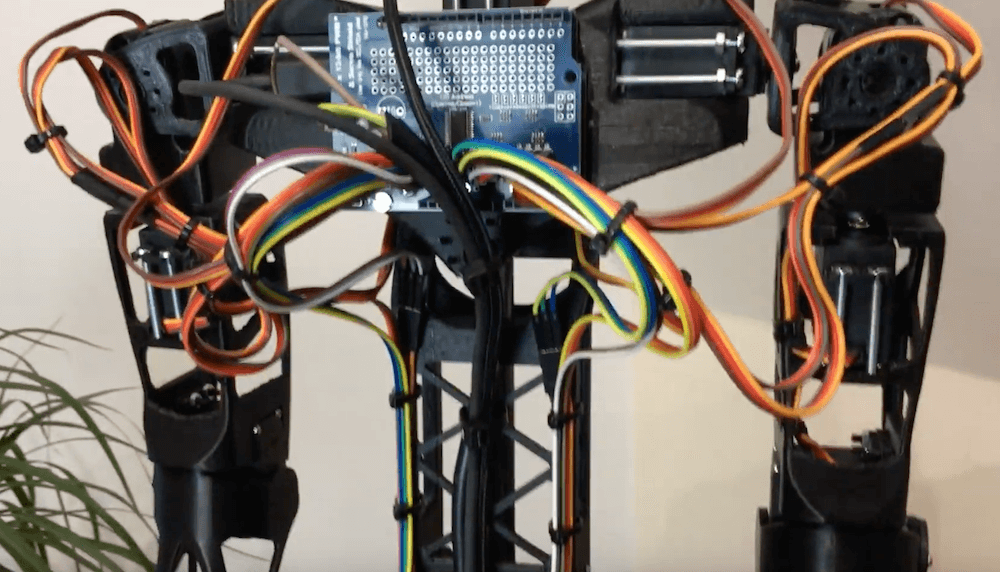
If you’d like to build your own vaguely humanoid robot, but don’t care about it getting around, then look no farther than Aster.
The 3D-printed bot is controlled by an Arduino Uno, with a servo shield to actuate its 16 servo motors. This enables it to move its arms quite dramatically as seen in the video below, along with its head. The legs also appear to be capable of movement, though not meant to walk, and is supported with a column in the middle of its structure.
Aster’s head display is made out of an old smartphone, and in the demo it shows its eyes as green geometric objects, an animated sketch, and then, somewhat shockingly, as different humans. Print files for the project are available here and the design is actually based on the more expensive Poppy Humanoid.
Awesome dad builds an Arduino-powered button box for his toddler son
Arduino Team — November 22nd, 2019
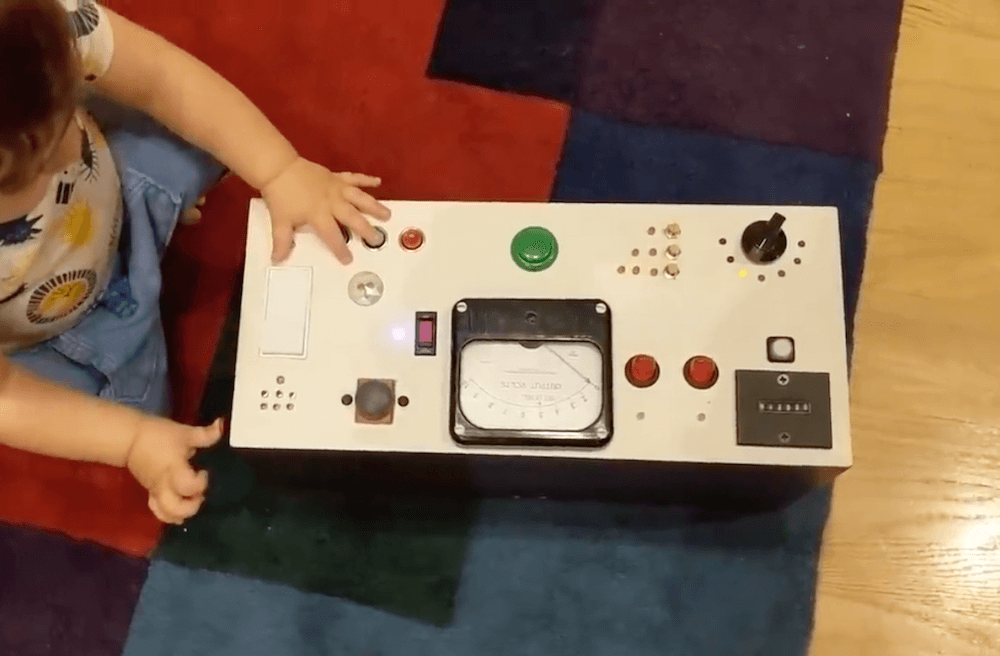
Like most one-year-olds, CodePanda’s son really likes pushing buttons. Rather than purchasing a so-called busy board that might teach him skills like unlocking doors or plugging in electrical outlets, he decided to build his own custom device controlled by an Arduino Uno.
The resulting toy features a wide variety of lights, buttons and switches, and makes sounds to keep the little guy entertained. In the center, a big green button activates an analog voltmeter, which not only looks cool, but actually indicates the battery level of the unit.
Rapidly create your own capacitive multi-touch sensors with this kit
Arduino Team — November 13th, 2019
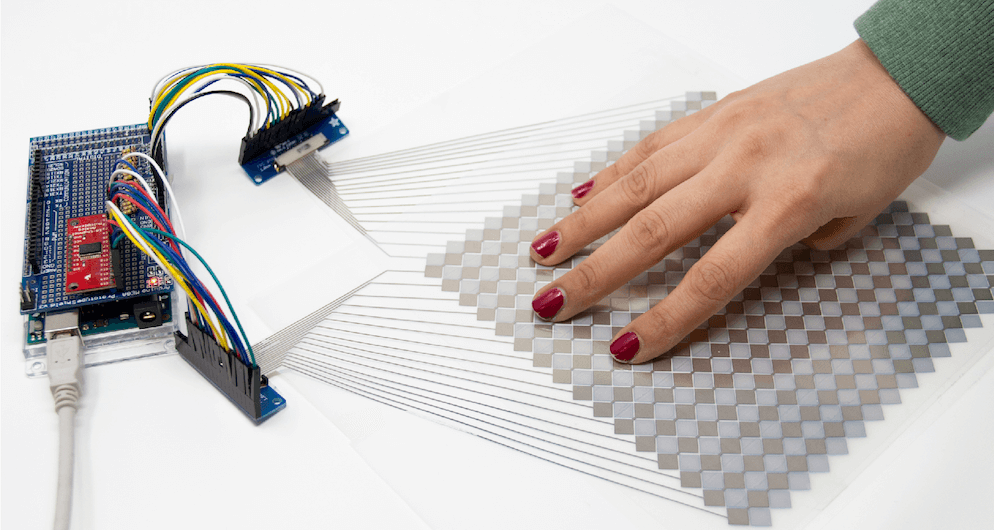
You likely use touchscreens every day when interacting with your phone — perhaps even to read this article — but prototyping your own capacitive matrix is unfortunately out of reach for most makers and electronics novices. As seen here, researchers have devised a new technique that will allow for easier prototyping of this type of interface, which can function on both flat and curved surfaces, over a variety of materials.
To accomplish this, the team developed an Arduino library, as well as one for Processing, and used OpenCV to track multiple finger positions. Interactions have been tested with an Uno, Mega and LilyPad, and would presumably work with almost any other Arduino board as needed!
We introduce Multi-Touch Kit, a low-cost do it-yourself technique to enable interaction designers, makers, and electronics novices alike to rapidly create and experiment with high-resolution multi-touch sensors of custom sizes, geometries, and materials.
In contrast to existing solutions, the Multi-Touch Kit is the first technique that works with a commodity microcontroller (our implementation uses a standard Arduino) and does not require any specialized hardware. As a technical enabler, we contribute a modified multi-touch sensing scheme that lever ages the human body as a transmission channel of MHz range signals through a capacitive near-field coupling mechanism. This leads to a clean signal that can be readily processed with the Arduino’s built-in analog-to-digital converter, resulting in a sensing accuracy comparable to industrial multi-touch con trollers. Only a standard multiplexer and resistors are required alongside the Arduino to drive and read out a touch sensor matrix.
The technique is versatile and compatible with many types of multi-touch sensor matrices, including flexible sensor films on paper or PET, sensors on textiles, and sensors on 3D printed objects. Furthermore, the technique is compatible with sensors of various scale, curvature, and electrode materials (silver, copper, conductive yarn) fabricated using conductive printing, hand-drawing with a conductive pen, cutting, or stitching.
Rapidly create your own capacitive multi-touch sensors with this kit
Arduino Team — November 13th, 2019
You likely use touchscreens every day when interacting with your phone — perhaps even to read this article — but prototyping your own capacitive matrix is unfortunately out of reach for most makers and electronics novices. As seen here, researchers have devised a new technique that will allow for easier prototyping of this type of interface, which can function on both flat and curved surfaces, over a variety of materials.
To accomplish this, the team developed an Arduino library, as well as one for Processing, and used OpenCV to track multiple finger positions. Interactions have been tested with an Uno, Mega and LilyPad, and would presumably work with almost any other Arduino board as needed!
We introduce Multi-Touch Kit, a low-cost do it-yourself technique to enable interaction designers, makers, and electronics novices alike to rapidly create and experiment with high-resolution multi-touch sensors of custom sizes, geometries, and materials.
In contrast to existing solutions, the Multi-Touch Kit is the first technique that works with a commodity microcontroller (our implementation uses a standard Arduino) and does not require any specialized hardware. As a technical enabler, we contribute a modified multi-touch sensing scheme that lever ages the human body as a transmission channel of MHz range signals through a capacitive near-field coupling mechanism. This leads to a clean signal that can be readily processed with the Arduino’s built-in analog-to-digital converter, resulting in a sensing accuracy comparable to industrial multi-touch con trollers. Only a standard multiplexer and resistors are required alongside the Arduino to drive and read out a touch sensor matrix.
The technique is versatile and compatible with many types of multi-touch sensor matrices, including flexible sensor films on paper or PET, sensors on textiles, and sensors on 3D printed objects. Furthermore, the technique is compatible with sensors of various scale, curvature, and electrode materials (silver, copper, conductive yarn) fabricated using conductive printing, hand-drawing with a conductive pen, cutting, or stitching.
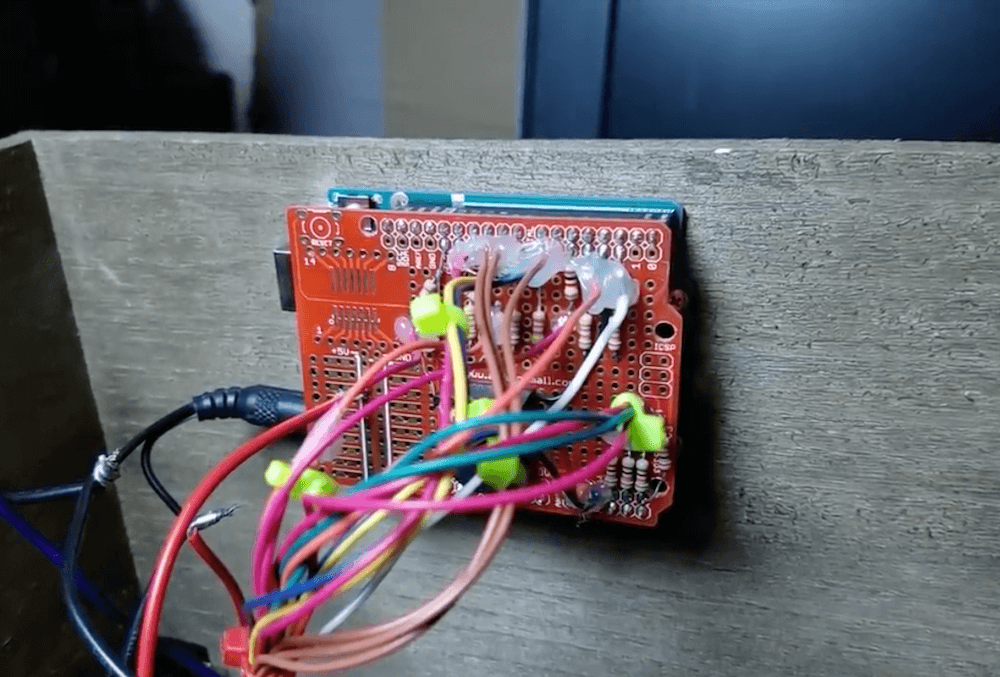
Because of their ability to visually sense the environment, head-mounted mixed reality (MR) systems can detect when a user touches a wall or other surface. These surfaces can then become interactive panels, with the small caveat that they traditionally treat a finger coming within 10mm of the surface as a touch.
While this leads to sometimes inaccurate readings, researchers at Tsinghua University in Beijing have implemented an inertial measurement unit (IMU) ring apparatus for contact sensing to increase precision from around 85% to just under 99%.
The experimental setup for this exercise used an Arduino Uno to read accelerometer data, along with a capacitive arrangement to confirm when a touch actually took place. Accelerometer data was compared with readings from a Leap Motion optical sensor, which in addition to greater accuracy, also reduced latency.
Rolling robot transformed into a zip lining contraption
Arduino Team — November 11th, 2019
MOREbot is an Arduino-powered educational robotic platform that’s currently available for pre-order. While the base kit is geared (literally and figuratively) towards building a small two-motor robot, MORE Technologies CEO Canon Reeves shows off how it can be reconfigured into an RC zip lining device in the video below.
The project uses the kit’s DC motors for traversing the cable, with O-rings that normally form the tires taken off in order to grip the top of a paracord. Everything is controlled by an Arduino Uno and a motor shield, while a Bluetooth module provides wireless connectivity. Control is via an iPad app, which simply rotates both motors at the same time as needed.
Since the parts are all modular, Reeves is planning on adding a few other attachments including a GoPro camera mount and perhaps even a servo that lets him drop a payload like a water balloon from it.
TipText enables one-handed text entry using a fingertip keyboard
Arduino Team — November 11th, 2019
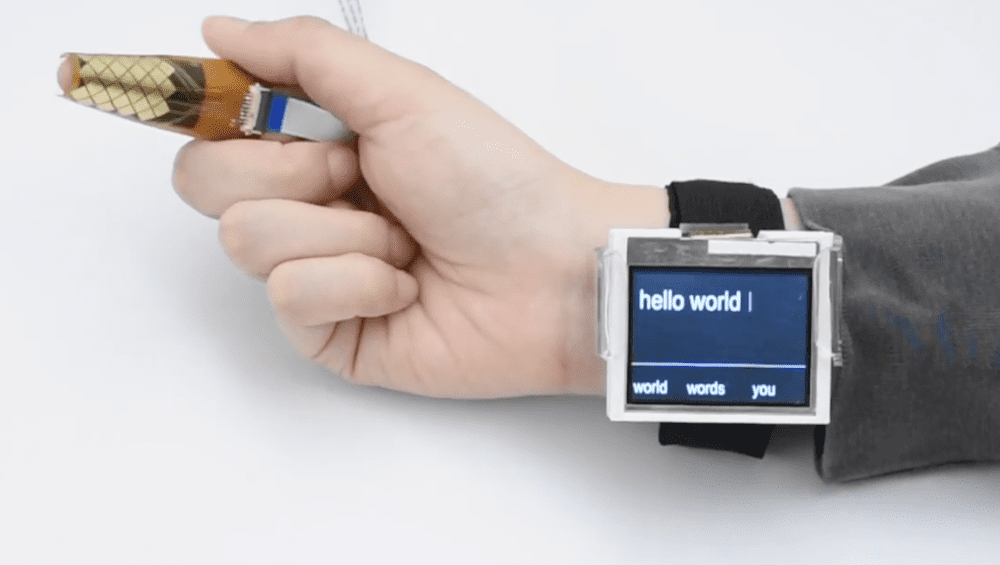
Today when you get a text, you can respond with message via an on-screen keyboard. Looking into the future, however, how would you interact unobtrusively with a device that’s integrated into eyeglasses, contacts, or perhaps even something else?
TipText is one solution envisioned by researchers at Dartmouth College, which uses a MPR121 capacitive touch sensor wrapped around one’s index finger as a tiny 2×3 grid QWERTY keyboard.
The setup incorporates an Arduino to process inputs on the grid and propose a number of possible words on a wrist-mounted display that the user can select by swiping right with the thumb. A new word is automatically started when the next text entry tap is received, allowing for a typing speed of around 12-13 words per minute.
Proxino takes your virtual circuit into the real world
Arduino Team — November 7th, 2019
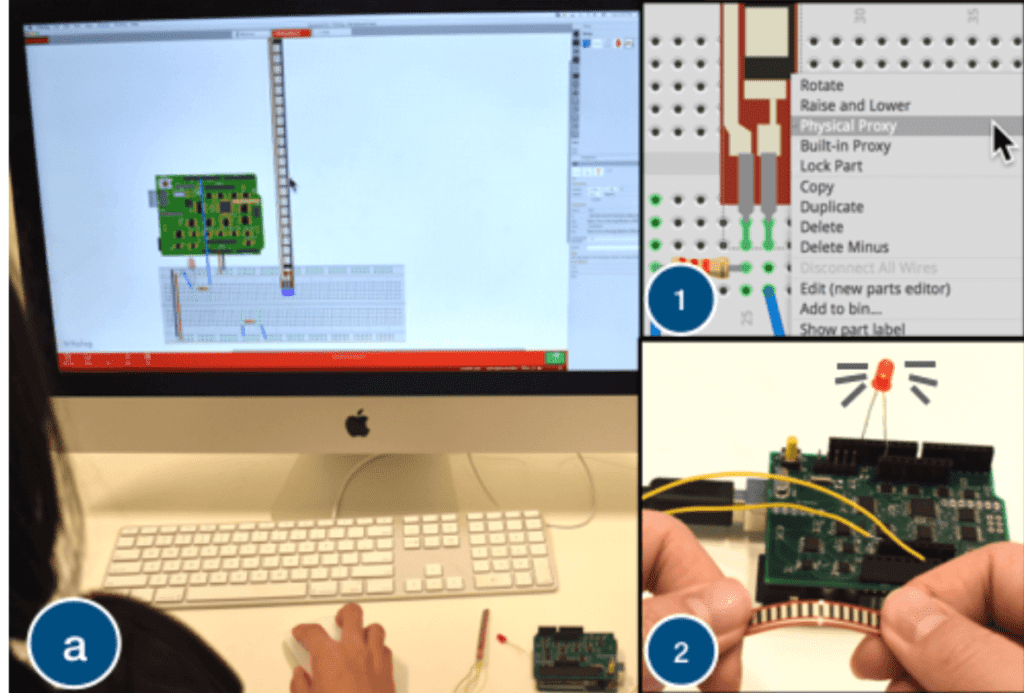
While circuit simulation tools become more accessible all the time, at some point it’s necessary to actual build your device and test it. Proxino, developed by researchers at Dartmouth College, takes a different approach, and enables you to virtually create a circuit, then test parts of it as needed with electronic components via physical proxies.
To accomplish this, Proxino hardware sits on an Arduino Uno as a shield, and generates the virtual circuit’s responses to inputs. This setup allows for the implementation of physical elements like buzzers, lights, and sensors to complement the simulated environment, which can even be shared by remote collaborators in different locations.
Proxino certainly looks like it could be an excellent instructional tool, or perhaps more!
Some tips and tricks for controlling a servo with an Arduino
Arduino Team — November 6th, 2019
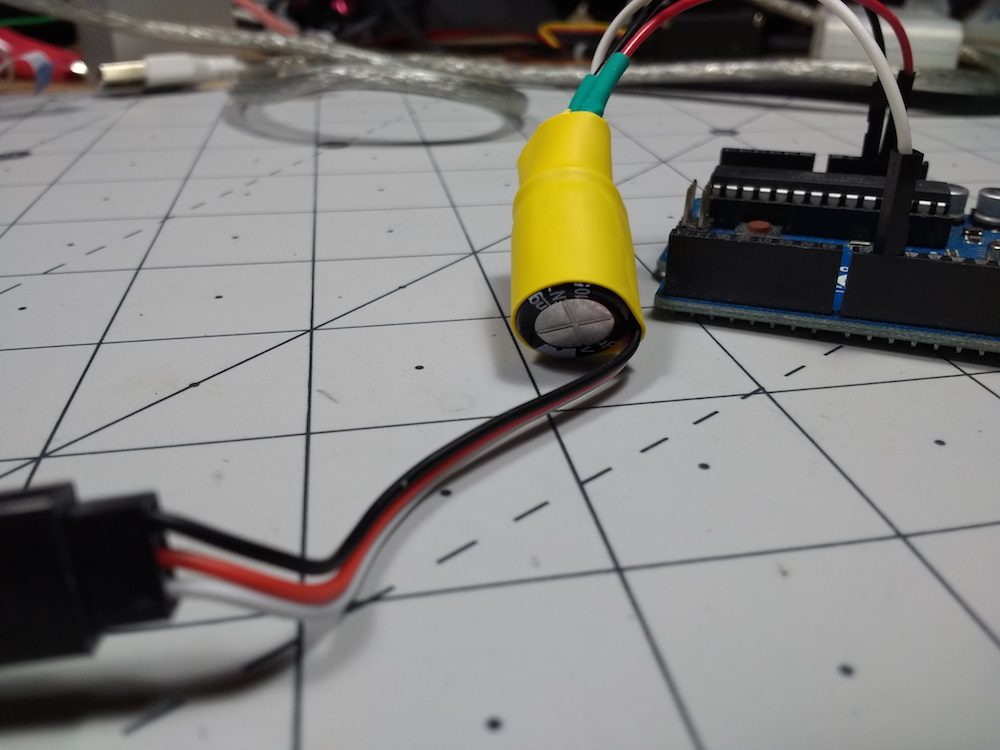
Servos aren’t particularly hard to control with Arduinos, and in fact there’s a library available just for that purpose. Actually making the connection between the board and servo and managing one’s power usage will require a bit more finesse.
In the video below, Jeremy S. Cook explains how you can create an adapter that goes between your servo and an Uno, including a capacitor to help even out voltage spikes. While in most cases you would want to supply power your servos separately from the Arduino, this technique seems to work well in a quick round of tests.
In addition, the clip shows how to attach a servo and then detach it to cut it off, using a function outside of the main loop and no additional hardware. This would be very helpful in applications where power is at a premium — or if you just don’t want the servo jittering back and forth!
Every jack-o’-lantern needs a pair of animatronic eyes
Arduino Team — October 31st, 2019
If you’d like your jack-o’-lantern to stand out, a pair of animatronic eyes should do the trick. While there are numerous ways that you can go about this, few (if any) look as good as the set made by Will Cogley in the first video below.
The incredibly realistic 3D-printed eyeballs are installed into the hollowed out pumpkin using skewers as supports, and glance in all directions, along with orange eyelids that open and close for an even more human(ish) appearance.
The second clip delves deeper into the eyeballs themselves, which come in several forms. Control is via a Wii Nunchuk-esque joystick interface, with the help of an Arduino.
Pen plotter? Laser engraver? This DIY machine gives you both!
Arduino Team — October 30th, 2019
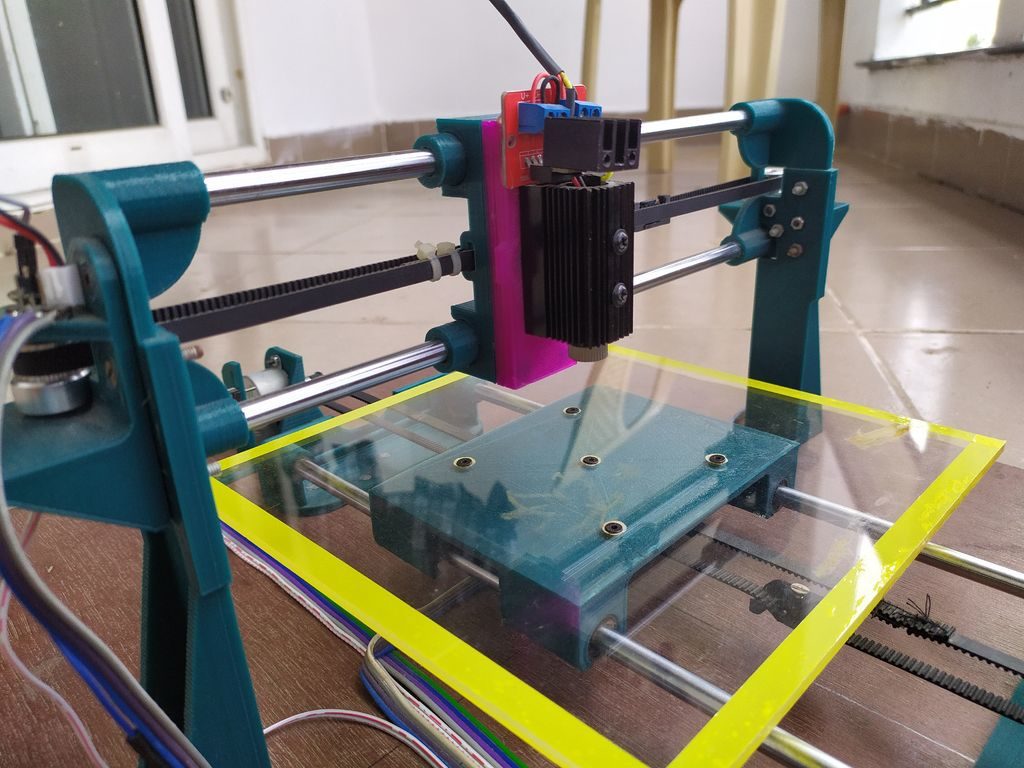
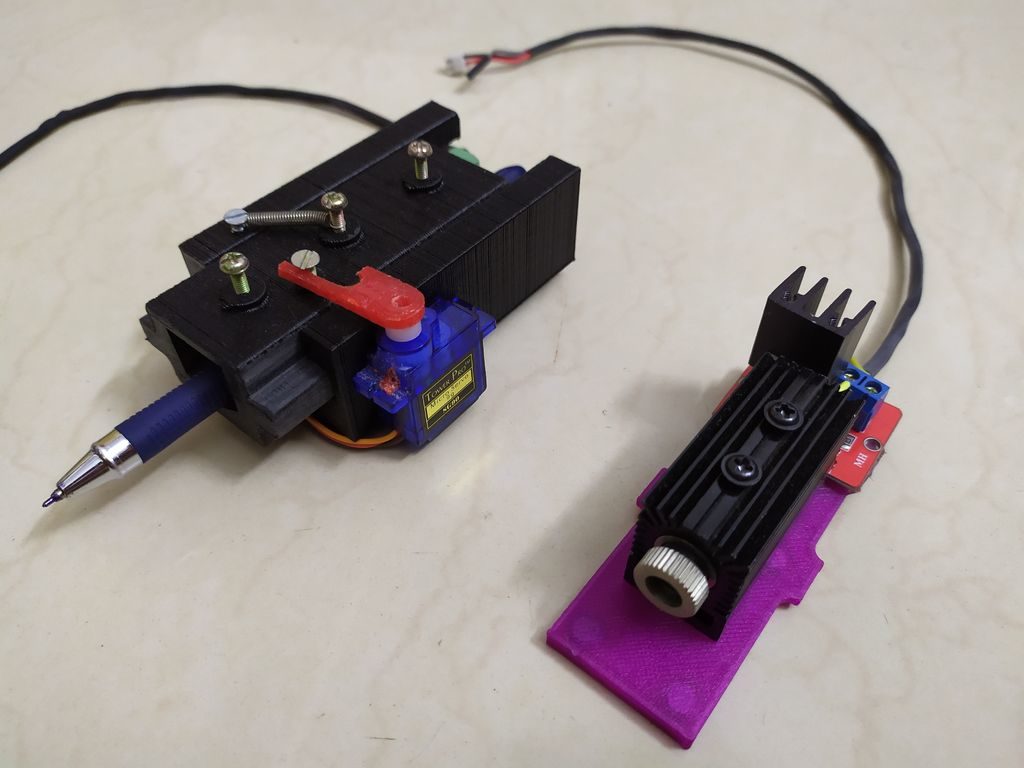
If you find yourself debating between a pen plotter or laser engraver, this project by Patrick Panikulam lets you have the best of both worlds in style. The DIY device pulls a writing instrument in the X-axis using a belt-driven overhead system, while the base itself moves in the Y direction.
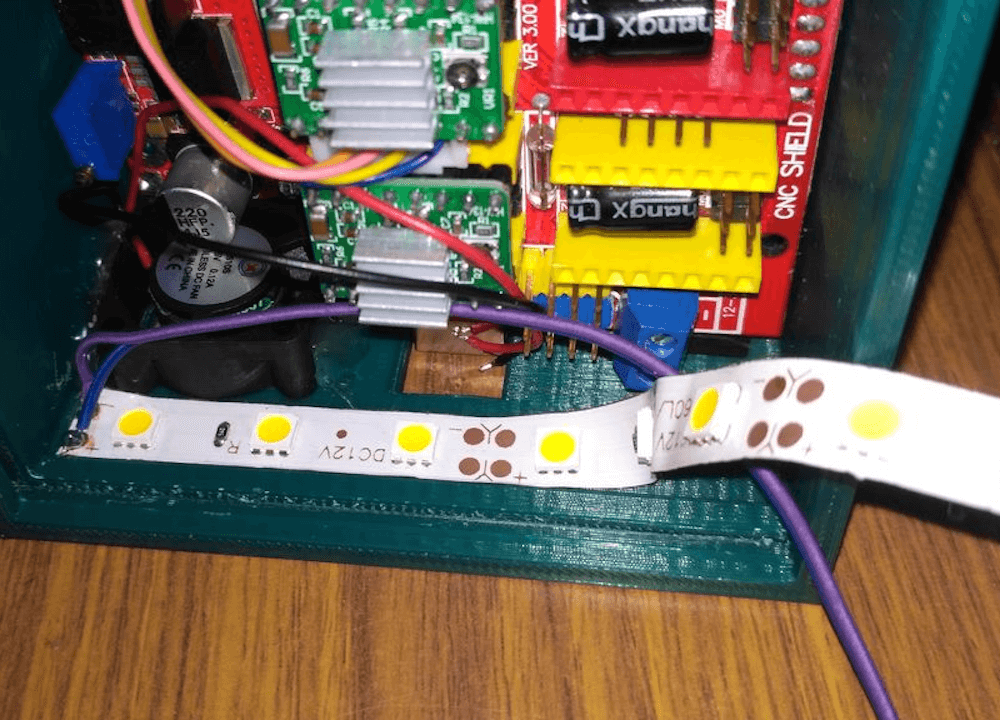
Motion is handled by an Arduino Uno, along with a CNC shield and two A4988 drivers that actuate modified 28BYJ-48 steppers. The shield also outputs laser control signals, which are converted into PWM signals for the lifting servo when in pen mode.
It’s an extremely clean build, and even features a Bluetooth module for wireless communication with your computer. Panikulam provides more details here if you’d like to create your own!
A couple of months back while checking out a few laser engravers on aliexpress, I came across some USB powered laser engravers. It was awesome that these could engrave on a variety of materials and also cut out shapes and designs from sticker sheets and paper and doing all this powered by a 5V USB supply. But the downside of these engravers was that they had a small work area, in most cases just 40mm X 40mm which is definitely way too small for my needs.
So I thought why not design and 3D print my own laser engraver from scratch. I started the designing process in Fusion 360 while keeping in mind all the 3D printing tolerances. And finally came up with something really cool. Along the way, I decided to make the laser holder modular so that I can easily replace the laser with a pen or marker for pen plotting. I also added a Bluetooth connectivity feature so that wired connection between your PC and the engraver can be eliminated while transmitting G-codes.
Um dir ein optimales Erlebnis zu bieten, verwenden wir Technologien wie Cookies, um Geräteinformationen zu speichern und/oder darauf zuzugreifen. Wenn du diesen Technologien zustimmst, können wir Daten wie das Surfverhalten oder eindeutige IDs auf dieser Website verarbeiten. Wenn du deine Einwillligung nicht erteilst oder zurückziehst, können bestimmte Merkmale und Funktionen beeinträchtigt werden.
Funktional
Immer aktiv
Die technische Speicherung oder der Zugang ist unbedingt erforderlich für den rechtmäßigen Zweck, die Nutzung eines bestimmten Dienstes zu ermöglichen, der vom Teilnehmer oder Nutzer ausdrücklich gewünscht wird, oder für den alleinigen Zweck, die Übertragung einer Nachricht über ein elektronisches Kommunikationsnetz durchzuführen.
Vorlieben
Die technische Speicherung oder der Zugriff ist für den rechtmäßigen Zweck der Speicherung von Präferenzen erforderlich, die nicht vom Abonnenten oder Benutzer angefordert wurden.
Statistiken
Die technische Speicherung oder der Zugriff, der ausschließlich zu statistischen Zwecken erfolgt.Die technische Speicherung oder der Zugriff, der ausschließlich zu anonymen statistischen Zwecken verwendet wird. Ohne eine Vorladung, die freiwillige Zustimmung deines Internetdienstanbieters oder zusätzliche Aufzeichnungen von Dritten können die zu diesem Zweck gespeicherten oder abgerufenen Informationen allein in der Regel nicht dazu verwendet werden, dich zu identifizieren.
Marketing
Die technische Speicherung oder der Zugriff ist erforderlich, um Nutzerprofile zu erstellen, um Werbung zu versenden oder um den Nutzer auf einer Website oder über mehrere Websites hinweg zu ähnlichen Marketingzwecken zu verfolgen.