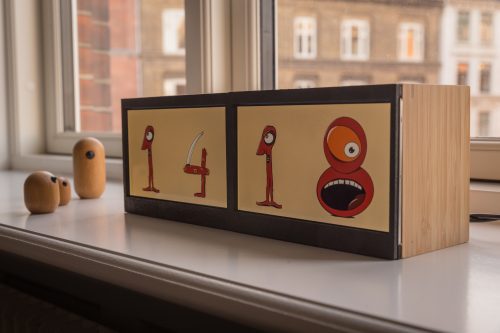
Schlagwort: The MagPi

  • Humane mouse trap | The MagPi #108

    Humane mouse trap | The MagPi #108

    Reading Time: 4 minutes

    Safely catching mice is a better way of fixing a problem, and using Raspberry Pi means it needs less supervision. In the new issue of The MagPi magazine, Rob Zwetsloot takes a look with the maker, Andrew Taylor.

    With some IoT projects, it’s the little things that help. For example, take Andrew Taylor, who did the good thing of setting up a humane mousetrap. However, checking it to see if any mice had been caught in it, while necessary, was getting a little boring.

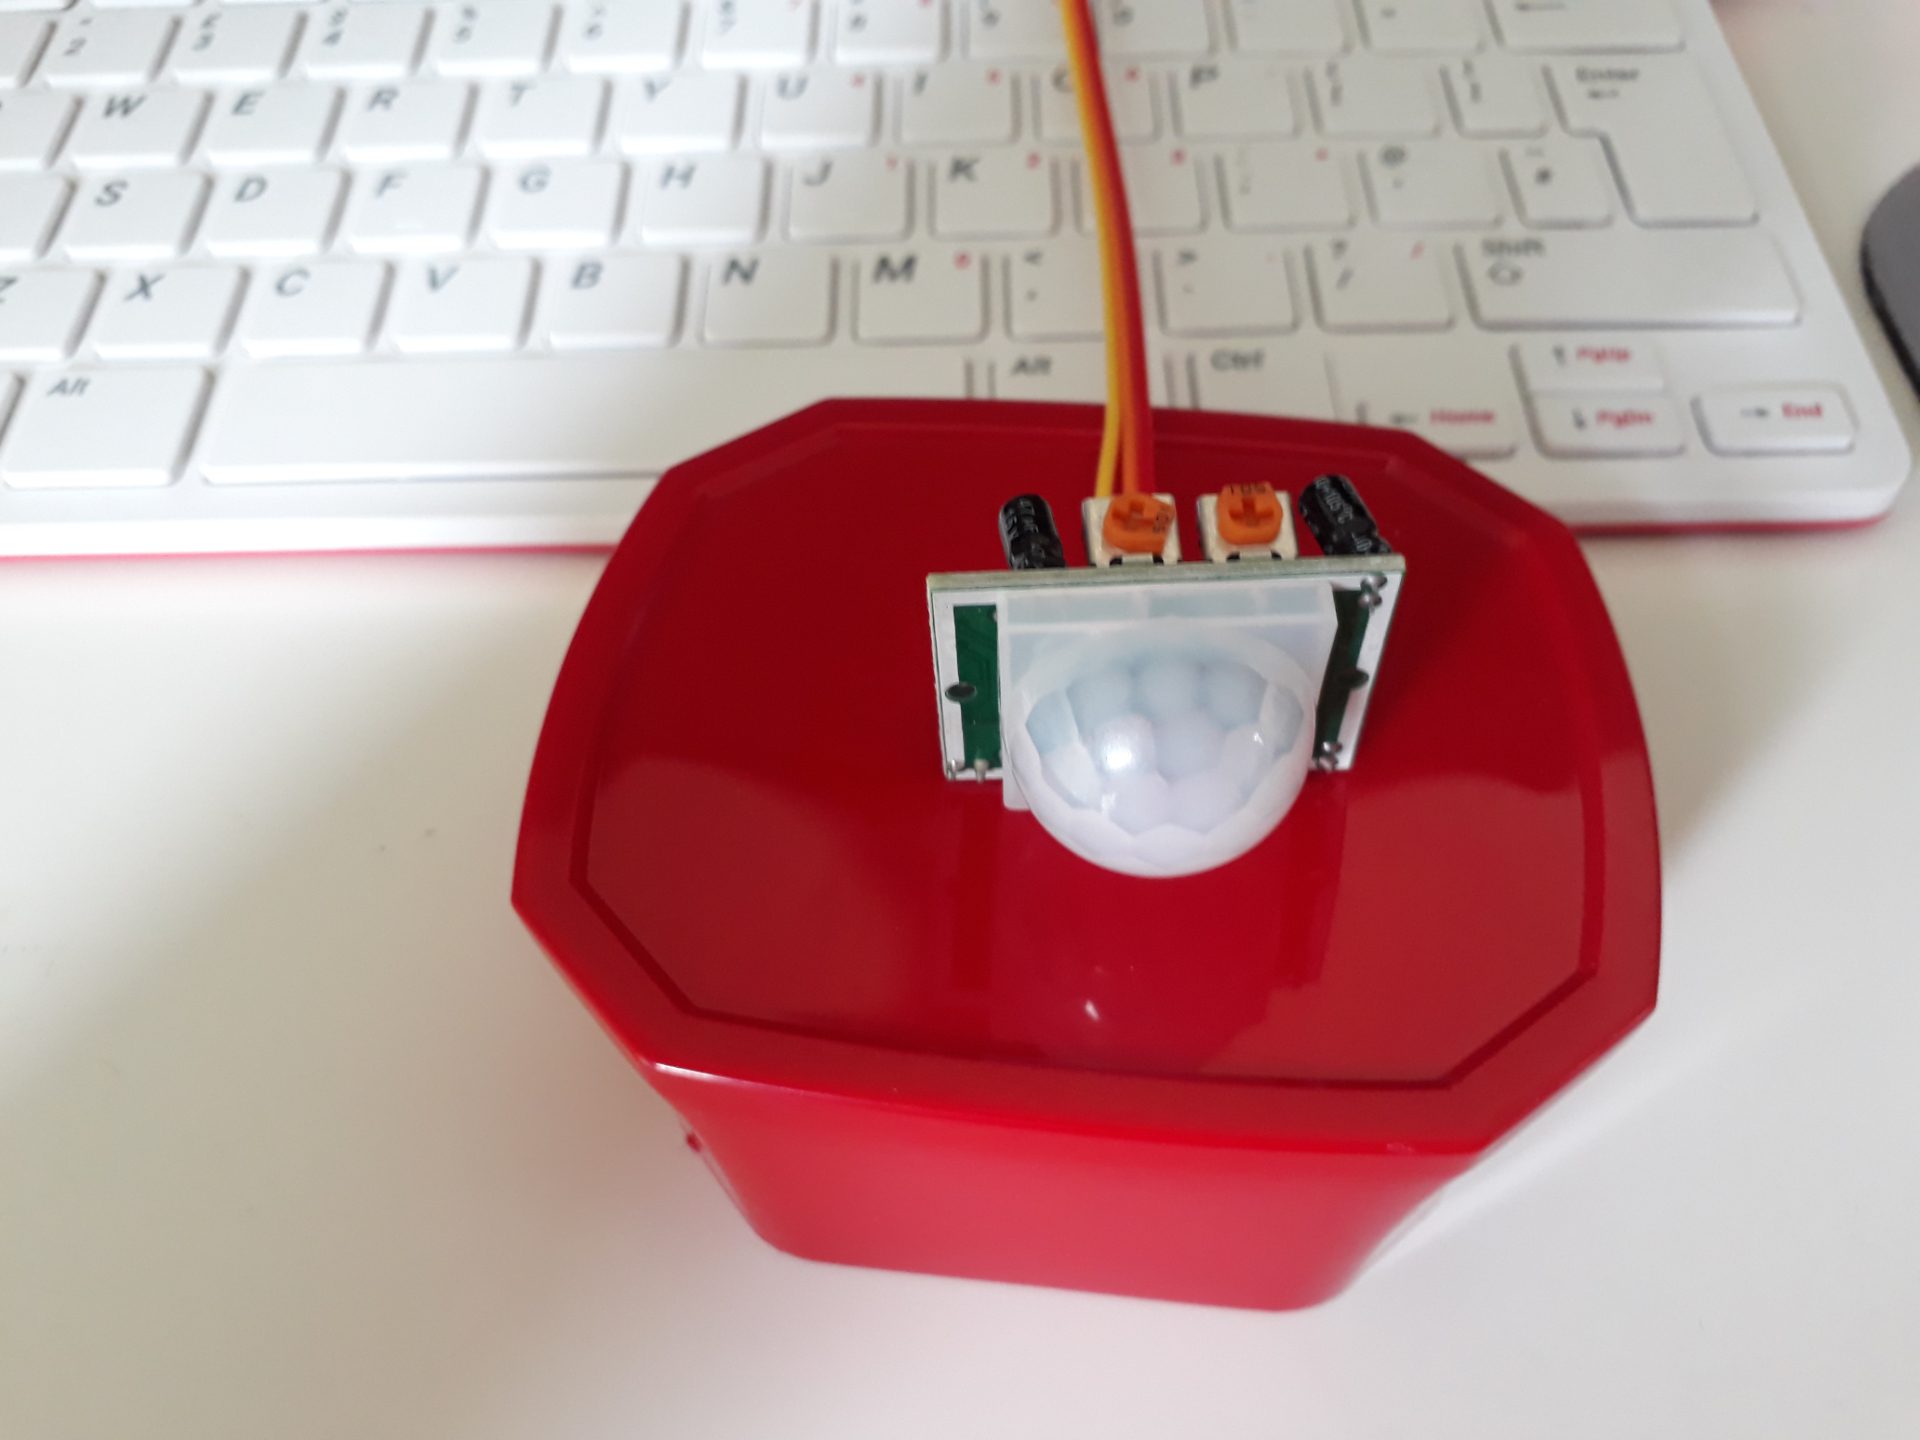
    There’s one major component to the setup, which is the PIR sensor

    “If a mouse had gone in and I did not check it, the mouse would quickly run out of food and water!” Andrew tells us. “Having been interested in Raspberry Pi for a couple of years and having recently begun learning Python using the Enviro+ environment sensors, I figured a Raspberry Pi with a motion sensor would be an ideal way to check.”

    It’s a fairly simple setup, one commonly used in CCTV builds and some fun ‘parent detectors’ on the Raspberry Pi Foundation’s projects site.

    An old coffee tub is used as a case for the sensor, a good way to recycle

    Mouse motion

    “I came across a couple of automated mousetraps that people had made from scratch, but wanting to keep it simple and cheap,” Andrew explains. “I wanted to use off-the-shelf parts where possible and keep costs down. The Pi Hut had a tutorial for a DIY burglar alarm utilising a PIR sensor, IFTTT, and Pushbullet, which seemed like an ideal starting point.”

    A Raspberry Pi Zero is used to check the motion sensor and send data if it’s activated

    IFTTT – If This Then That – is an online service popular with IoT folks. It’s great for small things like cross-posting images on social media services, or sending a push notification when motion is detected in a mousetrap.

    “I have only had one mouse since, but it worked!” Andrew says. “I was averaging about 800 detections a day and suddenly got well over a 1000. Sure enough, there was a mouse in the trap which I released shortly afterwards. I do tend to notice that the values fluctuate a bit, so it is always worth checking over the previous day’s results to see if it is notably higher.”

    Wiring up the PIR to Raspberry Pi is quite simple, and means the project is easy to maintain

    You might think that 800 push notifications a day is far worse than just occasionally checking your garage, and you’d be right, so Andrew tweaked the code a bit: “The code examples I found sent a notification for each movement detection – which I knew would be rather annoying, considering how randomly PIR sensors sometimes seem to trigger. My script instead logs any hits at a max of 1 per 30 seconds and then triggers a notification once every 24 hours, meaning I just get one notification a day.”

    It’s a simple design, and was kept simple to keep to a small budget

    Beat a path

    There’s always room for improvement, as Andrew explains: “I intend to improve the code so that it can record running averages and give an indication as to whether it believes there has been a significant spike that might necessitate me checking it out.”

    The first successful capture was released back outside the garage

    Whilst the aim of the project was to keep costs down, Andrew is tempted to experiment by adding a camera, and possibly a light, so he can have a peek remotely when there has been a spike in the readings and to see if it is a false alarm. Which, as he admits, is “a new height in laziness!”

    The MagPi #108 out NOW!

    You can grab the brand-new issue right now from the Raspberry Pi Press store, or via our app on Android or iOS. You can also pick it up from supermarkets and newsagents. There’s also a free PDF you can download.

    Website: LINK

  • Get outside with these Raspberry Pi summer projects

    Get outside with these Raspberry Pi summer projects

    Reading Time: 5 minutes

    Summer is fast approaching – and that’s the perfect excuse to get building. Whether you want to spy on your local wildlife, upgrade your vegetable patch, or feed your fish when you’re off on a weekend break, Raspberry Pi and a handful of add-ons make a great starting point. The latest issue of The MagPi is packed with some of the most inspirational projects to be found. They include a smart tide monitor, which will tell you when’s the best time to hit the beach, and a clever Heater Meter that can keep an eye on your barbecue while you get on with the prep in the kitchen.

    Check the tides

    Avoid nasty surprises when you arrive at the beach: check the tide level before you leave home
    Avoid nasty surprises when you arrive at the beach: check the tide level before you leave home

    If you’re heading out for any kind of water-based activity (and that includes sitting on the beach), it helps to know whether the tide is in or out and which way it’s heading. Sam Baker’s neat e-ink tide and weather tracker uses Raspberry Pi Zero and an enormous (7.5 in) e-ink display to track the motion of the ocean and upcoming weather conditions, so you don’t arrive at the beach to find the sand submerged.

    Print your own lawn-mower

    The return of summer means an addition to your weekly to-do list: mowing the lawn. But not if you build a PiMowBot smart lawn-mower robot. This uses any Raspberry Pi to control an autonomous lawnmower that navigates your garden using GPS and offers optional remote control, so you can keep the lawn trimmed from the comfort of a garden chair.

    Sit back, put your feet up, and enjoy the sunshine while PiMowBot takes care of mowing your lawn
    Sit back, put your feet up, and enjoy the sunshine while PiMowBot takes care of mowing your lawn

    The hardware, comprising the chassis, cutterbar and so on, is solar-powered and can be 3D-printed, while the software is a €19.99 download. The OBJ (Wavefront OBJect) file patterns for the various parts you’ll need to print are a £29.46 download from Cults3d. You’ll need to buy several components to put it together, as it also relies on a number of sensors, including – aside from the GPS receiver – a temperature and humidity sensor, compass module, and Camera Module.

    Although you do need to invest in quite a few parts for the PiMowBot, and spend time assembling them, the project still manages to undercut (sorry!) commercial alternatives, for which prices start at around £500, by a considerable margin.

    BBQ safely

    One thing that’s certain to put a dampener on a summer get-together is barbecued food that’s charred on the outside and raw in the middle. Fortunately, a lot of makers have set themselves the task of solving this problem – which they’ve done with aplomb. Tempiture pairs Raspberry Pi with a breadboard, food probe, and a handful of resistors to produce a wireless grilling thermometer which sends readings to the web. As a barbecue can take hours to get to cooking temperature, this lets you keep an eye on its progress while you’re prepping food in the kitchen.

    HeaterMeter lets you keep an eye on your BBQ from a distance, freeing you to get on with prep in the kitchen while the HeaterMeter maintains cooking temperatures
    HeaterMeter lets you keep an eye on your BBQ from a distance, freeing you to get on with prep in the kitchen while the HeaterMeter maintains cooking temperatures

    It’s not your only option, either. PitmasterPi performs a very similar job, taking regular readings to populate a real-time dashboard, and optionally sending emails or texts at crucial moments.

    HeaterMeter pairs Raspberry Pi with an Adruino microcontroller, thermal probe, and fan to maintain perfect temperatures, with support for web streaming, graphing, and alerts. What’s particularly appealing about HeaterMeter is that you can choose different starting points for your project, depending on how confident you are. If you’re a dab hand at soldering and reading a circuit diagram, start from scratch with a kit; but if you’re just craving a burger, skip all that and opt for a fully assembled board instead.

    Build a trail camera

    The Naturebytes camera case keeps all the components of an automated bird and wildlife camera neat and tidy
    The Naturebytes camera case keeps all the components of an automated bird and wildlife camera neat and tidy

    One of the best things about summer is the return of a host of migratory birds that desert us in the colder months. And, while foxes and badgers will have been with us throughout the winter, hedgehogs will have been hibernating between late autumn and early spring. Many of these animals are timid, so spotting them requires that you get up early, stay up late, or set up a trail camera which uses motion detection to capture an image when they pass.

    This has been a popular use for Raspberry Pi for years, but there are so many ways to go about it, you might be wondering which are the best options. You can pick up all the parts you need to build your own trail camera – aside from the power supply – from The Pi Hut for £110, or the case on its own for £40 if you have most of the other required components knocking around from old projects.

    Get your copy of The Magpi #106 now!

    We’ve shared just a few of our favourite summer project ideas here. For the full list, head to page 72 of the latest issue of The MagPi.

    magpi magazine issue 106 cover

    You can grab the brand-new issue right now online from the Raspberry Pi Press store, or via our app on Android or iOS. You can also pick it up from supermarkets and newsagents. There’s also a free PDF you can download.

    Website: LINK

  • Calculate pi with a Raspberry Pi Spigot | The MagPi #106

    Calculate pi with a Raspberry Pi Spigot | The MagPi #106

    Reading Time: 4 minutes

    Here’s an ingenious way of using a Raspberry Pi to calculate pi – and why not? Nicola King runs the numbers in the latest issue of The MagPi magazine.

    Pi is an irrational number, which means it can’t be expressed as the ratio of two integers. Since it has an infinite number of decimal places, calculating it to ever greater accuracy has long been an objective of mathematicians. So what better project for Pi Day (14 March) than to get a Raspberry Pi to calculate pi?

    [youtube https://www.youtube.com/watch?v=zqEtR9f9NLo?feature=oembed&w=500&h=281]

    You’ll find Adrian on YouTube as bornach

    That’s what Adrian Chung reckoned when looking to create a project for a ‘speed round’ contest. “I thought it would be neat to use a Raspberry Pi to compute pi to arbitrarily high precision,” he tells us.

    After looking into various methods, he learned about a class of algorithms that differed from the usual summing up of a sequence of decimal approximations. “Intriguingly, these so-called ‘spigot algorithms’ computed the next digit of pi after every few iterations of applying a small set of operations on a handful of integers,” he notes.

    Numbers on tap

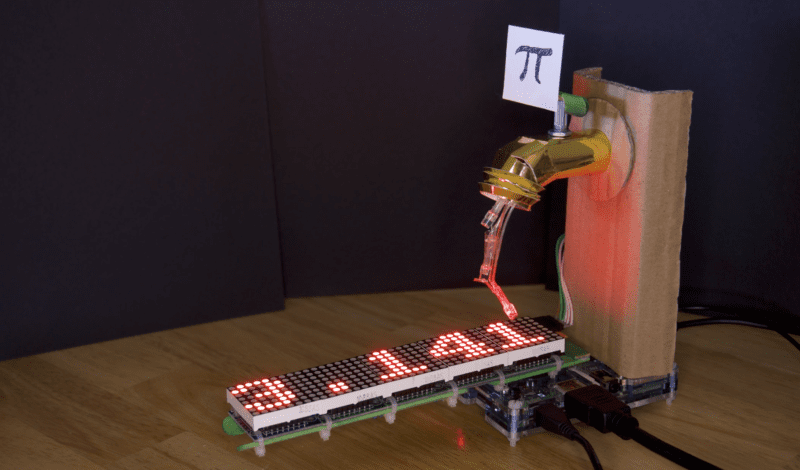
    Rather than simply using a Raspberry Pi to compute pi with a spigot algorithm, Adrian thought it required a more visual approach. “The need for a more visually explicit indication of what was actually running on the Raspberry Pi gave me the idea of creating a physical spigot prop with a tactile check valve that can be used to pause or resume the iterations of the algorithm,” he explains. Upon the user turning the spigot, digits appear to flow from the tap and along an LED matrix display below.

    An animation of three LEDs creates the illusion of digits flowing from the tap
    An animation of three LEDs creates the illusion of digits flowing from the tap

    “The MAX7219 8×8 LED display modules are daisy-chained SPI devices that are hooked up to the SPI interface on Raspberry Pi,” says Adrian. “They are powered directly off the 5V rail; however, I had to add a separate power switch because they power up with all the LEDs turned on and this was pulling down the supply voltage during bootup.”

    Three GPIO pins are used to animate the LED drips from the spigot. “The LEDs were cut from a Poundland Christmas decoration. Current is limited by 150 Ω resistors so that the drips don’t appear overly bright against the scrolling display.”

    A close-up of the spigot, which is constructed from shiny gold card with a cardboard stand
    A close-up of the spigot, which is constructed from shiny gold card with a cardboard stand

    A potentiometer in the spigot is connected to two GPIO pins to check the valve position. “This works by using one pin to charge a capacitor through the potentiometer, forming an RC delay, and then timing how long until a logic high is read by the other pin.”

    Adjusting the flow

    Adrian adapted an existing scrolling text demo script in the luma.led_matrix source code library: “I had to choreograph the dripping LED animation with the previous digits scrolling off to the left and the reveal of a new digit under the spigot.”

    He also needed to alter the potentiometer reading script, replacing the simple timing loop with regular system time queries for greater accuracy.

    Additional components for the build include resistors, a capacitor, and perfboard
    Additional components for the build include resistors, a capacitor, and perfboard

    So, how accurately can his Raspberry Pi Spigot calculate pi? “I left it to run for about six hours,” says Adrian. “It computed more than the first 8000 digits. It can compute pi much faster than this, but the animation of the digits streaming from the spigot would just be a blur.

    “Because those integer variables in the spigot algorithm only get larger, they continue to consume more and more RAM as more digits are cranked out. I don’t really know how many digits of pi my 1GB Raspberry Pi 2 would have been able to calculate if I had just let it run.”

    Whatever the answer, the project has proved a hit with the community: Adrian’s original tweet video has over 10,000 views and was retweeted over 100 times. 

    Get your copy of The Magpi #106 now!

    magpi magazine issue 106 cover

    You can grab the brand-new issue right now from the Raspberry Pi Press store, or via our app on Android or iOS. You can also pick it up from supermarkets and newsagents. There’s also a free PDF you can download.

    Website: LINK

  • Meet Ellora James

    Meet Ellora James

    Reading Time: 4 minutes

    In the latest issue of The MagPi magazine, we meet the smart young computer scientist behind an exciting new YouTube channel. When did you have that ‘ah-hah’ moment with computing? Ellora James remembers when she had hers.

    “When I was about 14/15 years old, I was considering taking Computer Science at exam level, and so my teacher gave me a Raspberry Pi to borrow and a booklet on Python to play about with,” Ellora tells us. “I remember taking it all home, setting up Raspberry Pi on my kitchen table, and writing my first-ever line of python where I got it to print ‘Hello World’. I was just fascinated by the concept of being able to get computers to do what we tell them, and I’ve been hooked ever since.”

    Ellora James

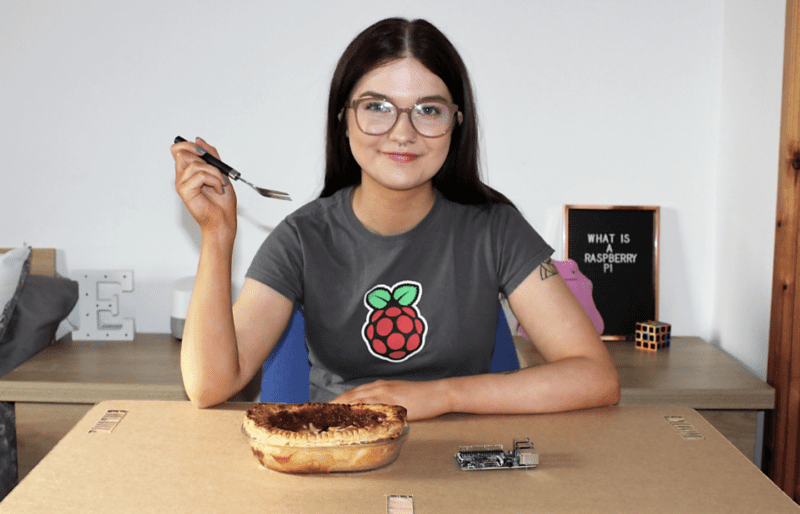
    Ellora James in a Raspberry Pi t shirt eating a pie
    Our favourite pie and microcomputer in one shot

    Several years, one company, and many awards later, Ellora is an up-and-coming young computer scientist who has recently launched her own amazing YouTube channel.

    What is your history with Raspberry Pi?

    “I continued to work through the Python booklet at home and started to dive deeper into Raspberry Pi itself. The big thing that really cemented my love of Raspberry Pi was being selected to attend the Raspberry Pi Digital Making Day in Cambridge, back in 2016. We had to create a 60-second video to apply and despite mine, from what I can remember, being very cheesy, I was selected to attend.

    Ellora James recording for her YouTube channel
    Ellora’s new YouTube channel includes fun builds with Raspberry Pi

    Me and my Mum travelled to Cambridge, which was a fun trip in itself. We tried soldering, set up bird-boxes with infrared cameras and Raspberry Pi Zero, and got to use electric paint to create circuits on T-shirts. It was so much fun, and I’m still planning on setting up my bird-box one day. Being specifically selected to attend gave me a lot of motivation to keep making. And that must have stayed with me over the years, as I’m back making again, and this time on an even bigger scale with my channel!”

    What is Envirocache?

    Envirocache is a mobile app designed to get children (and adults) outside, active, and educated about the world around them. The app allows you to search for walking routes near you and shows you points of interest you can find along the way. You unlock badges and earn points for finding these, like a nature treasure hunt.

    Ellora manages her YouTube channel mostly by herself, which can be a lot of work
    Ellora manages her YouTube channel mostly by herself, which can be a lot
    of work

    The concept started off as an entry to the Apps for Good competition and has grown from there. I now work on the app alongside my team members, Mari-Ann Ganson and Jamie Smith. The app is still in its development stage, but we’re looking at a potential release date this year.”

    What are some of your favourite things you’ve made with Raspberry Pi?

    “My first big project was my ‘PiAlarm’. I got a touchscreen display for the Raspberry Pi for Christmas back in 2015, and ended up designing an alarm clock in Python. It took many hours of work and I also lost my code at one point and had to start again, but I learned a lot from that project, and being my first big one it definitely holds a special place in my heart.

    Ellora with grow hat

    It had a full user interface, let me pick from multiple songs, and even tweeted the time it took me to get up and turn it off in an effort to encourage me to get out of bed quicker. I actually made a short video about it and still have the code somewhere, so I’m thinking of revisiting it on my channel as a future project. I also took part in the 2016/17 European Astro Pi Challenge, where my project idea involved measuring environmental data on the ISS to see how this impacted the circadian rhythms of astronauts.

    The idea was that the astronauts would log how long they slept for, the quality of their sleep, and also hunger levels, to gain an understanding of their circadian rhythm. I also planned to create a reaction game to test how sleep and hunger levels affected their reaction times.”

    Subscribe to Ellora’s YouTube channel

    If you like the sound of Ellora’s projects, why not subscribe to her YouTube channel. Ellora describes her channel as such:

    Hi everybody! My name is Ellora James and I’m a University student studying Ethical Hacking. I love all things technology and digital making, and this channel is dedicated to that. I’m also mildly *obsessed* with the Raspberry Pi, so you’ll see a lot of them on this channel!

    Website: LINK

  • Star Wars Arcade Cabinet | The MagPi #105

    Star Wars Arcade Cabinet | The MagPi #105

    Reading Time: 4 minutes

    Why pay over the odds when you can build an accurate replica, and have fun doing it? For the latest issue of The MagPi Magazine, Rob Zwetsloot switches off his targeting computer to have a look.

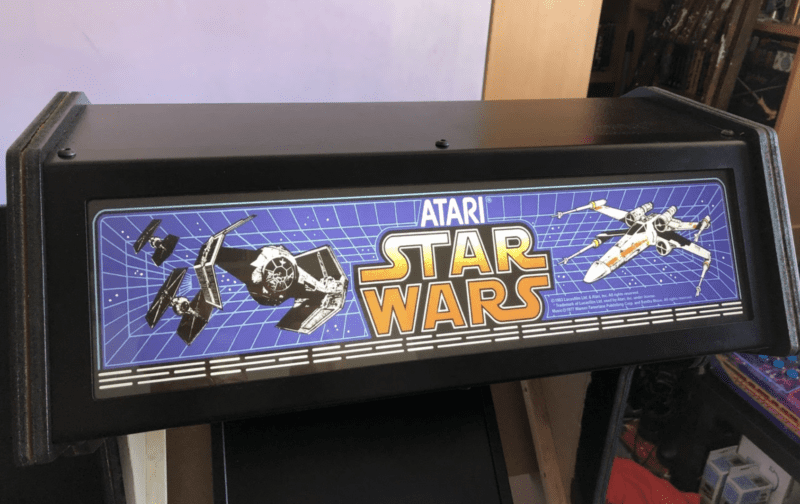
    header of the arcade cabinet bearing a Star Wars logo
    Art had to be rescaled, but it’s been done faithfully

    Getting the arcade machine of your dreams gets a little harder every day, especially the older they are. Making one, however, is always possible if you have the right skills and a Raspberry Pi.

    “My project was to build a replica, or as close as I could reasonably manage, of the Atari Star Wars arcade cabinet,” James Milroy tells us. “I really wanted to build a cockpit as that’s what I played on in the eighties, but sadly I didn’t have the room to house it, so the compromise was to build a stand-up cabinet instead.”

    The workings were simple when it came down to it: Raspberry Pi 3B+ with Pimoroni Picade X HAT. This gives us a power switch, audio amp, buttons, and a joystick if necessary. The replica yoke is interfaced with a USB adapter from the same company
    The workings were simple when it came down to it: Raspberry Pi 3B+ with Pimoroni Picade X HAT. This gives us a power switch, audio amp, buttons, and a joystick if necessary. The replica yoke is interfaced with a USB adapter from the same company

    Even then, the standard cabinet has a lot of detail, and James really nailed the look of it. Why build it from scratch, though? “Initially, I had toyed with sourcing an original cabinet and restoring it, but soon gave up on that idea after finding it nigh on impossible to source a cabinet here in the UK,” James explains. “Almost all cabinets for sale were located in the USA, so they were out of the question due to the high cost of shipping. Atari only made just over 12,500 cabinets worldwide, so their rarity meant that they commanded top dollar, effectively putting them out of my price range. It was at this point that I decided that if it was going to happen, then I would have to make it myself.”

    star wars arcade cabinet full length shot

    Making a cabinet is hard enough, but the control system would have to be an original Atari yoke. “The Atari yoke is considered the ‘holy grail’ of controllers and, again, is very hard to find,” James says. “My prayers were answered in October 2018 when a thread on a forum I was subscribed to popped up with a small Utah-based startup aiming to supply replica yokes at a realistic price to the arcade community. I grabbed two of these (one for my friend) and the project was on.”

    Good feeling

    When it came to actually emulating the game, for James there was only one choice: “My decision to go with a Raspberry Pi was a no-brainer really. I had previously made a bartop cabinet using a Raspberry Pi 3 and RetroPie/EmulationStation which I was really pleased with. So I had a platform that I already had experience with and knew was more than capable of emulating the one game I needed to run. Besides, the simplicity and low cost of the ecosystem for Raspberry Pi far outweighs the extra expense and effort required going down the PC route.”

    The riser was a custom build by James that emulates lights from the films
    The riser was a custom build by James that emulates lights from the film

    With a custom build and emulation, authenticity of the gameplay experience could be a bit off. However, that’s not the case here. “I think that it plays just like the real arcade machine mainly due to the inclusion of the replica yoke controller, and adding your credit by pressing the button on the coin door,” says James. “Ideally a vector monitor or a CRT would go a long way to making it look just like the original, but a reasonable representation is possible on an LCD using shaders and anti-aliasing. Gameplay does seem to get really hard really quick, though; this could be due to an imperfect emulation, but is more likely due to my reactions having dulled somewhat in the last 38 years!”

    Always in motion

    While the current build is amazing as it is, James does have some ideas to improve it. “Overall, I’m really pleased with the way the cabinet has worked out,” he says. “I will be replacing Raspberry Pi 3B+ with a Raspberry Pi 4 to enable me to run a newer version of MAME which will hopefully offer a better emulation, sort some audio glitching I get with my current setup, and hopefully enable some graphical effects (such as bloom and glow) to make it look more like its running on a CRT.”

    Get your copy of The Magpi #105 now!

    You can grab the brand-new issue right now online from the Raspberry Pi Press store, or via our app on Android or iOS. You can also pick it up from supermarkets and newsagents, but make sure you do so safely while following all your local guidelines. There’s also a free PDF you can download.

    Website: LINK

  • Raspberry Pi Zero W turns iPod Classic into Spotify music player

    Raspberry Pi Zero W turns iPod Classic into Spotify music player

    Reading Time: 4 minutes

    Recreating Apple’s iconic iPod Classic as a Spotify player may seem like sacrilege but it works surprisingly well, finds Rosie Hattersley. Check out the latest issue of The MagPi magazine (pg 8 – 12) for a tutorial to follow if you’d like to create your own.

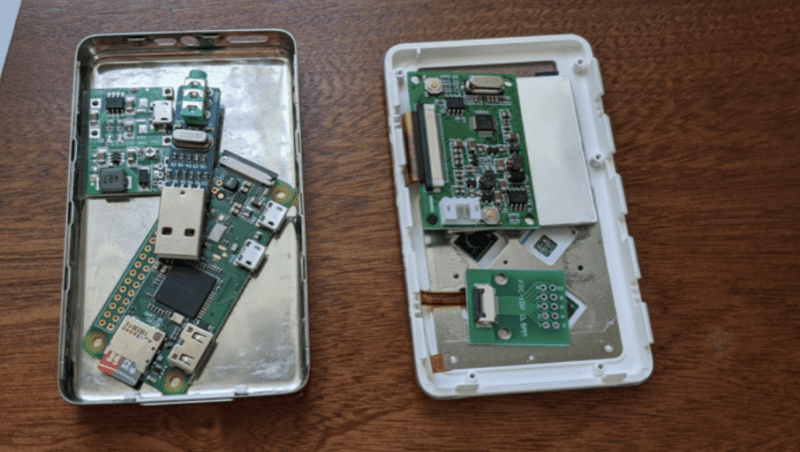
    Replacement Raspberry Pi parts laying inside an empty iPod case to check they will fit
    Replacement Raspberry Pi parts laying inside an empty iPod case to check they will fit

    When the original iPod was launched, the idea of using it to run anything other than iTunes seemed almost blasphemous. The hardware remains a classic, but our loyalties are elsewhere with music services these days. If you still love the iPod but aren’t wedded to Apple Music, Guy Dupont’s Spotify hack makes a lot of sense. “It’s empowering as a consumer to be able to make things work for me – no compromises,” he says. His iPod Classic Spotify player project cost around $130, but you could cut costs with a different streaming option.

    “I wanted to explore what Apple’s (amazing) original iPod user experience would feel like in a world where we have instant access to tens of millions of songs. And, frankly, it was really fun to take products from two competitors and make them interact in an unnatural way.” 

    Guy Dupont

    Installing the C-based haptic code on Raspberry Pi Zero, and connecting Raspberry Pi, display, headers, and leads
    Installing the C-based haptic code on Raspberry Pi Zero, and connecting Raspberry Pi, display, headers, and leads

    Guy’s career spans mobile phone app development, software engineering, and time in recording studios in Boston as an audio engineer, so a music tech hack makes sense. He first used Raspberry Pi for its static IP so he could log in remotely to his home network, and later as a means of monitoring his home during a renovation project. Guy likes using Raspberry Pi when planning a specific task because he can “program [it] to do one thing really well… and then I can leave it somewhere forever”, in complete contrast to his day job. 

    Mighty micro

    Guy seems amazed at having created a Spotify streaming client that lives inside, and can be controlled by, an old iPod case from 2004. He even recreated the iPod’s user interface in software, right down to the font. A ten-year-old article about the click wheel provided some invaluable functionality insights and allowed him to write code to control it in C. Guy was also delighted to discover an Adafruit display that’s the right size for the case, doesn’t expose the bezels, and uses composite video input so he could drive it directly from Raspberry Pi’s composite out pins, using just two wires. “If you’re not looking too closely, it’s not immediately obvious that the device was physically modified,” he grins.

    All replacement parts mounted in the iPod case
    All replacement parts mounted in the iPod case

    Guy’s retro iPod features a Raspberry Pi Zero W. “I’m not sure there’s another single-board computer this powerful that would have fit in this case, let alone one that’s so affordable and readily available,” he comments. “Raspberry Pi did a miraculous amount of work in this project.” The user interface is a Python app, while Raspberry Pi streams music from Spotify via Raspotify, reads user input from the iPod’s click wheel, and drives a haptic motor – all at once. 

    Guy managed to use a font for the music library that looks almost exactly the same as Apple’s original
    Guy managed to use a font for the music library that looks almost exactly the same as Apple’s original

    Most of the hardware for the project came from Guy’s local electronics store, which has a good line in Raspberry Pi and Adafruit components. He had a couple of attempts to get the right size of haptic motor, but most things came together fairly easily after a bit of online research. Help, when he needed it, was freely given by the Raspberry Pi community, which Guy describes as “incredible”.

    Things just clicked 

    Guy previously used Raspberry Pi to stream albums around his home
    Guy previously used Raspberry Pi to stream albums around his home

    Part of the fun of this project was getting the iPod to run a non-Apple streaming service, so he’d also love to see versions of the iPod project using different media players. You can follow his instructions on GitHub.

    Next, Guy intends to add a DAC (digital to analogue converter) for the headphone jack, but Bluetooth works for now, even connecting from inside his jacket pocket, and he plans to get an external USB DAC in time. 

    Website: LINK

  • Kay-Berlin Food Computer | The MagPi #104

    Kay-Berlin Food Computer | The MagPi #104

    Reading Time: 4 minutes

    In the latest issue of The MagPi Magazine, out today, Rob Zwetsloot talks to teacher Chris Regini about the incredible project his students are working on.

    When we think of garden automation, we often think of basic measures like checking soil moisture and temperature. The Kay-Berlin Food Computer, named after student creators Noah Kay and Noah Berlin, does a lot more than that. A lot more.

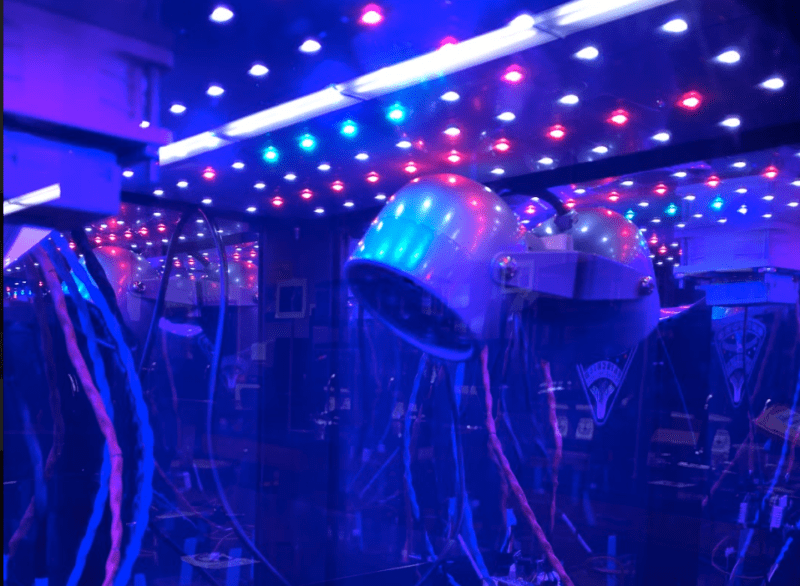
    At night, an IR LED floodlight allows for infrared camera monitoring via a Raspberry Pi NoIR Camera Module
    At night, an IR LED floodlight allows for infrared camera monitoring via a Raspberry Pi NoIR Camera Module

    “It is a fully automated growth chamber that can monitor over a dozen atmospheric and root zone variables and post them to an online dashboard for remote viewing,” Chris Regini tells us. He’s supervising both Noahs in this project. “In addition to collecting data, it is capable of adjusting fan speeds based on air temperature and humidity, dosing hydroponic reservoirs with pH adjustment and nutrient solutions via peristaltic pumps, dosing soil with water based on moisture sensor readings, adjusting light spectra and photoperiods, and capturing real-time and time-lapsed footage using a [Raspberry Pi] Camera Module NoIR in both daylight and night-time growth periods.”

    Everything can be controlled manually or set to be autonomous. This isn’t just keeping your garden looking nice, this is the future of automated farming.

    All the data is used for automation, but it’s accessible to students for manual control
    All the data is used for automation, but it’s accessible to students for manual control

    Seeds of knowledge

    “The idea originated from the long standing MIT food computer project and lots of open-source collaboration in both the agriculture and Raspberry Pi communities,” Chris explains. “We’ve always had the hopes of creating an automated growing system that could collect long-term data for use in the ISS during space travel or in terrestrial applications where urbanisation or climate concerns required the growth of food indoors.”

    With students doing a lot of learning from home in the past year, having such a system accessible online for interaction was important for Chris: “Adding a layer that could keep students engaged in this endeavour during remote learning was the catalyst that truly spurred on our progress.”

    “All data is viewable in real time and historically,
    “All data is viewable in real time and historically,

    This level of control and web accessibility is perfect for Raspberry Pi, which Chris, his students, and his Code Club have been using for years.

    “The fact that we had access to the GPIOs for sensors and actuators as well as the ability to capture photo and video was great for our application,” Chris says. “Being able to serve the collected data and images to the web, as well as schedule subroutines via systemd, made it the perfect fit for accessing our project remotely and having it run time-sensitive programs.”

    There are six plants in the box, allowing for a lot of data collection
    There are six plants in the box, allowing for a lot of data collection

    The computer has been in development for a while, but the students working on it have a wide range of skills that have made it possible.

    “We have had a dedicated nucleus of students that have spent time learning plant science, electronic circuitry, Python, developing UIs, and creating housings in CAD,” Chris explains. “They all started as complete beginners and have benefited greatly from the amazing tutorials available to them through the Raspberry Pi Foundation website as well as the courses offered on FutureLearn.”

    Grow beyond

    “The entire system has a network of sensors... which monitor atmospheric variables of air temperature, humidity, CO2, O2, and air pressure.
    The entire system has a network of sensors which monitor atmospheric variables of air temperature,
    humidity, CO2, O2, and air pressure.

    The project is ongoing – although they’re already getting a lot of data that is being used for citizen science.

    “The system does a fantastic job collecting data and allowing us to visualise it via our Adafruit IO+ dashboards,” Chris says. “Upgrading our sensors and actuators to more reliable and accurate models has allowed the system to produce research level data that we are currently sharing in a citizen science project called Growing Beyond Earth. It is funded by NASA and is organised through Fairchild Botanical Gardens. We have been guided along the way by industry professionals in the field of hydroponics and have also collaborated with St. Louis-based MARSfarm to upgrade the chamber housing, reflective acrylic panels, and adjustable RGBW LED panel.  Linking our project with scientists, engineers, researchers, and entrepreneurs has allowed it to really take off.”

    Get your copy of The Magpi #104 now!

    You can grab the brand-new issue right now online from the Raspberry Pi Press store, or via our app on Android or iOS. You can also pick it up from supermarkets and newsagents, but make sure you do so safely while following all your local guidelines. There’s also a free PDF you can download.

    MagPi 104 cover

    Website: LINK

  • #MonthOfMaking is back in The MagPi 103!

    #MonthOfMaking is back in The MagPi 103!

    Reading Time: 3 minutes

    Hey folks, Rob from The MagPi here! I hope you’ve been doing well. Despite how it feels, a brand-new March is just around the corner. Here at The MagPi, we like to celebrate March with our annual #MonthOfMaking event, where we want to motivate you to get making.

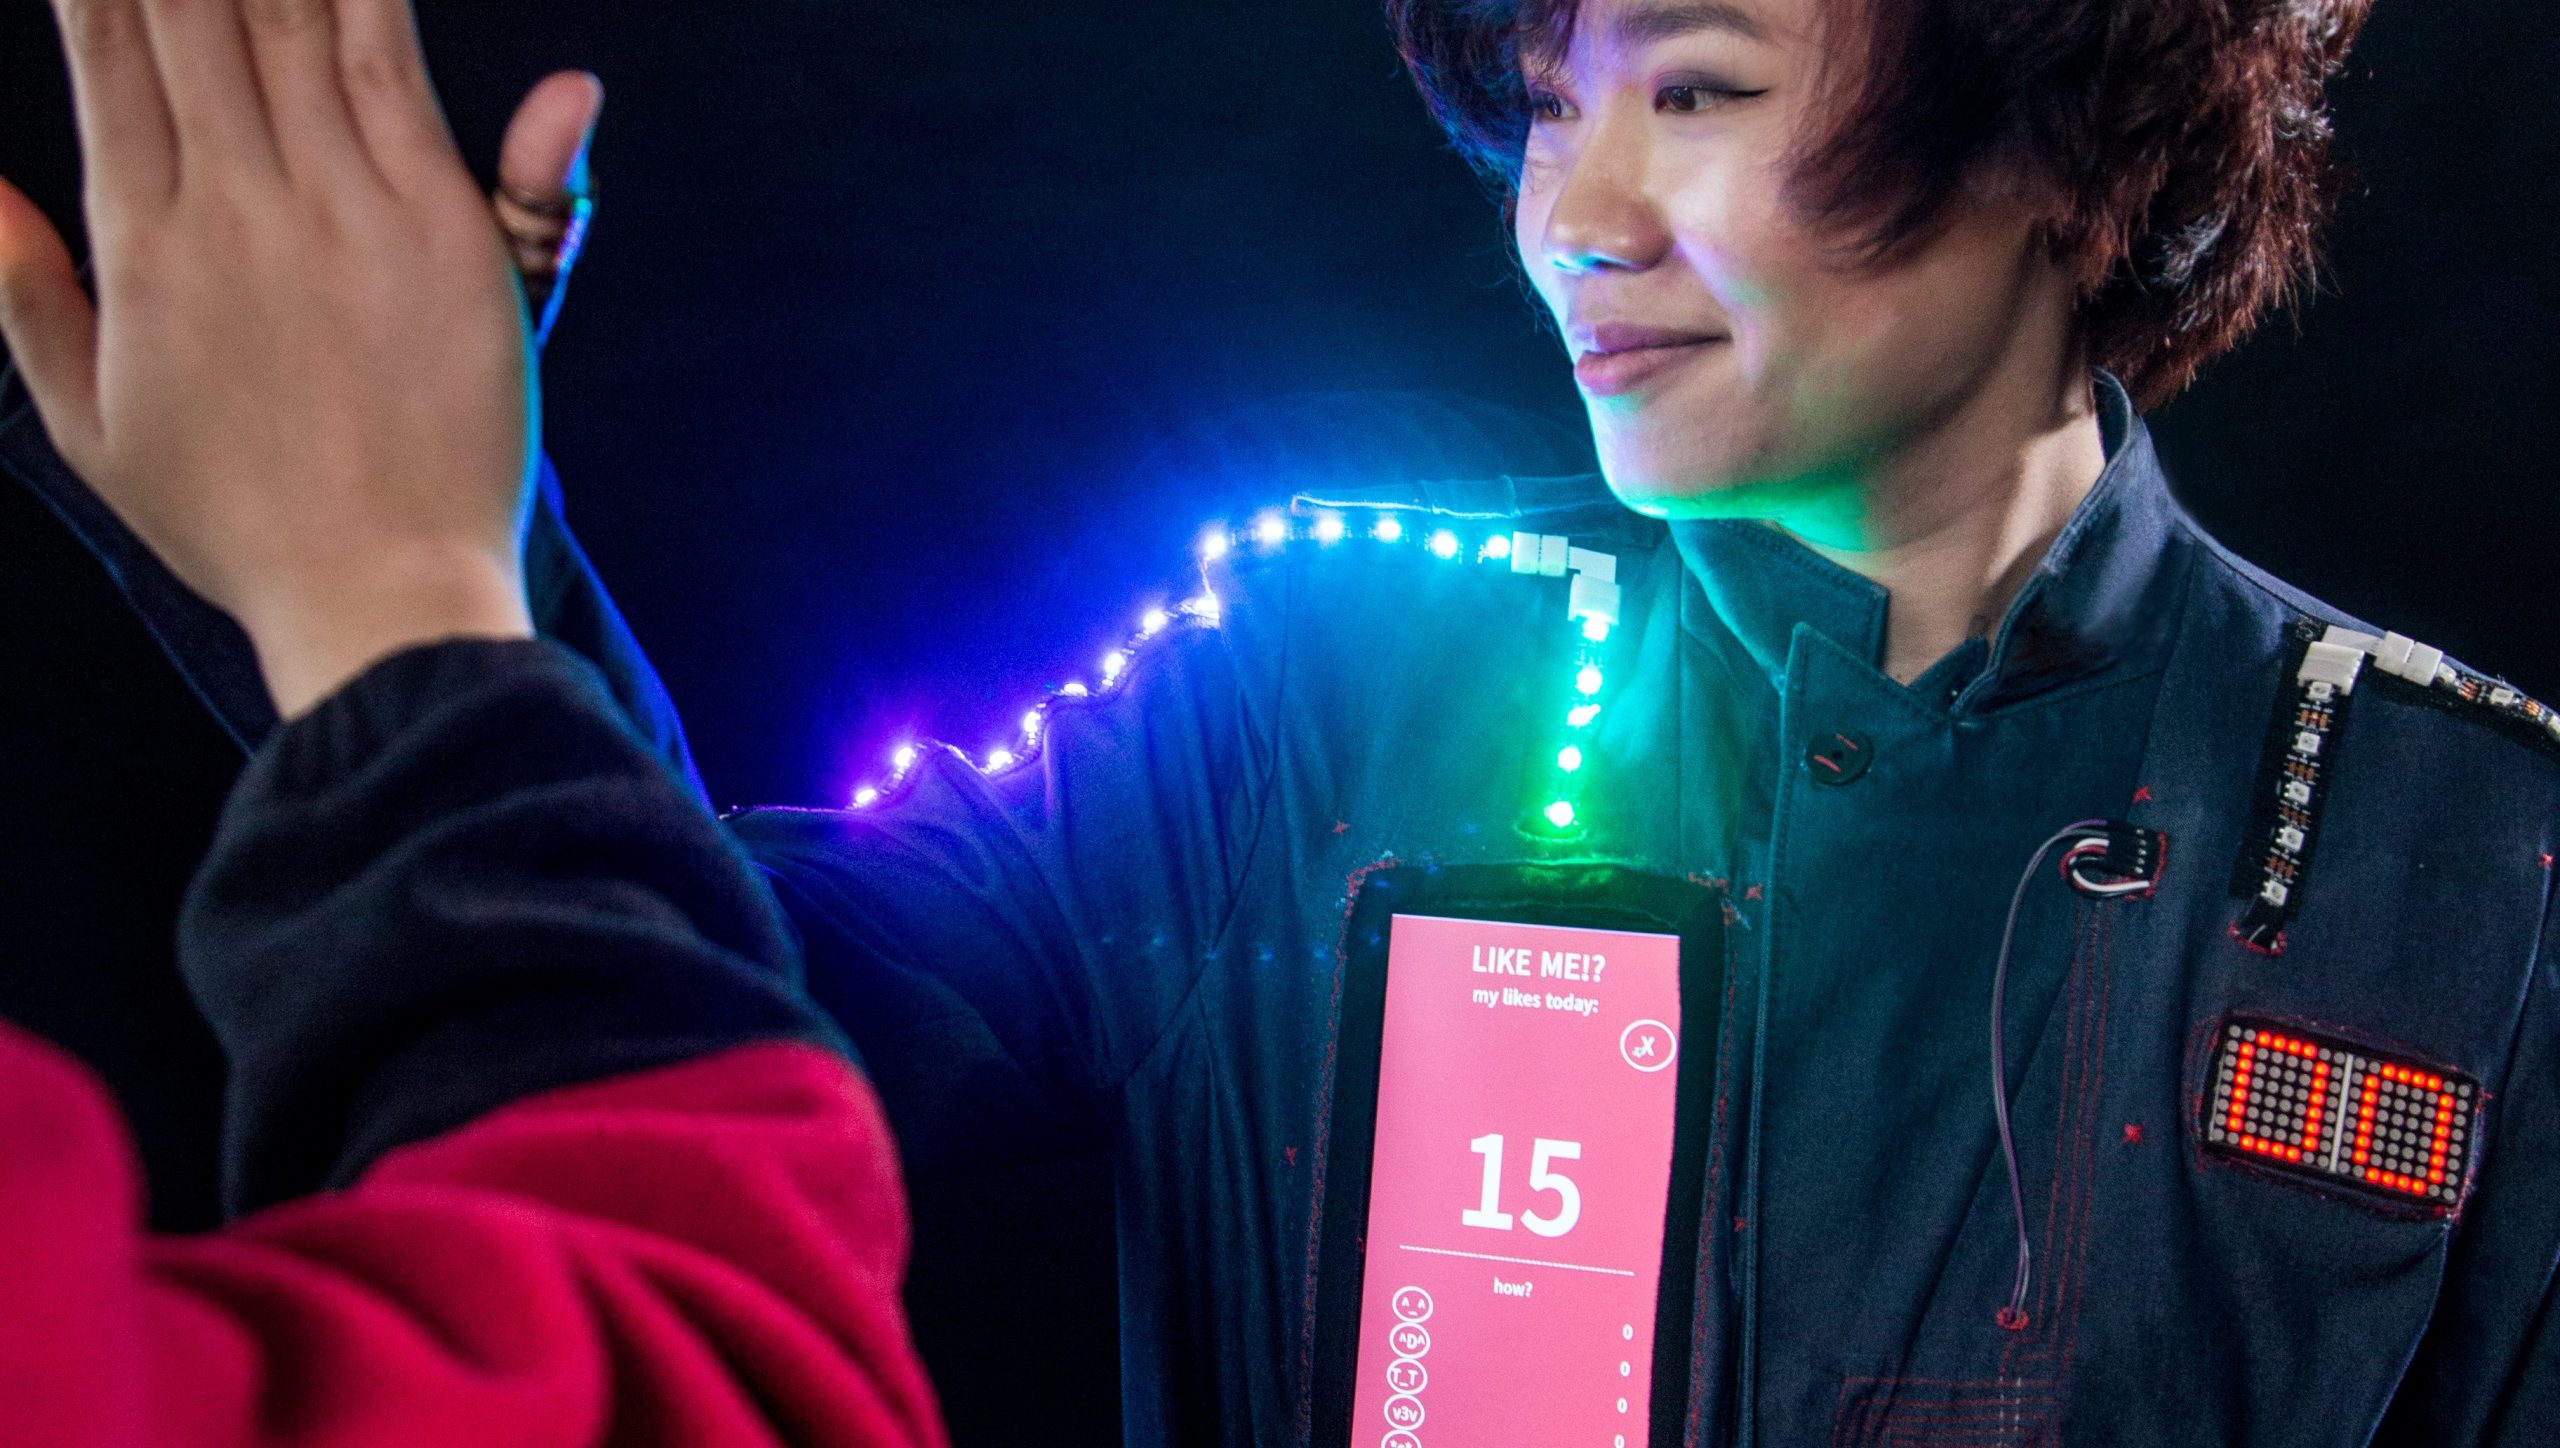
    A MonthOfMaking project: Someone wearing a wearable tech project featuring LEDs, a two-digit LED matrix, and a tablet screen. The person is high-fiving someone who is out of view.
    You could make tech you can wear

    But what should I make?

    Making what? Anything you want. Flex your creative building skills with some programming, or circuity, or woodworking, metalwork, knitting, baking, photography, and whatever else you’ve been wanting to try out. Just make it, and share it with the hashtag #MonthOfMaking.

    A MonthOfMaking project: a wildlife camera camouflaged in branches
    You could make something to hide in nature while you capture… nature

    In The MagPi 103 we have a big feature on alternative ways you can make — at least alternative to what we usually cover in the magazine. From sewing and embroidery to recycling and animation, we hope you’ll be inspired to try something new.

    Try something new with Raspberry Pi Pico

    I’ve got a few projects lined up myself, including some Raspberry Pi Pico stuff I’ve been mulling over.

    A MonthOfMaking project: a homemade chandelier consisting of glass bottles and an LED ring
    You could make a chandelier light fitting out of drinks bottles?!

    Speaking of: we also show you some easy Raspberry Pi Pico projects to celebrate its recent release! You’ll discover all the ways you can get started with and learn more about Raspberry Pi’s first microcontroller.

    All this and our usual selection of articles on weather maps, on-air lights, meme generators, hardware reviews, and much more is packed into issue 103!

    A MonthOfMaking project: two Nintendo Game Boys, one of them hacked with two extra buttons and a colour display
    Maybe you could tinker with some old tech

    Get The MagPi 103 now

    You can grab the brand-new issue right now online from the Raspberry Pi Press store, or via our app on Android or iOS. You can also pick it up from supermarkets and newsagents, but make sure you do so safely while following all your local guidelines.

    magpi magazine cover issue 103

    Finally, there’s also a free PDF you can download. Good luck during the #MonthOfMaking, folks! I’ll see y’all online.

    Website: LINK

  • Raspberry Pi engineers on the making of Raspberry Pi Pico | The MagPi 102

    Raspberry Pi engineers on the making of Raspberry Pi Pico | The MagPi 102

    Reading Time: 4 minutes

    In the latest issue of The MagPi Magazine, on sale now, Gareth Halfacree asks what goes into making Raspberry Pi’s first in-house microcontroller and development board.

    [youtube https://www.youtube.com/watch?v=o-tRJPCv0GA?feature=oembed&w=500&h=281]

    “It’s a flexible product and platform,” says Nick Francis, Senior Engineering Manager at Raspberry Pi, when discussing the work the Application-Specific Integrated Circuit (ASIC) team put into designing RP2040, the microcontroller at the heart of Raspberry Pi Pico

    It would have been easy to have said, well, let’s do a purely educational microcontroller “quite low-level, quite limited performance,” he tells us. “But we’ve done the high-performance thing without forgetting about making it easy to use for beginners. To do that at this price point is really good.”

    “I think we’ve done a pretty good job,” agrees James Adams, Chief Operating Officer at Raspberry Pi. “We’ve obviously tossed around a lot of different ideas about what we could include along the way, and we’ve iterated quite a lot and got down to a good set of features.”

    A board and chip

    “The idea is it’s [Pico] a component in itself,” says James. “The intent was to expose as many of the I/O (input/output) pins for users as possible, and expose them in the DIP-like (Dual Inline Package) form factor, so you can use Raspberry Pi Pico as you might use an old 40-pin DIP chip. Now, Pico is 2.54 millimetres or 0.1 inch pitch wider than a ‘standard’ 40-pin DIP, so not exactly the same, but still very similar.

    “After the first prototype, I changed the pins to be castellated so you can solder it down as a module, without needing to put any headers in. Which is, yes, another nod to using it as a component.”

    Getting the price right

    “One of the things that we’re very excited about is the price,” says James. “We’re able to make these available cheap as chips – for less than the price of a cup of coffee.”

    “It’s extremely low-cost,” Nick agrees. “One of the driving requirements right at the start was to build a very low-cost chip, but which also had good performance. Typically, you’d expect a microcontroller with this specification to be more expensive, or one at this price to have a lower specification. We tried to push the performance and keep the cost down.”

    “We’re able to make these available cheap as chips.”

    James Adams

    Raspberry Pi Pico also fits nicely into the Raspberry Pi ecosystem: “Most people are doing a lot of the software development for this, the SDK (software development kit) and all the rest of it, on Raspberry Pi 4 or Raspberry Pi 400,” James explains. “That’s our primary platform of choice. Of course, we’ll make it work on everything else as well. I would hope that it will be as easy to use as any other microcontroller platform out there.”

    Eben Upton on RP2040

    “RP2040 is an exciting development for Raspberry Pi because it’s Raspberry Pi people making silicon,” says Eben Upton, CEO and co-founder of Raspberry Pi. “I don’t think other people bring their A-game to making microcontrollers; this team really brought its A-game. I think it’s just beautiful.

    Is Pico really that small, or is Eben a giant?

    “What does Raspberry Pi do? Well, we make products which are high performance, which are cost-effective, and which are implemented with insanely high levels of engineering attention to detail – and this is that. This is that ethos, in the microcontroller space. And that couldn’t have been done with anyone else’s silicon.”

    Issue #102 of The MagPi Magazine is out NOW

    MagPi 102 cover

    Never want to miss an issue? Subscribe to The MagPi and we’ll deliver every issue straight to your door. Also, if you’re a new subscriber and get the 12-month subscription, you’ll get a completely free Raspberry Pi Zero bundle with a Raspberry Pi Zero W and accessories.

    Website: LINK

  • The Stargate | The MagPi 101

    The Stargate | The MagPi 101

    Reading Time: 4 minutes

    Fans of the Stargate SG-1 series, prepare to be inspired: a fellow aficionado has fashioned his own model of the show’s iconic portal. Nicola King takes an interstellar trip in the latest issue of The MagPi Magazine.

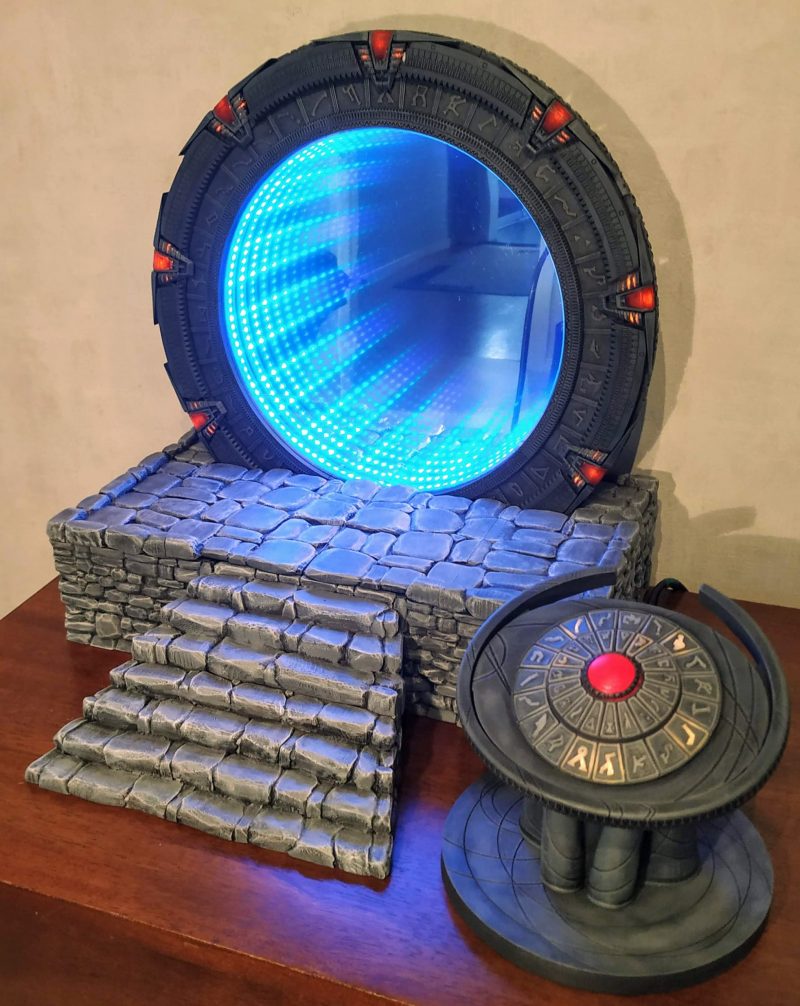
    A mini version of the Stargate from TV sat on a table. Blue glowing light emits from the fake tunnel

    When Kristian Tysse began making some projects on his new 3D printer, he soon became aware that the possibility of printing his own ‘working’ Stargate SG-1 model was within his grasp at last. “I suddenly realised I might now have enough knowledge about 3D printing, Raspberry Pi, motors, and programming to actually make a Stargate model of my own,” he tells us. “I wanted people who are familiar with the show to immediately know what it was, and tried to make it work as best I could, while staying as true as possible to the feeling and essence of the TV show.”

    Raspberry Pi buried in the wires powering the mini stargate

    Kristian also wanted to use a Raspberry Pi within this fully interactive, light-up, moving-parts project as “it is a powerful device with lots of flexibility. I do like that it functions as a full computer with an operating system with all the possibility that brings.”

    Model minutiae

    The back of the stargate controller with no lights on

    You only have to look at the model to see just how much 3D printing was needed to get all of the parts ready to piece together, and Kristian created it in segments. But one of the key parts of his model is the DHD or Dial Home Device which viewers of the series will be familiar with. “The DHD functions as a USB keyboard and, when the keys are used, it sends signals to the (Python) program on Raspberry Pi that engages the different motors and lights in a proper Stargate way,” he enthuses. “If a correct set of keys/symbols are pressed on the DHD, the wormhole is established – illustrated on my Stargate with an infinity mirror effect.” 

    “I wanted people who are familiar with the show to immediately know what it was”

    Kristian Tysse

    However, the DHD was a challenge, and Kristian is still tweaking it to improve how it works. He admits that writing the software for the project was also tricky, “but when I think back, the most challenging part was actually making it ‘functional’, and fitting all the wires and motors on it without destroying the look and shape of the Stargate itself.”

    Dazzling detail

    A close up of the stargate control panel with glowing orange touch buttons

    Kristian admits to using a little artistic licence along the way, but he is keen to ensure the model replicates the original as far as possible. “I have taken a few liberties here and there. People on the social media channels are quick to point out differences between my Stargate and the one in the series. I have listened to most of those and done some changes. I will implement some more of those changes as the project continues,” he says. He also had to redesign the project several times, and had a number of challenges to overcome, especially in creating the seven lit, moving chevrons: “I tried many different approaches before I landed on the right one.”

    The results of Kristian’s time-intensive labours are truly impressive, and show what you can achieve when you are willing to put in the hours and the attention to detail. Take a look at Kristian’s extremely detailed project page to see more on this super-stellar make.

    Issue #101 of The MagPi Magazine out NOW

    The front cover of the magazine featuring Raspberry Pi 400

    Never want to miss an issue? Subscribe to The MagPi and we’ll deliver every issue straight to your door. Also, if you’re a new subscriber and get the 12-month subscription, you’ll get a completely free Raspberry Pi Zero bundle with a Raspberry Pi Zero W and accessories.

    Website: LINK

  • 100 Raspberry Pi moments

    100 Raspberry Pi moments

    Reading Time: 4 minutes

    The official Raspberry Pi magazine turned 100 this month! To celebrate, the greatest Raspberry Pi moments, achievements, and events that The MagPi magazine has ever featured came back for a special 100th issue.

    100 Raspberry Pi Moments is a cracking bumper feature (starting on page 32 of issue 100, if you’d like to read the whole thing) highlighting some influential projects and educational achievements, as well as how our tiny computers have influenced pop culture. And since ’tis the season, we thought we’d share the How Raspberry Pi made a difference section to bring some extra cheer to your festive season.

    The Raspberry Pi Foundation was originally launched to get more UK students into computing. Not only did it succeed at that, but the hardware and the Foundation have also managed to help people in other ways and all over the world. Here are just a few examples!

    Computers for good

    The Raspberry Pi Foundation provides free learning resources for everyone; however, not everyone has access to a computer to learn at home. Thanks to funding from the Bloomfield Trust and in collaboration with UK Youth and local charities, the Foundation has been able to supply hundreds of Raspberry Pi Desktop Kits to young people most in need. The computers have allowed these children, who wouldn’t have been able to otherwise, to learn from home and stay connected to their schools during lockdown. The Foundation’s work to distribute Raspberry Pi computers to young people in need is ongoing.

    Elsewhere, a need for more medical equipment around the world resulted in many proposals and projects being considered for cheap, easy-to produce machines. Some included Raspberry Pi Zero, with 40,000 of these sold for ventilator designs.

    Offline learning

    While there’s no global project or standard to say what an offline internet should contain, some educational projects have tried to condense down enough online content for specific people and load it all onto a Raspberry Pi. RACHEL-Pi is one such solution. The RACHEL-PI kit acts as a server, hosting a variety of different educational materials for all kinds of subjects, as well as an offline version of Wikipedia with 6000 articles. There’s even medical info for helping others, math lessons from Khan Acadamy, and much more.

    The RACHEL sites are available in English, French, and Spanish

    17,000 ft is another great project, which brings computing to schools high up in the Himalayas through a similar method in an attempt to help children stay in their local communities.

    Young learners in red jackets and baseball caps using tablets to learn in a Himalayan school
    Ladakh is a desert-like region up a mountain that can easily shut down during the winter

    Education in other countries

    The free coding resources available on our projects site are great, and the Raspberry Pi Foundation works to make them accessible to people whose first language isn’t English: we have a dedicated translation team and, thanks to volunteers around the world, provide our free resources translated into up to 32 other languages. From French and Welsh to Korean and Arabic, there’s a ton of projects that learners from all over the world can access in their first language.

    And through the Code Club and CoderDojo programmes, the Foundation supports volunteers around the world to run free coding clubs for young people.

    A Raspberry Pi lab in Kuma Adamé, Togo that Dominique Laloux helped create and update
    A Raspberry Pi lab in Kuma Adamé, Togo, that Dominique Laloux helped create and update

    That’s not all: several charitable groups have set up Raspberry Pi classrooms to bring computing education to poorer parts of the world. People in African countries and parts of rural India have benefited from these programmes, and work is being done to widen access to ever more people and places.

    Pocket FM

    The Pocket FM is far smaller than traditional transmitters, and therefore easy to move into the country and set up

    The HAM radio community loves Raspberry Pi for amateur radio projects; however, sometimes people need radio for more urgent purposes. In 2016, German group Media in Cooperation and Transition created the Pocket FM 96 , micro radio transmitters with 4–6km range. These radios allowed Syrians in the middle of a civil war to connect to free media on Syrnet for more reliable news.

    There are a number of independent radio stations that transmit through Pocket FM
    There are a number of independent radio stations that transmit through Pocket FM

    Raspberry Pi powered these transmitters, chosen because of how easy it is to upgrade and add components to. Each transmitter is powered by solar power, and Syrnet is still transmitting through them as the war continues into its tenth year.

    Website: LINK

  • The MagPi #100: celebrate 100 amazing moments from Raspberry Pi history

    The MagPi #100: celebrate 100 amazing moments from Raspberry Pi history

    Reading Time: 3 minutes

    Hey there, folks, Rob from The MagPi here! I hope you’ve all been doing OK.

    Today we celebrate the 100th issue of The MagPi, the official Raspberry Pi magazine!

    Flat view of the special front cover of the magazine featuring a big red number 100

    Most of you probably know that The MagPi didn’t start off official, though: eight and a half years ago, intrepid community members came together to create The MagPi as a fanzine, and it ran as one for 30 issues (plus one special) until early 2015, when it became part of Raspberry Pi and went official.

    Officially official

    An orange rover robot which looks a bit like a dog with wheels and a cute smiling face

    For 70 issues now, the rest of the team and I have worked hard to bring Raspberry Pi fans a monthly magazine packed full of amazing content from the global Raspberry Pi (and wider maker) community. In the last six-ish years, I’ve built robots with you, stuffed Raspberry Pi Zeros into games controllers, lit up my Christmas tree, written far too many spooky puns, gone stargazing, recorded videos for numerous Raspberry Pi launches, and tried to help everyone who wanted to get their hands on the (in)famous issue 40.

    Celebrating a milestone

    Hand held gaming devices which look like traditional Game Boys

    I could go on, but I already have: for issue 100 we’re celebrating 100 incredible moments in Raspberry Pi history, from its humble beginnings to becoming the third best-selling computer ever, and one of the few to be on the International Space Station.

    One of those moments was the release of Raspberry Pi 400, an incredibly cool model of Raspberry Pi that elicited a few ‘oohs’ and ‘aahs’ from me when mine arrived in the post. We give it the full MagPi breakdown with benchmarks and interviews, courtesy of our good friend Gareth Halfacree.

    How to get issue 100

    Photos of ten Christmas themed projects and short blurbs linking to longer articles about them

    But wait, there’s more! We’ve managed to squeeze in our usual array of projects, tutorials, reviews, and community reports as well. Expect cool robots, funky guitars, handheld console building guides, and case reviews.

    You can buy The MagPi 100 right this very moment from the online Raspberry Pi Press store, get it on our app for Android or iOS, or even just download the PDF.

    Subscription offers!

    Never want to miss an issue? Subscribe to The MagPi and we’ll deliver every issue straight to your door. Also, if you’re a new subscriber and get the 12-month subscription, you’ll get a completely free Raspberry Pi Zero bundle with a Raspberry Pi Zero W and accessories.

    I really think you’ll like this issue. Here’s to another 100.

    A gif of Patrick Stewart saying But the future is left for us to write

    Website: LINK

  • Mars Clock

    Mars Clock

    Reading Time: 4 minutes

    A sci-fi writer wanted to add some realism to his fiction. The result: a Raspberry Pi-based Martian timepiece. Rosie Hattersley clocks in from the latest issue of The MagPi Magazine.

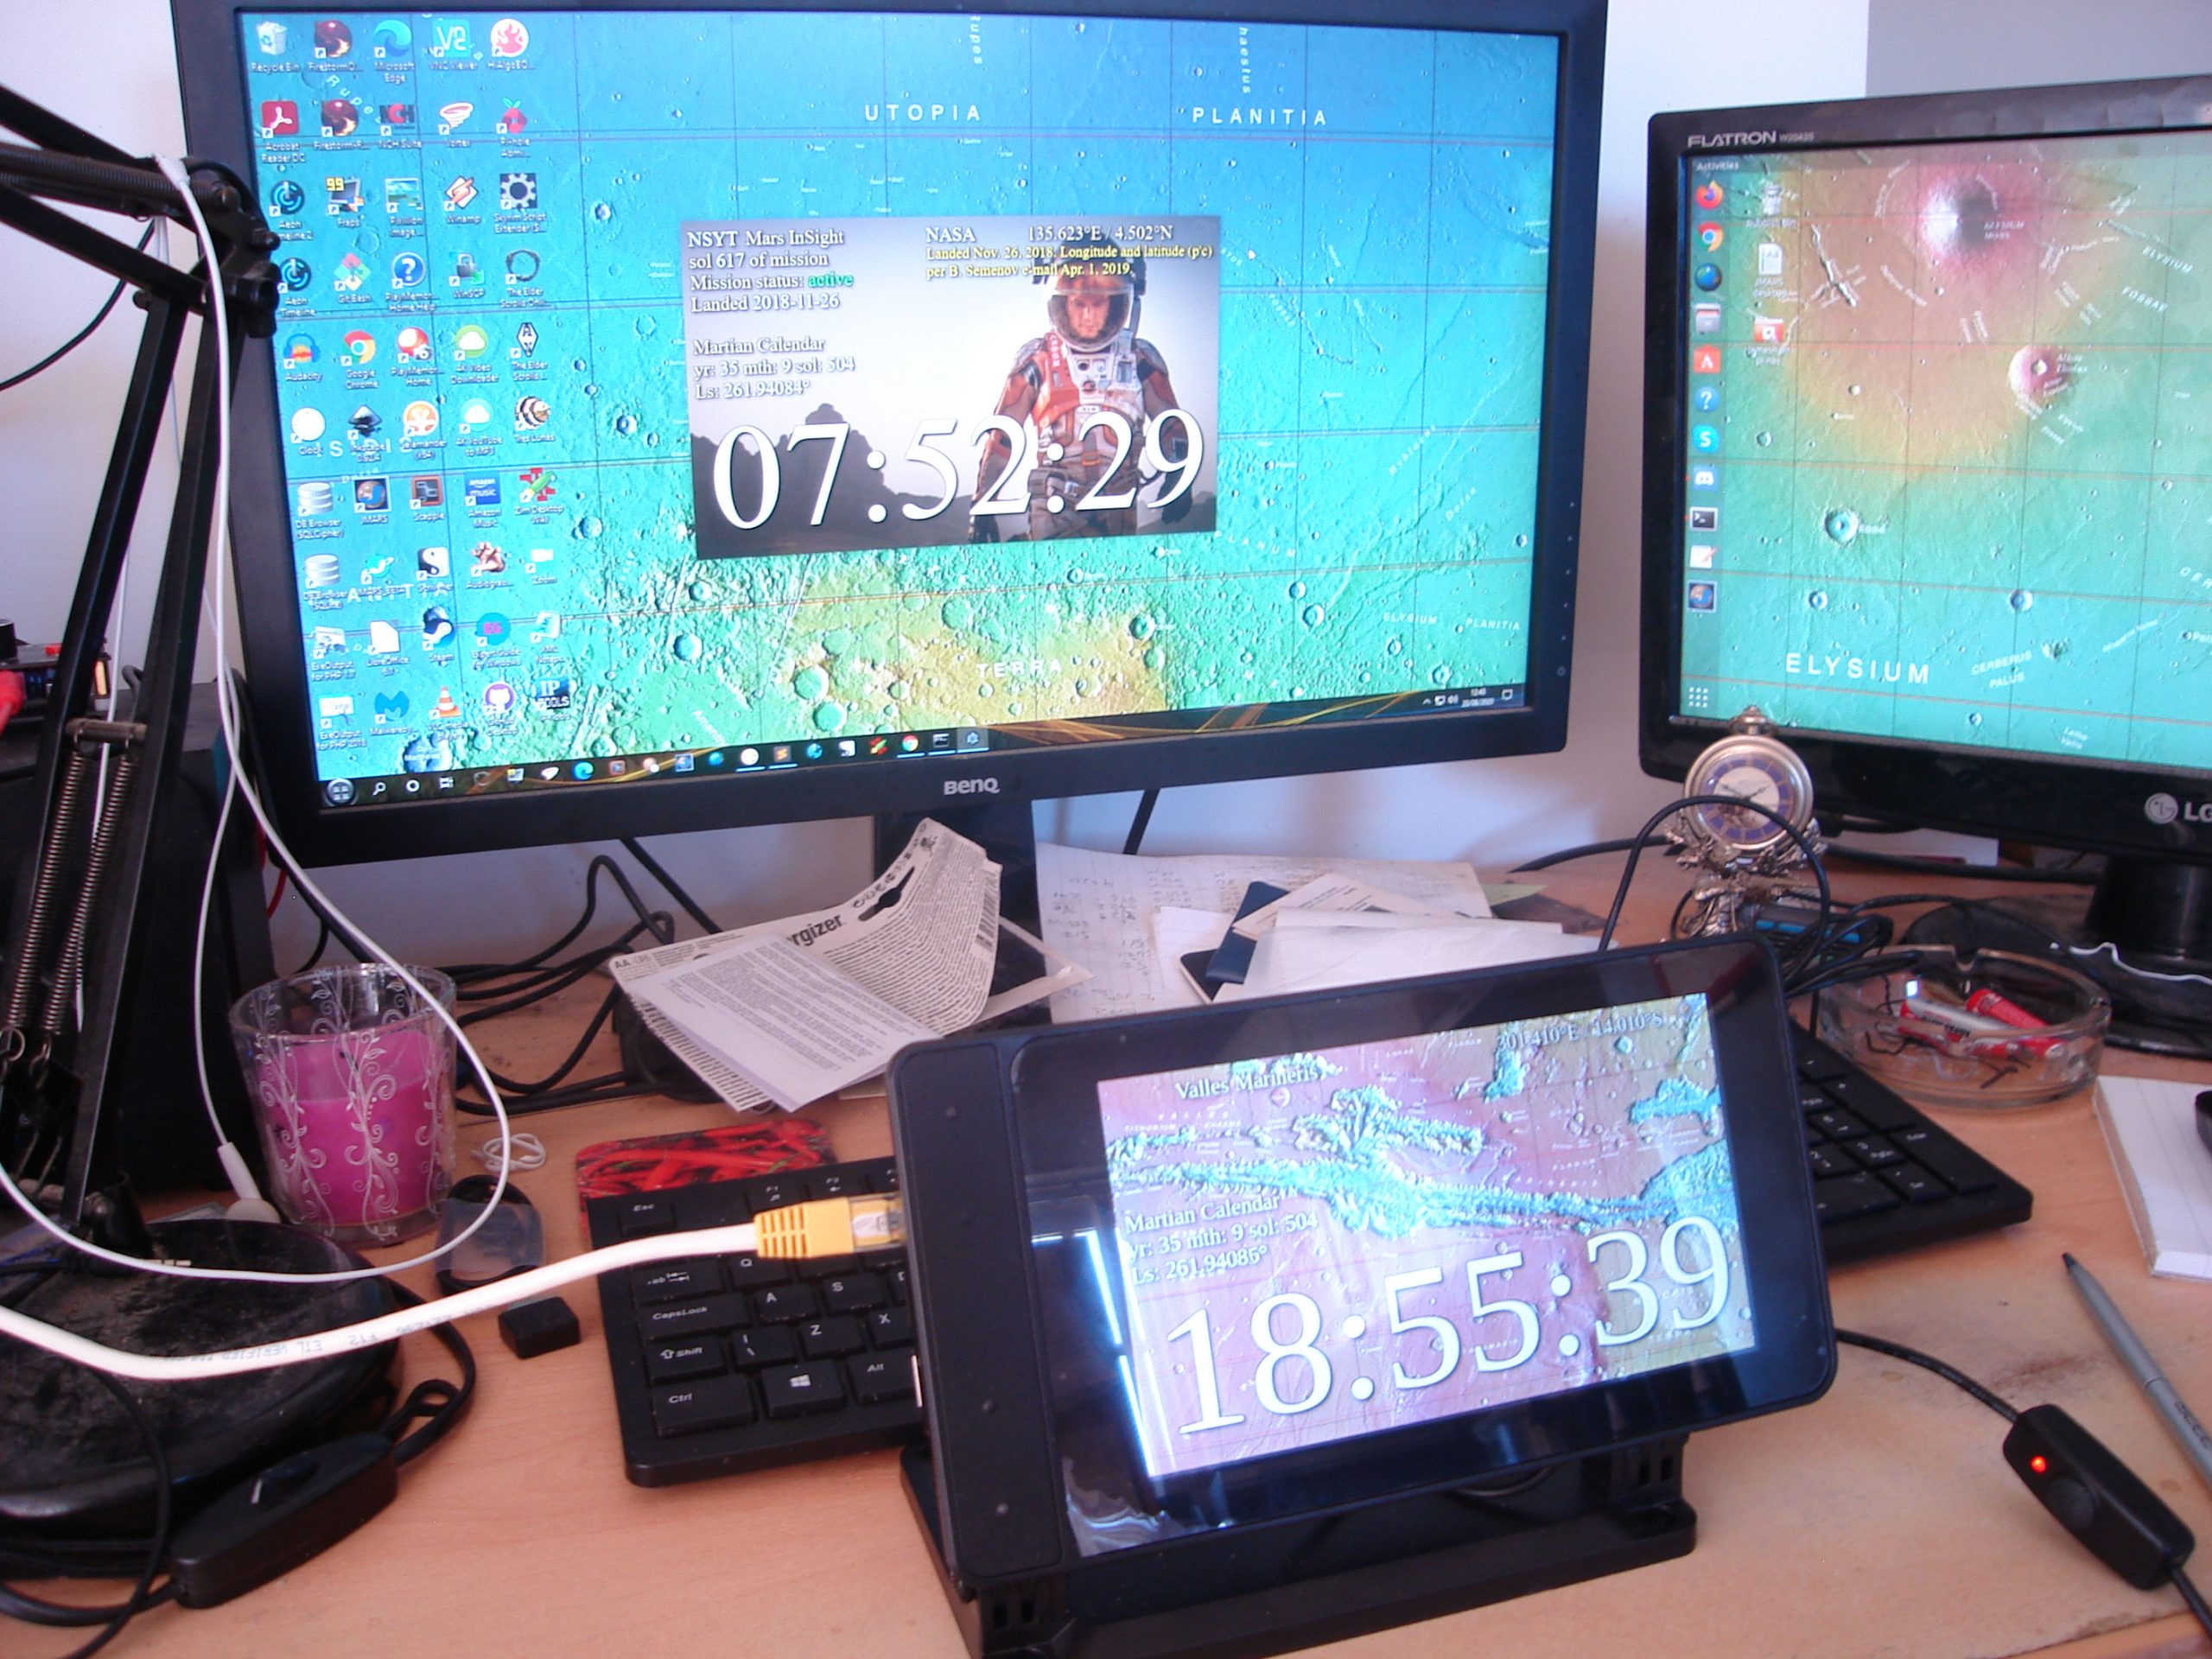
    The Mars Clock project is adapted from code Phil wrote in JavaScript and a Windows environment for Raspberry Pi

    Ever since he first clapped eyes on Mars through the eyepiece of a telescope, Philip Ide has been obsessed with the Red Planet. He’s written several books based there and, many moons ago, set up a webpage showing the weather on Mars. This summer, Phil adapted his weather monitor and created a Raspberry Pi-powered Mars Clock.

    Mission: Mars

    After writing several clocks for his Mars Weather page, Phil wanted to make a physical clock: “something that could sit on my desk or such like, and tell the time on Mars.” It was to tell the time at any location on Mars, with presets for interesting locations “plus the sites of all the missions that made it to the surface – whether they pancaked or not.”

    The projects runs on a 2GB Raspberry Pi 4 with official 7-inch touchscreen

    Another prerequisite was that the clock had to check for new mission file updates and IERS bulletins to see if a new leap second had been factored into Universal Coordinated Time.

    “Martian seconds are longer,” explains Phil, “so everything was pointing at software rather than a mechanical device. Raspberry Pi was a shoo-in for the job”. However, he’d never used one.

    “I’d written some software for calculating orbits and one of the target platforms was Raspberry Pi. I’d never actually seen it run on a Raspberry Pi but I knew it worked, so the door was already open.” He was able to check his data against a benchmark NASA provided. Knowing that the clocks on his Mars Weather page were accurate meant that Phil could focus on getting to grips with his new single-board computer.

    Phil’s Mars Weather page shows seasonal trends since March 2019.

    He chose a 2GB Raspberry Pi 4 and official-inch touchscreen with a SmartiPi Touch 2 case. “Angles are everything,” he reasons. He also added a fan to lower the CPU temperature and extend the hardware’s life. Along with a power lead, the whole setup cost £130 from The Pi Hut.

    Since his Mars Clock generates a lot of data, he made it skinnable so the user can choose which pieces of information to view at any one time. It can display two types of map – Viking or MOLA – depending on the co-ordinates for the clock. NASA provides a web map-tile service with many different data sets for Mars, so it should be possible to make the background an interactive map, allowing you to zoom in/out and scroll around. Getting these to work proved rather a headache as he hit incompatibilities with the libraries.

    Learn through experience

    Phil wrote most of the software himself, with the exception of libraries for the keyboard and FTP which he pulled from GitHub. Here’s all the code.

    The Mars Clock’s various skins show details of missions to Mars, as well as the location’s time and date

    He used JavaScript running on the Node.js/Electron framework. “This made for rapid development and is cross-platform, so I could write and test it on Windows and then move it to the Raspberry Pi,” he says. With the basic code written, Phil set about paring it back, reducing the number and duration of CPU time-slices the clock needed when running. “I like optimised software,” he explains.

    His decades as a computer programmer meant other aspects were straightforward. The hardware is more than capable, he says of his first ever experience of Raspberry Pi, and the SmartiPi case makers had done a brilliant job. Everything fit together and in just a few minutes his Raspberry Pi was working.

    The SmartiPi Touch 2 case houses Raspberry Pi 4 and a fan to cool its CPU

    Since completing his Mars Clock Phil has added a pi-hole and a NAS to his Raspberry Pi setup and says his confidence using them is such that he’s now contemplating challenging himself to build an orrery (a mechanical model of the solar system). “I have decades of programming experience, but I was still learning new things as the project progressed,” he says. “The nerd factor of any given object increases exponentially if you make it yourself.”

    The MagPi Magazine | Issue 99

    Check out page 26 in the latest issue of The MagPi Magazine for a step-by-step and to learn more about the maker, Phillip. You can read a PDF copy for free on The MagPi Magazine website if you’re not already a subscriber.

    Website: LINK

  • The Howff 3D scanning rig| The MagPi 99

    The Howff 3D scanning rig| The MagPi 99

    Reading Time: 4 minutes

    How do you create a 3D model of a historic graveyard? With eight Raspberry Pi computers, as Rob Zwetsloot discovers in the latest issue of The MagPi magazine, out now.

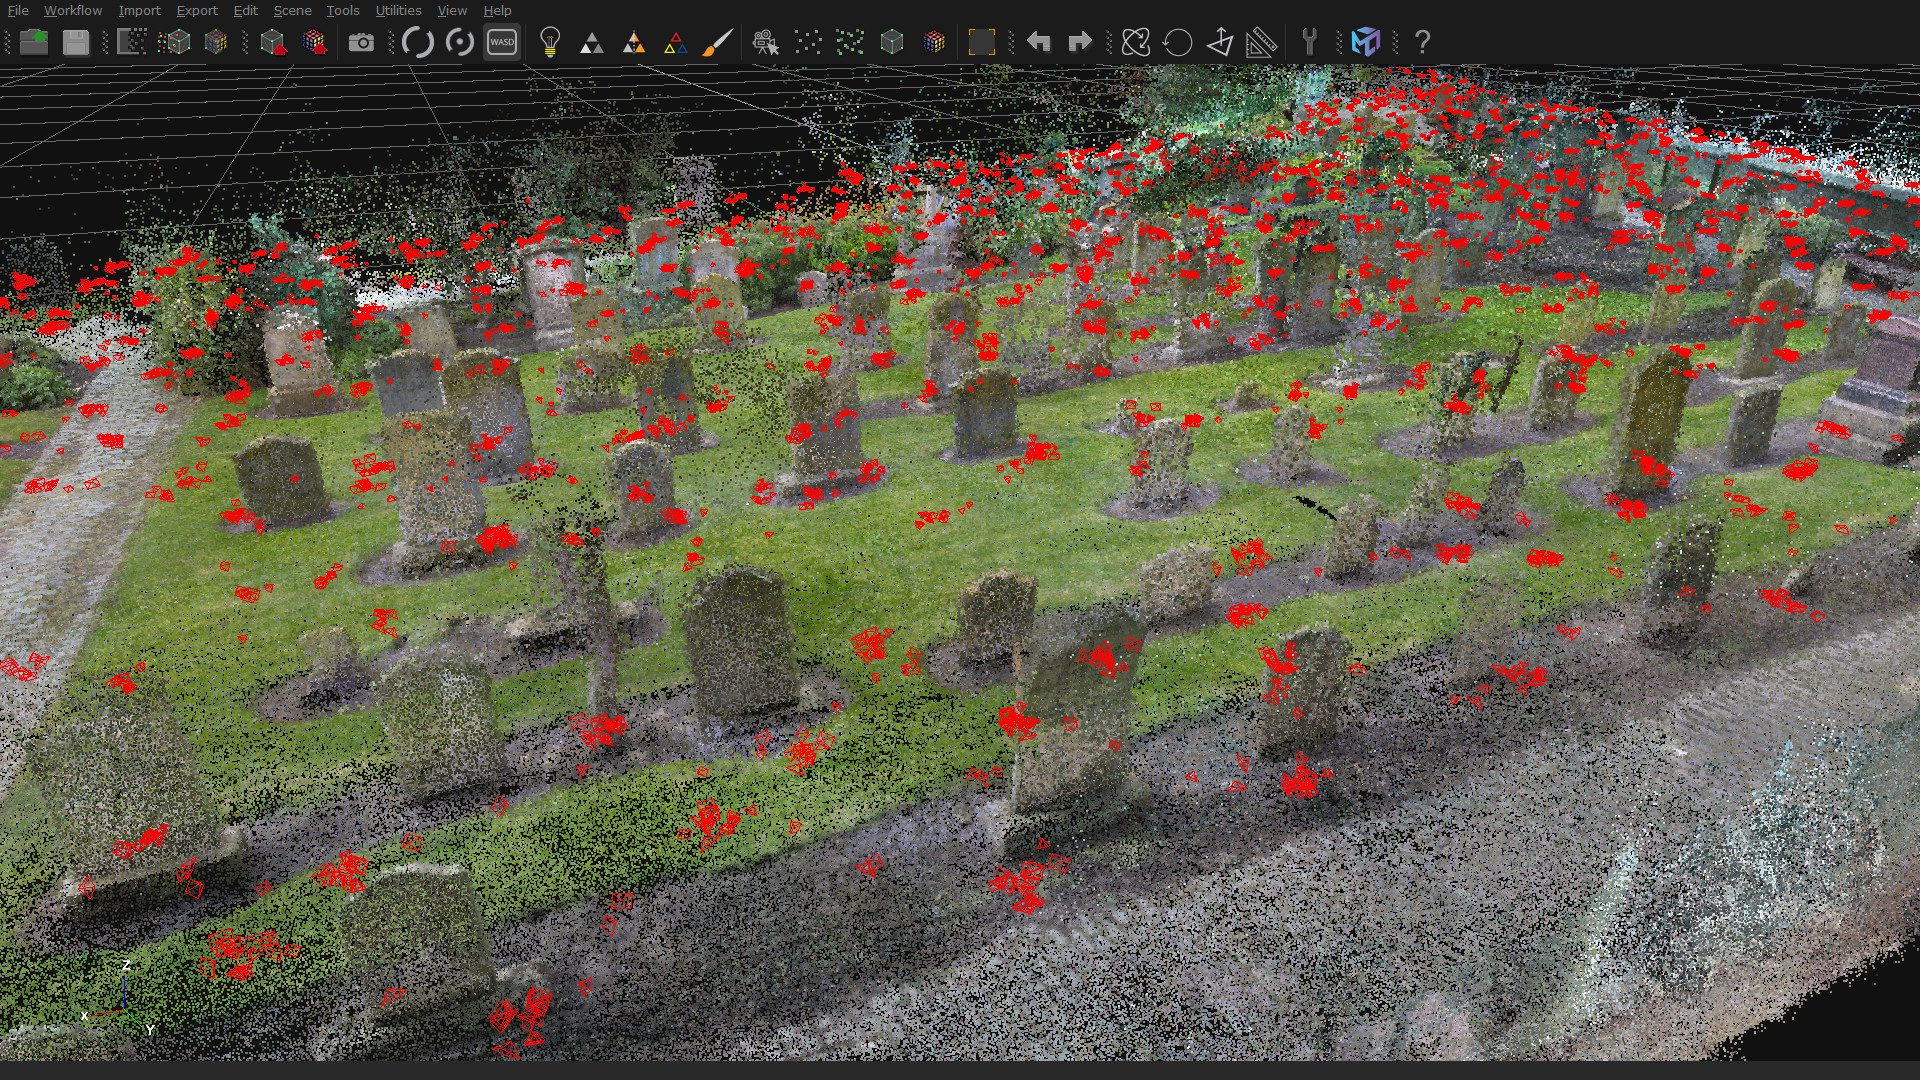
    The software builds up the 3D model of the graveyard

    “In the city centre of Dundee is a historical burial ground, The Howff,” says Daniel Muirhead. We should probably clarify that he’s a 3D artist. “This old graveyard is densely packed with around 1500 gravestones and other funerary monuments, which happens to make it an excellent technical challenge for photogrammetry photo capture.”

    This architecture, stone paths, and vibrant flora is why Daniel ended up creating a 3D-scanning rig out of eight Raspberry Pi computers. And the results are quite stunning.

    Eight Raspberry Pi computers are mounted to the ball, with cameras pointing towards the ground

    “The goal of this project was to capture photos for use in generating a 3D model of the ground,” he continues. “That model will be used as a base for attaching individual gravestone models and eventually building up a full composite model of this complex subject. The ground model will also be purposed for rendering an ultra-high-resolution map of the graveyard. The historical graveyard has a very active community group that are engaged in its study and digitisation, the Dundee Howff Conservation Group, so I will be sharing my digital outputs with them.”

    Google graveyard

    There are thousands of pictures, like this one, being used to create the model

    To move the rig throughout the graveyard, Daniel used himself as the major moving part. With the eight Raspberry Pi cameras taking a photo every two seconds, he was able to capture over 180,000 photos over 13 hours of capture sessions.

    “The rig was held above my head and the cameras were angled in such a way as to occlude me from view, so I was not captured in the photographs which instead were focused on the ground,” he explains. “Of the eight cameras, four were the regular model with 53.5 ° horizontal field of view (FoV), and the other four were a wide-angle model with 120 ° FoV. These were arranged on the rig pointing outwards in eight different directions, alternating regular and wide-angle, all angled at a similar pitch down towards the ground. During capture, the rig was rotated by +45 ° for every second position, so that the wide-angles were facing where the regulars had been facing on the previous capture, and vice versa.”
    Daniel worked according to a very specific grid pattern, staying in one spot for five seconds at a time, with the hopes that at the end he’d have every patch of ground photographed from 16 different positions and angles.

    Maker Daniel Muirhead is a 3D artist with an interest in historical architecture

    “With a lot of photo data to scan through for something fairly complex, we wondered how well the system had worked. Daniel tells us the only problems he had were with some bug fixing on his code: “The images were separated into batches of around 10,000 (1250 photos from each of the eight cameras), plugged into the photogrammetry software, and the software had no problem in reconstructing the ground as a 3D model.”

    Accessible 3D surveying

    He’s now working towards making it accessible and low-cost to others that might want it. “Low-cost in the triple sense of financial, labour, and time,” he clarifies. “I have logged around 8000 hours in a variety of photogrammetry softwares, in the process capturing over 300,000 photos with a regular camera for use in such files, so I have some experience in this area.”

    “With the current state of technology, it should be possible with around £1000 in equipment to perform a terrestrial photo-survey of a town centre in under an hour, then with a combined total of maybe three hours’ manual processing and 20 hours’ automated computer processing, generate a high-quality 3D model, the total production time being under 24 hours. It should be entirely plausible for a local community group to use such a method to perform weekly (or at least monthly) 3D snapshots of their town centre.”

    The MagPi issue 99 – Out now

    The MagPi magazine is out now, available in print from the Raspberry Pi Press onlinestore, your local newsagents, and the Raspberry Pi Store, Cambridge.

    You can also download the PDF directly from the MagPi magazine website.

    Website: LINK

  • (Raspberry) Pi Commander | The MagPi 95

    (Raspberry) Pi Commander | The MagPi 95

    Reading Time: 4 minutes

    Adrien Castel’s idea of converting an old electronic toy into a retro games machine was no flight of fancy, as David Crookes discovers

    The 1980s was a golden era for imaginative electronic toys. Children would pester their parents for a Tomytronic 3D or a Nintendo Game & Watch. And they would enviously eye anyone who had a Tomy Turnin’ Turbo Dashboard with its promise of replicating the thrill of driving (albeit without the traffic jams).

    All of the buttons, other than the joystick, are original to the toy – as are the seven red LED lights

    Two years ago, maker Matt Brailsford turned that amazing toy into a fully working Out Run arcade machine and Adrien Castel was smitten. “I loved the fact that he’d upcycled an old toy and created something that could be enjoyed as a grown-up,” he says. “But I wanted to push the simulation a bit further and I thought a flying sim could do the trick.”

    “I didn’t want to modify the look of the toy”

    Ideas began flying around Adrien’s mind. “I knew what I wanted to achieve so I made an overall plan in my head,” he recalls. First he found the perfect toy: a battery-powered Sky Fighter F-16 tabletop game made by Dival. He then decided to base his build around a Raspberry Pi 3A+. “It’s the perfect hardware for projects like this because of its flexibility,” Adrien says.

    Taking off

    The toy needed some work. Its original bright red joystick was missing and Adrien knew he’d have to replace the original screen with a TFT LCD. To do this, he 3D-printed a frame to fit the TFT display and he created a smaller base for the replacement joystick. Adrien also changed the microswitches for greater sensitivity but he didn’t go overboard with the changes.

    The games can make use of the full screen. Adrien would have liked a larger screen, but the original ratio oddly lay between 4:3 and 16:9, making a bigger display harder to find

    “I knew I would have to adapt some parts for the joystick and for the screen, but I didn’t want to modify the look of the toy,” Adrien explains. “To be honest, modifying the toy would have involved some sanding and painting and I was worried that it would ruin the overall effect of the project if it was badly executed.”

    A Raspberry Pi 3A+ sits at the heart of the Pi Commander, alongside a mini audio amplifier, and it’s wired up to components within the toy

    As such, a challenge was set. “I had to keep most of the original parts such as throttle levers and LEDs and adapt them to the new build,” he says. “This meant getting them to work together with the system and it also meant using the original PCB, getting rid of the components and re-routing the electronics to plug on the GPIOs.”

    There were some enhancements. Adrien soldered a PAM8403 3W class-D audio amplifier to Raspberry Pi and this allowed a basic speaker to replace the original for better sound. But there were some compromises too.

    The original PCB was used and the electronics were re-routed. All the components need to work between 3.3 to 5V with the lowest possible amperage while fitting into a tight space

    “At first I thought the screen could be bigger than the one I used, but the round shape of the cockpit didn’t give much space to fit a screen larger than four inches.” He also believes the project could be improved with a better joystick: “The one I’ve used is a simple two-button arcade stick with a jet fighter look.”

    Flying high

    By using the retro gaming OS Recalbox (based on EmulationStation and RetroArch), however, he’s been able to perfect the overall feel. “Recalbox allowed me to create a custom front end that matches the look of a jet fighter,” he explains. It also means the Pi Commander plays shoot-’em-up games alongside open-source simulators like FlightGear (flightgear.org). “It’s a lot of fun.”

    Read The MagPi for free!

    Find more fantastic projects, tutorials, and reviews in The MagPi #93, out now! You can get The MagPi #95 online at our store, or in print from all good newsagents and supermarkets. You can also access The MagPi magazine via our Android and iOS apps.

    Don’t forget our super subscription offers, which include a free gift of a Raspberry Pi Zero W when you subscribe for twelve months.

    And, as with all our Raspberry Pi Press publications, you can download the free PDF from our website.

    Website: LINK

  • Monitoring bees with a Raspberry Pi and BeeMonitor

    Monitoring bees with a Raspberry Pi and BeeMonitor

    Reading Time: 4 minutes

    Keeping an eye on bee life cycles is a brilliant example of how Raspberry Pi sensors help us understand the world around us, says Rosie Hattersley

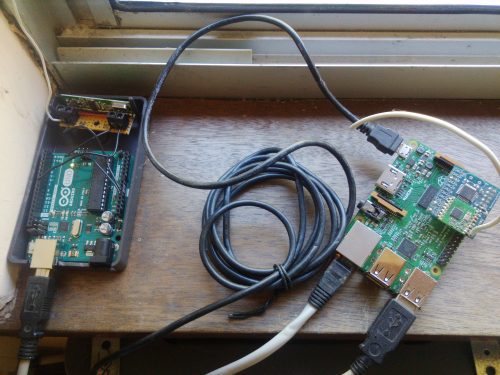
    The setup featuring an Arduino, RF receiver, USB cable and Raspberry Pi

    Getting to design and build things for a living sounds like a dream job, especially if it also involves Raspberry Pi and wildlife. Glyn Hudson has always enjoyed making things and set up a company manufacturing open-source energy monitoring tools shortly after graduating from university. With access to several hives at his keen apiarist parents’ garden in Snowdonia, Glyn set up BeeMonitor using some of the tools he used at work to track the beehives’ inhabitants.

    Glyn bent down infront of a hive checking the original BeeMonitor setup

    Glyn checking the original BeeMonitor setup

    “The aim of the project was to put together a system to monitor the health of a bee colony by monitoring the temperature and humidity inside and outside the hive over multiple years,” explains Glyn. “Bees need all the help and love they can get at the moment and without them pollinating our plants, weíd struggle to grow crops. They maintain a 34∞C core brood temperature (± 0.5∞C) even when the ambient temperature drops below freezing. Maintaining this temperature when a brood is present is a key indicator of colony health.”

    Wi-Fi not spot

    BeeMonitor has been tracking the hives’ population since 2012 and is one of the earliest examples of a Raspberry Pi project. Glyn built most of the parts for BeeMonitor himself. Open-source software developed for the OpenEnergyMonitor project provides a data-logging and graphing platform that can be viewed online.

    Spectators in protective suits watching staff monitor the beehive

    BeeMonitor complete with solar panel to power it. The Snowdonia bees produce 12 to 15 kg of honey per year

    The hives were too far from the house for WiFi to reach, so Glyn used a low-power RF sensor connected to an Arduino which was placed inside the hive to take readings. These were received by a Raspberry Pi connected to the internet.

    Diagram showing what information BeeMonitor is trying to establish

    Diagram showing what information BeeMonitor is trying to establish

    At first, there was both a DS18B20 temperature sensor and a DHT22 humidity sensor inside the beehive, along with the Arduino (setup info can be found here). Data from these was saved to an SD card, the obvious drawback being that this didn’t display real-time data readings. In his initial setup, Glyn also had to extract and analyse the CSV data himself. “This was very time-consuming but did result in some interesting data,” he says.

    Sensor-y overload

    Almost as soon as BeeMonitor was running successfully, Glyn realised he wanted to make the data live on the internet. This would enable him to view live beehive data from anywhere and also allow other people to engage in the data.

    “This is when Raspberry Pi came into its own,” he says. He also decided to drop the DHT22 humidity sensor. “It used a lot of power and the bees didn’t like it – they kept covering the sensor in wax! Oddly, the bees don’t seem to mind the DS218B20 temperature sensor, presumably since it’s a round metal object compared to the plastic grille of the DHT22,” notes Glyn.

    Bees interacting with the temperature probe

    Unlike the humidity sensor, the bees don’t seem to mind the temperature probe

    The system has been running for eight years with minimal intervention and is powered by an old car battery and a small solar PV panel. Running costs are negligible: “Raspberry Pi is perfect for getting projects like this up and running quickly and reliably using very little power,” says Glyn. He chose it because of the community behind the hardware. “That was one of Raspberry Pi’s greatest assets and what attracted me to the platform, as well as the competitive price point!” The whole setup cost him about £50.

    Glyn tells us we could set up a basic monitor using Raspberry Pi, a DS28B20 temperature sensor, a battery pack, and a solar panel.

    Website: LINK

  • The Raspberry Pi Press store is looking mighty fine

    The Raspberry Pi Press store is looking mighty fine

    Reading Time: 3 minutes

    Eagle-eyed Raspberry Pi Press fans might have noticed some changes over the past few months to the look and feel of our website. Today we’re pleased to unveil a new look for the Raspberry Pi Press website and its online store.

    Did you know?

    Raspberry Pi Press is the publishing imprint of Raspberry Pi (Trading) Ltd, which is part of the Raspberry Pi Foundation, a UK-based charity that does loads of cool stuff with computers and computer education.

    Did you also know?

    Raspberry Pi Press publishes five monthly magazines: The MagPi, HackSpace Magazine, Wireframe, Custom PC, and Digital SLR Photography. It also produces a plethora of project books and gorgeous hardback beauties, such as retro gamers’ delight Code the Classics, as well as Hello World, the computing and digital making magazine for educators! Phew!

    And did you also, also know?

    The Raspberry Pi Press online store ships around the globe, with copies of our publications making their way to nearly every single continent on planet earth. Antarctica, we’re looking at you, kid.

    It’s upgrade time!

    With all this exciting work going on, it seemed only fair that Raspberry Pi Press should get itself a brand new look. We hope you’ll enjoy skimming the sparkling shelves of our online newsagents and bookshop.

    Ain’t nothin’ wrong with a little tsundoku

    You can pick up all the latest issues of your favourite magazines or treat yourself to a book or three, and you can also subscribe to all our publications with ease. We’ve even added a few new payment options to boot.

    New delivery options

    We’ve made a few changes to our shipping options, with additional choices for some regions to make sure that you can easily track your purchases and receive timely and reliable deliveries, even if you’re a long way from the Raspberry Pi Press printshop.

    Customers in the UK, the EU, North America, Australia, and New Zealand won’t see any changes to delivery options. We continue to work to make sure we’re offering the best price and service we can for everyone, no matter where you are.

    Have a look and see what you think!

    So hop on over to the new and improved Raspberry Pi Press website to see the changes for yourself. And if you have any feedback, feel free to drop Oli and the team an email at [email protected].

    Website: LINK

  • How to work from home with Raspberry Pi | The Magpi 93

    How to work from home with Raspberry Pi | The Magpi 93

    Reading Time: 7 minutes

    If you find yourself working or learning, or simply socialising from home, Raspberry Pi can help with everything from collaborative productivity to video conferencing. Read more in issue #92 of The MagPi, out now.

    01 Install the camera

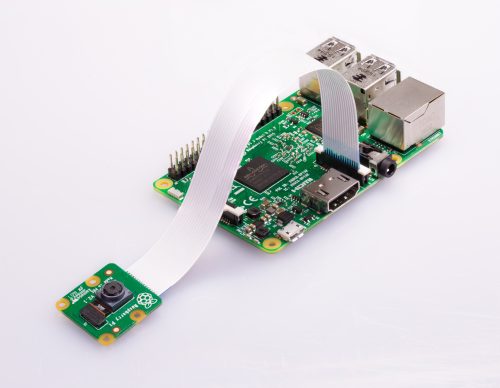
    If you’re using a USB webcam, you can simply insert it into a USB port on Raspberry Pi. If you’re using a Raspberry Pi Camera Module, you’ll need to unpack it, then find the ‘CAMERA’ port on the top of Raspberry Pi – it’s just between the second micro-HDMI port and the 3.5mm AV port. Pinch the shorter sides of the port’s tab with your nails and pull it gently upwards. With Raspberry Pi positioned so the HDMI ports are at the bottom, insert one end of the camera’s ribbon cable into the port so the shiny metal contacts are facing the HDMI port. Hold the cable in place, and gently push the tab back home again.

    If the Camera Module doesn’t have the ribbon cable connected, repeat the process for the connector on its underside, making sure the contacts are facing downwards towards the module. Finally, remove the blue plastic film from the camera lens.

    02 Enable Camera Module access

    Before you can use your Raspberry Pi Camera Module, you need to enable it in Raspbian. If you’re using a USB webcam, you can skip this step. Otherwise, click on the raspberry menu icon in Raspbian, choose Preferences, then click on Raspberry Pi Configuration.

    When the tool loads, click on the Interfaces tab, then click on the ‘Enabled’ radio button next to Camera. Click OK, and let Raspberry Pi reboot to load your new settings. If you forget this step, Raspberry Pi won’t be able to communicate with the Camera Module.

    03 Set up your microphone

    If you’re using a USB webcam, it may come with a microphone built-in; otherwise, you’ll need to connect a USB headset, a USB microphone and separate speakers, or a USB sound card with analogue microphone and speakers to Raspberry Pi. Plug the webcam into one of Raspberry Pi’s USB 2.0 ports, furthest away from the Ethernet connector and marked with black plastic inners.

    Right-click on the speaker icon at the top-right of the Raspbian desktop and choose Audio Inputs. Find your microphone or headset in the list, then click it to set it as the default input. If you’re using your TV or monitor’s speakers, you’re done; if you’re using a headset or separate speakers, right-click on the speaker icon and choose your device from the Audio Outputs menu as well.

    04 Set access permissions

    Click on the Internet icon next to the raspberry menu to load the Chromium web browser. Click in the address box and type hangouts.google.com. When the page loads, click ‘Sign In’ and enter your Google account details; if you don’t already have a Google account, you can sign up for one free of charge.

    When you’ve signed in, click Video Call. You’ll be prompted to allow Google Hangouts to access both your microphone and your camera. Click Allow on the prompt that appears. If you Deny access, nobody in the video chat will be able to see or hear you!

    05 Invite friends or join a chat

    You can invite friends to your video chat by writing their email address in the Invite People box, or copying the link and sending it via another messaging service. They don’t need their own Raspberry Pi to participate – you can use Google Hangouts from a laptop, desktop, smartphone, or tablet. If someone has sent you a link to their video chat, open the message on Raspberry Pi and simply click the link to join automatically.

    You can click the microphone or video icons at the bottom of the window to temporarily disable the microphone or camera; click the red handset icon to leave the call. You can click the three dots at the top-right to access more features, including switching the chat to full-screen view and sharing your screen – which will allow guests to see what you’re doing on Raspberry Pi, including any applications or documents you have open.

    06 Adjust microphone volume

    If your microphone is too quiet, you’ll need to adjust the volume. Click the Terminal icon at the upper-left of the screen, then type alsamixer followed by the ENTER key. This loads an audio mixing tool; when it opens, press F4 to switch to the Capture tab and use the up-arrow and down-arrow keys on the keyboard to increase or decrease the volume. Try small adjustments at first; setting the capture volume too high can cause the audio to ‘clip’, making you harder to hear. When finished, press CTRL+C to exit AlsaMixer, then click the X at the top-right of the Terminal to close it.

    Adjust your audio volume settings with the AlsaMixer tool

    Work online with your team

    Just because you’re not shoulder-to-shoulder with colleagues doesn’t mean you can’t collaborate, thanks to these online tools.

    Google Docs

    Google Docs is a suite of online productivity tools linked to the Google Drive cloud storage platform, all accessible directly from your browser. Open the browser and go to drive.google.com, then sign in with your Google account – or sign up for a new account if you don’t already have one – for 15GB of free storage plus access to the word processor Google Docs, spreadsheet Google Sheets, presentation tool Google Slides, and more. Connect with colleagues and friends to share files or entire folders, and collaborate within documents with simultaneous multi-user editing, comments, and change suggestions.

    Slack

    Designed for business, Slack is a text-based instant messaging tool with support for file transfer, rich text, images, video, and more. Slack allows for easy collaboration in Teams, which are then split into multiple channels or rooms – some for casual conversation, others for more focused discussion. If your colleagues or friends already have a Slack team set up, ask them to send you an invite; if not, you can head to app.slack.com and set one up yourself for free.

    Discord

    Built more for casual use, Discord offers live chat functionality. While the dedicated Discord app includes voice chat support, this is not yet supported on Raspberry Pi – but you can still use text chat by opening the browser, going to discord.com, and choosing the ‘Open Discord in your browser’ option. Choose a username, read and agree to the terms of service, then enter an email address and password to set up your own free Discord server. Alternatively, if you know someone on Discord already, ask them to send you an invitation to access their server.

    Firefox Send

    If you need to send a document, image, or any other type of file to someone who isn’t on Google Drive, you can use Firefox Send – even if you’re not using the Firefox browser. All files transferred via Firefox Send are encrypted, and can be protected with an optional password, and are automatically deleted after a set number of downloads or length of time. Simply open the browser and go to send.firefox.com; you can send files up to 1GB without an account, or sign up for a free Firefox account to increase the limit to 2.5GB.

    GitHub

    For programmers, GitHub is a lifesaver. Based around the Git version control system, GitHub lets teams work on a project regardless of distance using repositories of source code and supporting files. Each programmer can have a local copy of the program files, work on them independently, then submit the changes for inclusion in the master copy – complete with the ability to handle conflicting changes. Better still, GitHub offers additional collaboration tools including issue tracking. Open the browser and go to github.com to sign up, or sign in if you have an existing account, and follow the getting started guide on the site.

    Read The MagPi for free!

    Find more fantastic projects, tutorials, and reviews in The MagPi #93, out now! You can get The MagPi #92 online at our store, or in print from all good newsagents and supermarkets. You can also access The MagPi magazine via our Android and iOS apps.

    Don’t forget our super subscription offers, which include a free gift of a Raspberry Pi Zero W when you subscribe for twelve months.

    And, as with all our Raspberry Pi Press publications, you can download the free PDF from our website.

    Website: LINK

  • Special offer for magazine readers

    Special offer for magazine readers

    Reading Time: 2 minutes

    You don’t need me to tell you about the unprecedented situation that the world is facing at the moment. We’re all in the same boat, so I won’t say anything about it other than I hope you stay safe and take care of yourself and your loved ones.

    The other thing I will say is that every year, Raspberry Pi Press produces thousands of pages of exciting, entertaining, and often educational content for lovers of computing, technology, games, and photography.

    In times of difficulty, it’s not uncommon for people to find solace in their hobbies. The problem you’ll find yourself with is that it’s almost impossible to buy a magazine at the moment, at least in the UK: most of the shops that sell them are closed (and even most of their online stores are too).

    We’re a proactive bunch, so we’ve done something about that:

    From today, you can subscribe to The MagPi, HackSpace magazine, Custom PC, or Digital SLR Photography at a cost of three issues for £10 in the UK – and we’re giving you a little extra too.

    We like to think we produce some of the best-quality magazines on the market today (and you only have to ask our mums if you want a second opinion). In fact, we’d go as far as to say our magazines are exactly the right mix of words and pictures for making the most of all the extra home-time you and your loved ones are having.

    Take your pick for three issues at £10 and get a free book worth £10!

    If you take us up on this offer, we’ll send the magazines direct to your door in the UK, with free postage. And we’re also adding a gift to thank you for signing up: on top of your magazines, you’ll get to choose a book that’s worth £10 in itself.

    In taking up this offer, you’ll get some terrific reading material, and we’ll deliver it all straight to you — no waiting around. You’ll also be actively supporting our print magazines and the charitable work of the Raspberry Pi Foundation.

    I hope that among our magazines, you’ll find something that’s of interest to you or, even better yet, something that sparks a new interest. Enjoy your reading!

    Website: LINK

  • Instaclock | The Magpi 92

    Instaclock | The Magpi 92

    Reading Time: 4 minutes

    Designed to celebrate a new home, Instaclock uses two Raspberry Pi computers to great visual effect. Rosie Hattersley introduces maker Riccardo Cereser’s eyecatching build in issue #92 of The MagPi, out now.

    There is nothing like a deadline to focus the mind! Copenhagen-based illustrator and UX designer Riccardo Cereser was about to move into a new apartment with his girlfriend, and was determined his new home would have a unique timepiece. Instaclock is the result.

    Having studied at the Copenhagen Institute of Interactive Design, Italian-born Riccardo was keen that his new apartment would include an object that reflected his skills. He began sketching out ideas in Photoshop, starting with the idea of images representing numbers. “A hand showing fingers; a bicycle wheel resembling the number 0; candles on a cake; or the countdown numbers that appear in the beginning of a recording…” he suggests.

    Having decided the idea could be used for an interactive clock, he quickly worked out how such an image-based concept might work displaying the hour, minutes, and seconds on displays in three wooden boxes.

    Next, he set off around Copenhagen. “I started taking photos of anything that could resemble a number, aiming to create sets of ten pictures each based on a specific theme,” he recalls. “I then thought how awesome it would be to be able to switch the theme and create new sets on the go, potentially by using Instagram.”

    This, Riccardo explains, is how the project became known as Instaclock. He was able to visualise his plan using Photoshop and made a prototype for his idea. It was clear that there was no need to display seconds, for example. Minute-by-minute updates would be fine.

    Getting animated

    Next up was figuring out how to call up and refresh the images displayed. Riccardo had some experience of using Raspberry Pi, and had even made a RetroPie games console. He also had a friend on the interactive design course who might just be able to help

    Creative coder Andreas Refsgaard soon got involved, and was quickly able to come up with a Processing sketch for Instaclock.

    Having spent dozens of hours looking into how an API might be used to pull in specific images for his clock, Riccardo was grateful that Andreas immediately grasped how it could be done. Riccardo then set parameters in cron for each Raspberry Pi used, so the Instaclock loaded images at startup and moved on to the next image set every ten seconds.

    Because Riccardo wanted Instaclock to be as user-friendly as possible, they also added a rule that shuts a screen down if the button on top of it is pressed for ten seconds or more. The script was one he got from The MagPi.

    Assembly time

    One of the most fun aspects of this project was the opportunity to photograph, draw, or source online images that represent numerals. It was also the most time-consuming, of course. Images reside in Dropbox folders, so can be accessed from anywhere. Deciding on a suitable set of screens to display them, and boxes or frames for them, could also have dragged on but for an impromptu visit to Ikea. Riccardo fortuitously found that the Waveshare screens he selected would fit neatly into the store’s Dragan file organiser boxes. He was then able to laser-cut protective overlays secured with tiny magnets.

    Read The MagPi for free!

    Find more fantastic projects, tutorials, and reviews in The MagPi #92, out now! You can get The MagPi #92 online at our store, or in print from all good newsagents and supermarkets. You can also access The MagPi magazine via our Android and iOS apps.

    Don’t forget our super subscription offers, which include a free gift of a Raspberry Pi Zero W when you subscribe for twelve months.

    And, as with all our Raspberry Pi Press publications, you can download the free PDF from our website.

    Website: LINK

  • El Carrillon | The MagPi 92

    El Carrillon | The MagPi 92

    Reading Time: 3 minutes

    Most Raspberry Pi projects we feature debut privately and with little fanfare – at least until they’re shared by us.

    The El Carrillon project, however, could hardly have made a more public entrance. In September 2019 it was a focal point of Argentina’s 49th annual Fiesta Nacional de la Flor (National Flower Festival), where its newly overhauled bell tower proudly rang out a brand-new, Raspberry Pi-enabled tune.

    Many years ago, festival organisers created custom hardware with a PIC (programmable interface) microcontroller to control 18 tuned bells. Each bell is associated with a musical note, from A3 to D5 with all the semitones. Until its long overdue update, the tower’s 18 bells had rung the tune to Ayer, also known as Yesterday by The Beatles. They now have a brand-new repertoire of MIDI-based tunes, including the theme from Star Wars.

    For Gerardo Richarte, the originator of the project, there was a little extra pressure: his dad is on the board of the NGO that organises Fiesta Nacional de la Flor, and challenged his son to come up with a way to update the bells so different songs could be played.

    Ringing the changes

    With the challenge accepted, Mariano Martinez Peck explains, “We chose Raspberry Pi because it was inexpensive, yet powerful enough to run Linux, Python, and VA Smalltalk. We could find ready-made HATs that actually matched the pinout of the existing flat cables without much hacking, and only a minimal amount of other hardware was needed. In addition, there was plenty of documentation, materials, tutorials, and GPIO libraries available.”

    The bells had a pre-existing driver module

    The project aim was to be able to run a mobile-friendly website within Raspberry Pi Zero that allowed control, configuration, and playback of MIDI songs on the bell tower. “In addition, we wanted to allow live playing from a MIDI keyboard,” says Mariano. The project developed as a live test and iteration update, but the final build only came together when Mariano and Gerardo’s moment in the spotlight arrived and El Carrillon rang out the first new tunes.

    Coding a classic

    The decades-old chimes were controlled by assembly code. This was superseded by Python when the team made the switch to Raspberry Pi Zero. Mariano explains, “Raspberry Pi allowed us to use Python to directly interface with both the old and new hardware and get the initial project working.”

    However, the Python code was itself replaced by object-oriented VA Smalltalk code – an environment both Mariano and Gerardo are adept at using. Mariano says, “Smalltalk’s live programming environment works really well for fast, iterative development and makes software updates quick and easy without the need for recompilation that lower-level languages [such as assembly or C/C++] would need.”

    El Carrillon’s bells can now play any MIDI file on Raspberry Pi, and the notes of the song will be mapped to the tuned bells. However, as the testing process revealed, some songs are more recognisable than others when reproduced on chimes.

    A final feature enabled Gerardo to bag some brownie points with his father-in-law. He recently added a web interface for controlling, configuring, and playing songs, meaning the bells can now be controlled remotely and the song selected via a smartphone app.

    The El Carrillon bell tower forms a striking backdrop to the flower festival and other cultural events

    Read The MagPi for free!

    Find more amazing projects and tutorials in The MagPi #92, out now! You can get The MagPi #92 online at our store, or in print from all good newsagents and supermarkets. You can also access The MagPi magazine via our Android and iOS apps.

    Don’t forget our fantastic subscription offers, which include a free gift of a Raspberry Pi Zero W when you subscribe for twelve months.

    And, as with all our Raspberry Pi Press publications, you can download the free PDF from our website.

    Website: LINK

  • The MagPi 91: #MonthOfMaking is back for 2020!

    The MagPi 91: #MonthOfMaking is back for 2020!

    Reading Time: 4 minutes

    If you read The MagPi, it’s safe to say you like making in some way. The hobby has exploded in popularity over the last few years, thanks in no small part to a burgeoning online community and the introduction of low-cost computing with Raspberry Pi.

    Last year we decided to celebrate making with a month-long online event called #MonthOfMaking. The idea was simply to get people to share what they’re making online, whatever it was. Whether you’re turning on your first LED with code or sending rockets to the moon, we want to create a space where you can share your proud achievements. So, let’s get making.

    What is #MonthOfMaking?

    #MonthOfMaking is simply an excuse to get people inspired to make something. And by make, we mean electronics, engineering, art, and craft projects. Get your creative powers buzzing and make something that you can show to the world.

    There’s no skill-level threshold to participating either. If you’ve been wanting to start learning, this can be your jumping-on point. By sharing your builds with the community, you can learn and grow. Here are some simple rules to sum it all up:

    1. Find a new project, continue with one you’re working on, or finally crack on with something you’ve been putting off.
    2. Take pictures of your build progress and share it online with the hashtag #MonthOfMaking.
    3. If you can help someone with a problem, give them a hand.
    4. Have fun!

    Getting ideas and inspiration

    We’ve all been there. Sat down at a work bench or desk, staring at some components and thinking… what can I make with this? What would I like to make? Like any other creative pursuit, you’ll need some inspiration. If the projects in the magazine haven’t inspired you, then here are some website suggestions…

    Instructables

    Instructables is one of the oldest sites out there for finding amazing project guides and ideas, and we’ve been fans of it for years. The best part is you can search by specific project types as well, including Raspberry Pi if you’d like to keep it on‑brand. They’ve recently added more arts and crafts stuff if you fancy trying your hand at knitting.

    Hackaday and Hackster

    For more serious hacks for more advanced makers, Hackaday and Hackster have some great projects that really take a deep dive into a project. If you’re curious as to the limits of electronics and programming, these may be the place to look. Equally, if you want to do something huge with a lot of computer power, they should be your first stop.

    Raspberry Pi projects

    There are so many amazing things on the Raspberry Pi projects site that can help you with your first steps in just about any field of making. It’s also home to loads of great and simple home-grown projects that are perfect for young makers and older makers alike.

    Planning your build

    Step 01 Read and understand

    Basing your build on a tutorial you’ve seen? Seen a few things you’d like to combine into something else? Always make sure to read the instructions you’ve found properly so that you know if it’s within your skill level.

    Step 02 Order supplies
    Write a list of what you need. Always double‑check you have the component you think you have. Sometimes you may need to buy from separate places, so just make sure the delivery times work for you.

    Step 03 Follow along and be safe

    Need adult supervision for a project? Absolutely get some. Even adults need to be wary, so always take safety precautions and wear protective clothing when needed. Make sure to follow any tutorials you’ve found as closely as you can.

    Read The MagPi for free!

    The rest of our #MonthOfMaking guide, along with loads more amazing projects and tutorials, can be found in The MagPi #91, out today, including our starter electronics guide! You can get The MagPi #91 online at our store, or in print from the Raspberry Pi Store in Cambridge and all good newsagents and supermarkets. You can also access The MagPi magazine via our Android and iOS apps.

    We have a new US subscription offer!

    Don’t forget our amazing subscription offers, which include a free gift of a Raspberry Pi Zero W when you subscribe for twelve months. Until the end of March, you can get a twelve-month subscription in the US for only $60! Head to magpi.cc/usa to find out more.

    And, as with all our Raspberry Pi Press publications, you can download the free PDF from our website.

    Website: LINK