
Summer is fast approaching – and that’s the perfect excuse to get building. Whether you want to spy on your local wildlife, upgrade your vegetable patch, or feed your fish when you’re off on a weekend break, Raspberry Pi and a handful of add-ons make a great starting point. The latest issue of The MagPi is packed with some of the most inspirational projects to be found. They include a smart tide monitor, which will tell you when’s the best time to hit the beach, and a clever Heater Meter that can keep an eye on your barbecue while you get on with the prep in the kitchen.
Check the tides
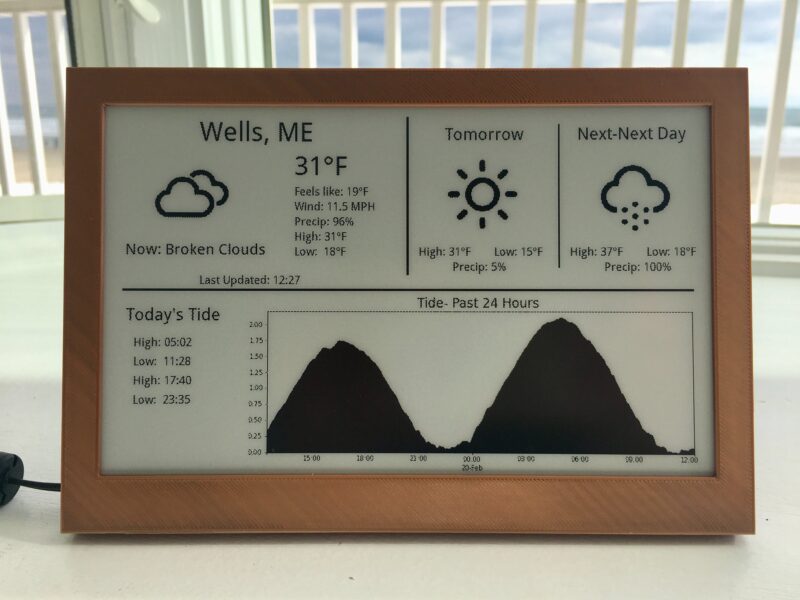
If you’re heading out for any kind of water-based activity (and that includes sitting on the beach), it helps to know whether the tide is in or out and which way it’s heading. Sam Baker’s neat e-ink tide and weather tracker uses Raspberry Pi Zero and an enormous (7.5 in) e-ink display to track the motion of the ocean and upcoming weather conditions, so you don’t arrive at the beach to find the sand submerged.
Print your own lawn-mower
The return of summer means an addition to your weekly to-do list: mowing the lawn. But not if you build a PiMowBot smart lawn-mower robot. This uses any Raspberry Pi to control an autonomous lawnmower that navigates your garden using GPS and offers optional remote control, so you can keep the lawn trimmed from the comfort of a garden chair.
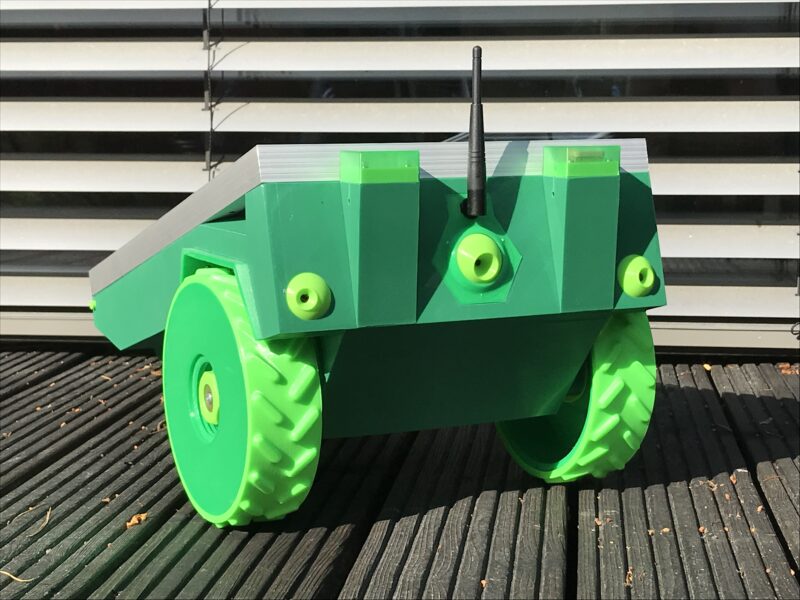
The hardware, comprising the chassis, cutterbar and so on, is solar-powered and can be 3D-printed, while the software is a €19.99 download. The OBJ (Wavefront OBJect) file patterns for the various parts you’ll need to print are a £29.46 download from Cults3d. You’ll need to buy several components to put it together, as it also relies on a number of sensors, including – aside from the GPS receiver – a temperature and humidity sensor, compass module, and Camera Module.
Although you do need to invest in quite a few parts for the PiMowBot, and spend time assembling them, the project still manages to undercut (sorry!) commercial alternatives, for which prices start at around £500, by a considerable margin.
BBQ safely
One thing that’s certain to put a dampener on a summer get-together is barbecued food that’s charred on the outside and raw in the middle. Fortunately, a lot of makers have set themselves the task of solving this problem – which they’ve done with aplomb. Tempiture pairs Raspberry Pi with a breadboard, food probe, and a handful of resistors to produce a wireless grilling thermometer which sends readings to the web. As a barbecue can take hours to get to cooking temperature, this lets you keep an eye on its progress while you’re prepping food in the kitchen.
It’s not your only option, either. PitmasterPi performs a very similar job, taking regular readings to populate a real-time dashboard, and optionally sending emails or texts at crucial moments.
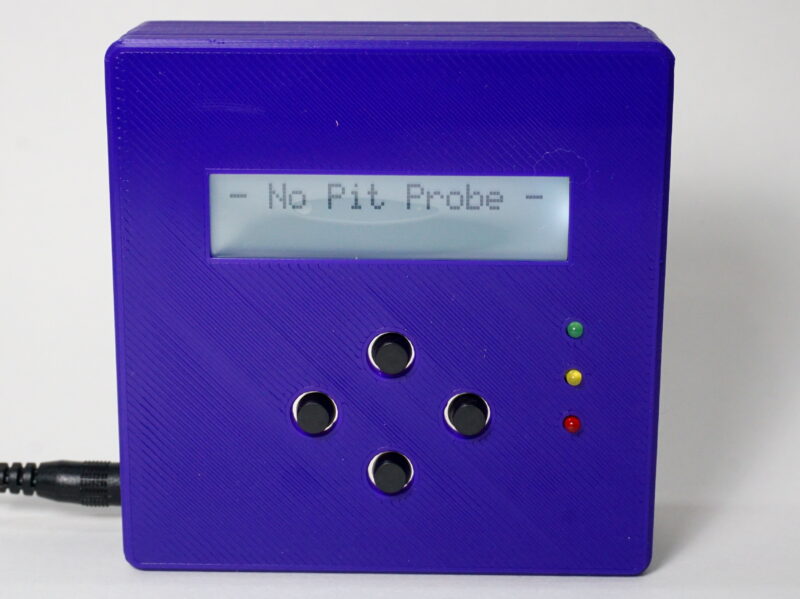
HeaterMeter pairs Raspberry Pi with an Adruino microcontroller, thermal probe, and fan to maintain perfect temperatures, with support for web streaming, graphing, and alerts. What’s particularly appealing about HeaterMeter is that you can choose different starting points for your project, depending on how confident you are. If you’re a dab hand at soldering and reading a circuit diagram, start from scratch with a kit; but if you’re just craving a burger, skip all that and opt for a fully assembled board instead.
Build a trail camera
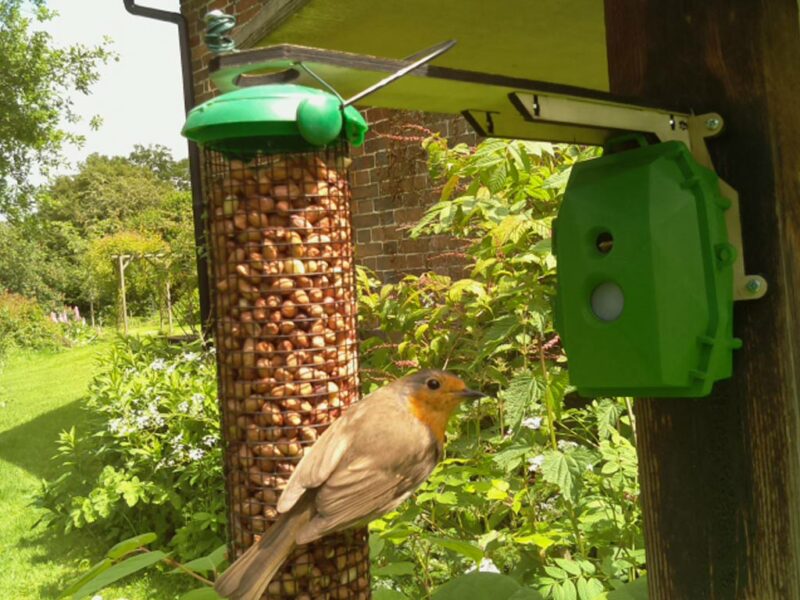
One of the best things about summer is the return of a host of migratory birds that desert us in the colder months. And, while foxes and badgers will have been with us throughout the winter, hedgehogs will have been hibernating between late autumn and early spring. Many of these animals are timid, so spotting them requires that you get up early, stay up late, or set up a trail camera which uses motion detection to capture an image when they pass.
This has been a popular use for Raspberry Pi for years, but there are so many ways to go about it, you might be wondering which are the best options. You can pick up all the parts you need to build your own trail camera – aside from the power supply – from The Pi Hut for £110, or the case on its own for £40 if you have most of the other required components knocking around from old projects.
Get your copy of The Magpi #106 now!
We’ve shared just a few of our favourite summer project ideas here. For the full list, head to page 72 of the latest issue of The MagPi.
You can grab the brand-new issue right now online from the Raspberry Pi Press store, or via our app on Android or iOS. You can also pick it up from supermarkets and newsagents. There’s also a free PDF you can download.
Website: LINK
Schreibe einen Kommentar
Du musst angemeldet sein, um einen Kommentar abzugeben.