Schlagwort: robots
-

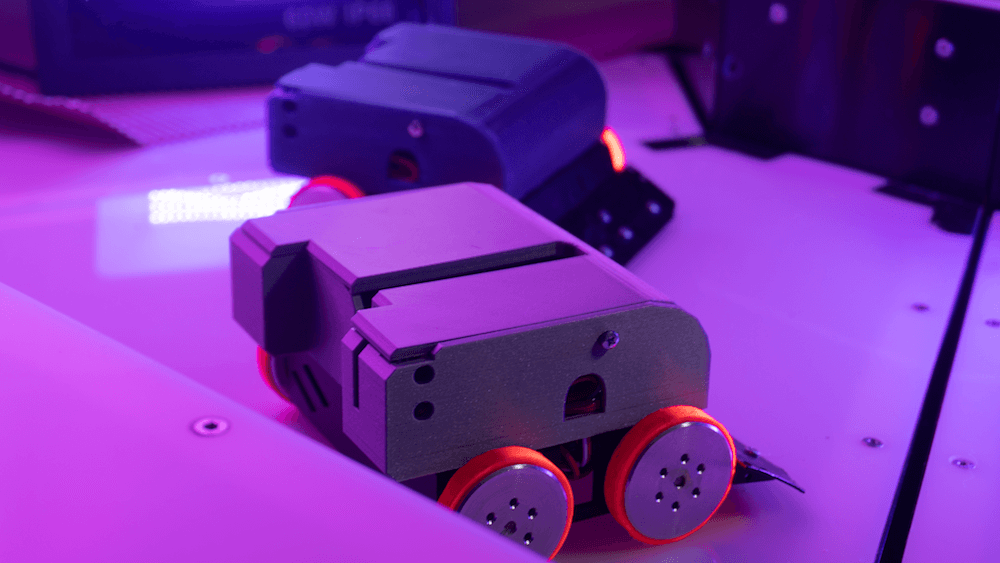
Adaptive Field Robot changes wheel shape to overcome various terrain
Reading Time: 2 minutesAdaptive Field Robot changes wheel shape to overcome various terrain Arduino Team — January 6th, 2020 If your robotic vehicle will only work on smooth surfaces, the choice of a wheel is obvious. For more rugged bots, the same applies with knobby wheels. For those that need to operate in both environments,…
-

Now you can battle real robots over the Internet
Reading Time: 2 minutesNow you can battle real robots over the Internet Arduino Team — December 6th, 2019 Robot-sumo bouts can be a great way to pit your automation skills against others. Participating normally means a lot of hard work to get your bot functioning properly, and likely a fair amount of travel to meet…
-

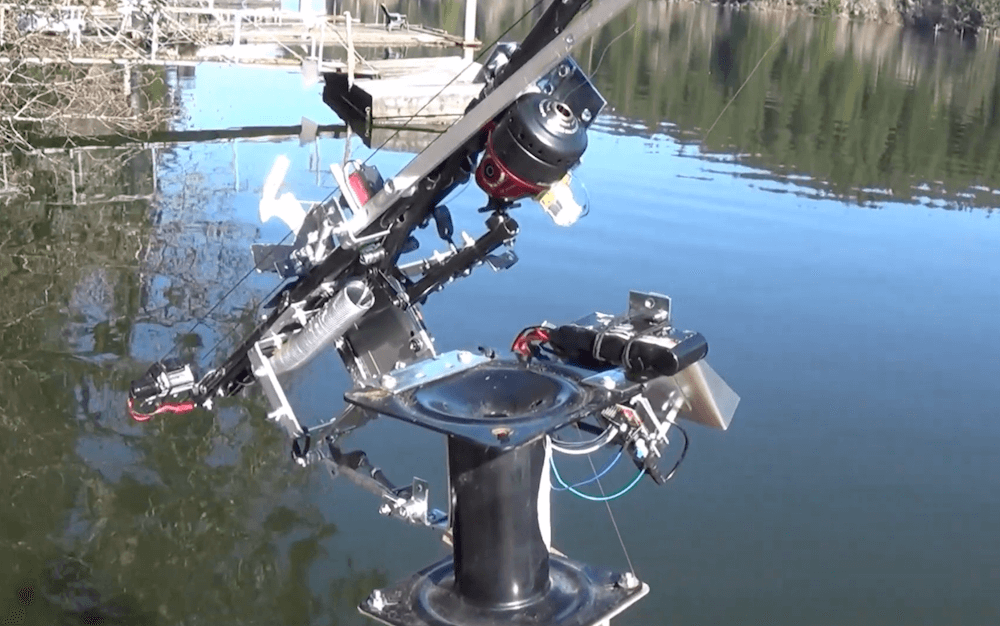
An Arduino-powered fishing pole with automatic casting and reeling
Reading Time: < 1 minuteAn Arduino-powered fishing pole with automatic casting and reeling Arduino Team — December 5th, 2019 YouTuber MrTeslonian was asked if he could create an automatic fishing pole for someone with a serious disability. While this would seem like a daunting task, he was able to build one using a spring-loaded mechanism,…
-

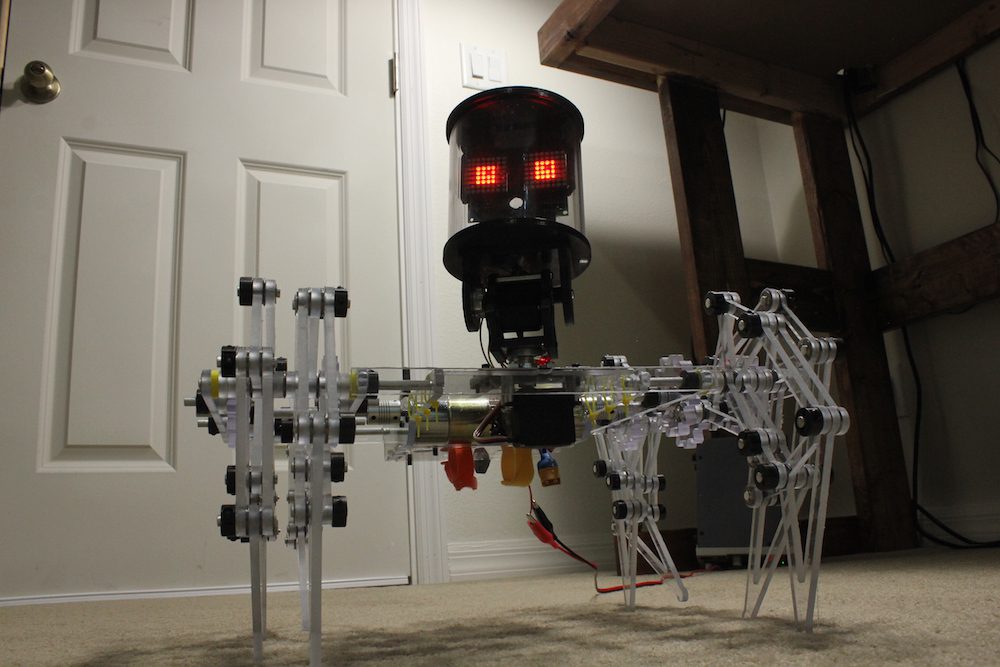
ClearCrawler Strandbeeest walks under Arduino control
Reading Time: < 1 minuteClearCrawler Strandbeeest walks under Arduino control Arduino Team — December 3rd, 2019 Maker Jeremy S. Cook has been building Theo Jansen-style walkers for literally years, and after several iterations has come up with what he calls the “ClearCrawler.” This little guy stands at just over 15 inches tall — including its…
-

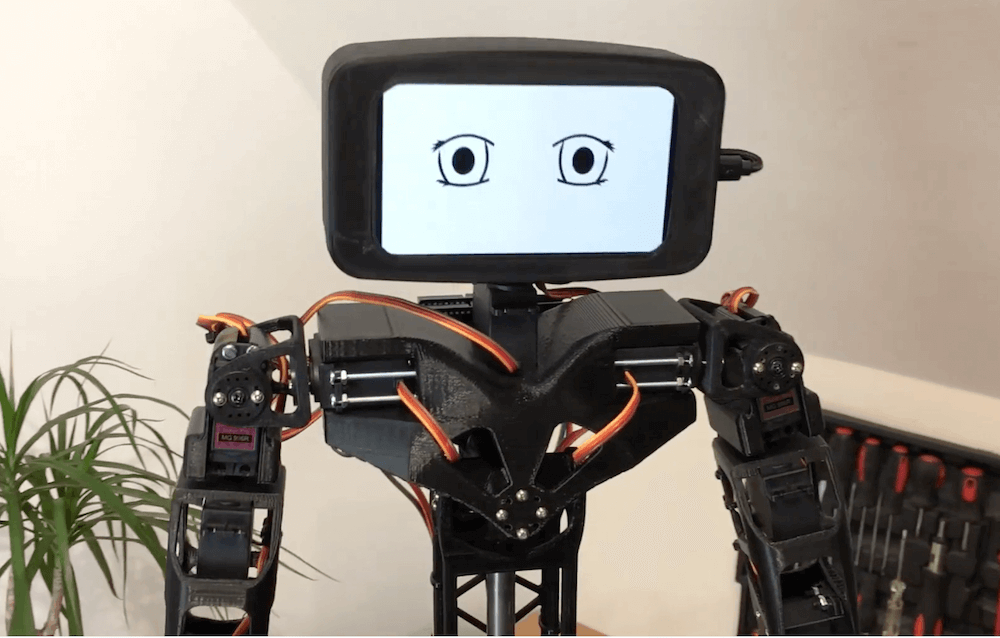
Meet Aster, the 3D-printed humanoid robot
Reading Time: 2 minutesMeet Aster, the 3D-printed humanoid robot Arduino Team — November 29th, 2019 If you’d like to build your own vaguely humanoid robot, but don’t care about it getting around, then look no farther than Aster. The 3D-printed bot is controlled by an Arduino Uno, with a servo shield to actuate its 16…
-

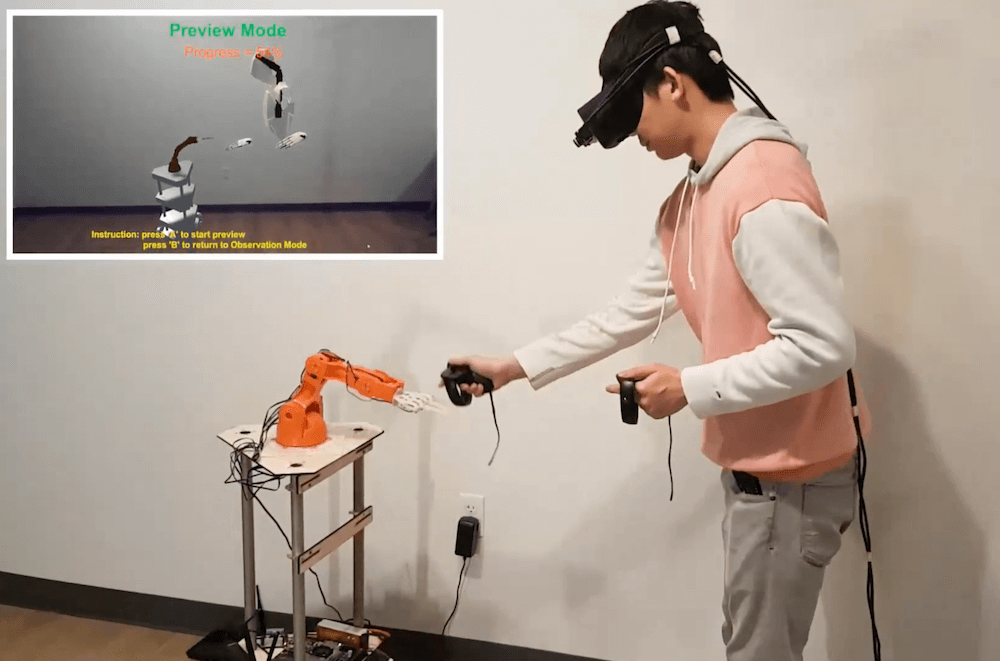
Improve human-robot collaboration with GhostAR
Reading Time: 2 minutesImprove human-robot collaboration with GhostAR Arduino Team — November 26th, 2019 As robotics advance, the future could certainly involve humans and automated elements working together as a team. The question then becomes, how do you design such an interaction? A team of researchers from Purdue University attempt to provide a solution with…
-

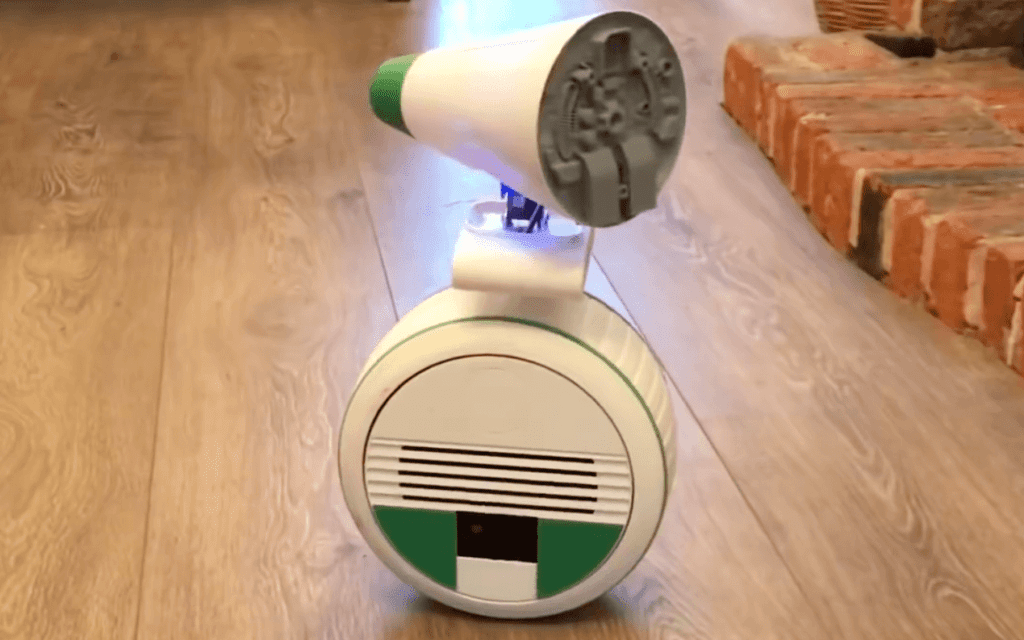
This YouTuber recreated the D-O droid from Star Wars: Episode 9 with Arduino
Reading Time: 2 minutesThis YouTuber recreated the D-O droid from Star Wars: Episode 9 with Arduino Arduino Team — November 21st, 2019 While it’s yet to make its premiere, Matt Denton has already built the D-O droid from Star Wars: The Rise of Skywalker using a MKR WiFi 1010 for control, along with a MKR…
-

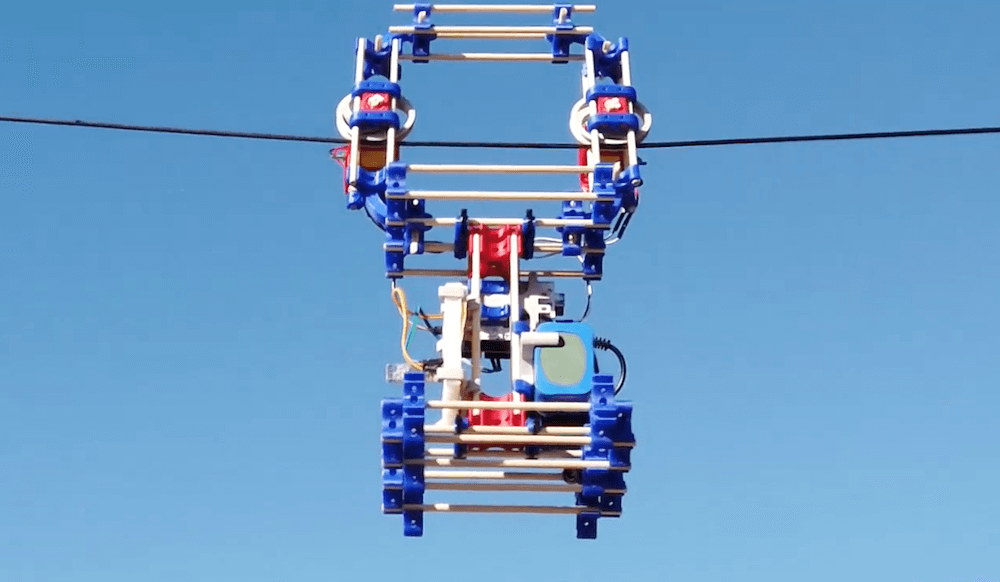
Rolling robot transformed into a zip lining contraption
Reading Time: 2 minutesRolling robot transformed into a zip lining contraption Arduino Team — November 11th, 2019 MOREbot is an Arduino-powered educational robotic platform that’s currently available for pre-order. While the base kit is geared (literally and figuratively) towards building a small two-motor robot, MORE Technologies CEO Canon Reeves shows off how it can be…
-

Competition robot picks up (almost) all the balls
Reading Time: < 1 minuteCompetition robot picks up (almost) all the balls Arduino Team — November 9th, 2019 For the Warman Design and Build Competition in Sydney last month, Redditor ‘Travman_16 and team created an excellent Arduino-powered entry. The contest involved picking up 20 payloads (AKA balls) from a trough, and delivering them to a…
-

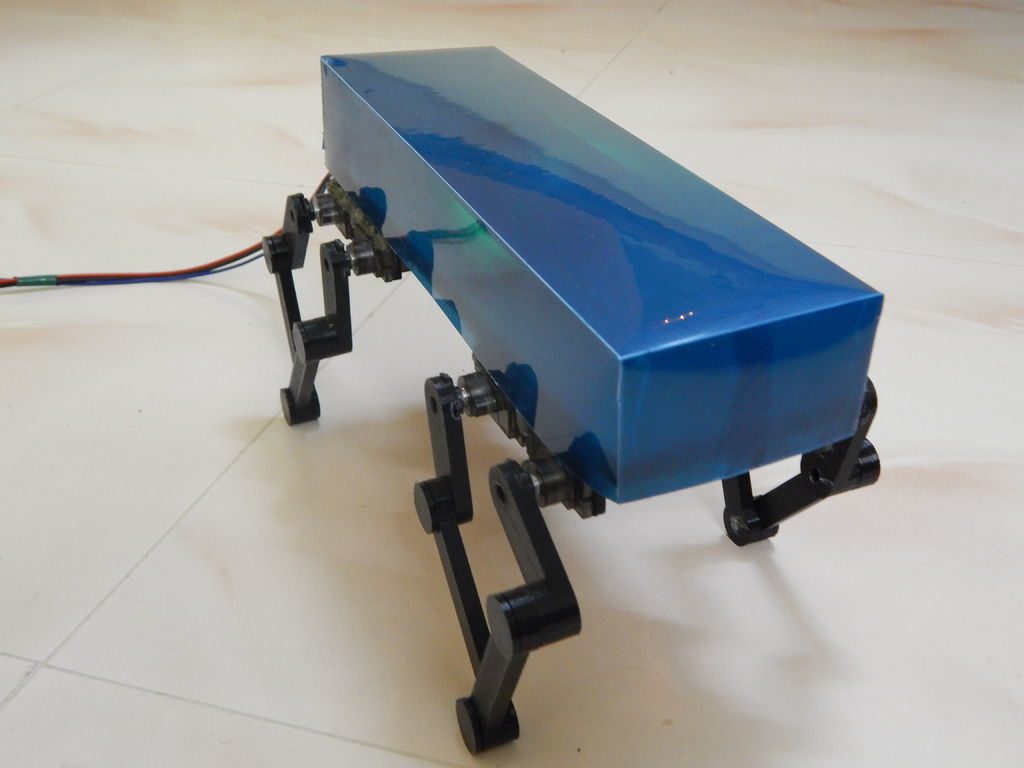
Baby Cheetah is a mini, MIT-inspired quadruped robot
Reading Time: 2 minutesBaby Cheetah is a mini, MIT-inspired quadruped robot Arduino Team — October 29th, 2019 Since we can’t all have the MIT Mini Cheetah at home, Jegatheesan Soundarapandian decided to make his own version — measuring just 23 cm x 9 cm x 9 cm. As shown in the video below, the aptly…
-
UCSD engineers developed electrically-controlled soft robot actuators
Reading Time: 2 minutesUCSD engineers developed electrically-controlled soft robot actuators Arduino Team — October 12th, 2019 Engineers at the University of California San Diego have come up with a way to build soft robots that are compact, portable and multifunctional without the requirement for compressed air. Instead, they’re using a system of tubular actuators made…
-

Watch this guitarist perform an acoustic set with his own robotic drummer
Reading Time: 2 minutesWatch this guitarist perform an acoustic set with his own robotic drummer Arduino Team — October 11th, 2019 As shown in the video below, Tristan Calderbank is a very talented singer and guitar player, but what’s perhaps most interesting about his performance is the percussion section. Instead of a person (or an…
-

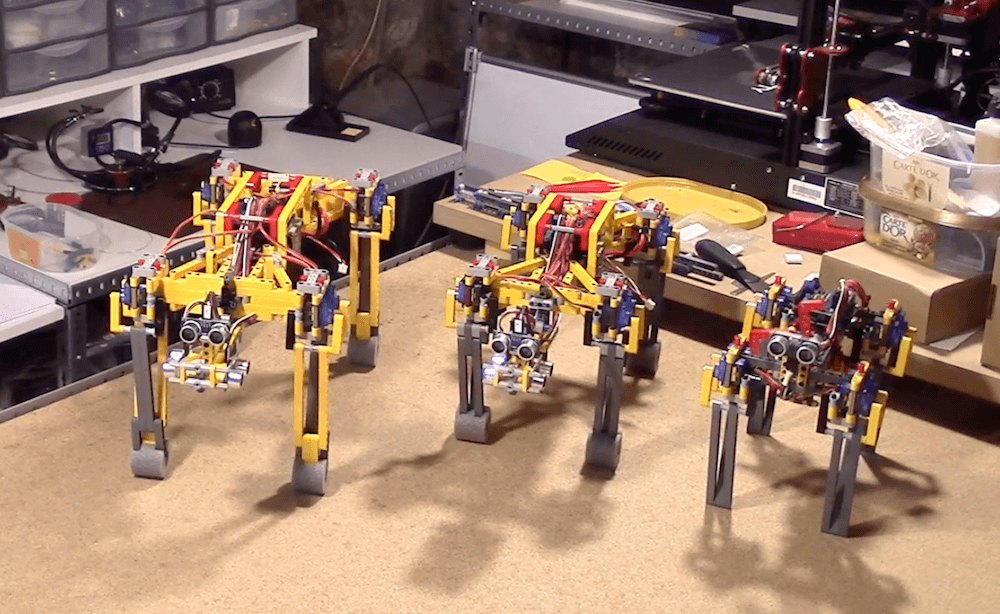
These LEGO linkage walkers wander under Arduino control
Reading Time: 2 minutesThese LEGO linkage walkers wander under Arduino control Arduino Team — September 27th, 2019 YouTuber Oracid1 has developed a unique family of four-legged robots, dubbed “FiveBarQuads.” The quadrupeds all feature ultrasonic sensing for navigation and a body made out of LEGO components — and as seen in the first video below, his…
-

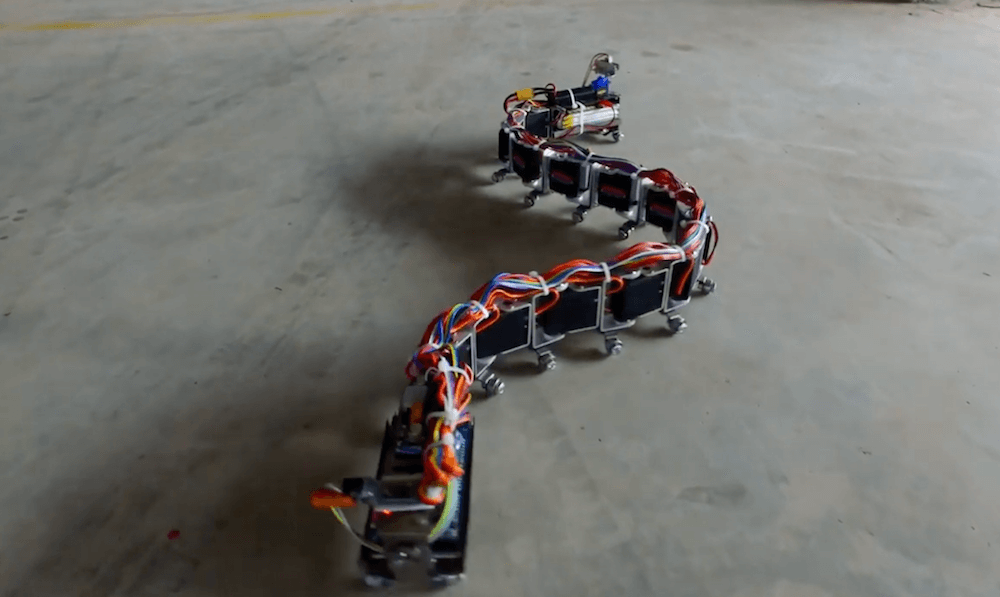
Robo-snake slithers across the ground under Arduino control
Reading Time: < 1 minuteRobo-snake slithers across the ground under Arduino control Arduino Team — September 13th, 2019 What has a dozen servos, a WiFi camera, and an Arduino Mega for a brain? Nevon Projects’ snake-bot, of course! This impressive robot uses a total of 12 servos for locomotion and can travel across a variety…
-
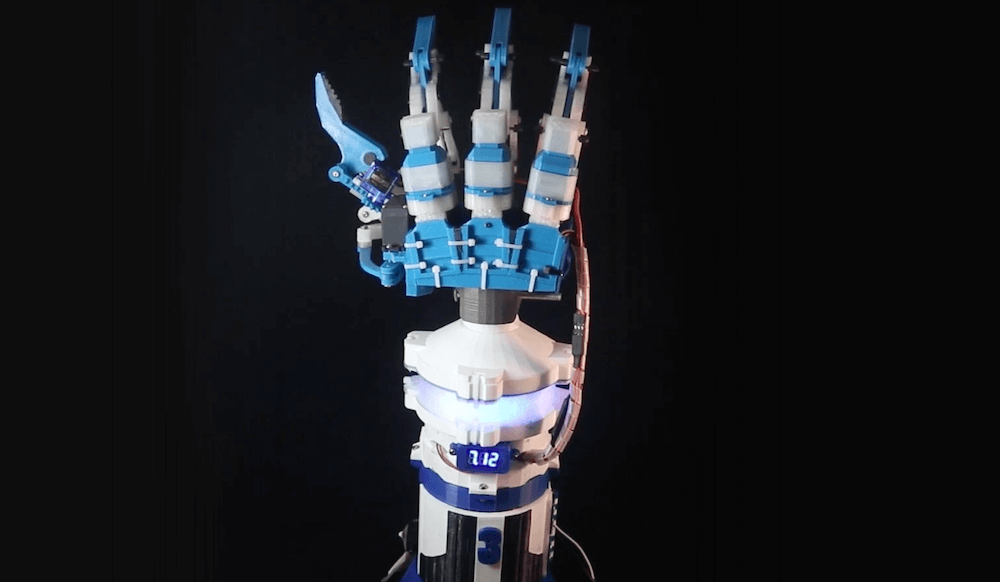
Designing a modular and ambidextrous four-fingered robot hand
Reading Time: 2 minutesDesigning a modular and ambidextrous four-fingered robot hand Arduino Team — September 4th, 2019 Gray Eldritch (AKA The Technomanc3r) has been working on a robotic hand for some time now, and has settled (so far) on a design with three independent servo-actuated fingers and a thumb. He’s also implemented a wrist assembly…
-

Build your own Arduino-based delta robot with Delta X
Reading Time: < 1 minuteBuild your own Arduino-based delta robot with Delta X Arduino Team — August 29th, 2019 If you’ve ever seen a delta 3D printer work, you’ve certainly been amazed at the careful coordination of three motors to accurate position a carriage. While impressive in this role, delta robots can be used for…
-

Standbeest-inspired ClearCrawler robot clomps around on 8 legs
Reading Time: 2 minutesStandbeest-inspired ClearCrawler robot clomps around on 8 legs Arduino Team — July 23rd, 2019 When you want to build a walking robot, the normal route is to individually control each leg with a number of servos or other actuators. Maker Jeremy S. Cook, however, took a different approach with his ‘ClearCrawler,’ using…
-

Zeus is a humanoid that can hold a conversation
Reading Time: 2 minutesZeus is a humanoid that can hold a conversation Arduino Team — July 23rd, 2019 As seen in the videos below, Zeus is a metallic humanoid robot capable of moving its head and arms around, featuring a pair of hand grippers that should be quite useful when the time comes. For now,…