Schlagwort: robotic arm
-

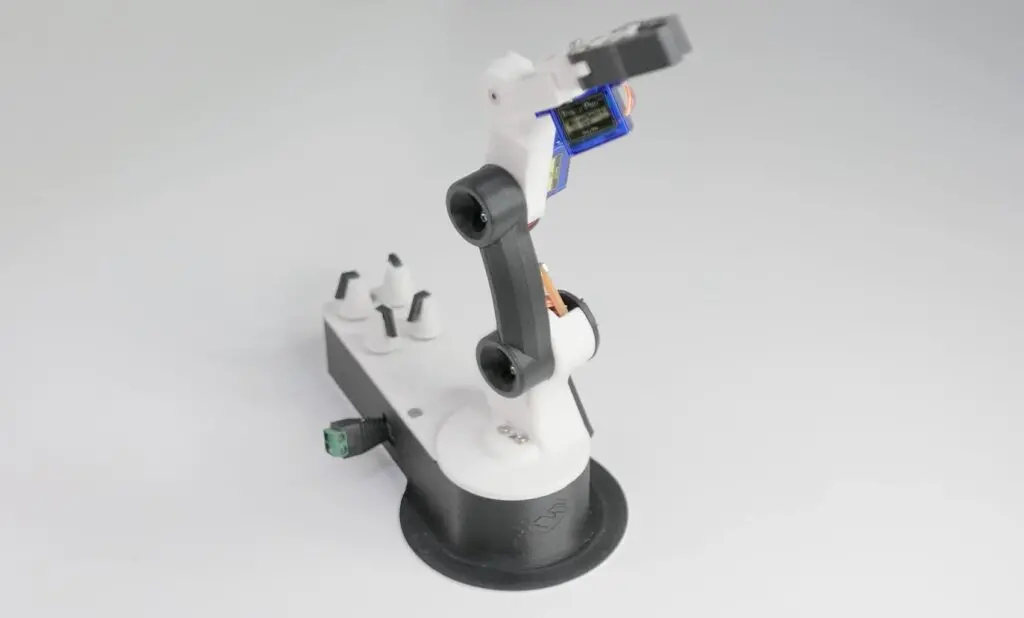
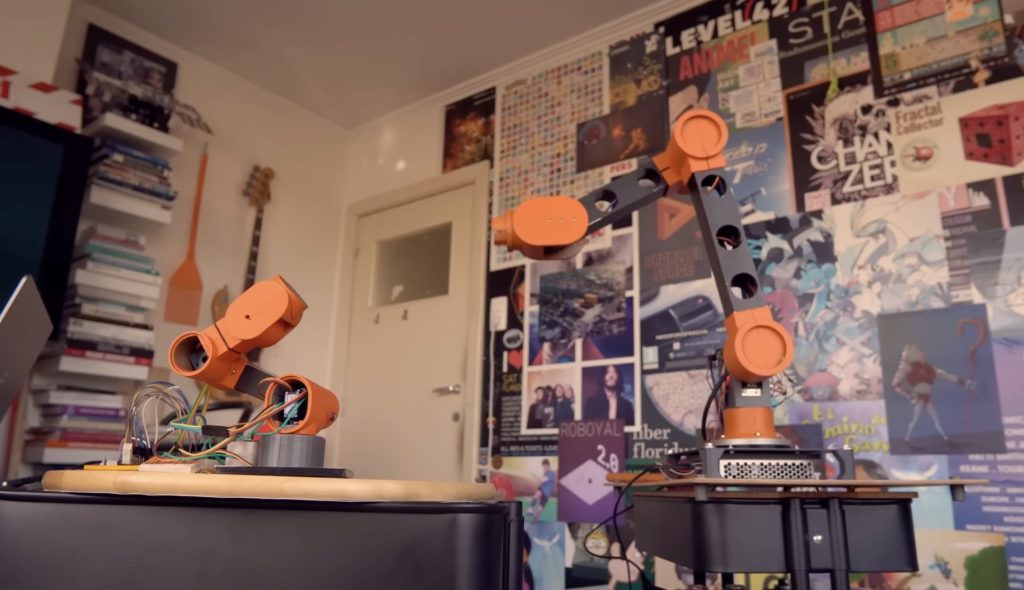
This 3D-printed robotic arm can be built with just a few inexpensive components
Reading Time: 2 minutesRobotics is already an intimidating field, thanks to the complexity involved. And the cost of parts, such as actuators, only increases that feeling of inaccessibility. But as FABRI Creator shows in their most recent video, you can build a useful robotic arm with just a handful of inexpensive components. This is pint-sized…
-

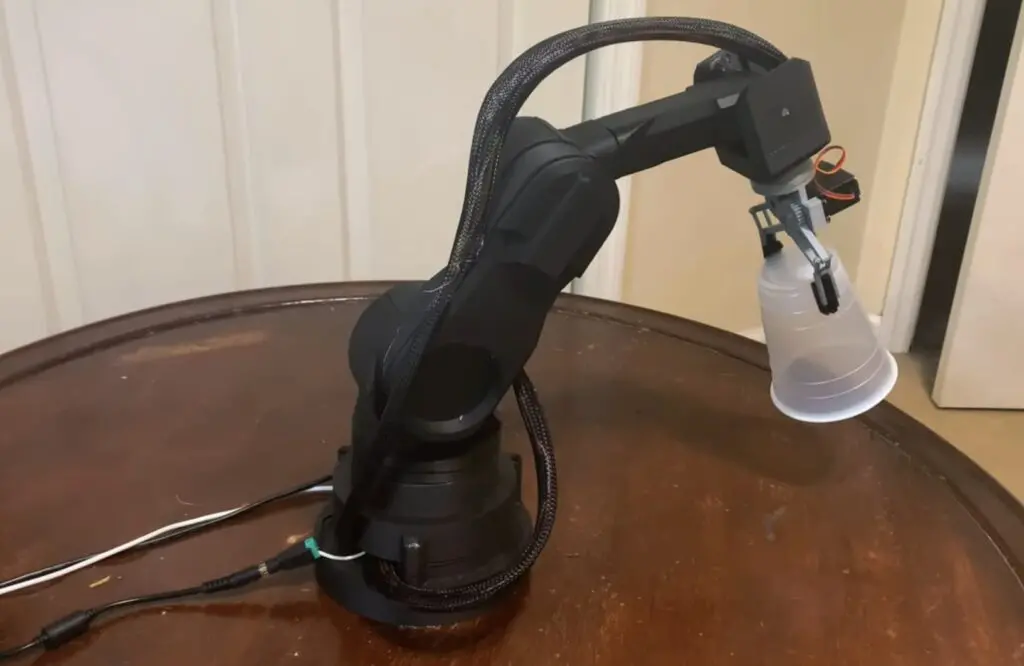
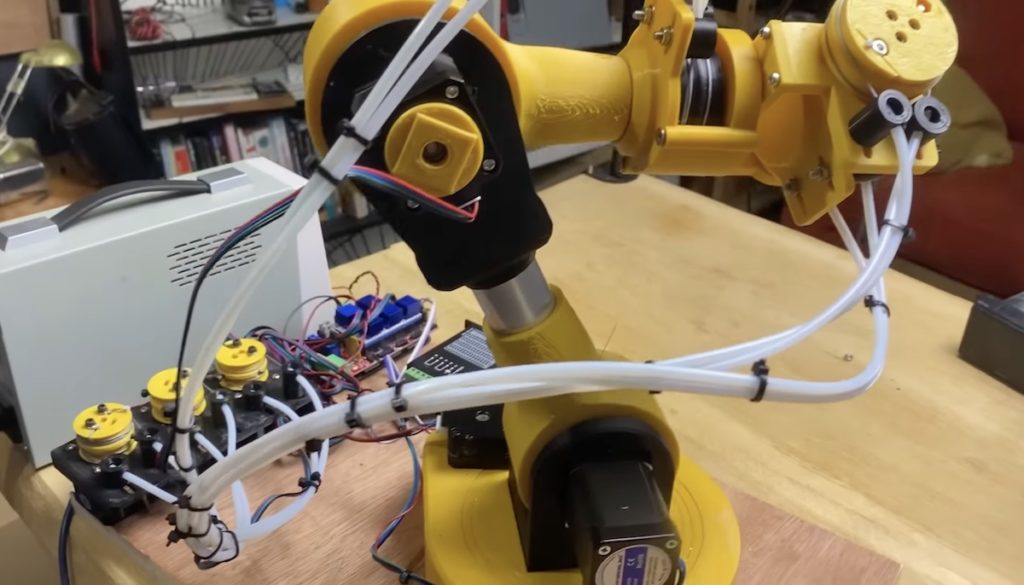
3D printing an affordable robot arm
Reading Time: 2 minutesIf you have an interest in robotics, then a robot arm is a great educational tool to start your journey. But professional robot arms are expensive and the DIY route is more informative anyway. That’s especially true if you take the time to design the arm yourself, as did Oliver Paff after…
-

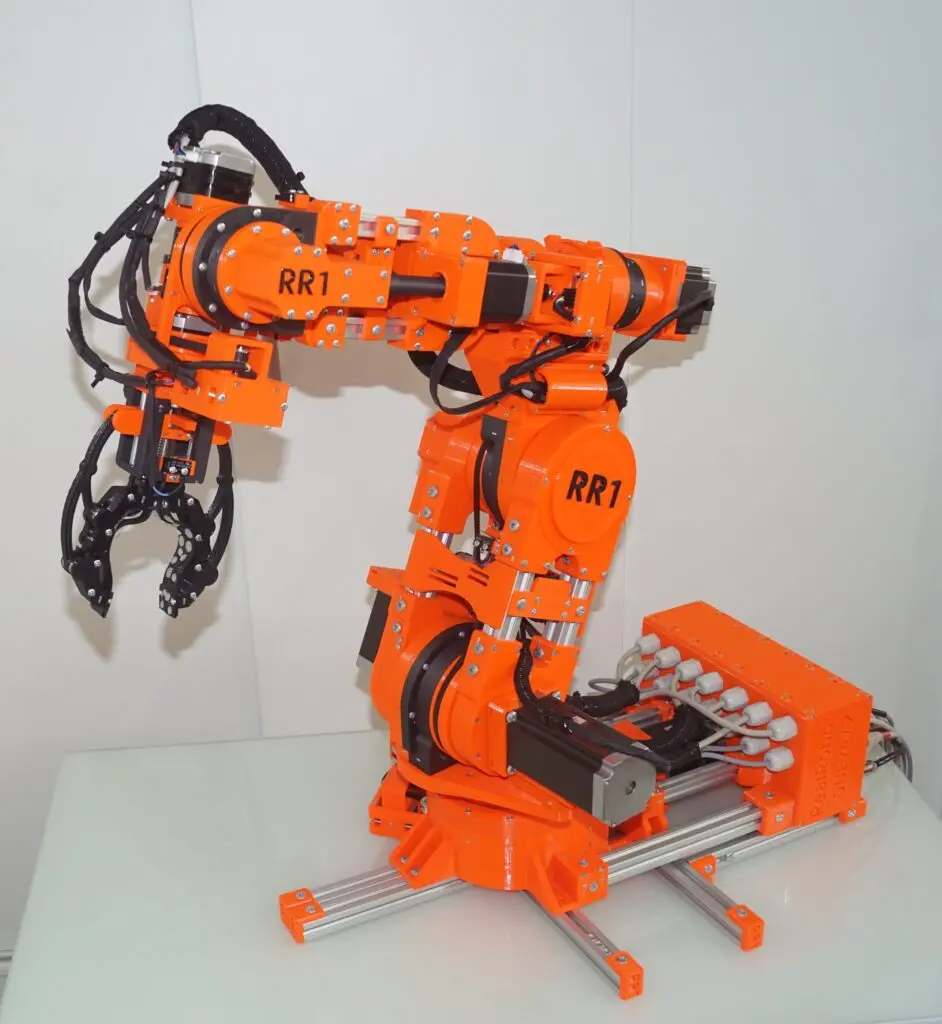
Meet Real Robot One V2: A mini DIY industrial robot arm
Reading Time: 2 minutesStarted in 2022 as an exploration of what’s possible in the field of DIY robotics, Pavel Surynek’s Real Robot One (RR1) project is a fully-featured 6+1-axis robot arm based on 3D-printed parts and widely available electronics. The initial release was constructed with PETG filament, custom gearboxes for transferring the motor torque to the actuators,…
-

Ceiling fan becomes a “spaceship” SCARA robot arm
Reading Time: 2 minutesWe all know how annoying a ceiling fan can be when it isn’t balanced well and that annoyance perfectly demonstrates the necessity of a good, sturdy bearing. A ceiling fan’s bearing needs to allow for smooth rotational motion with as little friction as possible, while completely constraining movement in every other axis.…
-

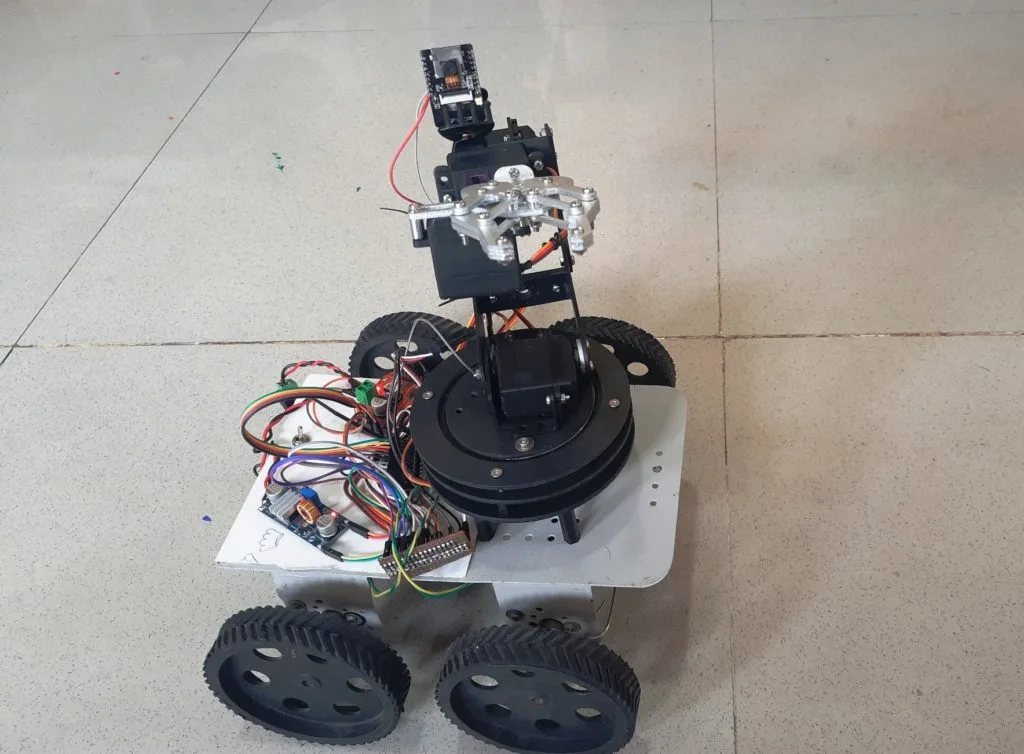
This remote-controlled, highly mobile robot features a 4DOF arm and an onboard camera
Reading Time: 2 minutesStatic manipulators and mobile robot chassis each have their own advantages, and so by combining the two into a single platform, AadhunikLabs was able to realize both at the same time. The base frame is comprised of four individual wheels, each with their own high-torque geared motor and driven by a pair of VNH3ASP30 DC…
-

This cheap robot arm can follow recorded movements
Reading Time: 2 minutesThere are many ways to control a robot arm, with the simplest being a sequential list of rotation commands for the motors. But that method is very inefficient when the robot needs to do anything complex in the real world. A more streamlined technique lets the user move the arm as necessary,…
-

Build your own high-quality ARCTOS robot arm
Reading Time: 2 minutesIf you want a robot arm, either for some practical job or just fun, you have a lot of options. There are many consumer and industrial robot arms on the market, but the models that aren’t glorified toys tend to be pricey. You can also build your own. If you go that…
-

An Arduino Leonardo-powered, 3D-printed robotic arm designed from scratch
Reading Time: 2 minutesGetting started in the world of robotics can be a very challenging task, even for more experienced hobbyists, due to how difficult it can be to achieve smooth and precise motion through programming. Frustrated by the lack of accessible options, the YouTuber known as “Build Some Stuff” decided to not only design his own, but…
-

Micro robot arm controls macro robot arm
Reading Time: 2 minutesBuilding a capable robot is only half of the battle. To take advantage of that robot, you’ll need a good way to control it. When it makes sense, you can pre-program movements. But when you want to control a robot in real time, you need suitable controller. Conventional joysticks and gamepads don’t…
-

Increase a robot arm’s payload capacity by relocating its wrist motors
Reading Time: 2 minutesTo give an electric car more range, you need a bigger battery pack. But that adds weight, so you need bigger motors and more battery capacity to compensate. This creates a vicious cycle and robot arms are susceptible to a similar problem. A robot arm needs to lift its own weight in…
-

Real Robot One is a high-performance robotic arm that you can build yourself
Reading Time: 2 minutesArduino Team — August 15th, 2022 Robotic arms are versatile machines and are great for learning about principles of robotics or even doing useful work for hobbyists. That work might be picking and placing components on PCBs, packing boxes, or anything else you can imagine. But to perform that work well, the…
-

Move this custom robotic arm through a touchscreen interface
Reading Time: 2 minutesArduino Team — July 19th, 2022 Normally, robotic arms are controlled by a GUI running on a host PC, or with some kind of analog system that maps human inputs to various degrees of rotation. However, Instructables user Maurizio Miscio was able to build a custom robotic arm that is completely self-contained…
-

AugLimb is the extra arm you didn’t know you needed
Reading Time: 2 minutesAugLimb is the extra arm you didn’t know you needed Arduino Team — September 24th, 2021 As a maker, you probably have a third hand for your soldering station. They come in handy when you need to hold a component, PCB, solder, and soldering iron all at the same time. But an…
-

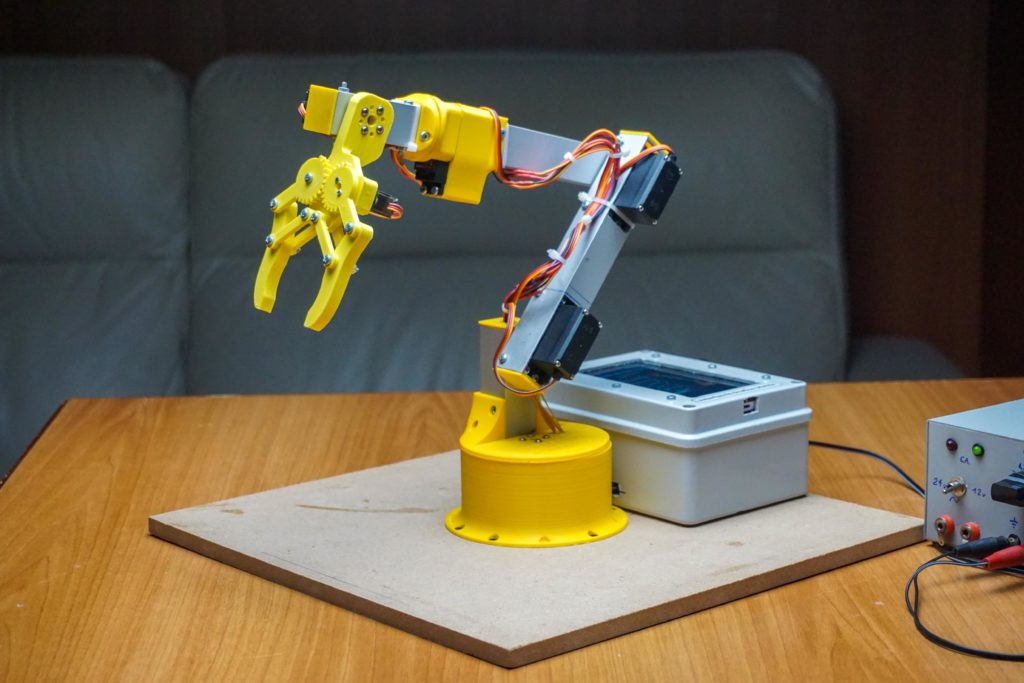
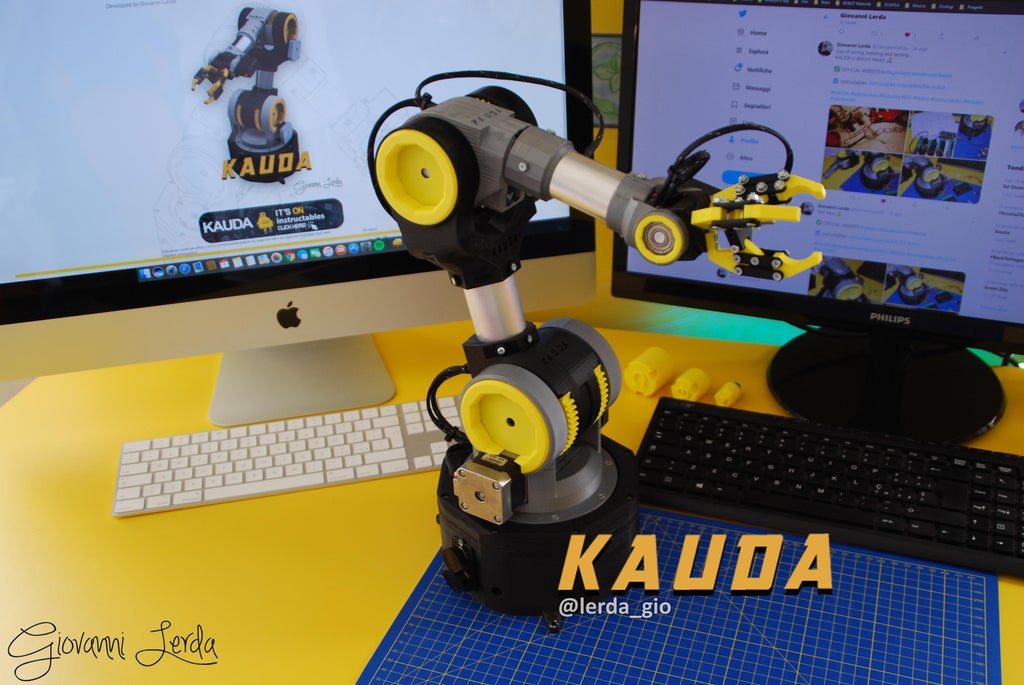
KAUDA is a low-cost, highly-efficient robotic arm
Reading Time: < 1 minuteKAUDA is a low-cost, highly-efficient robotic arm Arduino Team — September 16th, 2020 Would you like your own industrial robot arm, but don’t have tens of thousands of dollars to spend? You could instead build Giovanni Lerda’s KAUDA, a five-axis device that uses under 800g of PLA, an Arduino Mega, and…
-

Store and replay this robot’s movements from your phone
Reading Time: 2 minutesStore and replay this robot’s movements from your phone Arduino Team — July 8th, 2019 Robotic arms can be interesting, as are robots that roll around—especially on a semi-exotic Mecanum wheel setup. Dejan Nedelkovski’s latest How To Mechatronics build, however, combines both into one package. This project actually starts out in a…