Schlagwort: Raspberry Pi Zero W
-

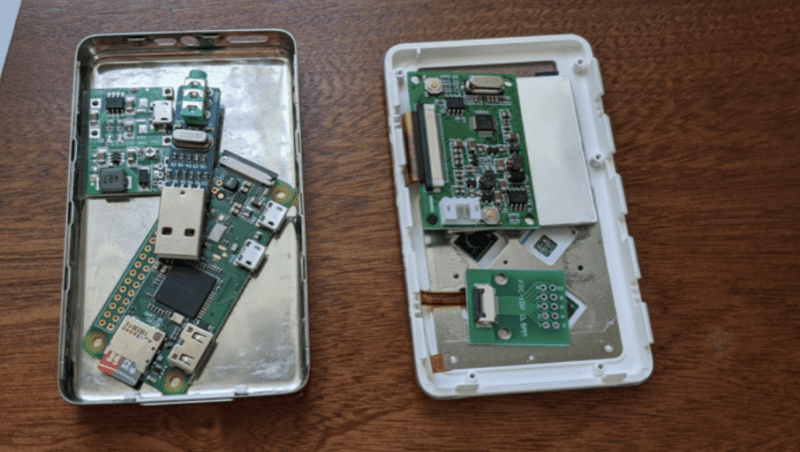
Raspberry Pi Zero W turns iPod Classic into Spotify music player
Reading Time: 4 minutesRecreating Apple’s iconic iPod Classic as a Spotify player may seem like sacrilege but it works surprisingly well, finds Rosie Hattersley. Check out the latest issue of The MagPi magazine (pg 8 – 12) for a tutorial to follow if you’d like to create your own. Replacement Raspberry Pi parts laying inside…
-

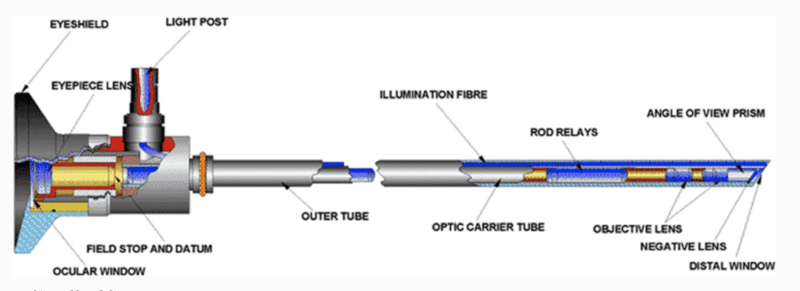
Low-cost Raspberry Pi Zero endoscope camera
Reading Time: 3 minutesResearchers at the University of Cape Town set about developing an affordable wireless endoscope camera to rival expensive, less agile options. Endoscopic cameras are used to look at organs inside your body. A long, thin, flexible tube with a light at the end is fed down your throat (for example), and an…
-

Remotely monitor freezer temperatures with Raspberry Pi
Reading Time: 3 minutesElizabeth from Git Tech’d has shown us how to monitor freezers and fridges remotely with a temperature sensor and Raspberry Pi. A real-time temperature monitor dashboard lets you keep an eye on things, and text message alerts can be set up to let you know when the temperature is rising. [youtube https://www.youtube.com/watch?v=hSwVGgmGjhU?feature=oembed&w=500&h=281]…
-

What the blink is my IP address?
Reading Time: 3 minutesPicture the scene: you have a Raspberry Pi configured to run on your network, you power it up headless (without a monitor), and now you need to know which IP address it was assigned. [youtube https://www.youtube.com/watch?v=XbJ5vT8FvXU?feature=oembed&w=500&h=281] Matthias came up with this solution, which makes your Raspberry Pi blink its IP address, because…
-

Raspberry Pi + Furby = ‘Furlexa’ voice assistant
Reading Time: 3 minutesHow can you turn a redundant, furry, slightly annoying tech pet into a useful home assistant? Zach took to howchoo to show you how to combine a Raspberry Pi Zero W with Amazon’s Alexa Voice Service software and a Furby to create Furlexa. [youtube https://www.youtube.com/watch?v=aCOsM-4NEKs?feature=oembed&w=500&h=281] Furby was pretty impressive technology, considering that…
-

Boston Dynamics’ Handle robot recreated with Raspberry Pi
Reading Time: 3 minutesYou in the community seemed so impressed with this recent Boston Dynamics–inspired build that we decided to feature another. This time, maker Harry was inspired by Boston Dynamics’ research robot Handle, which stands 6.5 ft tall, travels at 9 mph and jumps 4 feet vertically. Here’s how Harry made his miniature version,…
-

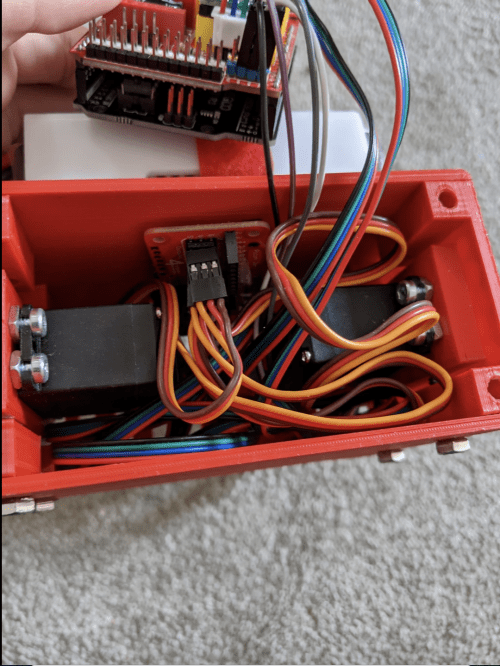
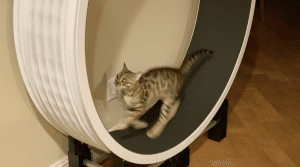
Track your cat’s activity with a homemade speedometer
Reading Time: 3 minutesFirstly, hamster wheels for cats are (still) a thing. Secondly, Bengal cats run far. And Shawn Nunley on reddit is the latest to hit on this solution for kitty exercise and bonus cat stats. Here is the wheel itself. That part was shop-bought. (Apparently it’s a ZiggyDoo Ferris Cat Wheel.) Smol kitty…
-

Watch Game of Thrones with a Raspberry Pi-powered Drogon
Reading Time: 2 minutesChannel your inner Targaryen by building this voice-activated, colour-changing, 3D-printed Drogon before watching the next episode of Game of Thrones. Winter has come This is a spoiler-free zone! I’ve already seen the new episode of season 8, but I won’t ruin anything, I promise. Even if you’ve never watched an episode of…
-

Build your own Arthur satellite dish for tracking the ISS
Reading Time: 3 minutesConstruct a 3D paper model of the iconic Arthur satellite dish that notifies you whenever the International Space Station passes overhead! Project_Arthur Project_Arthur is a fun project allowing you to construct a 3d paper model of the Antenna 1 dish called Arthur from Goonhilly. The model will track the location of the…