Many, many mechanisms require gears, but the good news is that plastic gears are very cheap. The bad news is that you have to buy a lot of them at once and that means you need to know ahead of time what gears you need. Being able to make gears on-demand would be very convenient, but most 3D printers lack the tolerance to do it well and CNC setups get expensive. But by following Mr Innovative’s recent video, you can build your own affordable machine that automatically cuts gears.
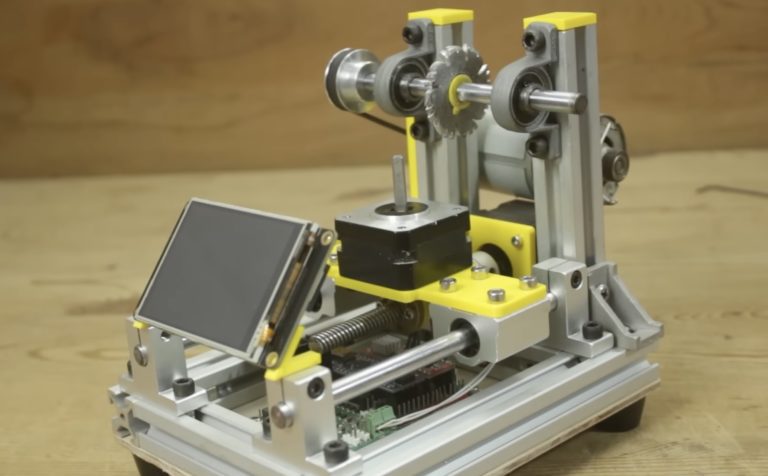
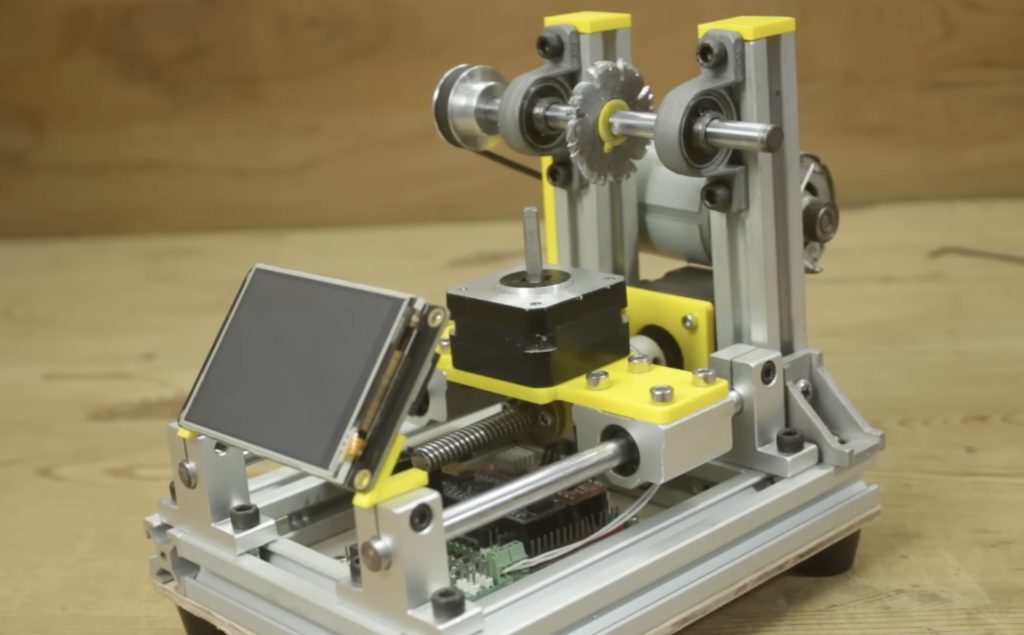
This might be able to handle very soft metals, but it is really meant for cutting nylon and other plastics. Users can set the diameter and the number of teeth, which together dictate the pitch. However, they can not change the tooth cut profile without swapping out the blade. They set the parameters on a Nextion LCD touchscreen and then the machine takes care of the rest. It rotates the gear by the calculated pitch, then moves the gear into the circular cutting blade according to the set diameter.
An Arduino Nano board interfaces with the Nextion LCD and controls the two stepper motors through drivers on a custom shield, as well as the large DC motor that spins the blade. The gear blank mounts directly onto one stepper motor via a coupler, while the second stepper motor controls the linear motion through a lead screw. The frame is a combination of aluminum extrusion and 3D-printed parts, with bearing blocks for the linear movement.
A maker could buy a lot of gears with the money it takes to build this machine, but the ability to cut custom gears to exact specifications whenever necessary would be very handy.
Writer Jason Pargin coined the term “Monkeysphere” to convey Dunbar’s number, which is the maximum number of stable relationships that a person can maintain. It is difficult for people to feel true empathy for anyone outside of their Monkeysphere, which is around 150 people. The result is that we often fail to give the proper attention to injustices that happen outside of our personal Monkeyspheres. To combat that tendency, Ahmed Oyenuga created the Interactive Air Quality Map.
If you live in the United States, the United Kingdom, or almost any other Western country, your air quality is probably pretty good. You might know on an intellectual level that many foreign countries and cities have serious issues with air pollution that cause real health problems. But those areas are far enough outside of your Monkeysphere that you have trouble caring about them. That isn’t a problem with you; it is simple human nature. Oyenuga’s air quality map provides striking visuals to hammer home the point, so that you get a tangible feel for the air quality in far away locales. It is one thing to read a statistic or look at a graph, but quite another to see the conditions in real-time with your own eyes.
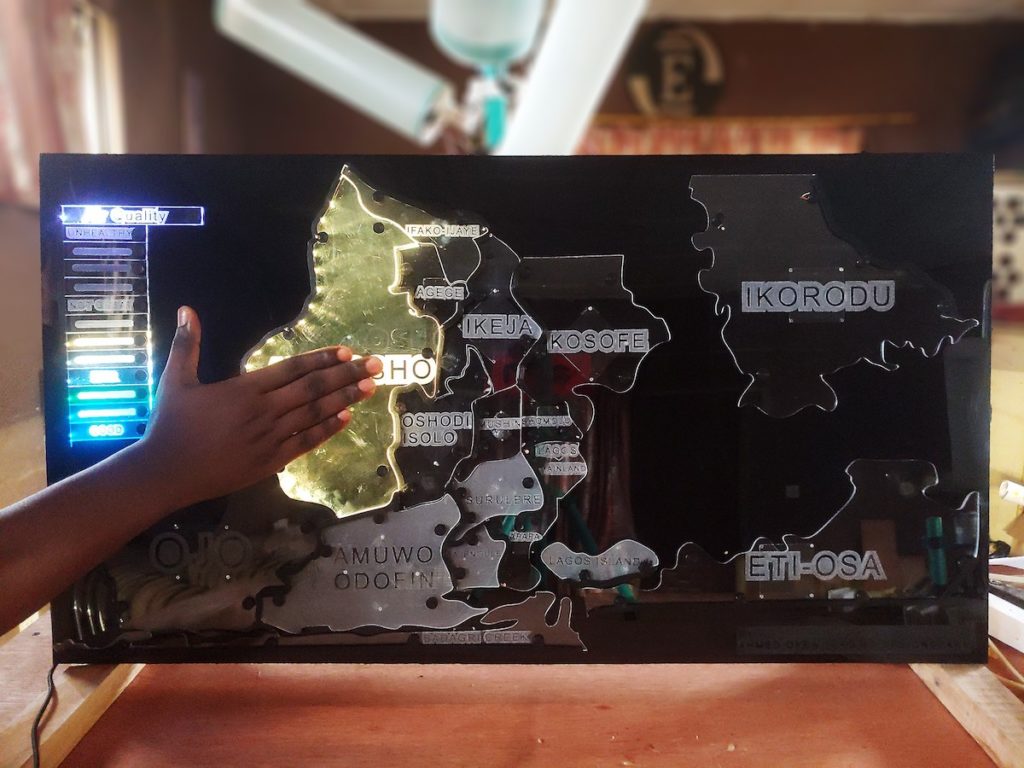
That map consists of several regions cut out of clear acrylic and edge-lit with RGB LEDs. Most of the time, they shine with a pretty rainbow color that makes the map look like an art piece. But if someone touches a region or holds their hand nearby, that region lights up with a color that corresponds to its current air quality.
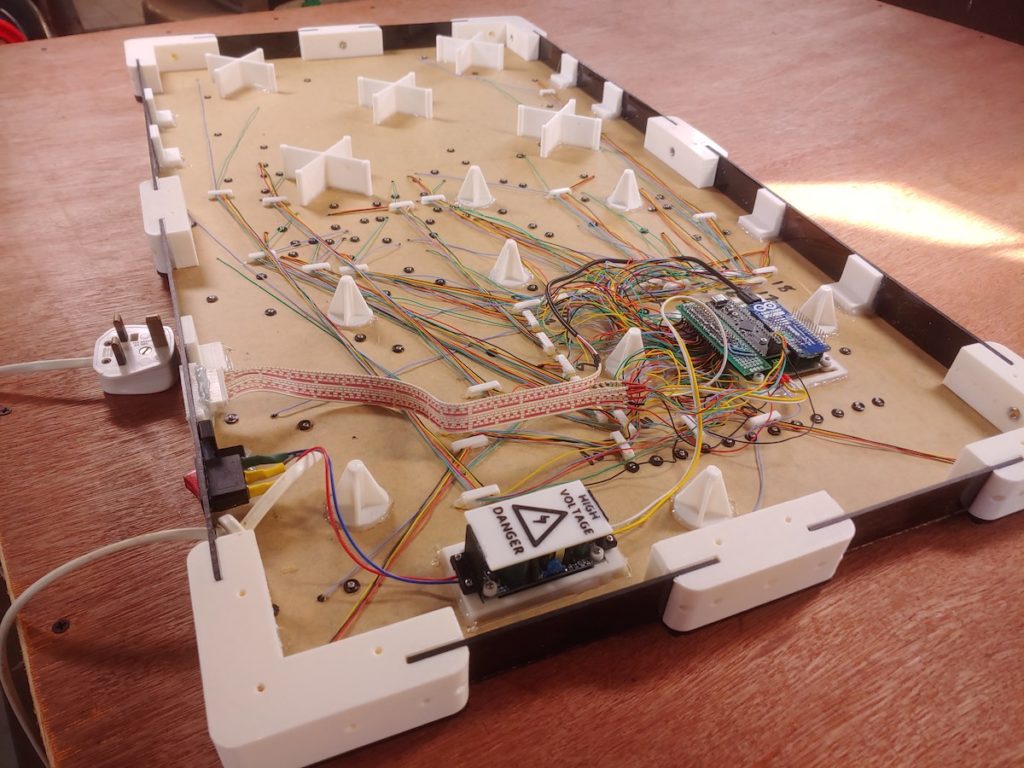
Air quality information is sometimes available through online service APIs, but that is less common in poor or rural areas. So Oyenuga built his own GPS-enabled air quality monitors using the DesignSpark Environmental Sensor Development Kit (ESDK). He hasn’t deployed those in many locations yet, but hopes to expand. An Arduino MKR WiFi 1010 uses that data to determine the light color for each region. A custom board based on an ATSAMD21J17 handles the capacitive sensing that detects when a user moves their hand near a region.
This map only shows the area around Lagos, Nigeria, but anyone can build a similar map that covers other areas or even the entire globe.
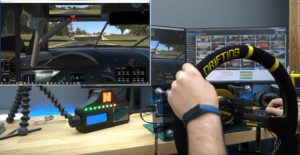
When participating in sim racing video games, players often need to use a steering wheel controller in order to enjoy smooth and accurate movements of their on-screen vehicles. However, due to a shortage of certain racing rigs, finding one has become a challenge. Luckily, ilge ipek has come up with a custom solution that not only provides a far cheaper wheel alternative to store-bought ones, but even competes in regard to some features.
The electronic components ipek selected for this project included a 10K ohm potentiometer for getting the wheel’s current position, an Arduino Leonardo to read the value and send it to the host PC, and an existing steering wheel that could be easily attached to the rig. In terms of software, the Leonardo runs firmware generated from the MMJoy program, which allows hobbyists to connect hardware as various HID inputs via USB. Once uploaded, the attached potentiometer was mapped as a new joystick input that adjusts along the ‘X’ axis.
Back on the hardware side of things, ipek placed screws into a MOMO racing wheel, which was then linked to a gear. With this configuration, the wheel can move up to 900 total degrees- similar to the range of motion seen in many cars. For more information about this project, you can view its write-up here on ipek’s blog.
talians are notoriously protective of their culinary traditions, often rooted in the use of specific local ingredients, family recipes passed on from generation to generation, and strict compliance to the way nonna and mamma always prepared favorite dishes.
However, Italy is also a country of innovation and resourcefulness! So in the face of climate change, major pasta brand Barilla has taken a somewhat daring step forward to suggest their customers try passive cooking: let pasta cook in hot water after only two minutes of boiling on the stove, saving precious energy for the remaining cooking time. Italian grandmothers might cringe at the idea, but Barilla’s clear step-by-step guide claims this can reduce CO2 emissions by up to 80% – which could generate a remarkable positive impact on the environment, considering approximately 400 million plates of spaghetti, penne, tagliatelle, and more are served around the world every day.
Worried your environmental awareness will come at the cost of not-so-great noodles? Don’t be! The key to successful passive cooking is to simply follow correct timing, so Barilla has prepared a complete downloadable chart with adjusted cooking times depending on the pasta shape.
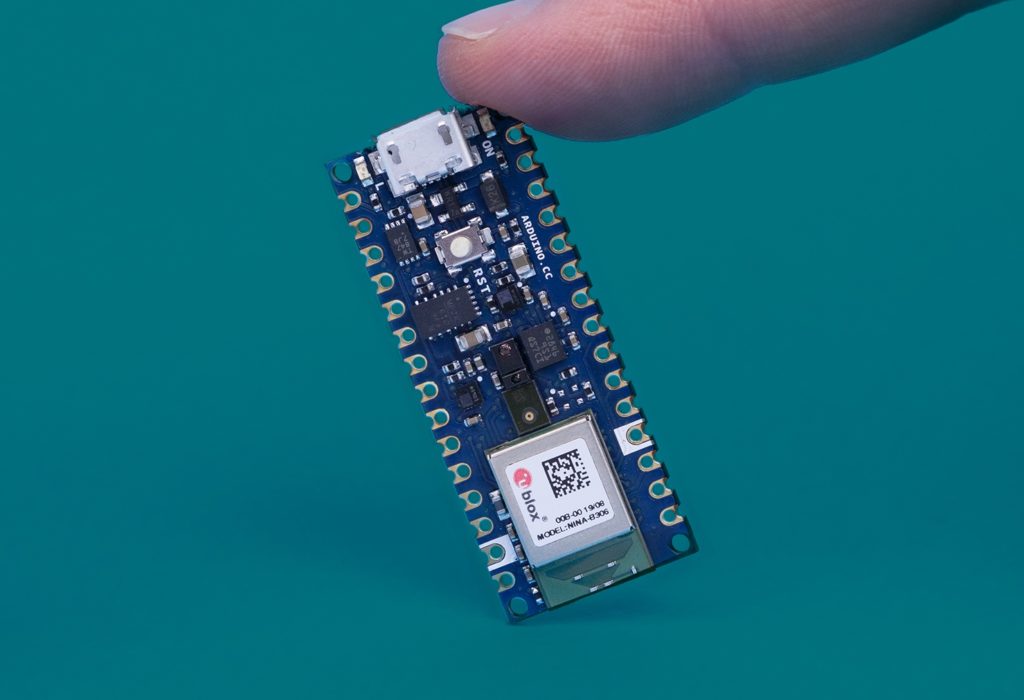
And since this may well be the modern way to cook your favorite Italian dish, why not make it easier – and a lot more fun – with some IoT? Barilla also provides detailed instructions to build your own Passive Cooker smart timer device: a temperature sensor and an Arduino Nano 33 BLE board, programmed via the Arduino IDE 2.0 and placed in a 3D-printed 100% biodegradable casing, connect to a dedicated free app on your phone to let you know when to pour the pasta in boiling water and when to turn off the stove – and start saving energy.
Barilla’s website states, “We wanted to make this project open source so everyone can make their copy and even improve it if they want to.” That’s Italian for “Hey, Arduino community! Let’s start cooking.”
talians are notoriously protective of their culinary traditions, often rooted in the use of specific local ingredients, family recipes passed on from generation to generation, and strict compliance to the way nonna and mamma always prepared favorite dishes.
However, Italy is also a country of innovation and resourcefulness! So in the face of climate change, major pasta brand Barilla has taken a somewhat daring step forward to suggest their customers try passive cooking: let pasta cook in hot water after only two minutes of boiling on the stove, saving precious energy for the remaining cooking time. Italian grandmothers might cringe at the idea, but Barilla’s clear step-by-step guide claims this can reduce CO2 emissions by up to 80% – which could generate a remarkable positive impact on the environment, considering approximately 400 million plates of spaghetti, penne, tagliatelle, and more are served around the world every day.
Worried your environmental awareness will come at the cost of not-so-great noodles? Don’t be! The key to successful passive cooking is to simply follow correct timing, so Barilla has prepared a complete downloadable chart with adjusted cooking times depending on the pasta shape.
And since this may well be the modern way to cook your favorite Italian dish, why not make it easier – and a lot more fun – with some IoT? Barilla also provides detailed instructions to build your own Passive Cooker smart timer device: a temperature sensor and an Arduino Nano 33 BLE board, programmed via the Arduino IDE 2.0 and placed in a 3D-printed 100% biodegradable casing, connect to a dedicated free app on your phone to let you know when to pour the pasta in boiling water and when to turn off the stove – and start saving energy.
Barilla’s website states, “We wanted to make this project open source so everyone can make their copy and even improve it if they want to.” That’s Italian for “Hey, Arduino community! Let’s start cooking.”
Security is one of the things we value most in our homes. A home is somewhere to feel safe, protected from the harms of the outside world. As a result, we tend to invest a lot of money in security features like well-locked doors, alarms, and cameras.
Most of the tools we use to keep our homes safe are decades or even centuries old. Can smart technology and automation help make our homes even safer? In this article, we’ll take a look at some of the ways you can use automation and other tools to keep your smart home as secure as possible.
Smart home security
There are lots of ways you can harness technology to improve the security of your home, such as:
Smart doorbells with attached cameras, that can film the person ringing your doorbell at any given time and transmit the video to your smartphone. This helps you quickly register who is at your door and alert you to any suspicious behavior, even when you’re not at home.
Smart alarm systems that use sensors to monitor movement around your home and send alerts to your phone. These can also use camera footage to record any suspicious activity
Smart locking features that allow you to open your doors using a digital keypad or even an app on your phone
Project examples
Let’s take a look at some smart home security projects from the Arduino community.
Arduino member Jayesh Naweni wanted to build a password-based door locking system. The project involved creating a keypad where you can enter the password and unlock the door without the need for carrying any keys.
This type of project is very simple to get started, requires only a few materials, and can be done by someone with a beginner-level understanding of programming.
The project works by using a sensor which detects movement outside the door of your home. When it picks you up, an LED will switch on and you’ll be required to say a specific, pre-set password to gain access. If it’s correct, this will trigger another LED and a music player and you will be allowed to enter. If you say the wrong password, a buzzer will sound and the camera will capture a photo of you (or your intruder) and post it on Twitter.
This system also helps keep the home safe by detecting if the water and gas in your kitchen pass a certain threshold. If so, you’ll receive an alert on your phone and the fan will be turned on to push gas out of the home.
Aaron Kow built this entire IoT security model as the final year project submission during his last year of engineering at University. It’s designed to be remotely accessible from any smart device or PC, allowing you to quickly stay on top of the security of your entire home.
The project relies on multiple sensors set up throughout the house. When the system is activated, any harmful activities taking place will be detected and a message alert will be sent to the homeowner.
On top of this, data collected by the sensors will be stored in the cloud and displayed on a website via a custom web-based application. This allows you to monitor any suspicious activity that takes place in real time. The project also features Access Control Technology, using the “Near Field Communication” approach that can recognize trusted individuals with the right to enter the house.
Create a safer home with Arduino
Smart homes are often safer homes. It’s fairly easy to build simple home security systems, drawing on technologies like automation and the cloud to detect intruders, alert you to any suspicious activity, and make it easier for you to protect your home and the people in it.
Arduino’s products can help you do this, and it doesn’t take long to learn the basics and start putting together your own cloud projects for all kinds of fascinating purposes. Visit our homepage to find out more and get started.
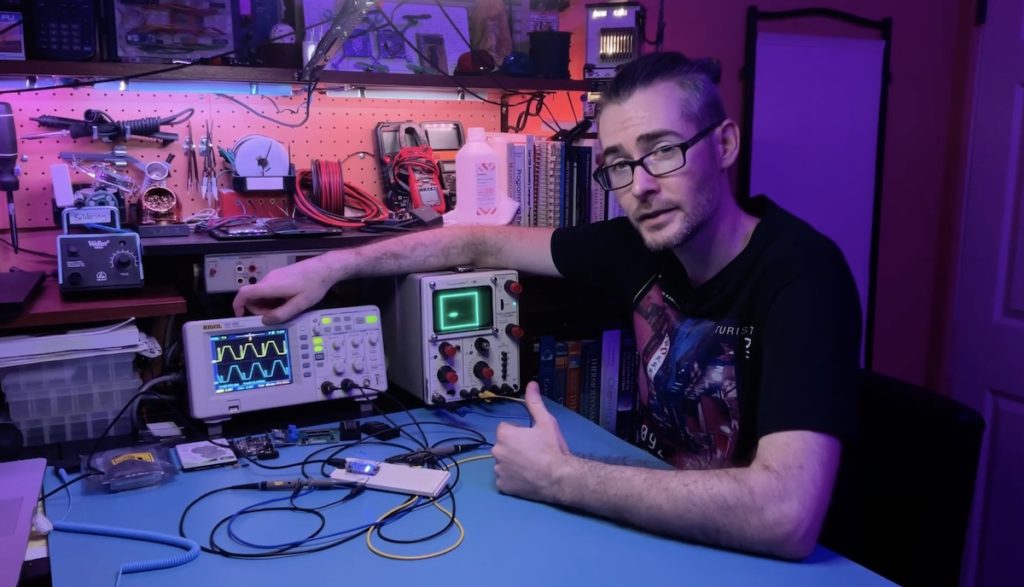
Unless you’re very young, then you probably remember watching a CRT (cathode-ray tube) television. Those work by directing an electron beam very quickly along row after row while pulsing power to create raster images. But it is also possible to create vector images by directing the electron beam along paths instead of scanning, which you might notice is what an oscilloscope does. Trevor combined these two ideas and made a video explaining how you can create vector video art with an Arduino, a handful of resistors, and an oscilloscope.
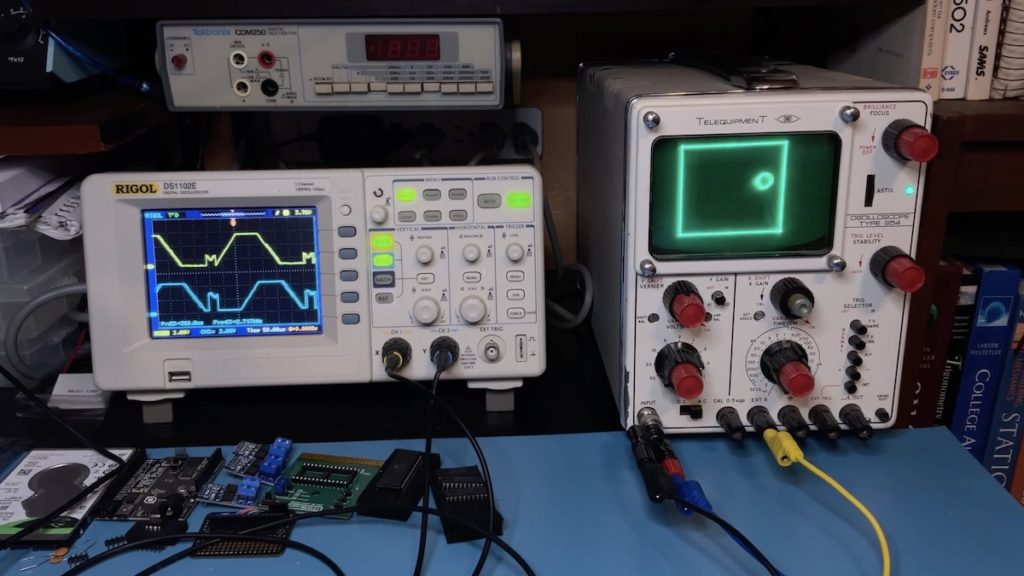
A conventional analog oscilloscope contains a CRT just like an old tube TV. But instead of sweeping the electron beam to scan line by line, they direct the beam according to the voltage of the input signals. One signal pushes the beam up and down in the Y axis, while the second signal pushes the beam left and right in the X axis. That is useful for visualizing electrical signals for analysis, but it also means that controlling the position of the electron beam is as simple as adjusting the voltage of the oscilloscope’s input signals.
Not all oscilloscopes give users the ability to adjust the strength of the electron beam, or even to turn it off. For that reason, Trevor’s tutorial relies on timing to control intensity. If the beam remains in a location for a long time, it will produce a brighter spot. If it jumps quickly from one location to another, it will produce almost no light along the path.
On the hardware side, an Arduino Nano board outputs the X and Y signals to the oscilloscope through resistor ladders (each connected to several pins) that act as DACs (digital-to-analog converters). The DACs are necessary because digital signals only output as HIGH (5V) or LOW (0V) and wouldn’t be able to direct the electron beam anywhere in-between. Trevor’s code includes functions to help users draw using those outputs, with some very impressive results.
We all strive to maintain healthier lifestyles, yet the kitchen is often the most challenging environment by far due to it containing a wide range of foods and beverages. The Smart-Badge project, created by a team of researchers from the German Research Centre for Artificial Intelligence (DFKI), aims to track just how many times we reach for the refrigerator door or drink water using machine learning and a suite of environmental sensors.
The wearable device itself is comprised of a single PCB that houses a pair of microcontrollers, an NXP iMXRT1062 for quickly gathering complex data, and an Arduino Nano 33 BLE Sense for collecting more basic samples. Whether it’s the digital gas sensor, the accelerometer, an IR thermal array, or an air pressure sensor, each reading is compiled into a single stream which updates at 6Hz and can either be stored locally on an SD card or sent via Bluetooth® to a phone.
After having 10 volunteers perform various tasks around a mock kitchen while wearing the Smart-Badge and then labeling each activity, the researchers were able to collect a sizable dataset. The 791 total data channels were fed through several layers of a neural network that could ultimately classify activities with 92.4% accuracy.
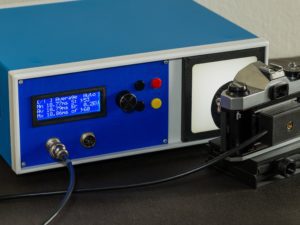
By their very nature, digital cameras are always measuring the amount of light hitting their sensors and use that information to adjust exposure times. But film cameras require adjustment to get the proper exposure for a particular setup and even swapping lenses can change that. Traditional calibration equipment is expensive, but this DIY film camera tester kit is an affordable alternative.
To perform the tests needed to calibrate a film camera, you want a precision light source and an accurate exposure sensor. An exposure sensor alone does work for some tests and the kit has provisions for those, but a calibrated light source helps to configure light meters built into cameras. This kit provides both light source and exposure sensor options, with different modules available for common camera types. The full kit allows for both time-based and light-accumulation calibration tests for film cameras.
The key component is an Arduino Nano board, which monitors the connected exposure sensor. Through a custom shield PCB, it displays the exposure results on a 20×4 character LCD and a control interface board lets the user set up each job. For the tests that require it, there is a calibrated light source that provides highly repeatable output from one exposure to the next. The kit on Tindie is out of stock right now, but this project is open source so users can build their own Film Camera tester
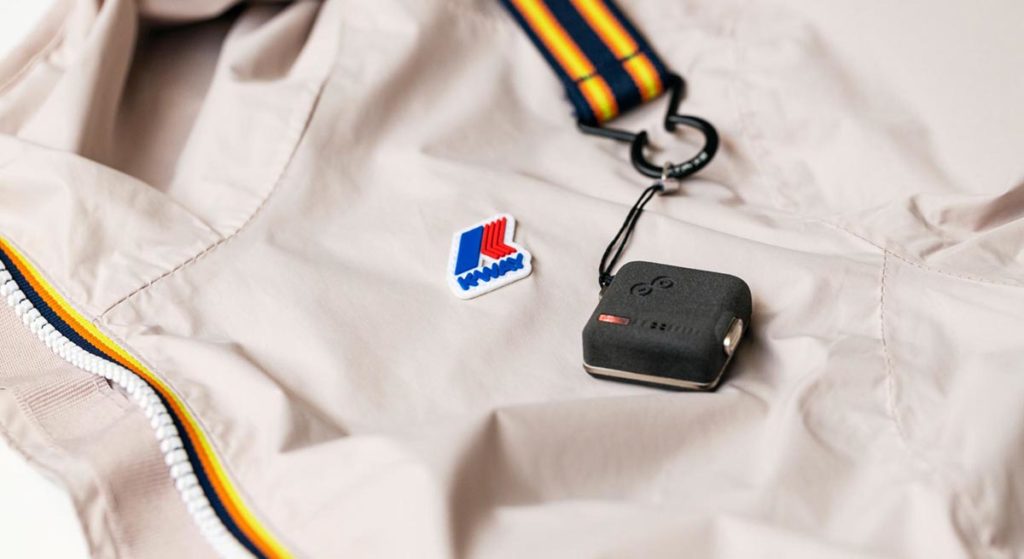
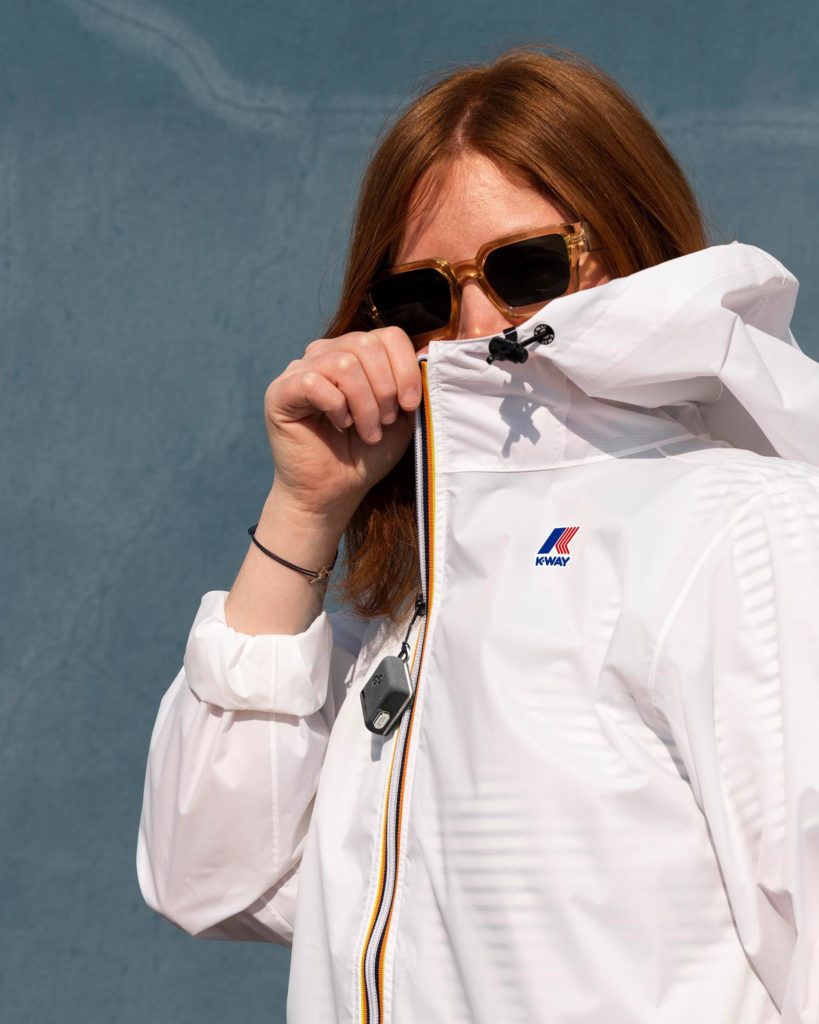
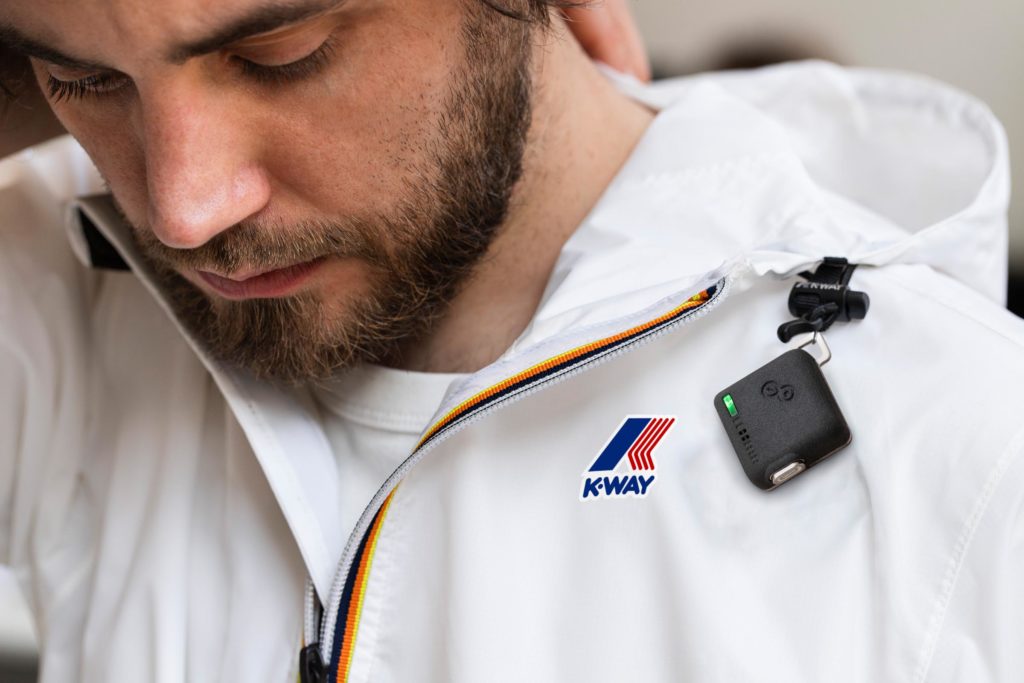
Imagine the possibilities generated by integrating advanced AI and powerful sensors in to one of the most iconic outdoors jackets with a heritage that’s more than 50 years old. You could start sensing and interacting with the surroundings like never before.
This is what we created here at Arduino: enclosing the Nicla Sense ME, the new sensory brain from Arduino, into the K-WAY jacket, powered with Edge Impulse AI, to sense the external world and imagine a new way to conceive smart clothing.
The Nicla Sense ME is beautifully nestled in a custom silicone mold, attached to the iconic coloured zipper of the K-WAY jacket to help you program, monitor, and work with some of the most relevant environmental data that matters to you most.
The Nicla Sense ME on the K-WAY jacket recognizes in real-time whenever the air you’re breathing is polluted, can indicate changing weather conditions, and it communicates with you through a LED on the board or even a smart phone app.
And what would you do with the same technology? If this question is intriguing to you, get ready and pitch your idea. Arduino, with the support of Edge Impulse, will select the best pitch ideas and send over a jacket and a Nicla Sense ME for developing your ideas and make them come true!
The call for developers will officially open on October 18, be sure you won’t miss it!
The world would be a much better place if everyone could wake according to their own natural circadian rhythm and natural sunlight peeking through their window. But the world doesn’t work like that and many people have to force themselves awake. That’s especially true for people who don’t have conventional work schedules and this gorgeous Artificial Sunrise Headboard gives them a pleasant wakeup call.
Consider how our ancestors woke up before artificial lighting came along and humanity was still nomadic, because we haven’t evolved much since then. As the sun started to rise, the sky would transition from black to dark blue and then continue to lighten over the course of an hour or two. That provided people with gradual stimulation to ease them from sleep into wakefulness, which stands in stark contrast to the sudden, blaring alarms that are common today. This headboard simulates the gradual sunrise and an integrated personal assistant brews coffee to give sleepers a little extra incentive to get out of bed.
This headboard is stunning, thanks to the fantastic design and craftsmanship. It partially covers the sleepers’ heads with Adafruit NeoPixel RGB LED lighting, which increases in brightness and changes color over the course of the waking routine. Two Arduino Mega 2560 boards control all of the system’s functions, including the custom personal assistant dubbed PRISMA. An Adafruit MP3 Shield gives PRISMA a voice and a MIKROE SpeakUp 2 Click voice recognition board lets PRISMA understand commands. A DS3231 real-time clock is necessary for accurate timekeeping.
Details on the construction of the headboard and PRISMA’s functions are available in the Instructables tutorial. But it can respond to a handful of basic commands, such as setting a wake time. At that time, it begins the slow LED animation for the artificial sunrise. It also controls the operation of the coffee maker through a relay module connected to one of the Arduino boards.
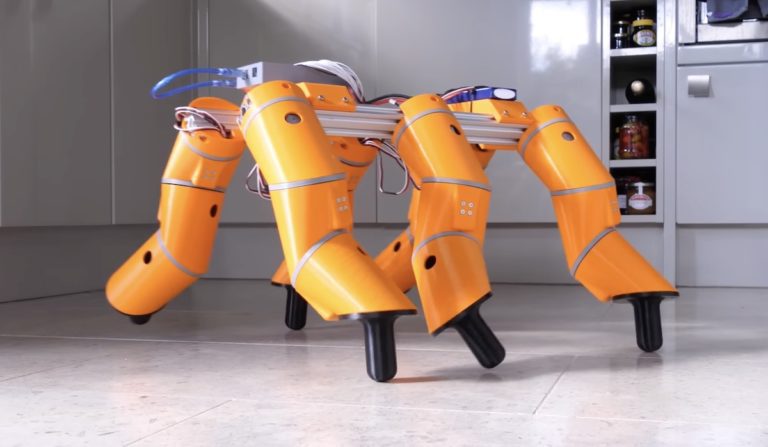
James Bruton gave that title to his most recent video as a good-natured jab at Allen Pan’s project about “giving snakes there legs back.” In Pan’s video, he built a robotic exoskeleton to let snakes walk around on motorized legs. But as Bruton noted in his video intro, those legs didn’t look very snakelike. So Bruton created his own robot that walks around on more serpentine limbs.
This robot’s six limbs each have three degrees of freedom (DoF), all of which are motor-driven. But unlike most robotic limb designs, these use “oblique swivel joint mechanisms.” That mouthful of a term means that each joint rotates on a plane offset at an angle relative to the preceding joint. While that arrangement isn’t suitable for many applications, the kinematics are interesting and the resulting movement does resemble the wriggling of a snake’s body as it slithers along.
Beefy servo motors rotate the joints and an Arduino Mega 2560 board controls them. The servos don’t allow for continuous rotation, but that wasn’t necessary for this robot’s gait. Power comes from a hobby LiPo battery pack and Bruton pilots the robot using the custom universal remote that makes an appearance in most of his videos. All of the leg segments were 3D-printed and attached to a frame made from a couple pieces of aluminum extrusion.
While it is easy for the Arduino to control the position of each servo motor, Bruton had to do a lot of work to figure out how to coordinate their movement. He figured out the basics through trial-and-error, but sophisticated control would require trigonometry and the implementation of inverse kinematics. Bruton decided not to bother with those, since he had already accomplished his goal of building robotic legs that look like they would belong to a snake.
The first Guitar Hero game hit shelves in 2005 and kickstarted the rhythm game revolution. While it wasn’t the first rhythm game, its inclusion of “realistic” guitar controllers changed the industry. It wasn’t long before competitor Rocksmith took things a step further and let players use real electric guitars. But guitars are so common; if you want to stand out, you go for the brass. That’s why Greig Stewart (AKA Theremin Hero) built this custom controller for the Trombone Champ game.
Trombone Champ is currently enjoying viral attention thanks to its quirkiness. To play the game, the user drags their mouse cursor up and down to mimic moving a trombone’s slide and clicks their mouse to blow air. Like Guitar Hero and most other rhythm games, the goal is to hit the notes with the most accuracy possible. But Theremin Hero correctly surmised that moving a mouse is nothing like playing a real trombone, so he converted a cheap trombone kazoo toy into a controller for Trombone Champ.
The toy kazoo looks like a tiny trombone and the slider does alter the pitch, but it isn’t tuned at all and so analyzing the pitch isn’t useful. So Theremin Hero chose to tie the toy’s slider position to the mouse cursor position in the Y axis and any sound coming from the kazoo triggers a mouse click. Their custom computer software handles the latter by listening through any microphone connected to the computer, but monitoring the slider position was more difficult and required an Arduino.
To get an accurate measurement of the slider position, Theremin Hero used an Arduino Nano board and a VL53L1X Time-of-Flight (ToF) sensor. ToF sensors work like one-dimensional LIDAR and calculates distance by measuring the time it takes for a laser pulse to bounce off an object and return to the sensor. The ToF sensor calculates the distance and the Arduino sends that data to the computer software via Serial. The software then translates the distance into a coordinate for the mouse cursor.
As you can see, this works very well and looks like a lot of fun to play.
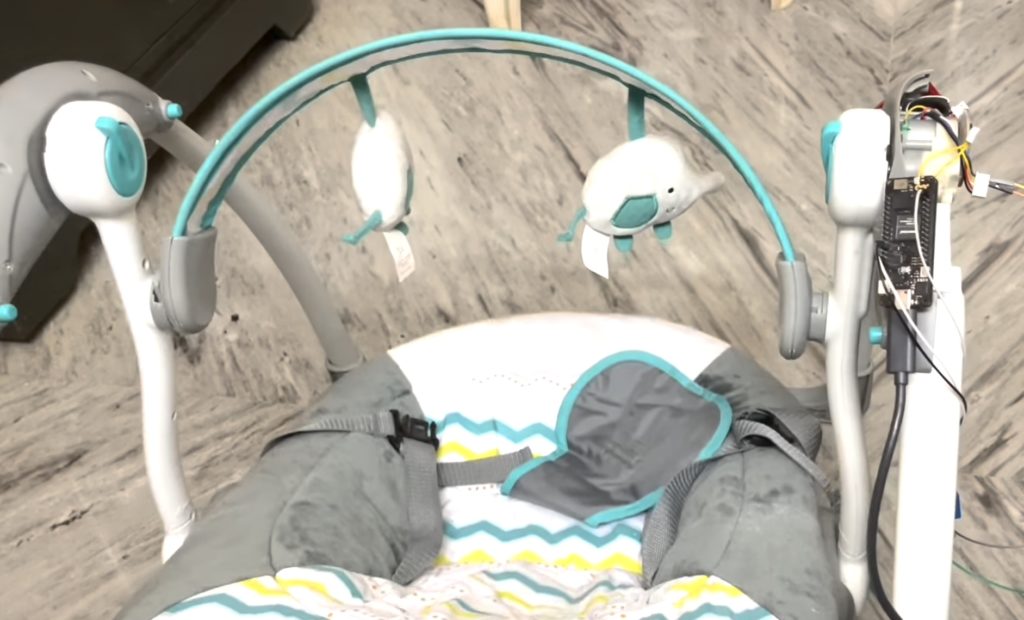
No one enjoys hearing their baby cry, especially when it occurs in the middle of the night or when the parents are preoccupied with another task. Unfortunately, switching on a motorized baby swing requires physically getting up and pressing a switch or button, which is why Manivannan Sivan developed one that can automatically trigger whenever a cry is detected using machine learning.
Sivan began his project by first gathering real world samples of crying sounds and background noise from an Arduino Portenta H7 and Vision Shield before labeling them accordingly in the Edge Impulse Studio. From here, he created a simple impulse which takes in time-series audio data and generates a spectrogram which is then used to train a Keras neural network model. Once fully trained, the model could accurately distinguish between the two sounds about 98% of the time.
Beyond merely classifying the sounds from the two onboard microphones, Sivan’s custom program also sets a relay to activate for 20 seconds if crying has been detected, after which it turns off until crying is recognized again. He hopes to use this project as a convenient way to assist busy parents with the difficult task of calming a crying baby without the need for constant manual intervention. You can read more about it here on the project’s Edge Impulse docs page.
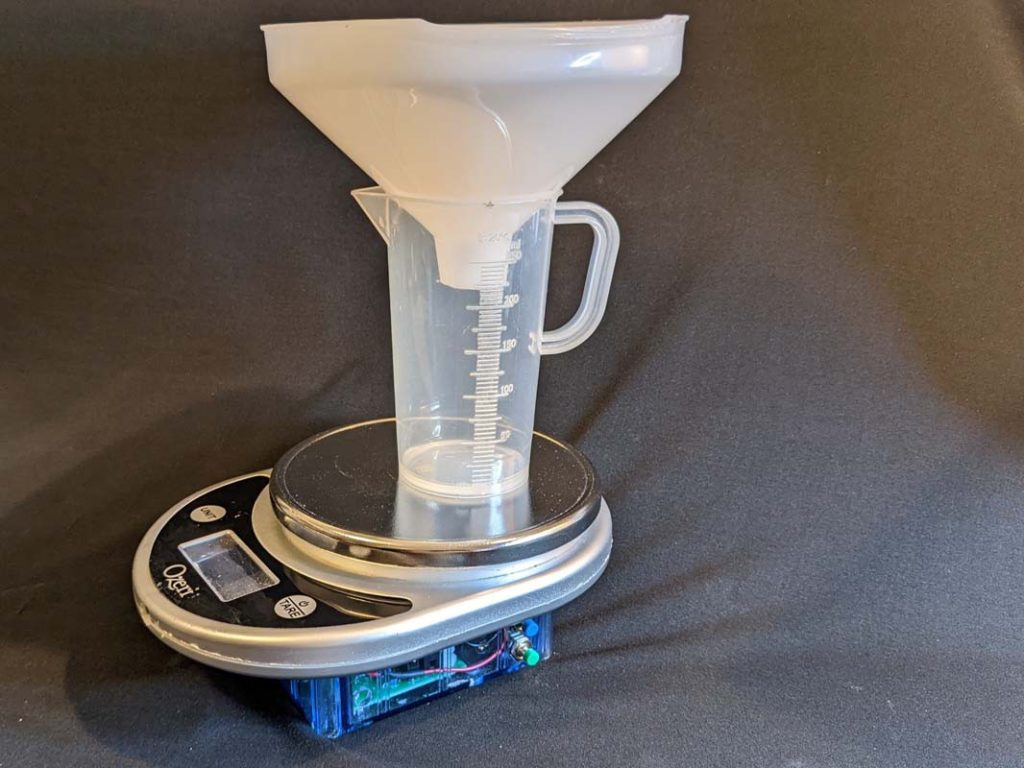
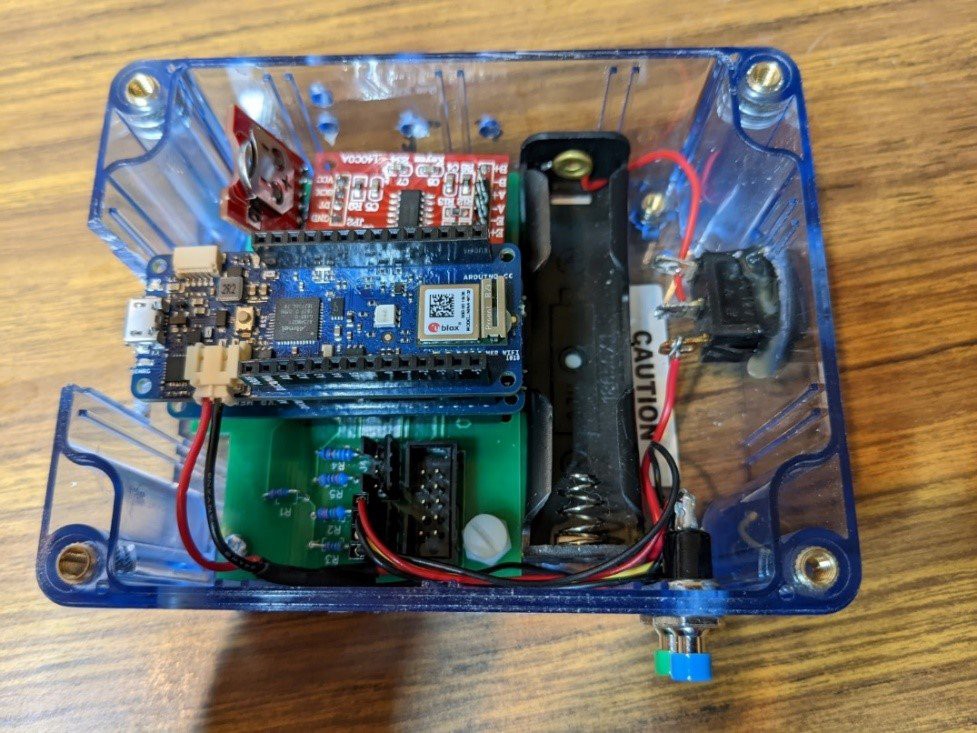
Many medical conditions can affect urine flow, either as the primary effect or as a secondary symptom. That’s especially true for men, because prostate problems often affect urination. Benign prostate hyperplasia (BPH), for example, is a non-cancerous enlargement of the prostate that results in a weak urine stream. BPH is usually treatable with medication, but doctors need a way to measure a treatment’s efficacy. Jerry Smith developed Uroflow to monitor urine streams and track the progress of BPH treatment.
When one’s prostate enlarges, it can both put pressure on the bladder and restrict the urethra. That results in a frequent feeling that one needs to urinate, but also a weak stream. When the enlargement isn’t related to cancer, it falls under the BPH umbrella. A key to diagnosing BPH is a urinary flow test, which detects stream strength and urine volume. Follow-up urinary flow tests help doctors monitor treatment. But typical equipment for urinary flow testing is expensive and requires that the patient visit their doctor. Uroflow is inexpensive to build, which would let patients perform urinary flow tests at home.
Uroflow works by measuring the weight of a cup as the patient urinates. The device can determine the total volume based on the weight and it can calculate flow by measuring the weight over time. The Uroflow device consists of a cheap food scale and an Arduino MKR WiFi 1010 board. The Arduino monitors the output from the scale and sends the results to a PC. Custom software interprets the results and performs the calculations, then displays the data in a graph. Patients can compare many graphs collected over the course of their treatment to evaluate the efficacy of medications.
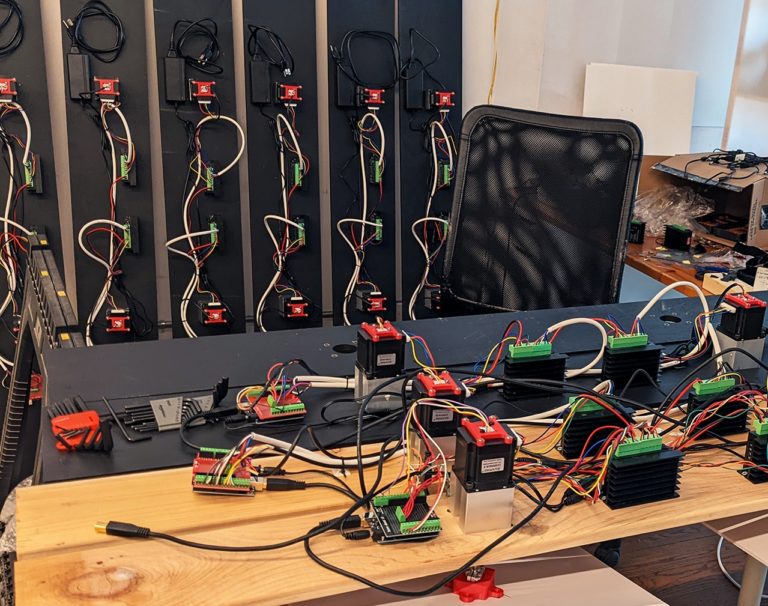
Art may be subjective, but all of our readers can appreciate the technology that goes into kinetic art. That term encompasses any piece of art that incorporates movement, which means it can be as simple as a sculpture that turns in the wind. But by integrating electronics, artists can achieve impressive effects. That was the case for Nicholas Stedman and his Devicist Design Works team, who built the Flux kinetic art installation for Shopify’s Toronto offices.
Flux is a massive 40-foot-long kinetic art piece that hangs suspended from the ceiling in the Shopify offices. That length is divided into 20 individual planks, each of which contains two reflective prisms. The prisms rotate in different patterns, resulting in mesmerizing visuals as light reflects around the art piece and the surrounding office. It is striking in its industrial minimalism, but subtle enough that it blends into the space instead of overpowering it.
Stedman’s team used stepper motors to rotate the prisms. 20 Arduino Uno boards control the steppers through silent TMC2160 drivers and receive feedback on position via AS5600 magnetic encoders. A Raspberry Pi single-board computer running a Node.js program coordinates the operation of the Arduino boards through USB. The team also developed 3D simulation software that helps them create animation patterns in a virtual space before deploying them in the real world.
Smart homes have many benefits, and it’s not all about convenience, security, and chores. Entertainment is a big part of what we do at home, and smart technology can help us maximize our enjoyment of our home entertainment systems and manage them more easily.
In this article, we’ll look at some of the ways smart home technology leads to better entertainment, and we’ll share a few examples of home entertainment projects from the Arduino project hub that you can try.
The benefits of smart home entertainment
Smart entertainment systems are easier to control and navigate. Smart tech makes it easier to change the volume, switch between systems, and get more out of your entertainment device’s features.
You can sync entertainment devices with other gadgets like voice control tools and even exercise machines to create a more user-friendly and feature-rich experience.
With smart tech you gain more control over your devices, allowing you to monitor things like screen time and use, and keep younger family members safe by banning certain sites and apps and monitoring activity.
Exercise and entertainment can be a perfect combination, with devices like the Peloton gaining lots of popularity in recent years. Connecting an exercise machine to your home entertainment system can be a great way to make your workouts more interesting and engaging — especially when your entertainment acts as an incentive to work harder.
Arduino community member Roboro built this project where he connected a stationary bike to an Arduino Nano, allowing him to control the streaming of Netflix on a PC.
When you set up the device, it will open Firefox and start playing Netflix. The bike will monitor your speed according to a routine you designed, and if you fall below your desired speed for too long Netflix will pause until you speed up again. You don’t have to use Netflix — the same setup should work with any streaming service with a few small tweaks.
Pravin Desai built this simple project to allow users to change the channel on their TV using their voice. Voice control is a popular tool in many homes today, and devices like Amazon’s Alexa now make it easier than ever to control the technology in our homes simply by telling it what to do.
Desai’s project works by using a Bluetooth-controlled voice TV remote with an IR transmitter. An app called BT voice control converts voice input to string and sends it to Arduino to make your command a reality.
Jose Luis Bejarano Vasquez built a project to help users control their TV, DVD, and audio system using Arduino and an Android app. It’s fairly easy to replicate and requires only a handful of components.
The good old-fashioned pinball machine is a tried-and-tested form of entertainment, a staple of arcades and bars the world over. In your home, a pinball machine can be the perfect way to entertain guests or even just keep yourself busy.
Arduino member Frogger1108 had always wanted a pinball machine but soon discovered that fully-working pinball machines in good condition do not come cheap and require a lot of maintenance and knowledge — especially the older electromechanical (EM) machines.
Frogger1108 spent some time looking up how to build a pinball machine and found various homemade projects using Arduino. Instead of buying their own pinball machine components (which was expensive and time-consuming), Frogger1108 bought an old pinball playfield on eBay and used it for its parts.
The end result was a fully functional pinball machine controlled by a single Arduino Mega 2560. It cost significantly less than a new or even slightly used machine and is every bit as entertaining and fun.
Create a more entertaining home with Arduino
Building a better home entertainment system with fun games, easier control of your existing gadgets, and even more fun exercise options is easier than ever with Arduino’s tools. You can now build a home that is more enjoyable to spend time in for you, your family, and any guests you have over.
Visit our home page to learn more about how Arduino works and the many different projects you can build with our solutions.
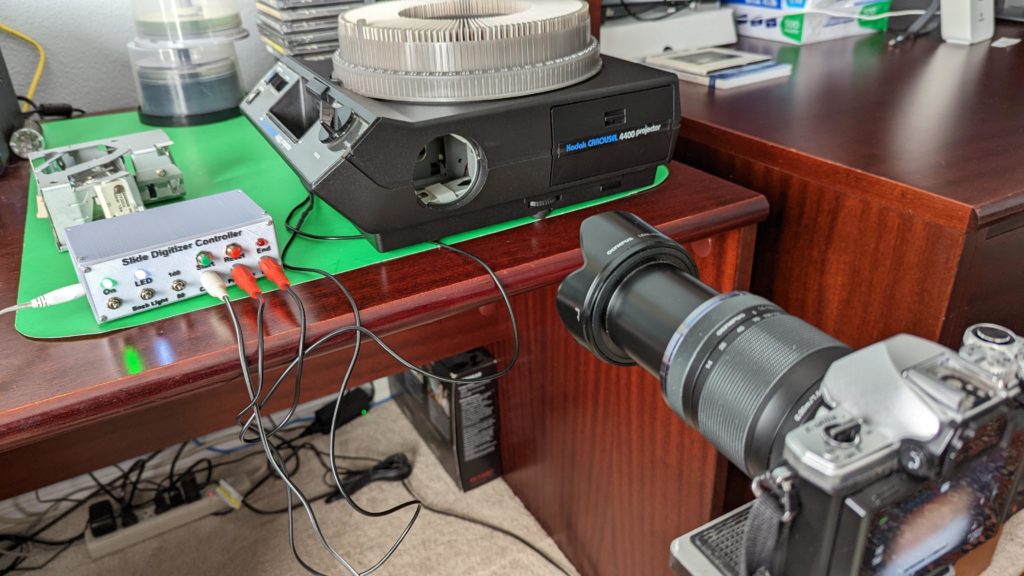
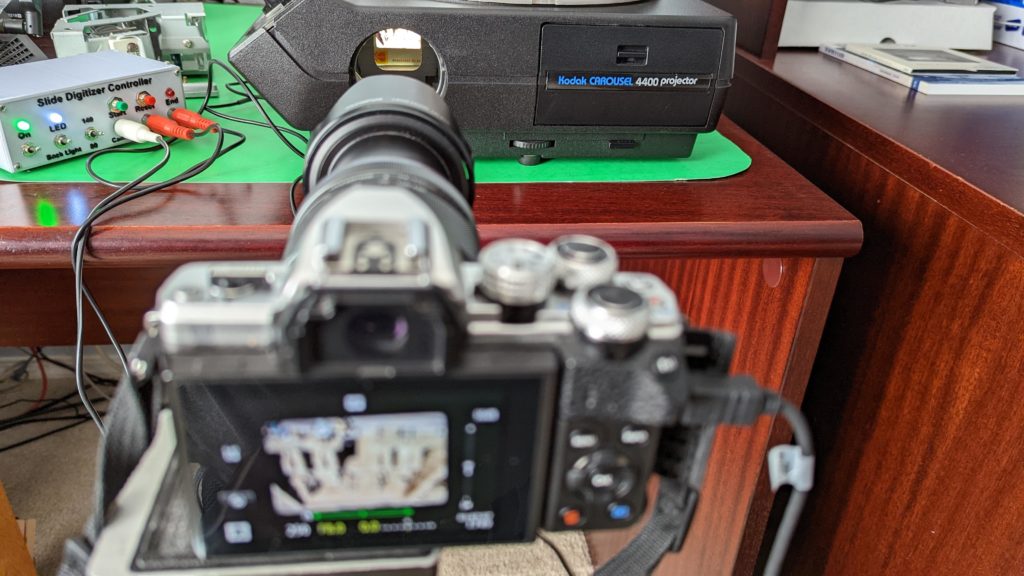
Sharing photos used to be a difficult task. Even after paying for someone to develop your photos and waiting to get them back, you’d end up with small prints that your friends would have to huddle around. One common alternative was 35mm slide projection. Photographers could snap images and then have them developed as 35mm slides. They could then pop those into a slide projector that would blow up the image on a screen or wall where everyone could see the photo. If your family has a large collection of 35mm slides, this Instructables tutorial will help you digitize them.
As great as 35mm slides were, they don’t have much of a place in our modern world. Not many people have working slide projectors these days and most would prefer digital photos that they can share on social media, store on their computer, or display on a TV. There are 35mm slide digitizing services, but those can cost more than 50 cents (USD) per slide. That becomes very expensive if your slide collection is large. If you have a slide projector, even if its projection bulb is burnt out, this tutorial will help you digitize the slides by snapping photos with a modern DSLR camera.
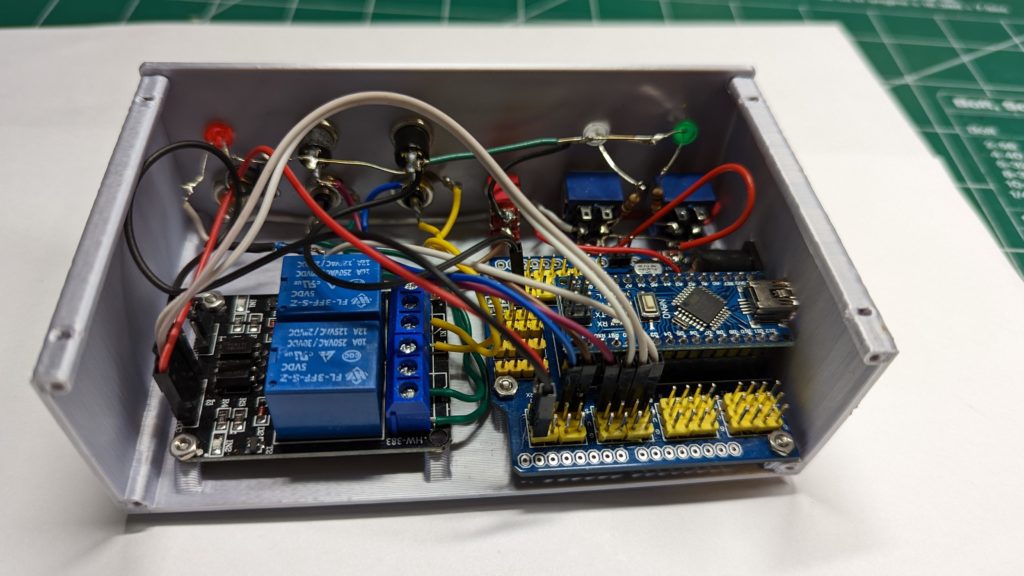
The idea here is to aim the DSLR camera lens at the slide where it sits in front of the projection lense. LEDs light up the slide (instead of the original projector bulb). You could snap each photo manually, but an Arduino Nano board can automate the process. If you follow the tutorial, the Arduino will wait for the camera to focus and stabilize, trigger the camera’s shutter, and then advance the carousel mechanism to load the next slide. It will repeat that process quickly while tracking the number of slides, so it can stop when it reaches the end of the carousel.
This makes it easy to digitize hundreds or even many thousands of 35mm slides with minimal labor. You’ll end up with digital photos (or raw image files) that you can use with modern devices.
Some modern cars, trucks, and SUVs have smart active suspension systems that can adjust to different terrain conditions. They adjust in real-time to maintain safety or performance. But they tend to only come on high-end vehicles because they’re expensive, complicated, and add weight. That’s why it is so impressive that Jallson Suryo was able to add a similar smart suspension adjustment system to his bicycle.
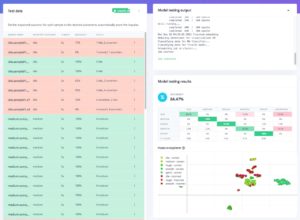
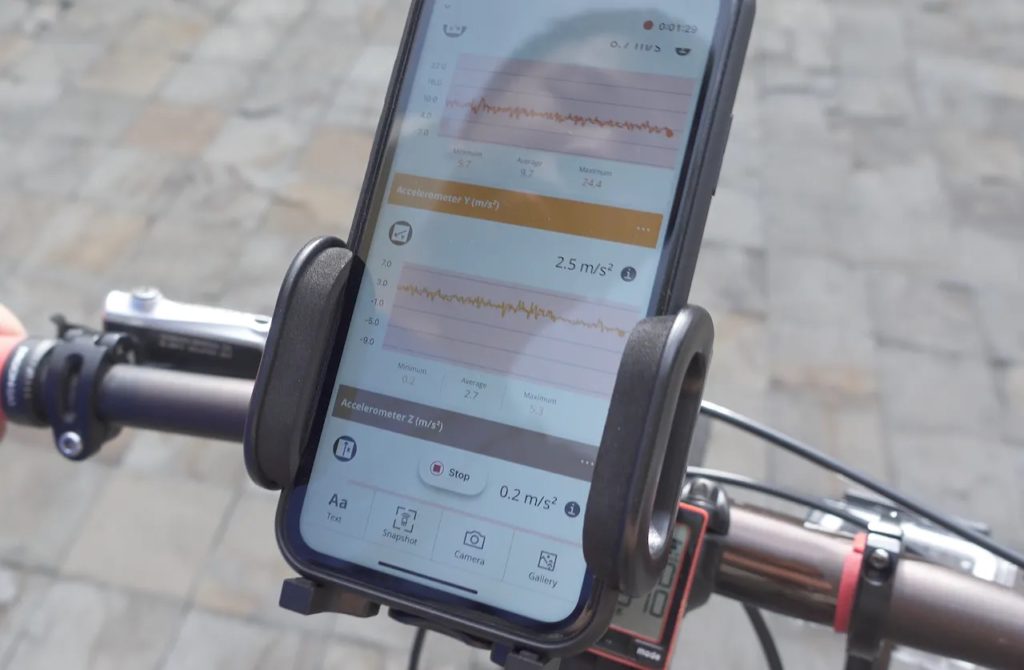
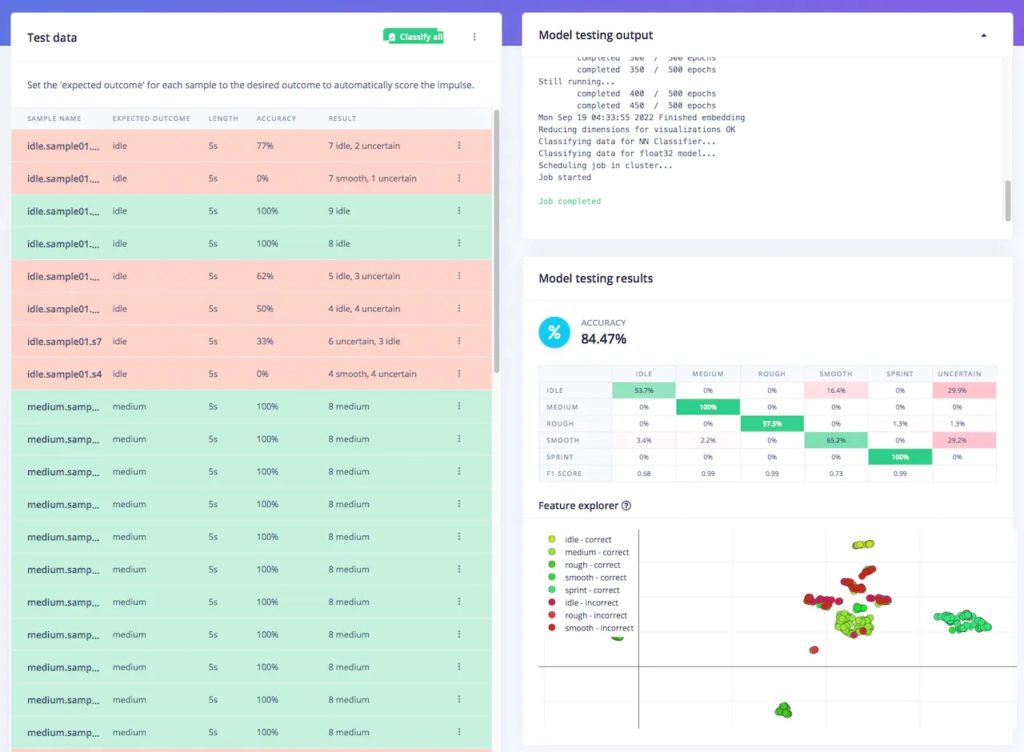
This system will only work on specific bicycles that have suspension forks that the user can adjust with a knob. A servo-driven mechanism mounts onto the fork and turns the knob to tweak the firmness and rebound of the front suspension. Normally the rider would need to stop and turn that knob by hand when necessary, but this system can perform that adjustment automatically in response to the current conditions. It can recognize and accommodate five different conditions: idle, medium, rough, smooth, and sprint.
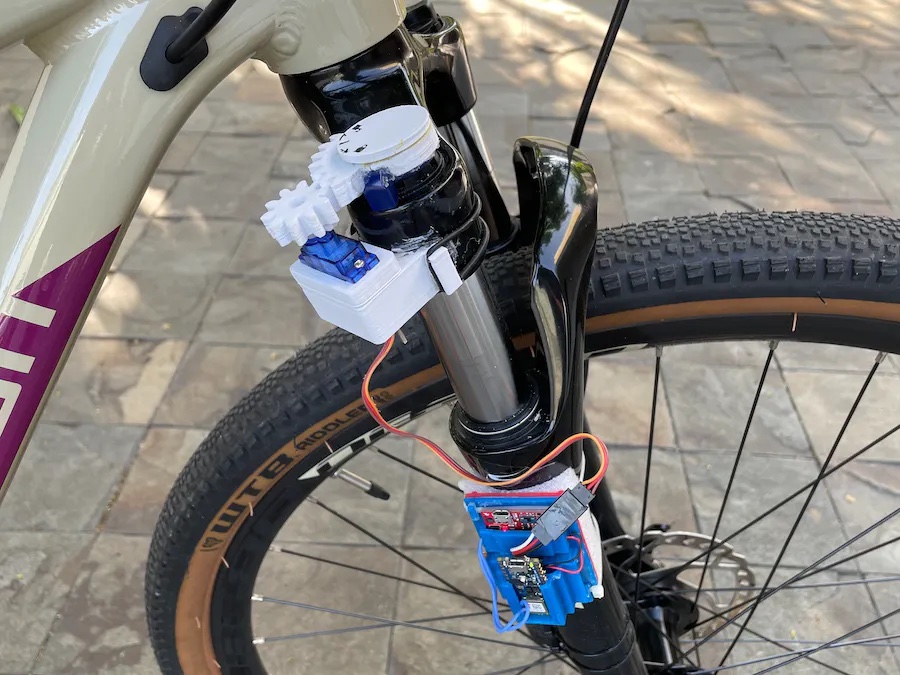
Suryo’s project is especially interesting because it recognizes the conditions with a machine learning model that monitors an Arduino Nano 33 BLE Sense board’s built-in nine-axis inertial sensor. Suryo didn’t have to program explicit sensor reading classifications. He trained the machine learning model, built with Edge Impulse Studio, on real-world data gathered through the Arduino Science Journal app. He could, for example, ride on a rough trail and tell the model that the inertial sensor readings it sees correspond to that mode.
The Arduino receives power from a lithium battery via a SparkFun charger/booster board. It runs the trained and deployed Edge Impulse ML model. When it detects inertial sensor readings that indicate a specific terrain or action, it turns the servo to adjust the suspension knob to the ideal setting.
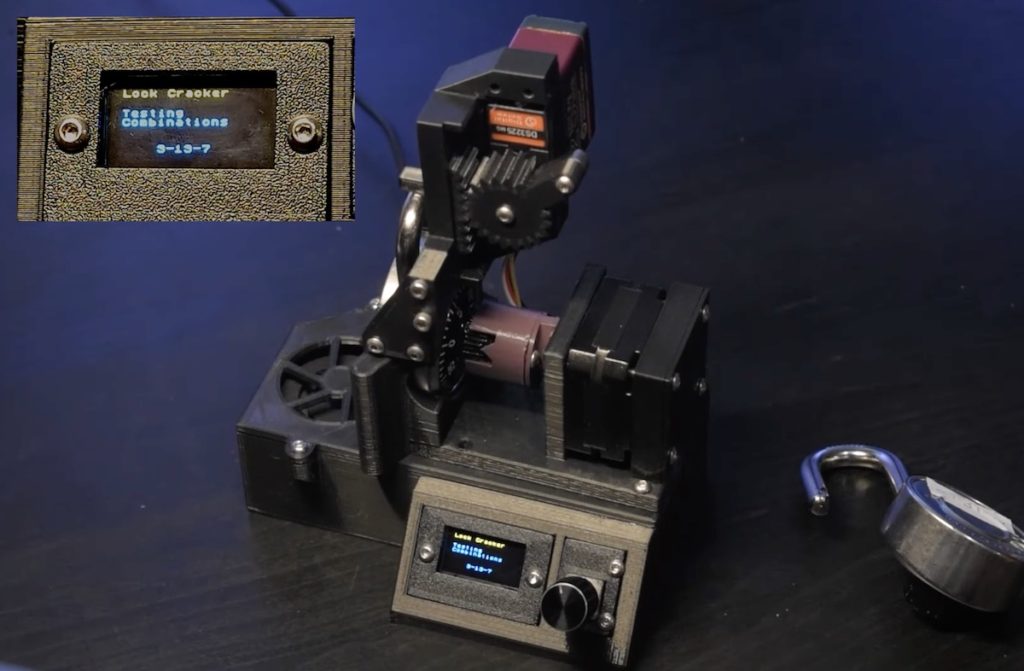
Big names on YouTube like LockPickingLawyer show us that a skilled individual can pick just about any lock that accepts a key. As it turns out, combination padlocks are also very easy to decode and it is even possible to automate that process so that a robot can do the job. Doing so only requires a few affordable parts and a simple algorithm. Mew463 explains how a Master Lock-cracking robot works and how to build your own.
This cracking process works thanks to the mechanics of combination padlocks. While the combination lock on something like a bank vault is very sophisticated, these padlocks have limited space for their mechanisms. They also tend to be cheap. For those reasons, one can feel the mechanisms engaging when stress is on the shackle.
To find the first number, you just pull on the shackle and turn the dial. It will catch just before the correct number. The third number is more complicated, but it is possible to infer by following the proper steps. The second number isn’t identifiable with tricks, but it is easy to try all of the possibilities once you know the other two numbers.This robot follows those steps for you, opening typical combination padlocks in under a minute. The 3D-printed frame holds both a stepper motor and servo motor. The stepper motor rotates the dial and has a magnetic encoder to give precise feedback on the dial position. The servo motor pulls up on the shackle and has an added analog line for feedback. An Arduino Nano board controls the two motors according to the algorithm. A user can navigate a menu and start the cracking process with a rotary encoder knob. The menu appears on an OLED screen, which also shows the lock’s combination after cracking.
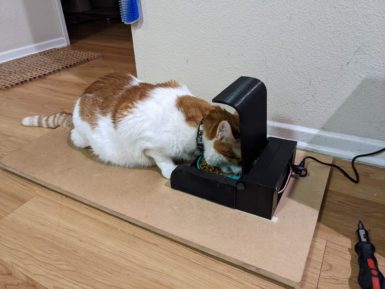
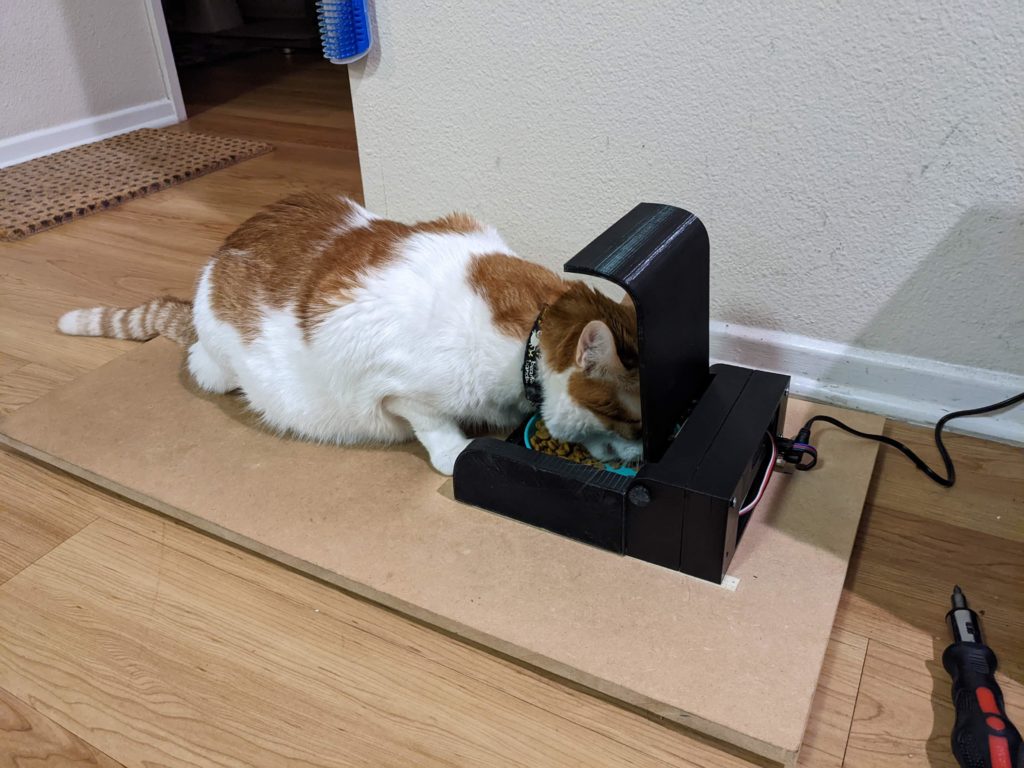
A common problem among owners of multiple pets is how to feed them separately. If one animal needs special food, is on a diet, or likes to eat from another’s bowl, it becomes difficult to control each pet’s consumption. That is especially true when one pet doesn’t like to finish their bowl of food immediately and leaves it open to theft by another. To solve this problem and prevent one cat from stealing another cat’s special diabetic diet food, Tomas built a selective pet feeder.
Like most of us would, Tomas first thought of using NFC tags on his cat’s collars to grant access to their food bowls. But NFC has a very limited range, which makes it hard to use in a situation like this. After considering other solutions, Tomas realized that one of his cats weighs quite a bit more than the other. If they were a similar weight then this wouldn’t work, but because the difference is substantial, he figured he could use a scale to grant access to the special diet food.
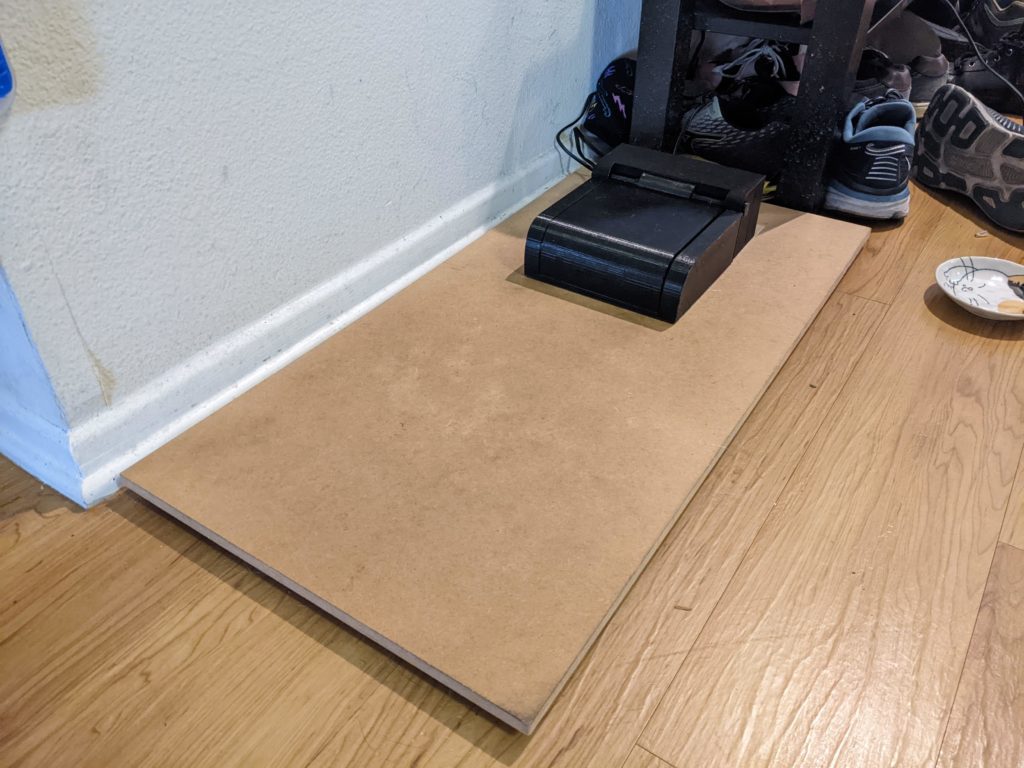
This meant constructing a servo-actuated cover for the special food and a cat-friendly scale. Any Arduino-compatible board can control the operation. The scale is four load cells connected to the development board through an amplifier. A sheet of MDF on top of the load cells provides a large surface for the cat to sit on. If the detected weight corresponds to the diabetic cat, the development board activates the servo to open the 3D-printed door that covers the diet food. If the scale doesn’t detect any weight or if it detects the weight of the other cat, it keeps the door closed.
This is an elegant and simple solution that should be useful for any pet owner that finds themselves in a similar situation.
Um dir ein optimales Erlebnis zu bieten, verwenden wir Technologien wie Cookies, um Geräteinformationen zu speichern und/oder darauf zuzugreifen. Wenn du diesen Technologien zustimmst, können wir Daten wie das Surfverhalten oder eindeutige IDs auf dieser Website verarbeiten. Wenn du deine Einwillligung nicht erteilst oder zurückziehst, können bestimmte Merkmale und Funktionen beeinträchtigt werden.
Funktional
Immer aktiv
Die technische Speicherung oder der Zugang ist unbedingt erforderlich für den rechtmäßigen Zweck, die Nutzung eines bestimmten Dienstes zu ermöglichen, der vom Teilnehmer oder Nutzer ausdrücklich gewünscht wird, oder für den alleinigen Zweck, die Übertragung einer Nachricht über ein elektronisches Kommunikationsnetz durchzuführen.
Vorlieben
Die technische Speicherung oder der Zugriff ist für den rechtmäßigen Zweck der Speicherung von Präferenzen erforderlich, die nicht vom Abonnenten oder Benutzer angefordert wurden.
Statistiken
Die technische Speicherung oder der Zugriff, der ausschließlich zu statistischen Zwecken erfolgt.Die technische Speicherung oder der Zugriff, der ausschließlich zu anonymen statistischen Zwecken verwendet wird. Ohne eine Vorladung, die freiwillige Zustimmung deines Internetdienstanbieters oder zusätzliche Aufzeichnungen von Dritten können die zu diesem Zweck gespeicherten oder abgerufenen Informationen allein in der Regel nicht dazu verwendet werden, dich zu identifizieren.
Marketing
Die technische Speicherung oder der Zugriff ist erforderlich, um Nutzerprofile zu erstellen, um Werbung zu versenden oder um den Nutzer auf einer Website oder über mehrere Websites hinweg zu ähnlichen Marketingzwecken zu verfolgen.