Schlagwort: mega
-

Arduino Mega controls this amazing water organ
Reading Time: 2 minutesArduino Mega controls this amazing water organ Arduino Team — November 7th, 2018 Earlier this year, artist Niklas Roy was invited to participate in the Drehmoment art festival that takes place in the south-west of Germany. The “catch” to this festival is that each artist was invited to team up with a…
-

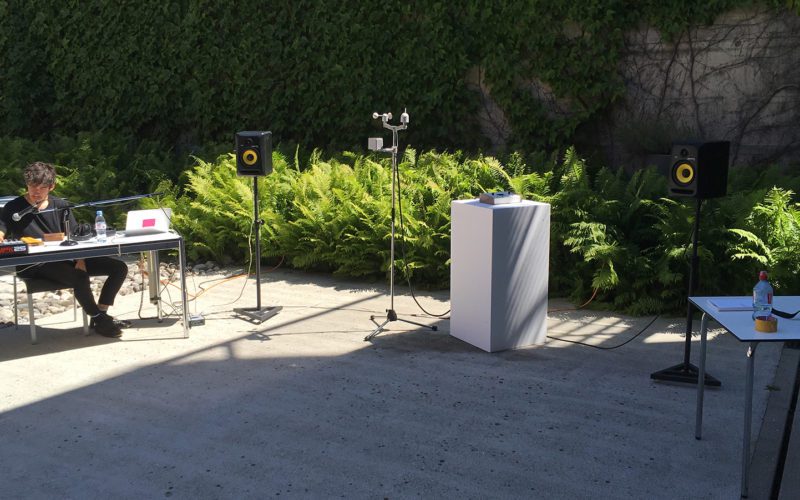
Custom weather station enhances and modifies electronic music
Reading Time: 2 minutesCustom weather station enhances and modifies electronic music Arduino Team — October 25th, 2018 While the environment is important for any musical performance, generally it’s not an active part of the show. Adrien Kaeser, though, has come up with a device called the “Weather Thingy“ that integrates climate-related events directly into electronic…
-

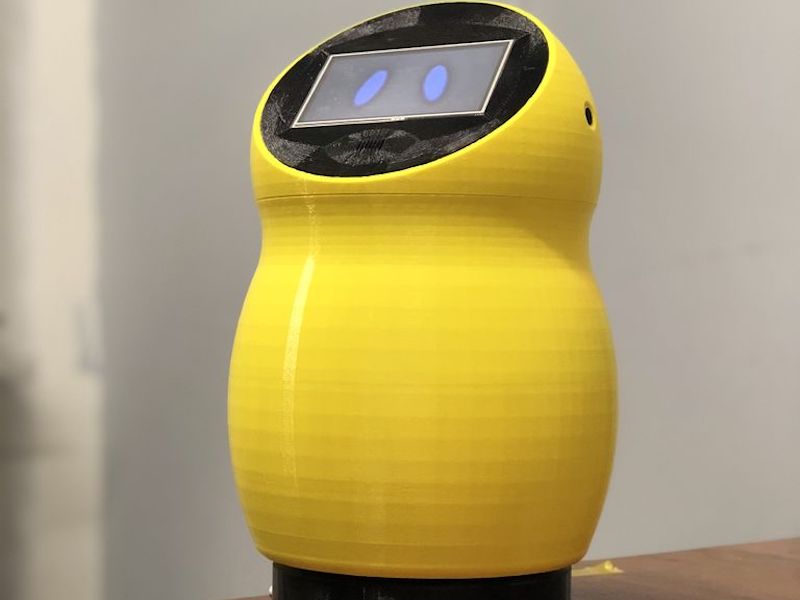
Twinky, the Arduino robot assistant
Reading Time: 2 minutesTwinky, the Arduino robot assistant Arduino Team — October 5th, 2018 In the middle of a project, you may find that what you’re making is similar to something that’s been done before. Such was the case with Adrian Lindermann when he started constructing his “Twinky” robot and found the Jibo social bot…
-

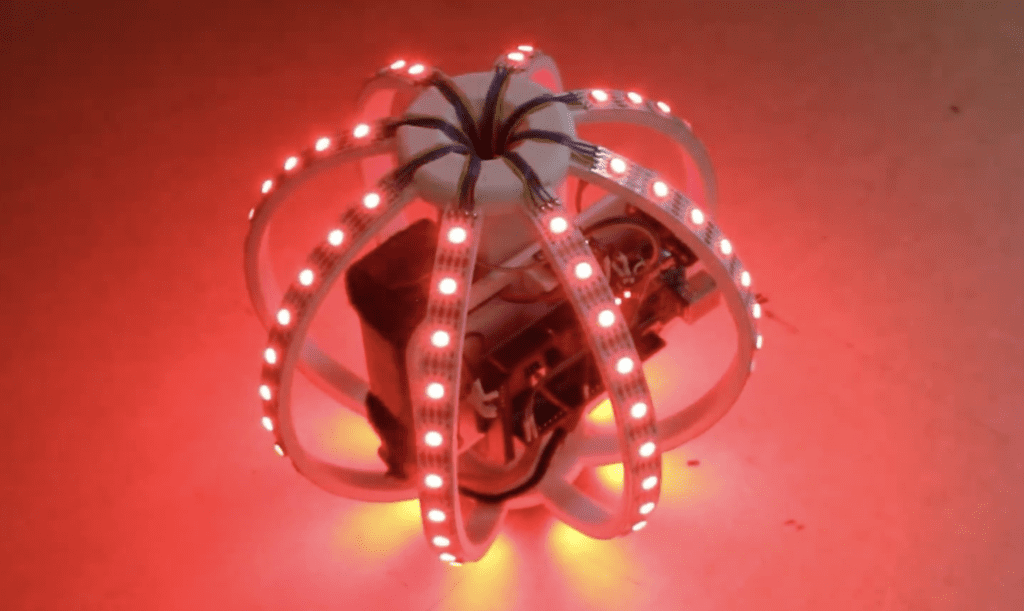
3D-printed “orbament” lights up with movement
Reading Time: < 1 minute3D-printed “orbament” lights up with movement Arduino Team — September 18th, 2018 What would you get if you crossed a gigantic Christmas tree ornament with an LED strip and Arduino/IMU control? Perhaps you’d come up with something akin to this colorful “RGB LED Ball” by James Bruton. The device features eight…
-
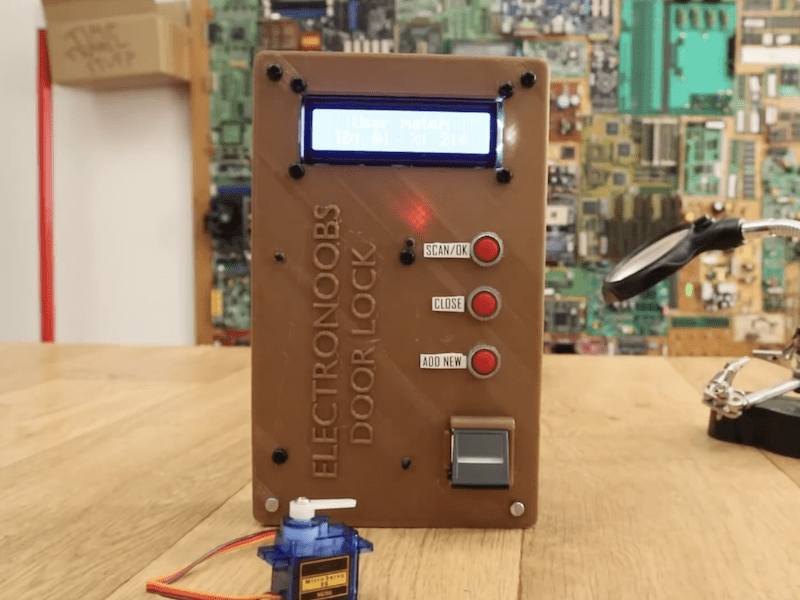
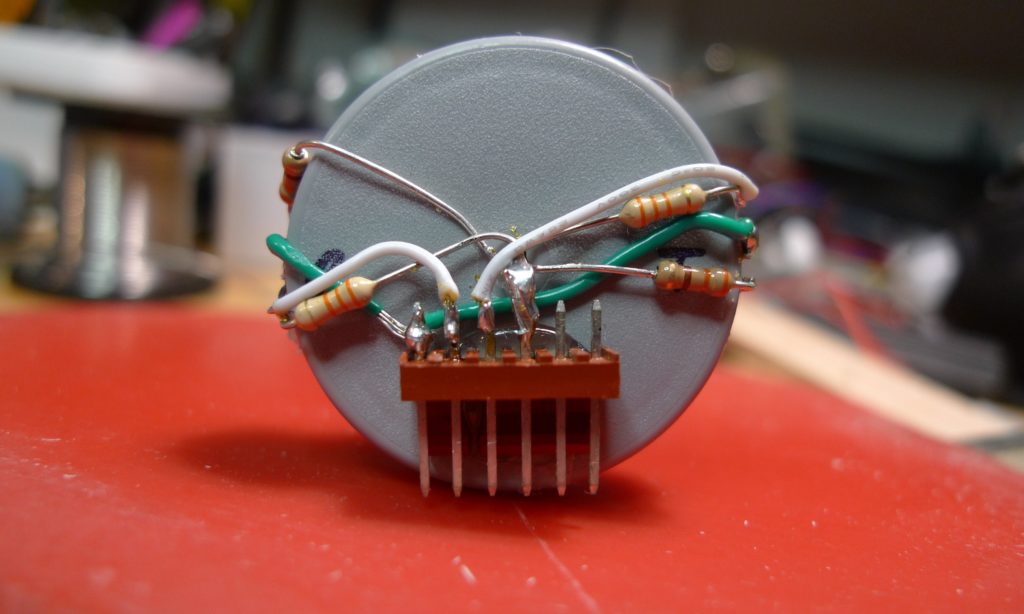
Build an Arduino Mega fingerprint door lock
Reading Time: 2 minutesBuild an Arduino Mega fingerprint door lock Arduino Team — September 13th, 2018 If you don’t want to carry keycard or memorize a passcode, this build from Electronoobs might be just the thing. The system uses a fingerprint reader to check to see if you have access, and if approved, the device’s…
-

Sip and puff Morse code entry with Arduino
Reading Time: < 1 minuteSip and puff Morse code entry with Arduino Arduino Team — September 10th, 2018 Those that need a text entry method other than a traditional keyboard and mouse often use a method where a character is selected, then input using a sip or puff of air from the user’s mouth. Naturally…
-

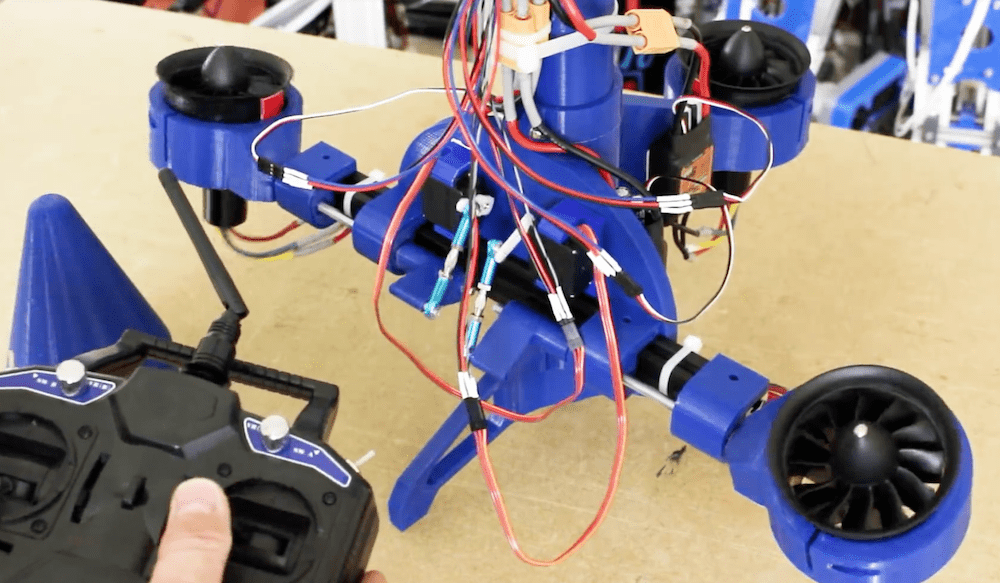
Electric-powered fan rocket takes off and lands(?) vertically
Reading Time: 2 minutesElectric-powered fan rocket takes off and lands(?) vertically Arduino Team — August 13th, 2018 Does a rocket need to use a certain type of fuel, or even be capable of spaceflight? While James Bruton’s build might not fit everyone’s definition of this type of craft because of its electric ducted fan (EDF)…
-

Check the weather on this Arduino-controlled split-flap display
Reading Time: < 1 minuteCheck the weather on this Arduino-controlled split-flap display Arduino Team — August 9th, 2018 Split-flap displays show information using characters changed by an electric motor. While they’ve largely been replaced by more modern means, hobbyists like “gabbapeople” have been keeping this this technique alive, in this case as a four-character IoT…
-

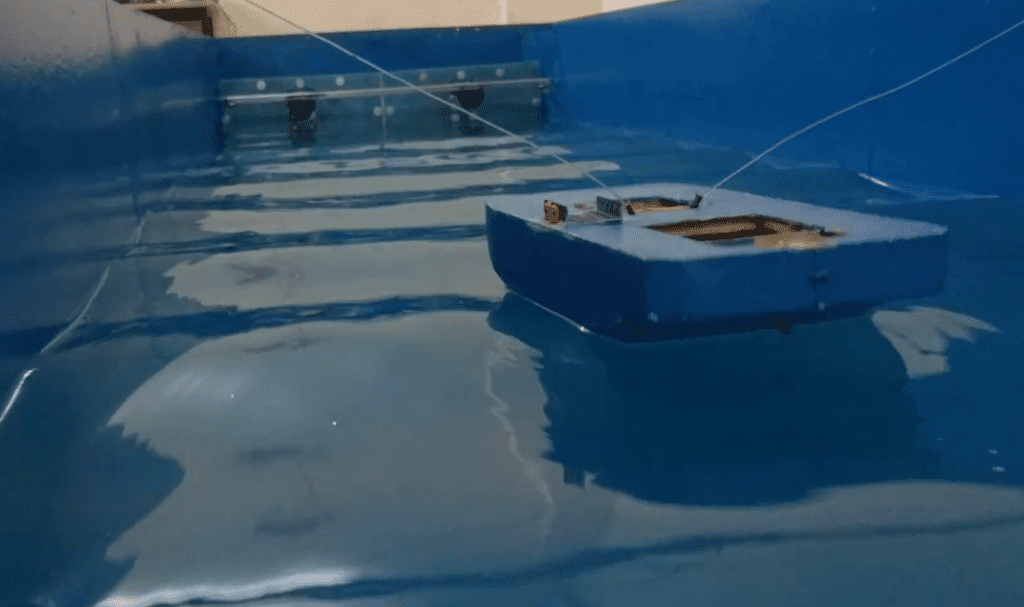
Generating waves with Arduino
Reading Time: < 1 minuteGenerating waves with Arduino Arduino Team — August 6th, 2018 Need a wave generator to test out your latest boat, barge, or submarine design, but can’t quite afford one? If so, then you might consider Subham Bhatt’s DIY tank that he was able to construct for around $1,200 USD. Bhatt’s device…
-

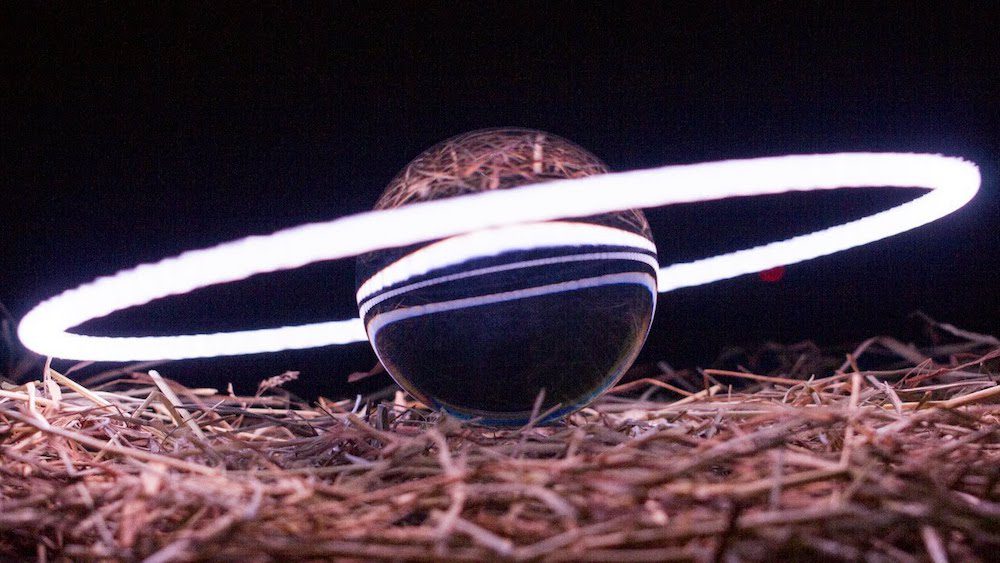
Light painting rig is a masterpiece of artistic hardware hacking
Reading Time: 2 minutesLight painting rig is a masterpiece of artistic hardware hacking Arduino Team — July 30th, 2018 Light painting is an art form where dark areas are selectively lit to form interesting effects. While normally a manual operation, Josh Sheldon has come up with a rig to automate and enhance the process. The results…
-

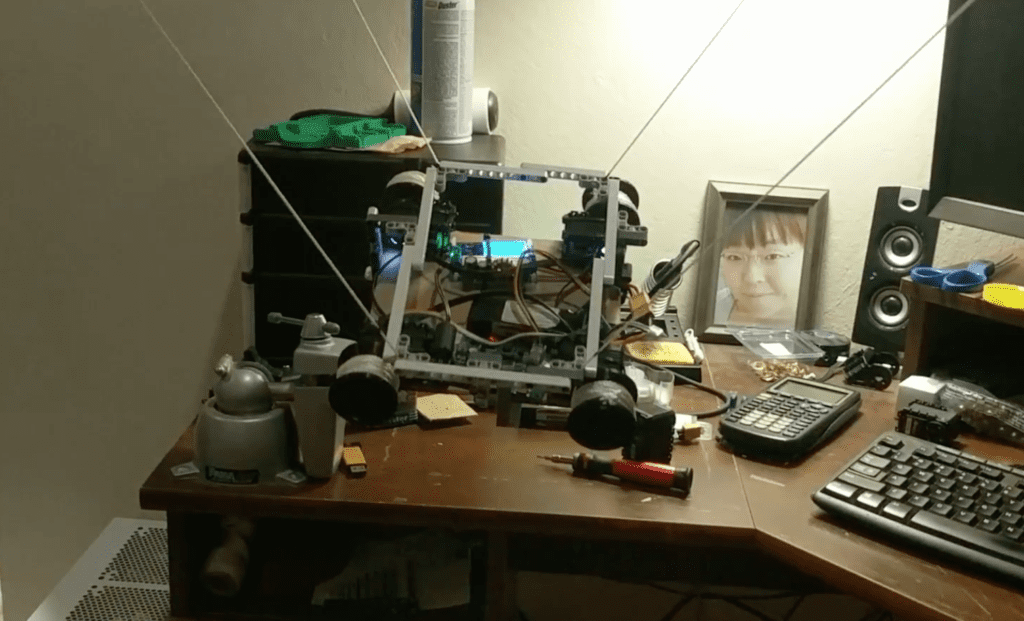
Ceiling-mounted cable robot with Arduino Mega
Reading Time: 2 minutesCeiling-mounted cable robot with Arduino Mega Arduino Team — July 30th, 2018 Cable-based robots are a common sight at sporting events as remote camera operators, but what about one for your living room? As spotted on Reddit, Nathaniel Nifong decided there was no reason not to have one of these devices, and…
-

Stop motion short filmed with the help of Arduino
Reading Time: < 1 minuteStop motion short filmed with the help of Arduino Arduino Team — July 30th, 2018 One can imagine that making a stop motion animation film is a lot of work, but if you’ve ever wondered what one involves, James Wilkinson decided to document the process of making Billy Whiskers: The Mystery…
-

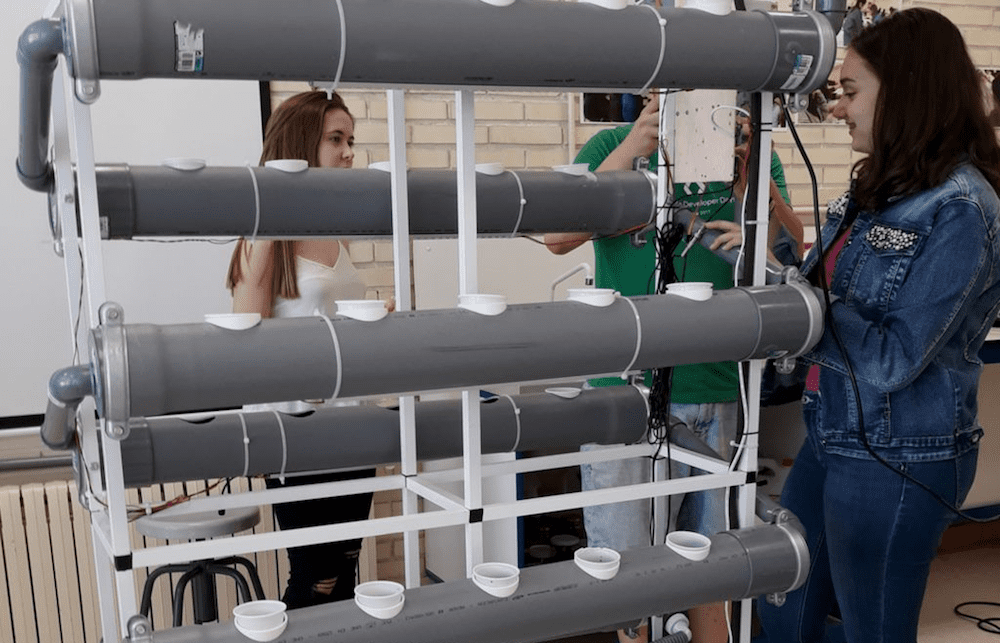
Smart hydroponic assembly made with Arduino Mega
Reading Time: 2 minutesSmart hydroponic assembly made with Arduino Mega Arduino Team — July 23rd, 2018 If you love electronics as well as plants, what better way to combine the two than with a smart hydroponic system? Students at the Juan de Lanuza School decided to do just that, creating a portable hydroponic assembly that’s…
-

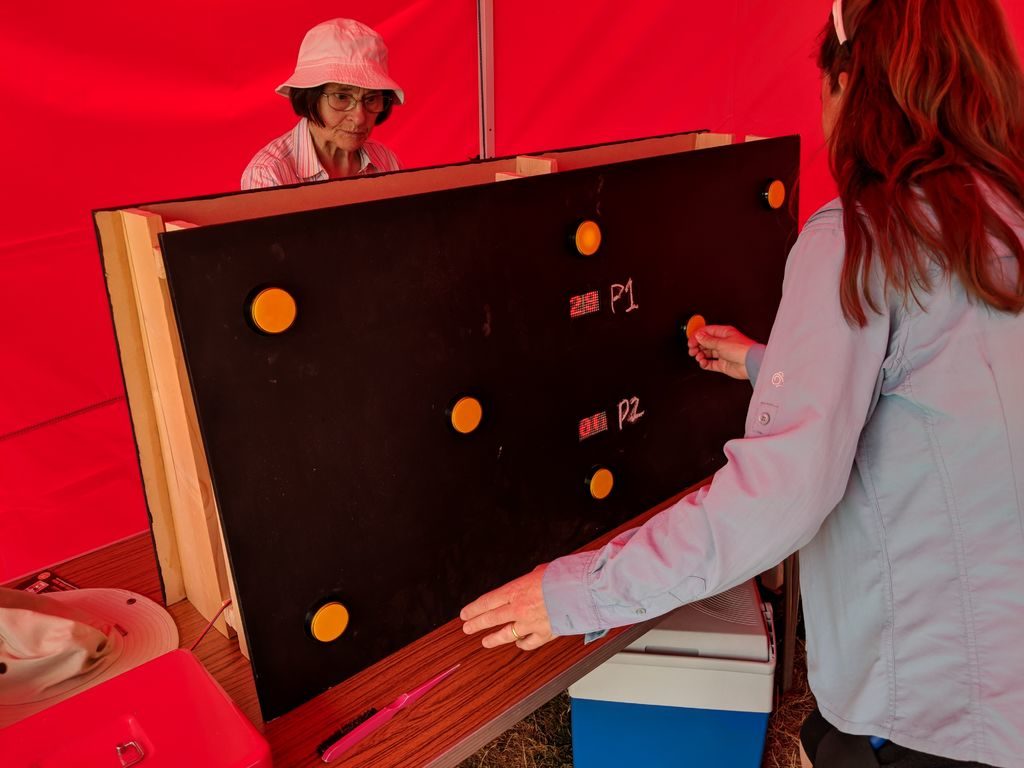
An Arduino “Whack-a-Button” Reaction Game
Reading Time: < 1 minuteAn Arduino “Whack-a-Button” Reaction Game Arduino Team — July 16th, 2018 After Instructables user R0RSHACH’s son won a place at the World Scout Jamboree in 2019, the maker decided to create a fairground-style game for fundraising. The resulting device is akin to a Whack-a-Mole or Batak game that can be found at high-end…
-

TerraDome is a Jurassic World-themed terrarium
Reading Time: 2 minutesTerraDome is a Jurassic World-themed terrarium Arduino Team — June 25th, 2018 If you need a warm place to keep your tropical plants, then look no further than the beautiful “TerraDome” from maker “MagicManu.” The device is equipped with an Arduino Mega that helps regulate the temperature inside its clear octagonal structure…
-

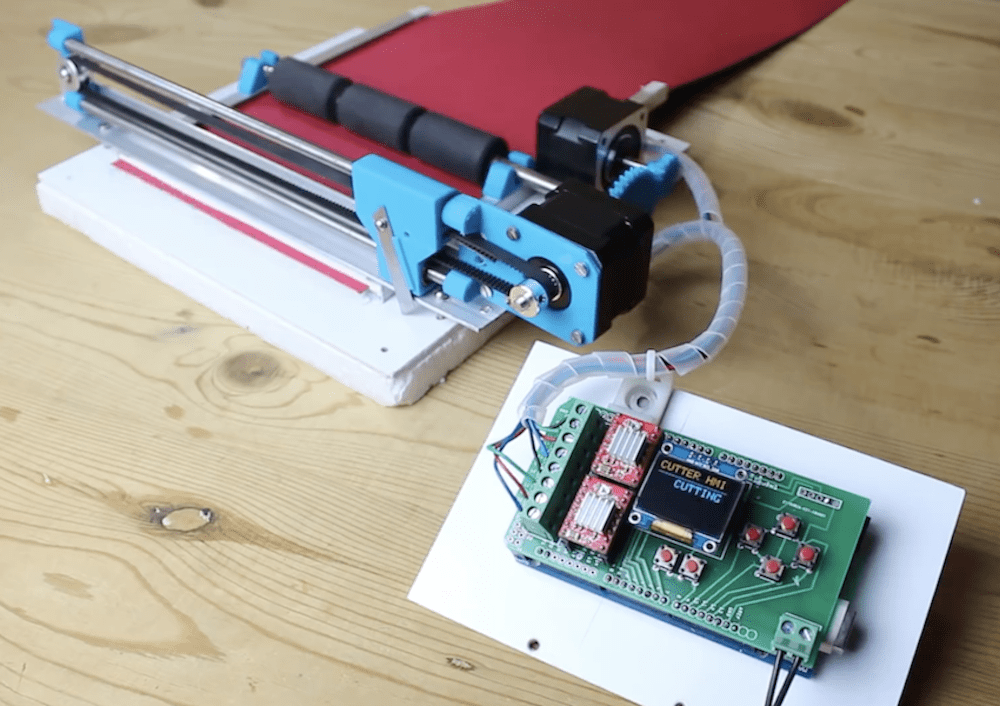
An Automated Paper Cutter
Reading Time: < 1 minuteAn Automated Paper Cutter Arduino Team — June 15th, 2018 Are scissors and manual paper cutters not working for you? Well, “Mr Innovative” has the solution in the form of an Arduino-driven device that cuts paper to length automatically. As you can see in the video below, a user simply inputs…
-

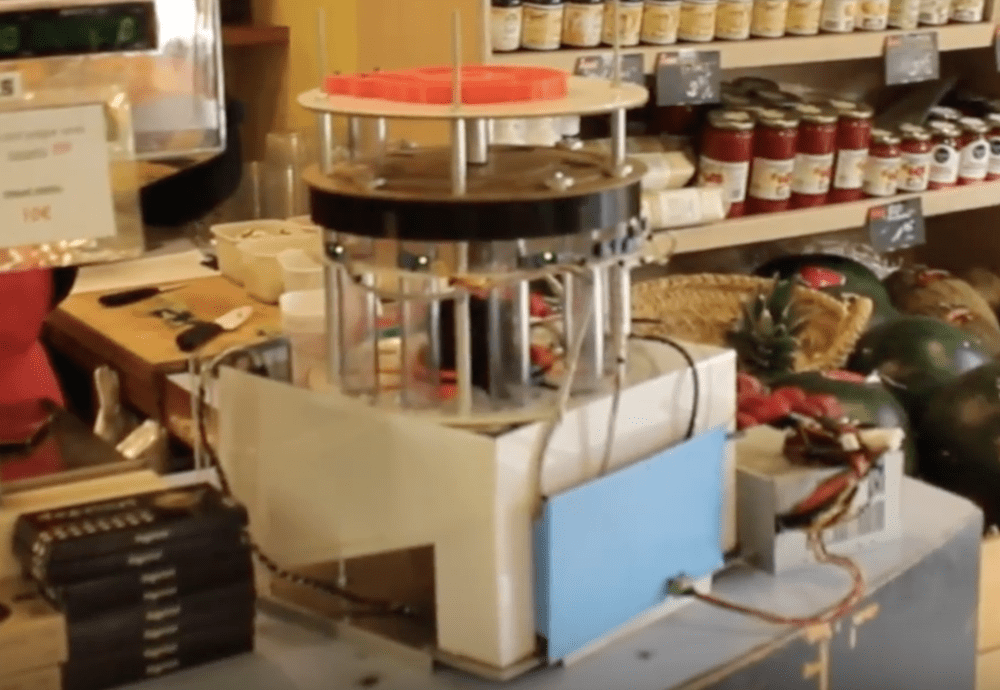
SmartCash can sort and give out change
Reading Time: < 1 minuteSmartCash can sort and give out change Arduino Team — June 15th, 2018 If you run a small business where transactions are made, handling out coins is a necessary part of the job. While a cash register does the trick, perhaps you could try out the SmartCash device—a cylindrical electromechanical system…
-
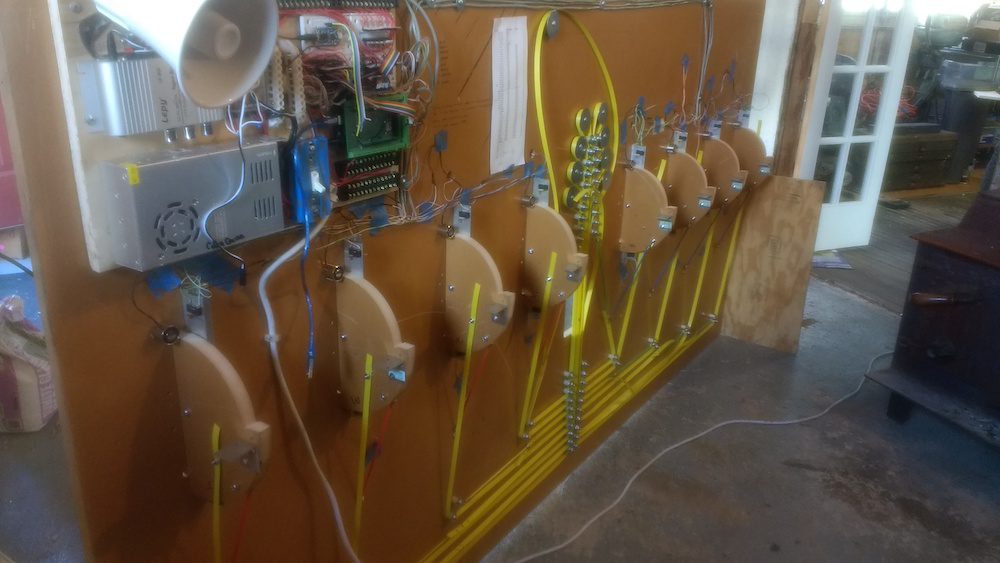
Meme Weaver guides users through fabric creation
Reading Time: 2 minutesMeme Weaver guides users through fabric creation Arduino Team — June 14th, 2018 We all need to wear clothes, but where do they come from? If you answered “the mall,” then perhaps it’s time to play a couple rounds on the “Meme Weaver.” As seen here, this project by the husband and wife…
-
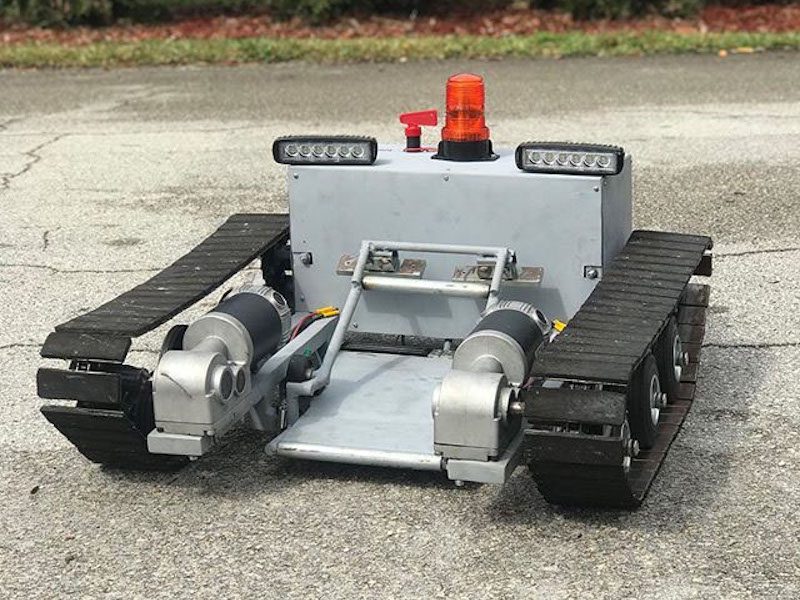
Pull small planes around with this Arduino Mega-based tug
Reading Time: 2 minutesPull small planes around with this Arduino Mega-based tug Arduino Team — June 12th, 2018 While there are many ways to move an airplane on the ground, Anthony DiPilato decided to create a “tug” of his own. The treaded device looks like a tiny tank, and when it slides under the aircraft’s front…
-

A DIY Automobile Black Box with Arduino Mega
Reading Time: 2 minutesA DIY Automobile Black Box with Arduino Mega Arduino Team — June 8th, 2018 If you’d like to monitor your driving habits, or perhaps keep them handy in the event of an accident, a “black box,” or more properly a “telematics” device is just what you’re looking for. Monitoring driving habits can…
-

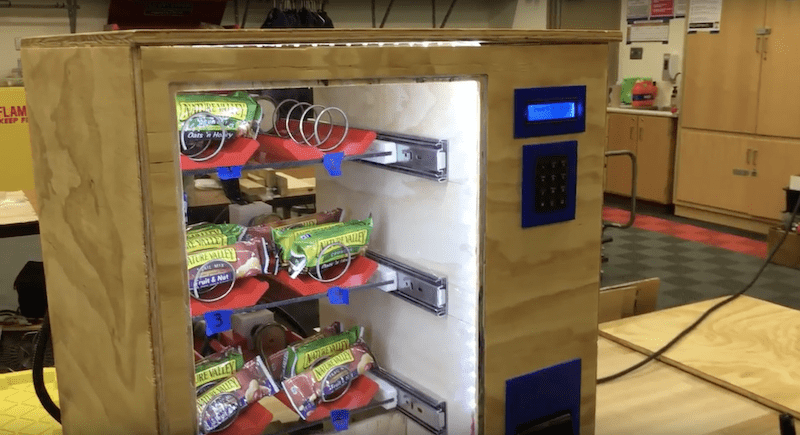
These high school students built their own vending machine
Reading Time: < 1 minuteThese high school students built their own vending machine Arduino Team — June 7th, 2018 If you’re a high school student and would appreciate a vending machine in class, what’s to be done? Most of the time the answer is “not much,” but Tustin High T-Tech students were able to get…
-
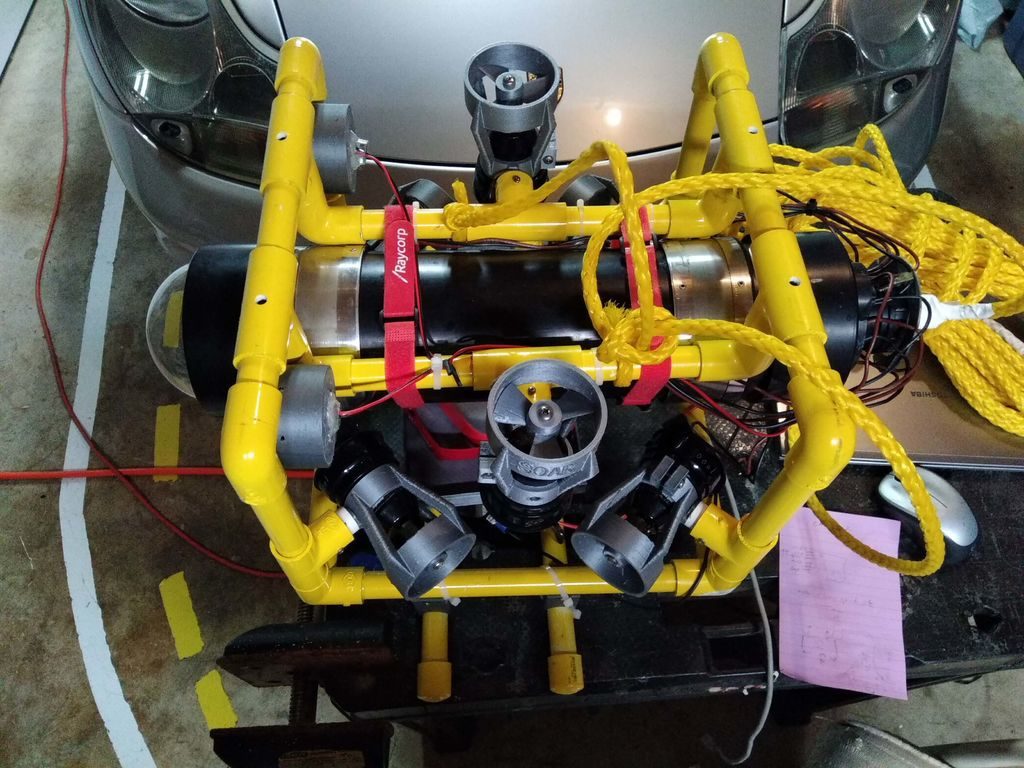
DIY submersible ROV flies through the water
Reading Time: < 1 minuteDIY submersible ROV flies through the water Arduino Team — May 31st, 2018 If you’d like to check out your pool or a lake without getting wet, this underwater ROV looks like a great solution. The DIY device features a sturdy PVC frame with six thrusters that allow it to move through…