Schlagwort: Maker Builds

  • Gladys Project: a Raspberry Pi home assistant

    Gladys Project: a Raspberry Pi home assistant

    Reading Time: 4 minutes

    If, like me, you’re a pretty poor time-keeper with the uncanny ability to never get up when your alarm goes off and yet still somehow make it to work just in time — a little dishevelled, brushing your teeth in the office bathroom — then you too need Gladys.

    Raspberry Pi home assistant

    Over the last year, we’ve seen off-the-shelf home assistants make their way onto the Raspberry Pi. With the likes of Amazon Alexa, Google Home, and Siri, it’s becoming ever easier to tell the air around you to “Turn off the bathroom light” or “Resume my audiobook”, and it happens without you lifting a finger. It’s quite wonderful. And alongside these big names are several home-brew variants, such as Jarvis and Jasper, which were developed to run on a Pi in order to perform home automation tasks.

    So do we need another such service? Sure! And here’s why…

    A Romantic Mode with your Home Assistant Gladys !

    A simple romantic mode in Gladys ! See https://gladysproject.com for more informations about the project 🙂 Devices used : – A 5$ Xiaomi Switch Button – A Raspberry Pi 3 with Gladys on it – Connected lights ( Works with Philips Hue, Milight lamp, etc..

    Gladys Project

    According to the Gladys creators’ website, Gladys Project is ‘an open-source program which runs on your Raspberry Pi. It communicates with all your devices and checks your calendar to help you in your everyday life’.

    Gladys does the basic day-to-day life maintenance tasks that I need handled in order to exist without my mum there to remind me to wake up in time for work. And, as you can see from the video above, it also plays some mean George Michael.

    A screenshot of a mobile phone showing the Gladys app - Gladys Project home assistant

    Gladys can help run your day from start to finish, taking into consideration road conditions and travel time to ensure you’re never late, regardless of external influences. It takes you 30 minutes to get ready and another 30 minutes to drive to work for 9.00? OK, but today there’s a queue on the motorway, and now your drive time is looking to be closer to an hour. Thankfully, Gladys has woken you up a half hour earlier, so you’re still on time. Isn’t that nice of her? And while you’re showering and mourning those precious stolen minutes of sleep, she’s opening the blinds and brewing coffee for you. Thanks, mum!

    A screenshot of the Gladys hub on the Raspberry Pi - Gladys Project home assistant

    Set the parameters of your home(s) using the dedicated hub.

    Detecting your return home at the end of the day, Gladys runs your pre-set evening routine. Then, once you place your phone on an NFC tag to indicate bedtime, she turns off the lights and, if your nighttime preferences dictate it, starts the whale music playlist, sending you into a deep, stressless slumber.

    A screenshot of Etcher showing the install process of the Gladys image - Gladys Project home assistant

    Gladys comes as a pre-built Raspbian image, ready to be cloned to an SD card.

    Gladys is free to download from the Gladys Project website and is compatible with smart devices such as Philips Hue lightbulbs, WeMo Insight Switches, and the ever tricky to control without the official app Sonos speakers!

    Automate and chill

    Which tasks and devices in your home do you control with a home assistant? Do you love sensor-controlled lighting which helps you save on electricity? How about working your way through an audiobook as you do your housework, requesting a pause every time you turn on the vacuum cleaner?

    Share your experiences with us in the comments below, and if you’ve built a home assistant for Raspberry Pi, or use an existing setup to run your household, share that too.

    And, as ever, if you want to keep up to date with Raspberry Pi projects from across the globe, be sure to follow us on social media, sign up to our weekly newsletter, the Raspberry Pi Weekly, and check out The MagPi, the official magazine of the Raspberry Pi community, available in stores or as a free PDF download.

    Website: LINK
  • BitBarista: a fully autonomous corporation

    BitBarista: a fully autonomous corporation

    Reading Time: 3 minutes

    To some people, the idea of a fully autonomous corporation might seem like the beginning of the end. However, while the BitBarista coffee machine prototype can indeed run itself without any human interference, it also teaches a lesson about ethical responsibility and the value of quality.

    BitBarista

    Bitcoin coffee machine that engages coffee drinkers in the value chain

    Autonomous corporations

    If you’ve played Paperclips, you get it. And in case you haven’t played Paperclips, I will only say this: give a robot one job and full control to complete the task, and things may turn in a very unexpected direction. Or, in the case of Rick and Morty, they end in emotional breakdown.

    BitBarista

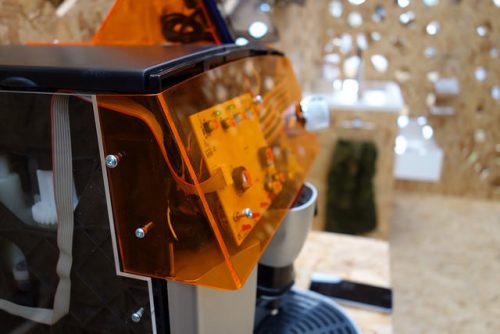
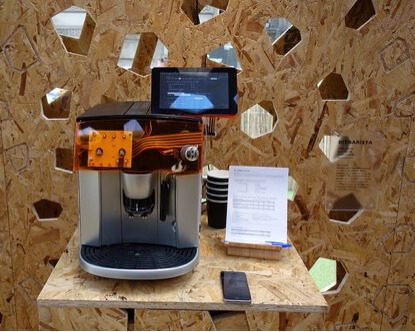
    While the fully autonomous BitBarista resides primarily on the drawing board, the team at the University of Edinburgh’s Center for Design Informatics have built a proof-of-concept using a Raspberry Pi and a Delonghi coffee maker.

    BitBarista fully autonomous coffee machine using Raspberry Pi

    Recently described by the BBC as ‘a coffee machine with a life of its own, dispensing coffee to punters with an ethical preference’, BitBarista works in conjunction with customers to source coffee and complete maintenance tasks in exchange for BitCoin payments. Customers pay for their coffee in BitCoin, and when BitBarista needs maintenance such as cleaning, water replenishment, or restocking, it can pay the same customers for completing those tasks.

    BitBarista fully autonomous coffee machine using Raspberry Pi

    Moreover, customers choose which coffee beans the machine purchases based on quality, price, environmental impact, and social responsibility. BitBarista also collects and displays data on the most common bean choices.

    BitBarista fully autonomous coffee machine using Raspberry Pi

    So not only is BitBarista a study into the concept of full autonomy, it’s also a means of data collection about the societal preference of cost compared to social and environmental responsibility.

    For more information on BitBarista, visit the Design Informatics and PETRAS websites.

    Home-made autonomy

    Many people already have store-bought autonomous technology within their homes, such as the Roomba vacuum cleaner or the Nest Smart Thermostat. And within the maker community, many more still have created such devices using sensors, mobile apps, and microprocessors such as the Raspberry Pi. We see examples using the Raspberry Pi on a daily basis, from simple motion-controlled lights and security cameras to advanced devices using temperature sensors and WiFi technology to detect the presence of specific people.

    How to Make a Smart Security Camera with a Raspberry Pi Zero

    In this video, we use a Raspberry Pi Zero W and a Raspberry Pi camera to make a smart security camera! The camera uses object detection (with OpenCV) to send you an email whenever it sees an intruder. It also runs a webcam so you can view live video from the camera when you are away.

    To get started building your own autonomous technology, you could have a look at our resources Laser tripwire and Getting started with picamera. These will help you build a visitor register of everyone who crosses the threshold a specific room.

    Or build your own Raspberry Pi Zero W Butter Robot for the lolz.

    Website: LINK
  • Hacker House’s gesture-controlled holographic visualiser

    Hacker House’s gesture-controlled holographic visualiser

    Reading Time: 3 minutes

    YouTube makers Hacker House are back with a beautiful Flick-controlled holographic music visualiser that we’d really like to have at Pi Towers, please and thank you.

    Make a Holographic Audio Visualizer with Gesture Control

    Find all the code and materials on: https://www.hackster.io/hackerhouse/holographic-audio-visualizer-with-motion-control-e72fee A 3D holographic audio visualizer with gesture control can definitely spice up your party and impress your friends. This display projects an image from a monitor down onto an acrylic pyramid, or “frustum”, which then creates a 3D effect.

    Homemade holographic visualiser

    You may have seen a similar trick for creating holograms in this tutorial by American Hacker:

    How To Make 3D Hologram Projector – No Glasses

    Who will know that from plastic cd case we can make mini 3d hologram generator and you can watch 3d videos without glasses.

    The illusion works due to the way in which images reflect off a flat-topped pyramid or frustum, to use its proper name. In the wonderful way they always do, the residents of Hacker House have now taken this trick one step further.

    The Hacker House upgrade

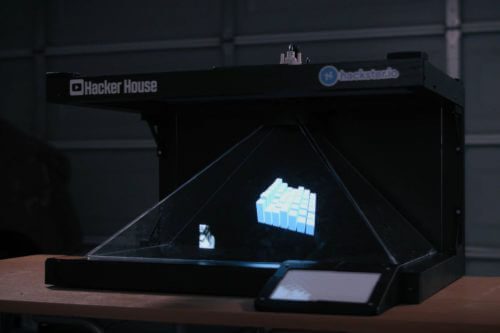
    Using an LCD monitor, 3D-printed parts, a Raspberry Pi, and a Flick board, the Hacker House team has produced a music visualiser truly worthy of being on display.

    Hacker House Raspberry Pi holographic visualiser

    The Pi Supply Flick is a 3D-tracking and gesture board for your Raspberry Pi, enabling you to channel your inner Jedi and control devices with a mere swish of your hand. As the Hacker House makers explain, in this music player project, there are various ways in which you could control the playlist, visualisation, and volume. However, using the Flick adds a wow-factor that we highly approve of.

    The music and visualisations are supplied by a Mac running node.js. As the Raspberry Pi is running on the same network as the Mac, it can communicate with the it via HTTP requests.

    Sketch of network for Hacker House Raspberry Pi holographic visualiser

    The Pi processes incoming commands from the Flick board, and in response send requests to the Mac. Swipe upward above the Flick board, for example, and the Raspberry Pi will request a change of visualisation. Swipe right, and the song will change.

    Hacker House Raspberry Pi holographic visualiser

    As for the hologram itself, it is formed on an acrylic pyramid sitting below an LCD screen. Images on the screen reflect off the three sides of the pyramid, creating the illusion of a three-dimensional image within. Standard hocus pocus trickery.

    Full details on the holographic visualiser, including the scripts, can be found on the hackster.io project page. And if you make your own, we’d love to see it.

    Your turn

    Using ideas from this Hacker House build and the American Hacker tutorial, our maker community is bound to create amazing things with the Raspberry Pi, holograms, and tricks of the eye. We’re intrigued to see what you come up with!

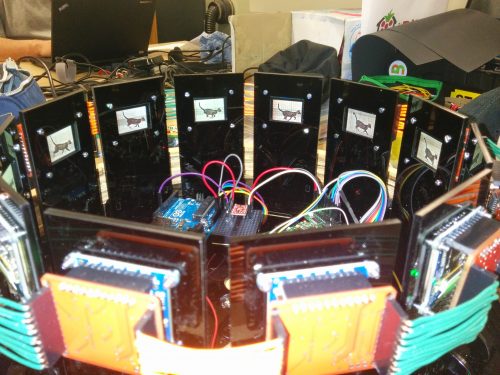
    For inspiration, another example of a Raspberry Pi optical illusion project is Brian Corteil’s Digital Zoetrope:

    Brian Corteil's Digital Zoetrope - Hacker House Raspberry Pi holographic visualiser

    Are you up for the challenge of incorporating optical illusions into your Raspberry Pi builds? Share your project ideas and creations in the comments below!

    Website: LINK
  • Raspberry Pi Halloween projects 2017

    Raspberry Pi Halloween projects 2017

    Reading Time: 3 minutes

    Come with us on a journey to discover the 2017 Raspberry Pi Halloween projects that caught our eye, raised our hair, or sent us screaming into the night.

    A clip of someone being pulled towards a trap door by hands reaching up from it - Raspberry Pi Halloween projects

    Happy Halloween

    Whether you’re easily scared or practically unshakeable, you can celebrate Halloween with Pi projects of any level of creepiness.

    Even makers of a delicate constitution will enjoy making this Code Club Ghostbusters game, or building an interactive board game using Halloween lights with this MagPi tutorial by Mike Cook. And how about a wearable, cheerily LED-enhanced pumpkin created with the help of this CoderDojo resource? Cute, no?

    Felt pumpkin with blinking LED smiley face - Raspberry Pi Halloween projects

    Speaking of wearables, Derek Woodroffe’s be-tentacled hat may writhe disconcertingly, but at least it won’t reach out for you. Although, you could make it do that, if you were a terrible person.

    Slightly queasy Halloween

    Your decorations don’t have to be terrifying: this carved Pumpkin Pi and the Poplawskis’ Halloween decorations are controlled remotely via the web, but they’re more likely to give you happy goosebumps than cold sweats.

    A clip of blinking Halloween decorations covering a house - Raspberry Pi Halloween projects

    The Snake Eyes Bonnet pumpkin and the monster-face projection controlled by Pis that we showed you in our Halloween Twitter round-up look fairly friendly. Even the 3D-printed jack-o’-lantern by wermy, creator of mintyPi, is kind of adorable, if you ignore the teeth. And who knows, that AlexaPi-powered talking skull that’s staring at you could be an affable fellow who just fancies a chat, right? Right?

    Horror-struck Halloween

    OK, fine. You’re after something properly frightening. How about the haunted magic mirror by Kapitein Haak, or this one, with added Philips Hue effects, by Ben Eagan. As if your face first thing in the morning wasn’t shocking enough.

    Haunted magic mirror demonstration - Raspberry Pi Halloween projects

    If you find those rigid-faced, bow-lipped, plastic dolls more sinister than sweet – and you’re right to do so: they’re horrible – you won’t like this evil toy. Possessed by an unquiet shade, it’s straight out of my nightmares.

    Earlier this month we covered Adafruit’s haunted portrait how-to. This build by Dominick Marino takes that concept to new, terrifying, heights.

    Haunted portrait project demo - Raspberry Pi Halloween projects

    Why not add some motion-triggered ghost projections to your Halloween setup? They’ll go nicely with the face-tracking, self-winding, hair-raising jack-in-the-box you can make thanks to Sean Hodgins’ YouTube tutorial.

    And then, last of all, there’s this.

    The Saw franchise's Billy the puppet on a tricycle - Raspberry Pi Halloween projects

    NO.

    This recreation of Billy the Puppet from the Saw franchise is Pi-powered, it’s mobile, and it talks. You can remotely control it, and I am not even remotely OK with it. That being said, if you’re keen to have one of your own, be my guest. Just follow the guide on Instructables. It’s your funeral.

    Make your Halloween

    It’s been a great year for scary Raspberry Pi makes, and we hope you have a blast using your Pi to get into the Halloween spirit.

    And speaking of spirits, Matt Reed of RedPepper has created a Pi-based ghost detector! It uses Google’s Speech Neural Network AI to listen for voices in the ether, and it’s live-streaming tonight. Perfect for watching while you’re waiting for the trick-or-treaters to show up.

    Website: LINK
  • The Poplawski’s Holiday Frights

    The Poplawski’s Holiday Frights

    Reading Time: 2 minutes

    After becoming internet-famous for their interactive Christmas lights, the Poplawskis have expanded their festive offerings this year with Holiday Frights, a fiendish collection of spooky decor controlled by a Raspberry Pi.

    Poplawski's Holiday Frights Raspberry Pi Halloween

    The Poplawskis’ holiday lights

    Full of lights and inflatable decorations sprawling across the front lawn, the annual pi-powered Poplawski Christmas setup is something we await eagerly here at Pi Towers. What better way to celebrate the start of the holiday season than by inflating reindeer and flashing fairy lights on another continent?

    Poplawski's Holiday Lights Raspberry Pi

    image c/o Chris Poplawski

    So this year, when an email appeared in our inbox to announce the Holiday Frights Halloween edition, we were over the moon!

    Take control

    It’s about 5am in Easton, Pennsylvania, but I’m 99% sure the residents of the Poplawski’s Holiday Frights home were fully aware of me endlessly toggling their Halloween decorations  — on, off, on, off — in the process of creating the GIF above.

    The decorations of the Poplawski’s Holiday Frights are controlled by a Raspberry Pi which, in turn, takes input from a website. And while we’ve seen many Pi projects with online interfaces controlling real-life devices, we can’t help but have a soft spot for this particular one because of its pretty, flashy lights.

    Poplawski's Holiday Frights website Raspberry Pi Halloween

    To try out the decorations yourself, go to the Poplawski’s Holiday Frights website. Also make sure to bookmark the site, or follow the Facebook page, for updates on their Christmas edition.

    When you’re on the site, you will also see how many other people are currently online. If you’re not alone, the battle over which lights are turned on or off can commence! In case you’re feeling extra generous, you can donate 10¢ to fix the decorations in a state of your choosing for 60 seconds, while also helping the Poplawskis power their lights.

    Getting spooky

    Have you built something Pi-powered and spooky for Halloween? Make sure to share it with us across our social media accounts or in the comments below.

    Website: LINK

  • Ben’s Raspberry Pi Twilight Zone pinball hack

    Ben’s Raspberry Pi Twilight Zone pinball hack

    Reading Time: 4 minutes

    When Ben North was faced with the dilemma of his nine-year-old son wanting him to watch his pinball games while, at the same time, Ben should be doing housework, he came up with a brilliant hack. Ben decided to investigate the inner workings of his twenty-year-old Twilight Zone pinball machine to convert its score display data into a video stream he could keep an eye on while working.

    Ben North Raspberry Pi Twilight Zone Pinball

    Ben ended up with this. Read on to find out how…

    Dad? Dad! DAD!!

    Kids love sharing their achievements. That’s a given. And so, after Ben introduced his son Zach to his beloved pinball machine, Zach wanted his dad to witness his progress. However, at some point Ben had to get back to the dull reality of adulting.

    My son Zach, now 9, has been steadily getting better at [playing pinball], and is keen for me to watch his games. So he and I wanted a way for me to keep an eye on how his game is going, while I do other jobs elsewhere.

    The two of them thought that, with the right tools and some fiddling, they could hijack the machine’s score information on its way to the dot matrix display and divert it to a computer. “One way to do this would be to set up a webcam.” Ben explains on his blog, “But where’s the fun in that?”

    Twilight Zone pinball wizardry

    After researching how the dot matrix receives and displays the score data, Ben and Zach figured out how to fetch its output using a 16-channel USB logic analyser. Then they dove into learning to convert the data the logic analyser outputs back into images.

    Ben North Raspberry Pi Twilight Zone Pinball

    “Exploring in more detail confirmed that the data looked reasonable. We could see well-distinguished frames and rows, and within each row, the pixel data had a mixture of high (lit pixel) and low (dark pixel).”

    After Ben managed to convert the signals of one frame into a human-readable pixel image, it was time to think about the hardware that could do this conversion in real time. Though he and Zach were convinced they would have to build custom hardware to complete their project, they decided to first give the Raspberry Pi a go. And it turned out that the Pi was up to the challenge!

    Ben North Raspberry Pi Twilight Zone Pinball - example output

    “By an amazing coincidence, the [first] frame I decoded was one showing that I am the current Lost In The Zone champion.”

    To decode the first frame, Ben had written a Python script. However, he coded the program to produce a score live stream in C++, since this language is better at handling high-speed input and output. To make sure Zach would learn from the experience, Ben explained the how and why of the program to him.

    I talked through with Zach what the program needed to do — detect clock edges, sample pixel data, collect rows, etc. — but then he left me to do ‘all the boring typing’.

    Ben used various pieces of open-source software while working on this project, including the sigrok suite for signal analysis and the multimedia framework gstreamer for handling the live video stream to the Raspberry Pi.

    Find more information about the Twilight Zone pinball build, including a lot of technical details and the code itself, on Ben’s blog.

    Worthy self-promotion from Ben

    “I also did an FPGA project to replicate some of the Colossus code-breaking machine used in Bletchley Park during World War II,” explained Ben in our recent emails. “with a Raspberry Pi as the host.”

    Colossus computer Twilight Zone Pinball

    The original Colossus, not Ben’s.
    Image c/o Wikipedia

    As a bit of a history nerd myself, I think this is beyond cool. And if, like me, you’d like to learn more, check out the link here.

    Website: LINK
  • Twitter makers love Halloween

    Twitter makers love Halloween

    Reading Time: 2 minutes

    Halloween is almost upon us! In honour of one of the maker community’s favourite howlidays, here are some posts from enthusiastic makers on Twitter to get you inspired and prepared for the big event.

    Lorraine’s VR Puppet

    Lorraine Underwood on Twitter

    Using a @Raspberry_Pi with @pimoroni tilt hat to make a cool puppet for #Halloween https://t.co/pOeTFZ0r29

    Made with a Pimoroni Pan-Tilt HAT, a Raspberry Pi, and some VR software on her phone, Lorraine Underwood‘s puppet is going to be a rather fitting doorman to interact with this year’s trick-or-treaters. Follow her project’s progress as she posts it on her blog.

    Firr’s Monster-Mashing House

    Firr on Twitter

    Making my house super spooky for Halloween! https://t.co/w553l40BT0

    Harnessing the one song guaranteed to earworm its way into my mind this October, Firr has upgraded his house to sing for all those daring enough to approach it this coming All Hallows’ Eve.

    Firr used resources from Adafruit, along with three projectors, two Raspberry Pis, and some speakers, to create this semi-interactive display.

    While the eyes can move on their own, a joystick can be added for direct control. Firr created a switch that goes between autonomous animation and direct control.

    Find out more on the htxt.africa website.

    Justin’s Snake Eyes Pumpkin

    Justin Smith on Twitter

    First #pumpkin of the season for Friday the 13th! @PaintYourDragon’s snake eyes bonnet for the #RaspberryPi to handle the eye animation. https://t.co/TSlUUxYP5Q

    The Animated Snake Eyes Bonnet is definitely one of the freakiest products to come from the Adafruit lab, and it’s the perfect upgrade for any carved pumpkin this Halloween. Attach the bonnet to a Raspberry Pi 3, or the smaller Zero or Zero W, and thus add animated eyes to your scary orange masterpiece, as Justin Smith demonstrates in his video. The effect will terrify even the bravest of trick-or-treaters! Just make sure you don’t light a candle in there too…we’re not sure how fire-proof the tech is.

    And then there’s this…

    EmmArarrghhhhhh on Twitter

    Squishy eye keyboard? Anyone? Made with @Raspberry_Pi @pimoroni’s Explorer HAT Pro and a pile of stuff from @Poundland 😂👀‼️ https://t.co/qLfpLLiXqZ

    Yeah…the line between frightening and funny is never thinner than on Halloween.

    Make and share this Halloween!

    For more Halloween project ideas, check out our free resources including Scary ‘Spot the difference’ and the new Pioneers-inspired Pride and Prejudice‘ for zombies.

    Halloween Pride and Prejudice Zombies Raspberry Pi

    It is a truth universally acknowledged that a single man in possession of the zombie virus must be in want of braaaaaaains.

    No matter whether you share your Halloween builds on Twitter, Facebook, G+, Instagram, or YouTube, we want to see them — make sure to tag us in your posts. We also have a comment section below this post, so go ahead and fill it with your ideas, links to completed projects, and general chat about the world of RasBOOrry Pi!

    …sorry, that’s a hideous play on words. I apologise.

    Website: LINK

  • Derek Woodroffe’s steampunk tentacle hat

    Derek Woodroffe’s steampunk tentacle hat

    Reading Time: 3 minutes

    Halloween: that glorious time of year when you’re officially allowed to make your friends jump out of their skin with your pranks. For those among us who enjoy dressing up, Halloween is also the occasion to go all out with costumes. And so, dear reader, we present to you: a steampunk tentacle hat, created by Derek Woodroffe.

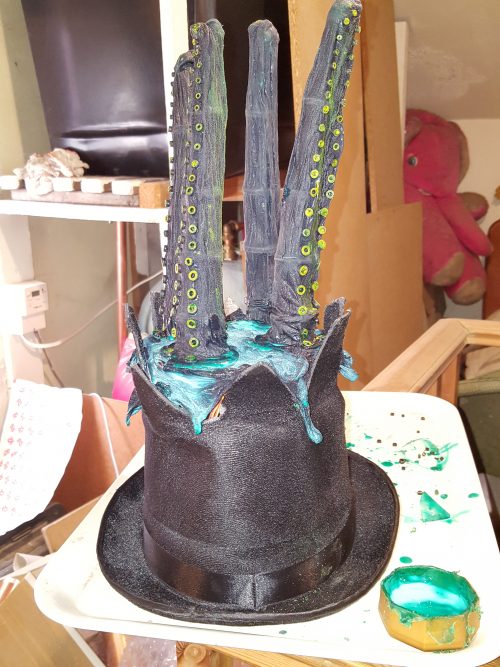
    Finished Tenticle hat

    Finished Tenticle hat

    Extreme Electronics

    Derek is an engineer who loves all things electronics. He’s part of Extreme Kits, and he runs the website Extreme Electronics. Raspberry Pi Zero-controlled Tesla coils are Derek’s speciality — he’s even been on one of the Royal Institution’s Christmas Lectures with them! Skip ahead to 15:06 in this video to see Derek in action:

    Let There Be Light! // 2016 CHRISTMAS LECTURES with Saiful Islam – Lecture 1

    The first Lecture from Professor Saiful Islam’s 2016 series of CHRISTMAS LECTURES, ‘Supercharged: Fuelling the future’. Watch all three Lectures here: http://richannel.org/christmas-lectures 2016 marked the 80th anniversary since the BBC first broadcast the Christmas Lectures on TV. To celebrate, chemist Professor Saiful Islam explores a subject that the lectures’ founder – Michael Faraday – addressed in the very first Christmas Lectures – energy.

    Wearables

    Wearables are electronically augmented items you can wear. They might take the form of spy eyeglasses, clothes with integrated sensors, or, in this case, headgear adorned with mechanised tentacles.

    Why did Derek make this? We’re not entirely sure, but we suspect he’s a fan of the Cthulu mythos. In any case, we were a little astounded by his project. This is how we reacted when Derek tweeted us about it:

    Raspberry Pi on Twitter

    @ExtElec @extkits This is beyond incredible and completely unexpected.

    In fact, we had to recover from a fit of laughter before we actually managed to type this answer.

    Making a steampunk tentacle hat

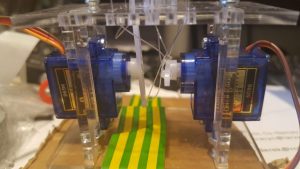
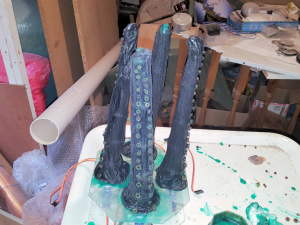
    Derek made the ‘skeleton’ of each tentacle out of a net curtain spring, acrylic rings, and four lengths of fishing line. Two servomotors connect to two ends of fishing line each, and pull them to move the tentacle.

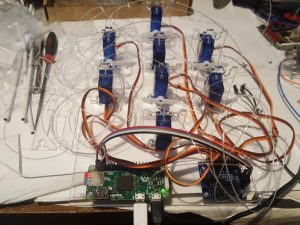
    Then he covered the tentacles with nylon stockings and liquid latex, glued suckers cut out of MDF onto them, and mounted them on an acrylic base. The eight motors connect to a Raspberry Pi via an I2C 8-port PWM controller board.

    The Pi makes the servos pull the tentacles so that they move in sine waves in both the x and y directions, seemingly of their own accord. Derek cut open the top of a hat to insert the mounted tentacles, and he used more liquid latex to give the whole thing a slimy-looking finish.

    steampunk tentacle hat by Derek Woodroffe

    Iä! Iä! Cthulhu fhtagn!

    You can read more about Derek’s steampunk tentacle hat here. He will be at the Beeston Raspberry Jam in November to show off his build, so if you’re in the Nottingham area, why not drop by?

    Wearables for Halloween

    This build is already pretty creepy, but just imagine it with a sensor- or camera-powered upgrade that makes the tentacles reach for people nearby. You’d have nightmare fodder for weeks.

    With the help of the Raspberry Pi, any Halloween costume can be taken to the next level. How could Pi technology help you to win that coveted ‘Scariest costume’ prize this year? Tell us your ideas in the comments, and be sure to share pictures of you in your get-up with us on Twitter, Facebook, or Instagram.

    Website: LINK

  • N O D E’s Handheld Linux Terminal

    N O D E’s Handheld Linux Terminal

    Reading Time: 3 minutes

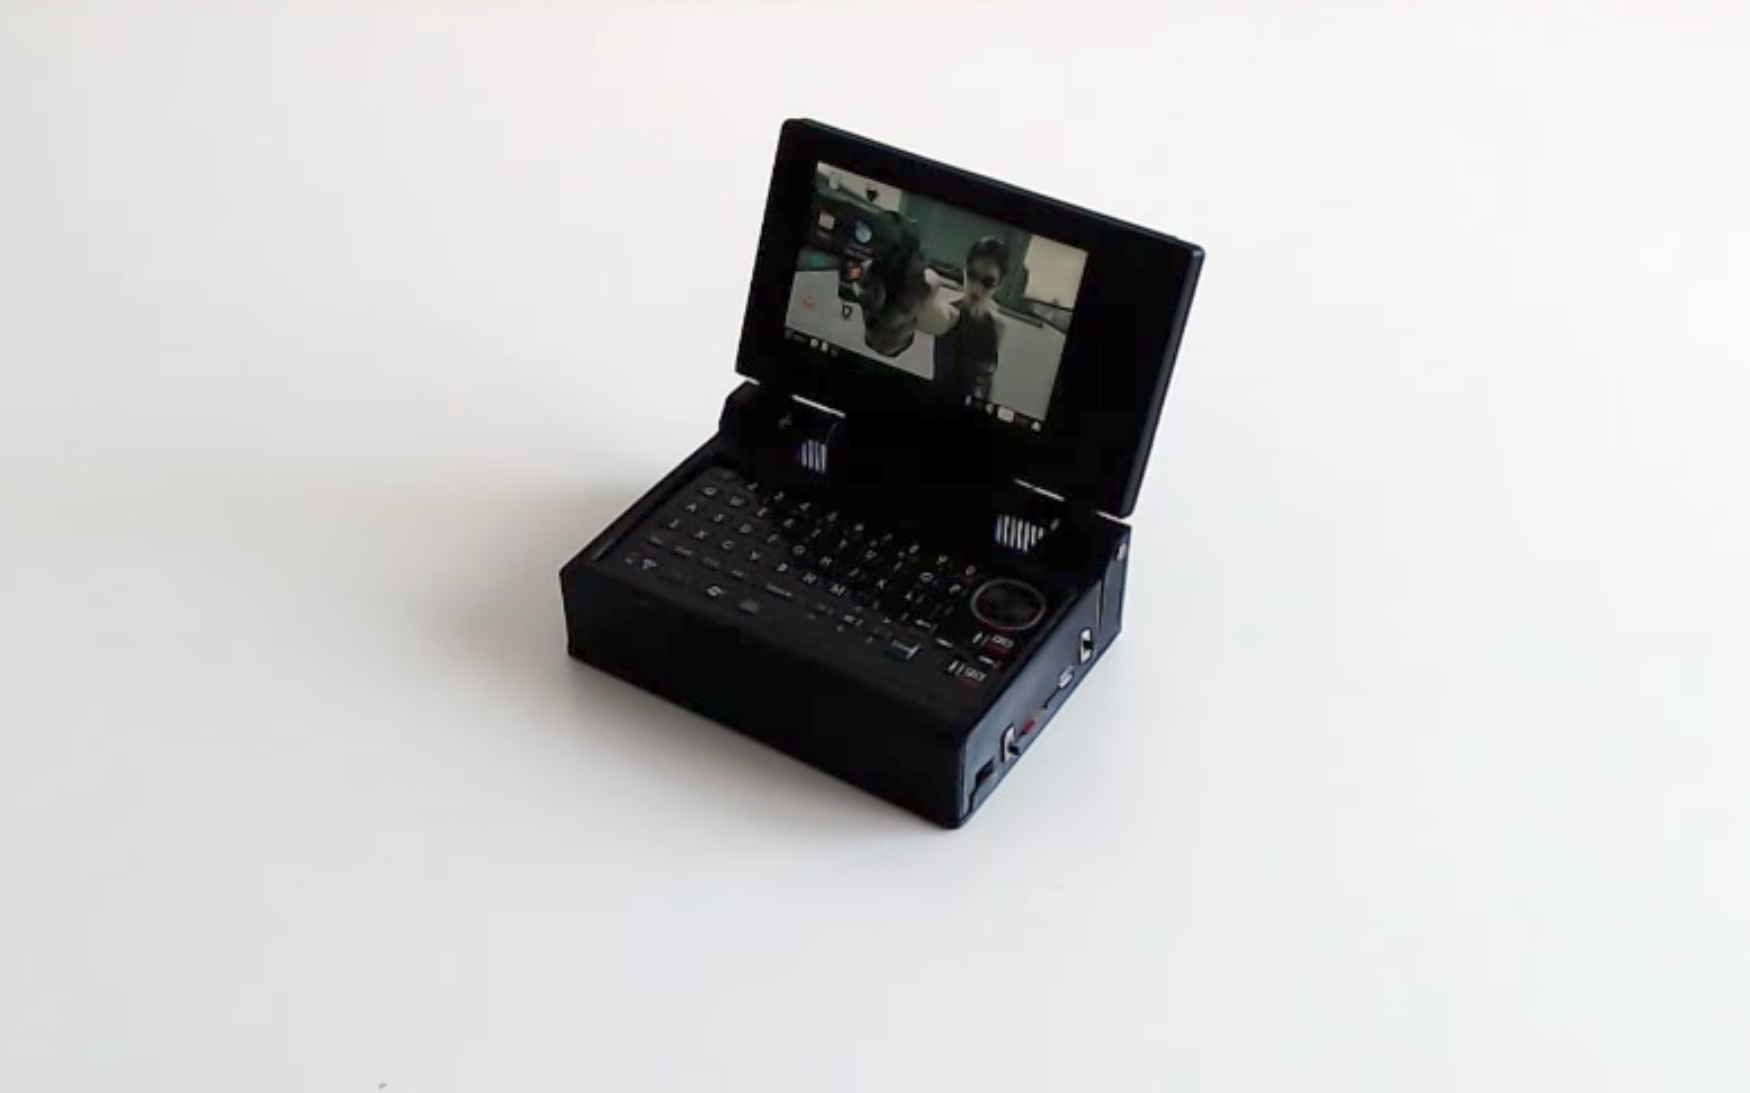
    Fit an entire Raspberry Pi-based laptop into your pocket with N O D E’s latest Handheld Linux Terminal build.

    The Handheld Linux Terminal Version 3 (Portable Pi 3)

    Hey everyone. Today I want to show you the new version 3 of the Handheld Linux Terminal. It’s taken a long time, but I’m finally finished. This one takes all the things I’ve learned so far, and improves on many of the features from the previous iterations.

    N O D E

    With interests in modding tech, exploring the boundaries of the digital world, and open source, YouTuber N O D E has become one to watch within the digital maker world. He maintains a channel focused on “the transformative power of technology.”

    “Understanding that electronics isn’t voodoo is really powerful”, he explains in his Patreon video. “And learning how to build your own stuff opens up so many possibilities.”

    NODE Youtube channel logo - Handheld Linux Terminal v3

    The topics of his videos range from stripped-down devices, upgraded tech, and security upgrades, to the philosophy behind technology. He also provides weekly roundups of, and discussions about, new releases.

    Essentially, if you like technology, you’ll like N O D E.

    Handheld Linux Terminal v3

    Subscribers to N O D E’s YouTube channel, of whom there are currently over 44000, will have seen him documenting variations of this handheld build throughout the last year. By stripping down a Raspberry Pi 3, and incorporating a Zero W, he’s been able to create interesting projects while always putting functionality first.

    Handheld Linux Terminal v3

    With the third version of his terminal, N O D E has taken experiences gained from previous builds to create something of which he’s obviously extremely proud. And so he should be. The v3 handheld is impressively small considering he managed to incorporate a fully functional keyboard with mouse, a 3.5″ screen, and a fan within the 3D-printed body.

    Handheld Linux Terminal v3

    “The software side of things is where it really shines though, and the Pi 3 is more than capable of performing most non-intensive tasks,” N O D E goes on to explain. He demonstrates various applications running on Raspbian, plus other operating systems he has pre-loaded onto additional SD cards:

    “I have also installed Exagear Desktop, which allows it to run x86 apps too, and this works great. I have x86 apps such as Sublime Text and Spotify running without any problems, and it’s technically possible to use Wine to also run Windows apps on the device.”

    We think this is an incredibly neat build, and we can’t wait to see where N O D E takes it next!

    Website: LINK

  • Sean Hodgins’ Haunted Jack in the Box

    Sean Hodgins’ Haunted Jack in the Box

    Reading Time: 3 minutes

    After making a delightful Bitcoin lottery using a Raspberry Pi, Sean Hodgins brings us more Pi-powered goodness in time for every maker’s favourite holiday: Easter! Just kidding, it’s Halloween. Check out his hair-raising new build, the Haunted Jack in the Box.

    Haunted Jack in the Box – DIY Raspberry Pi Project

    This project uses a raspberry pi and face detection using the pi camera to determine when someone is looking at it. Plenty of opportunities to scare people with it. You can make your own!

    Haunted jack-in-the-box?

    Imagine yourself wandering around a dimly lit house. Your eyes idly scan a shelf. Suddenly, out of nowhere, a twangy melody! What was that? You take a closer look…there seems to be a box in jolly colours…with a handle that’s spinning by itself?!

    Sidling up to Sean Hodgins' Haunted Jack in the Box

    What’s…going on?

    You freeze, unable to peel your eyes away, and BAM!, out pops a maniacally grinning clown. You promptly pee yourself. Happy Halloween, courtesy of Sean Hodgins.

    Clip of Sean Hodgins' Haunted Jack in the Box

    Eerie disembodied voice: You’re welco-o-o-ome!

    How has Sean built this?

    Sean purchased a jack-in-the-box toy and replaced its bottom side with one that would hold the necessary electronic components. He 3D-printed this part, but says you could also just build it by hand.

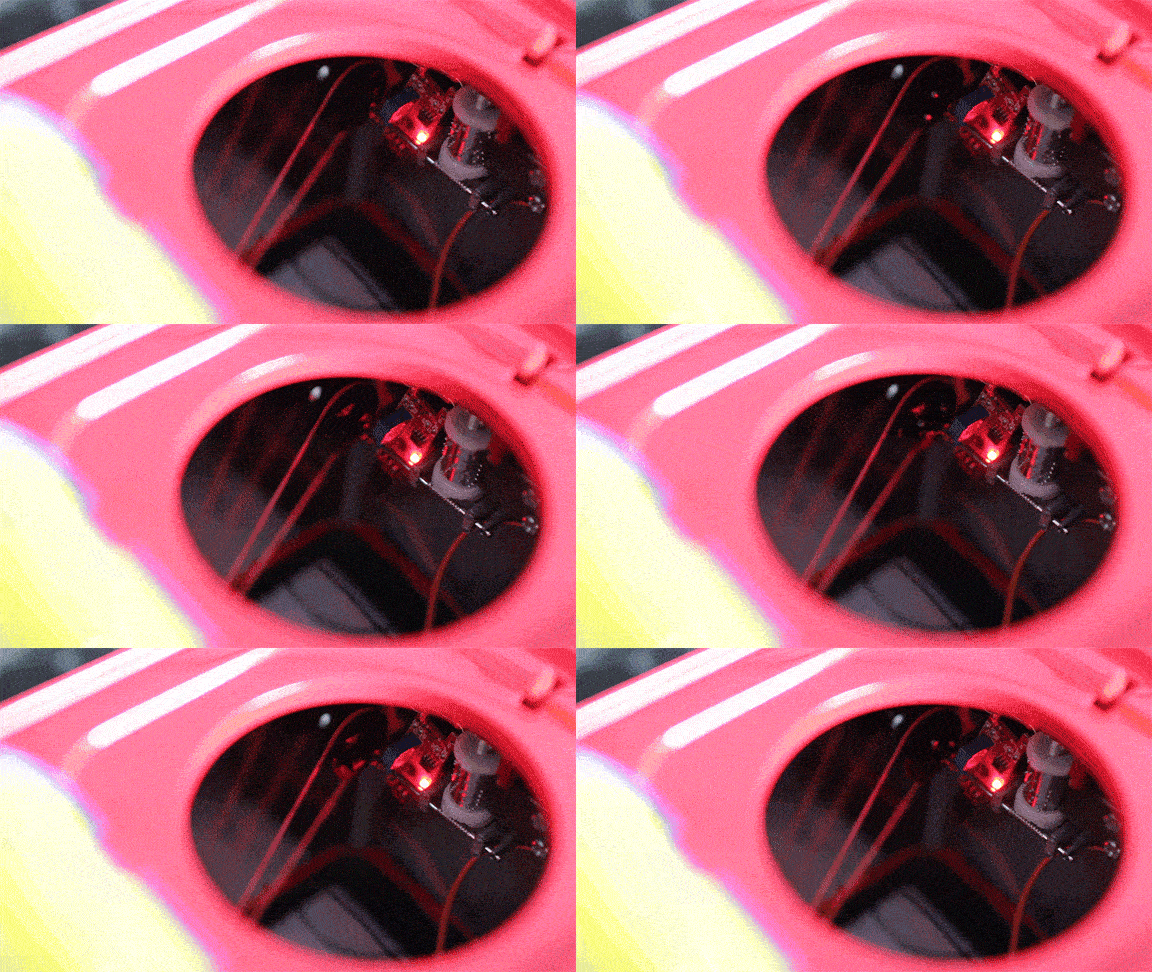
    The bottom of the box houses a Raspberry Pi 3 Model B and a servomotor which can turn the windup handle. There’s also a magnetic reed switch which helps the Pi decide when to trigger the Jack. Sean hooked up the components to the Pi’s GPIO pins, and used an elastic band as a drive belt to connect the pulleys on the motor and the handle.

    Film clip showing the inside of Sean Hodgin's Haunted Jack in the Box

    Sean explains that he has used a lot of double-sided tape and superglue in this build. The bottom and top are held together with two screws, because, as he describes it, “the Jack coming out is a little violent.”

    In addition to his video walk-through, he provides build instructions on Instructables, Hackaday, Hackster, and Imgur — pick your poison. And be sure to subscribe to Sean’s YouTube channel to see what he comes up with next.

    Wait, how does the haunted part work?

    But if I explain it, it won’t be scary anymore! OK, fiiiine.

    With the help of a a Camera Module and OpenCV, Sean implemented facial recognition: Jack knows when someone is looking at his box, and responds by winding up and popping out.

    View of command line output of the Python script for Sean Hodgins' Haunted Jack in the Box

    Testing the haunting script

    Sean’s Python script is available here, but as he points out, there are many ways in which you could adapt this code, and the build itself, to be even more frightening.

    So very haunted

    What would you do with this build? Add creepy laughter? Soundbites from It? Lighting effects? Maybe even infrared light and a NoIR Camera Module, so that you can scare people in total darkness? There are so many possibilities for this project — tell us your idea in the comments.

    Website: LINK
  • BrailleBox: Android Things Braille news display

    BrailleBox: Android Things Braille news display

    Reading Time: 2 minutes

    Joe Birch has built a simple device that converts online news stories to Braille, inspired by his family’s predisposition to loss of eyesight. He has based his BrailleBox on Android Things, News API, and a Raspberry Pi 3.

    Demonstation of Joe Birch's BrailleBox

    The background

    Braille is a symbol system for people with visual impairment which represents letters and numbers as raised points. Commercial devices that dynamically produce Braille are very expensive, so Joe decided to build a low-cost alternative that is simple to recreate.

    Braille alphabet

    Image by DIPF CC BY-SA 3.0

    News API is a tool for fetching JSON metadata from over 70 online news sources. You can use it to integrate headlines or articles into websites and text-based applications.

    The BrailleBox

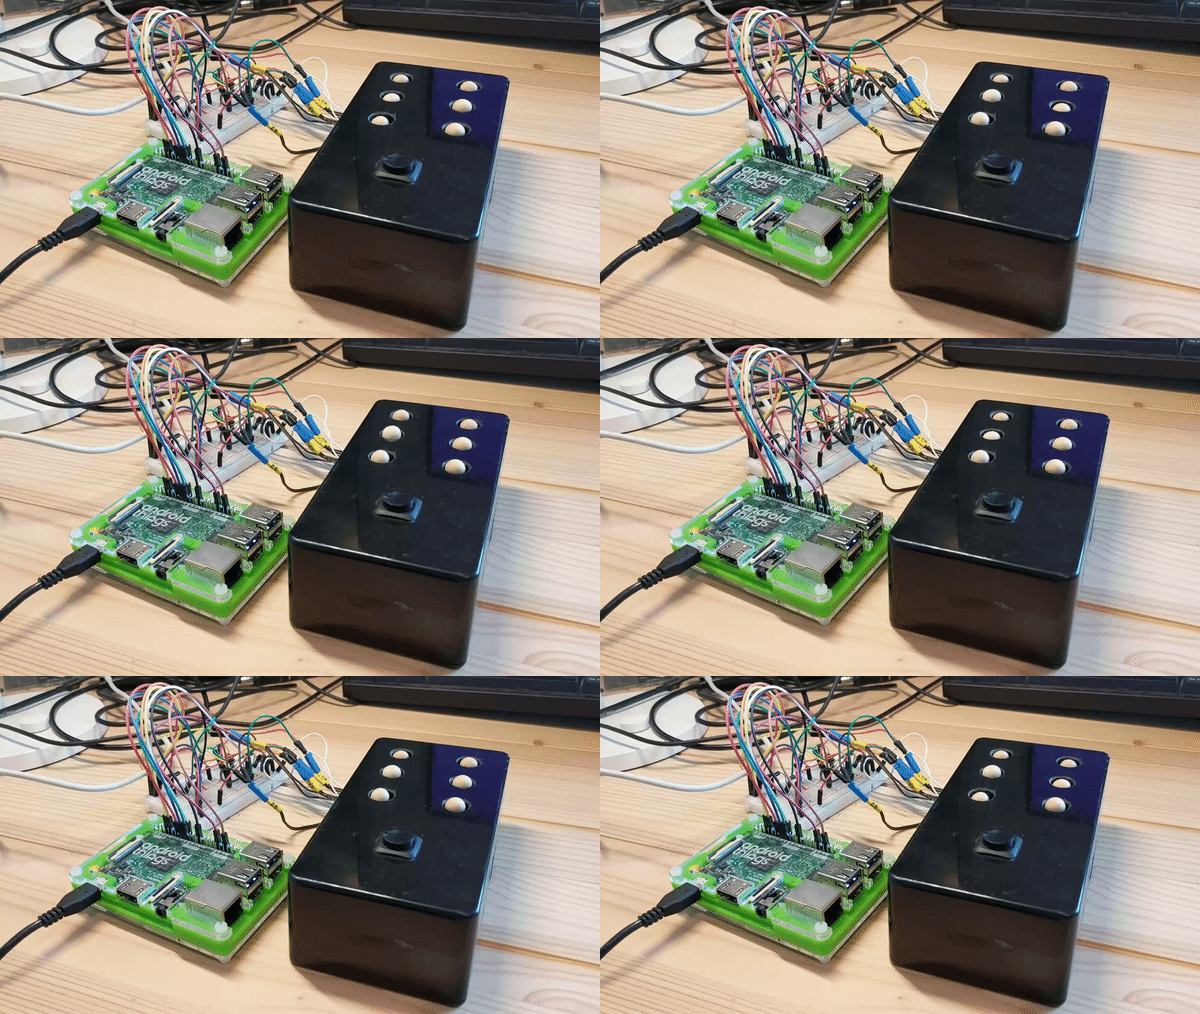
    To create the six nubs necessary to form Braille symbols, Joe topped solenoids with wooden balls. He then wired them up to GPIO pins of the Pi 3 via a breadboard.

    One of the solenoids of Joe Birch's BrailleBox

    One of the solenoids Joe built into the BrailleBox

    Next, he took control of the solenoids using Android Things. He set up the BrailleBox software to start running on boot, and added a push button. When he presses the button, the program fetches a news story using News API, and the solenoids start moving.

    BrailleBox Demo

    Uploaded by Joe Birch on 2017-06-20.

    Since Joe is an Android Engineer, looking through his write-up and code for BrailleBox might be useful for anyone interested in Android Things.

    If you like this project, make sure you keep an eye on Joe’s Twitter, since he has plans to update the BrailleBox design. His next step is to move on from the prototyping stage and house all the hardware inside the box. Moreover, he is thinking about adding a potentiometer so that users can choose their preferred reading speed.

    Accessibility

    If you want to find our community’s conversation about accessibility and assistive technology, head to the forums. And if you’re working to make computing more accessible, or if you’ve built an assistive project, let us know in the comments or on social media, so that we can boost the signal!

    Website: LINK

  • Low-tech Raspberry Pi robot

    Low-tech Raspberry Pi robot

    Reading Time: 2 minutes

    Robot-builder extraordinaire Clément Didier is ushering in the era of our cybernetic overlords. Future generations will remember him as the creator of robots constructed from cardboard and conductive paint which are so easy to replicate that a robot could do it. Welcome to the singularity.

    Bare Conductive on Twitter

    This cool robot was made with the #PiCap, conductive paint and @Raspberry_Pi by @clementdidier. Full tutorial: https://t.co/AcQVTS4vr2 https://t.co/D04U5UGR0P

    Simple interface

    To assemble the robot, Clément made use of a Pi Cap board, a motor driver, and most importantly, a tube of Bare Conductive Electric Paint. He painted the control interface onto the cardboard surface of the robot, allowing a human, replicant, or superior robot to direct its movements simply by touching the paint.

    Clever design

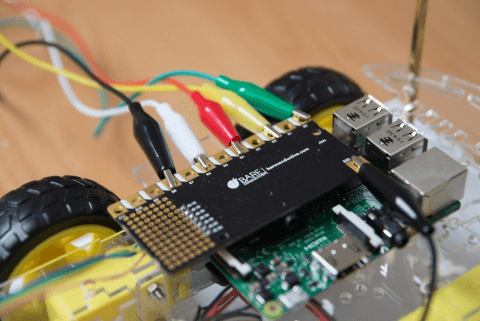
    The Raspberry Pi 3, the motor control board, and the painted input buttons interface via the GPIO breakout pins on the Pi Cap. Crocodile clips connect the Pi Cap to the cardboard-and-paint control surface, while jumper wires connect it to the motor control board.

    Raspberry Pi and bare conductive Pi Cap

    Sing with me: ‘The Raspberry Pi’s connected to the Pi Cap, and the Pi Cap’s connected to the inputs, and…’

    Two battery packs provide power to the Raspberry Pi, and to the four independently driven motors. Software, written in Python, allows the robot to respond to inputs from the conductive paint. The motors drive wheels attached to a plastic chassis, moving and turning the robot at the touch of a square of black paint.

    Artistic circuit

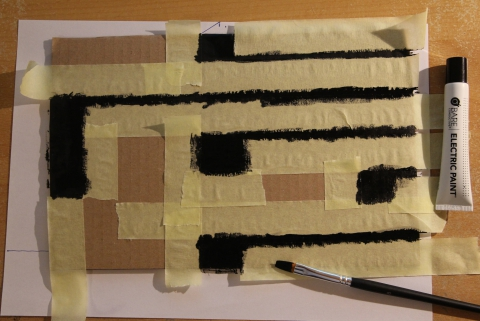
    Clément used masking tape and a paintbrush to create the control buttons. For a human, this is obviously a fiddly process which relies on the blocking properties of the masking tape and a steady hand. For a robot, however, the process would be a simple, freehand one, resulting in neatly painted circuits on every single one of countless robotic minions. Cybernetic domination is at (metallic) hand.

    The control surface of the robot, painted with bare conductive paint

    One fiddly job for a human, one easy task for robotkind

    The instructions and code for Clément’s build can be found here.

    Low-tech solutions

    Here at Pi Towers, we love seeing the high-tech Raspberry Pi integrated so successfully with low-tech components. In addition to conductive paint, we’ve seen cardboard laptops, toilet roll robots, fruit drum kits, chocolate box robots, and hamster-wheel-triggered cameras. Have you integrated low-tech elements into your projects (and potentially accelerated the robot apocalypse in the process)? Tell us about it in the comments!

    Website: LINK