Schlagwort: geeky lifestyle
-

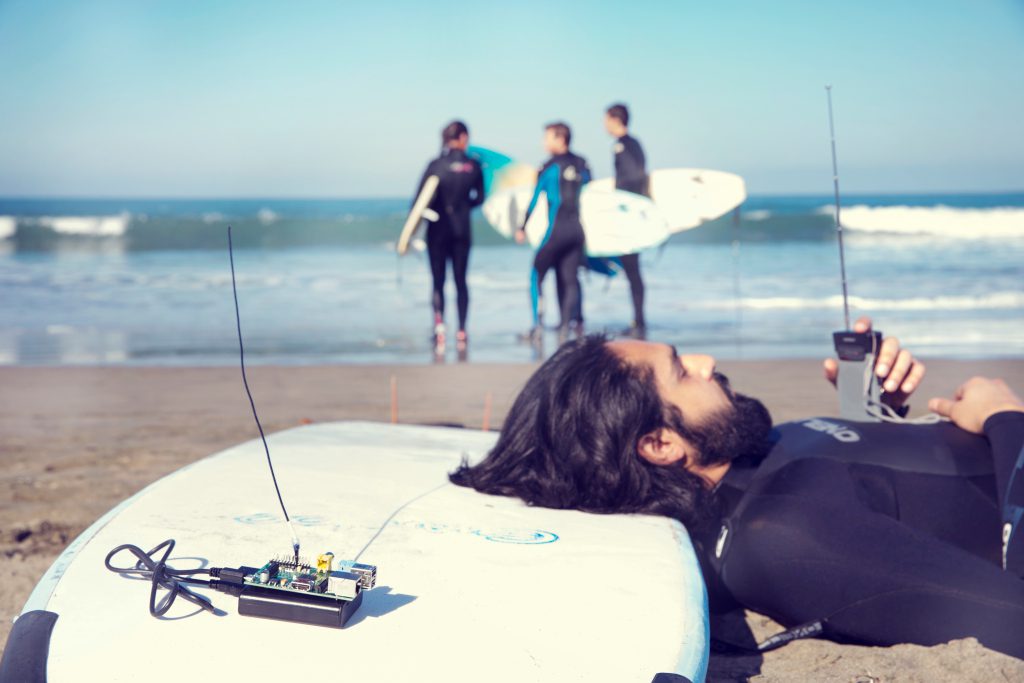
Weekend Projects – Raspberry Pirate Radio
Reading Time: < 1 minuteComplete instructions for this episode of Weekend Projects can be found at http://makezine.com/projects/raspberr… Using a readymade disk image and one simple solder connection, turn your Raspberry Pi into a streaming pirate radio. This project was originally created by Oliver Mattos and Oskar Weigl. It was revised by Ryan Grassel and extended…
-

Giant Rubik’s Cube Has 6-Sides and 1014-Tiles
Reading Time: 2 minutesA standard Rubik’s Cube is hard enough to solve for most people, but this Pillow 13x13x13 IQ Brick takes things to a whole new level. There are 13 squares in a row on each side of the cube, and in total, the 3D puzzle features 1,014 colored tiles – 169 colored tiles…
-

28 Awesome Alternate Fan Arts On Batman!
Reading Time: < 1 minute
-

Fascinating Look at Mysterious Ultra Deep Holes Discovered in Russia
Reading Time: < 1 minutePeople are discovering mysterious, ultra deep holes in Russian forests. They appear in the dense forest where there is no easy access for a car, truck, heavy digging equipment, or even people. Plus, there’s no soil nearby that should be taken from such deep hole to be found.
-

The Home Counties sinkhole that swallowed a CAR!
Reading Time: < 1 minuteFamily flee village home after their VW disappears into 30ft-deep crater which appeared overnight Ever had that sinking feeling when you open the front door in the morning and wonder where you left the car?
-

Sony blamed for Nintendo’s ‚inability to secure third-party titles‘
Reading Time: < 1 minuteAccording to japanese firm ACE Securities, Sony is to blame for Nintendo’s inability to secure third-party games.
-

An abandoned veterinary school looks like the most terrifying place
Reading Time: < 1 minuteOld mental institutions. Haunted houses. Cemeteries at night. Clown conventions. They’re all terrifying. But I’m pretty sure I’d rather sleep overnight in those places than spend a single minute in this abandoned veterinary school. At this horrifying school you see animal heads trapped in formaldehyde, organs floating around, death surrounding you…
-

First Look at Saietta R, the World’s First Electric Superbike
Reading Time: < 1 minuteIntroducing Saietta R, the world’s first electric superbike, capable of going from 0-60 mph in just 3.9 seconds without using a single drop of fuel.
-

12 Amazing Pictures of Things Cut in Half
Reading Time: < 1 minuteDo you ever wonder what common (and not so common) things would look like on the inside if they were cut in half? Take a look at this odd collection of cutaway shots of random objects, giving you an inside view. Source: http://www.oddee.com/item_98842.aspx?utm_source=Oddee&utm_campaign=35b59cfed1-RSS_ARTICLE_OF_THE_DAY&utm_medium=email&utm_term=0_a52606686c-35b59cfed1-63493265
-
Thor and Loki’s Stop-Motion LEGO Video by Jordan Tseng
Reading Time: < 1 minuteQuote from the Creator of the Video: 2014 Happy new year!! It’s been a while I’m going to have the University entrance examination 2 weeks later, that’s awful.Anyway,hope you guys enjoyed it.It’s the first time I use Lego to make a stop motion.
-

This Candy Picture Isn’t Photoshoped
Reading Time: < 1 minuteAt first glance, the bottom image appears to be digitally altered, when in reality, the shot was created with the condensation on a pane of glass. A DSLR camera was then placed above the glass and paired with optimal lighting.
-

Samsung YOUM Smartwatch Boasts Display Like You’ve Never Seen Before
Reading Time: < 1 minuteMost smartwatches have your standard LED / OLED / LCD displays, but the Samsung YOUM boasts a flexible AMOLED display that literally wraps around your wrist. It’s powered by a custom version of Google Android and features Google Now, which is always listening for the ‚Ok Google‘ command, similar to Google…
-

Google is Currently Building Real Robots, Skynet May be Coming
Reading Time: < 1 minuteGoogle already has self-driving cars, so self-aware robots with artificial intelligence are the next logical step, right? To kick things off, „Google hopes to create robots for use in industrial settings, like factories [and they’re already] experimenting with delivering packages in urban areas, building upon that existing technology is a no-brainer.“…
-
WWE Wrestlers with awesome Real Street Fighter combos
Reading Time: 2 minutes YES! YES! YES! (etc.) Not sure where exactly these came from or what talented genius came up with the idea of turning IRL WWE wrestling moves into flashy super Street Fighter-esque combos in animated gifs, but had I known they existed before actually seeing them, they’re pretty much one of those things…
-

AMAZON announces: Amazon ‚Prime Air‘
Reading Time: 2 minutesWe’re excited to share Prime Air — something the team has been working on in our next generation R&D lab. The goal of this new delivery system is to get packages into customers‘ hands in 30 minutes or less using unmanned aerial vehicles. Putting Prime Air into commercial use will take some…
-

21 Mind-Blowing Storm Clouds Like You’ve Never Seen Them Before
Reading Time: < 1 minuteStorms are created when a center of low pressure develops with a system of high pressure surrounding it. This combination of opposing forces can create winds and result in the formation of storm clouds, such as the cumulonimbus. Here are a few mind-blowing pictures of storm clouds that show them like…
-

8 Pictures, Things That You Should See Before Camping Out for Black Friday
Reading Time: < 1 minuteFor those who don’t know (or aren’t from the US), Black Friday is the Friday following Thanksgiving Day, often regarded as the beginning of the Christmas shopping season. In recent years, most major retailers have opened extremely early and offered promotional sales to kick off the holiday shopping season, similar to…
-
Video Shows Why Neptune Pine Might be the Best Smart Watch Yet
Reading Time: < 1 minuteAfter a year of development, the rugged Neptune Pine has finally been unveiled, and it works without a smartphone. Making and receiving calls, typing out text messages, or even just listening to music and taking pictures, is a breeze, functioning exactly like a smartphone. Simply pop in a micro SIM card…
-

3D Printed Batteries Will Soon Be a Click Away, Might Change the Tech World
Reading Time: < 1 minuteWe have seen the future of batteries, and they’ll be 3D-printed from the comfort of your own home. That’s right, Harvard researcher Jennifer Lewis is working on inks that can solidify into electronic components. Technically speaking, lithium titanium oxide, deionized water, and ethylene glycol are mixed together with ceramic balls, then…
-
Make yourself the Most Useless Machine EVER! Tutorial Instructions
Reading Time: 10 minutesAlso Known As: The Ultimate Machine Battery Pack Gear Motor Toggle Switch Microswitch Printed Circuit Board Green & Red 3 mm LEDs Two 56 Ohm Resistors Hook-Up Wire Heat Shrink Soldering The Machine: Soldering is so easy there’s a comic book instruction guide called Soldering is Easy that we recommend. It was created by…
-

Incredible Ryuuko Matoi cosplay
Reading Time: < 1 minuteOfficial Source: http://imgur.com/gallery/CLKNI http://imgur.com/a/CLKNI?gallery
-

Video Shows Off Disney’s Ultra Realistic Frozen Snow Simulator
Reading Time: < 1 minuteFor those who don’t already know, Frozen is Disney’s latest computer animated musical fantasy-comedy film that’s loosely inspired by Hans Christian Andersen’s fairy tale The Snow Queen, it is the 53rd animated feature in the Walt Disney Animated Classics series. The film’s animators visited an Ice Hotel in Quebec, Canada to…