Schlagwort: easter
-

Easter fun with Raspberry Pi
Reading Time: 3 minutesEaster is nearly upon us, and we’ll be stepping away from our home-office desks for a few days. Before we go, we thought we’d share some cool Easter-themed projects from the Raspberry Pi community. Egg-painting robot [youtube https://www.youtube.com/watch?v=QBEAppVn6Ao?feature=oembed&w=500&h=281] Teacher Klaus Rabeder designed, 3D-printed, and built a robot which his students programmed in…
-

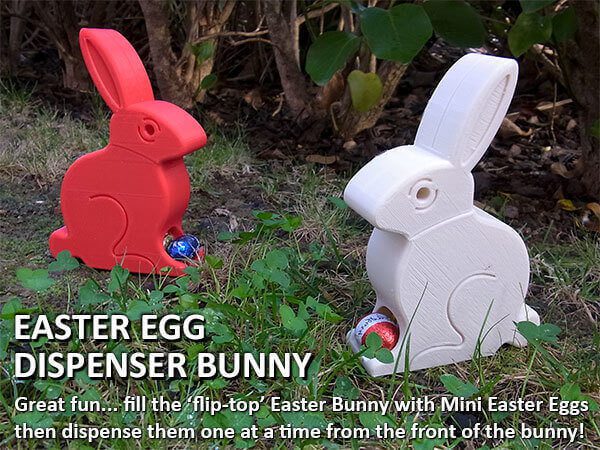
Weekend Project: 3D Print a Chocolate Easter Egg Dispenser Bunny
Reading Time: 3 minutesReady to scarf down lots of chocolate this holiday weekend? Exercise some portion control with a 3D printed Easter Egg Dispenser Bunny. This weekend, you may be indulging in a traditional Easter Egg hunt in your garden. Or perhaps you’ll be kicking back with a Martini. Whichever leisure activity you pursue, make…
-
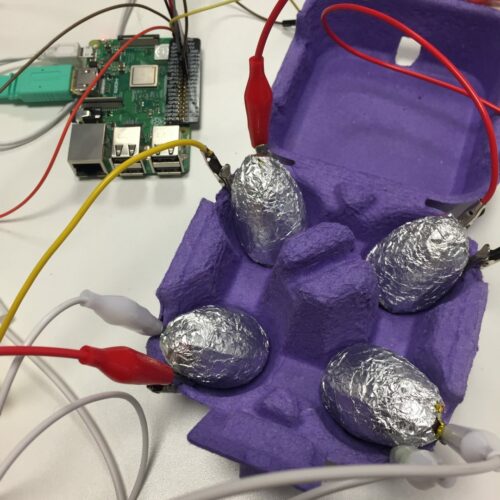
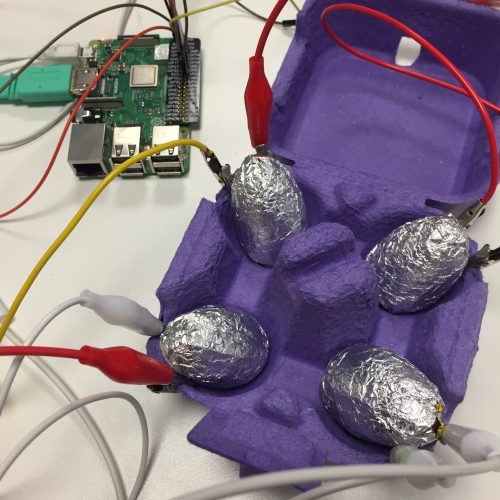
Alex’s quick and easy digital making Easter egg hunt
Reading Time: 3 minutesLooking to incorporate some digital making into your Easter weekend? You’ve come to the right place! With a Raspberry Pi, a few wires, and some simple code, you can take your festivities to the next level — here’s how! If you logged in to watch our Instagram live-stream yesterday, you’ll have seen…
-

Wie man richtig Eierpeckt, alle Spielregeln!
Reading Time: 2 minutesSpitze gegen Spitze und Boden gegen Boden. Wer kennt es in Österreich nicht, das Eierpecken! Kaum ein anderer Brauch ist neben dem Ostereier-Suchen so beliebt, wie das Eierpecken. Traditionell werden bei der Osterjause, die bunten Ostereier gerne verspeist. Mithilfe des Eierpeckens können diese in einem lustigen Spiel geöffnet werden. Und das beste…