Kategorie: Science

  • Gregory Kress New CEO of 3D Printing Marketplace Shapeways

    Gregory Kress New CEO of 3D Printing Marketplace Shapeways

    Reading Time: 3 minutes

    Shapeways has a new CEO and his name is Gregory Kress; the company will continue its expansion into a 3D printing marketplace where creators can design, make, and sell their ideas.

    New York-based 3D printing service and marketplace Shapeways has announced the official appointment of Gregory Kress as CEO. He’ll be taking over from interim CEO Tom Finn, who was overseeing the transition from Co-Founder and former CEO Peter Weijmarshausen since August 2017.

    “While excited about how far we’ve come, I look forward to accelerating Shapeways’ vision to become the complete end-to-end platform helping people, ‘design, make, and sell,’ regardless of their 3D modeling experience,” says Kress.

    Shapeways began operations in 2007 as an online 3D printing service. It has since evolved into a sophisticated marketplace for the production, distribution, and supply chain fulfillment of 3D printed goods.

    Currently, Shapeways offers over 60 different 3D printing materials and finishes to their customers. They’re closing in on a magic number — their 10 millionth product printed — and receives 140,000 new design uploads each month.

    With the hiring of Kress, the company says it has begun a new process; to implement services that will address both creative and business “pain points” for creators. It will expand its end-to-end services for current and new Shapeways users to design, make and sell their work.

    Intriguingly, Shapeways says it also plans to expand vertically and provide production services beyond 3D printing. This seems to mirror similar changes in strategy that were recently announced by another leading light of the 3D printing industry, 3D Hubs.


    Gregory Kress

    Gregory Kress is the Shape(ways) of Things to Come

    According to his corporate bio, Kress brings more than fifteen years of relevant experience to his new role at Shapeways.

    He most recently served as President and COO of Open Education. There, Kress oversaw the business expanding to more than 400,000 students in 25 countries and supported by over 1,200 employees. Prior to Open Education, he spent 11 years in leadership positions across GE.

    “We know people have ideas or want products that can be made and sold thanks to advanced design, production, and fulfillment technology — but most of them don’t know where to begin. Without proper support or infrastructure, the entire process seems inaccessible, complicated, intimidating, and expensive,” says Albert Wenger, Managing Partner at Union Square Ventures.

    “Greg is experienced at growing platform businesses and we’re thrilled that he’ll be applying that deep knowledge and energy to empower creators to realize those design dreams.”

    Shapeways has factories and offices in New York, the Netherlands, and partners around the globe. Company investors include Union Square Ventures, Index Ventures, Lux Capital, Andreessen Horowitz, INKEF Capital, Hewlett Packard Ventures, and Presidio Ventures.

    Source: Press Release


    gregory kress


    License: The text of „Gregory Kress New CEO of 3D Printing Marketplace Shapeways“ by All3DP is licensed under a Creative Commons Attribution 4.0 International License.

    Subscribe to updates from All3DP

    You are subscribed to updates from All3DP

    Website: LINK

  • JGAurora A5 3D Printer: Review the Facts Here!

    JGAurora A5 3D Printer: Review the Facts Here!

    Reading Time: 2 minutes

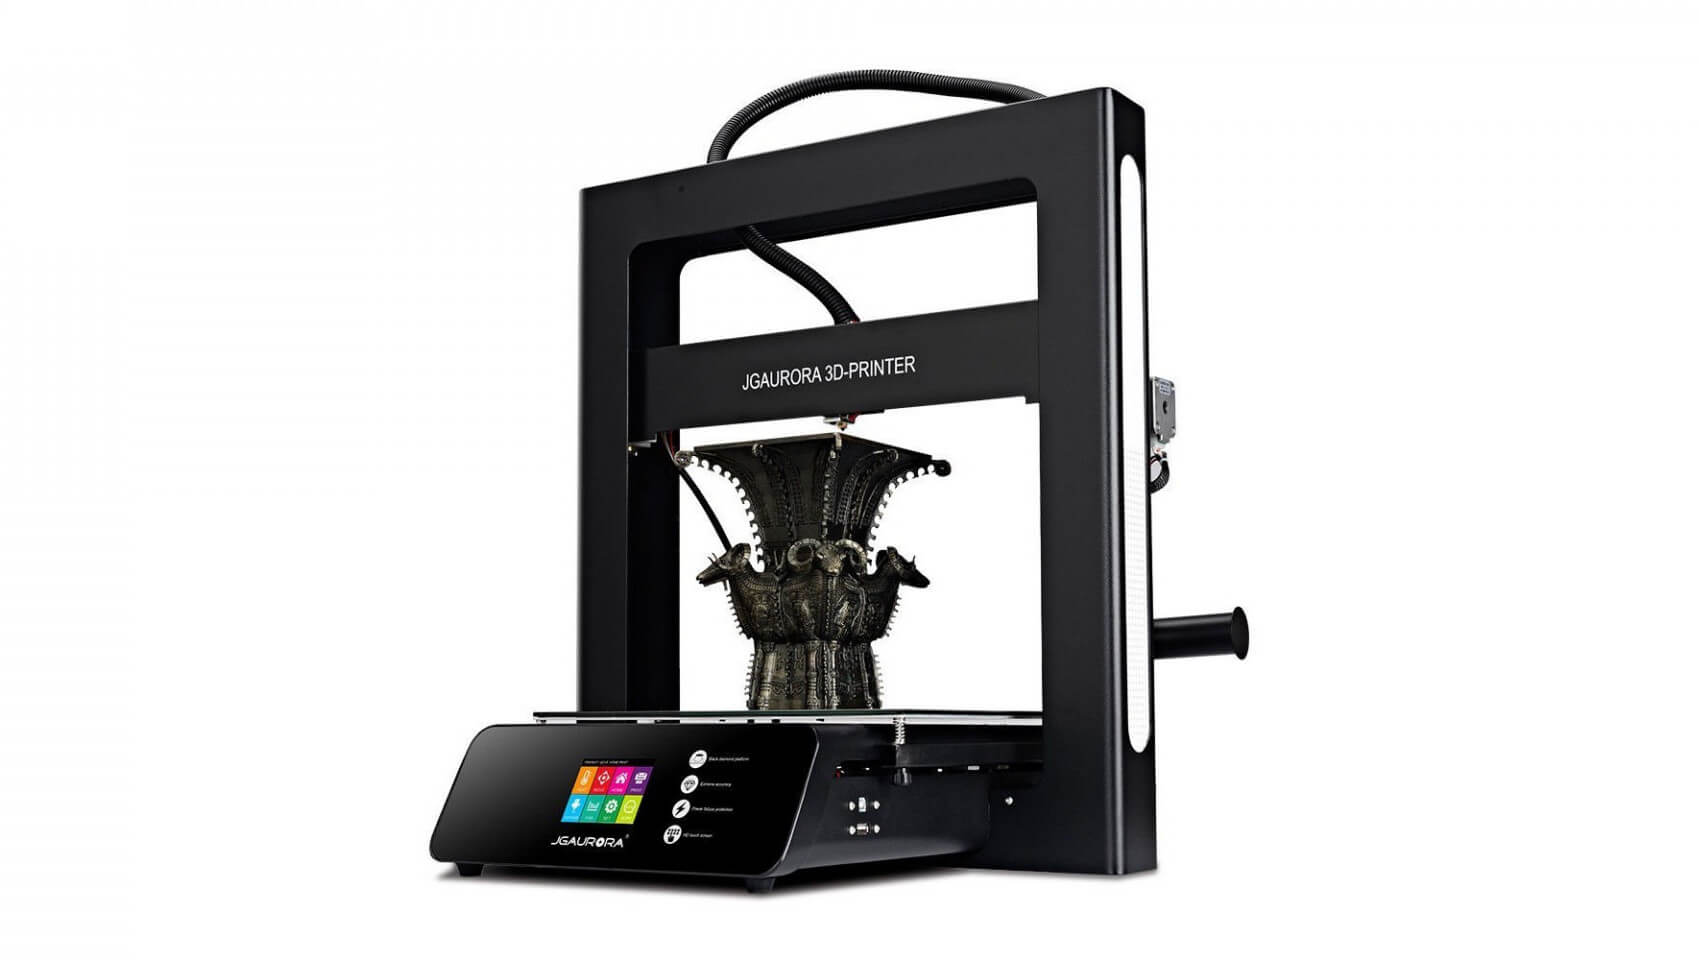
    The JGAurora A5 is a big machine – if you want to add it to your workshop, you’ll definitely need to clear some space. The printer itself is capable of producing prints as big as 305 x 305 x 320 mm, which puts it in the range of the popular Creality CR-10 (300 x 300 x 400 mm, in-depth review here).

    The JGAurora A5 3D printer comes partially assembled. All you have to do is to mount the Z-Axis to the base part, set up the spool holder, make sure set the machine to the proper voltage for your country. The whole process shouldn’t take longer than 1 hour.

    Having done that, you attach the spool holder and feed the filament in the Bowden extruder. Beginners should start 3D printing with the PLA provided in the box, as it is easier to handle than notoriously difficult materials like ABS or Nylon. The hotend, by the way, is an E3D V6 hotend clone with a custom heatsink.

    The heat bed (the manufacturer calls it “Black Diamond Glass Heated platform”) is a glass plate with some additional coating, comparable to the Anycubic Ultrabase. Before you start the first prints on the JGAurora A5 3D printer, you have to level the bed. The printer software will help you by moving the nozzle to the bed’s edges, but you still have to calibrate the bed manually by turning screws.

    Models can be loaded via a USB stick. Alternatively, you can hook up the machine to a computer and print directly from there. Even if there’s a Wifi option in the printer menu, it is clearly not working and also not advertised to do so. Also, there’s no SD card slot available.

    When it comes to slicing, the manufacturer recommends Cura. For the right settings, please follow this informative thread on Thingiverse.

    There are two interesting features on the JGAurora A5 3D printer that you don‘t find in most printers.

    1. Filament out detection: Every time the filament runs out, the printer stops and emits a loud warning signal.
    2. Power recovery: Not only the Prusa i3 MK3 offers this great feature. The JGAurora A5 3D printer can handle power outages and, according to Maker’s Muse, the printer handles this perfectly. When reconnected to a power line, the printer heats up the hotend and continues without any problems.

    Website: LINK

  • [DEAL] MakerGear M3-SE & M3-ID 3D Printers, $200 Off

    [DEAL] MakerGear M3-SE & M3-ID 3D Printers, $200 Off

    Reading Time: 2 minutes

    MatterHackers is running a limited-time deal on MakerGear’s two top-tier 3D printers, the M3-SE and M3-ID, both $200 off at $2,350 and $3,099 respectively.

    MakerGear are enjoying something of a hot run of late, what with the US company’s M2 sitting top of the desktop pile in 3D Hub’s Q1 2018 3D printing trend report.

    But, despite the M2’s popularity, there are newer and arguably greater machines. An incremental upgrade over the M2, the M3-SE (single extrusion) adds WiFi connectivity, an inbuilt Raspberry Pi running a MakerGear-ified version of OctoPrint and sophisticated bed leveling process to the already winning formula found in the M2.

    Further than this, there is also the M3-ID, which boasts the surprisingly rare party trick of an independent dual extrusion system on top of all of the above.

    MatterHackers is running a special on the two, knocking $200 off the M3-SE and M3-ID list prices. If you’re interested, better act fast. The promo ends February 26th, 2018.

    DEAL: MakerGear M3-SE 3D printer, 8% off at $2,350

    DEAL: MakerGear M3-ID independent dual extrusion 3D printer, 6% off at $3,099

    Other deals:

    All3DP is an editorially independent publication. Occasionally we need to pay our bills, so we affiliate some product links through which we may receive a small commission. For the full spiel, check out our Terms of Use.


    License: The text of „[DEAL] MakerGear M3-SE & M3-ID 3D Printers, $200 Off“ by All3DP is licensed under a Creative Commons Attribution 4.0 International License.

    Subscribe to updates from All3DP

    You are subscribed to updates from All3DP

    Website: LINK

  • RoMA: Robotic Modeling Assistant Could be a Better Prototyping Machine

    RoMA: Robotic Modeling Assistant Could be a Better Prototyping Machine

    Reading Time: 3 minutes

    Cornell and MIT are working on a joint project called the Robotic Modeling Assistant (RoMA) which will bring together multiple technologies to create an ultimate prototyping machine. 

    Although 3D printing is certainly improving and streamlining prototyping, researchers from MIT and Cornell want to bring more emerging technologies together to improve such machines.

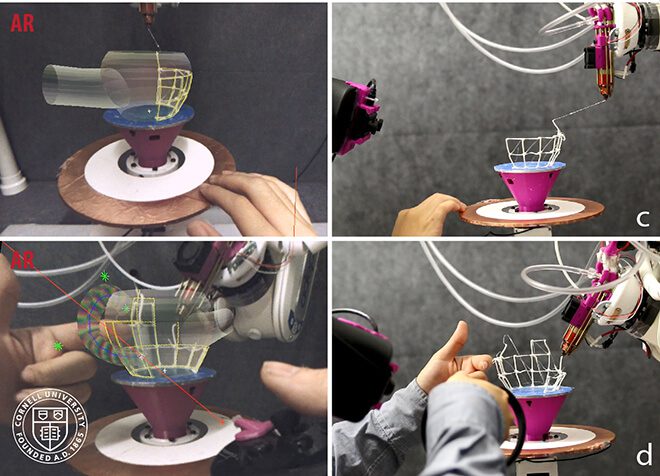
    The joint project is called the Robotic Modeling Assistant (RoMA). It blends technologies such as augmented reality, 3D printing and robotics. It looks like a robotic arm with a 3D printing pen attached to the end of the arm.

    Team leader Huaishu Peng explains on his website that the machine is an interactive fabrication system. It offers a fast, hands-on, precise modeling experience.

    Essentially, users can create a 3D model in-situ and get hands on with their 3D print using the open, robotic arm. Peng adds:

    “With RoMA, users can integrate real-world constraints into a design rapidly, allowing them to create well-proportioned tangible artifacts. Users can even directly design on and around an existing object, and extending the artifact by in-situ fabrication.”

    Although this process might appear clunky and awkward, it’s an interesting mixture of the emerging technologies. Check out the way it works in the video below:

    Positives and Negatives of the Robotic Modeling Assistant

    Using the augmented reality headset, it’s possible to create the perfect design. While the designer creates a model with the AR CAD editor, the robotic arm will fabricate the object simultaneously.

    The small, basic plastic model created with the 3D printing pen attached to the end can be used as a tangible reference for the maker.

    With this robotic arm, it’s also possible to print on top of other objects as it doesn’t work with a printing bed. Currently, the machine is faster than most FDM 3D printing methods and designers can move the arm more easily.

    “At any time, the designer can touch the handle of the platform and rotate it to bring part of the model forward,” Peng continues.

    “The robotic arm will park away from the user automatically. If the designer steps away from the printing platform, the robotic fabricator can take the full control of the platform and finish the printing job.”

    However, it is more advanced than a 3D printing pen and offers more control. Peng explains that he hopes to see people designing their own everyday objects to suit their needs in the future. Want to find out more? Visit Peng’s website.

    Source: Tech Crunch


    Roma


    License: The text of „RoMA: Robotic Modeling Assistant Could be a Better Prototyping Machine“ by All3DP is licensed under a Creative Commons Attribution 4.0 International License.

    Subscribe to updates from All3DP

    You are subscribed to updates from All3DP

    Website: LINK

  • Stelia Aerospace Demos Cheap, Light and Strong Aircraft Fuselage Using WAAM

    Stelia Aerospace Demos Cheap, Light and Strong Aircraft Fuselage Using WAAM

    Reading Time: 3 minutes

    French firm Stelia Aerospace has lifted the lid on its newest innovation. Using WAAM (wire arc additive manufacturing), the company has demonstrated metallic self-reinforced aircraft fuselage panels that cut costs and save time from the assembly process.

    Aircraft structures and seating are the bread and butter of Stelia Aerospace’s business, with its designs and processes in place in products by the likes of Airbus and Boeing. So it stands to reason that the manufacturer would look to innovative ways to optimize it’s work. Showcasing the tremendous potential of additive manufacturing, the company recently launched its first self-reinforcing fuselage panel, which makes use of WAAM (wire arc additive manufacturing) for its construction.

    Constructed as part of the DEveloppement de la Fabrication Additive pour Composant TOpologique (DEFACTO) project — a research strategy founded by the company in 2014 to explore additive manufacturing in its particular field of fuselages and large aircraft sub-assemblies — the 1 sq m panel emphasizes that large-scale 3D printing in aerospace design is possible.

    Traditionally the types of panels the firm looks to produce are a skin of aluminum stiffened with a skeleton of supports that are manually attached. However, an issue with this is that each and every element requires meticulous placing, fitting and eventually welding together. This is a costly process that requires significant time.


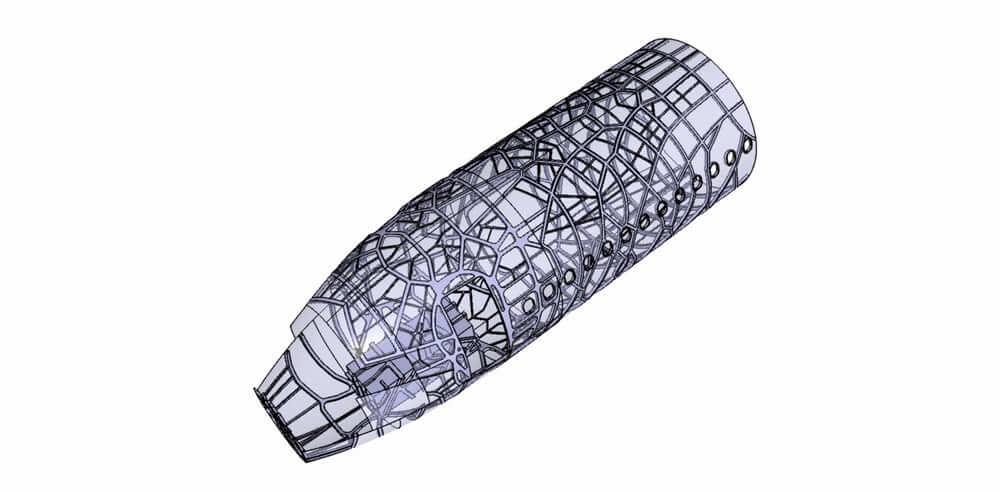
    Model of fuselage with 3D-printed stiffeners. (Image: Stelia Aerospace)

    3D Printing Plane Skeletons

    By using WAAM to reinforce the panels instead, the company finds that the resulting panel is not only lighter, but cheaper to produce too. Put simply, WAAM utilized a robotic arm to weld metal material (in the form of a wire) in successive layers, much like fused deposition modelling.

    With this 3D additive manufacturing demonstrator, Stelia Aerospace aims to provide its customers with innovative designs on very large structural parts derived from new calculation methods,” explained CEO of Stelia Aerospace, Cédric Gautier. “Through its R&T department, and thanks to its partners, Stelia Aerospace is therefore preparing the future of aeronautics, with a view to develop technologies that are always more innovative and will directly impact our core business, aerostructures.

    As a bonus, the process is more environmentally friendly as it integrates multiple functions into a single part and generally requires less material.


    Aerostructures manufacturing at Stelia Aerospace. (Image: Stelia Aerospace)

    Source: Stelia Aerospace


    License: The text of „Stelia Aerospace Demos Cheap, Light and Strong Aircraft Fuselage Using WAAM“ by All3DP is licensed under a Creative Commons Attribution 4.0 International License.

    Subscribe to updates from All3DP

    You are subscribed to updates from All3DP

    Website: LINK

  • Electric Eels Inspire Device Which Reaches 110 Volts

    Electric Eels Inspire Device Which Reaches 110 Volts

    Reading Time: 3 minutes

    A sheet of bioprinted hydrogels — inspired by the electric eel — is capable of delivering 110 volts of electricity. It has potential to become a soft power source which draws on a biological system’s chemical energy.

    Researchers used a 3D bioprinter to create a device which reached 110 volts from hydrogels. Essentially, they were inspired by electric eels’ ability to produce hundreds of volts.

    The researchers worked together to stack hydrogels full of varying strengths of salt water. Working on this project was Anirvan Guha, a graduate student at the University of Fribourg’s Adolphe Merkle Institute.

    He explains that in the future, this work will hopefully help develop power sources for implantable devices. This could work by offering a soft power source which can draw on a biological system’s chemical energy.

    Guha explains that such devices will be able to “utilize the gradients that already exist within the human body. Then you may be able to create a battery which continuously recharges itself, because these ionic gradients are constantly being re-established within the body.”


    Creating the Electric Eel Device with a Bioprinter

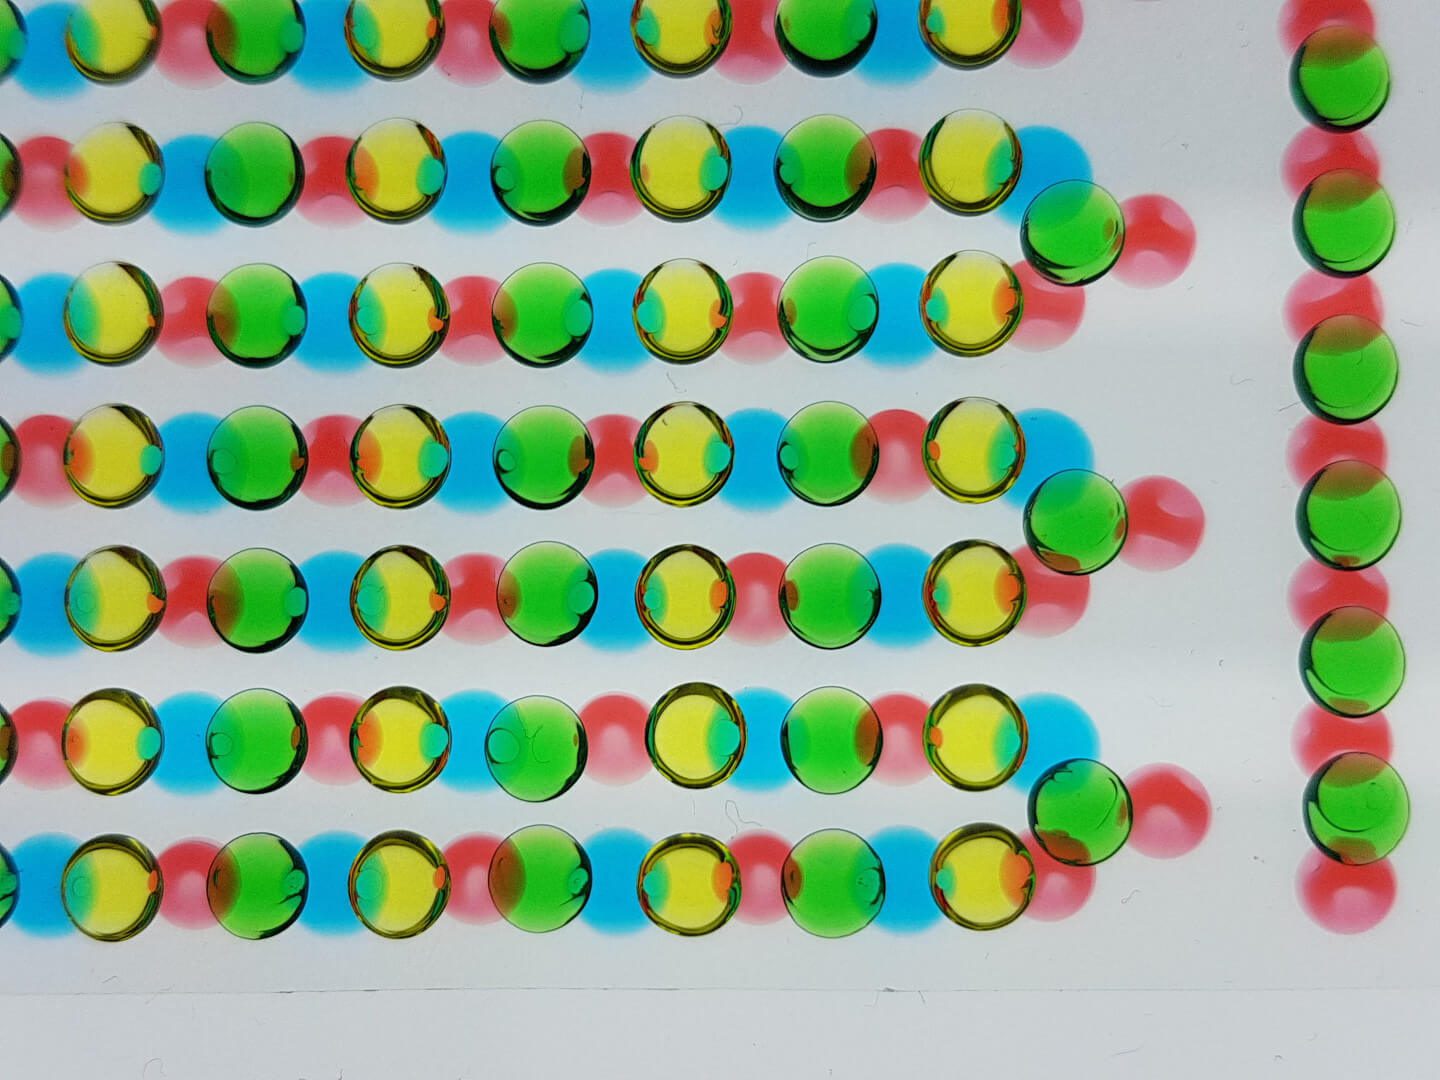
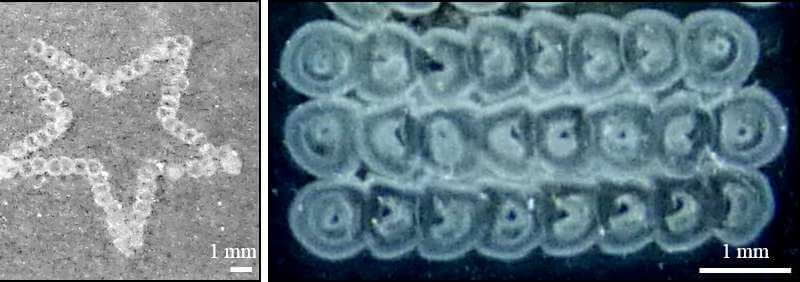
    To create the device, the researchers used a 3D bioprinter to deposit arrays of gel precursor droplets onto plastic substrates.

    Guha explains that the printer “deposits little droplets of gel … with the precision and spatial resolution to print an array of almost 2,500 gels on a sheet the size of a normal piece of printer paper.”

    It’s necessary to stack thousands of individual hydrogels to generate the volts, but this is easy work for a 3D bioprinter. After this process is complete,  the researchers cured the droplets with a UV light. This converted them into solid gels.

    Different salinity gels were printed on one substrate which were either high or low. On a second substrate, “cation-selective and anion-selective” gels were printed.

    Finally, the researchers would overlay the gels. As they connect, they form a conductive pathway. Essentially, this pathway is what generates up to 110 volts.

    Next, the aim is to increase the current which runs through the hydrogel. Guha explains: “Right now, we’re in the range of tens to hundreds of microamperes , which is too low to power most electronic devices.”

    Guha will be presenting his research this week at the Biophysical Society 62nd Annual Meeting in San Francisco. Find out more by reading the paper written by Guha and his co-authors called “An eel-inspired artificial electric organ: 110 volts from water and salt”.

    Source: Phys


    electric eel


    License: The text of „Electric Eels Inspire Device Which Reaches 110 Volts“ by All3DP is licensed under a Creative Commons Attribution 4.0 International License.

    Subscribe to updates from All3DP

    You are subscribed to updates from All3DP

    Website: LINK

  • 3D Printing Software company Beamler Acquires Printr

    3D Printing Software company Beamler Acquires Printr

    Reading Time: 3 minutes

    Beamler, the company that provides 3D printing software for the industry, has just announced the acquisition of Printr. It will be fully integrated into the buyer’s portfolio.

    Printr was founded in 2014 by students in the Netherlands. The company sought to make 3D printing more accessible. One of the major bottlenecks in 3D printing is the availability of software packages. Right now, designers require at least four software tools and the knowledge to use them.

    That is why Printr developed The Element, a box that connects to a 3D printer and contains all the necessary software to solve the issue. It was meant to be a “one-size-fits-all” solution.

    However, following a financing round of €750,000, Printr had to stop operation in October last year. The company cited unexpected industry developments as their reason.

    As part of the acquisition, Printr will be integrated with Beamler to boost its product line-up and innovation.

    Willem-Jan van Loon, Founder of Beamler explained that Printr’s ERP cloud system had been specifically developed for desktop 3D printers making it a pioneer in the market.

    “This allows engineers to access different 3D printers at the same time from any computer through the cloud,” van Loon said.

    “We see this technology as very promising and as a key solution for further development of our industry. The merger of our two businesses is great news for all our stakeholders and it accelerates the market. We intend to continue to invest and grow Printr technology. We will also incorporate different functions to our platform with the software version 1.1 at Q2 2018,“ he added.


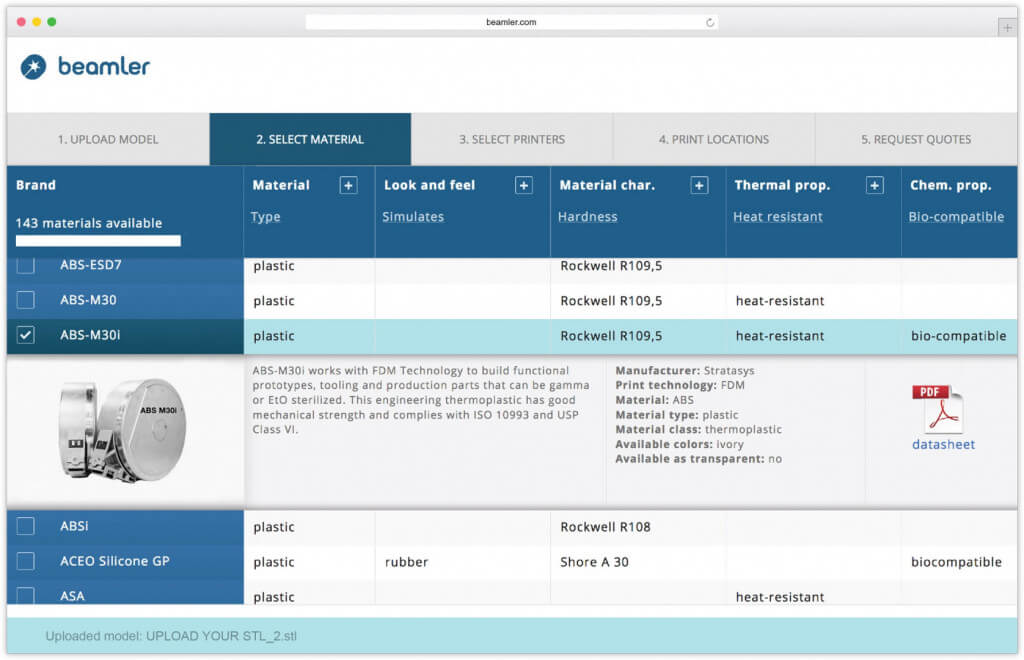
    Beamler software dashboard. (Image: Beamler)

    Beamler provides 3D Printing Network

    Beamler was originally established back in 2016 in Amsterdam. The company specializes in minimizing operational constraints across the 3D printing industry. Although ever more manufacturers are now implementing 3D printing technologies, a whopping 68% of them are facing implementation and operational issues.

    Such inefficiencies are often due to a lack of information or capital requirements.

    That’s where Beamler comes in. The company provides engineers and designers with 3D printing data to put them in touch with a worldwide industrial 3D printing network.

    Therefore, engineers are able to develop and launch their products faster to market. In addition, companies are able to strategically assess decisions in regards to 3D printing.


    Beamler case study models. (Image: Beamler)

    Source: Beamler


    License: The text of „3D Printing Software company Beamler Acquires Printr“ by All3DP is licensed under a Creative Commons Attribution 4.0 International License.

    Subscribe to updates from All3DP

    You are subscribed to updates from All3DP

    Website: LINK

  • Shapeways and Polycount Team Up for Dota 2 3D Printing Contest

    Shapeways and Polycount Team Up for Dota 2 3D Printing Contest

    Reading Time: 2 minutes

    3D printing service Shapeways and digital art forum and community Polycount are putting on a 3D printable design competition inspired by Valve’s Dota 2 video game.

    Leveraging the tasty licensing agreement it has with video games producer Valve (that the latter’s assets become fair game for reproduction), Shapeways is now partnering with online digital art community Polycount for a competition inspired by Valve video game Dota 2.

    Members of both Shapeways and Polycount communities are invited to design new 3D printable models (and therefore products to sell on the site) across five categories: sculpture, jewelry, toys, gadgets and props and cosplay.

    It’s no simple case of designing and tagging an entry once uploaded to Shapeways though. As part of the entry guidelines, creators must show the design envolution of their entry via a “work-in-progress” thread in the Shapeways forums.

    While it is the artistic prowess of the Polycount community that’ll be growing the Dota 2 model count on Shapeways, the 3D printing platform itself will be the sole judge of the competition. Printability, creativity and artistic merit are the three criteria entries will be judged by.

    The prize pool includes a Wacom graphics tablet, 3D printing vouchers (safe to assume redeemable only on Shapeways) and a Polycount trophy.

    If it sounds right up your alley, you’re in luck. The competition is open now, running until 23:59 PST April 29th, 2018.  You can check out the full terms, conditions, requirements and other nitty gritty deets over at Polycount’s post announcing the competition.

    Protected IP and 3D Printing Play Nice for a Change

    It was only in September last year that Shapeways and video game producer Valve paved the way to a happier 3D printing horizon for the designers. Under a special agreement, Shapeways users could turn to Valve’s vast catalog of games and the assets therein for inspiration with the guarantee that the heavy hammer of copyright infringement would remain sheathed.

    With enthusiasts free to draw upon Valve’s vast pool of characters and objects, a modest collection of these officially licensed models has emerged. Under the license it’s even possible for Shapeways users to sell these Valve-inspired models as prints via the platform’s user-made stores.

    It’s an admirable model, and one that we’re keen to see reproduced in the future.

    However it’s not always a good thing when a corporate entity with a bucket load of IPs crosses paths with community-driven 3D printing. As recently as November we saw cases of Disney pulling Star Wars inspired models from 3D model repository Thingiverse.

    So, while your low-poly Darth Vader is off limits, even for personal use, fans of Dota 2 over at Shapeways are living it up with officially endorsed figurines, trinkets and other homages.

    (Lead image: Dota 2 Blog)

    Website: LINK

  • LiDAR Scanning Technology Helps Archaeologists Uncover Forgotten Cities

    LiDAR Scanning Technology Helps Archaeologists Uncover Forgotten Cities

    Reading Time: 3 minutes

    LiDAR scanning technology offers tremendous potential to help archaeologists discover lost cities across the world.

    Archaeologists are able to speed up their process of discovery and exploration using a high-tech laser technique originally developed to scan the surface of the moon.

    The technology is based on light detection and ranging scanning (LiDAR) and was created in 1970. It uses a combination of aerial light pulses as well as GPS to create a 3D map of what lies beneath.

    The surveying method basically measures the distance to a target by illuminating it. It then measures the reflected pulse via a sensor. A wide variety of areas including geography, geology, seismology and geomatics are already using the LiDAR technology.

    This has led to some major discoveries, including the Mexican city of Angamuco. Although archeologists had been aware of its existence, the city had been covered in layers of lava making it harder to spot. There was no way of knowing how dense the city was.


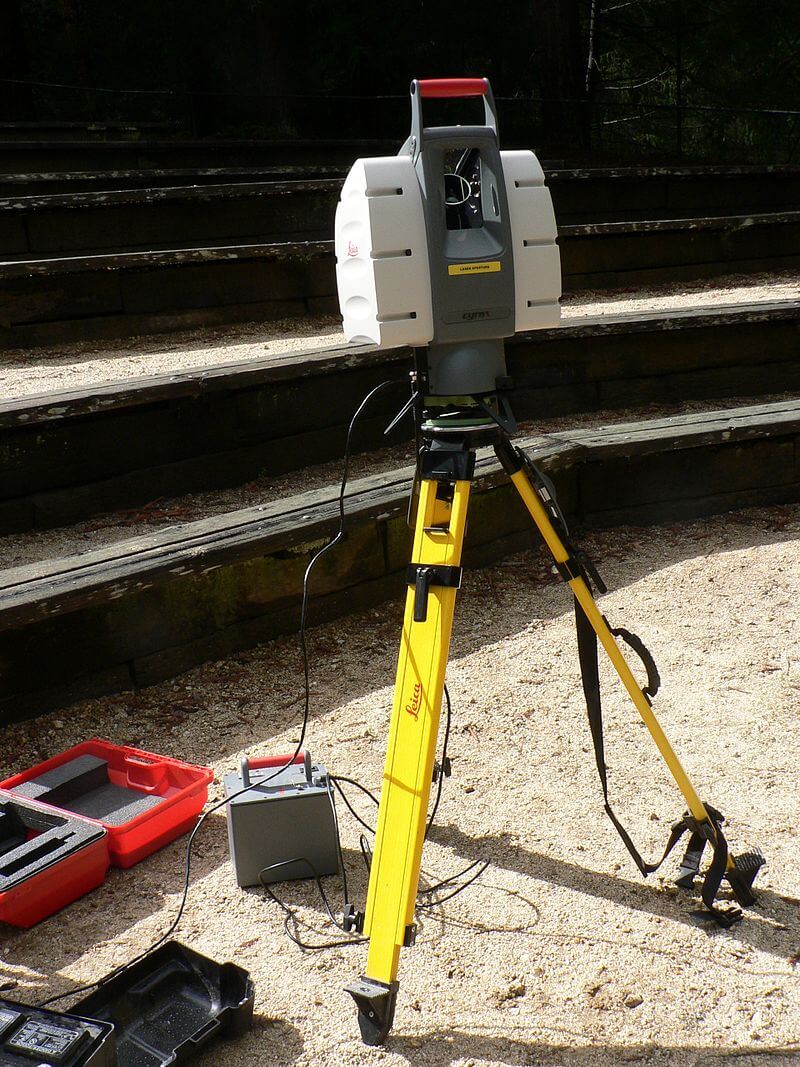
    LiDAR used to build 3D models. (Image: Wikipedia)

    Discovering the city of Angamuco and others with LiDAR

    According to Chris Fisher, an archeologist at Colorado State University, uncovering Angamuco has been a true achievement. Using LiDAR, the team noticed that the city extended over 26 km2.

    “That is a huge area with a lot of people and a lot of architectural foundations that are represented,” Fisher explained.

    “If you do the maths, all of a sudden you are talking about 40,000 building foundations up there, which is the same number of building foundations that are on the island of Manhattan.”

    He recently presented his findings at the 2018 AAAS Annual Meeting. Here, he discussed how LiDAR was used to uncover the ruins of yet another city in Honduras.

    Using the technology, the team has now verified over 7,000 architecture features spanning an area of 4 km2.

    Although archeologists are still having to do the dirty work, LiDAR offers tremendous future potential.

    “Everywhere you point the LiDAR instrument, you find new stuff, and that is because we know so little about the archaeological universe in the Americas right now. Right now every textbook has to be rewritten, and two years from now going to have to be rewritten again,” Fisher says.

    Source: The Guardian


    lidar


    Website: LINK

  • Artist Documents “Ritual of Habits” with 3D Scanning and 3D Printing

    Artist Documents “Ritual of Habits” with 3D Scanning and 3D Printing

    Reading Time: 2 minutes

    Rosalie Yu recreates her sweet treats in hyper-realistic detail with a grand project called a Ritual of Habits. She’s creating a virtual reality experience — and a 3D printed facsimile — of 256 desserts (and counting).

    Art and technology blend together like a fluffy mousse in a 360-degree virtual reality (VR) experience created by artist Rosalie Yu. The designer has spent two years documenting desserts and sweets from all angles to create 3D scans of them.

    As part of the A Ritual of Habits project, Yu recreated a VR world of sweets. The project serves to invigorate the senses through an augmented reality experience as well as 3D printed objects. You can see the entire collection hosted on her Sketchfab page.

    According to Yu, the project originated from habit – as the title suggests. She and her family are fans of sweets and desserts. Following her grandfather’s death, she began to document the sweets that were being eaten by her family.

    “I’ve been fascinated by the history of Dutch sugar plantations in colonial Taiwan and the decadent representation of sweets in Dutch still-life paintings,” Yu explained.

    “Photogrammetry enabled me to reflect on the global history of sugar alongside my own personal history and habits.”

    The Process behind a Ritual of Habits

    Currently working out of Brooklyn as part of a residency, Yu tends to take up to 50 close-up photos of a pastry or dessert.

    Afterwards, she uses the Agisoft PhotoScan to create the 3D model. She follows this by digitally sculpting the scan using the ZBrush tool. Once finished, Yu uses the ARKit and Unity to create the VR experiences.

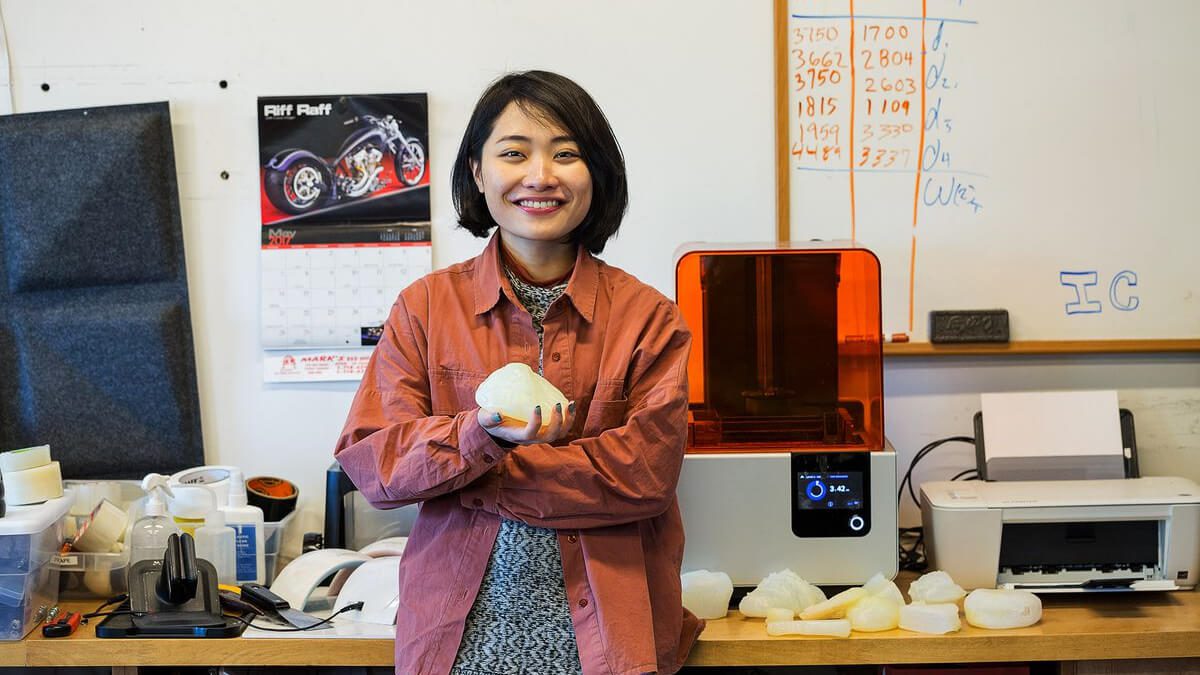
    For 3D printing, Yu fabricates the 3D models using a Formlabs Form 2 SLA printer. She then painstakingly paints the models to look even better than the real thing.

    This isn’t Yu’s first venture into VR, however. Indeed, she has built on her passion for art and technology. Her other works include live 3D maps of cities as well as 3D self-portraits.

    There are however limitations, as she admits.

    “The way a chemical image takes shape on photo paper is similar to the software’s process of stitching photos, connecting a point cloud, and reconstructing a mesh in 3D space,” she says.

    “You can’t immediately see the results of photogrammetry, just like traditional photographs that had to be developed in a dedicated space like darkroom. There is something magical and lonesome about both of these expansive processes.”

    The A Ritual of Habits offers a fully immersive experience of the sweet treat. The sound was created by sound designer Matthew Dougherty.

    Source: The Verge


    ritual of habits

    Website: LINK

  • Download and 3D Print Your Own Hyrule Castle from Zelda: Breath of the Wild

    Download and 3D Print Your Own Hyrule Castle from Zelda: Breath of the Wild

    Reading Time: 2 minutes

    If you’re a Zelda fan and have your own 3D printer, you’ll be happy to hear that there are now a myriad of memorabilia pieces you can create at home.

    “The Legend of Zelda” series provides some of the most memorable games you can play on a Nintendo system. If you’re hooked and now want to create your own memorabilia, you’ll be happy to hear that the internet is full of great props you can 3D print at home. In fact, All3DP even has a run-down of 25 of the best.

    However, adding to that list is Thingiverse user Jbenedetto84, who created a 3D model of the Hyrule castle and its grounds. He took the castle from the Nintendo Switch game “Zelda: Breath of the Wild”.

    If you’re not familiar with this game yet but are a Zelda fan, you should be familiar with the castle as Shigeru Miyamoto, the famous Japanese video game designer and producer, reuses themes, locations and props throughout every game.

    Benedetto is a maker and engineer who has over ten Zelda designs available to download from Thingiverse. Why not create your own Lynel model or the Divine Beast Vah Rudania? However, of course, the castle is certainly one of the most impressive.

    “The map in the game is so difficult to decipher that I may print this just to navigate in the game,” Benedetto jokingly adds about the model.

    3D Printing Zelda Props to Help Navigate the Game

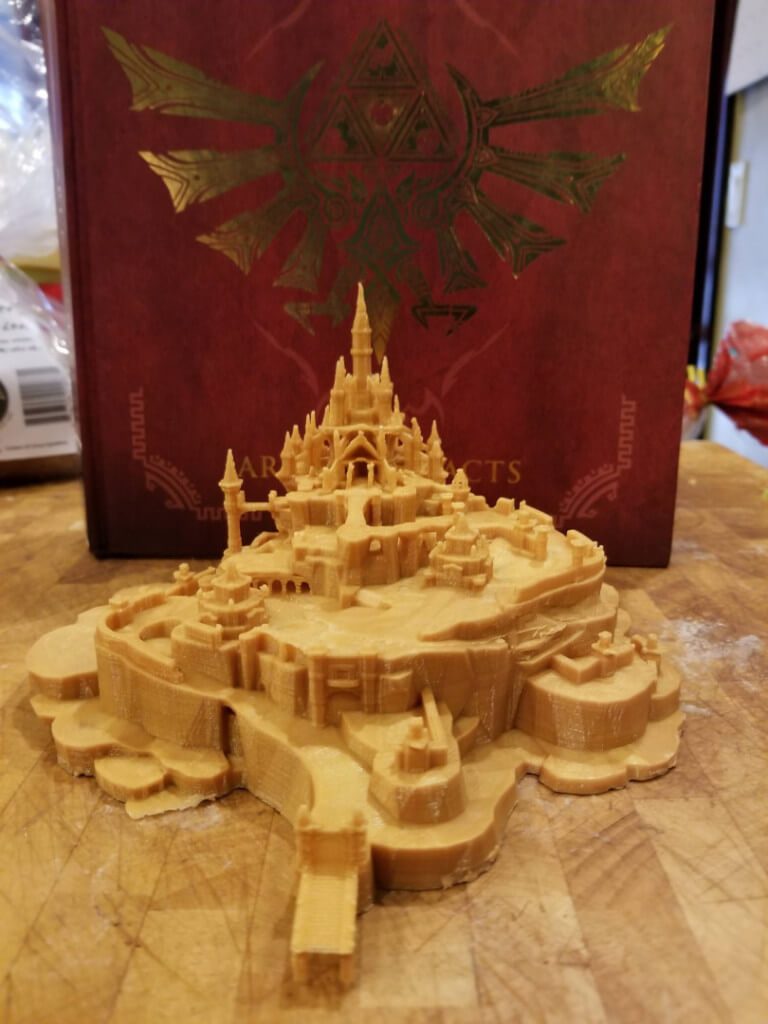
    The Hyrule castle is created from the map view of the Breath of the Wild game. As a result, the 3D print is extremely detailed and could help anyone who prints it to navigate the difficult and complicate areas of the game.

    Of his resulting designs, Benedetto also adds: “Interestingly enough when made solid it’s clear that the map view does not show any damage to the castle or grounds.”

    In order to test out whether this model actually worked out, Imgur user TheCrypticOne007 3D printed the design. The resulting print is just as impressive as you might expect.

    You can check out images of the 3D printed castle, here. If you’re tempted, why not 3D print your own and allow it to help you navigate that grounds of Hyrule yourself? Find the model on Thingiverse, here.


    Hyrule Castle

    Website: LINK

  • 12 Kickstarter 3D Printer Projects Live Right Now

    12 Kickstarter 3D Printer Projects Live Right Now

    Reading Time: < 1 minute

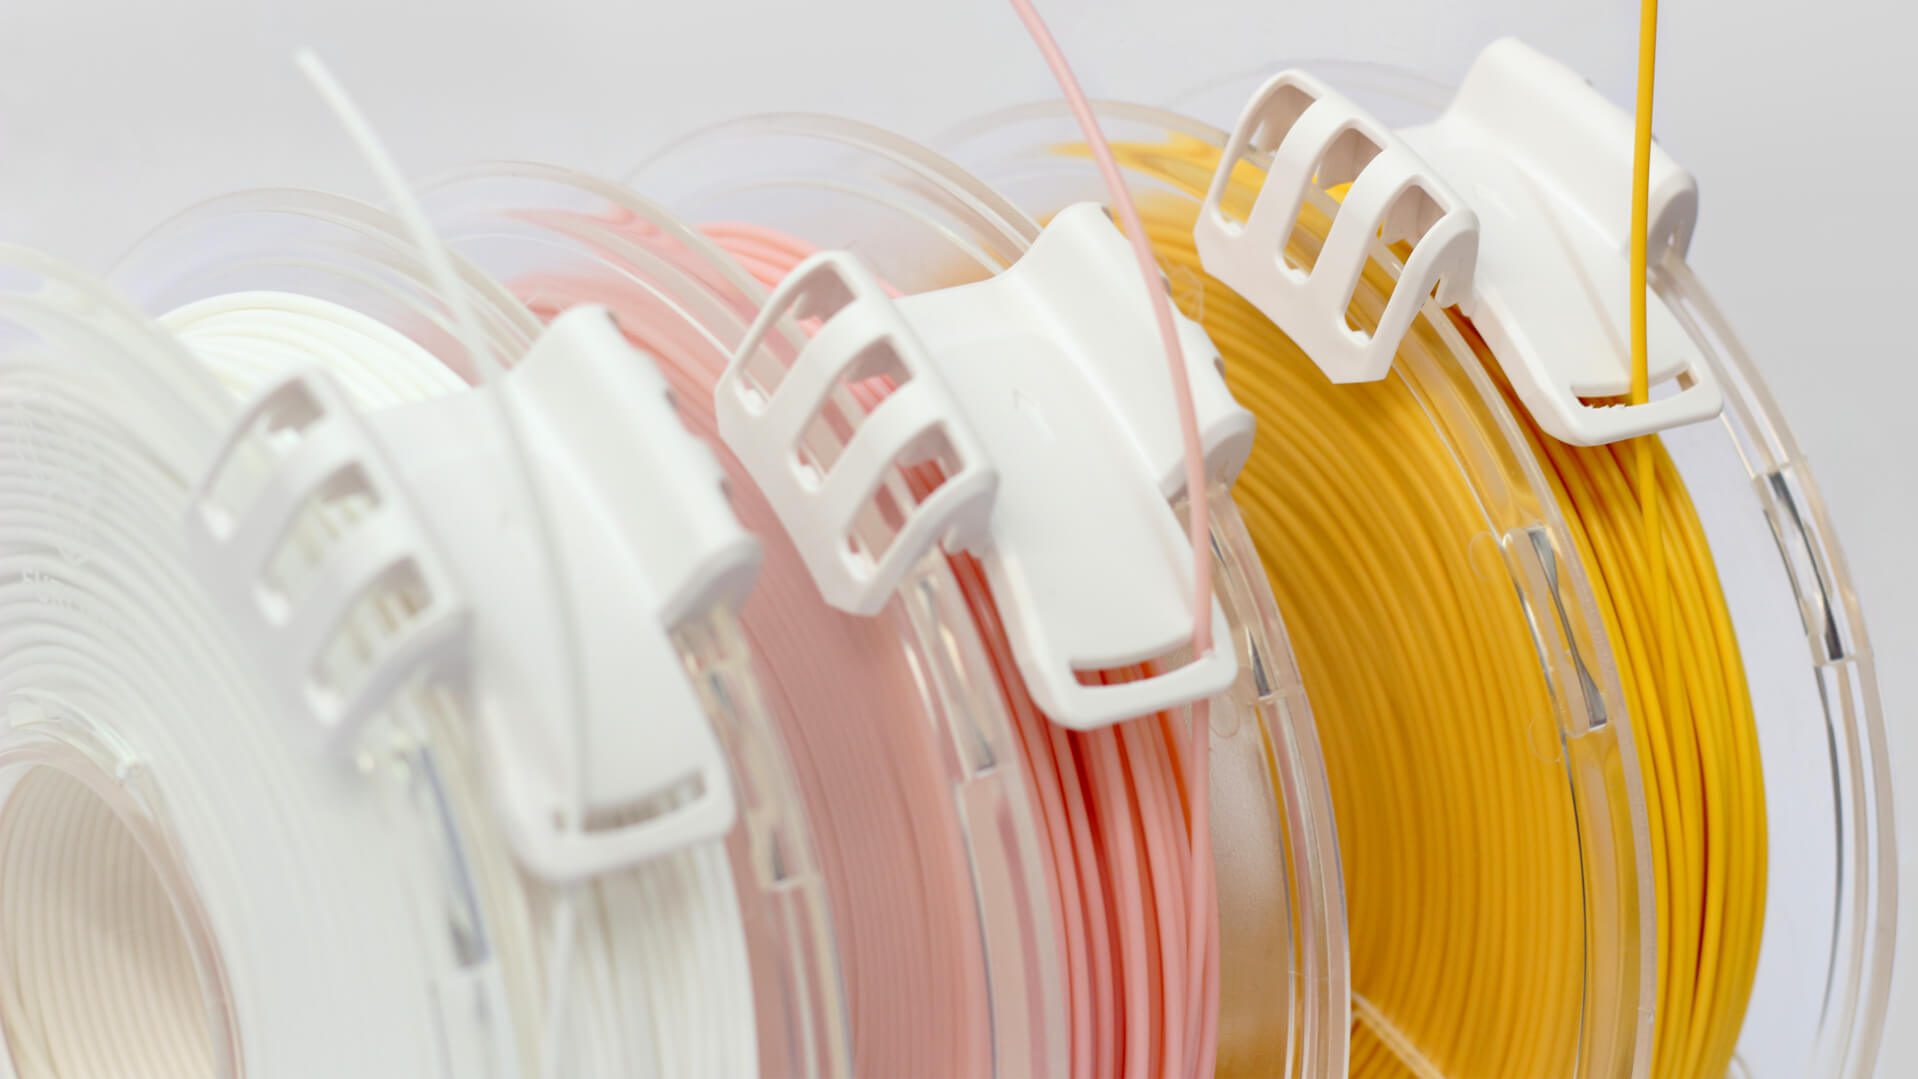
    Pitch: “High-quality PLA filament featuring the patented Furling SLIDER, which prevents your filament from getting tangled-up!”

    Comments on this Kickstarter 3D Printer Project: Utilising an in-house production system, these campaigners want to develop a full rainbow spectrum of 3D printing PLA filament that’s easy on the wallet. They’ve also devised a patented design called the Furling Slider, which prevents your spools from tangling.

    Rewards: Early Bird Specials are still available, including a tempting AU$ 1  reward for a spool (and color of your choice) plus a Furling Slider, where the recommended retail price would be AU$ 14.99. Alternatively, pledge AU$ 2 for a digital download of the Furling Slider STL file, and make your own.

    Backers: 290

    Pledges: AU $20,732 pledged towards AU $5,000 goal

    Days to go: 12

    Website: LINK

  • How 3D Scanning and Printing Helped Team GB to Win Winter Olympics Gold and Bronze

    How 3D Scanning and Printing Helped Team GB to Win Winter Olympics Gold and Bronze

    Reading Time: 3 minutes

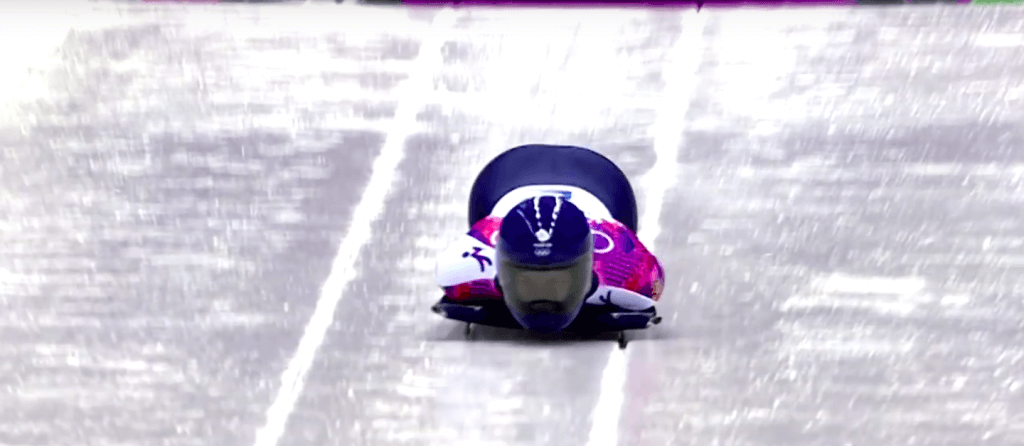
    Skeleton skinsuit engineers for Team GB used 3D scanning and printing to help the athletes get a slight advantage over their competitors at the 2018 Winter Olympics in Pyeongchang.

    Skeleton is an Olympic Winter Sport which involves using a tiny sled to plummet yourself down an ice track headfirst. When reaching speeds of 140 kilometers an hour, athletes require skill but also the right equipment.

    With just one body part out of place, athletes could go from gold to complete defeat. However, this didn’t happen for Elizabeth Yarnold and Dom Parsons, two members of Team GB athlete, who won gold and bronze.

    In their case, these victories aren’t simply down to skill as they also received a slight advantage from high-tech skinsuits. These were created by engineers using 3D scanning and printing. Once you’re at the top, being marginally better than your competitors and having the right equipment makes a huge difference.

    Rob Lewis, managing director at TotalSim, explains that improving equipment aerodynamics can help athletes find small yet easier gains. He explains: “The lead skeleton drivers, they’re all good drivers… With a lot of sports you quickly find that being a good sled driver or being a good bike rider is fine – but being ten percent better at that doesn’t make you much faster.”

    However, using technology to streamline and test out your skinsuit before you even create it, certainly can. Check out Yarnold in this video:

    Creating Virtual Wind Tunnels to Test 3D Models of Athletes

    To begin creating more aerodynamic suits, researchers take an entire 3D scan of the athlete’s body while they’re on their sled. The scan can be as down to a resolution of half a millimeter or even less.

    Using this data, the researchers create a 3D model of the athlete. The benefits of the 3D model are that researchers can use them for experiments, such as sending them through virtual wind tunnels over and over again.

    With an individualized 3D model, the researchers are provided with useful information which enables them to choose the perfect textures and materials for an athlete’s skinsuit.

    “You can control the airflow over different parts of the suits by having different materials. You need to make them bloody tight – make sure there are no wrinkles, nothing bunched up,” explains John Hart, a researcher at Sheffield Hallam University.

    Of course, the technology can only help so much as the final skinsuit needs to be within the confines of the sport’s rules. But, Hart adds: “There’s nothing in the rules that dictate how you stitch it together, or it’s made of different materials.”

    This year, Team GB’s skinsuits were objected to by other athletes. However, they were proven to have conformed to the rules and were good to go.

    Of course, Hart points out that the aerodynamics only offer a slight aid to the athletes. On the day, it comes down to the athlete’s skill and support. Congratulations to Parsons and Yarnold!

    Source: Wired


    Skeleton

    Website: LINK

  • [DEAL] Sugru Hacks for Your Home Kit, 14% Off at $12.95

    [DEAL] Sugru Hacks for Your Home Kit, 14% Off at $12.95

    Reading Time: < 1 minute

    Sugru is colorful, moldable and sticks most things to other things. Exactly what you need in a rubbery amorphous thingamajig. And, for now, it costs a little less than usual.

    We’re all for expounding the benefits and uses of 3D printing around the home, but sometimes you need an even quicker fix that doesn’t require the pinpoint precision of a machine. That’s where Sugru steps in.

    Coming in little ketchup-like packets (though we don’t recommend dousing your fries in it), simply form it with your hands and leave it to air cure into its final form — a sturdy rubber that’ll adhere to most things.

    One of the brand’s starter packs, the Hacks for Your Home Kit, includes a guide booklet covering uses for Sugru around the home and a tin to keep the four included pouches of Sugru safe.

    At the time of publication, Amazon.com lists the Hacks for your Home Kit at 14% off – just $12.95.

    DEAL: Sugru Hacks for Your Home Kit, 14% off at $12.95

    Other active deals:

    All3DP is an editorially independent publication. Occasionally we need to pay our bills, so we affiliate some product links through which we may receive a small commission. For the full spiel, check out our Terms of Use.

    Website: LINK

  • Weekend Project: 3D Printing Sticks for PLA Hot Glue Gun

    Weekend Project: 3D Printing Sticks for PLA Hot Glue Gun

    Reading Time: 4 minutes

    Who needs a 3D printer when you have a hot glue gun? A new Hackaday project from Donald Papp shows us how to use molten PLA filament to glue 3D printed objects together.

    When 3D printing ambitiously sized projects, hot glue guns come in handy as a tool to join two separate things together. But what if you could bind these objects with the very same PLA filament that you used to 3D print in the first place?

    A recent post on Hackaday by Donald Papp proves that this is possible. The author successfully transforms a hot glue gun into what can be described as a larger and more powerful 3D printing pen.

    As to how he decided to use PLA instead of actual glue, Papp wanted a more efficient way to piece together a hollow model. He explains:

    “It’s a workable process, but I felt that hot glue just wasn’t the right thing to use in this case. Hot glue can be slow to cool completely, and will always have a bit of flexibility to it. I wanted to work fast, and I wanted the joints to be hard and stiff. What I really wanted was melted PLA instead of glue, but I had no way to do it.”

    However, he also realized that a hot glue gun offered what he needed, including good ergonomics, tip visibility, tactile feedback, and simple mechanical operation. So he wanted to see if he could use one to melt PLA instead of glue.

    To make this idea work, Papp 3D printed his own glue sticks out of PLA, designing them to fit and extrude out of the hot glue gun. After testing the feasibility of his idea, the maker goes on to test the bonds of the PLA-based “glue”, and the results are quite surprising.

    Of course, the PLA hot glue gun works best on the inner surface of a 3D model, especially if you’re trying to keep the outer aesthetic as clean as possible.

    For today’s weekend project, you can transform you hot glue gun to work with special PLA “glue sticks”, and furthermore, use it to join your 3D prints together or just have some fun.


    PLA Hot Glue Gun: What Do You Need?

    You don’t need much to take on this weekend project. Here’s the (short) list of materials you need to create your own PLA hot glue gun:

    PLA Hot Glue Gun: Putting it All Together

    While the concept seems simple on the surface, Papp’s project took a fair amount of trial and error to make work. As first, he tried to stuff a bundle of PLA scraps into a cheap desktop hot glue gun, but found he needed the gun to reach a higher temperature to properly extrude the plastic material.

    The maker also realized that, in order to feed through the hot glue gun properly, the PLA need to have a special cylindric shape. Basically, the PLA had to be the exact same shape and size as the hot glue stick.

    To solve these issues, Papp purchased a high-temperature glue gun capable of reaching 208°C, and then designed a glue stick model to 3D print.

    “To feed my new glue gun I needed a cylinder 11 mm in diameter and at least 5 in long. Happily, 3D printers exist for the sole purpose of turning 1.75 mm filament into other shapes and sizes,” he writes.

    However, after discovering a problem with the feed mechanism, he had to redesign the PLA glue stick with notches, allowing the hot glue gun to successfully latch onto the material and push it through the nozzle.

    After his idea came to fruition, Papp tested how well the melted PLA “bonded” his 3D printed models together. He found the “glue” to be surprisingly strong, and while the pieces weren’t welded together, they did pass his “tug test”.

    Interested in creating your own PLA hot glue gun? You can learn more about the process on Papp’s expansive Hackaday post.


    Source: Hackaday Website: LINK

  • Surgeons use 3D Printed Titanium Implant to Rebuilt Man’s Breastbone and Ribs

    Surgeons use 3D Printed Titanium Implant to Rebuilt Man’s Breastbone and Ribs

    Reading Time: 2 minutes

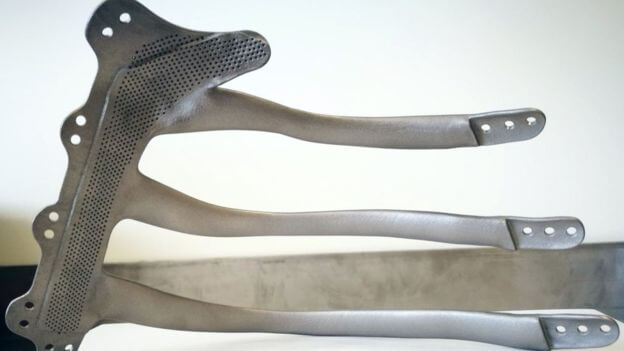
    Surgeons in Wales used a 3D printed titanium implant to rebuild the chest of a 71-year-old man after a cancer removal operation which took three ribs and part of his breast bone.

    3D printing has many medical uses, and for one of the first times in the UK, a titanium implant was 3D printed for a patient who required extensive surgery. Surgeons used this 3D printed implant, rather than a cement prosthetic, to rebuild the man’s chest.

    Peter Maggs had cancer in his chest and during surgery surgeons removed the tumor, which had grown to the size of a tennis ball, but also some of his breastbone and three ribs.

    The operation took eight hours and was carried out by surgeons at Morriston Hospital in Swansea, Wales. Cardiothoracic surgeon Ira Goldsmith explains:

    “It was a very extensive growth that needed to be removed. However, removing it also meant removing part of the breastbone and three ribs… That would leave a large defect that could have destabilised the entire chest wall and reconstructing it was going to be a very complex procedure.”


    3D Printed Implant

    Maggs’ New Titanium Ribs and Breastbone

    In similar operations, a cement prosthetic is the typical choice. Such a prosthetic is created during the surgery and takes an hour and a half to make.

    However, this time around, surgeon’s chose to use a titanium implant which was 3D printed in Wales ahead of time. One of the main benefits for using a 3D printed prosthetic is that it can be completely bespoke.

    Surgeons designed the implant and outsourced the 3D printing. Goldsmith then carried out the surgery with consultant surgeon Thomas Bragg and they had the implant on hand to use as soon as they needed it.

    This meant reducing the operating time, which was essential for Maggs who suffers from other health issues. Interestingly, Goldsmith sewed the implant into place, rather than using screws, to ensure it doesn’t break.

    Everything went well with the surgery and Maggs, from Abergavenny, Wales, said: “I’m feeling good now. Mr Goldsmith is a saint to me – and Mr Bragg.”

    Source: BBC


    Titanium Implant

    Website: LINK

  • Weekend Project: 3D Print Your Own RetroPie Nintendo Switch

    Weekend Project: 3D Print Your Own RetroPie Nintendo Switch

    Reading Time: 4 minutes

    The Nintendo Switch games console is an undeniable success. But, retailing for a few hundred dollars, its does require a significant chunk of change. Why not build your own for a fraction of the cost instead? Here’s how (disclaimer: the PiSwitch will not play Nintendo Switch games).

    Home hackable gaming has never been more alive, with the likes of RetroPie allowing tech savvy gamers to experience classics from their past on low-cost hardware for relatively little effort.

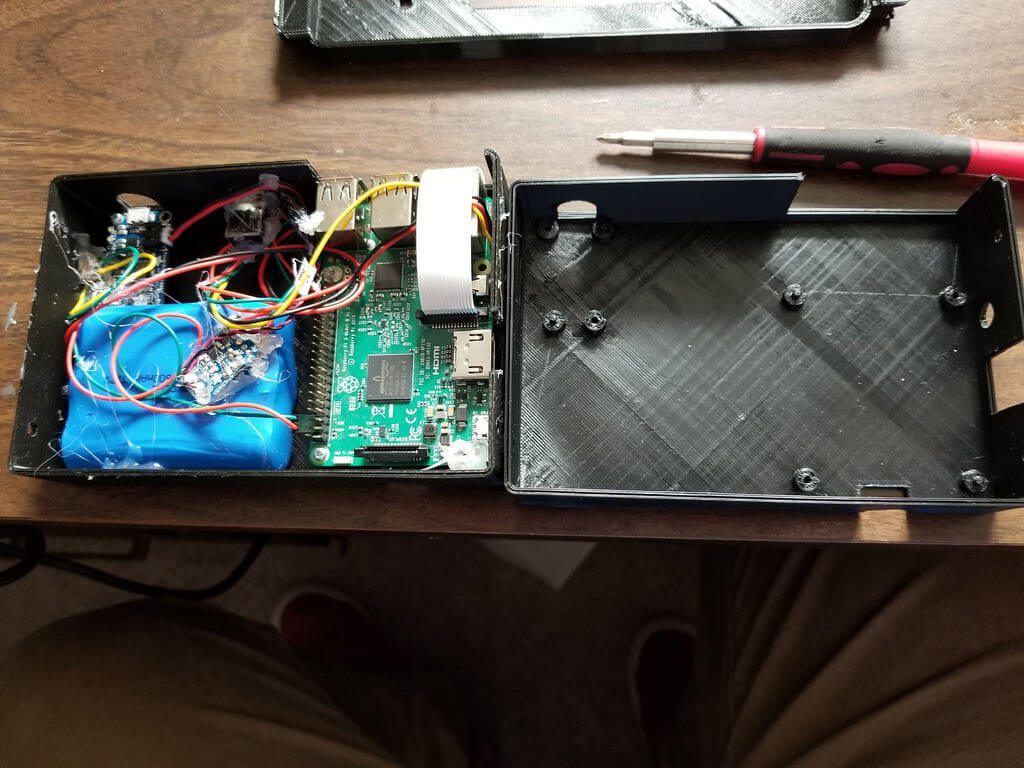
    Looking to shoehorn this rich seam of fun-filled nostalgia into a contemporary frame, maker Christopher Foote has 3D printed a RetroPie housing that accepts official Nintendo Joy-Con controllers. The end result is a handheld games console that looks like a Nintendo Switch, but plays decades old games.

    Foote calls his device the PiSwitch, and has made all of the parts, processes and instructions available online. Scroll past the jump for a deeper dive and make your own!

    3D Printed PiSwitch — Looks Like a Switch, Plays Like a RetroPie: What do You Need?

    Building a PiSwitch console is a little more involved that your typical printable project, requiring some soldering skills and bundles of patience. Here’s the full parts list:

    Building a 3D Printed PiSwitch RetroPie Games Console


    PiSwitch Nintendo Switch RetroPie

    Foote details the building of the PiSwitch across seven stages (part one being the procurement of the parts). Little of it is particularly difficult, but steady hands are a must as many steps require soldering.

    First up is to solder lengths of wire between the Raspberry Pi 3 and audio jack. And then following this, it’s time to wire up the power board and switch.

    The project includes a PowerBoost 1000C which enables the charging of the PiSwitch’s battery (to current spec giving 2-3 hours run time). Some trimming of legs on the power switch is required, before further wiring between it and the PowerBoost.

    Next up is to bring together the aforementioned pieces, plus the speaker and audio board, again with short lengths of wire. Foote details in his build guide the necessary arrangement. It’s at this point that the exposed PiSwitch can be hooked up to a battery to test all is well and working — an LED on the Pi should light up.


    PiSwitch Nintendo Switch RetroPie

    If the board lights up, then you’re good to continue. At each step of the build Foote recommends hot gluing the freshly soldered connections to secure them and eliminate shorts. In our opinion it makes sense to do this only after you’ve checked everything is working and know no re-soldering is required.

    After 3D printing the case parts, assembly should be a simple case of arranging the boards to align with their corresponding port holes. They can be fixed in place with the various laptop screws Foote recommends in his parts list. The design of the PiSwitch case doesn’t accommodate a hole for the headphone jack as is, so one will need to be drilled — between the Raspberry Pi 3 and PowerBoost.

    The penultimate stage of the PiSwitch build is to attach the screen, which Foote cautions against accidentally placing upside down in his guide. When correctly oriented, the screen will line up with the case.

    Finally, the last step to Switch-sized RetroPie goodness is to build the Pi software image. Before following Foote’s instructions specific to this project, you’ll need to visit the RetroPie GitHub and follow the installation instructions there.

    With that done, you can then follow along and set up the Joy-Con controllers and get to the device’s first boot.

    If this sounds like the sort of thing you’d happily spend a weekend doing, head on over the Foote’s Instructables post for the full guide in more detail.

    Of course, you could always just buy a Switch instead. Just sayin’…

    Source: Gizmodo

    Website: LINK

  • Famous Chinatown 3D Printed Rooster Project Comes to an End

    Famous Chinatown 3D Printed Rooster Project Comes to an End

    Reading Time: 3 minutes

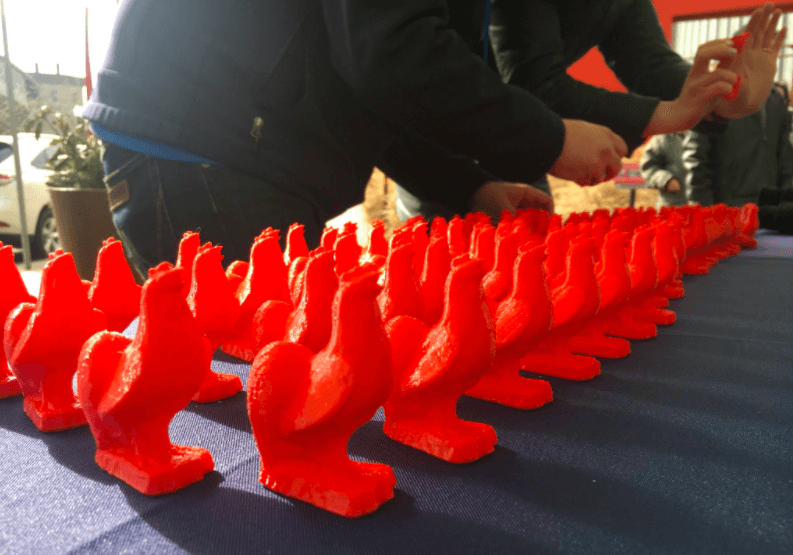
    Last year, artist Chris Templeman began a project in Boston’s Chinatown which had the aim of creating 2,000 plastic roosters using a 3D printer before the end of the Chinese New Year. He now views the project as a success. 

    The Chinese New Year of the Rooster is now over and the year of the dog begins. As the year of the rooster ends so does a project by artist Chris Templeman.

    The project began at the beginning of the Chinese New Year last year and had the aim of spitting out 2,000 tiny sculptures from a 3D printer. Templeman now views the project as a success.

    He debuted the 3D printer in Boston’s Chinatown last year and, although he’s faced many issues throughout the year, the machine worked in a vending machine style. To do this, he used an automated outdoor 3D printer.

    However, sadly the machine would regularly fail due to being outside. As a result, some of the prints weren’t all successful. “It was a long year,” he says. But, he’s certainly learned a lot about the subtle art of 3D printing.


    Rooster

    Saying Goodbye to the 3D Printed Rooster and Hello to the Year of the Dog

    Templeman explains that the project became quickly known by locals who would regularly check whether the 3D printer had produced anything. He adds:  “It was really interesting that I was able to be a tiny part of people’s routine.”

    Each of the prints would take hours to create. As a result, many people would check the machine but would often be unable to take a print home.

    When Templeman heard about this, he decided to hold a giveaway with the help of the Rose Kennedy Greenway, who commissioned the project.

    Together they created 200 extra roosters and gave them all away to locals who’d been unable to take one of the initial 2,000. Templeman explains that this caused a stir with people lining up to receive one.

    Amazingly, they ran out of roosters within the hour. “People were like, ‘I’ve been waiting all year to get one!’” he explains.

    Going forward, Templeman explains that one of the roosters will be traveling with the Museum of Fine Arts exhibit. This inclusion is predominantly due to the fact that the roosters were created from a scan of a sculpture at the MFA.

    Sadly, they are not creating 3D printed dogs for this year but the project will continue. Templeman even adds that he will help others who want to work with the technology. He says: “It’s a strange expertise I find myself having. If somebody happens to want to print lots of things outdoors I kind of know how to do that now.”

    Source: Boston Magazine


    Rooster

    Website: LINK

  • Researchers Develop Bioprinting Method to Recreate Biological Structures From Cells and Molecules

    Researchers Develop Bioprinting Method to Recreate Biological Structures From Cells and Molecules

    Reading Time: 3 minutes

    Researchers from Queen Mary University of London have developed a 3D bioprinting method that enables the creation of biological structures from cells and molecules that are commonly found in natural tissues.

    From human skin to ears made from a patient’s own cells, 3D bioprinting has changed the landscape of medical innovation in some major ways. It seems as if new breakthroughs involving biofabrication are occurring on a weekly basis, and this week is no different…

    Researchers from Queen Mary University of London (QMUL) have recently devised a new 3D biofabrication technique that uses cells and molecules to create constructs that resemble biological structures.

    The method consists of placing structures into an ink that resembles the natural environment of cells. This allows the cells to grow and behave exactly as they would in a body.

    Consequently, researchers are able to monitor cells more closely and observe how they may adapt to certain environments. It would also guide further research into finding out how cancer cells grow. Scientists could observe immune cells closely to monitor their interaction with other cells. Furthermore, the results of such studies could lead to the development of new and improved drugs.

    Professor Alvaro Mata, one of the leaders on the project at QMUL, explained:

    “The technique opens the possibility to design and create biological scenarios like complex and specific cell environments. can be used in different fields such as tissue engineering by creating constructs that resemble tissues or in vitro models that can be used to test drugs in a more efficient manner.”


    Structures made from gel via biofabrication. (Image: Clara Hedegaard)

    New Biofabrication Method Creates Biological Structures that Mimic Body Parts and Regenerate Tissues

    As part of the method, the researchers combined molecular self-assembly with additive manufacturing. They were able to assemble molecules into complex structures.

    In addition, the biofabrication technique allows the QMUL researchers to control structures and assemblies digitally. This allows the team to mimic body parts and also regenerate tissues.

    Generally, 3D printable inks are limited in their ability to activate cells. But by including full control over the 3D printed structure at the microscopic level, the technique overcomes these challenges.

    Lead author of the paper and current PhD student at QMUL, Clara Hedegaard, adds:

    “This method enables the possibility to build 3D structures by printing multiple types of biomolecules capable of assembling into well defined structures at multiple scales. Because of this, the self-assembling ink provides an opportunity to control the chemical and physical properties during and after printing, which can be tuned to stimulate cell behavior.”

    The research, entitled “Hydrodynamically Guided Hierarchical Self-Assembly of Peptide–Protein Bioinks”, is published in Advanced Functional Materials.

    Source: Phys.org

    Website: LINK

  • Australian Sheepdog Receives Prosthetic Paw Thanks to 3D Printing

    Australian Sheepdog Receives Prosthetic Paw Thanks to 3D Printing

    Reading Time: 3 minutes

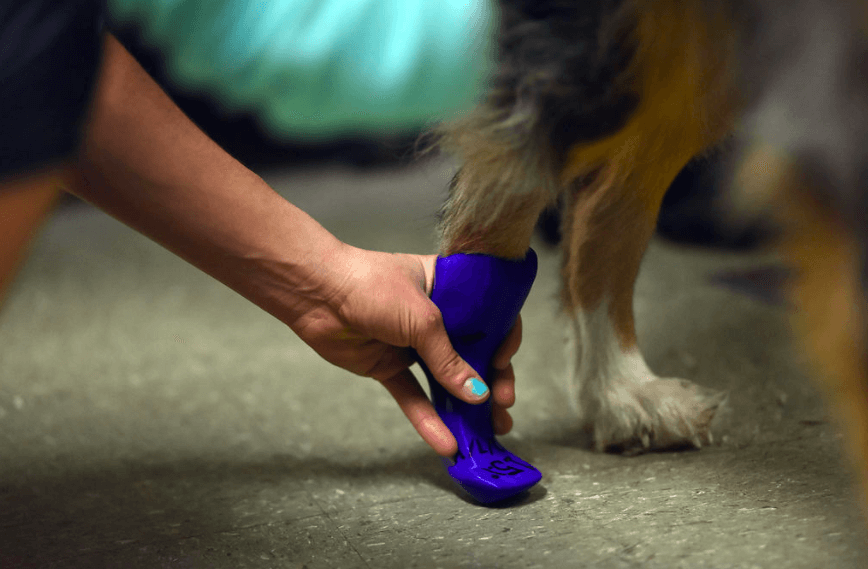
    Tucker, a five-year-old Australian sheepdog, can run on four feet again thanks to a 3D printed prosthetic paw. The hope is that the paw prosthetic will improve Tucker’s mobility and his quality of life. 

    This is yet another story of how 3D printing can help animals. This time around, Tucker, a five-year-old Australian sheepdog, received a 3D printed paw prosthetic.

    Tucker was born without several bones in his hind foot. Sadly, this was the reason for his lack of home before Kendra Earl Warlow adopted him. However, she adds that nothing stops him and he’s always happy to run around the yard with her other Australian sheepdog.

    Even so, Warlow worries about how to manage Tucker’s pain. He is on multiple pain medications and there is potential that his missing paw will lead to problems in the future.

    In order to manage this and hopefully help Tucker out, Warlow got in touch with the Mizzou 3D Printing Club. She had the idea to do this when seeing the club use 3D printers in the library last year.

    Since then, Tucker has been trying out prosthetics and adapting to them quickly. The team created different iterations based on a cast from the Australian sheep dog’s leg to see which will fit best.


    Tucker

    Fitting Tucker with a Prosthetic Paw

    For the past year, a team of seven people has been working with Tucker and Marlow. They’ve managed to create a 3D printed prosthetic which they hope will improve Tucker’s quality of life.

    For the latest prosthetic, the team used blue PLA filament and adjusted the form to fit Tucker better. However, they’re still working on the design to come up with the best possible fit – they explain that simple is better.

    The aim is always to get Tucker to distribute his weight and put more pressure on the prosthetic. Interestingly, for the latest iteration, the team used a rubber ball for the bottom of the foot which Tucker took to.

    However, despite the positive results, this isn’t the end for Tucker. The team will continue to work on finding the best possible prosthetic for the Australian sheepdog. In the meantime, he’s happy to run and play with his latest 3D printed design.

    Source: Missourian 


    Website: LINK

  • Carbon Takes a Bigger Bite of the Dental Market with New Materials and Partnerships

    Carbon Takes a Bigger Bite of the Dental Market with New Materials and Partnerships

    Reading Time: 4 minutes

    The Silicon Valley startup Carbon announces new partnerships with DENTCA and DREVE, fortifying its position in the dental market. Through these collaborations, Carbon will introduce resins for customized dental products, including 3D printed dentures, gingiva masks, and trays.

    Best known for partnering with adidas on the 3D printed Futurecraft 4D footwear (and more recently, the AlphaEDGE 4D LTD), the Silicon Valley 3D printing startup Carbon has transformed additive manufacturing from a prototyping tool to a viable technology for serial production.

    Carbon is now sinking its teeth deeper into the dental market, recently announcing new partnerships with DENTCA and DREVE. The 3D printer manufacturer is working with these two companies to disrupt how customize dental and orthodontic products are manufactured.

    Read more: Carbon Talks Adidas Collaboration and Bringing 3D Printing to the Serial Production Stage

    With DENTCA, Carbon will introduce 3D printed dentures, while the collaboration with DREVE will enable the production of gingiva masks and trays. To situate itself in the dental market, Carbon will develop new dental resin materials for its Digital Light Synthesis (DLS) technology.

    “While 3D printing is not new to the dental market, Carbon provides a complete solution with a very unique partnership approach, enabling dental labs to easily design and manufacture customized, high-quality products for their customers,” says Brian Ganey, General Manager of Carbon’s Oral Care Business.

    “Carbon is transforming manufacturing in the dental industry with robust and reliable 3D printers, a wide range of industrial-grade dental materials, and next-gen software that enables all these pieces to work together seamlessly.”


    Carbon Partners with DENTCA and DREVE, Develops New Dental Resins

    DENTCA is the world’s first CAD/CAM denture company, and will provide Carbon dental customers with Denture Base II and DENTCA Denture Teeth, two FDA-cleared (Class II) materials for 3D printed dentures.

    When used together, these new resins will allow dental technicians to produce high-quality dentures without the need for traditional denture fabrication knowledge. Through the partnership with DENTCA, Carbon will also offer DENTCA Denture Try-in material for temporary fit evaluation.


    (From L to R) Dentca Base II, Dentca Teeth, Dentca finished dentures

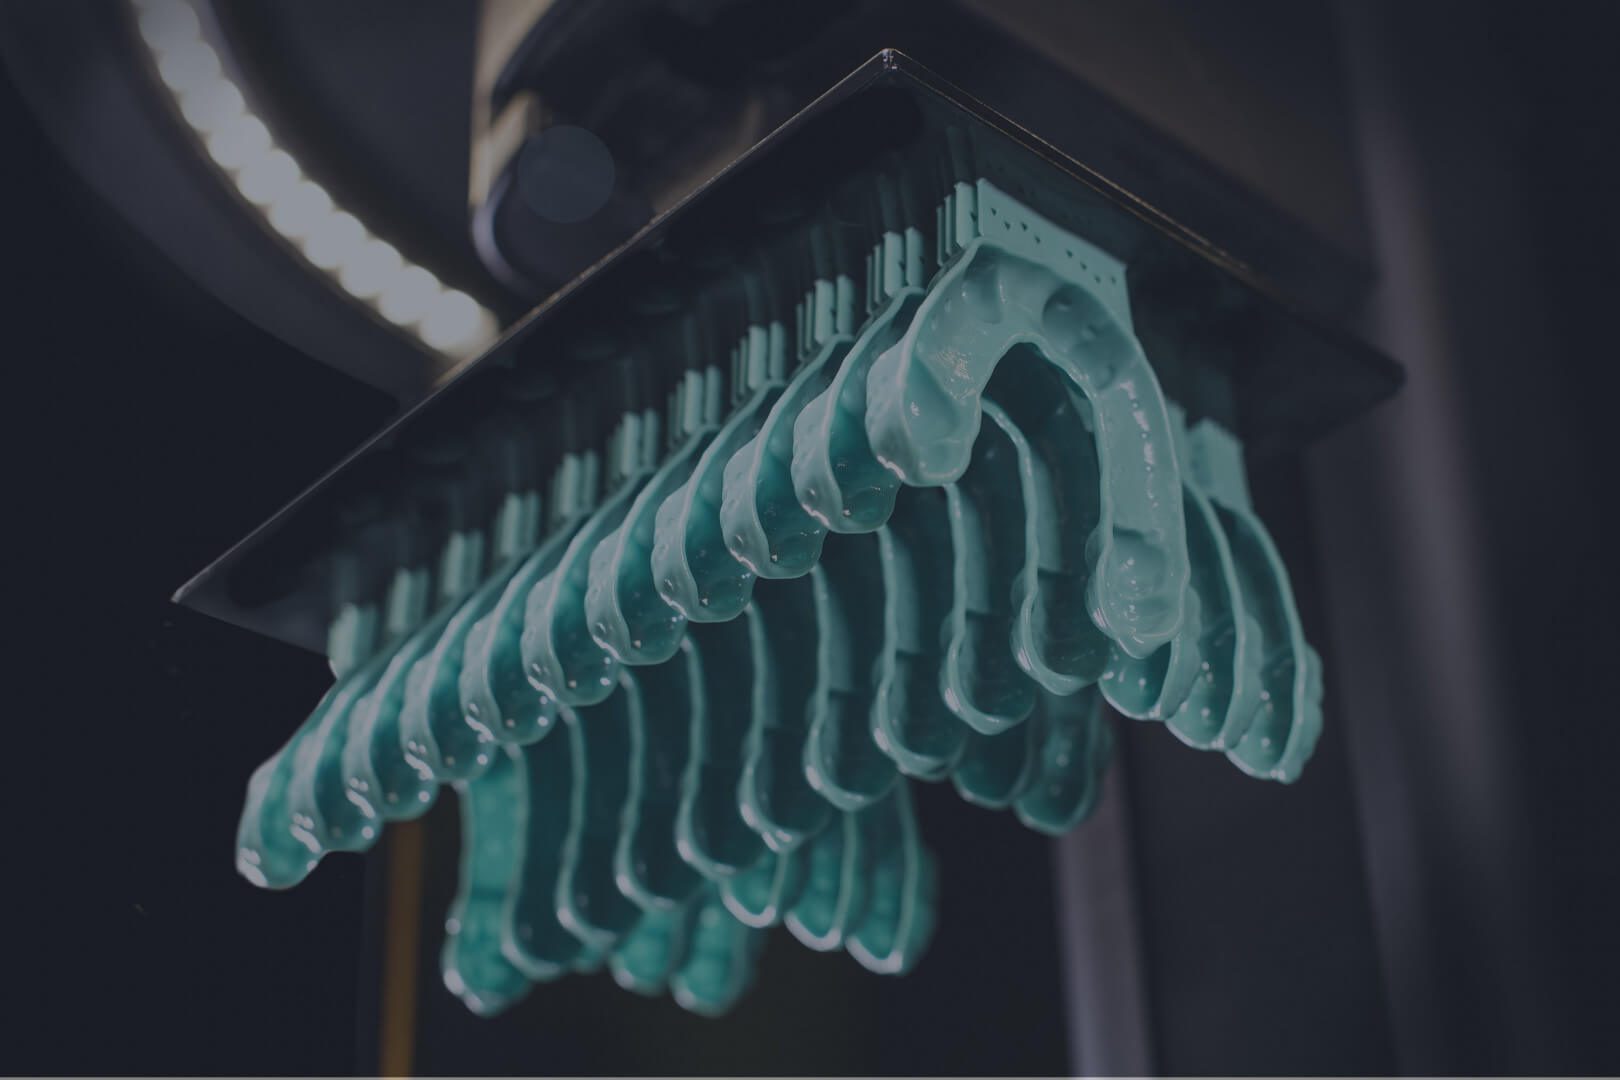
    Working alongside DREVE, Carbon is releasing two additional resins; DREVE FotoDent gingiva and DREVE FotoDent tray. These materials will enable dental and orthodontic labs to rapidly produce custom gingiva masks and dental impression trays.


    Dreve FotoDent tray

    A number of 3D printing companies, such as Formlabs and EnvisionTEC, have already found success in the dental market. However, Carbon believes its DLS technology is an optimal solution for dental and orthodontic labs.

    Not only does Carbon’s 3D printing ecosystem offer increased efficiency and accuracy, it also has unique features like part traceability and serialization. Therefore, unique ID numbers can be engraved onto 3D models in order to identify the digital historical record of the part.

    This is extremely valuable for the dental industry, as the FDA will increasingly require part-specific data to ensure product performance and patient safety.

    Although the newly announced partnerships mark a major step for the 3D printing startup, it’s not Carbon’s first foray with the dental industry. Last year, the company collaborated with Whip Mix to develop Whip Mix Surgical Guide. This clear resin is idea for producing dental surgical guides.

    Carbon plans to release the new DENTCA and DREVE materials by the end of March.


    Source: Carbon

    Website: LINK

  • Creality Ender 2 3D Printer: Review the Facts Here!

    Creality Ender 2 3D Printer: Review the Facts Here!

    Reading Time: 2 minutes

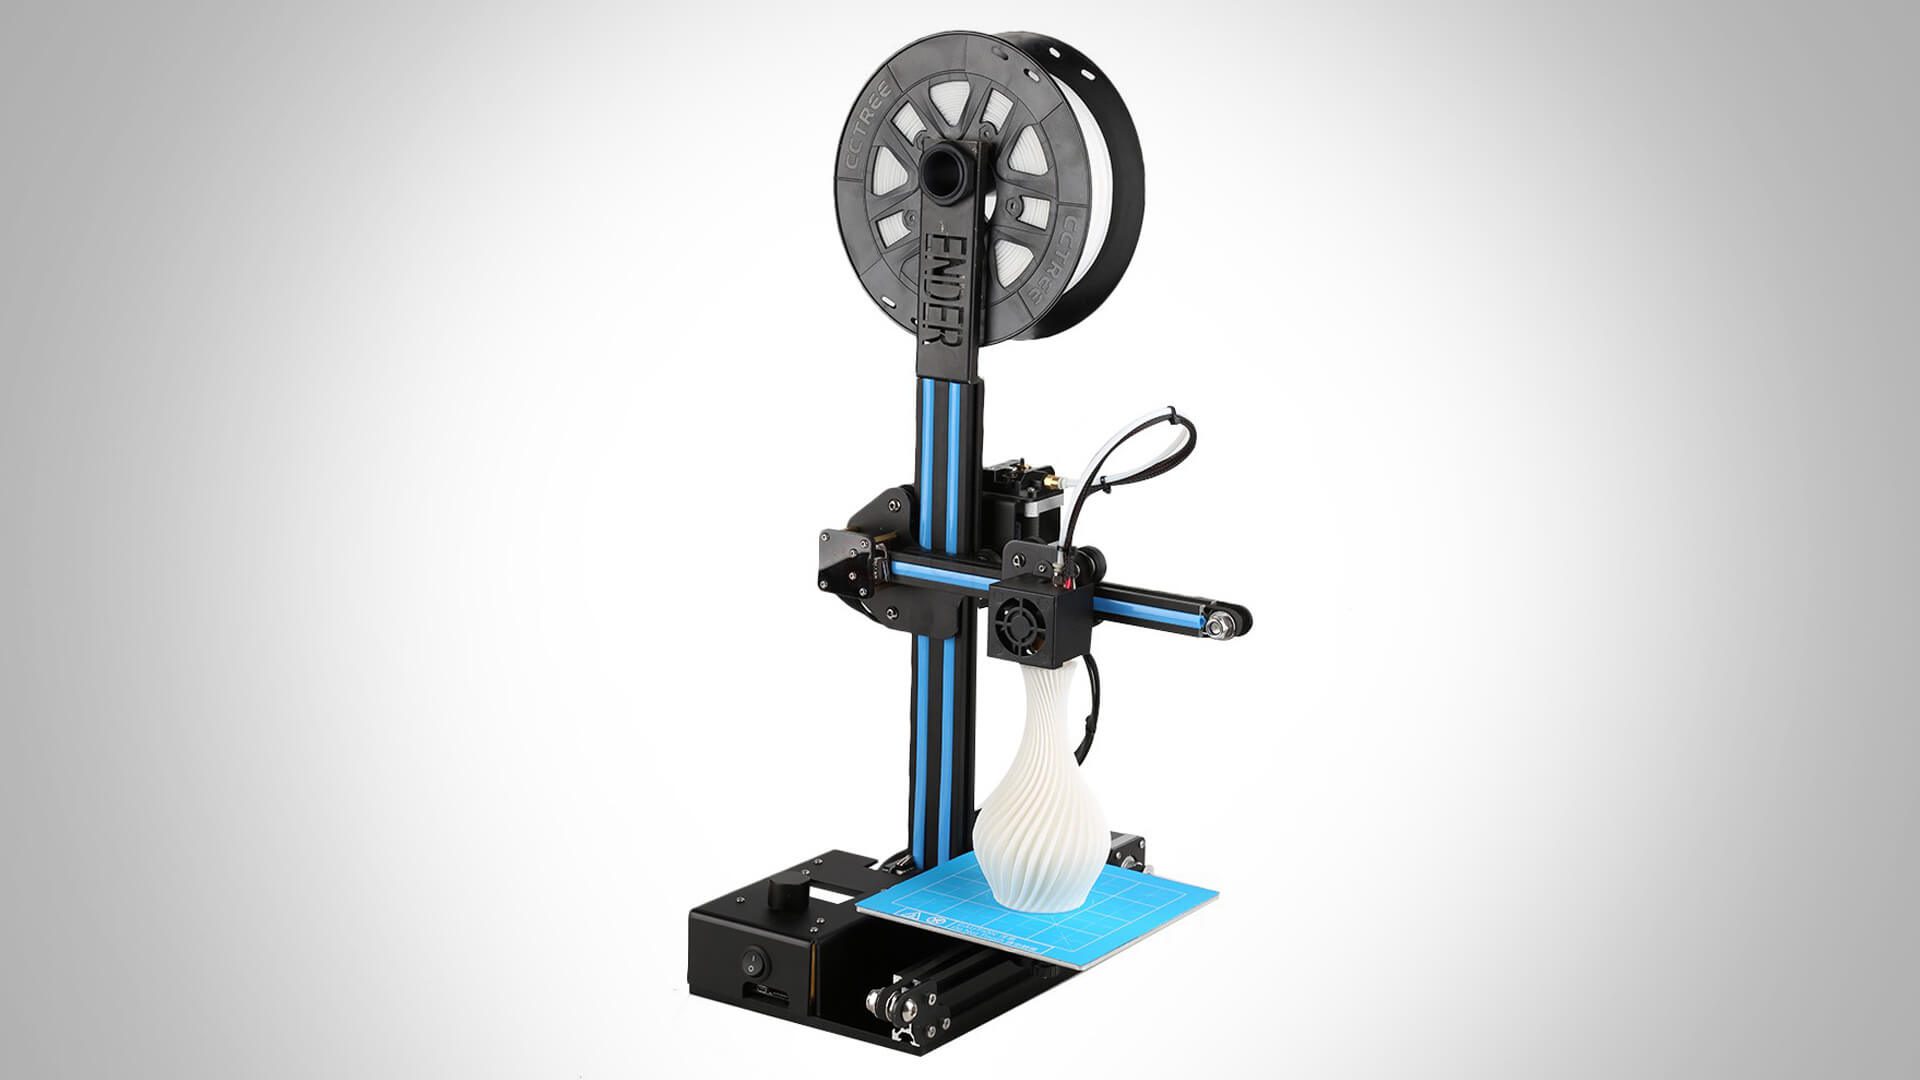
    Coming in (at the time of writing) around the USD $200 mark, the Creality Ender 2 3D printer is not the cheapest of 3D printer kits currently available on the market. Regardless it still falls within the category of budget 3D printer kits.

    For such such a barebones kit, there are some talking point we can address immediately. Firstly, the Creality Ender 2 3D printer makes use of fused deposition modeling (FDM) for its fabrication of 3D objects. Extruding thin lines of molten plastic into an arrangement that stacks, layer by layer, it is the most common desktop 3D printing method.

    The Ender 2 comes as a box full of bits and pieces you will need to assemble yourself — although major assemblies such as the control box/base and print head are pre-assembled. A popular means of keeping costs down and letting users get better acquainted with the technology, such kits are becoming increasingly commonplace.

    One retailer of the Creality Ender 2 3D printer (BangGood) cites a 25 minute built time.

    In terms of design, the Creality Ender 2 features V-slot aluminium extrusions for its frame. One of these stands vertically, with the print head gantry riding up and down it on V-slot pulleys. A Bowden style extruder pushes the filament into the hot end.

    Featuring a heated bed as standard, the Creality Ender 2 offers a print volume of 150 x 150 x 200mm. As is commonly found on inexpensive entry-point kits, there is no print cooling fan on the print head. This limits the materials you will be able to successfully print on the Creality Ender 2 3D printer, but is easily rectified by printing a mount and adding one yourself.

    We have yet to get our hands on the Ender 2 here at All3DP so cannot speak to its quality. But the word on the street (well, internet) is that for its price point, the Creality Ender 2 is capable of remarkably good prints. Though be wary — there are many reports online regarding failing power supplies.

    Website: LINK