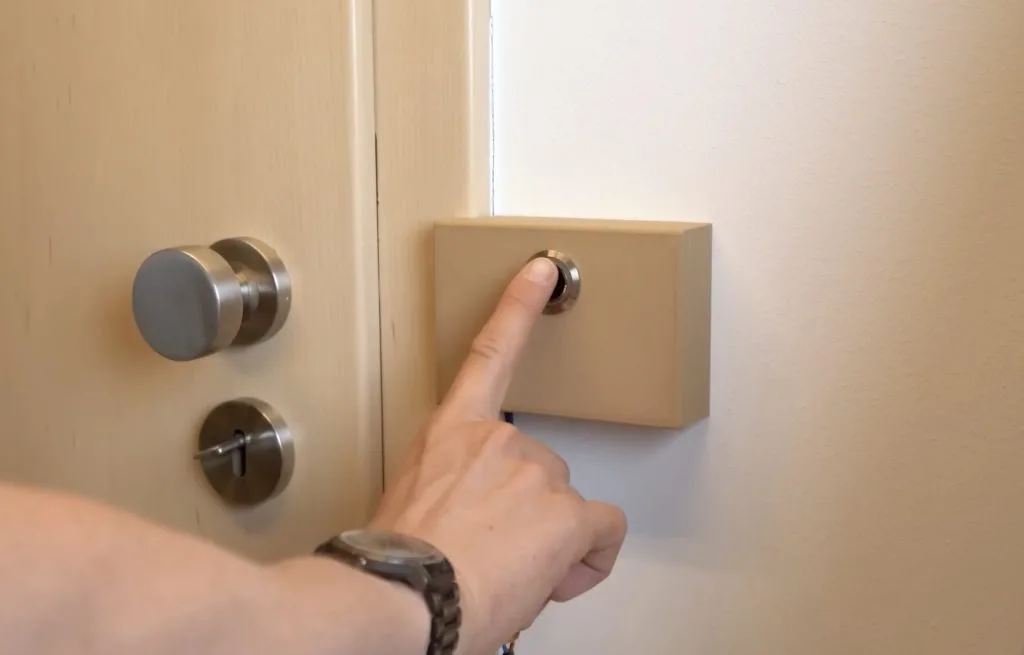
As one of YouTube’s most prolific makers, GreatScott! has a lab full of equipment that we love. But a lot of that equipment represents a potential hazard to children and GreatScott! has a newborn at home. Before that baby becomes a curious and ambulatory toddler, he decided to restrict access to his lab with this DIY fingerprint-reading smart lock.
Smart locks are actually trickier than they seem. Some require apps, others run on batteries that need frequent replacement or recharging, and none of them will work with every type of door. GreatScott! wanted something that didn’t require an internet connection, that was easy to open, and that used mains power so that he’d never have to worry about batteries. The only way to get that was by building it.
This relies on a similar electronic catch, which uses an electromagnetic solenoid to pull a pin that disengages the lock. With it, the door can open when the catch has power. For safety reasons, a lock like this may not be suitable for all situations.
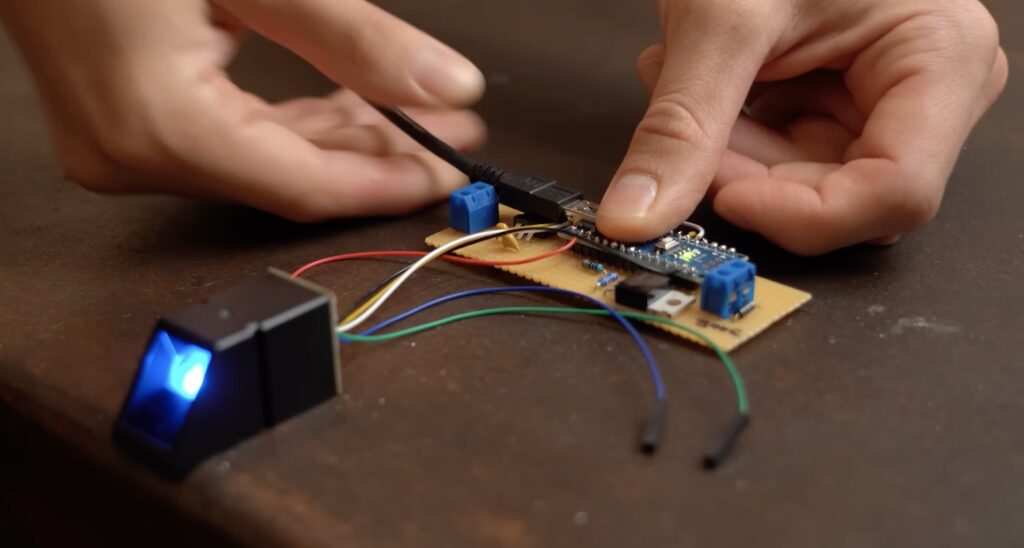
GreatScott! had to modify his door and door frame to fit that catch. He then designed a simple control board based on an Arduino Nano board. It toggles a MOSFET to allow power to reach the catch, unlocking it. The Arduino does so when it reads an authorized fingerprint through a small fingerprint scanner.
The final challenge, which GreatScott! is still sorting out, was running power. There isn’t an available outlet nearby, so he is searching for a solution. His partner vetoed a long wire channel, which means that GreatScott! may need to run power wires through the wall. Once he does, he’ll have a smart lock that meets all of his requirements.
Evernote, a note-taking and task-management app, works with a stylus so you can annotate documents and handwrite notes in the app’s Sketch feature. If you are using your tablet or foldable phone in landscape mode, you will now see a two-pane layout, similar to how the app works on a desktop computer. In this layout, you can quickly see all your notes at a glance on the left side, and then edit the note you select on the right side. Evernote also updated their widget layout to adapt to multiple sizes and orientations, so you can see all your notes right from the home screen of your device.
It’s been less than a year since ChatGPT catapulted generative artificial intelligence (AI) into mainstream public consciousness, reigniting the debate about the role that these powerful new technologies will play in all of our futures.
‘Will AI save or destroy humanity?’ might seem like an extreme title for a podcast, particularly if you’ve played with these products and enjoyed some of their obvious limitations. The reality is that we are still at the foothills of what AI technology can achieve (think World Wide Web in the 1990s), and lots of credible people are predicting an astonishing pace of progress over the next few years, promising the radical transformation of almost every aspect of our lives. Comparisons with the Industrial Revolution abound.
At the same time, there are those saying it’s all moving too fast; that regulation isn’t keeping pace with innovation. One of the UK’s leading AI entrepreneurs, Mustafa Suleyman, said recently: “If you don’t start from a position of fear, you probably aren’t paying attention.”
What is AI literacy for young people?
What does all this mean for education, and particularly for computing education? Is there any point trying to teach children about AI when it is all changing so fast? Does anyone need to learn to code anymore? Will teachers be replaced by chatbots? Is assessment as we know it broken?
If we’re going to seriously engage with these questions, we need to understand that we’re talking about three different things:
AI literacy: What it is and how we teach it
Rethinking computer science (and possibly some other subjects)
Enhancing teaching and learning through AI-powered technologies
AI literacy: What it is and how we teach it
For young people to thrive in a world that is being transformed by AI systems, they need to understand these technologies and the role they could play in their lives.
Our SEAME model articulates the concepts, knowledge, and skills that are essential ingredients of any AI literacy curriculum.
The first problem is defining what AI literacy actually means. What are the concepts, knowledge, and skills that it would be useful for a young person to learn?
The reality is that — with a few notable exceptions — the vast majority of AI literacy resources available today are probably doing more harm than good.
In the past couple of years there has been a huge explosion in resources that claim to help young people develop AI literacy. Our research team mapped and categorised over 500 resources, and undertaken a systematic literature review to understand what research has been done on K–12 AI classroom interventions (spoiler: not much).
The reality is that — with a few notable exceptions — the vast majority of AI literacy resources available today are probably doing more harm than good. For example, in an attempt to be accessible and fun, many materials anthropomorphise AI systems, using human terms to describe them and their functions and thereby perpetuating misconceptions about what AI systems are and how they work.
What emerged from this work at the Raspberry Pi Foundation is the SEAME model, which articulates the concepts, knowledge, and skills that are essential ingredients of any AI literacy curriculum. It separates out the social and ethical, application, model, and engine levels of AI systems — all of which are important — and gets specific about age-appropriate learning outcomes for each.
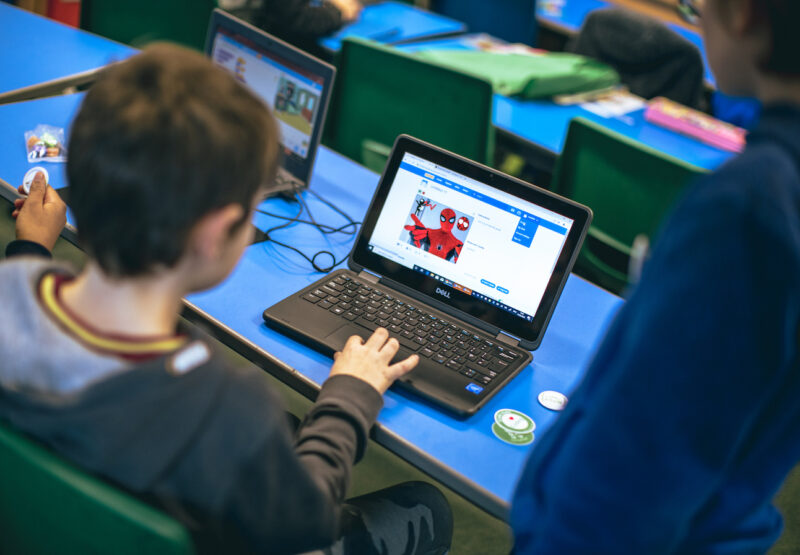
This research has formed the basis of Experience AI (experience-ai.org), a suite of resources, lessons plans, videos, and interactive learning experiences created by the Raspberry Pi Foundation in partnership with Google DeepMind, which is already being used in thousands of classrooms.
If we’re serious about AI literacy for young people, we have to get serious about AI literacy for teachers.
Defining AI literacy and developing resources is part of the challenge, but that doesn’t solve the problem of how we get them into the hands and minds of every young person. This will require policy change. We need governments and education system leaders to grasp that a foundational understanding of AI technologies is essential for creating economic opportunity, ensuring that young people have the mindsets to engage positively with technological change, and avoiding a widening of the digital divide. We’ve messed this up before with digital skills. Let’s not do it again.
Teacher professional development is key to AI literacy for young people.
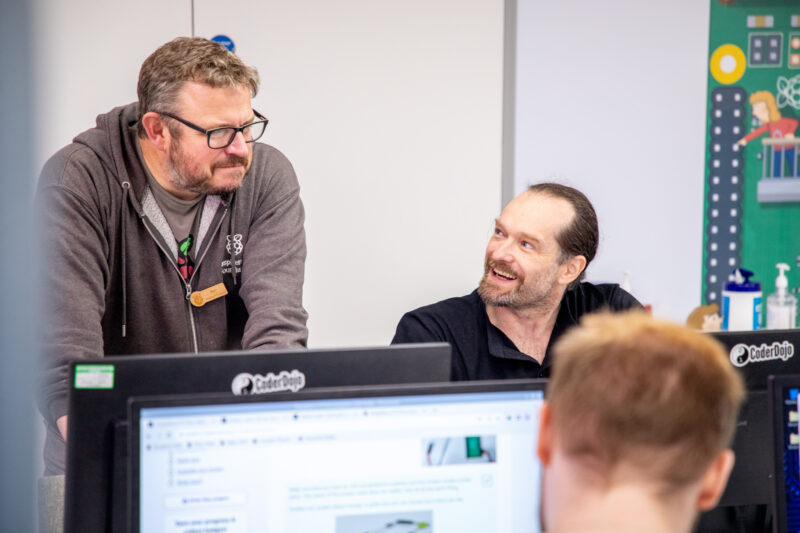
More than anything, we need to invest in teachers and their professional development. While there are some fantastic computing teachers with computer science qualifications, the reality is that most of the computing lessons taught anywhere on the planet are taught by a non-specialist teacher. That is even more so the case for anything related to AI. If we’re serious about AI literacy for young people, we have to get serious about AI literacy for teachers.
Rethinking computer science
Alongside introducing AI literacy, we also need to take a hard look at computer science. At the very least, we need to make sure that computer science curricula include machine learning models, explaining how they constitute a new paradigm for computing, and give more emphasis to the role that data will play in the future of computing. Adding anything new to an already packed computer science curriculum means tough choices about what to deprioritise to make space.
One of our Experience AI Lessons revolves around the us of AI technology to study the Serengeti ecosystem.
And, while we’re reviewing curricula, what about biology, geography, or any of the other subjects that are just as likely to be revolutionised by big data and AI? As part of Experience AI, we are launching some of the first lessons focusing on ecosystems and AI, which we think should be at the heart of any modern biology curriculum.
Some are saying young people don’t need to learn how to code. It’s an easy political soundbite, but it just doesn’t stand up to serious scrutiny.
There is already a lively debate about the extent to which the new generation of AI technologies will make programming as we know it obsolete. In January, the prestigious ACM journal ran an opinion piece from Matt Welsh, founder of an AI-powered programming start-up, in which he said: “I believe the conventional idea of ‘writing a program’ is headed for extinction, and indeed, for all but very specialised applications, most software, as we know it, will be replaced by AI systems that are trained rather than programmed.”
Writing computer programs is an essential part of learning how to analyse problems in computational terms.
With GitHub (now part of Microsoft) claiming that their pair programming technology, Copilot, is now writing 46 percent of developers’ code, it’s perhaps not surprising that some are saying young people don’t need to learn how to code. It’s an easy political soundbite, but it just doesn’t stand up to serious scrutiny.
Even if AI systems can improve to the point where they generate consistently reliable code, it seems to me that it is just as likely that this will increase the demand for more complex software, leading to greater demand for more programmers. There is historical precedent for this: the invention of abstract programming languages such as Python dramatically simplified the act of humans providing instructions to computers, leading to more complex software and a much greater demand for developers.
Learning to program will help young people understand how the world around them is being transformed by AI systems.
However these AI-powered tools develop, it will still be essential for young people to learn the fundamentals of programming and to get hands-on experience of writing code as part of any credible computer science course. Practical experience of writing computer programs is an essential part of learning how to analyse problems in computational terms; it brings the subject to life; it will help young people understand how the world around them is being transformed by AI systems; and it will ensure that they are able to shape that future, rather than it being something that is done to them.
Enhancing teaching and learning through AI-powered technologies
Technology has already transformed learning. YouTube is probably the most important educational innovation of the past 20 years, democratising both the creation and consumption of learning resources. Khan Academy, meanwhile, integrated video instruction into a learning experience that gamified formative assessment. Our own edtech platform, Ada Computer Science, combines comprehensive instructional materials, a huge bank of questions designed to help learning, and automated marking and feedback to make computer science easier to teach and learn. Brilliant though these are, none of them have even begun to harness the potential of AI systems like large language models (LLMs).
The challenge for all of us working in education is how we ensure that ethics and privacy are at the centre of the development of [AI-powered edtech].
One area where I think we’ll see huge progress is feedback. It’s well-established that good-quality feedback makes a huge difference to learning, but a teacher’s ability to provide feedback is limited by their time. No one is seriously claiming that chatbots will replace teachers, but — if we can get the quality right — LLM applications could provide every child with unlimited, on-demand feedback. AI-powered feedback — not giving students the answers, but coaching, suggesting, and encouraging in the way that great teachers already do — could be transformational.
The challenge for all of us working in education is how we ensure that ethics and privacy are at the centre of the development of AI-powered edtech.
We are already seeing edtech companies racing to bring new products and features to market that leverage LLMs, and my prediction is that the pace of that innovation is going to increase exponentially over the coming years. The challenge for all of us working in education is how we ensure that ethics and privacy are at the centre of the development of these technologies. That’s important for all applications of AI, but especially so in education, where these systems will be unleashed directly on young people. How much data from students will an AI system need to access? Can that data — aggregated from millions of students — be used to train new models? How can we communicate transparently the limitations of the information provided back to students?
Ultimately, we need to think about how parents, teachers, and education systems (the purchasers of edtech products) will be able to make informed choices about what to put in front of students. Standards will have an important role to play here, and I think we should be exploring ideas such as an AI kitemark for edtech products that communicate whether they meet a set of standards around bias, transparency, and privacy.
Realising potential in a brave new world
We may very well be entering an era in which AI systems dramatically enhance the creativity and productivity of humanity as a species. Whether the reality lives up to the hype or not, AI systems are undoubtedly going to be a big part of all of our futures, and we urgently need to figure out what that means for education, and what skills, knowledge, and mindsets young people need to develop in order to realise their full potential in that brave new world.
That’s the work we’re engaged in at the Raspberry Pi Foundation, working in partnership with individuals and organisations from across industry, government, education, and civil society.
If you have ideas and want to get involved in shaping the future of computing education, we’d love to hear from you.
This article will also appear in issue 22 of Hello World magazine, which focuses on teaching and AI. We are publishing this new issue on Monday 23 October. Sign up for a free digital subscription to get the PDF straight to your inbox on the day.
Also, we don’t always stick with the same tone or gender presentation. On average, 73% of participants report picking the same tone every time for self-representation, while 24% regularly swap between two tones. This is usually a color adjacent to their most commonly-used one, but many people report using multiple tones because of changes to their skin tone due to sun, or to align more closely with the skin tones of the audience they are engaging with.
Whether we use emoji skin tones is often related to the situation (e.g. at work vs chatting with family), but people are also reluctant to use these emoji to refer to other people. Many people feel it would be rude to “impose” a skin tone on someone else, especially someone they are not close to. They really are a deeply personal expression of identity.
In the same way we carefully pick our words when sending a formal email 👍🏽 or flirty text 🫶🏿, selecting our skin tone or gender is fluid. By providing faster access to the kind of emoji we need when we need it, our keyboards become a rich canvas for expression. 🫴🏾✨💖
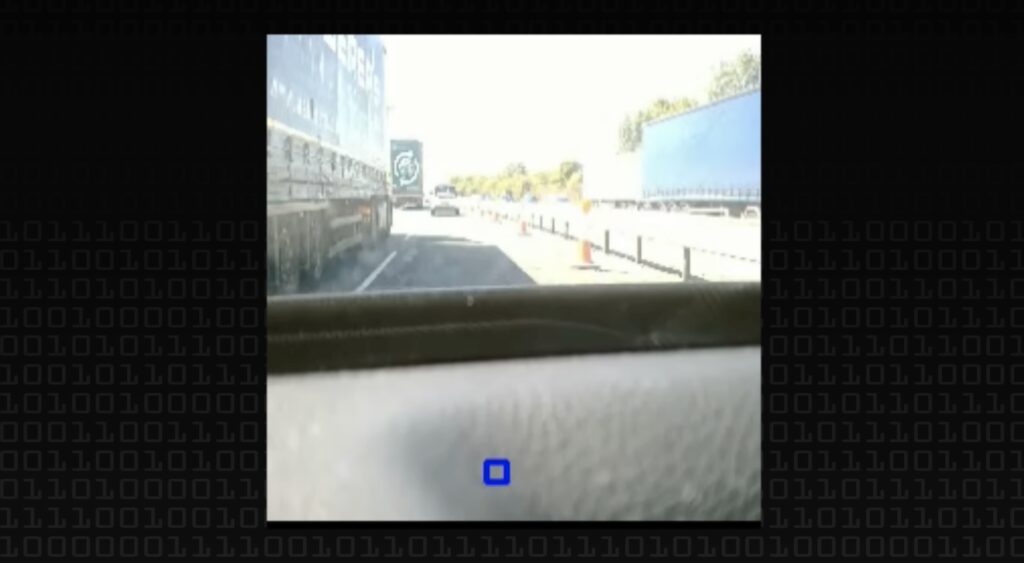
Despite overconfident proclamations from high-profile players in the tech and automotive industries, we’re still a long way from fully autonomous self-driving cars. Current prototypes work well under ideal conditions, but are easily thwarted by everyday real world anomalies. Lane keeping, however, is a much more approachable challenge and Computerphile was able add such functionality to an older vehicle.
Many of today’s cars have lane keeping capability and that usually works by looking at the lane lines on the road. Because drive-by-wire is now the norm, the vehicle can steer itself to remain within the lines. That works well on interstates and highways, because it only needs to perform small adjustments without any turns. This DIY lane keeping system works in a slightly different way. It looks at the entire scene in front of the car and uses an AI to determine if it should adjust the steering.
Before continuing, it is worth noting that Computerphile wanted to emphasis that this is not safe for use in the real world. There are too many potential safety issues and it would require extensive testing before it would be responsible to even try it on a public road.
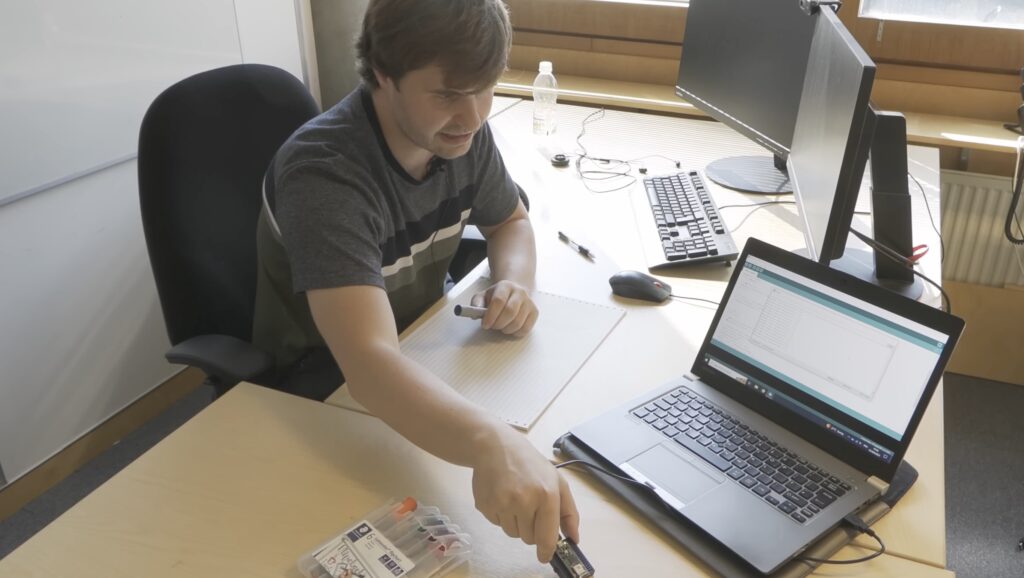
With that in mind, this system’s performance was only simulated. It uses a trained convolutional neural network (CNN) to indicate how the car would steer itself if it had actual control over the steering. Computerphile trained that CNN using a laptop, a webcam, and an Arduino Nano 33 IoT. The computer records video frames while also recording the orientation of the Arduino through its built-in six-axis IMU. With the board attached to the steering wheel, that orientation corresponds to the angle of the steering wheel.
Through the magic of machine learning, the CNN was able to associate types of imagery with steering angles. So it might see a bend in the road and know that that means the steering wheel needs to turn.
As Computerphile shows, this works fairly well. But it is also easily confused. It would take a lot more training data in a larger variety of conditions to produce a reliable system. In theory, however, such a system would be more robust than standard lane keeping systems that look at road lines.
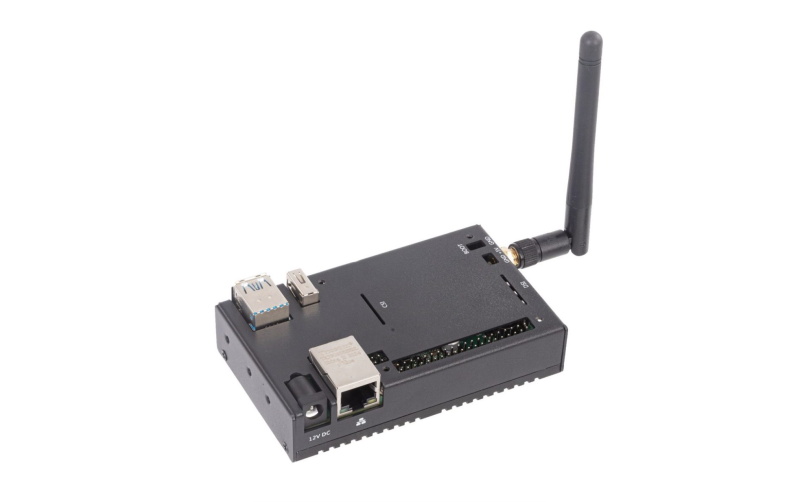
The device is available with optional Wi-Fi and Bluetooth – with an external screw-in antenna to boost the signal – and in several storage and RAM configurations.
On-board OS
The on-board eMMC storage (from 8GB to 32GB) is pre-installed with standard 32-bit Raspberry Pi OS and a BSP (board support package). It’s updatable in the usual ways (including Apt), but the OS can be re-flashed if you need a different version (such as 64-bit).
There’s also a microSD slot, purely for extra storage, although we found it tricky to insert the card without opening the case – ditto for the CSI (camera) and DSI (touchscreen) connections.
Once powered up, the unit boots up with the usual desktop GUI, although we needed to manually enable Wi-Fi in the taskbar. SSH is enabled by default, but you’ll want to change the password for the default ‘pi’ user for security reasons.
Apart from a slight hum, it all worked similarly to a Raspberry Pi 4. The CM4 Nano’s main advantage is that it’s more suited to industrial settings, with an improved ambient temperature range of -25 to 60°C.
Verdict
8/10
A CM4-based, ruggedised alternative to Raspberry Pi 4 with plenty of configuration options for your exact needs.
Specs
Features: CM4 with 8GB, 16GB, or 32GB eMMC storage; 1GB, 2GB, 4GB, or 8GB RAM; optional Wi-Fi/Bluetooth
Ports: 2 × USB 3.0, 1 × USB 2.0, 1 × USB-C, Ethernet, GPIO, CSI, DSI, PoE, 5 V output
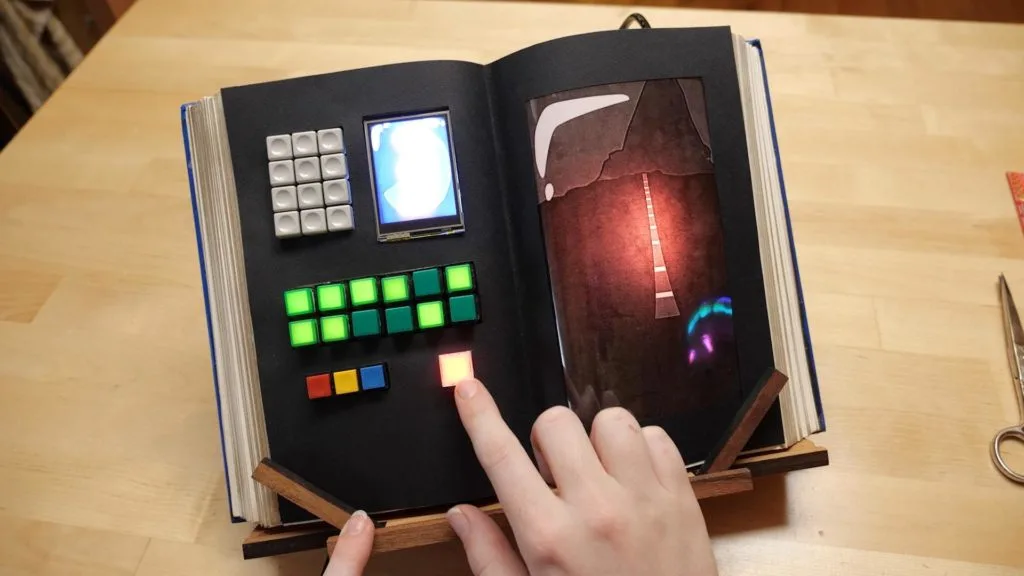
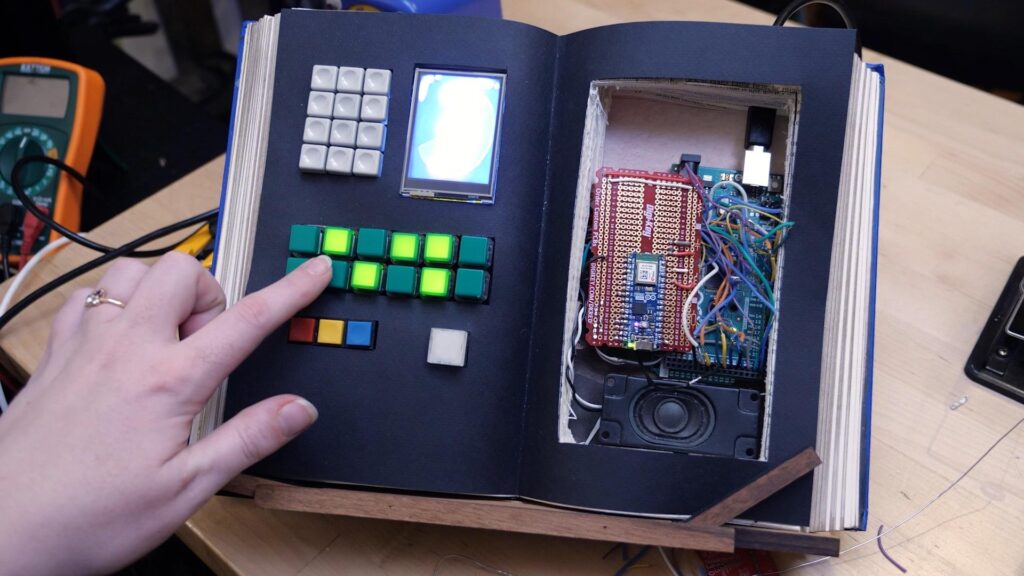
The Inspector Gadget cartoon was, naturally, full of fun gadgets. Even the eponymous inspector’s niece, Penny, got some nifty gizmos. One notable example was her computer book, which was exactly what it sounds like. To pay homage to the classic cartoon, Becky Stern recreated Penny’s computer book using a pair of Arduino boards.
It isn’t clear exactly which functions Penny’s computer book possesses within the canon of the Inspector Gadget cartoon, so Stern got a chance to exercise her own creativity. She referenced the cartoon to get a sense of the device’s aesthetics, design, and some of its capability. That helped her define the look of the replica device and how it should act. She determined that it should have several buttons (including a grid of illuminated buttons), a small screen on one side, and a big screen on the other side — all inside of a book.
Stern used two different boards to bring the device to life: an Arduino Nano ESP32 and a Mega 2560. The former monitors some of the buttons and controls the LCD panel on the left side. The latter monitors the green buttons and controls their LEDs. It also drives the LEDs behind the right “screen,” which is actually a static semi-transparent image. The LEDs light up in sequence to create an effect similar to what we see in the cartoon.
Most of the buttons lack actual functions, but Stern did add some interactivity by utilizing the Nano ESP32. The board hosts a web interface that users can access after connecting to the Wi-Fi network. That interface lets the user select images to show on the left screen, like a video call from Brain the dog, to really sell the visuals.
The world is facing a growing number of cybersecurity challenges, and the cost of cybercrime for organizations can range from tens of thousands of dollars to multiple millions. In fact, a recent FBI report shared that more than 800,000 cybercrime-related complaints were filed in 2022, with losses totaling over $10 billion.
Mobile devices are popular targets for cybercriminals, so it’s essential to put strong mobile security measures in place. Collaboration is also critical to improving mobile security. Developers, device manufacturers, security researchers, vendors, academics and the wider Android community constantly work together to discover and mitigate platform vulnerabilities as part of the Android Open Source Project.
To share and document the latest Android security capabilities, we’ve published an update to the Android Security Paper. The paper provides a comprehensive overview of the platform’s built-in, proactive security across hardware, anti-exploitation, Google Security Services and the range of management APIs available for businesses and governments alike.
Today, we are excited to share that Avnet and Arduino announced a global partnership to support equipment manufacturers and machine builders in moving toward a more modular future. The new agreement combines the strength of Avnet’s worldwide embedded design services and distribution support with Arduino’s robust embedded technology ecosystem of hardware and software.
Many of you may already know Avnet as the parent company of Hackster and Element 14. Avnet also includes several significant global technology distributors and solution providers serving individuals and businesses worldwide. Both companies decided to partner after seeing a global trend of professional customers moving towards modular boards over custom chip-down designs to accelerate product development.
The use of Arduino products among professional engineers has grown significantly over the last few years since Arduino PRO was introduced. From workbench prototyping to volume production, business customers report development time drops between 20% and 50% from incorporating Arduino software, firmware libraries, and microcontroller modules. This efficiency increase is one reason we are seeing an encouraging trend among enterprises to adopt open-source embedded technology.
“Design engineers will be able to quickly move from initial prototype and preproduction to high volume designs through Arduino’s open-source software and open hardware design approach,” said Alex Iuorio, senior vice president of Supplier Development at Avnet. “Not every customer has the time, resources, or capability to perform a chip-down design, which often is a manual, hands-on process to design, engineer, prototype, source and produce. Using Arduino’s PRO product line offerings and Avnet’s support will greatly reduce time to market.”
To support the shift to open modular design in product development, Arduino will be offering several engineer evaluation kits exclusively through Avnet. The evaluation kits target use cases in Predictive Maintenance, Environmental Sensing, Robotics, Vision, and Industrial Gateways integrating AI on the edge. Each kit provides a path for businesses to experience the benefits of Arduino in product development for commercial applications.
While there is an emphasis on supporting businesses in adopting open hardware, both companies are committed to creators at every level. We are excited to see what will come as the partnership launches and the developer communities grow together.
Block-based programming applications like Scratch and ScratchJr provide millions of children with an introduction to programming; they are a fun and accessible way for beginners to explore programming concepts and start making with code. ScratchJr, in particular, is designed specifically for children between the ages of 5 and 7, enabling them to create their own interactive stories and games. So it’s no surprise that they are popular tools for primary-level (K–5) computing teachers and learners. But how can teachers assess coding projects built in ScratchJr, where the possibilities are many and children are invited to follow their imagination?
Aim Unahalekhala
In the latest seminar of our series on computing education for primary-aged children, attendees heard about two research studies that explore the use of ScratchJr in K–2 education. The speaker, Apittha (Aim) Unahalekhala, is a graduate researcher at the DevTech Research Group at Tufts University. The two studies looked at assessing young children’s ScratchJr coding projects and understanding how they create projects. Both of the studies were part of the Coding as Another Language project, which sees computer science as a new literacy for the 21st century, and is developing a literacy-based coding curriculum for K–2.
How to evaluate children’s ScratchJr projects
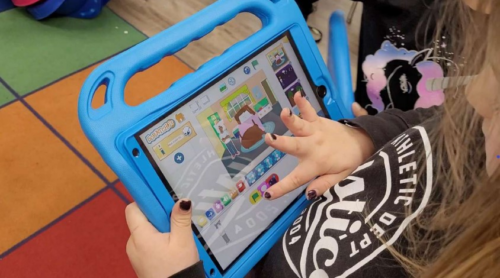
ScratchJr offers children 28 blocks to choose from when creating a coding project. Some of these are simple, such as blocks that determine the look of a character or setting, while others are more complex, such as messaging blocks and loops. Children can combine the blocks in many different ways to create projects of different levels of complexity.
Selecting blocks for a ScratchJr project
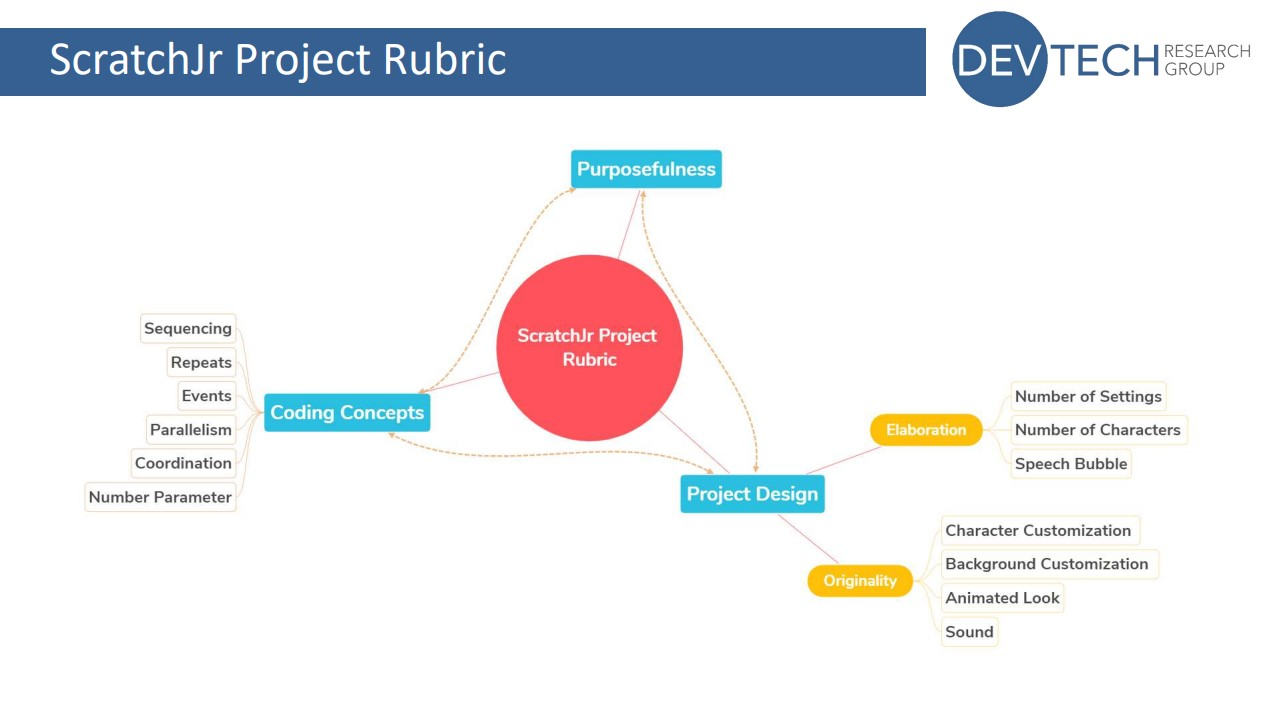
At the start of her presentation, Aim described a rubric that she and her colleagues at DevTech have developed to assess three key aspects of a ScratchJr coding project. These aspects are coding concepts, project design, and purposefulness.
Coding concepts in ScratchJr are sequencing, repeats, events, parallelism, coordination, and the number parameter
Project design includes elaboration (number of settings and characters, use of speech bubbles) and originality (character and background customisation, animated looks, sounds)
The rubric lets educators or researchers:
Assess learners’ ability to use their coding knowledge to create purposeful and creative ScratchJr projects
Identify the level of mastery of each of the three key aspects demonstrated within the project
Identify where learners might need more guidance and support
The elements covered by the ScratchJr project evaluation rubric. Click to enlarge.
As part of the study, Aim and her colleagues collected coding projects from two schools at the start, middle, and end of a curriculum unit. They used the rubric to evaluate the coding projects and found that project scores increased over the course of the unit.
They also found that, overall, the scores for the project design elements were higher than those for coding concepts: many learners enjoyed spending lots of time designing their characters and settings, but made less use of other features. However, the two scores were correlated, meaning that learners who devoted a lot of time to the design of their project also got higher scores on coding concepts.
The rubric is a useful tool for any teachers using ScratchJr with their students. If you want to try it in your classroom, the validated rubric is free to download from the DevTech research group’s website.
How do young children create a project?
The rubric assesses the output created by a learner using ScratchJr. But learning is a process, not just an end outcome, and the final project might not always be an accurate reflection of a child’s understanding.
By understanding more about how young children create coding projects, we can improve teaching and curriculum design for early childhood computing education.
In the second study Aim presented, she set out to explore this question. She conducted a qualitative observation of children as they created coding projects at different stages of a curriculum unit, and used Google Analytics data to conduct a quantitative analysis of the steps the children took.
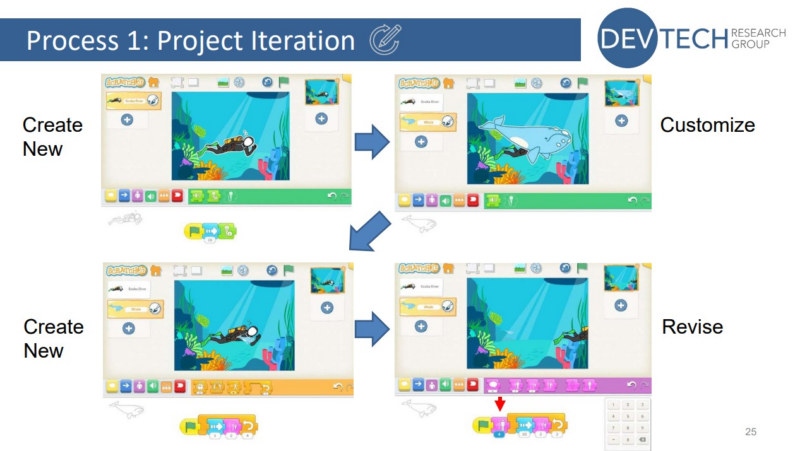
A project creation process involving iteration
Her findings highlighted the importance of encouraging young learners to explore the full variety of blocks available, both by guiding them in how to find and use different blocks, and by giving them the time and tools they need to explore on their own.
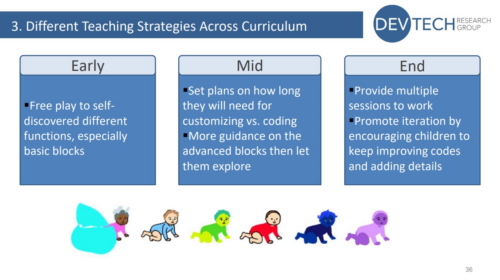
She also found that different teaching strategies are needed at different stages of the curriculum unit to support learners. This helps them to develop their understanding of both basic and advanced blocks, and to explore, customise, and iterate their projects.
Early-unit strategy:
Encourage free play to self-discover different functions, especially basic blocks
Mid-unit strategy:
Set plans on how long children will need on customising vs coding
More guidance on the advanced blocks, then let children explore
End-of-unit strategy:
Provide multiple sessions to work
Promote iteration by encouraging children to keep improving code and adding details
Teaching strategies for different stages of the curriculum
Join our next seminar on primary computing education
At our next seminar, we welcome Aman Yadav (Michigan State University), who will present research on computational thinking in primary school. The session will take place online on Tuesday 7 November at 17:00 UK time. Don’t miss out and sign up now:
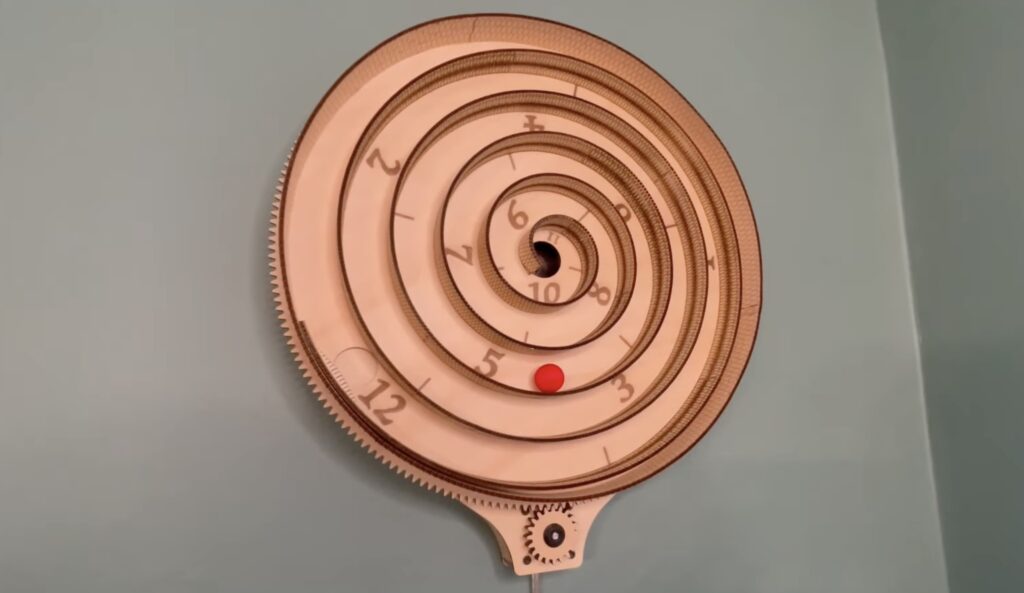
Sometimes makers come across products that they’d love to buy, but which are too expensive to justify. When that happens, the natural inclination of the maker is to build a DIY version. Such projects often end up costing way more — in both time and literal currency — than the product would have. But when we get lucky, we can save some money. That’s the case with this spiral clock built by Kelton.
Kelton based this design on the Aspiral Clock. That product was quite expensive at $542 and the company that made it seems to be defunct now anyway. Kelton’s version looks similar and works in the same way, but only requires about $60 in materials.
This clock is a giant spiral and indicates the time with a ball that rolls along the spiral. The entire spiral rotates at a constant speed, causing the ball to move towards the center. Numbers marked along the path show the time. When the ball reaches the center, it drops through a chute that puts it back at the beginning of the spiral. That repeats endlessly in 12-hour cycles.
The electronics are very simple: an Arduino Nano ESP32 board tells a stepper motor to spin at the exact rate that Kelton calculated. That stepper motor turns the spiral, keeping the ball in motion. Because this development board has an ESP32, it would have been possible to connect it to a WiFi network to find the time and keep everything in sync. But Kelton didn’t think that was necessary, so the spiral just rotates at a constant rate.
The real trick with this clock was the woodworking. All of the parts are laser-cut plywood and Kelton made heavy use of kerf cuts. Those break up a length of wood into many segments, so the wood can easily bend. That technique was perfect for creating the smooth spiral path and the result looks fantastic.
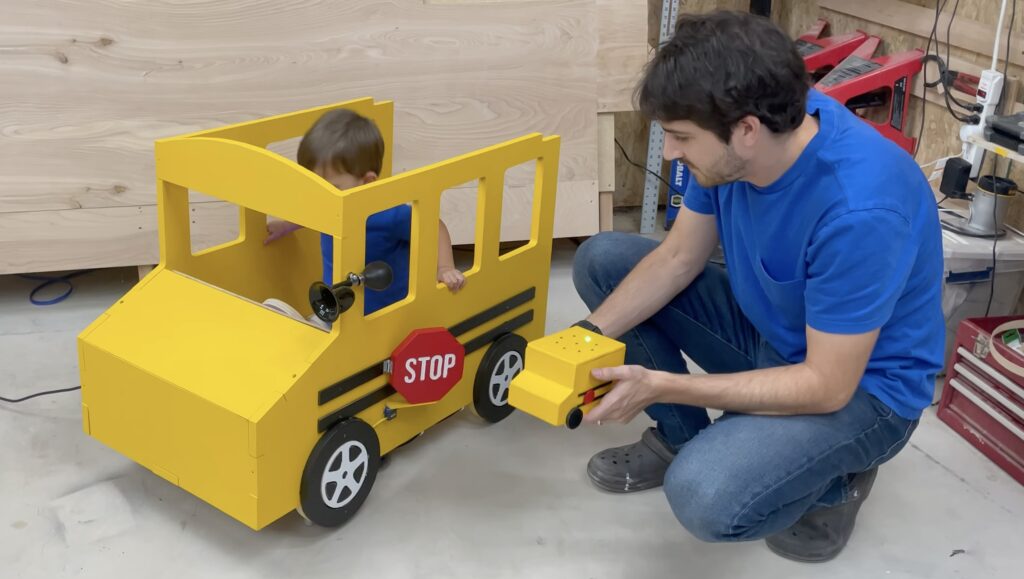
We all know that a child’s love can be bought. But how can working class parents compete with the lavish gifts that wealthy parents can afford? The answer is simple: by building toys that aren’t purchasable. Not only will a DIY gift have far more meaning, but it will impart a sense of superiority that comes from the knowledge that other parents can’t simply outspend you. That motivated Firth Fabrications to construct this school bus ride for his toddler.
This resembles one of those coin-operated rides that we used to see in front of every grocery store. The bright yellow wood school bus is big enough for a toddler to sit comfortably inside. When powered on, it begins rocking around on linear actuators. A dashboard inside the school bus gives the “driver” buttons and switches to play with, but they don’t actually move the vehicle. Instead, the linear actuators move according to commands sent by a remote control unit.
The remote looks like a small version of the school bus, which hints at its operation. It monitors its own orientation, then tells the linear actuators to move so that the ride matches. The remote unit contains an Arduino Nano board and an IMU module. It communicates with the Arduino Mega 2560 in the school bus via RF modules. Another Nano handles the dashboard functions, including swinging out the stop sign with a servo motor.
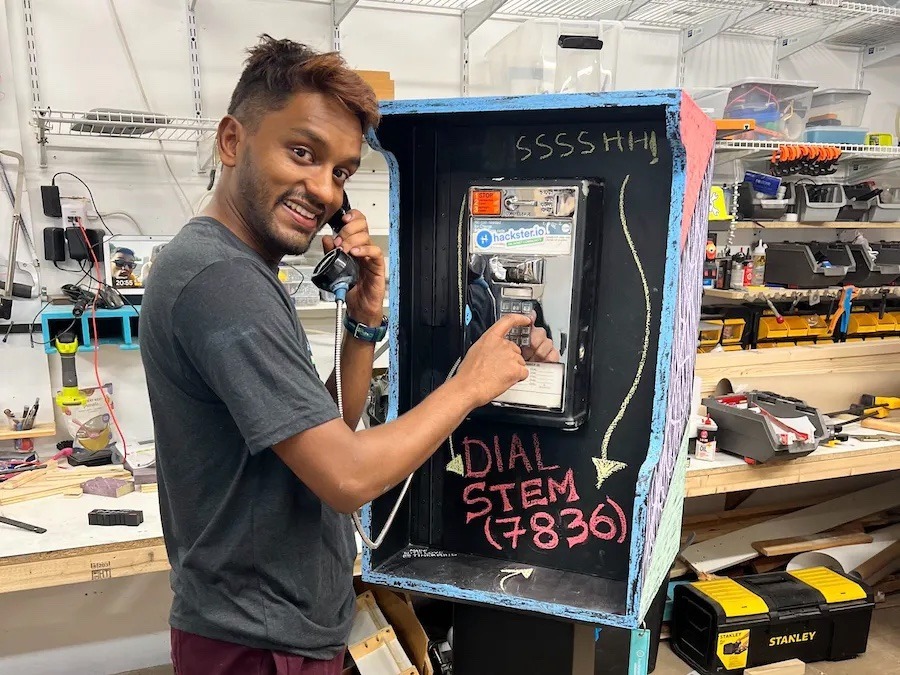
If you live in a nice neighborhood that has a sense of community, you may have come across a Little Free Library. Those are small cabinets filled with books that anyone can take. Ideally, people will also leave books for others. They’re usually situated next to sidewalks where passersby can stumble across them. Hackster.io currently has a contest challenging participants to build such a library dedicated to STEM and this inspired Amitabh Shrivastava to create a payphone that provides speakeasy-like access to his library.
Payphones are rare these days, so its mere existence should garner some attention. Anyone who looks at the payphone will then notice a message imploring them to dial 7836 for “STEM.” If they do so, the payphone will pop open to reveal the library inside. That is, of course, filled with books that can help people expand their knowledge on science, technology, engineering, and math. It adds a fun, interactive layer to the standard Little Free Library, while also demonstrating what a person can achieve with the knowledge within.
Shrivastava started this project with a real payphone that came from a laundromat. He then cracked that open to access the electronics inside and a score of $3.25 in loose change. Shrivastava added an Arduino Nano board to monitor the phone’s keypad and look for the numbers “7836.” If it sees those, it disengages a solenoid lock and the library door can swing open.
A custom cabinet ties the whole project together, providing plenty of space for books and conveying the desired aesthetic. This payphone will make its debut at Maker Faire Bay Area 2023 so you can see it for yourself if you’re heading to Mare Island this weekend or next, and will then inhabit the Avnet HQ building.
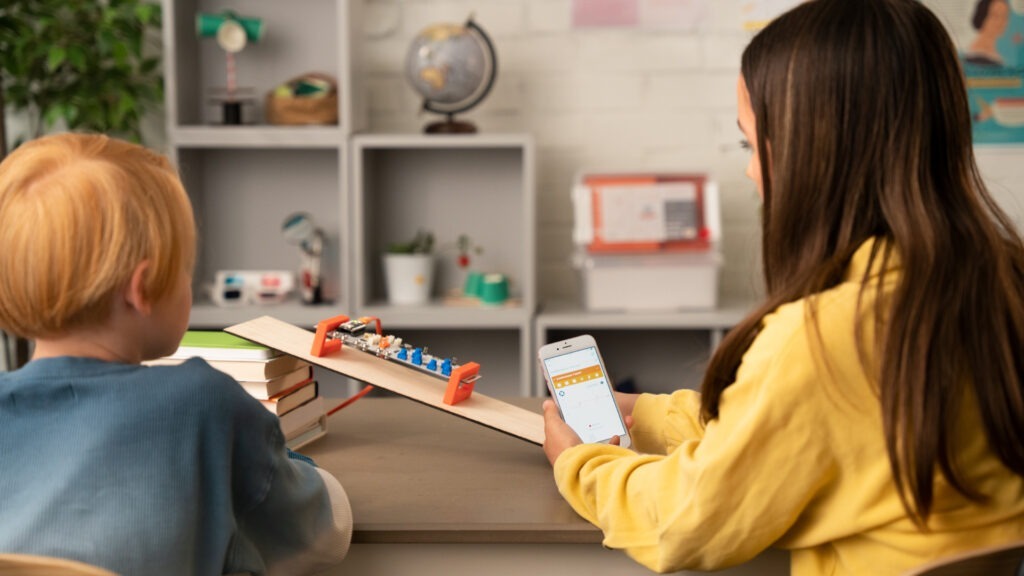
Stephen Hawking once said, “No one undertakes research in physics with the intention of winning a prize. It is the joy of discovering something no one knew before.” That joy is exactly what we hope to ignite with Arduino’s Science Kit R3, bridging theory with practical exploration with a complete toolbox that science teachers can use to develop hands-on and engaging STEM experiments in the classroom.
From the relationship between color and temperature to the effects of electrical currents on magnetic fields, the kit provides a comprehensive learning experience that allows students to interact with the very core of scientific investigations – also through real-time data collection and analysis. By measuring, recording, and interpreting data with theArduino Science Journal app, the learning process becomes interactive and dynamic.
So, how does the Science Kit R3 make physics the coolest subject in school?
Enhanced understanding of physics: No more passive reading. Dive deep into physics, understanding complex concepts through hands-on experimentation.
Promotion of scientific literacy: The real-time data collection and analysis features nurture scientific inquiry skills, priming students to thrive in our data-driven world.
User-friendly design: No prior coding or electronics knowledge is required, ensuring educators and students can jump straight into experiments with minimal setup.
Designed for education: The kit has been designed with teachers, for teachers and students.
Critical thinking stimulation: The kit’s design encourages students to apply what they’ve learned to real-world situations, sharpening their problem-solving abilities.
Self-directed learning: Through open-ended investigations, we’re giving students the reins, allowing their curiosity to guide their learning process.
Comprehensive teaching support: The Science Kit R3 isn’t just for students. We’ve also equipped educators with an intuitive guide to streamline the teaching process.
I was first recognized as being neurodivergent (dyslexic) at university. I struggled with reading and writing, but it was something that I still enjoyed and found ways to make happen despite my unknown issues. Once I was able to put a name on it, get the support I needed, and not feel so bad about myself and how I learned, I was able to be successful. A friend suggested I take an intro to education course and see how I liked it. From there, I found my passion in helping students who have a passion for learning, but struggle like I did. I want to support those learners that never matched the perfect learning profile many people expected from students.
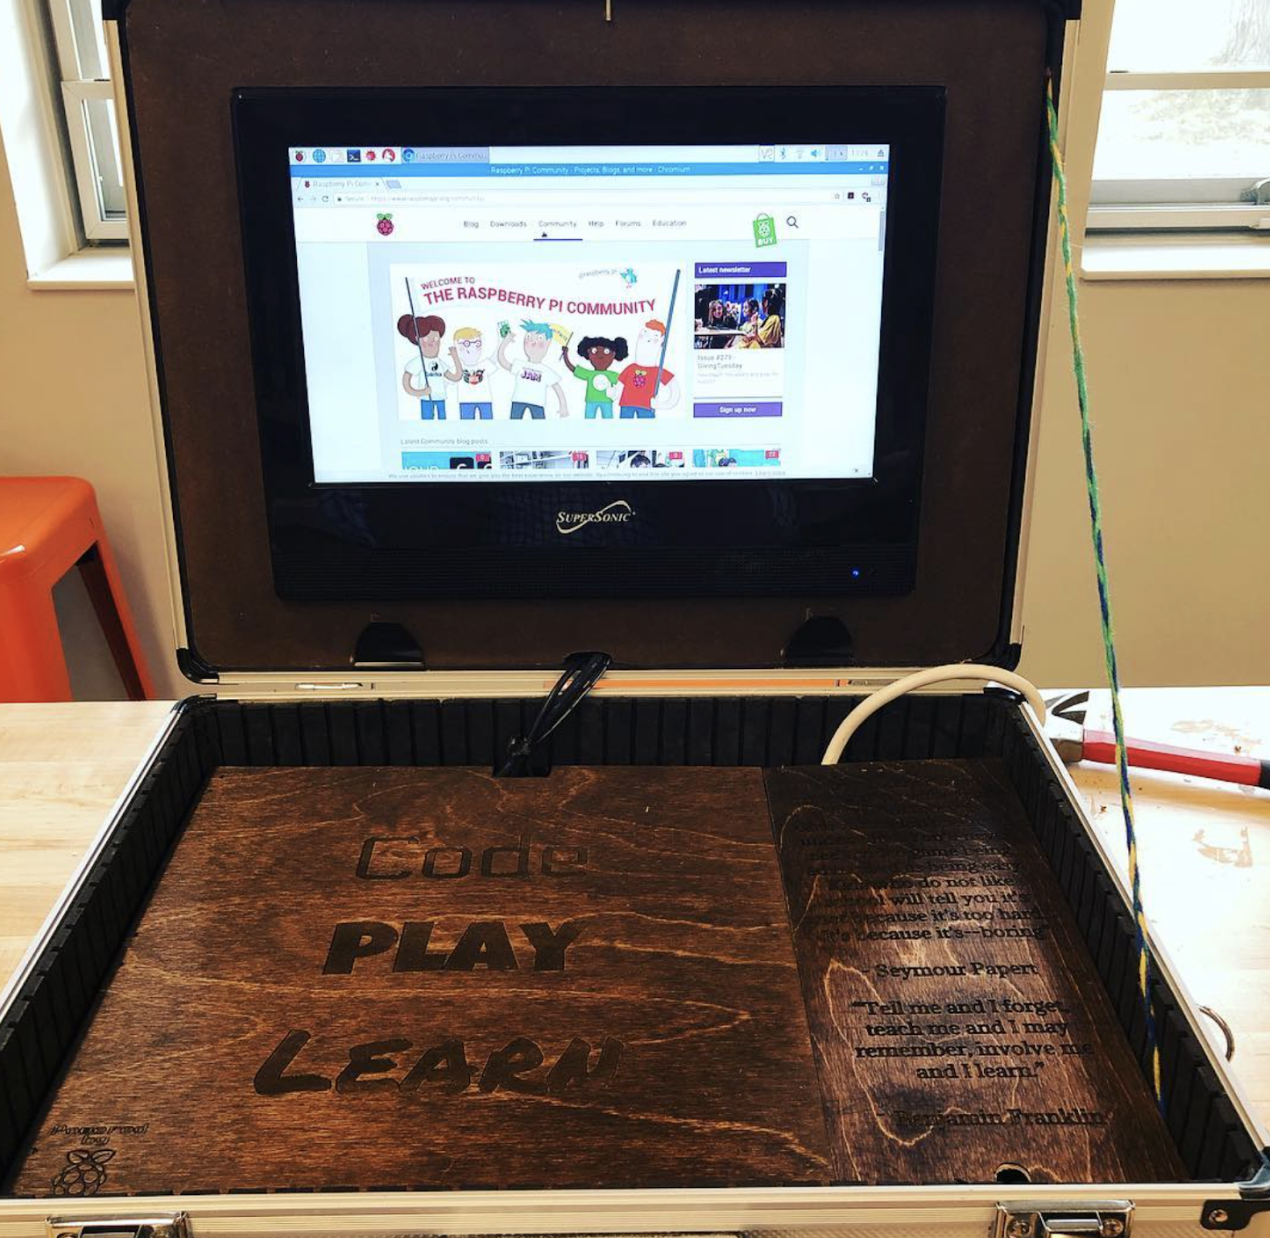
When did you learn about Raspberry Pi?
I started a design class for grade 11 and 12 students and we would explore problems in the school and find creative ways to solve them. I had never coded or worked with electronics before, so when a student suggested using Raspberry Pi to create an automated system for students to use to check them in and out of the classroom, I was very intrigued. I dove into Python coding and loved what I saw. The first North American Picademy was announced shortly after the students introduced me to [Raspberry] Pi and I signed up and had one of the very best professional development experiences in my career.
How did you bring Raspberry Pi into class?
I took what I learned from Picademy and explored how project-based learning, with and without Raspberry Pi, can be executed in a technology-based class and my Literature classes. I spent time with my students exploring the different ways Raspberry Pi could be leveraged to solve problems, and how we can code sensors to interact with Raspberry Pi and observe the environment around us and track that data.
“Going to Picademy and learning to code for the first time, and taking that skill into physical computing, is something that will stay with me. Matt Richardson, Carrie Anne Philbin, Ben Nuttall, James Robinson, and others really made an impact on me and how I view instruction and the value of code.”
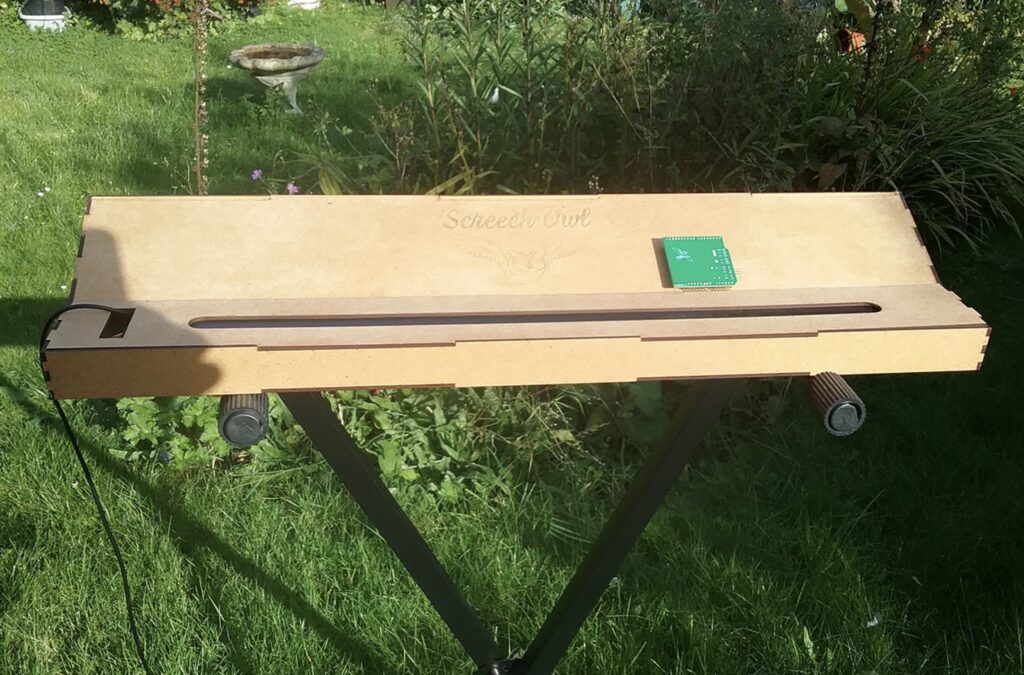
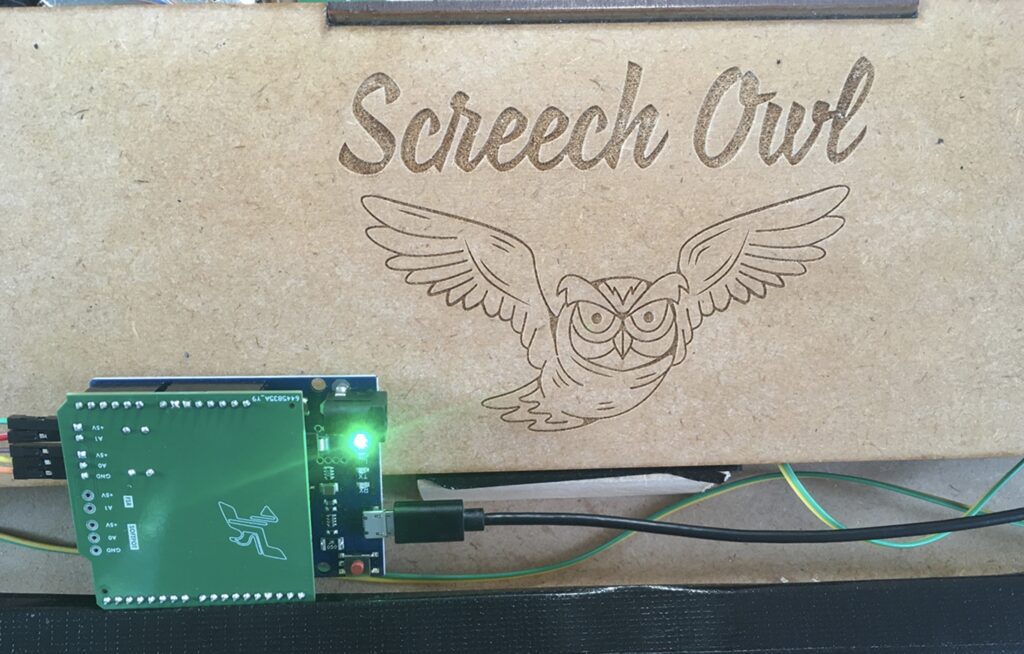
The Eowave Persephone was an interesting ribbon synthesizer that let musicians control frequency by moving their fingers across a long touch sensor. Ben Glover used to own one, but sold it. During shipping to the buyer, it got lost in the mail and so Glover can’t even buy it back. He regretted losing his Eowave Persephone, so he decided to create his own ribbon synthesizer called the Screech Owl.
If you could even find one, buying a used Eowave Persephone today would likely set you back at least a thousand dollars. But the Screech Owl is affordable to build, operates in the same manner, and sounds very similar. Glover is a novice maker and was able to pull of this project by outsourcing much of the work to ChatGPT and vendors on Fiverr.
One part that Glover designed himself was the custom PCB that acts as a shield for an Arduino Leonardo board. The Arduino handles the synthesis according to the input coming from the ribbon. That ribbon is actually two sensors: a SoftPot 500mm-long membrane potentiometer for position and thin film pressure sensor to measure force for aftertouch. Those components fit into a simple but attractive, laser-cut MDF enclosure.
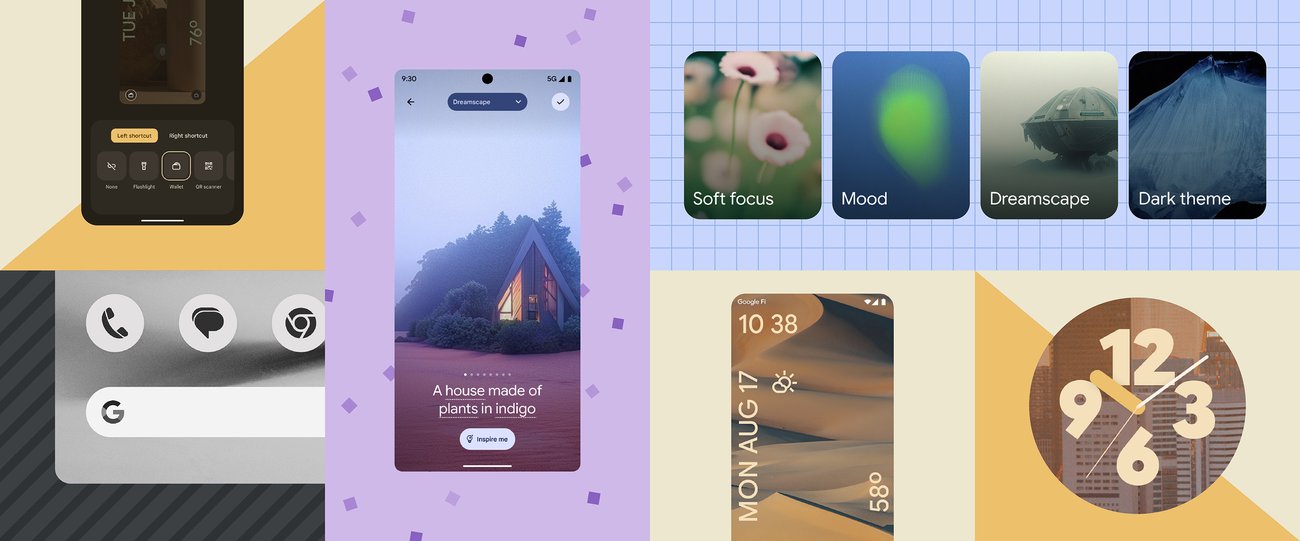
Android (and Google as a whole) serves people around the world, which means we have to support a seemingly infinite spectrum of needs, wants and personal tastes. On Android 14, you’ll see this work has matured, with more stylistic clock options, generative AI imagery and widgets and smarter shortcuts that better accommodate your preferences.
How many times in a day do you look at your phone to check the time? Clocks are an obvious first place to start, since they are featured prominently every time you look at your phone. Our new suite of custom clocks are not just for looks — they are also highly functional and have been designed in a manner so that you can still enjoy your wallpaper and continue to receive relevant and contextual information in our “At a Glance” space, such as weather information, travel, fitness activity, and live doorbell alerts that show who’s at the door when your Nest doorbell rings, to name a few.
Customizing your lock screen goes beyond the visual, too: being able to quickly access what you need, when you need it, is fundamental. With our new custom quick shortcut feature, you can personalize what you want to access directly from your lock screen. For example, if you’re a content creator, you can quickly pull up your video camera without having to manually toggle to a video recording mode after entering your camera app. Or if you’re dining out, QR code scanning can be just a shortcut away.
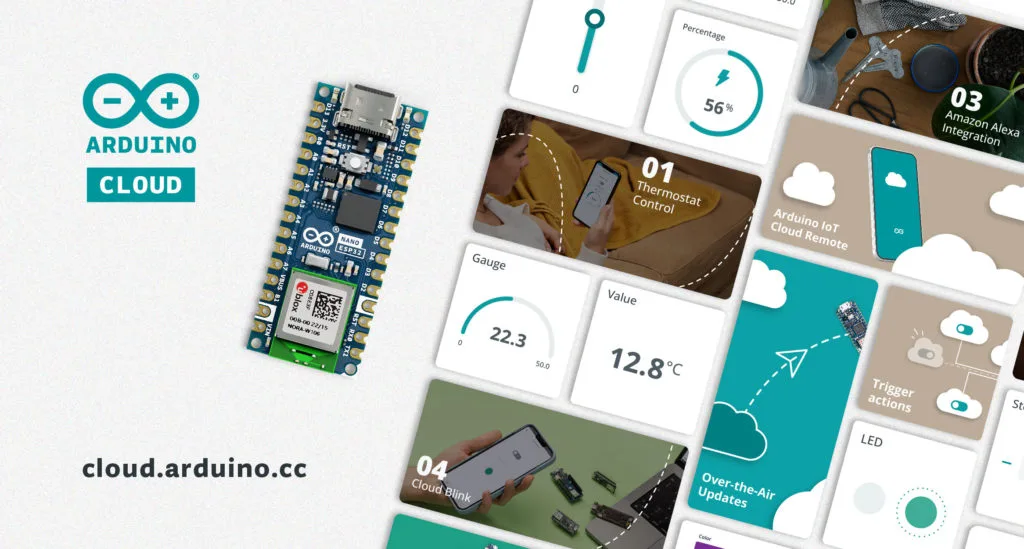
Our exclusive fall offer is here, and it’s packed with incredible savings.
With this promotion, you can enjoy a special 30% discount on the Arduino Cloud Maker yearly plan using the code “CLOUDNANO32.” Plus, when you select any other Arduino Cloud yearly plan (Entry, Maker, or Maker Plus), you can grab a Nano ESP32 for just $1!*
How to redeem the offer:
1. Select your yearly plan: Keep in mind that only the Yearly Maker plan is on sale. If you select the yearly Maker plan, be sure to apply the code “CLOUDNANO32” during checkout to unlock an amazing 30% discount.
2. Activate email notifications: To stay in the loop and receive your invitation for the Nano ESP32 at $1, activate your email notification.
3. Get your Nano ESP32 email invitation: Shortly after completing your Cloud subscription purchase, you will receive a special voucher via email, granting you access to the Nano ESP32 for just $1*.
Whether you’re an experienced IoT developer or a newcomer to the IoT world, this promotion offers something for everyone. Upgrade, save, and take your IoT projects to new heights. Act now before the offer expires on October 27th, 2023.
*To be eligible, you shall not have any active Arduino Cloud paid plan. Please note that the Nano ESP32 offer is exclusively available to the first 300 customers who purchase any Arduino Cloud yearly plan (Entry, Maker, or Maker Plus). Shipping fees and taxes apply. Please refer to our Terms & Conditions.
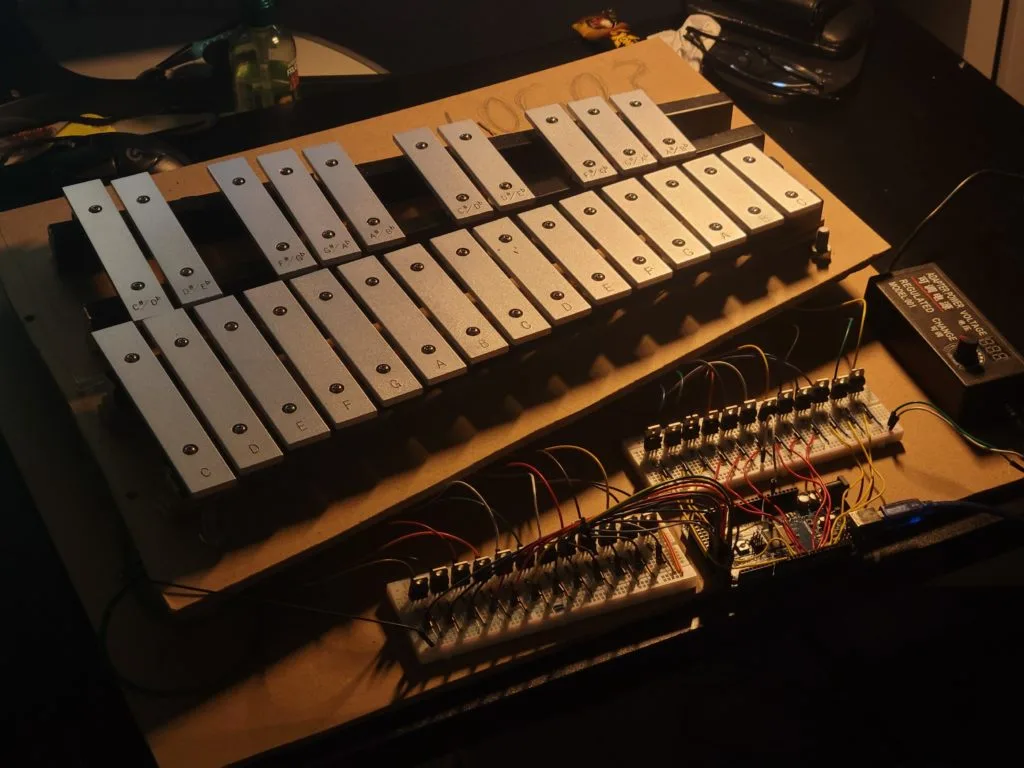
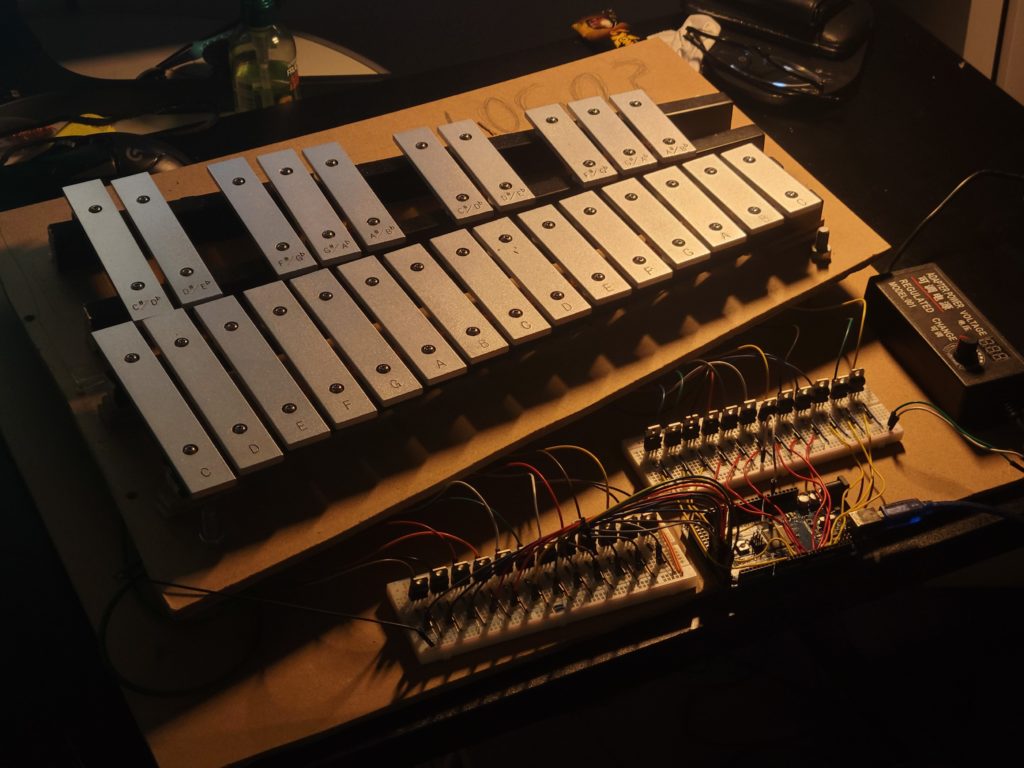
Xylophones are popular kids’ toys because they’re simple, affordable, and cheery. The name is also fun to say and gives us something to fill in the X spot in alphabet books. But while many of us banged on xylophones as children, few learned how to play them properly. To make such learning unnecessary, Rachad El Moutaouaffiq built this automatic xylophone.
If you listen to the melody in the video, you can hear that this sounds far more pleasant than any toddler smacking their toy xylophone while their parents pretend their ears don’t work. That’s because it is fully computer-controlled. Each bar has its own solenoid that acts as a mallet, for a perfect strike every time. Those operate according to MIDI files, so the automatic xylophone can play any tune.
To gain some experience with electromagnetism, El Moutaouaffiq constructed all of the solenoids himself. Each one consists of a nail, a short length of flexible tube, a couple of washers, and a hand-wound coil of wire.
An Arduino Mega 2560 controls all of the DIY solenoids through bipolar junction transistors (BJTs). It has a sketch that activates the solenoids according to incoming MIDI notes received via serial. Those come from a computer running LMMS MIDI software and are sent through serial by Hairless MIDI. El Moutaouaffiq simply had to define a pin for each MIDI note and connect the proper transistor to each pin.
El Moutaouaffiq hopes to add some AI functionality to send MIDI notes based on sheet music, but that isn’t working yet. For now, the automatic xylophone can play existing MIDI files.
Named Visionary by Gartner for the third year in a row, Elastic is the world’s leading platform for search-powered solutions – and a company we are proud to partner with.
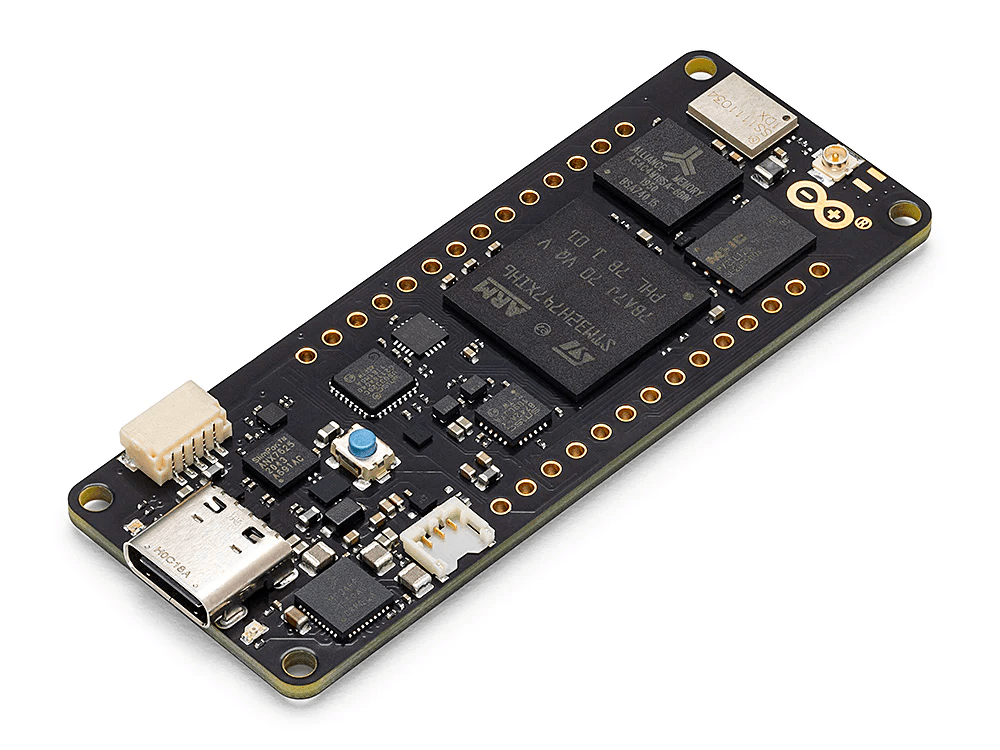
Recently, we collaborated with this data powerhouse on a Portenta H7-based R&D project to provide a simple Elasticsearch client library (written in C++) that runs on Arduino modules. That’s right: you can now communicate with an Elasticsearch server directly from an Arduino board!
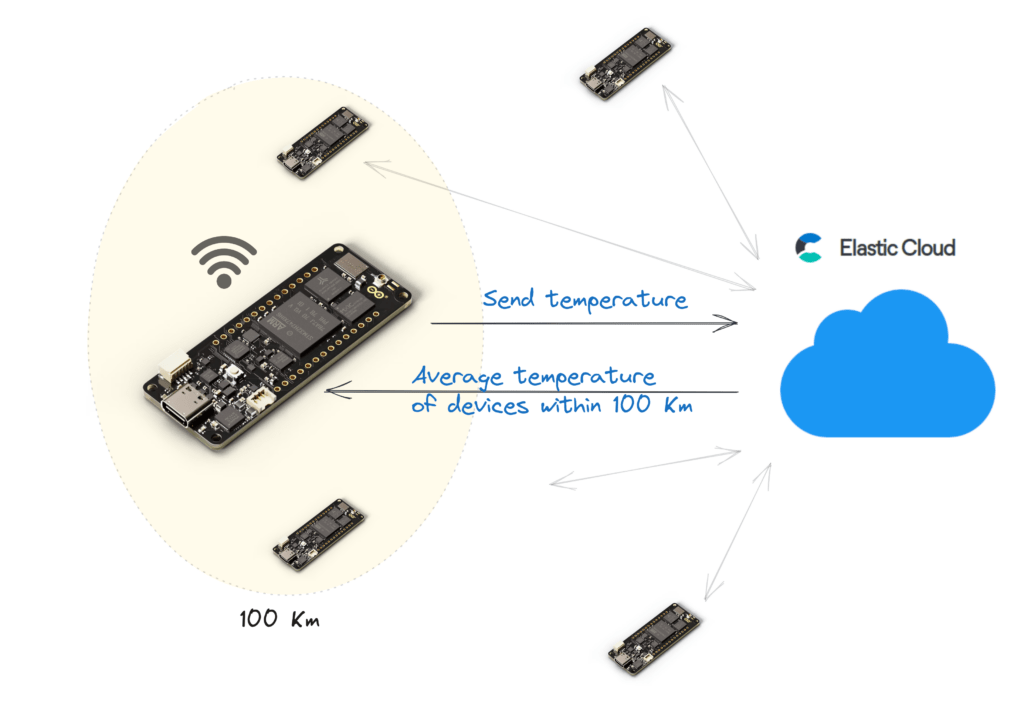
Among the many ways we immediately tested this new opportunity, we tried developing an IoT device that sends temperature data captured by sensors every five minutes to Elastic Cloud. This, combined with Elasticsearch’s geo features, could be the first step in building a solution that provides the current average temperature from all sensors 5 km away upon request.
Want to find out more? Here is a simple tutorial with all the details.
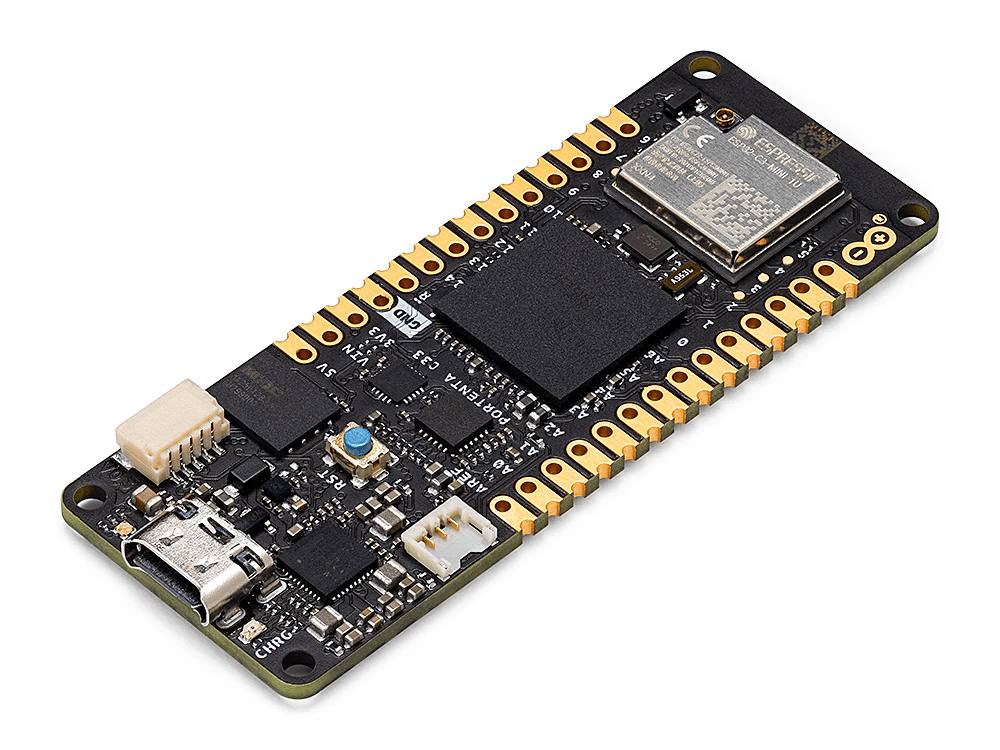
Portenta C33
Portenta H7
What’s more, Arduino Pro’s industrial-grade offerings fit in with the entire Arduino ecosystem, which includes Cloud services, countless software libraries and ready-to-use sketches shared by the community, and of course a wide variety of components to meet any need. These include popular products such as the MKR WiFi 1010 and Nano RP2040 boards – veritable cornerstones of the maker movement.
Use case: temperature feedback from multiple IoT devices
We designed a use case for a company that needed to manage multiple IoT devices located in Italy. Each device sends data coming from sensors (e.g. temperature) to Elastic Cloud. Using Elastic Cloud the company can manage any scale of IoT devices, without the need of managing a dedicated infrastructure. Moreover, the company needs to adjust some internal parameters of each device from the average temperature of neighboring devices, in a range of 100 km. This is a typical scenario in control engineering applications.
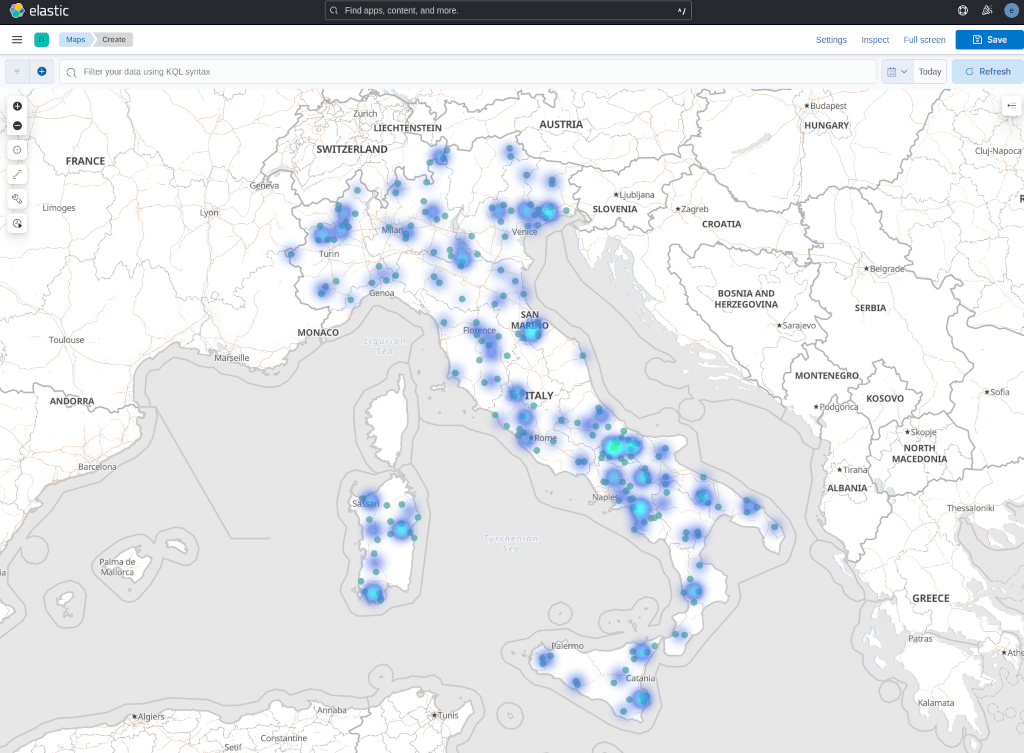
Using Kibana, the UI available in Elastic Cloud, we can easily create a dashboard to monitor the data coming from all the devices. Since we also have geo-data we can represent this information on a map.
This is a heat map created with different colors representing different temperatures (blue is cold and green, red are hot).
Setup of Elastic Cloud
The first step is to have an account for Elastic Cloud. If you don’t have one you can register for a trial here (no credit card required). Once you login you can create a new deployment, choosing the size of the Elasticsearch instances that you want to use.
Once you have created a deployment, you need to retrieve the endpoint URL and generate an API key of Elasticsearch. You can read this guideline for support on obtaining this information.
Preparing Elasticsearch index
We need to create an index to store the data coming from the Arduino boards. We want to store temperature values, position of the device using geo-location (latitude and longitude), a device identifier name, and a timestamp.
We can create an index “temperature” with the following HTTP request to Elasticsearch:
To send this HTTP request you can use the Dev Tools of Kibana in Elastic Cloud.
We want to store the timestamp of the operation each time a device sends data. This can be done using the ingest pipeline feature of Elasticsearch. An ingest pipeline is an action that Elasticsearch executes before indexing (storing) a document. For instance, a pipeline can assign the value of a specific document field, based on some calculation.
In our case, we just need to store the timestamp and we can create a “set-timestamp” pipeline:
PUT _ingest/pipeline/set-timestamp
{ "description": "sets the timestamp", "processors": [ { "set": { "field": "timestamp", "value": "{{{_ingest.timestamp}}}" } } ]
}
Using this pipeline we can then send data to Elasticsearch as follows:
Here the device-id H7-001 is the name of the Arduino board and location is the geographic point expressed with 12.4923 (longitude) and 41.8903 (latitude), that is the position of the Colosseum in Rome (Italy).
Notice that we did not specify the timestamp value because this is automatically generated using the “set-timestamp” pipeline (specified in the URL as query string).
Geo-distance query
To retrieve the average temperature of the devices distance up to 100 km we can use the following Elasticsearch query:
This query will return an “avg_temp” aggregation field containing the average temperature of all devices within a radius of 100 km.
Usage of the Elasticsearch client for Arduino
It’s finally time to show some Arduino code! Below is a simple sketch that sends a temperature value to Elastic Cloud, gets the average temperature performing a geo-distance query and waits for 30 seconds.
The code reported here is available online in the examples folder of the elastic/elasticsearch-arduino github repository. The sketch uses an elasticsearch_config.h file as follows:
In our example, we used Wi-Fi to connect the Arduino board to the internet.
The WIFI_SECRET_SSID and the WIFI_SECRET_PASS are the name of the SSID network to use and the Wi-Fi password.
The ELASTIC_ENDPOINT is the URL of the Elastic Cloud endpoint, the ELASTIC_PORT is 443 since Elastic Cloud uses TLS (https). The ELASTIC_CLOUD_API_KEY is the API key to be generated in the Elastic Cloud admin interface.
This file also contains other information related to the Arduino device. We have the longitude (DEVICE_GEO_LON) and latitude (DEVICE_GEO_LAT), the ID (DEVICE_ID) and the distance (DEVICE_GEO_DISTANCE) for the geo-query.
After filling all the previous information, we can have a look at the sketch, reported as follows:
#include <ArduinoJson.h>
#include <WiFi.h>
#include <WiFiSSLClient.h>
#include "ESClient.h" #include "elasticsearch_config.h" // WiFi settings
char ssid[] = WIFI_SECRET_SSID;
char pass[] = WIFI_SECRET_PASS; // Elastic settings
char serverAddress[] = ELASTIC_ENDPOINT;
int serverPort = ELASTIC_PORT; WiFiSSLClient wifi; ESClient client = ESClient(wifi, serverAddress, serverPort); int status = WL_IDLE_STATUS; void setup() { Serial.begin(9600); Serial.println("Started"); while (status != WL_CONNECTED) { Serial.print("Attempting to connect to Network named: "); Serial.println(ssid); // Connect to WPA/WPA2 network: status = WiFi.begin(ssid, pass); } // print the SSID of the network you're attached to: Serial.print("SSID: "); Serial.println(WiFi.SSID()); // print your WiFi shield's IP address: IPAddress ip = WiFi.localIP(); Serial.print("IP Address: "); Serial.println(ip); client.setElasticCloudApiKey(ELASTIC_CLOUD_API_KEY);
} void loop() { float temperature; // Set the temperature from a sensor (removing the randomness) temperature = random(10,30) + random(0,100)/100.00; // Prepare the JSON with temperature and geopoint for Elasticsearch StaticJsonDocument<200> doc; doc["temperature"] = temperature; doc["device-id"] = DEVICE_ID; doc["location"]["type"] = "Point"; doc["location"]["coordinates"][0] = DEVICE_GEO_LON; doc["location"]["coordinates"][1] = DEVICE_GEO_LAT; String temp; serializeJson(doc, temp); Serial.println("Sending to Elasticsearch:"); Serial.println(temp); ESResponse indexResult; // Send the temperature to Elastic Cloud indexResult = client.index("temperature", temp, "pipeline=set-timestamp"); DynamicJsonDocument result(1024); deserializeJson(result, indexResult.body); if (result["result"] == "created") { Serial.println("Created with _id: " + result["_id"].as<String>()); } else { Serial.println("Error sending data: " + indexResult.body); } StaticJsonDocument<512> query; query["query"]["bool"]["filter"]["geo_distance"]["distance"] = DEVICE_GEO_DISTANCE; query["query"]["bool"]["filter"]["geo_distance"]["location"][0] = DEVICE_GEO_LON; query["query"]["bool"]["filter"]["geo_distance"]["location"][1] = DEVICE_GEO_LAT; query["aggs"]["avg_temp"]["avg"]["field"] = "temperature"; query["size"] = 0; String search; serializeJson(query, search); Serial.println("Geo-location query:"); Serial.println(search); ESResponse searchResult; // Send the temperature to Elastic Cloud searchResult = client.search("temperature", search); DynamicJsonDocument avg(512); deserializeJson(avg, searchResult.body); float avgTemp = avg["aggregations"]["avg_temp"]["value"]; int numDevices = avg["hits"]["total"]["value"]; Serial.println("Average temperature of " + String(numDevices) + " devices in " + DEVICE_GEO_DISTANCE + ": " + String(avgTemp)); Serial.println("Wait 30 seconds"); delay(30000);
}
This sketch requires Wi-Fi, WiFiSSLClient (for connecting using TLS) for the internet connection, the EsClient for connecting to Elasticsearch and the ArduinoJson library for serializing and deserializing Json data structure.
In the setup() function we start the Wi-Fi connection and we set the API key of Elastic Cloud using client.setElasticCloudApiKey(ELASTIC_CLOUD_API_KEY) function call. The client object is initialized in the main area passing the Wi-Fi object, the server address (endpoint) and the HTTP port. In the loop() function we have the code that sends the temperature to Elastic Cloud. The temperature here is just a random float number between 10 and 30, typically coming from a sensor attached to the Arduino board. To prepare the document to send to Elasticsearch, we used the ArduinoJson library.
We used the following code to create a “doc” object:
This object is serialized in a JSON string as follows:
String temp;
serializeJson(doc, temp); Finally, the document, stored in the “temp” variable, can be sent to Elasticsearch using the index API, as follows: ESResponse indexResult;
indexResult = client.index("temperature", temp, "pipeline=set-timestamp"); This API adds the “temp” document in the index “temperature” using the “set-timestamp” pipeline. The result is stored in the “indexResult” variable that is a struct type as follows: struct ESResponse { int statusCode; String body;
};
The “statusCode” is the HTTP status code of the response and “body” is the response body. The index operation is successful if the response contains a “result” field with value “created”.
To get the average temperature of the devices within a radius of 100 km, we used the following geo-distance query, expressed using ArduinoJson.
The response of the search contains the average temperature, as an aggregation value. Moreover, we can retrieve the number of devices retrieved by the query using the [‘hits’][‘total’][‘value’] field in the JSON response from Elasticsearch.
Conclusion
Thanks to the collaboration with Arduino, we developed a very simple library that allows the usage of Elasticsearch directly from an Arduino board. In a few lines of code we can send data to Elasticsearch and execute complex elaborations, using geolocation and more.
We can’t wait to see what Arduino users will come up with, using Elasticsearch! For instance, if you are interested in generative AI you will certainly enjoy Elastic’s newest features. Give Elastic Cloud and the elasticsearch-arduino library a try!
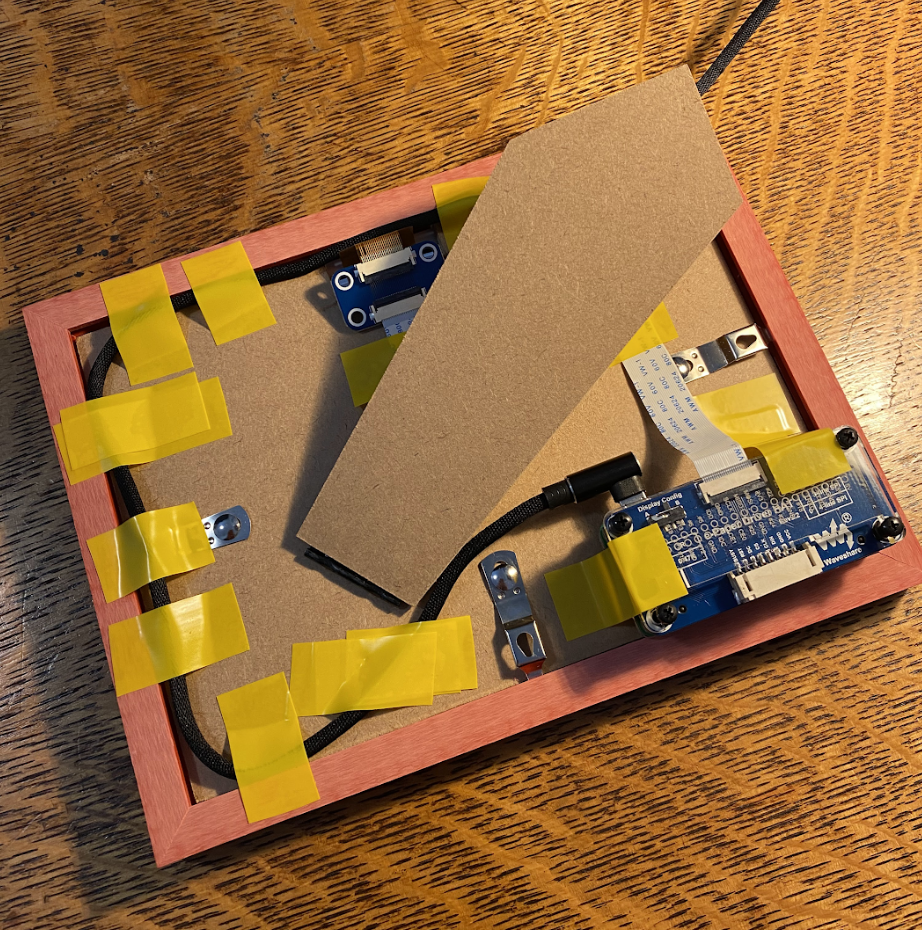
The answer, he figured, would be a system that made image-sharing simple, so he came up with the concept for a pair of custom-made digital photo frames that made use of e-ink displays. Although the couple would be limited to sharing black-and-white images, this approach had many benefits, notably low power consumption and simplicity.
“It had to be energy-efficient because Nunavik is mostly powered by diesel that’s brought in by boat,” Olivier says. “It also needed to require very little bandwidth as my fiancée’s internet would probably come from an unstable satellite link. The project had to be easy to use too and required, at most, a couple of seconds to share a picture, much like texting or writing an email. And I didn’t want my fiancée to fuss with a complicated app after completing a night shift and on-call duty.”
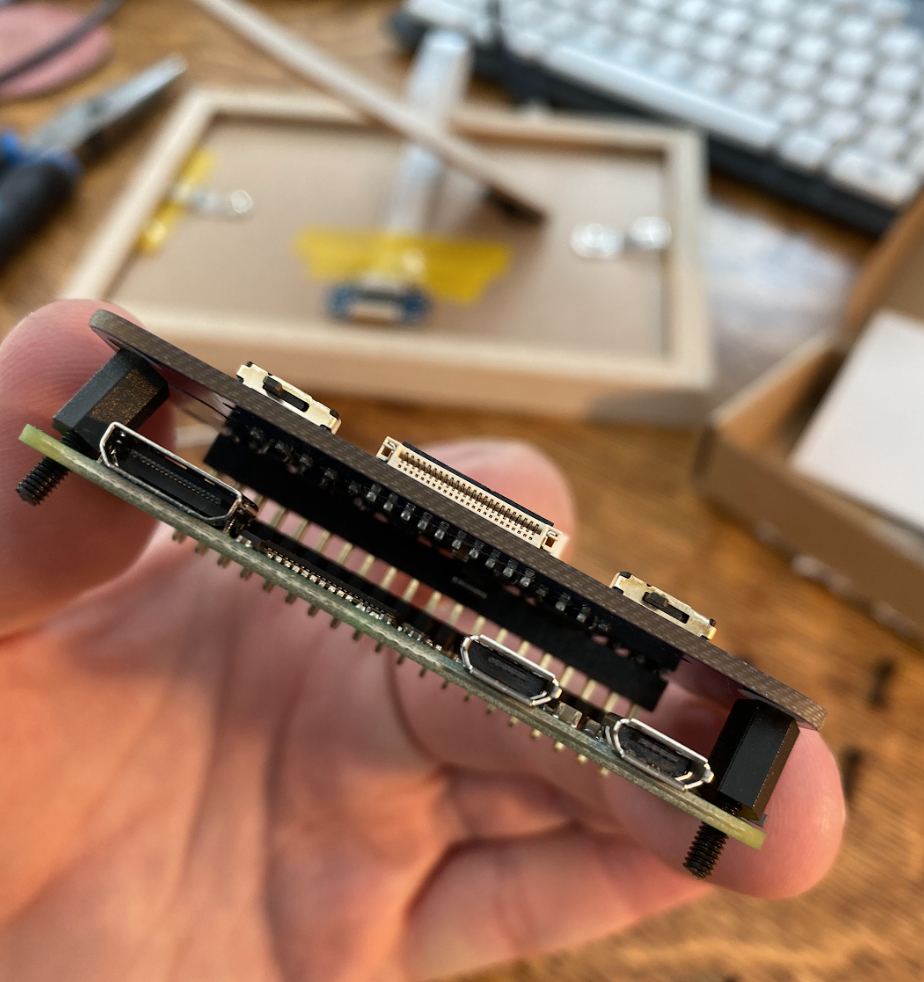
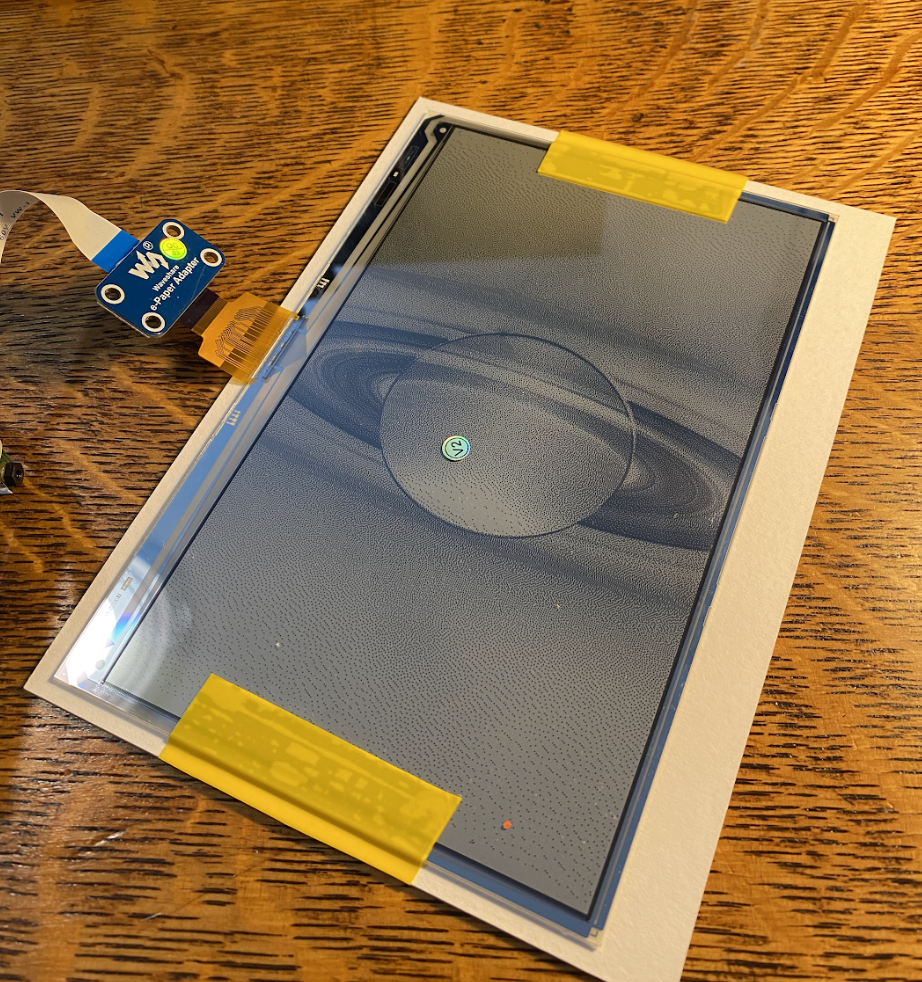
With that in mind, Olivier began to plan. A frame would consist of a Raspberry Pi Zero W computer and a 7.5-inch Waveshare e-ink display, and the idea was to allow images to be emailed to a Google inbox with a program written to make use of them at regular intervals.
“I like e-ink technology,” Olivier continues. “Each pixel on an e-ink display hosts tiny pigments that are physically jolted around by an electrical charge and they stay in place even if power is disconnected, which means the screen will continue displaying the same image until it is refreshed.”
Life through a lens
Olivier thought the project would be straightforward. It wasn’t. “I didn’t think writing a script to automatically read attachments from a Gmail inbox would prove so tricky,” he laments. “I definitely underestimated this part of the project because it took me a long time to figure out how a Flash web application written in Python can use and refresh Google authentication tokens.”
He used the industry-standard protocol for authorisation, OAuth 2.0, instead of a simpler email-password login strategy. “It was a way of future-proofing the project because it’s a robust and secure protocol directly supported by Google,” he says. He also added the ability to include custom messages which would be overlaid on to the images. “It was hard to speak on the phone, and internet audio calls were patchy, so I wanted a way to explain the context of each photo,” he adds.
For greater user-friendliness, Olivier created iPhone shortcuts too. “It simplified the process of selecting and emailing a recent image to the dedicated Gmail inbox,” Olivier says. “A click is enough to launch the whole process.” This addition proved an elegant way of stitching together all of the application’s parts and it proved effective.
“My fiancée was delighted when I gave it to her as a Christmas present,” Oliver recalls. “We spent a year swapping pictures to and fro, and I was able to discover the north through her lens as well before flying up to visit her.”
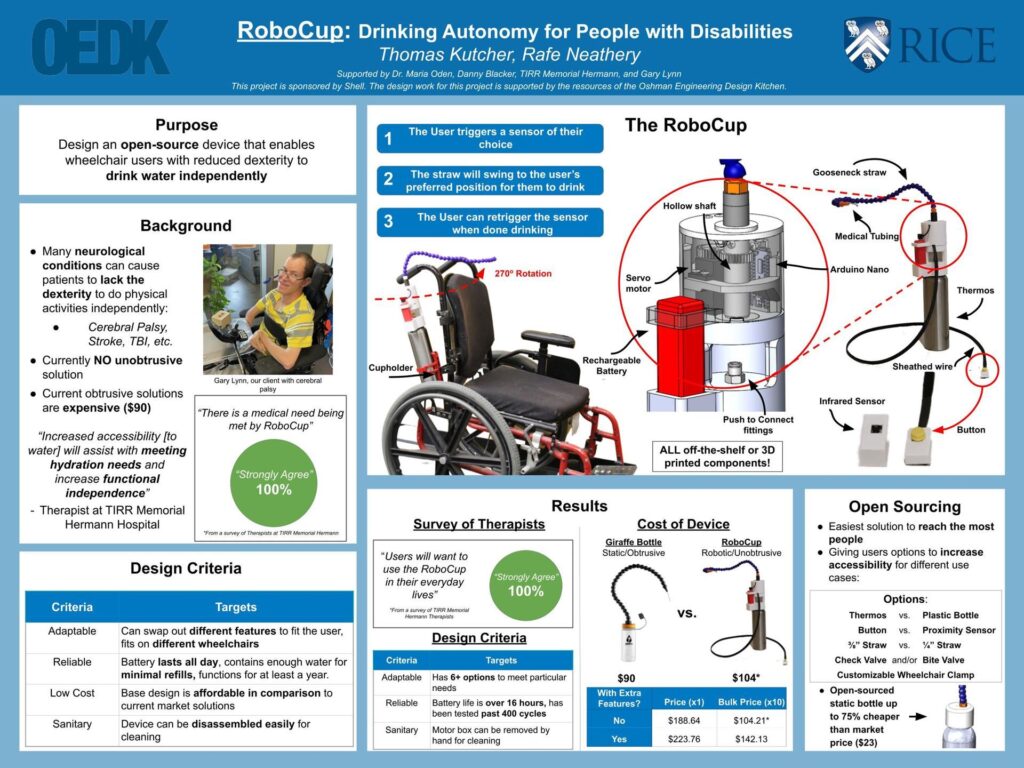
One of the many realities of living with cerebral palsy is limited upper body dexterity, as almost every activity requires the help of a caregiver. That includes something that most of us take for granted: drinking water. To restore at least that little bit of independence, Rice University engineering students Thomas Kutcher and Rafe Neathery designed the RoboCup.
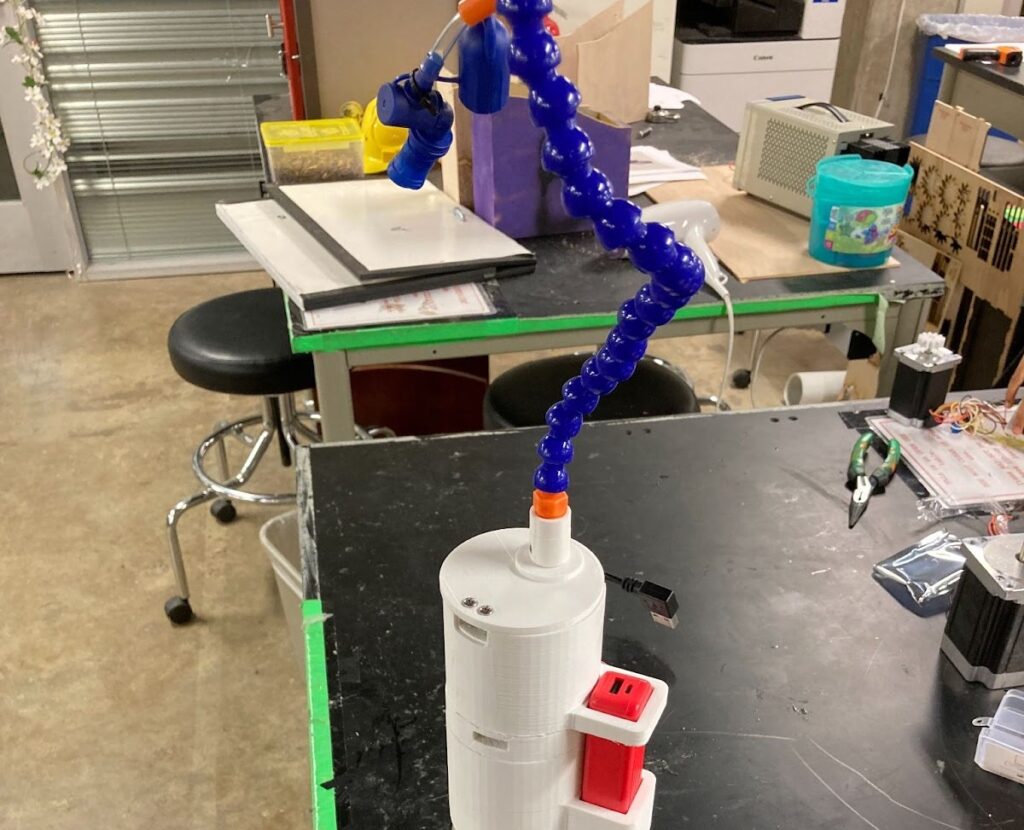
A typical solution for letting people with cerebral palsy drink without assistance is a “giraffe bottle.” That is a water bottle with a long gooseneck straw that extends in front of the user’s mouth. But while that does give them the ability to drink on their own, it is obtrusive and leaves a bulky straw in front of their face. RoboCup eliminates that issue by rotating the straw out of the way when it isn’t in use. To take a drink, the user just needs to push a button or move their finger over a sensor. The straw will then rotate back over to their mouth.
The best part is that RoboCup is open source, so anyone with a 3D printer and some basic skill with electronics can build one for around $100. The key component is an Arduino Nano board. It monitors the tactical button or distance sensor (whichever is appropriate for the user’s capability) and controls a servo motor that rotates the straw. Power comes from a small rechargeable battery and all of the components, aside from the 3D-printed parts, are off-the-shelf and readily available.
Um dir ein optimales Erlebnis zu bieten, verwenden wir Technologien wie Cookies, um Geräteinformationen zu speichern und/oder darauf zuzugreifen. Wenn du diesen Technologien zustimmst, können wir Daten wie das Surfverhalten oder eindeutige IDs auf dieser Website verarbeiten. Wenn du deine Einwillligung nicht erteilst oder zurückziehst, können bestimmte Merkmale und Funktionen beeinträchtigt werden.
Funktional
Immer aktiv
Die technische Speicherung oder der Zugang ist unbedingt erforderlich für den rechtmäßigen Zweck, die Nutzung eines bestimmten Dienstes zu ermöglichen, der vom Teilnehmer oder Nutzer ausdrücklich gewünscht wird, oder für den alleinigen Zweck, die Übertragung einer Nachricht über ein elektronisches Kommunikationsnetz durchzuführen.
Vorlieben
Die technische Speicherung oder der Zugriff ist für den rechtmäßigen Zweck der Speicherung von Präferenzen erforderlich, die nicht vom Abonnenten oder Benutzer angefordert wurden.
Statistiken
Die technische Speicherung oder der Zugriff, der ausschließlich zu statistischen Zwecken erfolgt.Die technische Speicherung oder der Zugriff, der ausschließlich zu anonymen statistischen Zwecken verwendet wird. Ohne eine Vorladung, die freiwillige Zustimmung deines Internetdienstanbieters oder zusätzliche Aufzeichnungen von Dritten können die zu diesem Zweck gespeicherten oder abgerufenen Informationen allein in der Regel nicht dazu verwendet werden, dich zu identifizieren.
Marketing
Die technische Speicherung oder der Zugriff ist erforderlich, um Nutzerprofile zu erstellen, um Werbung zu versenden oder um den Nutzer auf einer Website oder über mehrere Websites hinweg zu ähnlichen Marketingzwecken zu verfolgen.